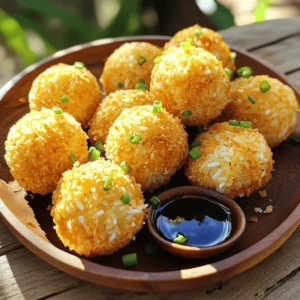
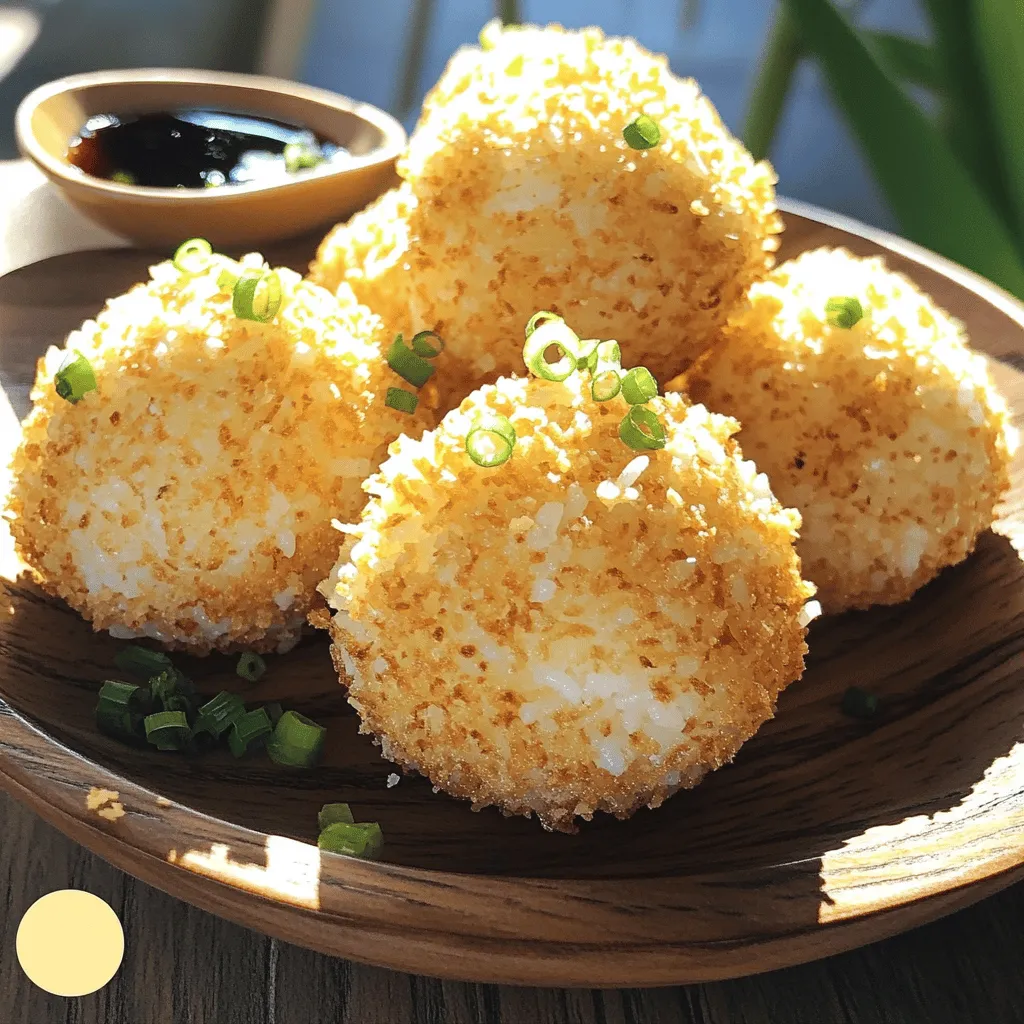
If you’re craving a crunchy snack that’s easy to make, these Easy Crispy Rice Balls are perfect for you! With just a handful of simple ingredients, you can whip up a tasty treat that’s great for any occasion. I’ll walk you through each step, from mixing the rice to frying these golden bites. Get ready for a fun kitchen adventure that will leave everyone wanting more! Let’s dive in!
Ingredients
When making Easy Crispy Rice Balls, you need a few key ingredients. Here’s what you’ll need:
– 2 cups cooked sushi rice
– 1/2 teaspoon salt
– 1/4 cup grated Parmesan cheese
– 1/4 cup green onions, finely chopped
– 1/2 cup panko breadcrumbs
– 1/2 cup all-purpose flour
– 2 large eggs, beaten
– Vegetable oil for frying
– Soy sauce for dipping
These ingredients come together to create a crispy, delicious snack. The sushi rice gives a nice sticky texture, perfect for shaping. The salt enhances the flavor, while the Parmesan adds a cheesy twist. Green onions bring fresh flavor and color. Panko breadcrumbs ensure that crunch we all love. All-purpose flour helps the rice balls hold their shape during frying. Eggs act as a binder, keeping everything together. Vegetable oil is essential for frying, giving that golden, crispy exterior. Finally, soy sauce is a classic dip that adds umami.
This simple list makes it easy to gather what you need. You can find most of these items at your local grocery store. If you want to make your rice balls extra special, feel free to add in your favorite herbs or spices! Check the Full Recipe for more detailed steps.
Step-by-Step Instructions
Preparation of Rice Mixture
– In a large bowl, combine the cooked sushi rice, salt, grated Parmesan cheese, and chopped green onions.
– Mix thoroughly for even consistency. This helps all flavors blend well. You want every bite to be tasty.
Forming Rice Balls
– Scoop about 2 tablespoons of the rice mixture and shape it into a ball.
– Repeat until you have formed 12 rice balls. Aim for a size similar to golf balls.
Breading Technique
– Set up a breading station: Place all-purpose flour in one bowl, beaten eggs in another, and panko breadcrumbs in a third.
– Roll each rice ball first in the flour, then dip into the beaten eggs, and finally coat with panko breadcrumbs. This ensures a nice crunch when frying.
Frying Process
– In a large frying pan, heat about 1 inch of vegetable oil over medium-high heat.
– When the oil is hot, test it by dropping in a breadcrumb; it should sizzle.
– Gently place a few rice balls in the oil. Fry until golden brown on all sides, about 3-4 minutes. Turn them occasionally for even cooking.
– Once golden, carefully remove the rice balls with a slotted spoon. Place them on a paper towel-lined plate to drain excess oil.
Now, enjoy your crispy rice balls hot with soy sauce for dipping! For more details, check out the Full Recipe.
Tips & Tricks
Achieving Optimal Crispiness
For perfect crispy rice balls, panko breadcrumbs are key. They are light and help create a great crunch. Regular breadcrumbs can make your rice balls dense and chewy. Use panko for the best results.
Oil temperature plays a big role in crispiness too. Heat your oil to medium-high. You can test if it’s ready by dropping in a breadcrumb. If it sizzles, you’re good to go! Frying in hot oil keeps the outside crispy while keeping the inside soft.
Serving Suggestions
For dipping, soy sauce is classic and tasty. You can also try spicy mayo or sweet chili sauce for a twist. Both add great flavor.
Pair your rice balls with fresh salads or crunchy veggies. They balance the rich flavors and make a complete meal. Some sliced cucumbers or a simple green salad work well.
Cooking Equipment
A good frying pan is crucial for this recipe. A deep, heavy skillet holds heat better, frying the rice balls evenly.
For shaping your rice balls, use your hands. They are the best tools! Just make sure your hands are wet to prevent sticking. You can also use a small ice cream scoop for uniform sizes.
Variations
Flavor Combinations
You can make your rice balls even more tasty. Try adding spices like garlic powder or paprika for a kick. Fresh herbs like basil or cilantro give a bright flavor too. If cheese is your thing, swap out Parmesan for mozzarella or cheddar. Each choice brings a fun twist to the dish.
Dietary Adjustments
Want to make these rice balls vegan? Use flaxseed meal or applesauce in place of eggs. This binding helps keep the rice balls together. For a gluten-free option, simply replace regular flour with a gluten-free blend. You can still enjoy this dish without the gluten!
Additional Fillings
Get creative with fillings! You can stuff your rice balls with cheese, cooked meats, or even veggies. Small pieces of bell peppers or mushrooms add flavor and color. Mix in proteins like shredded chicken or tofu for a heartier snack. Each bite becomes a surprise!
Storage Info
Storing Leftovers
To store your rice balls, let them cool first. Place them in an airtight container. You can refrigerate them for up to three days. If you want to keep them longer, freeze the rice balls. Wrap each one tightly in plastic wrap. Then, place them in a freezer bag. They will keep well for up to three months in the freezer.
Reheating Tips
To reheat, try using an oven or air fryer. Preheat your oven to 350°F (175°C). Place the rice balls on a baking sheet. Heat them for about 10-15 minutes, or until they are warm and crispy. If using an air fryer, set it to 350°F (175°C) and cook for 5-8 minutes. This method keeps them crispy and tasty. Avoid using a microwave, as it can make them soggy.
Shelf Life
In the fridge, your rice balls last about three days. In the freezer, they can stay fresh for three months. Always check for signs of spoilage. If they smell off or have a strange color, it’s best to toss them. Keeping an eye on their freshness ensures you enjoy them at their best.
FAQs
How do I keep my rice balls from falling apart?
To keep your rice balls from falling apart, use sushi rice. It has more starch than other rice types. This starch helps bind the rice together. When forming the balls, make sure to pack the rice tightly. If needed, add a little more cheese to help with binding.
Can I make these rice balls ahead of time?
Yes, you can make these rice balls ahead of time. Form the rice balls and place them on a tray. Cover them with plastic wrap and chill in the fridge. This lets the flavors mix. You can fry them just before serving for the best taste.
What type of rice is best for crispy rice balls?
Sushi rice is the best choice for crispy rice balls. It is short-grain rice and has more starch. This starch gives the rice a sticky texture. Other types of rice, like long-grain rice, may not hold together as well. The starch content is key for a great rice ball.
How long does it take to cook crispy rice balls?
Cooking crispy rice balls takes about 30 minutes. Here’s the breakdown:
– Prep time: 15 minutes to mix and form the rice balls.
– Cooking time: 15 minutes to fry them until golden brown.
Make sure to heat the oil well before adding the rice balls.
In this blog post, we covered how to make crispy rice balls. We discussed the ingredients, preparation steps, and cooking techniques. I shared tips for achieving the perfect crunch and delicious serving ideas. Don’t forget the fun variations and storage tips to keep them fresh. With these simple steps, you can create a tasty snack that satisfies. Enjoy your cooking adventure!