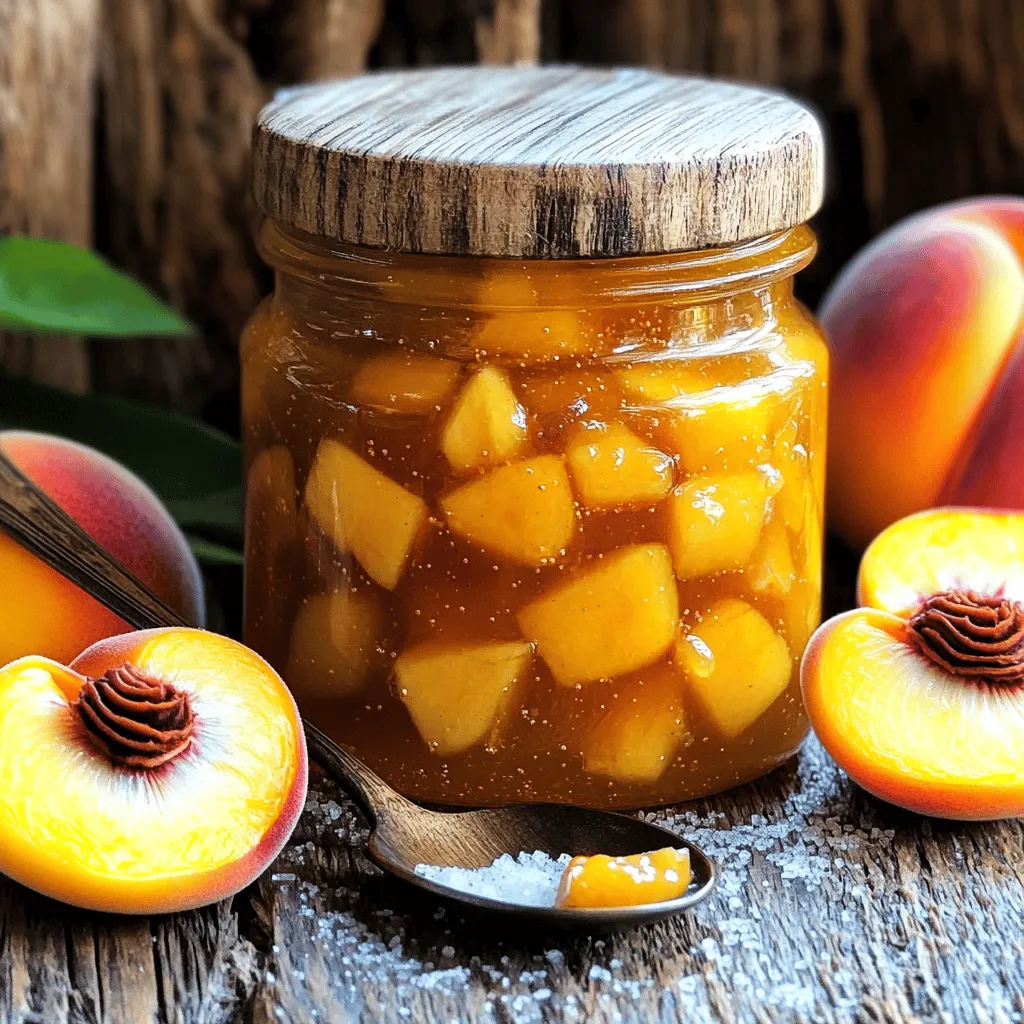
Are you ready to make a delicious treat this season? My Small Batch Vanilla Peach Jam is the perfect way to capture the sweet essence of summer in every jar. With fresh peaches, a hint of vanilla, and easy-to-follow steps, you’ll have a delightful spread that brightens up breakfast or dessert. Let’s dive into this simple, sweet jam-making adventure that will impress family and friends alike!
Ingredients
Required Ingredients
– Fresh peaches
– Granulated sugar
– Lemon juice
– Vanilla extract
– Almond extract
– Water
To make this jam, start with fresh peaches. They give the best flavor. Use ripe, juicy peaches for a sweet treat. Next, gather granulated sugar for sweetness. Lemon juice adds a nice tartness, balancing the flavors. Remember to include vanilla extract to enhance the peach taste. Almond extract adds a hint of nuttiness. Lastly, water helps to cook down the peaches.
Optional Add-ins
– Pectin for thicker consistency
– Spices like cinnamon or nutmeg
If you want a thicker jam, use pectin. It helps the jam set perfectly. You can also add spices for extra flavor. A pinch of cinnamon or nutmeg can make the jam unique. These add-ins allow you to customize your jam to your liking.
Equipment Needed
– Medium saucepan
– Potato masher or immersion blender
– Sterilized jars for storage
You will need a medium saucepan to cook the jam. A potato masher or immersion blender helps to break down the peaches. This gives the jam the right texture. Lastly, use sterilized jars for storage. This keeps your jam fresh and safe to eat.
For the complete instructions, check out the Full Recipe!
Step-by-Step Instructions
Preparing the Peaches
To make this jam, start with ripe peaches. Here’s how to peel and dice them easily:
– Boil water in a pot.
– Score the peaches with a small “X” on the bottom.
– Blanch the peaches for about 30 seconds.
– Remove and cool them in ice water.
– Peel the skins off with your fingers.
Now, to dice the peaches:
– Cut the peaches in half and remove the pit.
– Slice the peach halves into wedges.
– Chop the wedges into small pieces.
Time-saving tips:
– Use ripe peaches; they peel easier.
– Prepare a batch of peaches ahead of time.
Cooking the Jam
Now let’s cook the jam. Follow these steps:
1. Combine the diced peaches and water in a medium saucepan.
2. Heat over medium for about 5 minutes, stirring often.
3. Add sugar, lemon juice, and both extracts. Stir well.
4. Turn up the heat to medium-high and let it boil gently.
5. Boil for 10-15 minutes, stirring to prevent sticking.
To get the perfect thickness:
– Test the jam by spooning some onto a plate.
– If it drips slowly, it’s done. If it’s too runny, keep boiling.
Filling and Storing
After cooking, it’s time to fill your jars:
– Sterilize jars by boiling them in water for 10 minutes.
– Pour the jam into the hot jars, leaving some space at the top.
– Seal tightly with lids.
– Let them cool to room temperature.
For longer storage, you can process the jars:
– Place them in a water bath for 10 minutes.
– Let them cool completely.
Following these steps makes your vanilla peach jam safe and delicious. For the full recipe, check the recipe section.
Tips & Tricks
Perfecting the Flavor
To make your jam just right, you can adjust the sweetness. If you like it sweeter, add a bit more sugar. Taste as you go to find your perfect balance. If it’s too sweet, add a splash of lemon juice. This adds a nice bright flavor.
Enhancing vanilla notes is easy too. Use high-quality vanilla extract. If you want a stronger vanilla taste, add a touch more. Just remember not to overdo it. A little goes a long way.
Common Mistakes to Avoid
Watch out for overcooking. This can make your jam too thick and sticky. Keep an eye on it while it cooks. Stir often to avoid burning. Under-cooking is another issue. If you don’t cook it long enough, your jam may be too runny.
To prevent sticking, use a heavy-bottomed pan. This helps to heat evenly. Stir the mix every few minutes. This keeps it from sticking to the bottom. If it does stick, reduce the heat a bit.
Presentation Ideas
Creative ways to present your jam can impress friends. Try using small glass jars. They look cute and are easy to gift. You can also label them with fun names or the date.
Pairing suggestions are key for serving. Spread the jam on toast or scones. It also tastes great with cheese. Try it on a cheese board. The sweet and savory mix is a hit. For a simple treat, enjoy it with yogurt or ice cream.
For the full recipe, check the full recipe section above.
Variations
Different Fruit Combinations
You can mix peaches with other fruits for a unique jam. Try adding strawberries or raspberries for a berry twist. The sweet and tart flavors work well with peaches. In the fall, consider pairing peaches with apples or pears. These combinations create a warm, cozy flavor that feels like a hug in a jar.
Alternative Flavorings
Spice blends can bring a new depth to your jam. Adding a pinch of cinnamon or nutmeg can warm up the flavor. If you want a floral touch, try using rosewater or lavender extract. These flavors blend beautifully with peaches. You can also swap out vanilla extract for maple extract for a different twist. Each new flavor makes the jam special.
Sugar Alternatives
If you want a lower-sugar jam, try using honey or agave syrup. These natural sweeteners can replace granulated sugar. Start by using half the amount and adjust to your taste. Another option is using stevia or monk fruit sweetener for a no-calorie choice. Keep in mind that these alternatives may need different cooking times. Always check for the right thickness to get the best jam.
You can find the full recipe in another section. Enjoy making this jam your own!
Storage Info
Refrigeration Guidelines
How long will the jam last in the fridge?
The jam will last about three weeks in the fridge. Store it in a sealed jar. This keeps it fresh and safe to eat.
Best practices for keeping it fresh
Always use clean utensils when scooping the jam. Avoid double-dipping to prevent bacteria. Keep the jar tightly sealed when not in use. This helps to keep out air and moisture.
Canning for Longer Storage
Water bath canning process
To can your jam, first prepare your jars. Place them in simmering water to sterilize. Fill the hot jars with hot jam, leaving a little space at the top. Wipe the rims clean and seal with lids. Then, process the jars in boiling water for about 10 minutes.
Tips for safe canning practices
Check that the lids seal tightly after cooling. Press the center of each lid. If it pops up, it did not seal properly. Store sealed jars in a cool, dark place. This can help the jam last up to a year.
Freezing Jam
How to properly freeze jam for long-term storage
To freeze jam, use freezer-safe containers. Leave some space at the top for expansion. Label each container with the date and type of jam. This keeps your freezer organized and helps you use it in time.
Thawing and reusing frozen jam
To thaw frozen jam, place it in the fridge overnight. You can also set the container in warm water for faster thawing. Once thawed, stir well before using. Enjoy it on toast, in yogurt, or as a filling for desserts!
FAQs
Can I use frozen peaches for this recipe?
Yes, you can use frozen peaches. They work well in jam. Here are some best practices:
– Thaw before use: Let them sit in the fridge overnight.
– Drain excess liquid: Frozen peaches may release water. Drain this to avoid runny jam.
– Adjust cooking time: You may need to cook them a bit longer to thicken.
How can I tell if my jam is done cooking?
You can tell if your jam is done by looking for these signs:
– Color change: It will deepen and look glossy.
– Thick consistency: It should coat the back of a spoon.
– Testing with a plate: Place a spoonful on a cold plate. If it holds its shape, it’s ready.
What can I use this jam for?
This jam is versatile and tasty! Here are some ideas:
– Spread on toast: Perfect for breakfast or snacks.
– Swirl into yogurt: Add sweetness to your morning.
– Use in desserts: Try it in cakes or pastries.
– Serve with cheese: It pairs well with brie or goat cheese.
How to fix runny jam?
If your jam turns out runny, don’t worry! Here are some tips:
– Cook longer: Return it to the heat and boil for a bit more time.
– Add pectin: Stir in some pectin to help it set.
– Test again: Use the cold plate test for thickness after adjusting.
For a full recipe, check out the Full Recipe section.
In this post, we covered how to make delicious peach jam from scratch. You learned about the main and optional ingredients, the equipment you need, and step-by-step instructions for cooking. I shared tips for perfecting flavor and avoiding common mistakes. We explored variations and different storage methods to keep your jam fresh.
Making peach jam is fun and rewarding. Now, you can create your own tasty treats. Enjoy your kitchen adventure!
