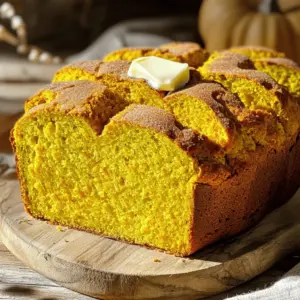
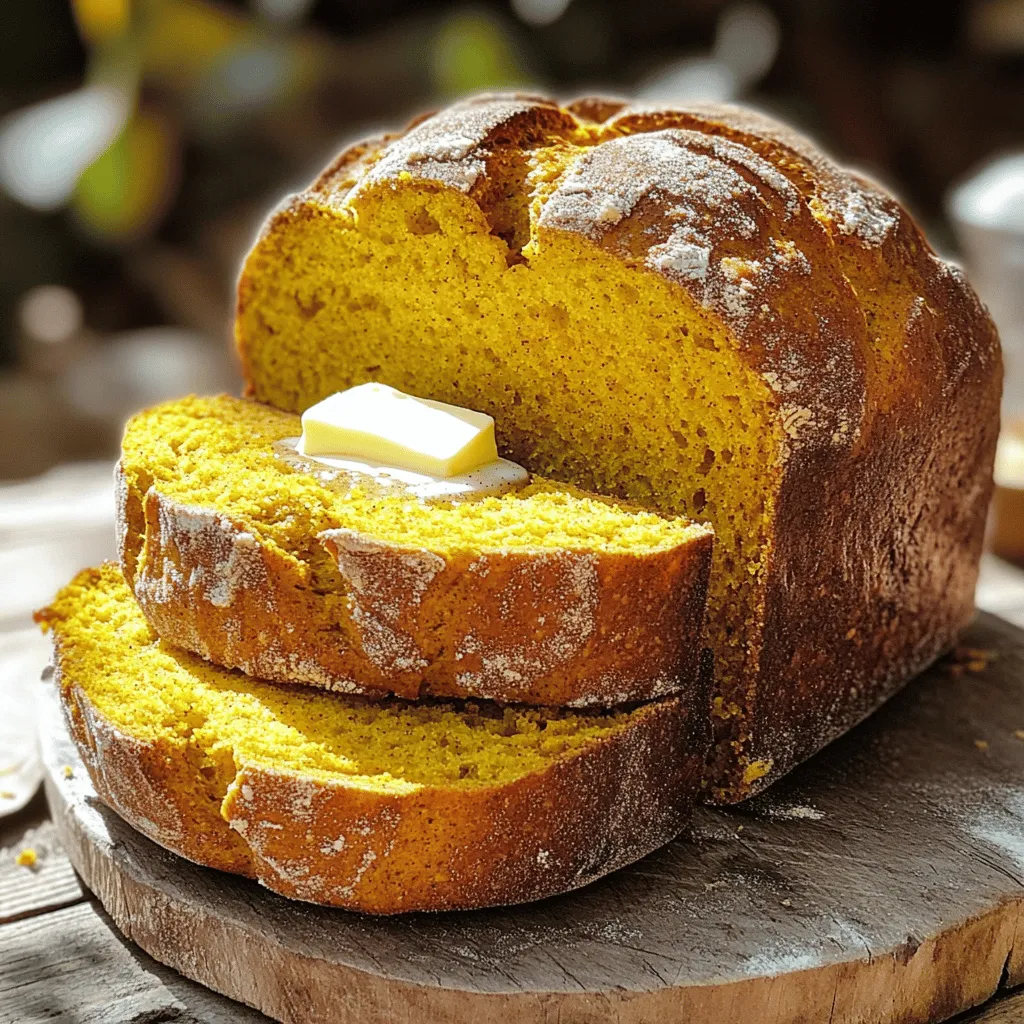
Fall is here, and nothing warms the heart like homemade Pumpkin Spice Sourdough Bread! This warm, flavorful treat blends the cozy taste of pumpkin with the tangy flair of sourdough, making it perfect for cool days. In this guide, I’ll walk you through each step, from mixing ingredients to baking the perfect loaf. Get ready to fill your kitchen with delightful aromas and impress your friends and family with your baking skills!
Ingredients
Dry Ingredients
– 3 cups bread flour
– 1 cup whole wheat flour
– 2 teaspoons salt
– 2 teaspoons cinnamon
– 1 teaspoon nutmeg
– ½ teaspoon ginger
– ¼ teaspoon cloves
I start with the dry ingredients. Bread flour gives the best structure. Whole wheat flour adds flavor and nutrition. The spices bring warmth. I love using cinnamon, nutmeg, ginger, and cloves. They make this bread taste like fall.
Wet Ingredients
– 1 cup pumpkin puree
– 1 cup sourdough starter
– 1 tablespoon honey or maple syrup (optional)
– 1 ½ cups warm water
Next, I mix the wet ingredients. Pumpkin puree adds moisture and a rich color. The sourdough starter is key for that tangy flavor. Sometimes, I add honey or maple syrup for a touch of sweetness. Warm water helps activate the starter.
Additional Items
– 2 teaspoons salt
– 1 ½ cups warm water
Salt is essential. It enhances flavors and helps with dough strength. Warm water, about 110°F, is perfect. It wakes up the starter and blends everything well. This balance of ingredients creates a delightful bread that’s perfect for any occasion.
Step-by-Step Instructions
Dough Preparation
Mixing the Dry Ingredients
Start with a large bowl. Add 3 cups of bread flour and 1 cup of whole wheat flour. Then, mix in 2 teaspoons of salt, 2 teaspoons of cinnamon, 1 teaspoon of nutmeg, ½ teaspoon of ginger, and ¼ teaspoon of cloves. Whisk well to blend the spices evenly.
Combining Wet Ingredients
In another bowl, mix together 1 cup of pumpkin puree, 1 cup of sourdough starter, and 1 ½ cups of warm water. If you want more sweetness, add 1 tablespoon of honey or maple syrup. Stir until everything is smooth and well combined.
Incorporating the Mixtures
Pour the wet mix into the dry ingredients. Use a wooden spoon or your hands to mix until no dry flour remains. The dough will feel sticky and shaggy, which is perfect.
Bulk Fermentation
Covering and Resting
Cover the bowl with a damp towel or plastic wrap. Let it rest at room temperature for 4 to 6 hours.
Stretch and Fold Technique
Every 30 minutes to an hour, perform a stretch and fold. Pull the dough from one side, stretch it, and fold it over itself. This builds strength in the dough.
Shaping and Rising
Shaping the Dough
After bulk fermentation, turn the dough onto a floured surface. Gently shape it into a round or oval loaf. Tuck the edges under for a nice form.
Second Rise Method
Place the shaped dough seam side up in a floured proofing basket. Cover it again and let it rise for 2 to 3 hours at room temperature. If you want deeper flavor, refrigerate it overnight.
Baking Process
Preheating the Oven
If you use a Dutch oven, preheat your oven to 450°F (232°C) for at least 30 minutes before baking.
Scoring the Loaf
Carefully turn the dough onto parchment paper. Use a sharp knife to score the top of the loaf. This helps it expand while baking.
Baking in a Dutch Oven
Place the loaf (with the parchment paper) into the pot. Cover it and bake for 30 minutes. Then, remove the lid and bake for another 15 to 20 minutes until the crust is golden brown.
Cooling
Cooling on a Rack
Once baked, turn the bread out onto a cooling rack. Let it cool completely before slicing to keep the texture perfect.
Tips & Tricks
Perfecting the Dough
– Importance of Active Starter: Your sourdough starter must be active and bubbly. An active starter helps the dough rise well. It adds flavor and texture. Feed your starter before you start the recipe. This ensures it has enough strength.
– Adjusting Hydration Levels: The dough will be sticky. The pumpkin puree adds moisture. If your dough feels too wet, add a bit more flour. Use bread flour for a better rise. Keep in mind that wetter doughs create a softer crumb.
Baking Tips
– Achieving a Crisp Crust: To get a crisp crust, use a Dutch oven. Preheat it well before baking. This traps steam, helping the crust form. You can also score the dough. This lets the bread expand and rise nicely.
– Preventing Soggy Bread: Avoid soggy bread by ensuring proper baking time. Bake until the crust is golden brown. If your bread is undercooked, it may turn out dense and wet. Always let it cool completely before slicing.
Presentation Tips
– Serving Suggestions: Serve warm slices with butter. A sprinkle of cinnamon sugar makes it even better. You can also pair it with cream cheese or a light spread. This adds a nice touch to the flavors.
– Storing Leftovers: Keep leftover bread in a paper bag. This helps maintain its crust. If you need to store it longer, wrap it in plastic. You can freeze it for up to three months. Just remember to let it thaw before enjoying.
Variations
Adding Mix-ins
You can make your pumpkin spice sourdough bread even better by adding mix-ins.
– Nuts and Seeds: Chopped walnuts or pecans add crunch. Add about ½ cup mixed in during the final dough mix. For seeds, try pumpkin or sunflower seeds. They add texture and flavor.
– Dried Fruits: Dried cranberries or raisins bring sweetness. Mix in about ½ cup for a fruity twist. This works well with the spices and pumpkin.
Flavor Enhancements
Enhancing flavors can make this bread unique.
– Additional Spices: You may want to add more spices. Consider cardamom or allspice for warmth. Just a pinch can change the taste in a great way.
– Sweetening Options: Instead of honey, try maple syrup or brown sugar. Each option gives a different flavor profile. Adjust the amount to your liking.
Gluten-Free Alternatives
If you need a gluten-free option, you can use different flours and ingredients.
– Alternative Flours: Try almond flour or a gluten-free blend. Make sure to adjust the liquid in the recipe. These flours absorb moisture differently.
– Substituting Ingredients: Use a gluten-free sourdough starter. You can also replace pumpkin puree with applesauce for a different taste. Just remember, the texture may vary slightly.
Storage Info
Short-term Storage
To keep your pumpkin spice sourdough bread fresh, store it at room temperature. Wrap the bread in a clean kitchen towel or place it in a paper bag. This method keeps the crust crisp while preventing it from drying out. Avoid plastic bags, as they can trap moisture and make the bread soggy.
If you need to refrigerate it, slice the bread first. Use an airtight container or wrap it well. This helps keep it fresh for a few days, but the crust may lose some of its crunch.
Long-term Storage
For long-term storage, freezing is the best choice. Slice the bread before freezing. Wrap each slice in plastic wrap or foil, then place them in a freezer bag. This way, you can grab just what you need later. The bread can last up to three months in the freezer.
When you’re ready to enjoy it, thaw the slices. You can leave them at room temperature for a few hours. For quicker results, use a toaster or microwave. Just be careful not to overheat it, as this can make the bread tough. Enjoy your pumpkin spice sourdough bread anytime!
FAQs
Common Questions
How to make sourdough rise faster?
To speed up sourdough rising, keep it warm. Try a sunny spot or near a heater. You can also use a bit more starter. A warm, draft-free area works best.
Can I use canned pumpkin for this recipe?
Yes, you can use canned pumpkin. It is convenient and gives good flavor. Just make sure it is pure pumpkin, not pie filling.
Is it possible to make this bread without a Dutch oven?
Yes, you can bake without a Dutch oven. Use a baking sheet instead. Place a pan with water in the oven for steam. This helps create a crusty loaf.
How should I adjust the recipe for high altitude?
At high altitudes, reduce the yeast slightly. Add a bit more water too. You may need to lower the oven temperature. Keep an eye on the baking time.
In this post, you learned how to make sourdough pumpkin bread. We covered key ingredients, from the flours to spices. You followed clear steps, from dough prep to baking. Plus, I shared tips for perfect bread and fun mix-ins.
Remember, practice makes perfect. Don’t be afraid to experiment with flavors and techniques. Enjoy baking your bread, and share it with others!