![Here’s what you need to make pumpkin scones: - 2 cups all-purpose flour - 1/2 cup brown sugar, packed - 1 tablespoon baking powder - 1/2 teaspoon baking soda - 1 teaspoon ground cinnamon - 1/2 teaspoon ground nutmeg - 1/4 teaspoon ground ginger - 1/4 teaspoon salt - 1/2 cup unsalted butter, cold and cubed - 1/2 cup canned pumpkin puree - 1/4 cup heavy cream - 1 large egg - 1/2 teaspoon vanilla extract These ingredients create a rich, flavorful base for your scones. The pumpkin puree gives moisture and a lovely color. The spices add warmth and depth. You can customize your scones with these fun options: - 1/4 cup chopped nuts (such as walnuts or pecans) for added crunch - Chocolate chips for a sweet twist - Dried cranberries for tartness Feel free to mix and match! Each add-in brings its own joy to the scone. You can also experiment with different spices or zest of an orange for a fresh touch. If you have dietary needs, here are some swaps you can try: - Use gluten-free flour for a gluten-free option. - Substitute coconut oil for butter for a dairy-free choice. - Replace heavy cream with almond milk for a lighter option. These substitutes won’t change the flavor too much. You can still enjoy pumpkin scones no matter your diet. Check the [Full Recipe] for more details on how to make these tasty treats! Start by preheating your oven to 425°F (220°C). Line a baking sheet with parchment paper. In a large bowl, mix together the dry ingredients. Combine 2 cups of all-purpose flour, 1/2 cup of brown sugar, 1 tablespoon of baking powder, 1/2 teaspoon of baking soda, 1 teaspoon of ground cinnamon, 1/2 teaspoon of ground nutmeg, 1/4 teaspoon of ground ginger, and 1/4 teaspoon of salt. Whisk until everything blends well. Next, add 1/2 cup of cold, cubed unsalted butter to the bowl. Use your fingers or a pastry cutter to mix the butter into the flour mixture. Do this until it looks like coarse crumbs. In another bowl, stir together 1/2 cup of canned pumpkin puree, 1/4 cup of heavy cream, 1 large egg, and 1/2 teaspoon of vanilla extract. Mix until smooth and creamy. Pour the wet ingredients into the dry mixture. Gently mix until just combined. Be careful not to overmix. If you want, you can fold in 1/4 cup of chopped nuts for a nice crunch. Lightly flour a clean surface. Turn out the dough and pat it into a circle about 1 inch thick. Cut it into wedges or use a biscuit cutter. Place the shaped scones on the prepared baking sheet, making sure to space them evenly. Bake them for 15 to 20 minutes. They should turn golden brown. To check if they’re done, insert a toothpick. It should come out clean. While your scones bake, prepare the glaze. In a bowl, mix 1 cup of powdered sugar with 1 to 2 tablespoons of milk. Keep mixing until the glaze is smooth and drizzles easily. After the scones have cooled for a few minutes, drizzle the glaze on top. To make your scones pop, sprinkle a little cinnamon or some pumpkin seeds on top. You can find the Full Recipe for this delightful treat to guide you through every step! To get soft and fluffy pumpkin scones, mix gently. Overworking the dough makes them tough. The key is to stop mixing once combined. When you fold in the wet ingredients, do it lightly. Use cold butter to create that flaky texture. I like to cut the butter into small cubes. This helps it blend well with the flour. One mistake is not measuring ingredients accurately. Use dry measuring cups for flour and sugar. Also, make sure your baking powder is fresh. Old baking powder can lead to flat scones. Another common error is skipping the chilling step. If you chill the dough for 15 minutes, it helps with the rise. Lastly, avoid opening the oven door too soon. This can cause the scones to sink. Serve pumpkin scones warm for the best taste. They go well with a hot cup of tea or coffee. You can also add a dollop of whipped cream on top. For a fun twist, try adding a sprinkle of cinnamon sugar. If you want to make it special, serve with apple butter. This adds a nice sweet and spicy touch. For the full recipe, check out the steps above. {{image_2}} To make vegan pumpkin scones, you can swap a few ingredients. Use plant-based butter instead of regular butter. Replace the egg with a flax egg made from one tablespoon of ground flaxseed and three tablespoons of water. Mix the flaxseed and water and let it sit for five minutes to thicken. Use almond or coconut milk instead of heavy cream. This way, you keep the scones moist and tasty. For gluten-free pumpkin scones, use a gluten-free flour blend. Many blends work well, but make sure it has xanthan gum for structure. You can also try almond flour for a nutty flavor. Keep the other ingredients the same to maintain flavor. This makes a great scone that everyone can enjoy. You can customize your pumpkin scones with fun add-ins. Consider adding chocolate chips for a sweet touch. Dried cranberries or raisins bring a fruity flavor. For a nutty crunch, fold in chopped walnuts or pecans. You can also add spices like cardamom for a unique twist. These variations let you create your perfect pumpkin scone. Check out the Full Recipe for more ideas! To keep your baked pumpkin scones fresh, place them in an airtight container. This helps to lock in moisture. Store them at room temperature for up to three days. For longer freshness, consider refrigerating them. The cold air will help prevent mold and keep them tasty. When you're ready to enjoy your scones again, reheating is easy. Preheat your oven to 350°F (175°C). Place the scones on a baking sheet and cover them with foil. Heat them for about 10 minutes. This warms them through while keeping them soft. You can also microwave a scone for about 15 seconds, but it may not stay as fluffy. Freezing scones is a great way to save some for later. First, let the scones cool completely. Next, wrap each scone tightly in plastic wrap. Place them in a freezer bag or container. They can stay in the freezer for up to three months. When you're ready to eat, just thaw them in the fridge overnight. Reheat them in the oven for the best taste. For more delicious details, check out the Full Recipe. To make pumpkin scones from scratch, gather your ingredients. You need flour, brown sugar, baking powder, baking soda, spices, salt, butter, pumpkin puree, cream, egg, and vanilla. Mix the dry ingredients in one bowl. In another bowl, mix the wet ingredients. Then, combine both mixtures gently. Shape the dough, cut it into wedges, and bake until golden. For the full recipe, check out the detailed instructions. Yes, you can use fresh pumpkin. Start by roasting or steaming the pumpkin until soft. Then, blend it until smooth. Make sure to drain excess water. Fresh pumpkin can add a vibrant taste to your scones. However, canned pumpkin is often more convenient and consistent in texture. You can find pumpkin scones at many local bakeries or coffee shops. Some grocery stores also sell them, especially in the fall. If you want a fresh batch, try making them at home. It’s a fun and rewarding process! Pumpkin scones are simple to make and versatile. We covered main ingredients, optional add-ins, and substitutes for diets. The step-by-step guide helps you prepare the dough, bake the scones, and glaze them for a perfect finish. I shared tips to avoid mistakes and enhance your scone texture. You can even explore variations for vegan or gluten-free options. Lastly, I provided storage tips to keep your scones fresh. Enjoy baking and sharing your delicious pumpkin scones with friends and family!](https://toastedrecipes.com/wp-content/uploads/2025/07/499ac5d8-8e38-42e2-8532-b3dc434e0d06.webp)
Are you ready to enjoy pumpkin scones that are both easy and delicious? In this guide, I’ll walk you through a simple recipe that captures the essence of fall in every bite. From choosing the perfect ingredients to baking techniques, I’ve got you covered. Plus, we’ll explore tasty variations to fit your diet. Let’s dive into making pumpkin scones that will impress your family and friends!
Ingredients
Main Ingredients for Pumpkin Scones
Here’s what you need to make pumpkin scones:
– 2 cups all-purpose flour
– 1/2 cup brown sugar, packed
– 1 tablespoon baking powder
– 1/2 teaspoon baking soda
– 1 teaspoon ground cinnamon
– 1/2 teaspoon ground nutmeg
– 1/4 teaspoon ground ginger
– 1/4 teaspoon salt
– 1/2 cup unsalted butter, cold and cubed
– 1/2 cup canned pumpkin puree
– 1/4 cup heavy cream
– 1 large egg
– 1/2 teaspoon vanilla extract
These ingredients create a rich, flavorful base for your scones. The pumpkin puree gives moisture and a lovely color. The spices add warmth and depth.
Optional Add-ins and Variations
You can customize your scones with these fun options:
– 1/4 cup chopped nuts (such as walnuts or pecans) for added crunch
– Chocolate chips for a sweet twist
– Dried cranberries for tartness
Feel free to mix and match! Each add-in brings its own joy to the scone. You can also experiment with different spices or zest of an orange for a fresh touch.
Ingredient Substitutes for Dietary Needs
If you have dietary needs, here are some swaps you can try:
– Use gluten-free flour for a gluten-free option.
– Substitute coconut oil for butter for a dairy-free choice.
– Replace heavy cream with almond milk for a lighter option.
These substitutes won’t change the flavor too much. You can still enjoy pumpkin scones no matter your diet. Check the [Full Recipe] for more details on how to make these tasty treats!
Step-by-Step Instructions
Preparation of the Dough
Start by preheating your oven to 425°F (220°C). Line a baking sheet with parchment paper. In a large bowl, mix together the dry ingredients. Combine 2 cups of all-purpose flour, 1/2 cup of brown sugar, 1 tablespoon of baking powder, 1/2 teaspoon of baking soda, 1 teaspoon of ground cinnamon, 1/2 teaspoon of ground nutmeg, 1/4 teaspoon of ground ginger, and 1/4 teaspoon of salt. Whisk until everything blends well.
Next, add 1/2 cup of cold, cubed unsalted butter to the bowl. Use your fingers or a pastry cutter to mix the butter into the flour mixture. Do this until it looks like coarse crumbs. In another bowl, stir together 1/2 cup of canned pumpkin puree, 1/4 cup of heavy cream, 1 large egg, and 1/2 teaspoon of vanilla extract. Mix until smooth and creamy.
Pour the wet ingredients into the dry mixture. Gently mix until just combined. Be careful not to overmix. If you want, you can fold in 1/4 cup of chopped nuts for a nice crunch. Lightly flour a clean surface. Turn out the dough and pat it into a circle about 1 inch thick. Cut it into wedges or use a biscuit cutter.
Baking the Scones
Place the shaped scones on the prepared baking sheet, making sure to space them evenly. Bake them for 15 to 20 minutes. They should turn golden brown. To check if they’re done, insert a toothpick. It should come out clean.
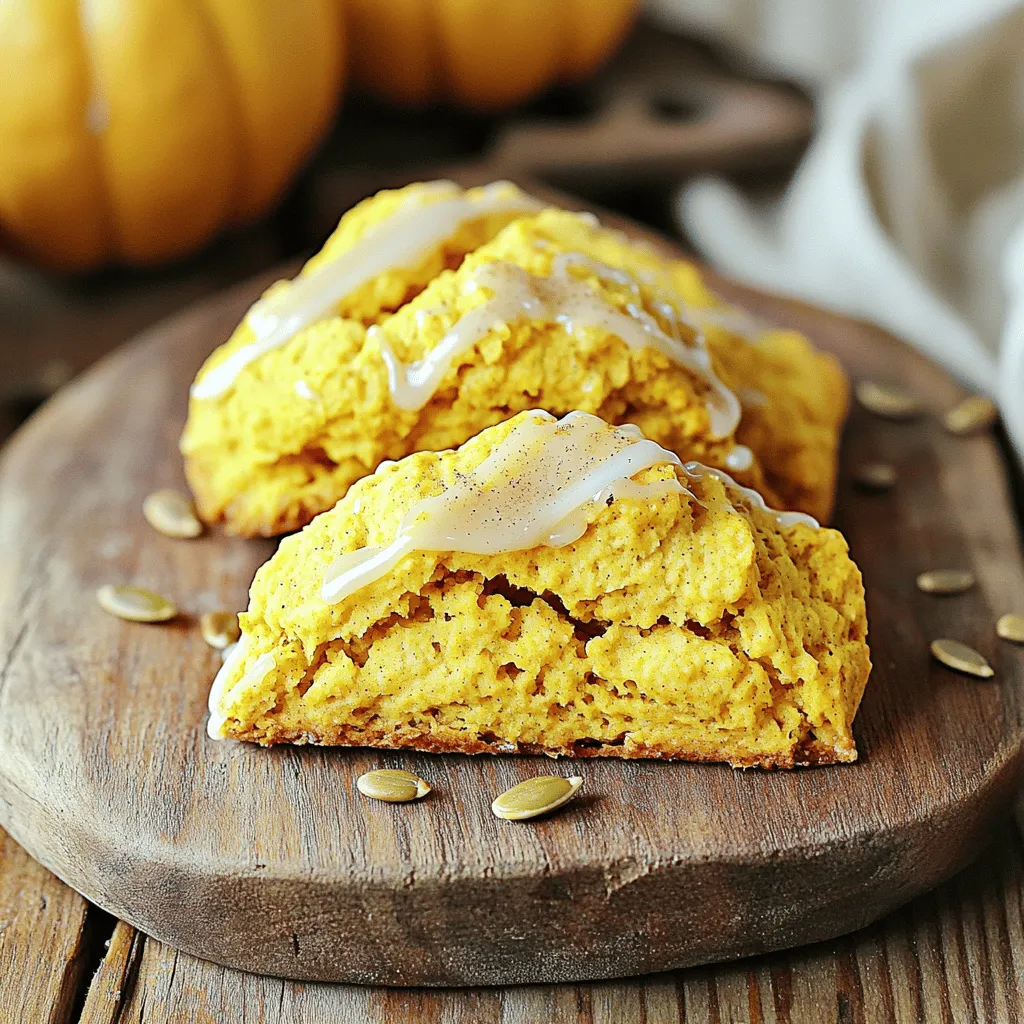
Glazing and Final Touches
While your scones bake, prepare the glaze. In a bowl, mix 1 cup of powdered sugar with 1 to 2 tablespoons of milk. Keep mixing until the glaze is smooth and drizzles easily. After the scones have cooled for a few minutes, drizzle the glaze on top. To make your scones pop, sprinkle a little cinnamon or some pumpkin seeds on top.
You can find the Full Recipe for this delightful treat to guide you through every step!
Tips & Tricks
Achieving the Perfect Texture
To get soft and fluffy pumpkin scones, mix gently. Overworking the dough makes them tough. The key is to stop mixing once combined. When you fold in the wet ingredients, do it lightly. Use cold butter to create that flaky texture. I like to cut the butter into small cubes. This helps it blend well with the flour.
Common Mistakes to Avoid
One mistake is not measuring ingredients accurately. Use dry measuring cups for flour and sugar. Also, make sure your baking powder is fresh. Old baking powder can lead to flat scones. Another common error is skipping the chilling step. If you chill the dough for 15 minutes, it helps with the rise. Lastly, avoid opening the oven door too soon. This can cause the scones to sink.
Serving Suggestions and Pairings
Serve pumpkin scones warm for the best taste. They go well with a hot cup of tea or coffee. You can also add a dollop of whipped cream on top. For a fun twist, try adding a sprinkle of cinnamon sugar. If you want to make it special, serve with apple butter. This adds a nice sweet and spicy touch. For the full recipe, check out the steps above.
Variations
Vegan Pumpkin Scones Recipe
To make vegan pumpkin scones, you can swap a few ingredients. Use plant-based butter instead of regular butter. Replace the egg with a flax egg made from one tablespoon of ground flaxseed and three tablespoons of water. Mix the flaxseed and water and let it sit for five minutes to thicken. Use almond or coconut milk instead of heavy cream. This way, you keep the scones moist and tasty.
Gluten-Free Pumpkin Scones Recipe
For gluten-free pumpkin scones, use a gluten-free flour blend. Many blends work well, but make sure it has xanthan gum for structure. You can also try almond flour for a nutty flavor. Keep the other ingredients the same to maintain flavor. This makes a great scone that everyone can enjoy.
Seasonal Add-ins and Flavor Twists
You can customize your pumpkin scones with fun add-ins. Consider adding chocolate chips for a sweet touch. Dried cranberries or raisins bring a fruity flavor. For a nutty crunch, fold in chopped walnuts or pecans. You can also add spices like cardamom for a unique twist. These variations let you create your perfect pumpkin scone. Check out the Full Recipe for more ideas!
Storage Info
How to Store Baked Pumpkin Scones
To keep your baked pumpkin scones fresh, place them in an airtight container. This helps to lock in moisture. Store them at room temperature for up to three days. For longer freshness, consider refrigerating them. The cold air will help prevent mold and keep them tasty.
Reheating Guidelines
When you’re ready to enjoy your scones again, reheating is easy. Preheat your oven to 350°F (175°C). Place the scones on a baking sheet and cover them with foil. Heat them for about 10 minutes. This warms them through while keeping them soft. You can also microwave a scone for about 15 seconds, but it may not stay as fluffy.
Freezing Pumpkin Scones for Later Use
Freezing scones is a great way to save some for later. First, let the scones cool completely. Next, wrap each scone tightly in plastic wrap. Place them in a freezer bag or container. They can stay in the freezer for up to three months. When you’re ready to eat, just thaw them in the fridge overnight. Reheat them in the oven for the best taste. For more delicious details, check out the Full Recipe.
FAQs
How do you make pumpkin scones from scratch?
To make pumpkin scones from scratch, gather your ingredients. You need flour, brown sugar, baking powder, baking soda, spices, salt, butter, pumpkin puree, cream, egg, and vanilla. Mix the dry ingredients in one bowl. In another bowl, mix the wet ingredients. Then, combine both mixtures gently. Shape the dough, cut it into wedges, and bake until golden. For the full recipe, check out the detailed instructions.
Can I use fresh pumpkin instead of canned pumpkin puree?
Yes, you can use fresh pumpkin. Start by roasting or steaming the pumpkin until soft. Then, blend it until smooth. Make sure to drain excess water. Fresh pumpkin can add a vibrant taste to your scones. However, canned pumpkin is often more convenient and consistent in texture.
Where can I buy pumpkin scones?
You can find pumpkin scones at many local bakeries or coffee shops. Some grocery stores also sell them, especially in the fall. If you want a fresh batch, try making them at home. It’s a fun and rewarding process!
Pumpkin scones are simple to make and versatile. We covered main ingredients, optional add-ins, and substitutes for diets. The step-by-step guide helps you prepare the dough, bake the scones, and glaze them for a perfect finish. I shared tips to avoid mistakes and enhance your scone texture. You can even explore variations for vegan or gluten-free options. Lastly, I provided storage tips to keep your scones fresh. Enjoy baking and sharing your delicious pumpkin scones with friends and family!
![Here’s what you need to make pumpkin scones: - 2 cups all-purpose flour - 1/2 cup brown sugar, packed - 1 tablespoon baking powder - 1/2 teaspoon baking soda - 1 teaspoon ground cinnamon - 1/2 teaspoon ground nutmeg - 1/4 teaspoon ground ginger - 1/4 teaspoon salt - 1/2 cup unsalted butter, cold and cubed - 1/2 cup canned pumpkin puree - 1/4 cup heavy cream - 1 large egg - 1/2 teaspoon vanilla extract These ingredients create a rich, flavorful base for your scones. The pumpkin puree gives moisture and a lovely color. The spices add warmth and depth. You can customize your scones with these fun options: - 1/4 cup chopped nuts (such as walnuts or pecans) for added crunch - Chocolate chips for a sweet twist - Dried cranberries for tartness Feel free to mix and match! Each add-in brings its own joy to the scone. You can also experiment with different spices or zest of an orange for a fresh touch. If you have dietary needs, here are some swaps you can try: - Use gluten-free flour for a gluten-free option. - Substitute coconut oil for butter for a dairy-free choice. - Replace heavy cream with almond milk for a lighter option. These substitutes won’t change the flavor too much. You can still enjoy pumpkin scones no matter your diet. Check the [Full Recipe] for more details on how to make these tasty treats! Start by preheating your oven to 425°F (220°C). Line a baking sheet with parchment paper. In a large bowl, mix together the dry ingredients. Combine 2 cups of all-purpose flour, 1/2 cup of brown sugar, 1 tablespoon of baking powder, 1/2 teaspoon of baking soda, 1 teaspoon of ground cinnamon, 1/2 teaspoon of ground nutmeg, 1/4 teaspoon of ground ginger, and 1/4 teaspoon of salt. Whisk until everything blends well. Next, add 1/2 cup of cold, cubed unsalted butter to the bowl. Use your fingers or a pastry cutter to mix the butter into the flour mixture. Do this until it looks like coarse crumbs. In another bowl, stir together 1/2 cup of canned pumpkin puree, 1/4 cup of heavy cream, 1 large egg, and 1/2 teaspoon of vanilla extract. Mix until smooth and creamy. Pour the wet ingredients into the dry mixture. Gently mix until just combined. Be careful not to overmix. If you want, you can fold in 1/4 cup of chopped nuts for a nice crunch. Lightly flour a clean surface. Turn out the dough and pat it into a circle about 1 inch thick. Cut it into wedges or use a biscuit cutter. Place the shaped scones on the prepared baking sheet, making sure to space them evenly. Bake them for 15 to 20 minutes. They should turn golden brown. To check if they’re done, insert a toothpick. It should come out clean. While your scones bake, prepare the glaze. In a bowl, mix 1 cup of powdered sugar with 1 to 2 tablespoons of milk. Keep mixing until the glaze is smooth and drizzles easily. After the scones have cooled for a few minutes, drizzle the glaze on top. To make your scones pop, sprinkle a little cinnamon or some pumpkin seeds on top. You can find the Full Recipe for this delightful treat to guide you through every step! To get soft and fluffy pumpkin scones, mix gently. Overworking the dough makes them tough. The key is to stop mixing once combined. When you fold in the wet ingredients, do it lightly. Use cold butter to create that flaky texture. I like to cut the butter into small cubes. This helps it blend well with the flour. One mistake is not measuring ingredients accurately. Use dry measuring cups for flour and sugar. Also, make sure your baking powder is fresh. Old baking powder can lead to flat scones. Another common error is skipping the chilling step. If you chill the dough for 15 minutes, it helps with the rise. Lastly, avoid opening the oven door too soon. This can cause the scones to sink. Serve pumpkin scones warm for the best taste. They go well with a hot cup of tea or coffee. You can also add a dollop of whipped cream on top. For a fun twist, try adding a sprinkle of cinnamon sugar. If you want to make it special, serve with apple butter. This adds a nice sweet and spicy touch. For the full recipe, check out the steps above. {{image_2}} To make vegan pumpkin scones, you can swap a few ingredients. Use plant-based butter instead of regular butter. Replace the egg with a flax egg made from one tablespoon of ground flaxseed and three tablespoons of water. Mix the flaxseed and water and let it sit for five minutes to thicken. Use almond or coconut milk instead of heavy cream. This way, you keep the scones moist and tasty. For gluten-free pumpkin scones, use a gluten-free flour blend. Many blends work well, but make sure it has xanthan gum for structure. You can also try almond flour for a nutty flavor. Keep the other ingredients the same to maintain flavor. This makes a great scone that everyone can enjoy. You can customize your pumpkin scones with fun add-ins. Consider adding chocolate chips for a sweet touch. Dried cranberries or raisins bring a fruity flavor. For a nutty crunch, fold in chopped walnuts or pecans. You can also add spices like cardamom for a unique twist. These variations let you create your perfect pumpkin scone. Check out the Full Recipe for more ideas! To keep your baked pumpkin scones fresh, place them in an airtight container. This helps to lock in moisture. Store them at room temperature for up to three days. For longer freshness, consider refrigerating them. The cold air will help prevent mold and keep them tasty. When you're ready to enjoy your scones again, reheating is easy. Preheat your oven to 350°F (175°C). Place the scones on a baking sheet and cover them with foil. Heat them for about 10 minutes. This warms them through while keeping them soft. You can also microwave a scone for about 15 seconds, but it may not stay as fluffy. Freezing scones is a great way to save some for later. First, let the scones cool completely. Next, wrap each scone tightly in plastic wrap. Place them in a freezer bag or container. They can stay in the freezer for up to three months. When you're ready to eat, just thaw them in the fridge overnight. Reheat them in the oven for the best taste. For more delicious details, check out the Full Recipe. To make pumpkin scones from scratch, gather your ingredients. You need flour, brown sugar, baking powder, baking soda, spices, salt, butter, pumpkin puree, cream, egg, and vanilla. Mix the dry ingredients in one bowl. In another bowl, mix the wet ingredients. Then, combine both mixtures gently. Shape the dough, cut it into wedges, and bake until golden. For the full recipe, check out the detailed instructions. Yes, you can use fresh pumpkin. Start by roasting or steaming the pumpkin until soft. Then, blend it until smooth. Make sure to drain excess water. Fresh pumpkin can add a vibrant taste to your scones. However, canned pumpkin is often more convenient and consistent in texture. You can find pumpkin scones at many local bakeries or coffee shops. Some grocery stores also sell them, especially in the fall. If you want a fresh batch, try making them at home. It’s a fun and rewarding process! Pumpkin scones are simple to make and versatile. We covered main ingredients, optional add-ins, and substitutes for diets. The step-by-step guide helps you prepare the dough, bake the scones, and glaze them for a perfect finish. I shared tips to avoid mistakes and enhance your scone texture. You can even explore variations for vegan or gluten-free options. Lastly, I provided storage tips to keep your scones fresh. Enjoy baking and sharing your delicious pumpkin scones with friends and family!](https://toastedrecipes.com/wp-content/uploads/2025/07/499ac5d8-8e38-42e2-8532-b3dc434e0d06-300x300.webp)