Do you crave a sweet treat that’s easy to make and looks fancy? You’re in the right place! Mini Crème Brûlée Cheesecakes are perfect for any occasion. These bites of heaven combine the creamy goodness of cheesecake with the rich taste of caramelized sugar. I’ll guide you through each step, from gathering your ingredients to serving them up. Let’s turn your kitchen into a dessert paradise!
Ingredients
Complete List of Ingredients
For these tasty mini crème brûlée cheesecakes, gather the following items:
– 1 cup graham cracker crumbs
– 4 tablespoons unsalted butter, melted
– 2 (8-ounce) packages cream cheese, softened
– 3/4 cup granulated sugar
– 1 teaspoon vanilla extract
– 1 teaspoon lemon zest
– 2 large eggs
– 1/2 cup heavy cream
– Additional granulated sugar for caramelizing
Ingredient Substitutions
You can swap some ingredients for alternatives without losing flavor. If you need a gluten-free option, use gluten-free graham cracker crumbs instead. For a dairy-free version, try vegan cream cheese and coconut cream. You can also use maple syrup in place of granulated sugar for a different sweet taste.
Tips for Selecting Fresh Ingredients
Fresh ingredients make a big difference in taste. When buying cream cheese, check for a smooth texture and no lumps. For eggs, choose ones with clean shells and a recent expiration date. Select lemons that feel heavy for their size; this means they have more juice. When picking vanilla extract, go for pure over imitation for better flavor. Always check the expiration dates on all your products to ensure freshness.
Step-by-Step Instructions
Prepping the Oven and Liners
Start by preheating your oven to 325°F (160°C). This step warms the oven for even baking. Next, grab a cupcake pan and line it with paper liners. The liners help in easy removal and keep the cheesecakes neat.
Making the Crust
In a small bowl, mix 1 cup of graham cracker crumbs with 4 tablespoons of melted butter. Stir until it looks like wet sand. Take about a tablespoon of this mixture and press it into the bottom of each cupcake liner. This forms a tasty crust. Bake the crust for 5 minutes. When done, remove it and let it cool.
Preparing the Cheesecake Filling
In a large bowl, beat 2 packages of softened cream cheese until it’s creamy. Gradually add 3/4 cup of granulated sugar, mixing until smooth. Then, stir in 1 teaspoon vanilla extract and 1 teaspoon of lemon zest. This adds flavor. Next, add 2 large eggs one at a time, mixing well after each addition. Finally, mix in 1/2 cup of heavy cream until the filling is lump-free.
Baking and Chilling Process
Pour the cheesecake filling over the cooled crusts, filling each about 3/4 full. Bake in the preheated oven for 18-20 minutes. The centers should be set but still slightly jiggly. Let them cool in the pan for 10 minutes before moving them to a wire rack to cool completely. After cooling, refrigerate the cheesecakes for at least 4 hours. Chilling is key for a firm texture.
To learn the full process for caramelizing the tops, refer to the Full Recipe.
Tips & Tricks
Achieving the Perfect Caramel Top
To get that perfect caramel top, use fine sugar. It melts evenly and quickly. Before you caramelize, make sure the cheesecakes are cold. This helps the sugar sit on top without sinking. Use a kitchen torch for better control. If you don’t have one, broil them briefly in the oven. Keep a close watch to prevent burning. The sugar should turn golden brown. This adds a nice crunch and flavor.
How to Avoid Cracks in Cheesecakes
Cracks can happen if the cheesecake bakes too fast. Bake at a low temperature. This helps the cheesecake cook evenly. Avoid opening the oven door while baking. It changes the heat inside. Make sure to mix the filling gently. Overmixing adds air, which causes cracks. Let the cheesecakes cool slowly in the oven. This helps them set without splitting. Chill them for at least four hours before serving.
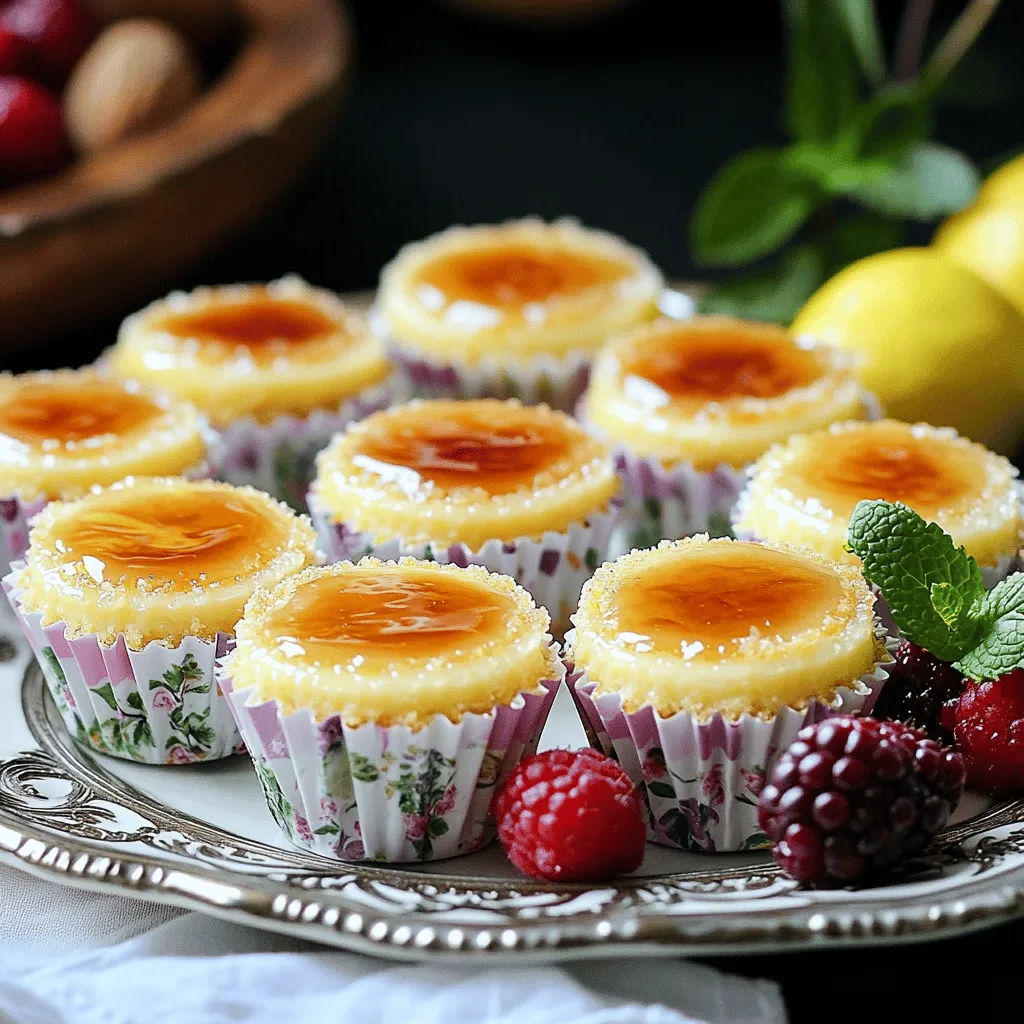
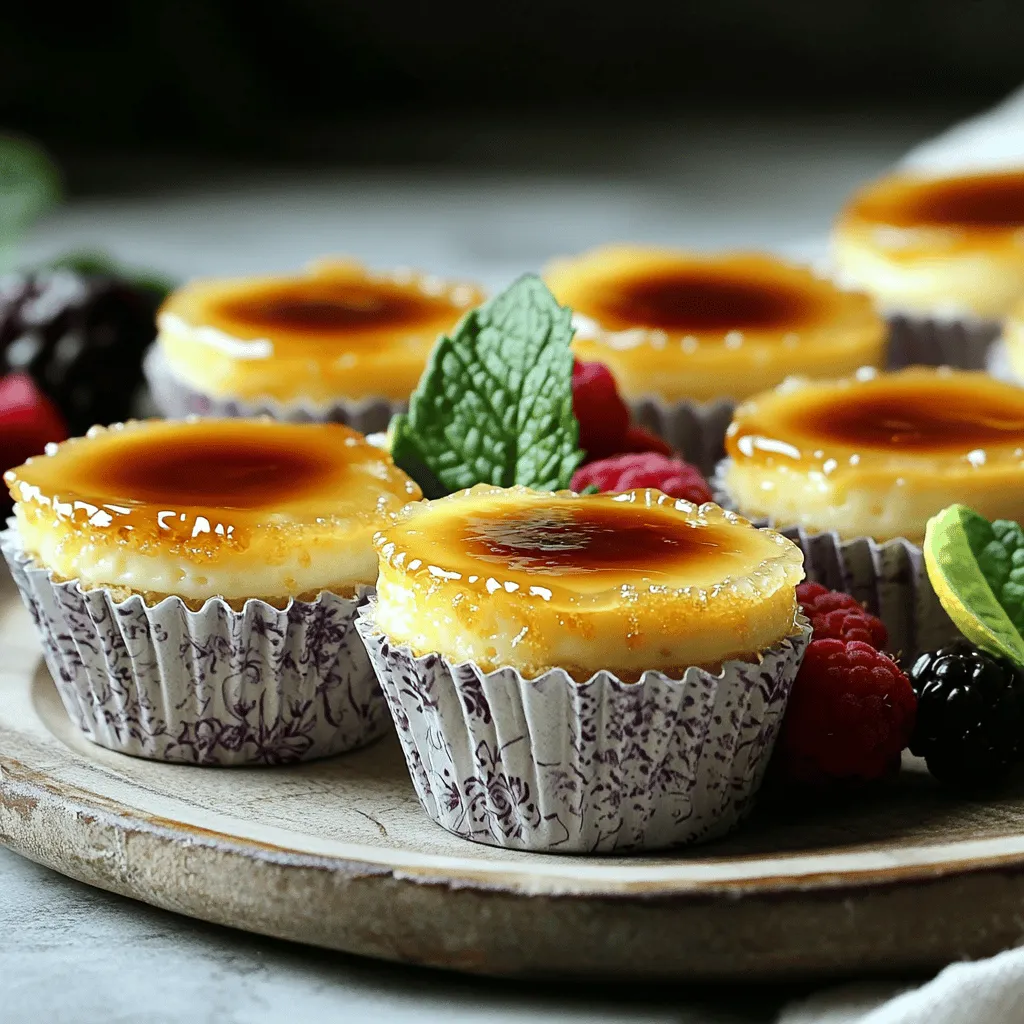
Serving Suggestions for Mini Crème Brûlée Cheesecakes
These mini cheesecakes look great on a platter. Add fresh berries or mint leaves for color. You could also drizzle some chocolate sauce on the plate. This adds a nice touch. Serve them with a cup of coffee or tea. The rich flavors pair well with warm drinks. For a fun twist, try adding a scoop of ice cream on the side. Each bite will be a sweet treat!
For the full recipe of Mini Crème Brûlée Cheesecakes, check the recipe section above.
Variations
Flavor Variations
You can change the taste of your Mini Crème Brûlée Cheesecakes in fun ways. Chocolate adds richness. Just mix in some melted chocolate when you make the filling. For fruit lovers, try adding fresh fruit puree. Blend strawberries or raspberries with the cream cheese for a fruity twist. You can also use lemon or orange zest for a bright, fresh flavor.
Gluten-Free Alternatives
If you need a gluten-free option, swap out the graham cracker crumbs. Use gluten-free cookie crumbs or ground almonds for the crust. Check labels on your cream cheese and other ingredients to ensure they are gluten-free. This way, everyone can enjoy these tasty treats.
Mini vs. Regular-Sized Cheesecakes
Mini cheesecakes are great for parties. They are easy to serve and eat. You can make them in cupcake liners, which makes for a fun presentation. Regular-sized cheesecakes are perfect for family gatherings. They take longer to bake and chill, but they create a stunning centerpiece. Both sizes taste amazing, so choose what fits your needs best.
For the full recipe, check out the details above and get started on these delightful desserts!
Storage Info
How to Store Mini Crème Brûlée Cheesecakes
To store your mini crème brûlée cheesecakes, place them in an airtight container. This keeps them fresh and moist. For best results, store them in the fridge. They will stay delicious for up to 5 days.
Freezing Guidelines
You can freeze these cheesecakes if you want to save some for later. First, let them cool completely. Then, wrap each cheesecake in plastic wrap. Place them in a freezer-safe bag or container. They can last up to 3 months in the freezer. To enjoy, thaw them in the fridge overnight before serving.
Shelf Life and Best Practices
The shelf life of mini crème brûlée cheesecakes is about 5 days in the fridge. Always check for any off smells or changes in texture before eating. For the best taste, consume them within the first few days. Enjoy the creamy texture and sweet flavor while they are fresh! For the full recipe, check out the previous sections.
FAQs
Can I make these cheesecakes ahead of time?
Yes, you can make mini crème brûlée cheesecakes ahead of time. After you bake them, let them cool and chill in the fridge. They taste even better after a day. Just make sure to caramelize the tops right before serving. This keeps the crust nice and crunchy.
What if I don’t have a kitchen torch for caramelizing?
If you don’t have a kitchen torch, don’t worry! You can use your oven’s broiler. After sprinkling sugar on top, place the cheesecakes under the broiler for a minute or two. Keep a close watch to avoid burning the sugar. Remove them once they turn a nice golden color.
How do I know when the cheesecakes are done?
The cheesecakes are done when the edges look set but the center is still slightly jiggly. They will firm up as they cool. A toothpick inserted in the center should come out mostly clean, but a tiny bit of filling is okay. This ensures a creamy texture.
For the full recipe, check out the detailed instructions above. Enjoy your baking!
This article has covered all you need to make delicious mini crème brûlée cheesecakes. We explored key ingredients and shared smart tips for choosing fresh items. You learned step-by-step methods for prepping, baking, and chilling. Plus, I offered tricks for perfect caramel tops and avoiding cracks. You can try many flavor variations and know how to store and freeze them properly.
I hope you feel ready to create your own tasty treats. Enjoy every step of the process and share your results!
