![To make these mini cheesecakes, you need a few key ingredients. Here’s what you'll need: - 1 cup graham cracker crumbs - 2 tablespoons sugar - 1/4 cup unsalted butter, melted - 16 oz cream cheese, softened - 1 cup powdered sugar - 1 teaspoon vanilla extract - 2 large eggs These ingredients create a rich, creamy filling and a delicious crust. For the topping, chocolate-covered strawberries add a sweet touch. Gather these ingredients: - 1 cup fresh strawberries, hulled and dried - 1 cup semisweet chocolate chips - 1 tablespoon coconut oil (optional for smoother chocolate coating) These strawberries not only taste great but also look stunning on top of the cheesecakes. Feel free to customize your cheesecakes with these options. Here are some ideas: - Different extract flavors (like almond or lemon) - Add a pinch of salt for balance - Use different types of chocolate (like dark or white) These options let you put your spin on the recipe and make it your own. For the full recipe, visit the [Full Recipe] link. To start, gather your crust ingredients: graham cracker crumbs, sugar, and melted butter. In a bowl, mix the crumbs and sugar. Then, pour in the melted butter. Stir until it looks like damp sand. Next, line a muffin tin with cupcake liners. Press about one tablespoon of the mixture into each liner. Pack it firmly to create a strong base. Bake in a preheated oven at 325°F for 5 to 7 minutes. Remove them and let them cool completely. Now it’s time for the filling! In a large bowl, add softened cream cheese. Use an electric mixer to beat it until smooth. Gradually add powdered sugar while mixing. Don’t rush; take your time to blend it well. Next, stir in the vanilla extract. Add eggs one at a time, mixing gently after each one. You want it smooth, but be careful not to overmix. Once done, your filling should be creamy and thick. Pour the cheesecake filling over the cooled crusts. Fill each one about three-quarters full. Place the muffin tin back into the oven. Bake for 18 to 20 minutes. The centers should be set but still have a slight jiggle. After baking, turn off the oven but leave the door cracked. Let the cheesecakes cool inside for about 30 minutes. This helps prevent cracks. Then, move them to the fridge to chill for at least 3 hours, or overnight if you can wait! While waiting for the cheesecakes to chill, it’s time for the strawberries. Melt semisweet chocolate chips in a microwave-safe bowl. Heat in 30-second intervals, stirring until smooth. If you want a glossy finish, stir in some coconut oil. Dip each hulled strawberry into the melted chocolate. Let any excess chocolate drip off. Place them on a parchment-lined baking sheet to set. When the cheesecakes are chilled, remove them from the muffin tin. Top each one with a chocolate-covered strawberry. Enjoy this sweet treat! For the full recipe, check out the details provided. To get a smooth cheesecake, start with room temperature cream cheese. Cold cream cheese makes lumps. Use a hand mixer instead of a whisk. This helps mix the cream cheese evenly. Mix on low speed after adding eggs. Overmixing can create cracks in the cheesecake. Melt chocolate slowly to avoid burning. Use a microwave, heating in 30-second bursts. Stir after each burst until smooth. You can also use a double boiler. Fill a pot with water and place a bowl on top. The steam will melt the chocolate gently. Add coconut oil for a glossy finish. This makes the chocolate shiny and smooth. Presentation matters! Serve the cheesecakes on a pretty platter. Add fresh mint leaves for color. Drizzle leftover chocolate around the plate to impress guests. Top each cheesecake with a chocolate-covered strawberry. This adds a pop of color and flavor. Enjoy your delightful mini cheesecakes! For the full recipe, check the details above. {{image_2}} You can switch up the toppings for a new taste. Try using fresh blueberries, raspberries, or even mango slices. Each fruit brings its own fun flavor. You can also drizzle caramel or a fruit sauce on top for extra sweetness. Experiment with flavored extracts, like almond or lemon, for a twist in the cheesecake batter. While graham cracker crusts are classic, you can try other options. Use crushed Oreos for a chocolatey base. Nut crusts, like almonds or pecans, add a nice crunch. For a gluten-free option, almond flour or coconut flour works well. Just mix with melted butter and press it into the muffin tin. If you need gluten-free mini cheesecakes, stick to gluten-free cookies for the crust. You can also use dairy-free cream cheese for a vegan twist. Sweeteners like agave or maple syrup can replace sugar. Just make sure to adjust the amounts, as these can be sweeter than regular sugar. To keep your mini cheesecakes fresh, place them in an airtight container. They will stay good in the fridge for up to five days. If you plan to eat them later, do not add the chocolate-covered strawberries until just before serving. This will keep everything fresh and tasty. Store chocolate-covered strawberries in the fridge as well. Place them in a single layer to avoid sticking. You can use parchment paper to help with this. They taste best when eaten within 24 hours, but you can keep them for up to two days. If you want to save some mini cheesecakes for later, freezing is a great option. Wrap each cheesecake tightly in plastic wrap. Then, place them in a freezer bag or container. They can last for up to two months in the freezer. Thaw them in the fridge overnight before serving. This way, they will taste just as good as fresh! For the full recipe, refer to the earlier section. You will know the mini cheesecakes are done when the edges are set. The center should be slightly jiggly but not liquid. This means they will firm up as they cool. If you insert a toothpick, it should come out mostly clean. Keep a close watch during the last few minutes to avoid overbaking. Yes, you can use many other toppings! Fresh fruit like raspberries or blueberries work great. You could also try whipped cream, caramel sauce, or even crushed cookies. The choice is yours! Just think about flavors that pair well with cheesecake. Mini cheesecakes last about 5 to 7 days in the refrigerator. Make sure to store them in an airtight container. This keeps them fresh and prevents any odors from other foods in your fridge. Enjoy them as a sweet treat throughout the week! Serve mini cheesecakes on a beautiful platter for a nice look. You can add fresh mint leaves for color. Drizzle any leftover chocolate sauce around the plate for flair. This makes your dessert table look inviting and fun! In this post, I shared how to make mini cheesecakes and chocolate-covered strawberries. I guided you through essential ingredients, step-by-step instructions, and helpful tips. You learned about fun variations and storage methods for leftovers. Remember, mini cheesecakes are easy to customize with different flavors or toppings. They make great treats for events. Now, it’s your turn to create these delicious desserts and impress your friends. Happy baking!](https://toastedrecipes.com/wp-content/uploads/2025/05/bad50643-bef6-4e42-aa8c-180dc2c3b26e.webp)
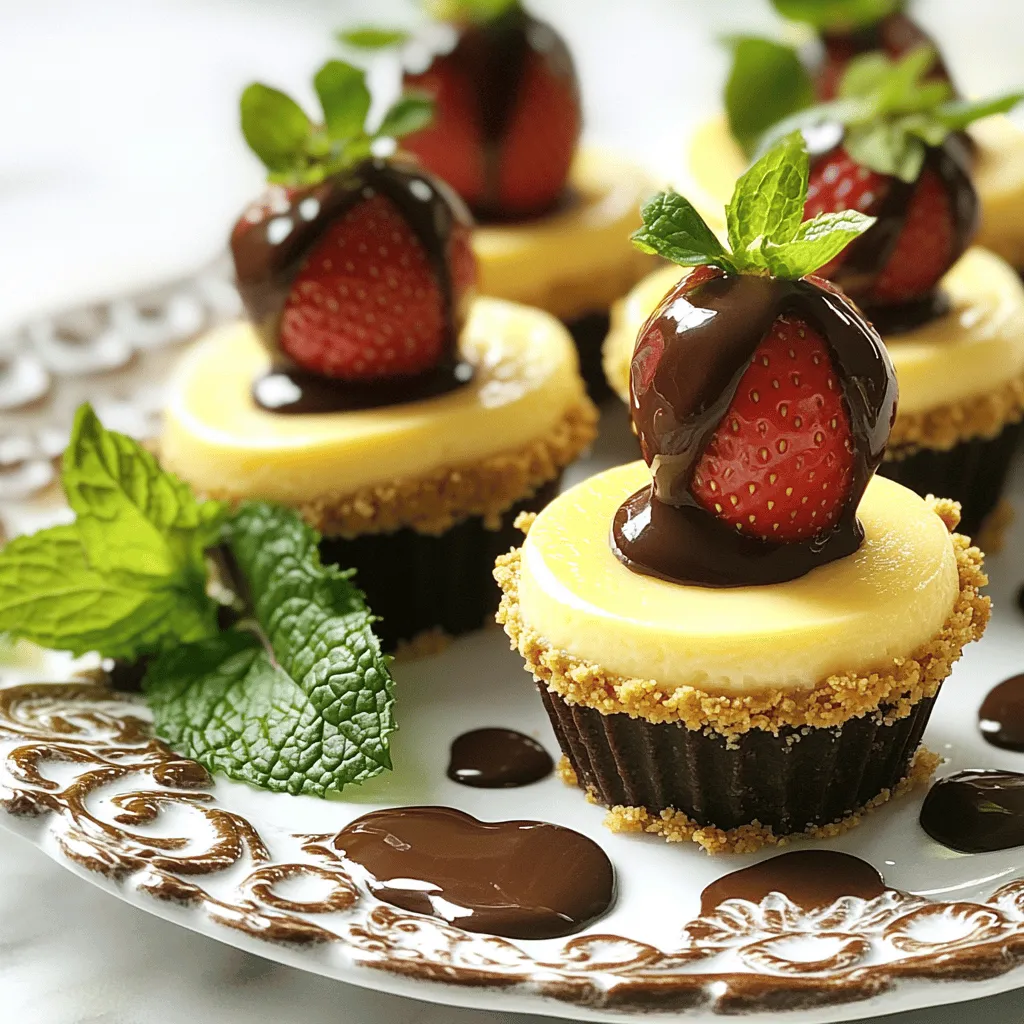
Get ready for a sweet treat that will impress everyone! These Mini Cheesecakes Topped with Chocolate-Covered Strawberries are a joy to make and eat. You’ll discover simple steps to create smooth and creamy cheesecakes, plus tips to customize them your way. With options for different flavors and crusts, there’s a perfect bite for everyone. Let’s dive in and turn up the fun with this delightful dessert!
Ingredients
Essential Ingredients for Mini Cheesecakes
To make these mini cheesecakes, you need a few key ingredients. Here’s what you’ll need:
– 1 cup graham cracker crumbs
– 2 tablespoons sugar
– 1/4 cup unsalted butter, melted
– 16 oz cream cheese, softened
– 1 cup powdered sugar
– 1 teaspoon vanilla extract
– 2 large eggs
These ingredients create a rich, creamy filling and a delicious crust.
Chocolate-Covered Strawberries Ingredients
For the topping, chocolate-covered strawberries add a sweet touch. Gather these ingredients:
– 1 cup fresh strawberries, hulled and dried
– 1 cup semisweet chocolate chips
– 1 tablespoon coconut oil (optional for smoother chocolate coating)
These strawberries not only taste great but also look stunning on top of the cheesecakes.
Optional Ingredients for Customization
Feel free to customize your cheesecakes with these options. Here are some ideas:
– Different extract flavors (like almond or lemon)
– Add a pinch of salt for balance
– Use different types of chocolate (like dark or white)
These options let you put your spin on the recipe and make it your own.
For the full recipe, visit the [Full Recipe] link.
Step-by-Step Instructions
Preparing the Crust
To start, gather your crust ingredients: graham cracker crumbs, sugar, and melted butter. In a bowl, mix the crumbs and sugar. Then, pour in the melted butter. Stir until it looks like damp sand. Next, line a muffin tin with cupcake liners. Press about one tablespoon of the mixture into each liner. Pack it firmly to create a strong base. Bake in a preheated oven at 325°F for 5 to 7 minutes. Remove them and let them cool completely.
Making the Cheesecake Filling
Now it’s time for the filling! In a large bowl, add softened cream cheese. Use an electric mixer to beat it until smooth. Gradually add powdered sugar while mixing. Don’t rush; take your time to blend it well. Next, stir in the vanilla extract. Add eggs one at a time, mixing gently after each one. You want it smooth, but be careful not to overmix. Once done, your filling should be creamy and thick.
Baking and Cooling the Cheesecakes
Pour the cheesecake filling over the cooled crusts. Fill each one about three-quarters full. Place the muffin tin back into the oven. Bake for 18 to 20 minutes. The centers should be set but still have a slight jiggle. After baking, turn off the oven but leave the door cracked. Let the cheesecakes cool inside for about 30 minutes. This helps prevent cracks. Then, move them to the fridge to chill for at least 3 hours, or overnight if you can wait!
Preparing and Assembling the Topping
While waiting for the cheesecakes to chill, it’s time for the strawberries. Melt semisweet chocolate chips in a microwave-safe bowl. Heat in 30-second intervals, stirring until smooth. If you want a glossy finish, stir in some coconut oil. Dip each hulled strawberry into the melted chocolate. Let any excess chocolate drip off. Place them on a parchment-lined baking sheet to set. When the cheesecakes are chilled, remove them from the muffin tin. Top each one with a chocolate-covered strawberry. Enjoy this sweet treat! For the full recipe, check out the details provided.
Tips & Tricks
Ensuring Smooth Cheesecake Texture
To get a smooth cheesecake, start with room temperature cream cheese. Cold cream cheese makes lumps. Use a hand mixer instead of a whisk. This helps mix the cream cheese evenly. Mix on low speed after adding eggs. Overmixing can create cracks in the cheesecake.
Chocolate Melting Techniques
Melt chocolate slowly to avoid burning. Use a microwave, heating in 30-second bursts. Stir after each burst until smooth. You can also use a double boiler. Fill a pot with water and place a bowl on top. The steam will melt the chocolate gently. Add coconut oil for a glossy finish. This makes the chocolate shiny and smooth.
Presentation and Serving Suggestions
Presentation matters! Serve the cheesecakes on a pretty platter. Add fresh mint leaves for color. Drizzle leftover chocolate around the plate to impress guests. Top each cheesecake with a chocolate-covered strawberry. This adds a pop of color and flavor. Enjoy your delightful mini cheesecakes! For the full recipe, check the details above.
Variations
Flavor Variations
You can switch up the toppings for a new taste. Try using fresh blueberries, raspberries, or even mango slices. Each fruit brings its own fun flavor. You can also drizzle caramel or a fruit sauce on top for extra sweetness. Experiment with flavored extracts, like almond or lemon, for a twist in the cheesecake batter.
Crust Alternatives
While graham cracker crusts are classic, you can try other options. Use crushed Oreos for a chocolatey base. Nut crusts, like almonds or pecans, add a nice crunch. For a gluten-free option, almond flour or coconut flour works well. Just mix with melted butter and press it into the muffin tin.
Dietary Adjustments
If you need gluten-free mini cheesecakes, stick to gluten-free cookies for the crust. You can also use dairy-free cream cheese for a vegan twist. Sweeteners like agave or maple syrup can replace sugar. Just make sure to adjust the amounts, as these can be sweeter than regular sugar.
Storage Info
How to Store Leftover Mini Cheesecakes
To keep your mini cheesecakes fresh, place them in an airtight container. They will stay good in the fridge for up to five days. If you plan to eat them later, do not add the chocolate-covered strawberries until just before serving. This will keep everything fresh and tasty.
Best Practices for Storing Chocolate-Covered Strawberries
Store chocolate-covered strawberries in the fridge as well. Place them in a single layer to avoid sticking. You can use parchment paper to help with this. They taste best when eaten within 24 hours, but you can keep them for up to two days.
Freezing Options for Cheesecakes
If you want to save some mini cheesecakes for later, freezing is a great option. Wrap each cheesecake tightly in plastic wrap. Then, place them in a freezer bag or container. They can last for up to two months in the freezer. Thaw them in the fridge overnight before serving. This way, they will taste just as good as fresh! For the full recipe, refer to the earlier section.
FAQs
How do I know when the mini cheesecakes are done?
You will know the mini cheesecakes are done when the edges are set. The center should be slightly jiggly but not liquid. This means they will firm up as they cool. If you insert a toothpick, it should come out mostly clean. Keep a close watch during the last few minutes to avoid overbaking.
Can I use other toppings instead of chocolate-covered strawberries?
Yes, you can use many other toppings! Fresh fruit like raspberries or blueberries work great. You could also try whipped cream, caramel sauce, or even crushed cookies. The choice is yours! Just think about flavors that pair well with cheesecake.
How long do mini cheesecakes last in the refrigerator?
Mini cheesecakes last about 5 to 7 days in the refrigerator. Make sure to store them in an airtight container. This keeps them fresh and prevents any odors from other foods in your fridge. Enjoy them as a sweet treat throughout the week!
What’s the best way to serve mini cheesecakes at events?
Serve mini cheesecakes on a beautiful platter for a nice look. You can add fresh mint leaves for color. Drizzle any leftover chocolate sauce around the plate for flair. This makes your dessert table look inviting and fun!
In this post, I shared how to make mini cheesecakes and chocolate-covered strawberries. I guided you through essential ingredients, step-by-step instructions, and helpful tips. You learned about fun variations and storage methods for leftovers. Remember, mini cheesecakes are easy to customize with different flavors or toppings. They make great treats for events. Now, it’s your turn to create these delicious desserts and impress your friends. Happy baking!
![To make these mini cheesecakes, you need a few key ingredients. Here’s what you'll need: - 1 cup graham cracker crumbs - 2 tablespoons sugar - 1/4 cup unsalted butter, melted - 16 oz cream cheese, softened - 1 cup powdered sugar - 1 teaspoon vanilla extract - 2 large eggs These ingredients create a rich, creamy filling and a delicious crust. For the topping, chocolate-covered strawberries add a sweet touch. Gather these ingredients: - 1 cup fresh strawberries, hulled and dried - 1 cup semisweet chocolate chips - 1 tablespoon coconut oil (optional for smoother chocolate coating) These strawberries not only taste great but also look stunning on top of the cheesecakes. Feel free to customize your cheesecakes with these options. Here are some ideas: - Different extract flavors (like almond or lemon) - Add a pinch of salt for balance - Use different types of chocolate (like dark or white) These options let you put your spin on the recipe and make it your own. For the full recipe, visit the [Full Recipe] link. To start, gather your crust ingredients: graham cracker crumbs, sugar, and melted butter. In a bowl, mix the crumbs and sugar. Then, pour in the melted butter. Stir until it looks like damp sand. Next, line a muffin tin with cupcake liners. Press about one tablespoon of the mixture into each liner. Pack it firmly to create a strong base. Bake in a preheated oven at 325°F for 5 to 7 minutes. Remove them and let them cool completely. Now it’s time for the filling! In a large bowl, add softened cream cheese. Use an electric mixer to beat it until smooth. Gradually add powdered sugar while mixing. Don’t rush; take your time to blend it well. Next, stir in the vanilla extract. Add eggs one at a time, mixing gently after each one. You want it smooth, but be careful not to overmix. Once done, your filling should be creamy and thick. Pour the cheesecake filling over the cooled crusts. Fill each one about three-quarters full. Place the muffin tin back into the oven. Bake for 18 to 20 minutes. The centers should be set but still have a slight jiggle. After baking, turn off the oven but leave the door cracked. Let the cheesecakes cool inside for about 30 minutes. This helps prevent cracks. Then, move them to the fridge to chill for at least 3 hours, or overnight if you can wait! While waiting for the cheesecakes to chill, it’s time for the strawberries. Melt semisweet chocolate chips in a microwave-safe bowl. Heat in 30-second intervals, stirring until smooth. If you want a glossy finish, stir in some coconut oil. Dip each hulled strawberry into the melted chocolate. Let any excess chocolate drip off. Place them on a parchment-lined baking sheet to set. When the cheesecakes are chilled, remove them from the muffin tin. Top each one with a chocolate-covered strawberry. Enjoy this sweet treat! For the full recipe, check out the details provided. To get a smooth cheesecake, start with room temperature cream cheese. Cold cream cheese makes lumps. Use a hand mixer instead of a whisk. This helps mix the cream cheese evenly. Mix on low speed after adding eggs. Overmixing can create cracks in the cheesecake. Melt chocolate slowly to avoid burning. Use a microwave, heating in 30-second bursts. Stir after each burst until smooth. You can also use a double boiler. Fill a pot with water and place a bowl on top. The steam will melt the chocolate gently. Add coconut oil for a glossy finish. This makes the chocolate shiny and smooth. Presentation matters! Serve the cheesecakes on a pretty platter. Add fresh mint leaves for color. Drizzle leftover chocolate around the plate to impress guests. Top each cheesecake with a chocolate-covered strawberry. This adds a pop of color and flavor. Enjoy your delightful mini cheesecakes! For the full recipe, check the details above. {{image_2}} You can switch up the toppings for a new taste. Try using fresh blueberries, raspberries, or even mango slices. Each fruit brings its own fun flavor. You can also drizzle caramel or a fruit sauce on top for extra sweetness. Experiment with flavored extracts, like almond or lemon, for a twist in the cheesecake batter. While graham cracker crusts are classic, you can try other options. Use crushed Oreos for a chocolatey base. Nut crusts, like almonds or pecans, add a nice crunch. For a gluten-free option, almond flour or coconut flour works well. Just mix with melted butter and press it into the muffin tin. If you need gluten-free mini cheesecakes, stick to gluten-free cookies for the crust. You can also use dairy-free cream cheese for a vegan twist. Sweeteners like agave or maple syrup can replace sugar. Just make sure to adjust the amounts, as these can be sweeter than regular sugar. To keep your mini cheesecakes fresh, place them in an airtight container. They will stay good in the fridge for up to five days. If you plan to eat them later, do not add the chocolate-covered strawberries until just before serving. This will keep everything fresh and tasty. Store chocolate-covered strawberries in the fridge as well. Place them in a single layer to avoid sticking. You can use parchment paper to help with this. They taste best when eaten within 24 hours, but you can keep them for up to two days. If you want to save some mini cheesecakes for later, freezing is a great option. Wrap each cheesecake tightly in plastic wrap. Then, place them in a freezer bag or container. They can last for up to two months in the freezer. Thaw them in the fridge overnight before serving. This way, they will taste just as good as fresh! For the full recipe, refer to the earlier section. You will know the mini cheesecakes are done when the edges are set. The center should be slightly jiggly but not liquid. This means they will firm up as they cool. If you insert a toothpick, it should come out mostly clean. Keep a close watch during the last few minutes to avoid overbaking. Yes, you can use many other toppings! Fresh fruit like raspberries or blueberries work great. You could also try whipped cream, caramel sauce, or even crushed cookies. The choice is yours! Just think about flavors that pair well with cheesecake. Mini cheesecakes last about 5 to 7 days in the refrigerator. Make sure to store them in an airtight container. This keeps them fresh and prevents any odors from other foods in your fridge. Enjoy them as a sweet treat throughout the week! Serve mini cheesecakes on a beautiful platter for a nice look. You can add fresh mint leaves for color. Drizzle any leftover chocolate sauce around the plate for flair. This makes your dessert table look inviting and fun! In this post, I shared how to make mini cheesecakes and chocolate-covered strawberries. I guided you through essential ingredients, step-by-step instructions, and helpful tips. You learned about fun variations and storage methods for leftovers. Remember, mini cheesecakes are easy to customize with different flavors or toppings. They make great treats for events. Now, it’s your turn to create these delicious desserts and impress your friends. Happy baking!](https://toastedrecipes.com/wp-content/uploads/2025/05/bad50643-bef6-4e42-aa8c-180dc2c3b26e-300x300.webp)