Are you ready to impress your friends and family with a delicious dessert? This Loaf Pan Burnt Basque Cheesecake is a simple treat that looks stunning and tastes divine. In this easy recipe guide, I will walk you through every step, from gathering your ingredients to serving and storing your cheesecake. Let’s dive into a world of creamy, burnt goodness that will leave your taste buds dancing!
Ingredients
Cream Cheese and Sugar Mixture
To make the base of your cheesecake, gather these key ingredients:
– 2 cups cream cheese, softened
– 3/4 cup granulated sugar
Start by mixing the softened cream cheese and sugar in a large bowl. Use a hand mixer set at medium speed. Beat until the mixture is smooth and creamy. This step is important. It helps to create a rich and velvety texture.
Eggs and Cream Components
Next, you will add the eggs and cream. You will need:
– 3 large eggs
– 1 cup heavy cream
– 1 tablespoon vanilla extract
Add the eggs one at a time. Mix well after each egg is added. Then, pour in the heavy cream and vanilla extract. Continue mixing until everything is blended well. The cream adds richness, while vanilla enhances the flavor.
Dry Ingredients
Finally, you will need the dry ingredients. For this, gather:
– 1/4 cup all-purpose flour
– 1/4 teaspoon salt
Sift the flour and salt over the cream mixture. Use a spatula to gently fold it in. Be careful not to overmix. This keeps the cheesecake light and fluffy. Each ingredient plays a key role in building flavor and texture in your loaf pan burnt Basque cheesecake.
Step-by-Step Instructions
Preparing the Oven and Loaf Pan
Start by preheating your oven to 400°F (200°C). This high heat helps create that lovely burnt top. Next, grab a 9×5 inch loaf pan. Line it with parchment paper, letting the paper hang over the edges. This makes it easy to lift out the cheesecake later.
Mixing the Batter
In a large mixing bowl, add 2 cups of softened cream cheese and 3/4 cup of granulated sugar. Beat them together with a hand mixer on medium speed. Mix until the mixture is smooth and creamy. Now, add 3 large eggs one at a time. Mix well after each egg. Then, pour in 1 cup of heavy cream and 1 tablespoon of vanilla extract. Mix until everything is well combined.
Next, sift 1/4 cup of all-purpose flour and 1/4 teaspoon of salt over the mixture. Use a spatula to gently fold it in. Be careful not to overmix; just combine it until you don’t see any dry flour.
Baking Time and Checking Doneness
Pour the batter into the prepared loaf pan. Smooth the top with a spatula. Place it in your preheated oven and bake for 50 to 60 minutes. You want the top to be a deep golden brown. The middle should still jiggle slightly when you shake the pan. The edges will look set, but the center will remain soft.
Once baked, take it out of the oven and let it cool in the pan for about 30 minutes. After that, transfer it to the refrigerator. Chill it for at least 4 hours, but overnight is best. Once chilled, gently pull it out using the parchment paper and slice it into thick pieces. Enjoy your delicious burnt Basque cheesecake!
Tips & Tricks
Achieving the Perfect Texture
To get the best texture for your loaf pan burnt Basque cheesecake, focus on your mixing. Start with room temperature cream cheese. This makes it easier to blend with the sugar. When you mix, go slow. Use a hand mixer on medium speed. Beat until it’s smooth and creamy, but don’t overmix.
When adding eggs, do it one at a time. Mix well after each one. This helps the eggs blend evenly. The heavy cream adds richness and makes the cake creamy. Add it after the eggs and mix just enough to combine. The flour and salt should be folded in gently. This keeps the cheesecake light and airy.
Cooling and Chilling Recommendations
Cooling is key to a great cheesecake. After baking, let it cool in the pan for about 30 minutes. This helps it set a bit. Then, transfer it to the fridge. Chill it for at least four hours. Overnight is even better. This helps the flavors deepen and the texture firm up.
Remember, if you skip this step, your cheesecake may be too soft. A well-chilled cheesecake will slice nicely and hold its shape.
Serving Suggestions
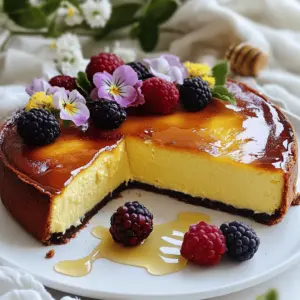
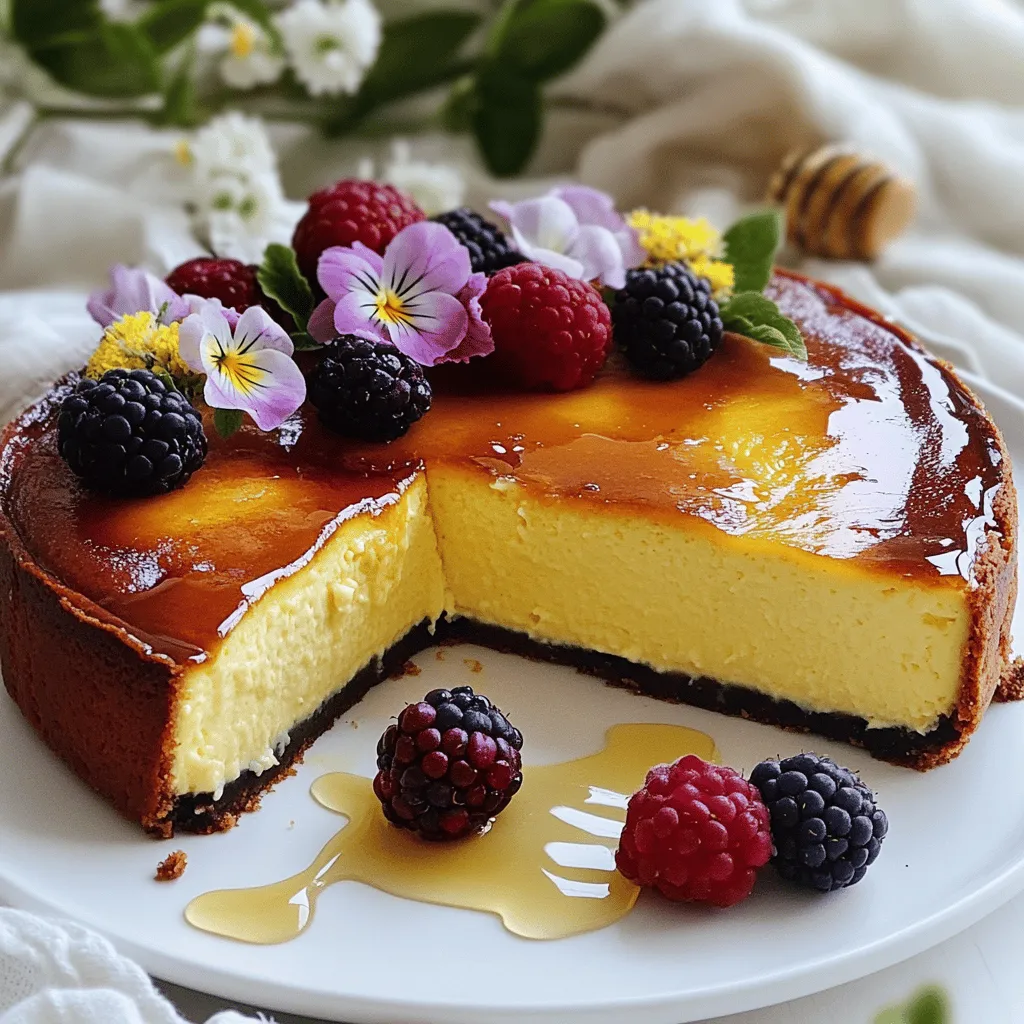
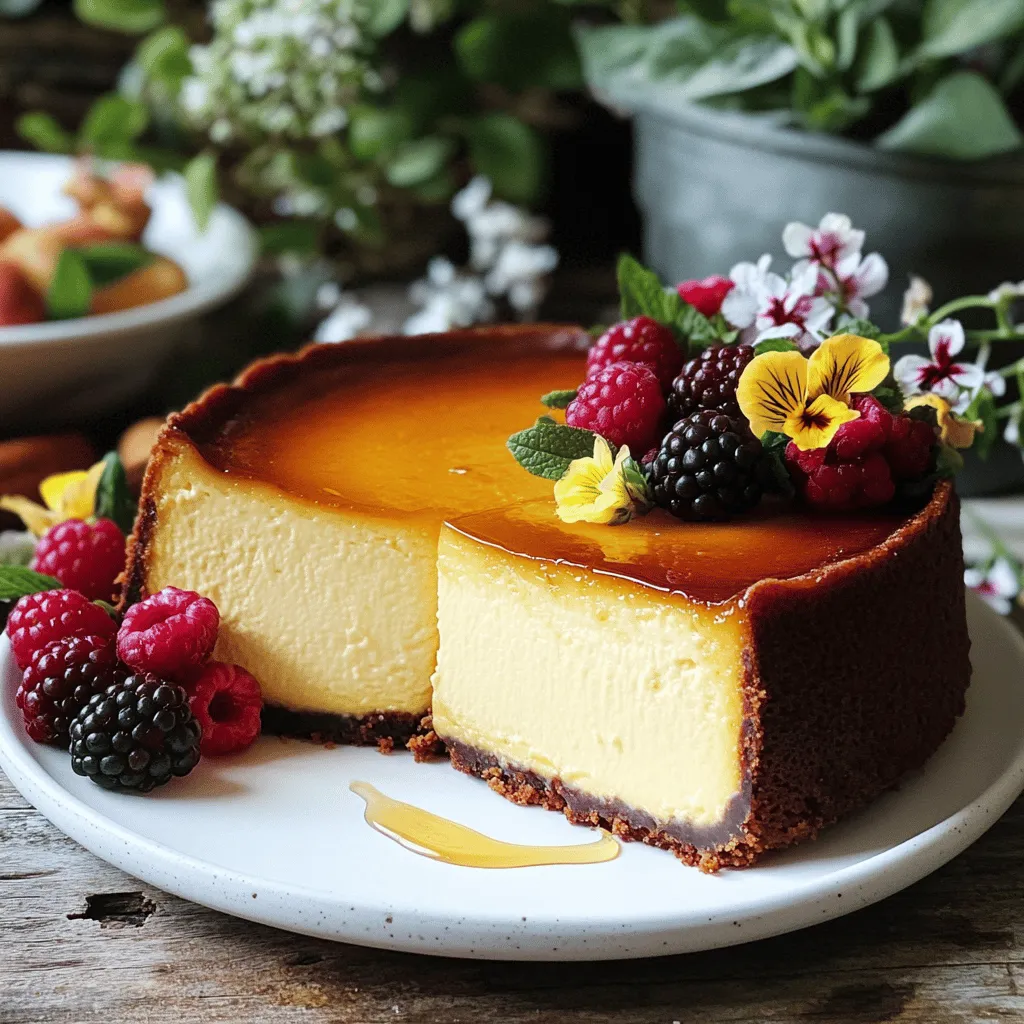
When serving your cheesecake, think about presentation. Slice it into thick pieces for a nice look. Plating it on a white plate makes it pop. You can add fresh berries or edible flowers for color. A drizzle of honey or fruit compote adds sweetness.
For extra fun, serve it with a side of whipped cream. It gives a lovely texture contrast. Enjoy your beautiful, delicious cheesecake!
Variations
Flavor Additions
You can mix in fun flavors to your cheesecake. Here are some easy ideas:
– Citrus Zest: Add the zest of one lemon or orange for a fresh taste. It brightens the creamy flavor.
– Chocolate: Melt dark chocolate and fold it in for a rich twist. It pairs well with the creamy texture.
– Coffee: Stir in a tablespoon of instant coffee for a mocha flavor. This adds depth and warmth.
Swapping Ingredients for Dietary Needs
You can adapt this cheesecake for different diets. Here are some swaps:
– Gluten-Free: Use gluten-free flour instead of all-purpose flour. This keeps the texture smooth while being safe for gluten-sensitive folks.
– Dairy-Free: Substitute cream cheese with a vegan cream cheese. Use coconut cream instead of heavy cream for a rich taste.
– Low-Sugar: Try a sugar substitute like erythritol. This keeps it sweet without the extra calories.
Serving Styles
Serving this cheesecake can be fun and creative. Here are some ideas:
– Individual Portions: Pour the batter into muffin tins for mini cheesecakes. This makes for cute, easy-to-serve treats.
– With Toppings: Top each slice with fresh berries or a drizzle of chocolate sauce. It adds color and flavor.
– Garnishes: Use edible flowers or mint leaves for a fancy touch. This makes your cheesecake look beautiful and inviting.
Storage Info
Refrigeration Tips
To keep your loaf pan burnt Basque cheesecake fresh, store it in the fridge. Wrap it tightly with plastic wrap or foil. This helps prevent it from drying out or absorbing odors. It can last in the fridge for about 5 days. Just remember to slice it before serving.
Freezing the Cheesecake
You can freeze this cheesecake if you want to save some for later. First, let it cool completely. Then, wrap each slice in plastic wrap. Place the slices in a freezer-safe bag or container. This cheesecake can last in the freezer for up to 3 months. When ready to eat, thaw it in the fridge overnight.
Best Practices for Storing Leftovers
Store any leftovers in a shallow airtight container. This keeps the cheesecake moist and safe from other foods. Avoid leaving it out at room temperature for long. Always return it to the fridge after serving. You can also place parchment paper between slices to prevent sticking.
FAQs
What is the difference between a traditional Basque cheesecake and a loaf pan version?
A traditional Basque cheesecake is often round and baked in a springform pan. It has a creamy center and a dark, burnt top. The loaf pan version is more compact and easier to slice. It still has that rich flavor and unique texture, but the shape makes it more convenient for serving. The cooking time might differ slightly too, as the loaf pan holds less batter than a round pan.
How do I know when the cheesecake is done baking?
You can tell the cheesecake is done when the top is a deep golden brown. The edges should look set, but the center should still have a slight giggle. This means it is creamy and not overcooked. I suggest checking it around the 50-minute mark. If the top is not dark enough, let it bake for a few more minutes.
Can I use a different type of pan for this recipe?
Yes, you can use other pans, like a round cake pan. Just remember, the baking time may change. If you use a springform pan, the cheesecake will have the same great taste but will be round. Just keep an eye on the baking time. If using a smaller pan, check for doneness sooner. The key is to keep that creamy center while achieving a nice burnt top.
We covered the main ingredients for the cheesecake, focusing on their roles. I provided step-by-step instructions, tips for perfect texture, and ways to personalize your dessert. You now know how to store it and answer common questions.
Enjoy making this cheesecake your own. Experiment with flavors and serving styles. Your effort will pay off with a delicious treat that everyone loves. Happy baking!