Are you ready to dive into the delicious world of Hatch Chile Enchilada Pie? This dish is packed with flavors that satisfy your taste buds and fill your belly. From roasting chiles to layering ingredients, I’ll guide you through every step. Whether you want a classic recipe or some fun variations, I have you covered. Let’s make a meal that everyone will love!
Ingredients
List of Ingredients
To make Hatch Chile Enchilada Pie, you’ll need the following ingredients:
– 6 large Hatch chiles, roasted and peeled
– 1 cup cooked shredded chicken (or black beans for a veggie option)
– 1 cup corn kernels (frozen or fresh)
– 1 cup black beans, rinsed and drained
– 2 cups shredded Monterey Jack cheese
– 1 cup salsa verde
– 8 corn tortillas
– 1 teaspoon cumin
– 1 teaspoon garlic powder
– ½ teaspoon salt
– ½ teaspoon black pepper
– Fresh cilantro, for garnish
– Sour cream, for serving
When choosing ingredients, go for fresh, high-quality items. Look for chiles that are firm and vibrant. Roasting the chiles brings out their sweet, smoky flavor. I prefer using fresh corn in summer for a crisp bite. If you can’t find Monterey Jack cheese, try cheddar for another great taste.
For substitutions, black beans work well in place of chicken. You can also add more veggies, like zucchini or bell peppers, for extra color and nutrition. If you want to make this dish vegan, skip the cheese and sour cream, or use plant-based options.
Step-by-Step Instructions
Preparation Steps
To make a Hatch Chile Enchilada Pie, follow these easy steps. First, preheat your oven to 375°F (190°C). This temperature helps the cheese melt perfectly.
Next, grab a large bowl. Combine the cooked shredded chicken (or black beans), corn kernels, black beans, half of the Monterey Jack cheese, cumin, garlic powder, salt, and black pepper. Mix it well. This mix is the heart of your pie.
Now, take a 9×13-inch baking dish. Spread ½ cup of salsa verde evenly at the bottom. This layer adds moisture and flavor. Then, layer 4 corn tortillas over the salsa verde. Overlap them slightly to cover the dish.
Spoon half of the chicken mixture over the tortillas. Make sure to spread it evenly. Then, add half of the roasted Hatch chiles on top. This layering builds flavor.
Next, layer another 4 corn tortillas over the chiles. Repeat with the remaining chicken mixture and chopped chiles. Pour the rest of the salsa verde over the top layer of tortillas. Sprinkle the remaining Monterey Jack cheese on everything.
Cover the baking dish with aluminum foil. Bake it in the preheated oven for 25 minutes. After that, remove the foil and bake for another 10-15 minutes. You want the cheese to be bubbly and golden brown.
Once it’s done, take it out of the oven. Let it cool for about 5 minutes before slicing. This cooling helps the pie hold its shape.
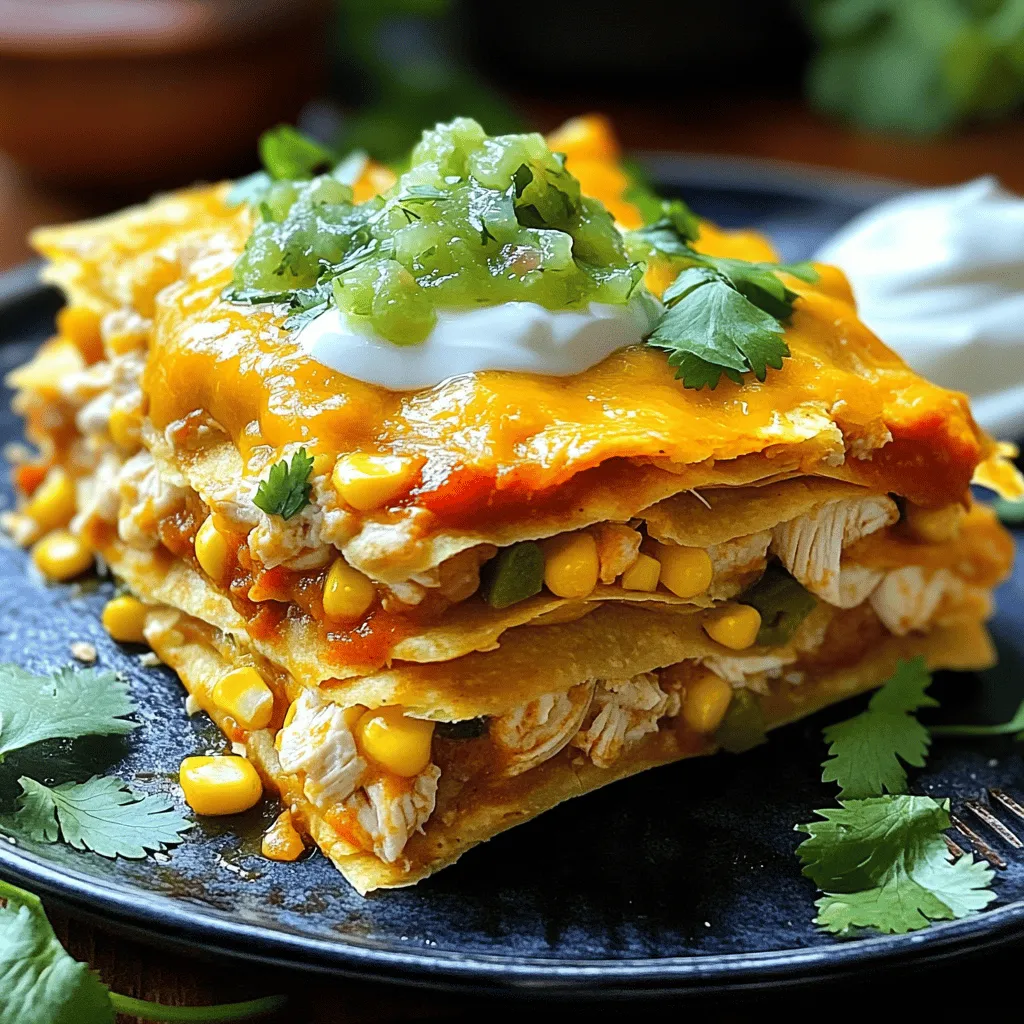
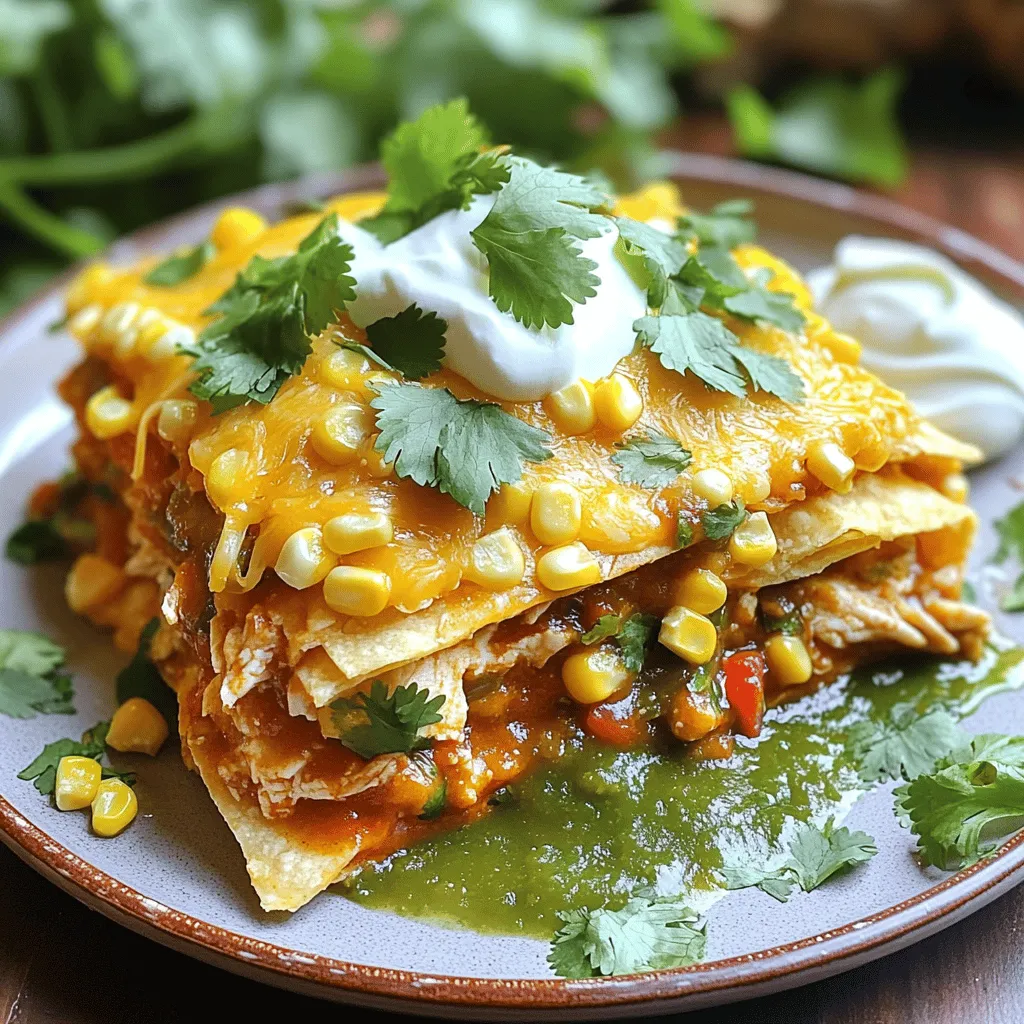
Finally, garnish with fresh cilantro. Serve it with a dollop of sour cream on the side. Enjoy each bite of this flavorful dish! For the full recipe, check the details above.
Tips & Tricks
Cooking Tips
To roast and peel Hatch chiles, first, place them under a broiler or on a grill. Turn the chiles often until the skins are blackened and blistered. This process takes about 10-15 minutes. After roasting, place the chiles in a paper bag for about 10 minutes. The steam helps loosen the skins, making them easier to peel.
For the best flavor combinations, always use fresh ingredients. Combine the roasted chiles with cooked chicken (or black beans for a veggie option) and sweet corn. The mix of flavors creates a rich taste. Adding spices like cumin and garlic powder enhances the overall flavor.
When layering and baking, start with salsa verde on the bottom. This keeps the tortillas moist. Layer tortillas, filling, and chiles, repeating until you reach the top. Finish with salsa and cheese. This method ensures every bite is filled with flavor.
Serving Suggestions
For side dishes, consider serving a light salad or Mexican rice. Both pair well and balance the meal. A simple avocado salad with lime dressing adds freshness.
For garnishes, sprinkle fresh cilantro on top of the enchilada pie. It adds a pop of color and flavor. Serving with a dollop of sour cream also enhances the dish’s richness. You can even add sliced jalapeños for a spicy kick!
Variations
Ingredient Swaps
You can easily make this Hatch Chile Enchilada Pie your own. If you want a vegetarian twist, swap the chicken for black beans. They add great flavor and texture. You can also add more veggies like bell peppers or zucchini. Just chop them up and mix them in!
If you prefer meat, try using ground turkey or beef. Both options work well in this dish. Just cook the meat before adding it to the mix. This way, you get a hearty meal that’s still packed with flavor.
Flavor Variations
To boost flavor, think about adding spices or herbs. A pinch of smoked paprika gives a nice smoky taste. You can also add fresh herbs like oregano or thyme for a bright note.
Cheese is another way to change things up. Instead of Monterey Jack, try pepper jack for some heat. You could also use a blend of cheeses like cheddar and queso fresco for a unique twist. Mixing different cheeses makes each bite exciting!
For more details on making this delicious dish, check out the Full Recipe.
Storage Info
How to Store Leftovers
To keep your Hatch Chile Enchilada Pie fresh, follow these steps:
– Refrigerate: Allow the pie to cool down. Cover it tightly with plastic wrap or aluminum foil. Store it in the fridge for up to 3 days.
– Freeze: If you want to save some for later, slice the pie into portions. Wrap each slice in plastic wrap and place them in a freezer-safe bag. This way, you can enjoy it for up to 3 months.
When reheating the pie, use the oven for the best results. Preheat the oven to 350°F (175°C). Remove any plastic wrap and cover the pie loosely with foil. Bake for about 20 minutes, or until it’s hot all the way through. This method helps keep the crust from getting soggy.
Shelf Life
Hatch Chile Enchilada Pie can last for 3 days in the fridge. If you freeze it, it can stay good for 3 months. Always check for signs of spoilage. If the pie smells off or has mold, it’s best to throw it away.
By following these tips, you can enjoy your delicious Hatch Chile Enchilada Pie over multiple meals. For the full recipe, check out the recipe section in this article.
FAQs
Common Questions
What is the origin of hatch chiles?
Hatch chiles come from the Hatch Valley in New Mexico. This area has the right soil and climate. Farmers grow these chiles, making them special. They are known for their rich flavor and unique heat. Many people visit Hatch each year for the harvest festival.
How spicy are Hatch chiles compared to other chiles?
Hatch chiles have a mild to medium spice level. They usually range from 1,000 to 8,000 Scoville heat units. This makes them less spicy than jalapeños but hotter than bell peppers. Many enjoy their warmth without being overwhelmed.
Can I make Hatch Chile Enchilada Pie ahead of time?
Yes, you can prepare the enchilada pie ahead of time. Make it up to a day before serving. Just cover it and store it in the fridge. When ready, bake it according to the instructions. This saves time and adds flavor.
What can I serve with Hatch Chile Enchilada Pie?
This pie pairs well with a fresh salad or Mexican rice. You can also serve it with refried beans or guacamole. For a fun twist, add some tortilla chips on the side. They add crunch and make the meal more exciting.
In summary, this guide covers everything you need for a great Hatch Chile Enchilada Pie. We explored the best ingredients, detailed cooking steps, and helpful tips. You learned about flavor variations and how to store leftovers properly.
Try different ingredients to match your taste and enjoy every bite. Cooking should be fun and full of flavor, so experiment boldly! Dive into this dish and make it your own. Happy cooking!