Are you ready to crunch into a world of flavor? In this post, I’ll show you how to make Garlic Dill Pickles that are both crunchy and packed with taste. With fresh cucumbers, aromatic garlic, and fragrant dill, these pickles are the perfect addition to any meal or snack. Let’s dive into this easy recipe, and soon you’ll be enjoying your homemade pickles!
Ingredients
List of Ingredients
To make tasty garlic dill pickles, you will need:
– 4 medium cucumbers, washed and sliced into spears
– 4 cloves garlic, peeled and crushed
– 1 tablespoon dill seeds
– 1 tablespoon mustard seeds
– 2 cups water
– 1 cup white vinegar
– 2 tablespoons kosher salt
– 1 tablespoon sugar
– 1/2 teaspoon crushed red pepper flakes (optional for a kick)
Essential Tools Needed
You will need a few simple tools:
– A medium saucepan to mix the brine
– A clean glass jar or container to store the pickles
– A cutting board and knife for slicing cucumbers
– A measuring cup and spoons for accuracy
Tips on Choosing Fresh Cucumbers
When picking cucumbers, look for these signs:
– Choose firm cucumbers with no soft spots.
– Opt for cucumbers that are bright green and smooth.
– Smaller cucumbers are often crunchier and tastier.
– Avoid cucumbers with yellow skin; they may be overripe.
Using fresh cucumbers makes a big difference in your pickles. Freshness means better crunch and flavor. For the best results, pick them just before you make the brine.
Step-by-Step Instructions
How to Prepare the Brine
To make the brine, grab a medium saucepan. Add 2 cups of water, 1 cup of white vinegar, 2 tablespoons of kosher salt, and 1 tablespoon of sugar. Heat this mix over medium-high heat. Stir until the salt and sugar dissolve. Once they are gone, take the pan off the heat. Let the brine cool to room temperature. This step is key to keeping the cucumbers crisp.
Packing the Jar Properly
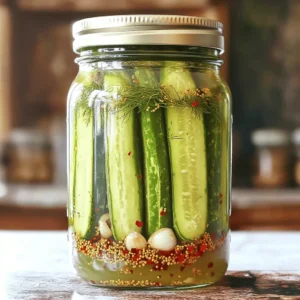
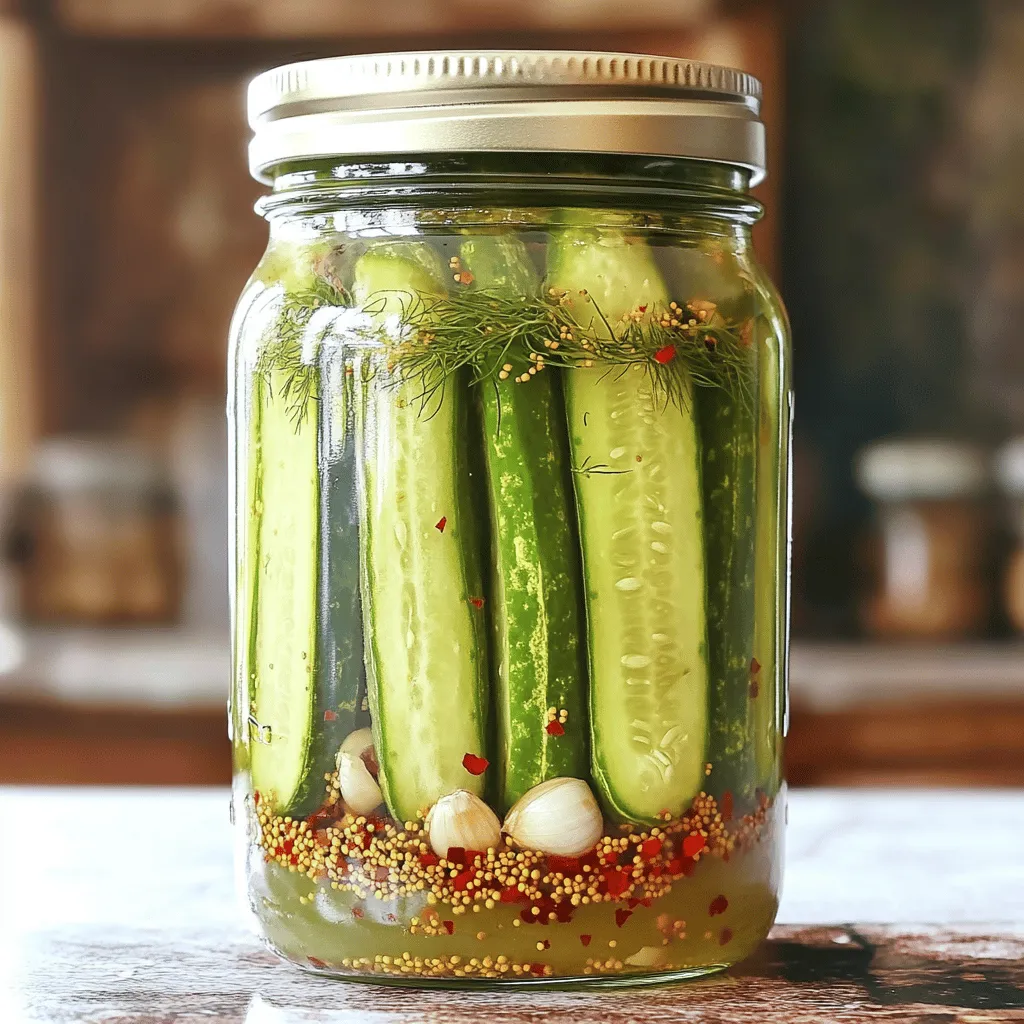
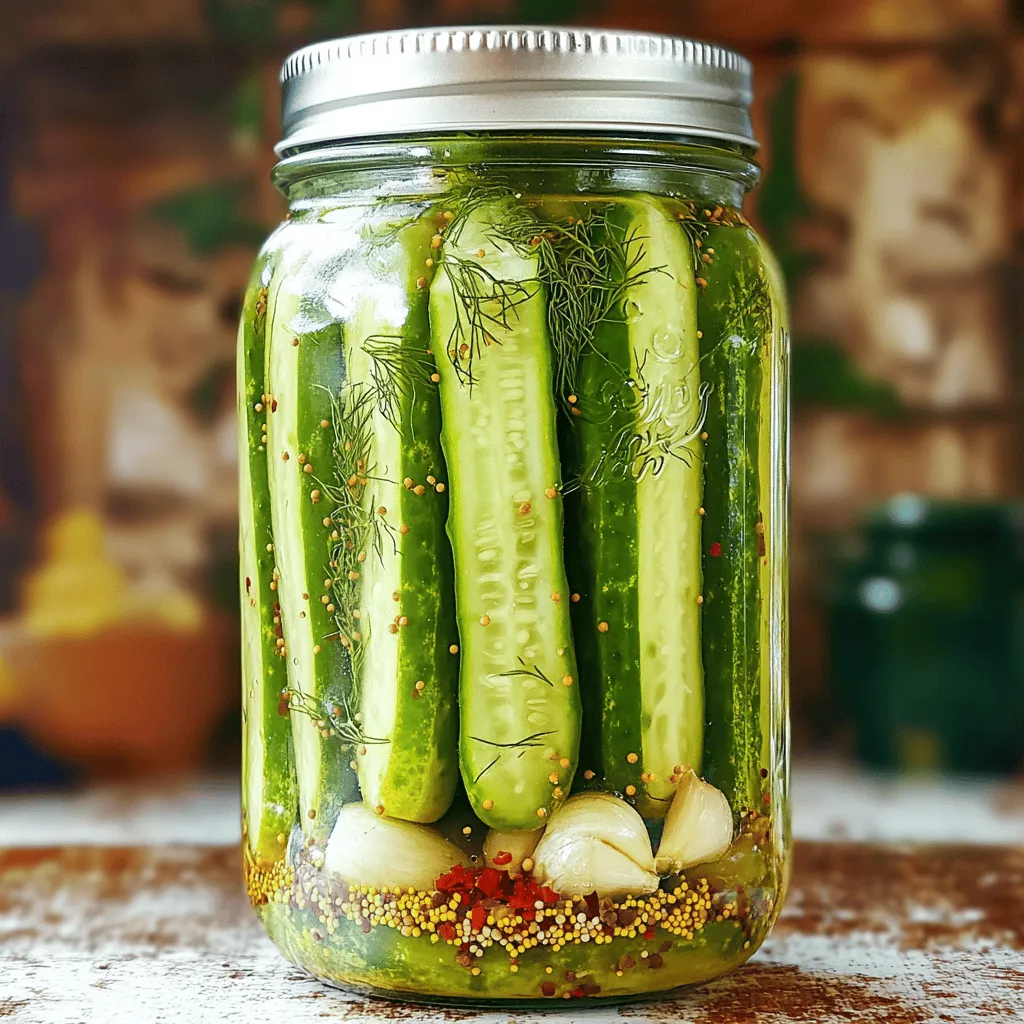
While the brine cools, prepare your jar. You need a clean glass jar or container for this. Start by adding 4 cloves of crushed garlic, 1 tablespoon of dill seeds, and 1 tablespoon of mustard seeds at the bottom of the jar. Now, pack 4 medium cucumber spears upright into the jar. Leave some space for the brine to flow around them. This will help each cucumber soak up the flavor.
Curing and Chilling Methods
Once the brine cools, pour it carefully over the cucumbers. Make sure they are fully submerged. Seal the jar tightly with a lid. Place it in the refrigerator. Allow the pickles to cure for at least 24 hours. The longer they sit, the better the flavor gets. You can enjoy your homemade pickles after a day, but they will taste even better after a few days! For more details, check the Full Recipe.
Tips & Tricks
Achieving the Best Flavor
To get the best flavor, use fresh cucumbers. Look for firm cucumbers with no soft spots. Fresh dill is key too. It gives a bright taste. I love to add crushed garlic for a strong punch. Letting the pickles sit longer helps the flavors meld. I suggest waiting at least three days for a richer taste.
Proper Fermentation Techniques
Fermentation is simple with the right steps. Keep everything clean to avoid bad bacteria. Always use a clean jar to store your pickles. Pour the brine over cucumbers when it’s cool. This helps the cucumbers stay crisp. Make sure the cucumbers are fully submerged in the brine. This prevents mold and keeps them tasty.
Common Mistakes to Avoid
Avoid using old cucumbers; they won’t taste good. Don’t skip the salt; it helps with crunch. If you use too much vinegar, the pickles will be too sour. Make sure to seal the jar tightly to keep out air. If you forget to let them chill long enough, they won’t be as flavorful. For more details, check the Full Recipe.
Variations
Spicy Garlic Dill Pickles
If you like heat, try spicy garlic dill pickles. Just add crushed red pepper flakes to the brine. This simple change gives your pickles a nice kick. Start with 1/2 teaspoon, then adjust to your taste. You can also add sliced jalapeños for more spice. The heat pairs well with the garlic and dill, making every bite exciting.
Sweet Dill Pickles
If you prefer a sweeter taste, sweet dill pickles are the way to go. Just add more sugar to your brine. A good starting point is 1/4 cup of sugar. This change balances the tangy vinegar and salty flavors. You can also add a touch of cinnamon or cloves for a unique twist. Sweet dill pickles work great on burgers or as a snack.
Alternative Herbs and Spices
You can mix up the flavors by using different herbs and spices. Try adding coriander seeds or black peppercorns for extra depth. Fresh herbs like tarragon or thyme also work well. Each herb changes the flavor profile, so feel free to experiment. You might find a new favorite combination that surprises you!
For the full recipe, check out Garlic-Dill Delight Pickles.
Storage Info
Best Practices for Refrigeration
Once your pickles are made, keep them in the fridge. Store them in a clean, airtight jar. This keeps them crunchy and fresh. Make sure the brine covers all the cucumbers. If you see any cucumbers sticking out, add a bit more brine. The cold helps the flavors mix and grow.
Long-term Preservation Options
For long-term storage, consider canning. Use sterilized jars and a proper canning method. This makes the pickles last for months. You can also freeze them, but the texture may change. If you want crisp pickles, stick with refrigeration or canning.
How to Tell if Pickles Have Gone Bad
Check for signs of spoilage. If you see mold on the surface, throw them out. A bad smell is another red flag. If the pickles feel mushy or slimy, they are no longer safe to eat. Always trust your senses when it comes to food safety.
For the full recipe, check out the Garlic-Dill Delight Pickles section!
FAQs
How long do homemade garlic dill pickles last?
Homemade garlic dill pickles can last for about 2 to 3 months in the fridge. Keep them sealed in a clean jar. Always check for signs of spoilage, like mold or off smells. If you see any, it’s best to toss them. The longer they sit, the stronger the flavor becomes. Just remember, they may lose crunch over time.
Can I use other types of cucumbers?
Yes, you can use other types of cucumbers! Pickling cucumbers work best, but any cucumber can fit. Try Persian or Kirby cucumbers for a fun twist. These varieties tend to stay crunchy and have fewer seeds. Just make sure they are fresh and firm for the best results.
What are the health benefits of garlic and dill?
Garlic and dill pack a punch in flavor and health benefits. Garlic is great for boosting your immune system. It may help lower blood pressure and cholesterol too. Dill adds a fresh taste and helps with digestion. Plus, it’s rich in antioxidants. Together, they make your pickles not only tasty but also healthy!
In this blog post, we explored how to make delicious homemade pickles. We covered essential ingredients, the right tools, and tips for choosing fresh cucumbers. You learned step-by-step instructions for making the brine and packing the jars. We highlighted tips for the best flavor and common mistakes to avoid. We even discussed variations like spicy garlic dill and sweet dill pickles. Lastly, we shared storage tips and answered common questions. Now, you are ready to create your own tasty pickles and enjoy the fun of home preservation.