If you’re searching for a fun and tasty snack, look no further! These Crispy Garlic Parmesan Squash Chips are easy to make and full of flavor. Using simple ingredients, you’ll create a crunchy treat that’s perfect any time of day. I’ll show you how to slice, season, and bake your way to absolute deliciousness. Say goodbye to boring snacks and hello to your new favorite dish!
Ingredients
Main Ingredients
– 2 medium yellow squash or zucchini
– 2 tablespoons olive oil
Seasoning Ingredients
– 3 tablespoons grated Parmesan cheese
– 1 teaspoon garlic powder
– 1 teaspoon onion powder
– ½ teaspoon paprika
– Salt and pepper to taste
Garnishing Ingredients
– Fresh parsley, chopped
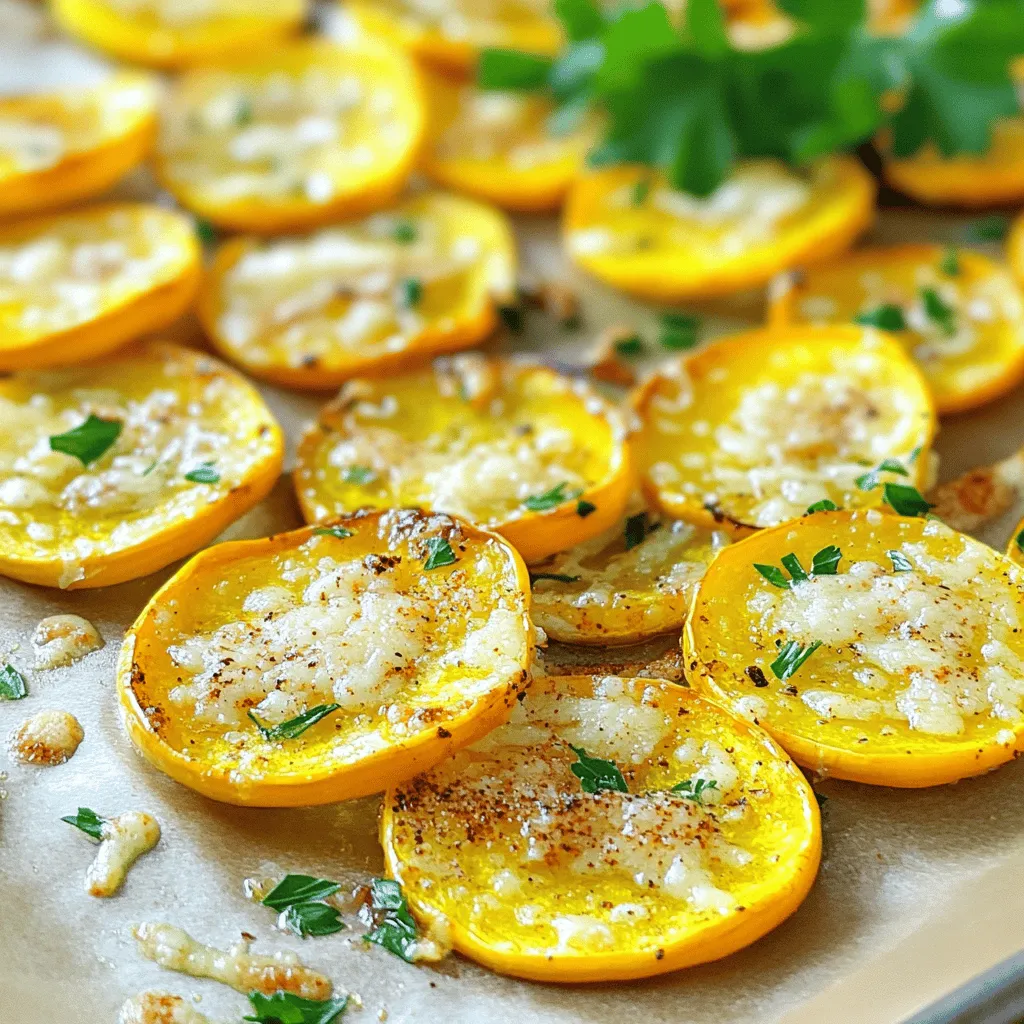
When I make Crispy Garlic Parmesan Squash Chips, I focus on fresh ingredients. First, I use two medium yellow squash or zucchini. They are great for this dish. The squash should be firm and bright. I slice them thin to get that perfect crisp.
Next, I grab some olive oil. This adds flavor and helps the chips crisp up nicely. I use two tablespoons to coat the squash slices evenly.
Now, let’s talk about the seasoning. I love using grated Parmesan cheese. It gives a rich, savory taste. I add three tablespoons of it. Then, I mix in garlic powder, onion powder, and paprika. Each adds a unique flavor. I finish with salt and pepper to taste. These spices really make the chips pop!
For garnish, I chop fresh parsley. It adds color and a fresh taste. I sprinkle it on top before serving. This simple touch makes the chips look great.
You can find the full recipe in the main article. Enjoy these crispy delights!
Step-by-Step Instructions
Prepping the Ingredients
To make perfect crispy garlic Parmesan squash chips, start by slicing the squash. Use a sharp knife and aim for even slices, about 1/8 inch thick. This helps them cook evenly. If you have a mandoline, it makes slicing even easier and quicker.
Next, prepare your baking sheet. Line it with parchment paper. This prevents the chips from sticking. It also makes cleanup a breeze. Make sure your baking sheet is large enough for all the slices to fit without overlapping.
Coating the Squash
Now, it’s time to coat the squash. In a large mixing bowl, add the thinly sliced squash. Drizzle 2 tablespoons of olive oil over the slices. Toss them well until each piece is covered. The oil helps the chips get crispy and golden.
In another small bowl, mix your seasoning. Combine 3 tablespoons of grated Parmesan cheese, 1 teaspoon of garlic powder, 1 teaspoon of onion powder, ½ teaspoon of paprika, and salt and pepper to taste. Mix this blend well, then sprinkle it over the squash. Toss gently again to coat each slice evenly.
Baking the Chips
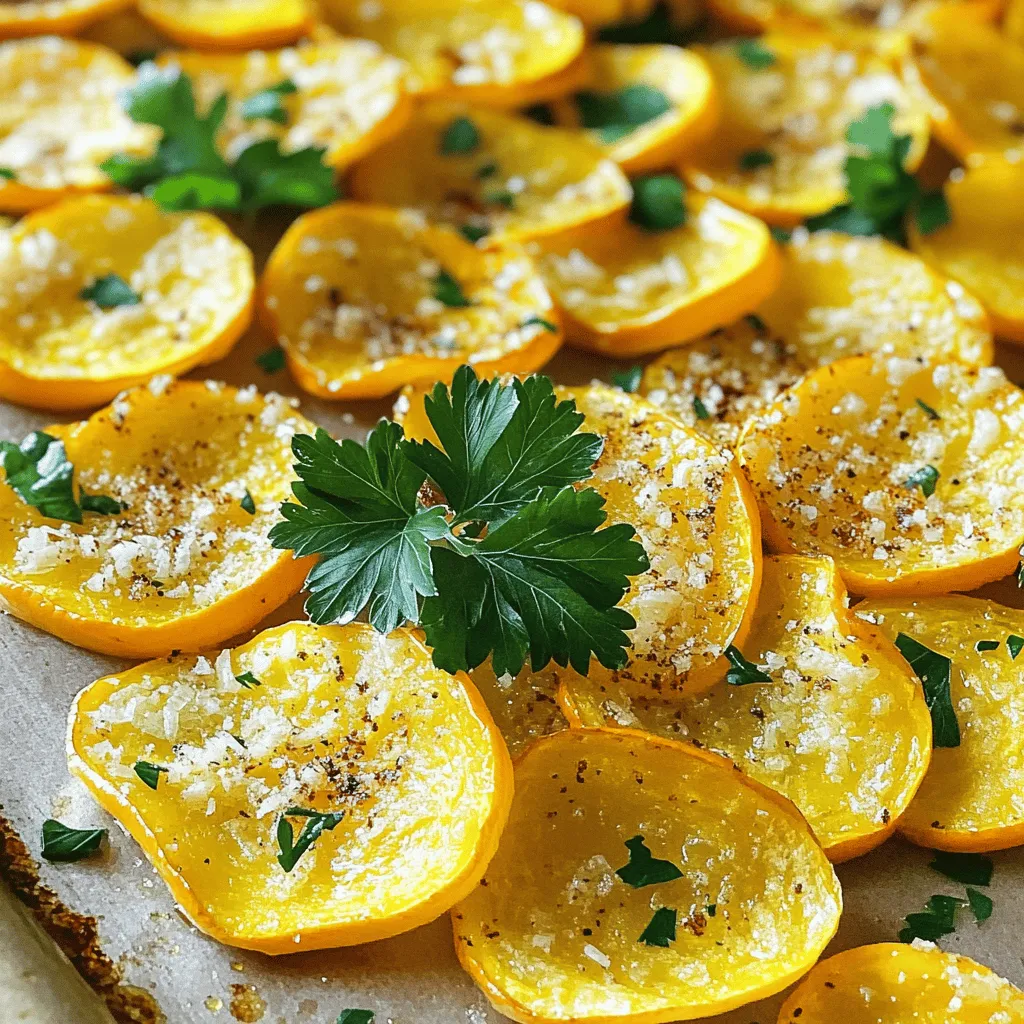
Preheat your oven to 425°F (220°C). Once it’s hot, lay the squash slices in a single layer on your prepared baking sheet. Avoid overlapping them. Bake for 15-20 minutes. Halfway through, flip the chips over. This is key for even crispiness.
You’ll know the chips are done when they are golden brown and crispy. Once baked, let them cool for a few minutes. Finally, sprinkle with fresh chopped parsley for a pop of color before serving. For the full recipe, check the earlier section!
Tips & Tricks
Achieving Maximum Crispiness
To get your squash chips nice and crispy, follow these steps:
– Baking tips for a crispy texture: Make sure your oven is preheated to 425°F (220°C). This high heat helps the chips cook quickly, which is key to a crisp texture. Use parchment paper on your baking sheet. This prevents sticking and helps with even browning.
– Avoiding moisture in the squash: Moisture is the enemy of crispiness. After slicing your squash, pat the pieces dry with a paper towel. This removes extra water and helps them crisp up in the oven.
Flavor Enhancements
To make your squash chips even tastier, consider these flavor boosts:
– Suggested spices and herbs: Besides garlic and onion powder, you can add dried herbs like thyme or oregano. These herbs add depth and an earthy taste. Experiment with your favorites to create your unique blend.
– Adding heat: red pepper flakes or cayenne: If you enjoy a little kick, sprinkle some red pepper flakes or cayenne pepper into your spice mix. Start with a small amount and adjust to your taste. This adds an exciting zing to your chips.
Presentation Ideas
How you serve your chips makes a big difference:
– Serving suggestions: Serve your crispy chips as a snack, appetizer, or side dish. Pair them with a dip like ranch or hummus for extra flavor.
– Plating and garnishing tips: For a beautiful presentation, arrange your chips in a single layer on a serving platter. Sprinkle fresh chopped parsley on top for color and a fresh taste. This simple touch makes your dish look inviting.
For the full recipe, check the details provided above!
Variations
Different Vegetables
You can switch up the squash for other veggies. Sweet potatoes make a great choice. They add a sweet, earthy flavor. Zucchini works well too, offering a similar texture. You can also try carrots or beets for a fun color. Each veggie will bring its own taste and crunch.
Cheese Alternatives
If you want to try different cheeses, cheddar is a great option. It adds a sharp taste that many people love. Nutritional yeast is another choice for a cheesy flavor. It’s also vegan-friendly and packed with vitamins. Both options can make your chips unique and tasty.
Dietary Adjustments
For a vegan version, skip the Parmesan and use nutritional yeast. This keeps the chips flavorful without dairy. If you need gluten-free options, rest assured, these chips are naturally gluten-free. Just make sure your seasoning is free from gluten. This way, everyone can enjoy the crispy goodness.
Storage Info
Best Ways to Store Leftovers
To keep your crispy garlic Parmesan squash chips fresh, use airtight containers. Glass or plastic containers work well. Before sealing, let the chips cool completely. This step prevents moisture buildup, which can make them soggy.
Reheating Instructions
When you want to enjoy your leftovers, reheating is key. The oven is best for keeping the chips crispy. Preheat your oven to 350°F (175°C). Spread the chips on a baking sheet and heat for about 10 minutes. If you use the microwave, they may lose their crunch. However, for a quick fix, a minute or two on medium power can work in a pinch.
Freezing Tips
You can freeze these chips, but it’s best to freeze them uncooked. Lay the seasoned squash slices on a baking sheet. Freeze them for an hour, then transfer to a freezer bag. When you’re ready to eat, bake them straight from the freezer. If you freeze cooked chips, they may turn soft upon thawing, so I do not recommend it. For thawing, let them sit in the fridge overnight.
FAQs
Can I bake the squash chips instead of frying them?
Yes, you can bake the squash chips. Baking is a great way to make them healthier. When you bake, you use less oil. This also helps keep the chips light and crispy. The oven’s heat cooks them evenly. You get a nice crunch without the mess of frying. Plus, baking is safer for kids to help with!
How do I know when the chips are done?
You will know the chips are done when they are golden brown. Look for a crispy texture. If they feel soft or floppy, they need more time. A good tip is to flip them halfway through baking. This helps them cook evenly. Keep an eye on them in the last few minutes. You want them crunchy but not burnt.
Can I use frozen squash?
Using frozen squash is not the best choice. Frozen squash tends to be softer. This can make the chips mushy instead of crispy. Fresh squash has a firmer texture. It also holds up better during baking. If you only have frozen, try to thaw and drain the excess water. But, for the best chips, fresh is the way to go.
This blog post covered how to make delicious and healthy squash chips. You learned about the main ingredients, seasoning options, and step-by-step instructions for perfect baking. We shared tips for crispiness, flavor boosts, and creative serving ideas. You can even try different vegetables and adapt the recipe for dietary needs. Remember to store your leftovers properly for the best taste later. With these easy steps, you can enjoy tasty snacks without guilt. Get cooking and enjoy your crispy treats!
