Crispy Garlic Fried Chicken Wings Easy and Delicious Recipe

WANT TO SAVE THIS RECIPE?

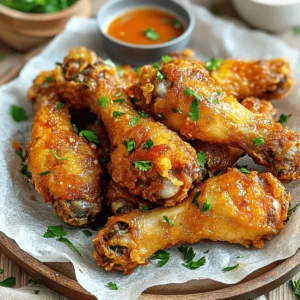
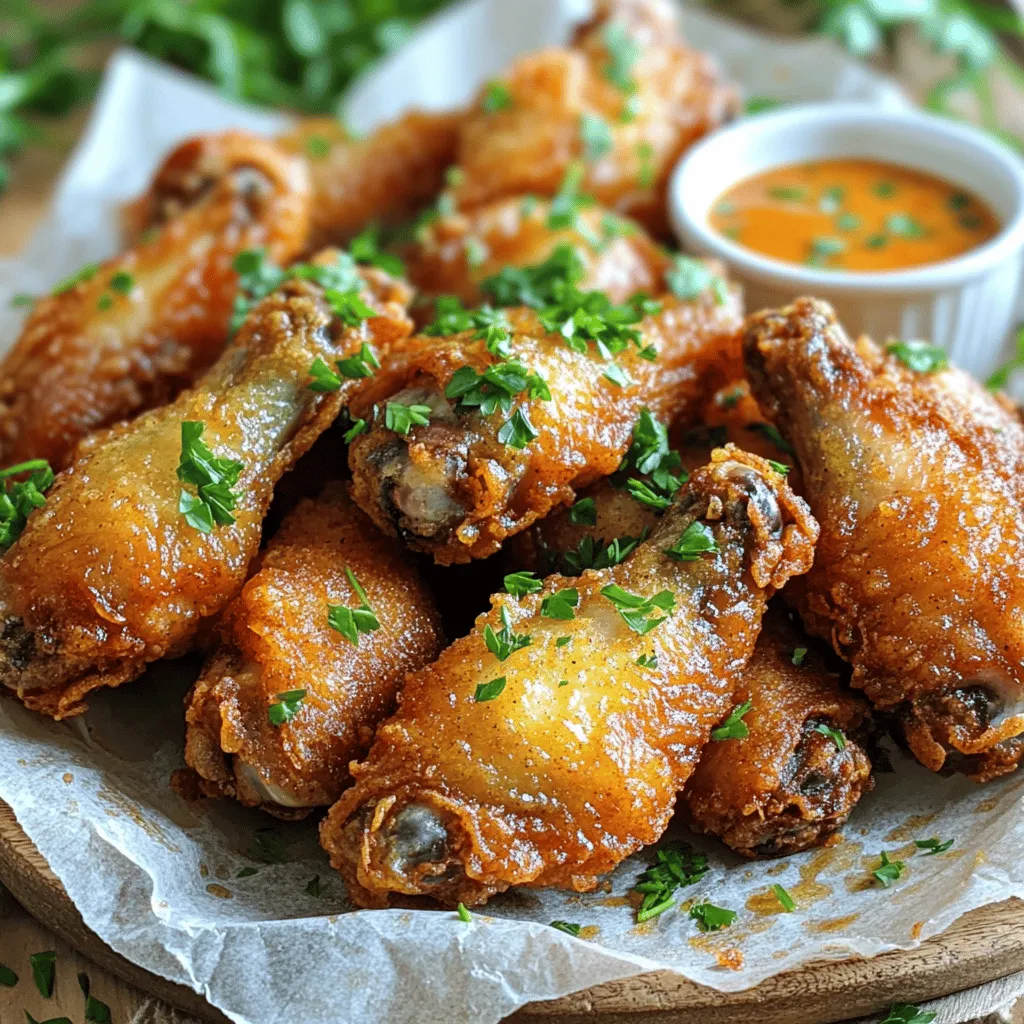
Are you ready for crispy, garlic-flavored perfection? My easy recipe for Crispy Garlic Fried Chicken Wings will wow your taste buds! With simple ingredients like buttermilk and fresh garlic, you’ll create a dish that’s crunchy outside and juicy inside. Get your frying pan ready; soon, you’ll have a crowd-pleasing snack that everyone will love. Dive into my step-by-step guide for tasty wings that bring happiness to any table!

Ingredients

Main Ingredients

– 2 lbs chicken wings

– 1 cup buttermilk

– 1 cup all-purpose flour

– ½ cup cornstarch

– 1 tablespoon garlic powder

– 1 teaspoon onion powder

– 1 teaspoon paprika

– 1 teaspoon baking powder

– Salt and pepper to taste

The main ingredients create a flavorful base for your crispy garlic fried chicken wings. The chicken wings are the star, offering juicy meat under a crunchy crust. Buttermilk adds tang and helps the coating stick. All-purpose flour and cornstarch mix for a light, crispy shell. Seasonings like garlic powder and paprika give depth and warmth to each bite.

Cooking Essentials

– Oil for frying

– 4 cloves garlic, minced

– 2 tablespoons fresh parsley, chopped

You need oil to fry the wings. It should be hot enough to create a crispy texture. Fresh garlic adds a rich, aromatic flavor. Parsley serves as a bright garnish that enhances the dish’s look.

Recommended Equipment

– Deep frying pan or pot

– Mixing bowls

– Slotted spoon

Using a deep frying pan or pot ensures even cooking. Mixing bowls help keep your workspace organized. A slotted spoon lets you drain excess oil from the wings after frying. These tools make the process smooth and simple. For the full recipe, check out the details provided earlier.

Step-by-Step Instructions

Marinating the Wings

To make the wings juicy and tasty, start by marinating them. In a large bowl, place the chicken wings and add one cup of buttermilk. Mix well to coat each wing. Cover the bowl and refrigerate for at least two hours. For the best flavor, marinate overnight. This helps tenderize the wings and adds flavor.

Preparing the Coating

Next, prepare the coating. In another bowl, mix the dry ingredients. You will need one cup of all-purpose flour, half a cup of cornstarch, one tablespoon of garlic powder, one teaspoon of onion powder, one teaspoon of paprika, and salt and pepper to taste. The cornstarch gives a nice crunch. The right texture is key for crispy wings.

Frying and Finishing

Now, it’s time to fry the wings. Heat oil in a deep frying pan to 350°F (175°C). Make sure the oil is deep enough to cover the wings. Fry the wings in batches, not crowding the pan. Cook for about 10 to 12 minutes or until they turn golden brown and crispy. Use a slotted spoon to take them out and let them drain on paper towels.

For the garlic sauce, heat a tablespoon of oil in a small skillet. Add four cloves of minced garlic and sauté for one to two minutes until fragrant. Mix in a pinch of salt. Toss the fried wings in the garlic sauce until they are well-coated. This step adds a punch of flavor.

Tips & Tricks

Achieving Maximum Crispiness

To get crispy garlic fried chicken wings, the coating matters. A good mix of flour and cornstarch gives the wings crunch. Aim for a thick coating, but don’t overdo it. Shake off any extra flour. This keeps the wings light and crispy.

For frying oil, choose oils with high smoke points. Peanut or canola oil works best. These oils let you fry at high heat without burning. This is key for crispy wings.

Marination Tips

Marinate the wings in buttermilk for at least two hours. Overnight gives the best flavor and tenderness. The buttermilk helps break down the chicken. This makes the wings juicy and tasty.

You can add spices to the buttermilk. Try hot sauce for a kick. Garlic powder or herbs can also enhance the flavor. Experiment to find your favorite mix!

Cooking Safety

Hot oil can be dangerous, so be careful. Always use a deep pot to avoid spills. Keep the pot on the stove and away from kids. A thermometer helps you keep track of oil temp. Aim for 350°F (175°C) for frying.

When frying, do not overcrowd the pan. This lowers the oil temperature. Fry in small batches for the best results. This ensures even cooking and crispiness.

Variations

Flavor Enhancements

You can easily change the flavor of these wings. Try adding other spices like cayenne for heat or smoked paprika for a smoky taste. Mixing dried herbs can also give your wings a fresh twist. For a spicy version, toss the wings in hot sauce before serving. You can even mix the hot sauce into the garlic sauce for extra kick. This way, you get that perfect balance of garlic and heat.

Healthier Options

If you want a healthier dish, consider baking the wings instead of frying them. Preheat your oven to 425°F (220°C). Place the coated wings on a baking sheet lined with parchment paper. Bake for about 40-45 minutes, flipping halfway through. This method keeps the wings crispy without all the oil. For an air fryer option, preheat your air fryer to 380°F (193°C). Cook the wings for 25-30 minutes, shaking the basket halfway. You’ll get crispy wings with less fat.

Serving Suggestions

These crispy garlic wings pair well with many dipping sauces. Ranch and blue cheese are popular choices. A sweet chili sauce adds a fun twist too. For sides, try coleslaw or carrot sticks. These fresh sides balance the rich flavors of the wings. Serve them on a large platter with parchment paper and extra parsley for a beautiful presentation. Check out the Full Recipe to make these wings today!

Storage Info

Refrigeration Guidelines

To store leftover wings, first let them cool. Place them in an airtight container. You can also use a zip-top bag. Make sure to remove as much air as possible. This helps keep them fresh longer. You can store them in the fridge for up to 3 days.

For reheating, preheat your oven to 350°F (175°C). Place the wings on a baking sheet. Heat for about 15-20 minutes until they’re warm and crispy again. You can also use an air fryer set to 350°F for about 10 minutes. This keeps them crispy and delicious.

Freezing Instructions

If you want to freeze cooked wings, let them cool first. Place them in a freezer-safe bag or container. Be sure to label it with the date. You can keep them frozen for up to 3 months.

When you’re ready to eat them, take the wings out of the freezer. Let them thaw in the fridge overnight. For reheating, use the oven or air fryer as mentioned before. This ensures they stay crispy and tasty.

Shelf Life

In the fridge, cooked wings last about 3 days. If you freeze them, they can last up to 3 months. Always check for any signs of spoilage before eating. Proper storage helps maintain their flavor and texture. Enjoy your crispy garlic fried chicken wings anytime!

FAQs

What makes wings crispy?

Cornstarch plays a key role in making wings crispy. It forms a light, crunchy layer when fried. A good resting time after coating helps too. This allows the flour and cornstarch to stick better. I always let my wings rest for 10-15 minutes. This small step makes a big difference in texture.

Can I make the wings ahead of time?

Yes, you can prepare the wings ahead. Marinate them in buttermilk up to overnight. After marinating, coat the wings and store them in the fridge. You can fry them whenever you are ready. This way, you save time and still enjoy fresh wings!

What type of garlic should I use?

I recommend using fresh garlic for the best flavor. Fresh garlic gives a strong, rich taste. Garlic powder is a good backup, but it has a milder flavor. If you want a bold taste, use fresh garlic. About four cloves should do the trick for this recipe.

How do I know when the wings are done frying?

To check if the wings are done, use a meat thermometer. They should reach 165°F (74°C). You can also look for a golden-brown color. If they look crisp and golden, they are likely ready. Always use a slotted spoon to remove them carefully. This keeps them nice and hot!

This blog post gave you all the details for making tasty chicken wings. We covered core ingredients, steps for marinating, coating, and frying. You learned tips for achieving crispiness and safety. We discussed fun flavor variations and storage methods. Now, you can create delicious wings at home, impressing friends and family. Enjoy experimenting with flavors and cooking methods. Trust the process, follow the tips, and you’ll have amazing wings every time.

- 2 lbs chicken wings - 1 cup buttermilk - 1 cup all-purpose flour - ½ cup cornstarch - 1 tablespoon garlic powder - 1 teaspoon onion powder - 1 teaspoon paprika - 1 teaspoon baking powder - Salt and pepper to taste The main ingredients create a flavorful base for your crispy garlic fried chicken wings. The chicken wings are the star, offering juicy meat under a crunchy crust. Buttermilk adds tang and helps the coating stick. All-purpose flour and cornstarch mix for a light, crispy shell. Seasonings like garlic powder and paprika give depth and warmth to each bite. - Oil for frying - 4 cloves garlic, minced - 2 tablespoons fresh parsley, chopped You need oil to fry the wings. It should be hot enough to create a crispy texture. Fresh garlic adds a rich, aromatic flavor. Parsley serves as a bright garnish that enhances the dish's look. - Deep frying pan or pot - Mixing bowls - Slotted spoon Using a deep frying pan or pot ensures even cooking. Mixing bowls help keep your workspace organized. A slotted spoon lets you drain excess oil from the wings after frying. These tools make the process smooth and simple. For the full recipe, check out the details provided earlier. To make the wings juicy and tasty, start by marinating them. In a large bowl, place the chicken wings and add one cup of buttermilk. Mix well to coat each wing. Cover the bowl and refrigerate for at least two hours. For the best flavor, marinate overnight. This helps tenderize the wings and adds flavor. Next, prepare the coating. In another bowl, mix the dry ingredients. You will need one cup of all-purpose flour, half a cup of cornstarch, one tablespoon of garlic powder, one teaspoon of onion powder, one teaspoon of paprika, and salt and pepper to taste. The cornstarch gives a nice crunch. The right texture is key for crispy wings. Now, it’s time to fry the wings. Heat oil in a deep frying pan to 350°F (175°C). Make sure the oil is deep enough to cover the wings. Fry the wings in batches, not crowding the pan. Cook for about 10 to 12 minutes or until they turn golden brown and crispy. Use a slotted spoon to take them out and let them drain on paper towels. For the garlic sauce, heat a tablespoon of oil in a small skillet. Add four cloves of minced garlic and sauté for one to two minutes until fragrant. Mix in a pinch of salt. Toss the fried wings in the garlic sauce until they are well-coated. This step adds a punch of flavor. To get crispy garlic fried chicken wings, the coating matters. A good mix of flour and cornstarch gives the wings crunch. Aim for a thick coating, but don’t overdo it. Shake off any extra flour. This keeps the wings light and crispy. For frying oil, choose oils with high smoke points. Peanut or canola oil works best. These oils let you fry at high heat without burning. This is key for crispy wings. Marinate the wings in buttermilk for at least two hours. Overnight gives the best flavor and tenderness. The buttermilk helps break down the chicken. This makes the wings juicy and tasty. You can add spices to the buttermilk. Try hot sauce for a kick. Garlic powder or herbs can also enhance the flavor. Experiment to find your favorite mix! Hot oil can be dangerous, so be careful. Always use a deep pot to avoid spills. Keep the pot on the stove and away from kids. A thermometer helps you keep track of oil temp. Aim for 350°F (175°C) for frying. When frying, do not overcrowd the pan. This lowers the oil temperature. Fry in small batches for the best results. This ensures even cooking and crispiness. {{image_2}} You can easily change the flavor of these wings. Try adding other spices like cayenne for heat or smoked paprika for a smoky taste. Mixing dried herbs can also give your wings a fresh twist. For a spicy version, toss the wings in hot sauce before serving. You can even mix the hot sauce into the garlic sauce for extra kick. This way, you get that perfect balance of garlic and heat. If you want a healthier dish, consider baking the wings instead of frying them. Preheat your oven to 425°F (220°C). Place the coated wings on a baking sheet lined with parchment paper. Bake for about 40-45 minutes, flipping halfway through. This method keeps the wings crispy without all the oil. For an air fryer option, preheat your air fryer to 380°F (193°C). Cook the wings for 25-30 minutes, shaking the basket halfway. You’ll get crispy wings with less fat. These crispy garlic wings pair well with many dipping sauces. Ranch and blue cheese are popular choices. A sweet chili sauce adds a fun twist too. For sides, try coleslaw or carrot sticks. These fresh sides balance the rich flavors of the wings. Serve them on a large platter with parchment paper and extra parsley for a beautiful presentation. Check out the Full Recipe to make these wings today! To store leftover wings, first let them cool. Place them in an airtight container. You can also use a zip-top bag. Make sure to remove as much air as possible. This helps keep them fresh longer. You can store them in the fridge for up to 3 days. For reheating, preheat your oven to 350°F (175°C). Place the wings on a baking sheet. Heat for about 15-20 minutes until they're warm and crispy again. You can also use an air fryer set to 350°F for about 10 minutes. This keeps them crispy and delicious. If you want to freeze cooked wings, let them cool first. Place them in a freezer-safe bag or container. Be sure to label it with the date. You can keep them frozen for up to 3 months. When you’re ready to eat them, take the wings out of the freezer. Let them thaw in the fridge overnight. For reheating, use the oven or air fryer as mentioned before. This ensures they stay crispy and tasty. In the fridge, cooked wings last about 3 days. If you freeze them, they can last up to 3 months. Always check for any signs of spoilage before eating. Proper storage helps maintain their flavor and texture. Enjoy your crispy garlic fried chicken wings anytime! Cornstarch plays a key role in making wings crispy. It forms a light, crunchy layer when fried. A good resting time after coating helps too. This allows the flour and cornstarch to stick better. I always let my wings rest for 10-15 minutes. This small step makes a big difference in texture. Yes, you can prepare the wings ahead. Marinate them in buttermilk up to overnight. After marinating, coat the wings and store them in the fridge. You can fry them whenever you are ready. This way, you save time and still enjoy fresh wings! I recommend using fresh garlic for the best flavor. Fresh garlic gives a strong, rich taste. Garlic powder is a good backup, but it has a milder flavor. If you want a bold taste, use fresh garlic. About four cloves should do the trick for this recipe. To check if the wings are done, use a meat thermometer. They should reach 165°F (74°C). You can also look for a golden-brown color. If they look crisp and golden, they are likely ready. Always use a slotted spoon to remove them carefully. This keeps them nice and hot! This blog post gave you all the details for making tasty chicken wings. We covered core ingredients, steps for marinating, coating, and frying. You learned tips for achieving crispiness and safety. We discussed fun flavor variations and storage methods. Now, you can create delicious wings at home, impressing friends and family. Enjoy experimenting with flavors and cooking methods. Trust the process, follow the tips, and you’ll have amazing wings every time.

Crispy Garlic Fried Chicken Wings

Indulge in the crunch of Crispy Garlic Fried Chicken Wings with this easy recipe that'll have everyone asking for seconds! Marinate, coat, and fry your way to perfectly crispy wings bursting with garlic flavor. Perfect for parties or a cozy dinner at home, this dish is a crowd-pleaser. Ready to impress? Click through to discover the full recipe and tips for serving these delicious wings hot and with your favorite dipping sauces!

Ingredients
  

2 lbs chicken wings

1 cup buttermilk

1 cup all-purpose flour

½ cup cornstarch

1 tablespoon garlic powder

1 teaspoon onion powder

1 teaspoon paprika

1 teaspoon baking powder

Salt and pepper to taste

Oil for frying

4 cloves garlic, minced

2 tablespoons fresh parsley, chopped

Instructions
 

Marinate the Wings: In a large bowl, add the chicken wings and pour in the buttermilk. Mix well, ensuring the wings are fully coated. Cover and refrigerate for at least 2 hours (or overnight for best results).

    Prepare the Coating: In another bowl, combine the flour, cornstarch, garlic powder, onion powder, paprika, baking powder, salt, and pepper.

      Coat the Wings: Remove the wings from the refrigerator and let them sit at room temperature for about 15 minutes. Dredge each wing in the flour mixture, shaking off any excess. Allow the coated wings to rest for another 10-15 minutes for the coating to set.

        Heat the Oil: In a deep frying pan or pot, heat the oil to 350°F (175°C). Ensure there is enough oil to fully submerge the wings.

          Fry the Wings: Fry the wings in batches, making sure not to overcrowd the pan. Cook for 10-12 minutes per batch or until golden brown and crispy. Use a slotted spoon to transfer the wings to a paper towel-lined plate to drain excess oil.

            Prepare the Garlic Sauce: In a small skillet, heat a tablespoon of oil over medium heat. Add the minced garlic and sauté for 1-2 minutes until fragrant and lightly golden. Remove from heat and mix in a pinch of salt, then toss the fried wings in the garlic sauce until well coated.

              Garnish and Serve: Garnish the wings with freshly chopped parsley.

                Prep Time: 2 hours | Total Time: 2 hours 30 minutes | Servings: 4

                  - Presentation Tips: Serve the wings on a large platter lined with parchment paper, sprinkled with extra parsley and accompanied by your favorite dipping sauce. Enjoy them hot!

                    WANT TO SAVE THIS RECIPE?