Crispy Chicken Caesar Wraps Simple and Flavorful Meal

WANT TO SAVE THIS RECIPE?

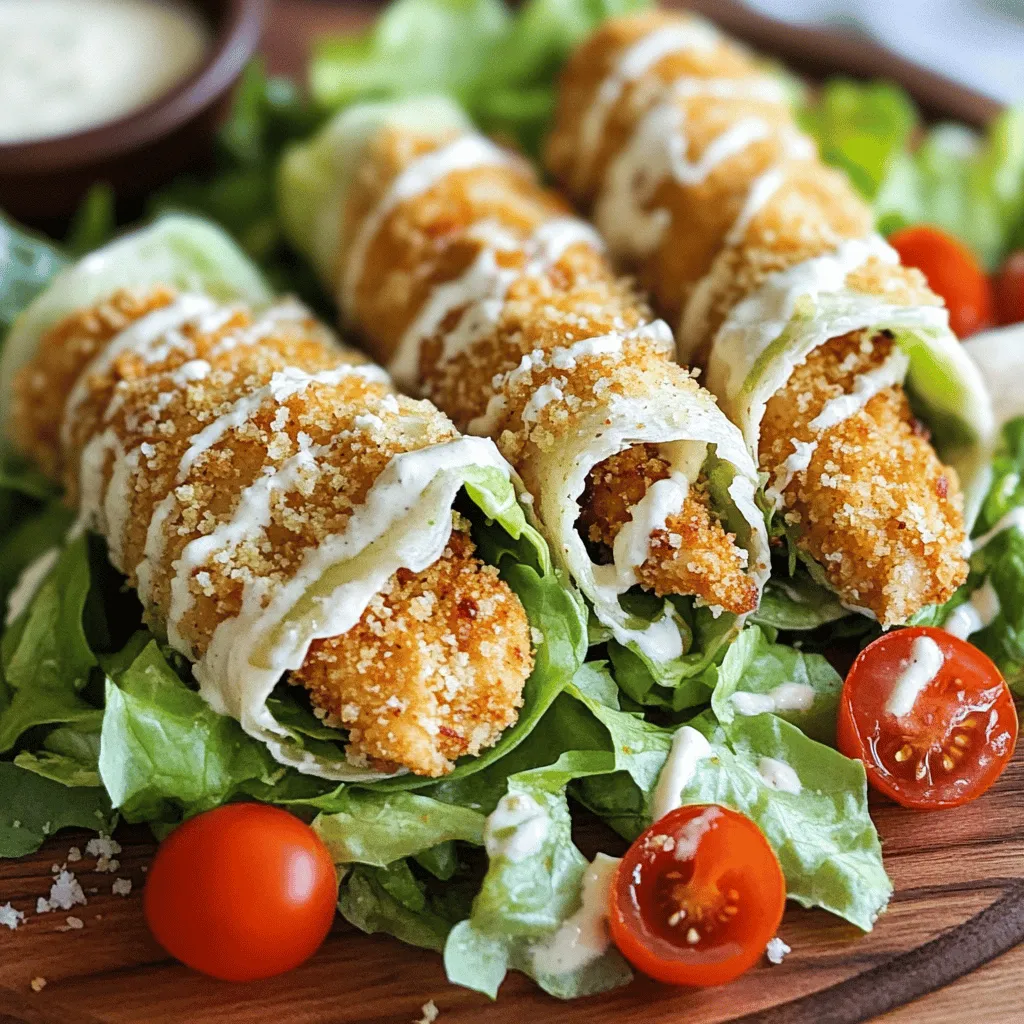
Are you ready for a meal that’s both simple and bursting with flavor? Crispy Chicken Caesar Wraps are the perfect way to enjoy a classic dish with a fun twist. Imagine juicy chicken, fresh greens, and rich dressing all wrapped up in a tortilla. Whether you’re looking for a quick lunch or a satisfying dinner, these wraps will become your new favorite. Let’s dive into this delicious recipe!

Ingredients

Chicken and Coating

– 2 large boneless chicken breasts

– ½ cup all-purpose flour

– 1 large egg

– 1 cup panko breadcrumbs

Wrap Filling

– 1 cup romaine lettuce, chopped

– ½ cup cherry tomatoes, halved

– ¼ cup grated Parmesan cheese

Tortillas and Dressing

– 4 large tortilla wraps (flour or whole wheat)

– ½ cup Caesar dressing

– 1 tablespoon olive oil

– Salt and pepper to taste

When you gather your ingredients, think about the fresh flavors you will create.

For the chicken, boneless breasts are best. They cook evenly and stay juicy. The coating adds crunch. You coat the chicken in flour first. This helps the egg stick. Then, dip it in egg. Finally, coat it in panko breadcrumbs. Panko gives a great crunch.

Next, you prepare the wrap filling. Chop the romaine lettuce. Halve the cherry tomatoes. Mix these with the grated Parmesan cheese. The cheese adds a salty bite. It pairs well with the Caesar dressing.

The tortillas hold it all together. You can choose flour or whole wheat. The choice depends on your taste.

Lastly, don’t forget the dressing. Caesar dressing adds creaminess. It binds the filling, making every bite delightful.

Try to have everything ready before you start cooking. This will make your meal prep smooth and quick. For the full recipe, check the steps below.

Step-by-Step Instructions

Preparing the Chicken

1. First, preheat your oven to 400°F (200°C). Prepare a baking sheet by lining it with parchment paper.

2. Season the chicken breasts with salt and pepper. This adds great flavor.

3. Next, coat each chicken breast in flour, shaking off any extra. This helps the egg stick.

4. In a bowl, beat the egg. Dip each floured chicken breast into the egg.

5. Now, coat the chicken in panko breadcrumbs. Press gently so they stick well.

Baking Process

1. Place the breaded chicken on the prepared baking sheet. Drizzle olive oil over the tops.

2. Bake the chicken for 20-25 minutes. Look for a golden brown color.

3. Use a meat thermometer to check the internal temperature. It should reach 165°F (75°C) for safe eating.

Preparing the Wrap Filling

1. While the chicken bakes, mix the filling. In a large bowl, combine chopped romaine, halved cherry tomatoes, Caesar dressing, and grated Parmesan.

2. Toss all the ingredients until they are well mixed. This ensures every bite is tasty.

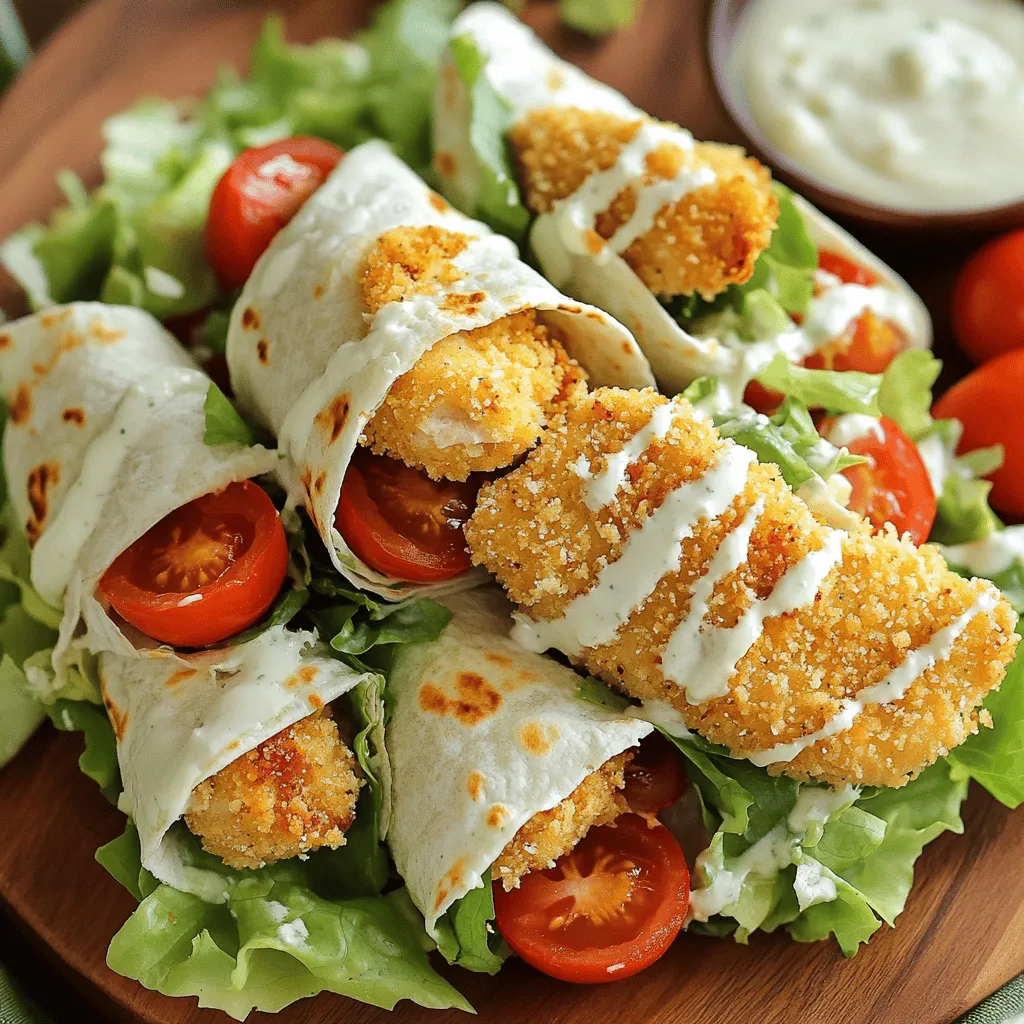
Assembling the Wraps

1. Once the chicken is done, let it rest for a few minutes. Then slice it into strips.

2. Prepare the tortillas by laying them flat. Place an equal portion of the lettuce mixture in the center of each tortilla.

3. Add a few strips of crispy chicken on top of the filling.

4. Fold in the sides of the tortilla. Roll from the bottom up to create a wrap.

5. Slice each wrap in half diagonally. This makes them easier to handle and serve.

Now you have a simple and flavorful meal ready to enjoy! For the full recipe, check the details above.

Tips & Tricks

Enhancing Crunchiness

To make your chicken extra crispy, I recommend these tips. First, use panko breadcrumbs. They create a light and airy crunch. If you bake the chicken, preheat your oven to 400°F (200°C). Use a parchment-lined baking sheet for easy cleanup. Drizzle olive oil over the chicken before baking. This helps it crisp up nicely.

You can also fry the chicken. Use a deep pan with hot oil. This gives it a golden-brown color and a crunchy texture. Frying takes less time than baking, but both methods work well.

Serving Suggestions

Pair your wraps with tasty sides or dips. I love serving these wraps with a fresh side salad. You can also add crispy fries for a fun touch. For a dip, use extra Caesar dressing. It adds flavor and fun to the meal.

Presentation is key! Slice your wraps in half diagonally. This makes them easy to handle. Arrange them neatly on a platter. Add fresh basil or parsley for a pop of color.

Flavor Boosters

Want to kick up the flavor? Consider adding more ingredients. Avocado slices or crispy bacon can add richness. For some heat, sprinkle in red pepper flakes or drizzle with hot sauce.

When it comes to dressing, homemade is often better. You can control the taste and ingredients. If you’re short on time, store-bought dressing works fine, too. Just find one you really like.

For the full recipe, check the section above.

Variations

Protein Alternatives

You can switch out the chicken for other proteins. Shrimp makes a tasty option. Just cook the shrimp until pink and tender. Tofu is great for a plant-based meal. Use firm tofu and pan-fry it for a nice texture. Turkey is another healthy choice. It adds a lean protein twist, perfect for any meal.

For those on a vegan diet, try chickpeas or lentils. Both add protein and fiber. You can season them with garlic and lemon for extra flavor.

Different Dressings

If you want to mix things up, try a different dressing. Ranch or Greek yogurt dressing can change the taste completely. You can also make a spicy version. Add some hot sauce or sriracha to your Caesar dressing. For a lighter option, mix yogurt with lemon juice and herbs.

These alternatives keep the wrap fresh and exciting. They allow personal taste to shine through.

Wrap Alternatives

The type of wrap can change your meal. Flour tortillas are classic, but try whole wheat for more fiber. If gluten is a concern, use gluten-free tortillas. They taste great and hold everything well.

Another fun idea is a salad bowl. Instead of a wrap, serve your filling in a bowl. This is a low-carb option that’s filling and healthy. Use the same fresh ingredients and dressing for a delicious twist.

For the full recipe, check the earlier section. Enjoy experimenting with these variations!

Storage Info

Storing Leftovers

To keep your Crispy Chicken Caesar Wraps fresh, wrap them tightly in plastic wrap or aluminum foil. Place them in an airtight container. Store them in the fridge. They stay fresh for about 2 to 3 days. If you notice them getting soggy, it’s best to eat them sooner.

Freezing Instructions

You can freeze assembled wraps for later use. Wrap each one tightly in plastic wrap and then place in a freezer bag. They can last up to 2 months in the freezer. When ready, remove them from the freezer and let them thaw in the fridge overnight. Reheat them in the oven at 350°F (175°C) for about 10-15 minutes. This brings back their crispy goodness.

Meal Prep Ideas

Prep your ingredients in advance for quick meals. Cook the chicken and chop the veggies ahead of time. Store these separately in the fridge. When it’s time to eat, just assemble the wraps. This way, you can enjoy a fresh meal without a lot of fuss. Consider prepping several wraps at once for busy weekdays.

FAQs

How can I make the chicken crispy without frying?

You can bake the chicken for a crispy texture. Start by coating the chicken in flour, egg, and panko breadcrumbs. The panko gives it that nice crunch. Drizzle a little olive oil on the chicken before baking. Set your oven to 400°F (200°C). Bake for about 20-25 minutes until golden brown. This method keeps it healthier and still tasty.

Can I use rotisserie chicken for this recipe?

Yes, rotisserie chicken is a great time-saver. Shred the chicken into bite-sized pieces. This way, you skip the cooking step. Just mix it with your wrap filling. It adds flavor and saves you prep time. Look for skinless options for a lighter meal.

What can I use instead of Caesar dressing?

If you want a change, try ranch or Greek yogurt dressing. Both pair well with the chicken and veggies. For a spicy twist, use buffalo sauce. You can also mix sour cream with herbs for a fresh taste. These alternatives keep the wraps fun and flavorful.

How do I store Crispy Chicken Caesar Wraps?

To keep your wraps fresh, wrap them in foil or plastic. Store them in the fridge for up to three days. This way, they stay crisp. Avoid sogginess by keeping the filling separate if possible. Just assemble when you’re ready to eat.

Can Crispy Chicken Caesar Wraps be made in advance?

Yes, you can prepare the filling ahead of time. Store the chicken and filling separately in the fridge. You can make the wraps just before serving. This keeps everything fresh and crunchy. Enjoy your wraps at their best with minimal effort. Check out the Full Recipe for more details!

In this blog post, we covered how to make Crispy Chicken Caesar Wraps from scratch. We went through the key ingredients, step-by-step instructions, and tips for perfecting your wrap. Remember, you can customize your filling and dressings for a unique touch.

Embrace the flexibility of these wraps. They can be a quick meal or a fun dish to share. Happy wrapping!

- 2 large boneless chicken breasts - ½ cup all-purpose flour - 1 large egg - 1 cup panko breadcrumbs - 1 cup romaine lettuce, chopped - ½ cup cherry tomatoes, halved - ¼ cup grated Parmesan cheese - 4 large tortilla wraps (flour or whole wheat) - ½ cup Caesar dressing - 1 tablespoon olive oil - Salt and pepper to taste When you gather your ingredients, think about the fresh flavors you will create. For the chicken, boneless breasts are best. They cook evenly and stay juicy. The coating adds crunch. You coat the chicken in flour first. This helps the egg stick. Then, dip it in egg. Finally, coat it in panko breadcrumbs. Panko gives a great crunch. Next, you prepare the wrap filling. Chop the romaine lettuce. Halve the cherry tomatoes. Mix these with the grated Parmesan cheese. The cheese adds a salty bite. It pairs well with the Caesar dressing. The tortillas hold it all together. You can choose flour or whole wheat. The choice depends on your taste. Lastly, don't forget the dressing. Caesar dressing adds creaminess. It binds the filling, making every bite delightful. Try to have everything ready before you start cooking. This will make your meal prep smooth and quick. For the full recipe, check the steps below. 1. First, preheat your oven to 400°F (200°C). Prepare a baking sheet by lining it with parchment paper. 2. Season the chicken breasts with salt and pepper. This adds great flavor. 3. Next, coat each chicken breast in flour, shaking off any extra. This helps the egg stick. 4. In a bowl, beat the egg. Dip each floured chicken breast into the egg. 5. Now, coat the chicken in panko breadcrumbs. Press gently so they stick well. 1. Place the breaded chicken on the prepared baking sheet. Drizzle olive oil over the tops. 2. Bake the chicken for 20-25 minutes. Look for a golden brown color. 3. Use a meat thermometer to check the internal temperature. It should reach 165°F (75°C) for safe eating. 1. While the chicken bakes, mix the filling. In a large bowl, combine chopped romaine, halved cherry tomatoes, Caesar dressing, and grated Parmesan. 2. Toss all the ingredients until they are well mixed. This ensures every bite is tasty. 1. Once the chicken is done, let it rest for a few minutes. Then slice it into strips. 2. Prepare the tortillas by laying them flat. Place an equal portion of the lettuce mixture in the center of each tortilla. 3. Add a few strips of crispy chicken on top of the filling. 4. Fold in the sides of the tortilla. Roll from the bottom up to create a wrap. 5. Slice each wrap in half diagonally. This makes them easier to handle and serve. Now you have a simple and flavorful meal ready to enjoy! For the full recipe, check the details above. To make your chicken extra crispy, I recommend these tips. First, use panko breadcrumbs. They create a light and airy crunch. If you bake the chicken, preheat your oven to 400°F (200°C). Use a parchment-lined baking sheet for easy cleanup. Drizzle olive oil over the chicken before baking. This helps it crisp up nicely. You can also fry the chicken. Use a deep pan with hot oil. This gives it a golden-brown color and a crunchy texture. Frying takes less time than baking, but both methods work well. Pair your wraps with tasty sides or dips. I love serving these wraps with a fresh side salad. You can also add crispy fries for a fun touch. For a dip, use extra Caesar dressing. It adds flavor and fun to the meal. Presentation is key! Slice your wraps in half diagonally. This makes them easy to handle. Arrange them neatly on a platter. Add fresh basil or parsley for a pop of color. Want to kick up the flavor? Consider adding more ingredients. Avocado slices or crispy bacon can add richness. For some heat, sprinkle in red pepper flakes or drizzle with hot sauce. When it comes to dressing, homemade is often better. You can control the taste and ingredients. If you're short on time, store-bought dressing works fine, too. Just find one you really like. For the full recipe, check the section above. {{image_2}} You can switch out the chicken for other proteins. Shrimp makes a tasty option. Just cook the shrimp until pink and tender. Tofu is great for a plant-based meal. Use firm tofu and pan-fry it for a nice texture. Turkey is another healthy choice. It adds a lean protein twist, perfect for any meal. For those on a vegan diet, try chickpeas or lentils. Both add protein and fiber. You can season them with garlic and lemon for extra flavor. If you want to mix things up, try a different dressing. Ranch or Greek yogurt dressing can change the taste completely. You can also make a spicy version. Add some hot sauce or sriracha to your Caesar dressing. For a lighter option, mix yogurt with lemon juice and herbs. These alternatives keep the wrap fresh and exciting. They allow personal taste to shine through. The type of wrap can change your meal. Flour tortillas are classic, but try whole wheat for more fiber. If gluten is a concern, use gluten-free tortillas. They taste great and hold everything well. Another fun idea is a salad bowl. Instead of a wrap, serve your filling in a bowl. This is a low-carb option that’s filling and healthy. Use the same fresh ingredients and dressing for a delicious twist. For the full recipe, check the earlier section. Enjoy experimenting with these variations! To keep your Crispy Chicken Caesar Wraps fresh, wrap them tightly in plastic wrap or aluminum foil. Place them in an airtight container. Store them in the fridge. They stay fresh for about 2 to 3 days. If you notice them getting soggy, it’s best to eat them sooner. You can freeze assembled wraps for later use. Wrap each one tightly in plastic wrap and then place in a freezer bag. They can last up to 2 months in the freezer. When ready, remove them from the freezer and let them thaw in the fridge overnight. Reheat them in the oven at 350°F (175°C) for about 10-15 minutes. This brings back their crispy goodness. Prep your ingredients in advance for quick meals. Cook the chicken and chop the veggies ahead of time. Store these separately in the fridge. When it’s time to eat, just assemble the wraps. This way, you can enjoy a fresh meal without a lot of fuss. Consider prepping several wraps at once for busy weekdays. You can bake the chicken for a crispy texture. Start by coating the chicken in flour, egg, and panko breadcrumbs. The panko gives it that nice crunch. Drizzle a little olive oil on the chicken before baking. Set your oven to 400°F (200°C). Bake for about 20-25 minutes until golden brown. This method keeps it healthier and still tasty. Yes, rotisserie chicken is a great time-saver. Shred the chicken into bite-sized pieces. This way, you skip the cooking step. Just mix it with your wrap filling. It adds flavor and saves you prep time. Look for skinless options for a lighter meal. If you want a change, try ranch or Greek yogurt dressing. Both pair well with the chicken and veggies. For a spicy twist, use buffalo sauce. You can also mix sour cream with herbs for a fresh taste. These alternatives keep the wraps fun and flavorful. To keep your wraps fresh, wrap them in foil or plastic. Store them in the fridge for up to three days. This way, they stay crisp. Avoid sogginess by keeping the filling separate if possible. Just assemble when you're ready to eat. Yes, you can prepare the filling ahead of time. Store the chicken and filling separately in the fridge. You can make the wraps just before serving. This keeps everything fresh and crunchy. Enjoy your wraps at their best with minimal effort. Check out the Full Recipe for more details! In this blog post, we covered how to make Crispy Chicken Caesar Wraps from scratch. We went through the key ingredients, step-by-step instructions, and tips for perfecting your wrap. Remember, you can customize your filling and dressings for a unique touch. Embrace the flexibility of these wraps. They can be a quick meal or a fun dish to share. Happy wrapping!

Crispy Chicken Caesar Wraps

Elevate your lunch game with these delicious Crispy Chicken Caesar Wraps! Ready in just 40 minutes, these wraps are bursting with flavor from tender chicken, fresh romaine, and creamy Caesar dressing, all wrapped up in a soft tortilla. Perfect for meal prep or a quick weeknight dinner. Click through to discover the full recipe and enjoy a tasty twist on a classic favorite that your family will love!

Ingredients
  

2 large boneless chicken breasts

1 cup panko breadcrumbs

½ cup all-purpose flour

1 large egg

1 tablespoon olive oil

1 cup romaine lettuce, chopped

½ cup cherry tomatoes, halved

½ cup Caesar dressing

¼ cup grated Parmesan cheese

4 large tortilla wraps (flour or whole wheat)

Salt and pepper to taste

Instructions
 

Preheat your oven to 400°F (200°C) and line a baking sheet with parchment paper.

    Season the chicken breasts with salt and pepper. Dredge each breast in flour, shaking off the excess.

      In a bowl, beat the egg, then dip the flour-coated chicken into the egg mixture.

        Coat the chicken in panko breadcrumbs, pressing lightly to ensure they adhere well.

          Place the breaded chicken on the prepared baking sheet and drizzle olive oil over them. Bake for 20-25 minutes, or until golden brown and cooked through (internal temperature should reach 165°F).

            While the chicken is baking, prepare the wrap filling. In a large bowl, mix the chopped romaine lettuce, halved cherry tomatoes, Caesar dressing, and grated Parmesan cheese. Toss until all ingredients are well coated.

              Once the chicken is done, let it rest for a few minutes before slicing it into strips.

                To assemble the wraps, place an equal portion of the lettuce mixture in the center of each tortilla. Add a few strips of crispy chicken on top.

                  Fold in the sides of the tortilla and then roll from the bottom up to create a wrap.

                    Slice each wrap in half diagonally for easier handling and serving.

                      Prep Time: 15 minutes | Total Time: 40 minutes | Servings: 4

                        - Presentation Tips: Serve these wraps with a side of extra Caesar dressing for dipping and sprinkle some additional Parmesan on top. Arrange on a platter with fresh basil or parsley for a colorful touch.

                          WANT TO SAVE THIS RECIPE?