![To make Crispy Beef and Cheese Chimichangas, gather these ingredients: - 1 pound ground beef - 1 small onion, finely chopped - 2 cloves garlic, minced - 1 tablespoon chili powder - 1 teaspoon cumin - 1 teaspoon paprika - Salt and pepper to taste - 1 cup shredded cheddar cheese - 1 cup shredded Monterey Jack cheese - 6 large flour tortillas - 1 cup oil (for frying) - Sour cream and salsa (for serving) - Fresh cilantro, chopped (for garnish) You can easily swap some ingredients for different flavors: - Use turkey or chicken instead of ground beef. - Try green onions if you don’t have a small onion. - Swap garlic cloves with garlic powder (1/4 teaspoon per clove). - Use taco seasoning instead of chili powder, cumin, and paprika. - For cheese, mix in pepper jack for a spicy twist. - Corn tortillas work well too but may be less flexible. To make your cooking smooth, you’ll need: - A large skillet for browning the meat - A spatula for mixing and flipping - A large pot for frying - A slotted spoon for removing chimichangas from oil - Paper towels to drain excess oil - A cutting board and knife for chopping These tools make the process easier and help you create delicious chimichangas. For the full recipe, refer to the earlier sections. To make the filling, start by heating a splash of oil in a large skillet over medium heat. Add the finely chopped onion. Sauté it until it softens, about 3-4 minutes. Next, toss in the minced garlic. Stir it for about a minute until it becomes fragrant. Then, add 1 pound of ground beef, chili powder, cumin, paprika, salt, and pepper. Cook this mixture until the beef turns brown and is no longer pink, about 6-7 minutes. Use a spoon to break up any clumps. Once cooked, remove the skillet from heat. Stir in 1 cup of shredded cheddar cheese and 1 cup of Monterey Jack cheese until they melt into the beef. Let this filling cool slightly before you assemble your chimichangas. Now that your filling is ready, it's time to assemble the chimichangas. First, warm the flour tortillas in a dry skillet or microwave. This makes them softer and easier to roll. Take a tortilla and place about 1/3 cup of the beef and cheese mixture in the center. Fold the sides of the tortilla over the filling. Then, roll it up tightly from the bottom to the top to form a chimichanga. Make sure it’s secure, so the filling doesn’t spill out while frying. Repeat this process for all six tortillas. For frying, heat 1 cup of oil in a large pot over medium-high heat until it shimmers. Carefully add each chimichanga, seam-side down, to the hot oil. Fry them for about 3-4 minutes on each side until they turn golden brown and crispy. Be sure not to overcrowd the pot; fry in batches if needed. Once they are crispy, remove them using a slotted spoon. Place the chimichangas on paper towels to drain excess oil. Serve them hot with sour cream, salsa, and a sprinkle of fresh cilantro on top. Enjoy your crispy beef and cheese chimichangas! For the full recipe, check the earlier section. To get that crunchy outside, make sure your oil is hot. Heat oil until it shimmers. Test it by dropping a small piece of tortilla in. If it sizzles, you’re ready! Fry the chimichangas seam-side down first. This keeps them closed. Fry for about 3-4 minutes on each side until golden. Drain on paper towels to remove excess oil. You can prepare the filling a day in advance. Store it in the fridge in an airtight container. When ready, warm the filling before wrapping it in tortillas. For freezing, wrap each chimichanga in plastic wrap. Place them in a freezer bag. They can stay fresh for up to three months. To cook from frozen, fry directly without thawing. Serve your chimichangas with sour cream and salsa for dipping. Fresh cilantro adds color and flavor. You can also pair them with a side of Mexican rice or beans. A light salad with lime dressing refreshes the meal. For a fun twist, add jalapeños for some heat! For the full recipe, check out the complete instructions above. {{image_2}} You can easily make vegetarian chimichangas. Replace the beef with black beans or lentils. Both are full of protein and flavor. Add in some diced bell peppers and corn for extra crunch. You can also mix in some sautéed mushrooms for a hearty bite. Use the same spices to keep the flavor strong. This way, you still get that delicious taste without the meat. Cheese is key to a great chimichanga. While I love cheddar and Monterey Jack, there are many other options. Try using pepper jack for a spicy kick. Feta adds a tangy twist that surprises your taste buds. You can also use a blend of mozzarella and gouda for a creamy texture. Experiment with different cheeses to find your favorite mix. If you like heat, add jalapeños to your filling. Fresh or pickled jalapeños both work well. You can also mix in some diced green chiles for an extra punch. For a smoky flavor, add chipotle powder or smoked paprika. These spices elevate the dish and make it exciting. Adjust the heat to your taste, so everyone can enjoy. To keep your crispy beef and cheese chimichangas fresh, store them properly. First, let them cool down. This step helps prevent sogginess. Place the chimichangas in an airtight container. You can also wrap them in plastic wrap. Keep them in the fridge for up to three days. If you want to store them longer, consider freezing. Just make sure they cool first before freezing. For the best taste, reheat chimichangas in the oven. Preheat your oven to 350°F (175°C). Place the chimichangas on a baking sheet. Heat for about 10-15 minutes. This method keeps them crispy. You can also reheat them in a skillet. Just use low heat and cover the pan. Flip them once for even heating. This will keep the outside nice and crunchy. Cooked chimichangas last for about three days in the fridge. If you freeze them, they can last up to three months. Uncooked chimichangas stay fresh for about two days in the fridge. If you freeze uncooked ones, they can last up to six months. Make sure to label your containers. This way, you’ll know when to use them. For the full recipe, check the main article. Chimichangas are deep-fried burritos. They are crispy on the outside and soft inside. The filling usually includes meat, cheese, and spices. You can find them in many Mexican restaurants. They often come with toppings like salsa or guacamole. They are tasty and filling, making them a favorite for many. Yes, you can bake chimichangas! Baking is a healthier option. To do this, preheat your oven to 425°F (220°C). Place the chimichangas seam-side down on a baking sheet. Brush them lightly with oil for crispiness. Bake for about 20-25 minutes, flipping halfway. They will turn golden and crispy without frying. You can tell chimichangas are done when they are golden brown. If frying, cook each side for 3-4 minutes. For baked chimichangas, check after 20 minutes. The filling should be hot and the tortillas crunchy. You can also use a food thermometer. The inside should reach 165°F (74°C) for safety. For more details, check the [Full Recipe]. Crispy beef and cheese chimichangas are fun and tasty to make. We covered all you need in this post, from the right ingredients to how to fry them perfectly. With easy tips for variations and storing leftovers, you can enjoy them anytime. Remember, the secret to success lies in the details, like achieving that perfect crispiness. So grab your tools and start cooking! Enjoy serving these delicious treats at your next meal.](https://toastedrecipes.com/wp-content/uploads/2025/05/4d8f8b48-e29f-42ad-bc6a-30d69dd68c61.webp)
Are you ready to enjoy a crispy, cheesy treat? My Crispy Beef and Cheese Chimichangas recipe delivers big flavor in every bite. With step-by-step instructions, you’ll learn how to make the perfect chimichangas at home. I’ll share handy tips, meal prep ideas, and delicious serving suggestions. Whether you’re cooking for a crowd or just for yourself, this dish will impress. Let’s dive into this delightful recipe!
Ingredients
List of Ingredients for Crispy Beef and Cheese Chimichangas
To make Crispy Beef and Cheese Chimichangas, gather these ingredients:
– 1 pound ground beef
– 1 small onion, finely chopped
– 2 cloves garlic, minced
– 1 tablespoon chili powder
– 1 teaspoon cumin
– 1 teaspoon paprika
– Salt and pepper to taste
– 1 cup shredded cheddar cheese
– 1 cup shredded Monterey Jack cheese
– 6 large flour tortillas
– 1 cup oil (for frying)
– Sour cream and salsa (for serving)
– Fresh cilantro, chopped (for garnish)
Ingredient Substitutions
You can easily swap some ingredients for different flavors:
– Use turkey or chicken instead of ground beef.
– Try green onions if you don’t have a small onion.
– Swap garlic cloves with garlic powder (1/4 teaspoon per clove).
– Use taco seasoning instead of chili powder, cumin, and paprika.
– For cheese, mix in pepper jack for a spicy twist.
– Corn tortillas work well too but may be less flexible.
Tools Needed for Preparation
To make your cooking smooth, you’ll need:
– A large skillet for browning the meat
– A spatula for mixing and flipping
– A large pot for frying
– A slotted spoon for removing chimichangas from oil
– Paper towels to drain excess oil
– A cutting board and knife for chopping
These tools make the process easier and help you create delicious chimichangas. For the full recipe, refer to the earlier sections.
Step-by-Step Instructions
Detailed Instructions for Cooking the Filling
To make the filling, start by heating a splash of oil in a large skillet over medium heat. Add the finely chopped onion. Sauté it until it softens, about 3-4 minutes. Next, toss in the minced garlic. Stir it for about a minute until it becomes fragrant. Then, add 1 pound of ground beef, chili powder, cumin, paprika, salt, and pepper. Cook this mixture until the beef turns brown and is no longer pink, about 6-7 minutes. Use a spoon to break up any clumps. Once cooked, remove the skillet from heat. Stir in 1 cup of shredded cheddar cheese and 1 cup of Monterey Jack cheese until they melt into the beef. Let this filling cool slightly before you assemble your chimichangas.
How to Assemble the Chimichangas
Now that your filling is ready, it’s time to assemble the chimichangas. First, warm the flour tortillas in a dry skillet or microwave. This makes them softer and easier to roll. Take a tortilla and place about 1/3 cup of the beef and cheese mixture in the center. Fold the sides of the tortilla over the filling. Then, roll it up tightly from the bottom to the top to form a chimichanga. Make sure it’s secure, so the filling doesn’t spill out while frying. Repeat this process for all six tortillas.
Frying the Chimichangas to Perfection
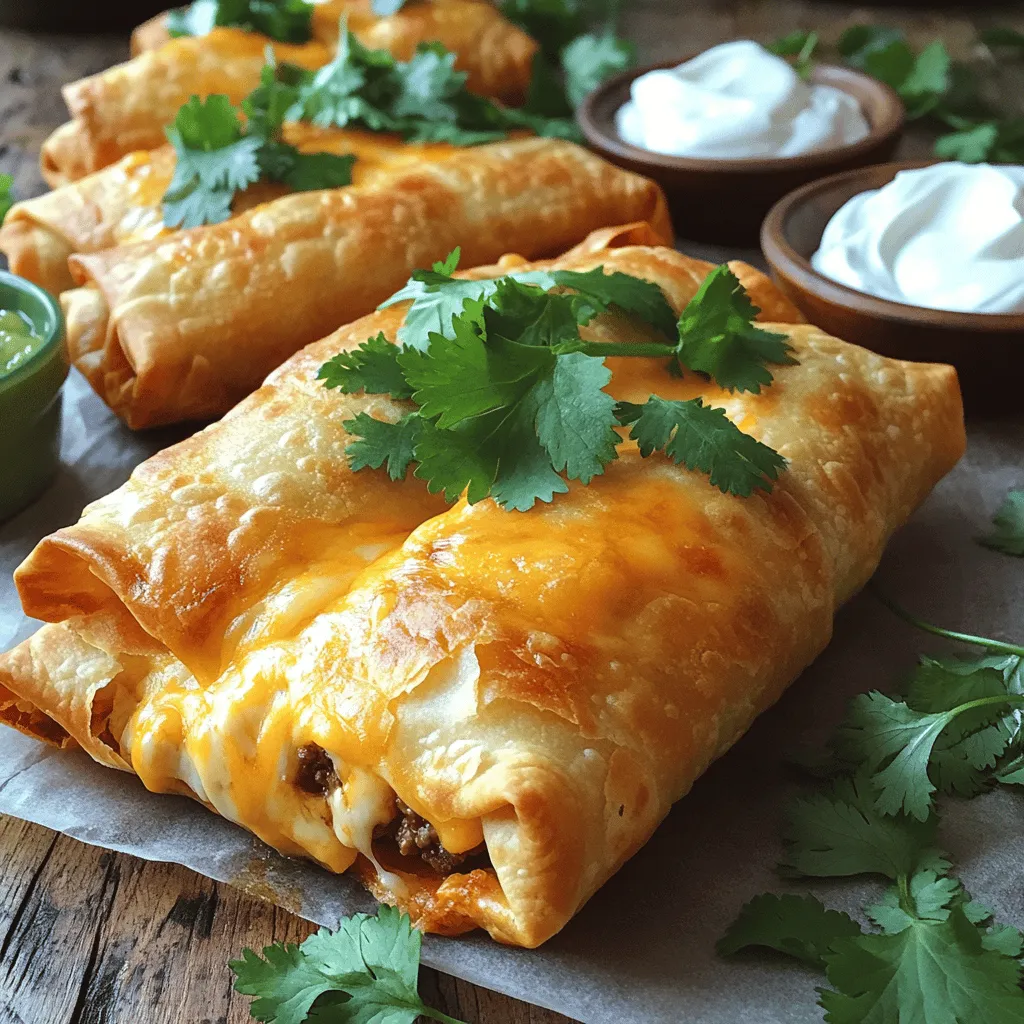
For frying, heat 1 cup of oil in a large pot over medium-high heat until it shimmers. Carefully add each chimichanga, seam-side down, to the hot oil. Fry them for about 3-4 minutes on each side until they turn golden brown and crispy. Be sure not to overcrowd the pot; fry in batches if needed. Once they are crispy, remove them using a slotted spoon. Place the chimichangas on paper towels to drain excess oil. Serve them hot with sour cream, salsa, and a sprinkle of fresh cilantro on top. Enjoy your crispy beef and cheese chimichangas! For the full recipe, check the earlier section.
Tips & Tricks
How to Achieve the Perfect Crispiness
To get that crunchy outside, make sure your oil is hot. Heat oil until it shimmers. Test it by dropping a small piece of tortilla in. If it sizzles, you’re ready! Fry the chimichangas seam-side down first. This keeps them closed. Fry for about 3-4 minutes on each side until golden. Drain on paper towels to remove excess oil.
Making Ahead and Freezing Tips
You can prepare the filling a day in advance. Store it in the fridge in an airtight container. When ready, warm the filling before wrapping it in tortillas. For freezing, wrap each chimichanga in plastic wrap. Place them in a freezer bag. They can stay fresh for up to three months. To cook from frozen, fry directly without thawing.
Serving Suggestions and Pairing Ideas
Serve your chimichangas with sour cream and salsa for dipping. Fresh cilantro adds color and flavor. You can also pair them with a side of Mexican rice or beans. A light salad with lime dressing refreshes the meal. For a fun twist, add jalapeños for some heat! For the full recipe, check out the complete instructions above.
Variations
Vegetarian Options for Chimichangas
You can easily make vegetarian chimichangas. Replace the beef with black beans or lentils. Both are full of protein and flavor. Add in some diced bell peppers and corn for extra crunch. You can also mix in some sautéed mushrooms for a hearty bite. Use the same spices to keep the flavor strong. This way, you still get that delicious taste without the meat.
Alternative Cheese Combinations
Cheese is key to a great chimichanga. While I love cheddar and Monterey Jack, there are many other options. Try using pepper jack for a spicy kick. Feta adds a tangy twist that surprises your taste buds. You can also use a blend of mozzarella and gouda for a creamy texture. Experiment with different cheeses to find your favorite mix.
Spicy Additions to Enhance Flavor
If you like heat, add jalapeños to your filling. Fresh or pickled jalapeños both work well. You can also mix in some diced green chiles for an extra punch. For a smoky flavor, add chipotle powder or smoked paprika. These spices elevate the dish and make it exciting. Adjust the heat to your taste, so everyone can enjoy.
Storage Info
Best Practices for Storing Leftovers
To keep your crispy beef and cheese chimichangas fresh, store them properly. First, let them cool down. This step helps prevent sogginess. Place the chimichangas in an airtight container. You can also wrap them in plastic wrap. Keep them in the fridge for up to three days. If you want to store them longer, consider freezing. Just make sure they cool first before freezing.
Reheating Methods for Optimal Taste
For the best taste, reheat chimichangas in the oven. Preheat your oven to 350°F (175°C). Place the chimichangas on a baking sheet. Heat for about 10-15 minutes. This method keeps them crispy. You can also reheat them in a skillet. Just use low heat and cover the pan. Flip them once for even heating. This will keep the outside nice and crunchy.
Shelf Life of Cooked and Uncooked Chimichangas
Cooked chimichangas last for about three days in the fridge. If you freeze them, they can last up to three months. Uncooked chimichangas stay fresh for about two days in the fridge. If you freeze uncooked ones, they can last up to six months. Make sure to label your containers. This way, you’ll know when to use them. For the full recipe, check the main article.
FAQs
What are Chimichangas?
Chimichangas are deep-fried burritos. They are crispy on the outside and soft inside. The filling usually includes meat, cheese, and spices. You can find them in many Mexican restaurants. They often come with toppings like salsa or guacamole. They are tasty and filling, making them a favorite for many.
Can I bake Chimichangas instead of frying?
Yes, you can bake chimichangas! Baking is a healthier option. To do this, preheat your oven to 425°F (220°C). Place the chimichangas seam-side down on a baking sheet. Brush them lightly with oil for crispiness. Bake for about 20-25 minutes, flipping halfway. They will turn golden and crispy without frying.
How do I know when Chimichangas are done cooking?
You can tell chimichangas are done when they are golden brown. If frying, cook each side for 3-4 minutes. For baked chimichangas, check after 20 minutes. The filling should be hot and the tortillas crunchy. You can also use a food thermometer. The inside should reach 165°F (74°C) for safety.
For more details, check the [Full Recipe].
Crispy beef and cheese chimichangas are fun and tasty to make. We covered all you need in this post, from the right ingredients to how to fry them perfectly. With easy tips for variations and storing leftovers, you can enjoy them anytime. Remember, the secret to success lies in the details, like achieving that perfect crispiness. So grab your tools and start cooking! Enjoy serving these delicious treats at your next meal.
![To make Crispy Beef and Cheese Chimichangas, gather these ingredients: - 1 pound ground beef - 1 small onion, finely chopped - 2 cloves garlic, minced - 1 tablespoon chili powder - 1 teaspoon cumin - 1 teaspoon paprika - Salt and pepper to taste - 1 cup shredded cheddar cheese - 1 cup shredded Monterey Jack cheese - 6 large flour tortillas - 1 cup oil (for frying) - Sour cream and salsa (for serving) - Fresh cilantro, chopped (for garnish) You can easily swap some ingredients for different flavors: - Use turkey or chicken instead of ground beef. - Try green onions if you don’t have a small onion. - Swap garlic cloves with garlic powder (1/4 teaspoon per clove). - Use taco seasoning instead of chili powder, cumin, and paprika. - For cheese, mix in pepper jack for a spicy twist. - Corn tortillas work well too but may be less flexible. To make your cooking smooth, you’ll need: - A large skillet for browning the meat - A spatula for mixing and flipping - A large pot for frying - A slotted spoon for removing chimichangas from oil - Paper towels to drain excess oil - A cutting board and knife for chopping These tools make the process easier and help you create delicious chimichangas. For the full recipe, refer to the earlier sections. To make the filling, start by heating a splash of oil in a large skillet over medium heat. Add the finely chopped onion. Sauté it until it softens, about 3-4 minutes. Next, toss in the minced garlic. Stir it for about a minute until it becomes fragrant. Then, add 1 pound of ground beef, chili powder, cumin, paprika, salt, and pepper. Cook this mixture until the beef turns brown and is no longer pink, about 6-7 minutes. Use a spoon to break up any clumps. Once cooked, remove the skillet from heat. Stir in 1 cup of shredded cheddar cheese and 1 cup of Monterey Jack cheese until they melt into the beef. Let this filling cool slightly before you assemble your chimichangas. Now that your filling is ready, it's time to assemble the chimichangas. First, warm the flour tortillas in a dry skillet or microwave. This makes them softer and easier to roll. Take a tortilla and place about 1/3 cup of the beef and cheese mixture in the center. Fold the sides of the tortilla over the filling. Then, roll it up tightly from the bottom to the top to form a chimichanga. Make sure it’s secure, so the filling doesn’t spill out while frying. Repeat this process for all six tortillas. For frying, heat 1 cup of oil in a large pot over medium-high heat until it shimmers. Carefully add each chimichanga, seam-side down, to the hot oil. Fry them for about 3-4 minutes on each side until they turn golden brown and crispy. Be sure not to overcrowd the pot; fry in batches if needed. Once they are crispy, remove them using a slotted spoon. Place the chimichangas on paper towels to drain excess oil. Serve them hot with sour cream, salsa, and a sprinkle of fresh cilantro on top. Enjoy your crispy beef and cheese chimichangas! For the full recipe, check the earlier section. To get that crunchy outside, make sure your oil is hot. Heat oil until it shimmers. Test it by dropping a small piece of tortilla in. If it sizzles, you’re ready! Fry the chimichangas seam-side down first. This keeps them closed. Fry for about 3-4 minutes on each side until golden. Drain on paper towels to remove excess oil. You can prepare the filling a day in advance. Store it in the fridge in an airtight container. When ready, warm the filling before wrapping it in tortillas. For freezing, wrap each chimichanga in plastic wrap. Place them in a freezer bag. They can stay fresh for up to three months. To cook from frozen, fry directly without thawing. Serve your chimichangas with sour cream and salsa for dipping. Fresh cilantro adds color and flavor. You can also pair them with a side of Mexican rice or beans. A light salad with lime dressing refreshes the meal. For a fun twist, add jalapeños for some heat! For the full recipe, check out the complete instructions above. {{image_2}} You can easily make vegetarian chimichangas. Replace the beef with black beans or lentils. Both are full of protein and flavor. Add in some diced bell peppers and corn for extra crunch. You can also mix in some sautéed mushrooms for a hearty bite. Use the same spices to keep the flavor strong. This way, you still get that delicious taste without the meat. Cheese is key to a great chimichanga. While I love cheddar and Monterey Jack, there are many other options. Try using pepper jack for a spicy kick. Feta adds a tangy twist that surprises your taste buds. You can also use a blend of mozzarella and gouda for a creamy texture. Experiment with different cheeses to find your favorite mix. If you like heat, add jalapeños to your filling. Fresh or pickled jalapeños both work well. You can also mix in some diced green chiles for an extra punch. For a smoky flavor, add chipotle powder or smoked paprika. These spices elevate the dish and make it exciting. Adjust the heat to your taste, so everyone can enjoy. To keep your crispy beef and cheese chimichangas fresh, store them properly. First, let them cool down. This step helps prevent sogginess. Place the chimichangas in an airtight container. You can also wrap them in plastic wrap. Keep them in the fridge for up to three days. If you want to store them longer, consider freezing. Just make sure they cool first before freezing. For the best taste, reheat chimichangas in the oven. Preheat your oven to 350°F (175°C). Place the chimichangas on a baking sheet. Heat for about 10-15 minutes. This method keeps them crispy. You can also reheat them in a skillet. Just use low heat and cover the pan. Flip them once for even heating. This will keep the outside nice and crunchy. Cooked chimichangas last for about three days in the fridge. If you freeze them, they can last up to three months. Uncooked chimichangas stay fresh for about two days in the fridge. If you freeze uncooked ones, they can last up to six months. Make sure to label your containers. This way, you’ll know when to use them. For the full recipe, check the main article. Chimichangas are deep-fried burritos. They are crispy on the outside and soft inside. The filling usually includes meat, cheese, and spices. You can find them in many Mexican restaurants. They often come with toppings like salsa or guacamole. They are tasty and filling, making them a favorite for many. Yes, you can bake chimichangas! Baking is a healthier option. To do this, preheat your oven to 425°F (220°C). Place the chimichangas seam-side down on a baking sheet. Brush them lightly with oil for crispiness. Bake for about 20-25 minutes, flipping halfway. They will turn golden and crispy without frying. You can tell chimichangas are done when they are golden brown. If frying, cook each side for 3-4 minutes. For baked chimichangas, check after 20 minutes. The filling should be hot and the tortillas crunchy. You can also use a food thermometer. The inside should reach 165°F (74°C) for safety. For more details, check the [Full Recipe]. Crispy beef and cheese chimichangas are fun and tasty to make. We covered all you need in this post, from the right ingredients to how to fry them perfectly. With easy tips for variations and storing leftovers, you can enjoy them anytime. Remember, the secret to success lies in the details, like achieving that perfect crispiness. So grab your tools and start cooking! Enjoy serving these delicious treats at your next meal.](https://toastedrecipes.com/wp-content/uploads/2025/05/4d8f8b48-e29f-42ad-bc6a-30d69dd68c61-300x300.webp)