![- 2 tablespoons vegetable oil - 1 large onion, diced - 4 cloves garlic, minced - 2 pounds beef chuck, cut into 1-inch cubes - 4 cups beef broth The base of Colorado green chili starts with quality ingredients. Vegetable oil brings fat to the dish, which is key for cooking. I use one large onion, diced finely, to add sweetness and depth. Four cloves of minced garlic enhance the flavor profile, giving the chili a robust taste. Next, I add two pounds of beef chuck, cut into one-inch cubes. This cut is perfect for slow cooking and becomes tender over time. Four cups of beef broth create a rich, savory foundation. This broth helps meld all the flavors together as it simmers. For the chiles, I recommend using either Hatch or Anaheim. Hatch chiles have a smoky, rich flavor, while Anaheim chiles are milder and offer a fresh taste. Both types work well in this dish. To prepare the chiles, roast them over an open flame until their skin blisters. This step enhances their flavor. After roasting, place them in a paper bag for about 10 minutes. This makes peeling easy. Once cool, remove the skins and seeds, then dice them for your chili. I add two medium potatoes, peeled and diced, for texture and heartiness. They soak up all the flavors and make the chili more filling. Key spices include: - 1 teaspoon ground cumin - 1 teaspoon dried oregano - 1/2 teaspoon smoked paprika These spices give the chili its unique taste. Don't forget salt and pepper to taste; they balance the flavors and elevate the dish. You can find the full recipe for Colorado green chili [Full Recipe]. First, grab a large pot and heat 2 tablespoons of vegetable oil over medium heat. Once the oil is hot, add 1 diced large onion and 4 minced garlic cloves. Sauté these until the onion turns translucent, which takes about 5 minutes. You want to see a nice light golden color. This step builds a solid flavor base, so don't rush it. If the onions start to brown too quickly, lower the heat. Next, raise the heat to medium-high and add 2 pounds of beef chuck, cut into 1-inch cubes. Browning the meat is key for deep flavor. Cook the beef for about 8 to 10 minutes, turning to brown all sides. Get that nice crust, but avoid overcrowding the pot. If your pot is too full, the meat will steam, not brown. Once the beef is browned, pour in 4 cups of beef broth. Make sure the broth covers the meat. Then, stir in 6-8 roasted and diced green chiles, along with 2 diced medium potatoes. Add 1 teaspoon of ground cumin, 1 teaspoon of dried oregano, and 1/2 teaspoon of smoked paprika. Don't forget to season with salt and pepper! Stir everything together to mix well. The right consistency should be thick but soupy, perfect for a chili. Now, bring the pot to a boil. After that, reduce the heat to low, cover, and let it simmer. Cook for 1.5 to 2 hours. This slow cooking helps the flavors blend and the meat to become tender. Check the chili occasionally, stirring gently. It's done when the beef is soft and the flavors are rich. Enjoy this time; it’s all part of the process of making the perfect Colorado Green Chili. For the full recipe, check out the complete list of ingredients and steps. To make your beef tender, choose chuck. It has great fat and flavor. Sear the beef well for a rich taste. Cook on low heat to keep it juicy. Add the broth only after browning. This helps the meat soak in the flavors. For spice levels, taste as you go. Start with fewer chiles to avoid too much heat. You can always add more later. If it’s too spicy, add more potatoes. They help absorb some heat. Serve your Colorado green chili in deep bowls. This gives it a nice look. Sprinkle fresh cilantro on top for color. A dollop of sour cream adds creaminess. Shredded cheese makes it even better. Warm tortillas on the side are perfect for dipping. Use a heavy pot, like cast iron or a Dutch oven. They hold heat well and cook evenly. A good knife helps with chopping. Keep it sharp for easy cutting. This makes prep work quick and safe. Having a sturdy wooden spoon is also helpful for stirring. For the full recipe, check out the [Full Recipe]. {{image_2}} To make a vegetarian version, you can swap meat for beans. Black beans or pinto beans work great. You can also use lentils for a hearty feel. This keeps the dish filling and tasty. You should reduce cooking time when using beans. Beans usually cook faster than beef. Simmer the chili for about 30-45 minutes instead of the full 1.5 to 2 hours. This way, the flavors blend well without overcooking the beans. Colorado green chili can be mild or spicy. If you prefer mild, use fewer chiles. You can start with just two or three green chiles. You can also remove the seeds for less heat. For a spicy kick, add more chiles. You can also mix in diced jalapeños or a pinch of cayenne pepper. Just remember to taste as you go. This helps you find the right heat level for you. Each county in Colorado has its unique spin on green chili. Some places use different types of chiles or add unique spices. The use of local ingredients can really change the flavor. For example, some areas might add corn or even beer. Try exploring recipes from various regions. You’ll find exciting twists that make this dish even more delightful. You can also learn how to use local produce to add fresh flavors. After enjoying your Colorado green chili, let it cool down. Cooling it helps keep the flavor. Transfer your cooled chili into airtight containers. Make sure to seal them well. This keeps air out and avoids freezer burn. If you need to store it for a long time, consider freezing it. When you reheat the chili, do it gently. Use a pot on low heat to warm it up. Stir often to keep the heat even. If you prefer, you can microwave it in short bursts. This method keeps the flavor strong. To avoid mushy texture, don’t overcook it again. You can freeze Colorado green chili for later use. Pour it into freezer-safe containers or bags. Squeeze out any extra air before sealing. This helps prevent freezer burn. It can last in the freezer for up to three months. When you’re ready, just thaw and reheat. Check out [Full Recipe] for more details on making this delicious dish! Green chili and chili verde are not the same. Green chili uses roasted green chiles, beef, and spices. Chili verde, on the other hand, often uses tomatillos and pork. Both dishes are flavorful but differ in key ingredients and taste. Green chili is thick and hearty, while chili verde is more tangy and fresh. Yes, you can use a slow cooker for Colorado Green Chili. Start by browning the beef in a pan. This step adds great flavor. Then, add all ingredients to the slow cooker. Set it on low for about 6 to 8 hours. This method lets the flavors blend beautifully. Colorado Green Chili can be spicy, but it depends on the chiles you use. Hatch chiles are milder, while Anaheim chiles can pack a bit more heat. If you want less spice, remove the seeds and ribs from the chiles before adding them. You can also control heat by adjusting the number of chiles. Colorado Green Chili pairs well with several sides. Here are some great options: - Warm tortillas for dipping - Rice to soak up the sauce - Cornbread for a sweet touch - A simple salad for freshness These sides enhance the meal and add variety to your plate. Enjoy experimenting with these pairings! You now have the keys to making delicious Colorado Green Chili. We've covered essential ingredients, from chiles to spices, and step-by-step instructions for perfecting each bite. I shared cooking tips to enhance flavor and texture, along with variations for every taste. Plus, I detailed storage and reheating techniques to keep your chili fresh. Remember, cooking is about having fun and experimenting. Use this guide as your roadmap, and enjoy creating your own tasty versions of this classic dish. Happy cooking!](https://toastedrecipes.com/wp-content/uploads/2025/08/9b76e490-de1c-4498-a4e1-2670cb1f56c5.webp)
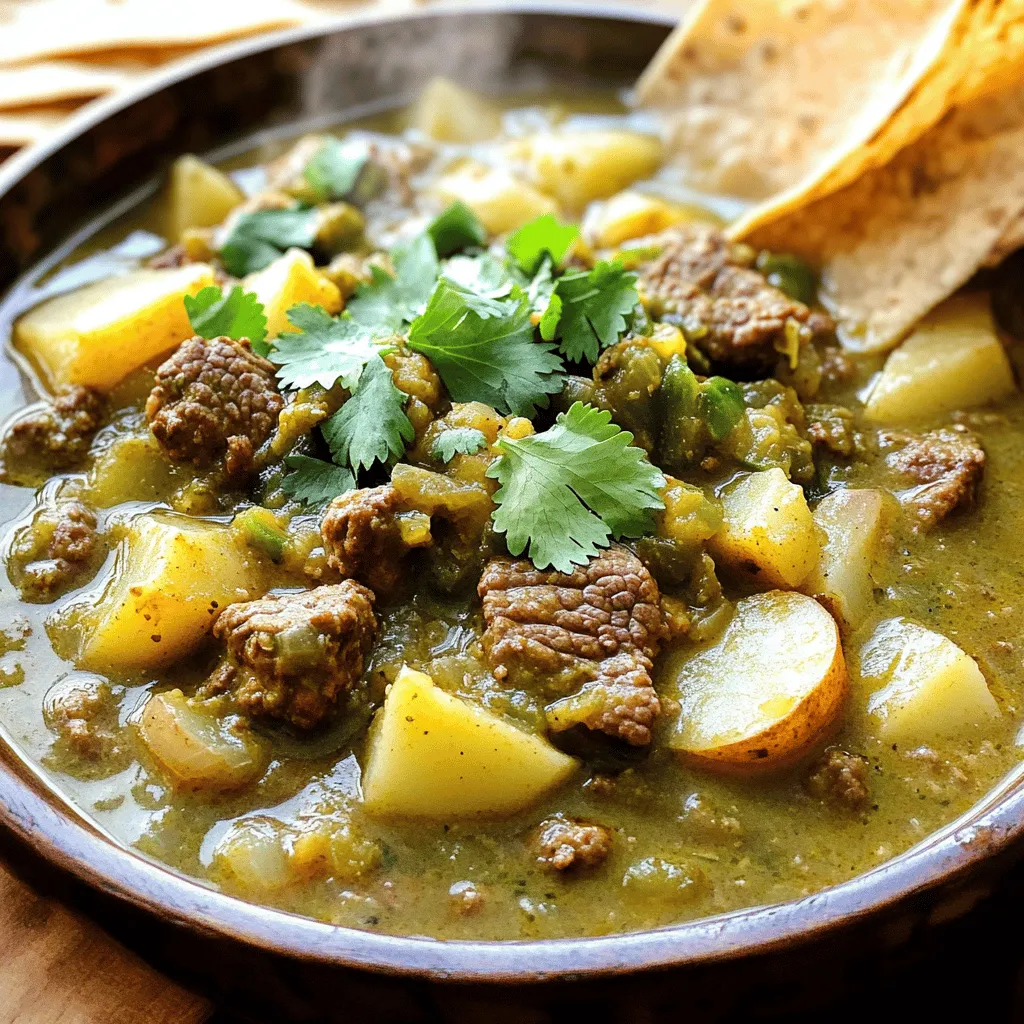
If you crave a dish packed with bold flavors and warmth, Colorado Green Chili is your answer. This savory delight combines tender beef, fire-roasted green chiles, and spices that dance on your palate. I’ll guide you step-by-step through making this comforting meal, ensuring you impress friends and family with each bite. Ready to dive into a world of flavor? Let’s get started!
Ingredients
Essential Ingredients for Colorado Green Chili
– 2 tablespoons vegetable oil
– 1 large onion, diced
– 4 cloves garlic, minced
– 2 pounds beef chuck, cut into 1-inch cubes
– 4 cups beef broth
The base of Colorado green chili starts with quality ingredients. Vegetable oil brings fat to the dish, which is key for cooking. I use one large onion, diced finely, to add sweetness and depth. Four cloves of minced garlic enhance the flavor profile, giving the chili a robust taste.
Next, I add two pounds of beef chuck, cut into one-inch cubes. This cut is perfect for slow cooking and becomes tender over time. Four cups of beef broth create a rich, savory foundation. This broth helps meld all the flavors together as it simmers.
Green Chiles
For the chiles, I recommend using either Hatch or Anaheim. Hatch chiles have a smoky, rich flavor, while Anaheim chiles are milder and offer a fresh taste. Both types work well in this dish.
To prepare the chiles, roast them over an open flame until their skin blisters. This step enhances their flavor. After roasting, place them in a paper bag for about 10 minutes. This makes peeling easy. Once cool, remove the skins and seeds, then dice them for your chili.
Additional Seasonings and Vegetables
I add two medium potatoes, peeled and diced, for texture and heartiness. They soak up all the flavors and make the chili more filling.
Key spices include:
– 1 teaspoon ground cumin
– 1 teaspoon dried oregano
– 1/2 teaspoon smoked paprika
These spices give the chili its unique taste. Don’t forget salt and pepper to taste; they balance the flavors and elevate the dish.
You can find the full recipe for Colorado green chili [Full Recipe].
Step-by-Step Instructions
Preparing the Base
First, grab a large pot and heat 2 tablespoons of vegetable oil over medium heat. Once the oil is hot, add 1 diced large onion and 4 minced garlic cloves. Sauté these until the onion turns translucent, which takes about 5 minutes. You want to see a nice light golden color. This step builds a solid flavor base, so don’t rush it. If the onions start to brown too quickly, lower the heat.
Browning the Beef
Next, raise the heat to medium-high and add 2 pounds of beef chuck, cut into 1-inch cubes. Browning the meat is key for deep flavor. Cook the beef for about 8 to 10 minutes, turning to brown all sides. Get that nice crust, but avoid overcrowding the pot. If your pot is too full, the meat will steam, not brown.
Combining Ingredients
Once the beef is browned, pour in 4 cups of beef broth. Make sure the broth covers the meat. Then, stir in 6-8 roasted and diced green chiles, along with 2 diced medium potatoes. Add 1 teaspoon of ground cumin, 1 teaspoon of dried oregano, and 1/2 teaspoon of smoked paprika. Don’t forget to season with salt and pepper! Stir everything together to mix well. The right consistency should be thick but soupy, perfect for a chili.
Cooking Time
Now, bring the pot to a boil. After that, reduce the heat to low, cover, and let it simmer. Cook for 1.5 to 2 hours. This slow cooking helps the flavors blend and the meat to become tender. Check the chili occasionally, stirring gently. It’s done when the beef is soft and the flavors are rich. Enjoy this time; it’s all part of the process of making the perfect Colorado Green Chili. For the full recipe, check out the complete list of ingredients and steps.
Tips & Tricks
Perfecting Your Colorado Green Chili
To make your beef tender, choose chuck. It has great fat and flavor. Sear the beef well for a rich taste. Cook on low heat to keep it juicy. Add the broth only after browning. This helps the meat soak in the flavors.
For spice levels, taste as you go. Start with fewer chiles to avoid too much heat. You can always add more later. If it’s too spicy, add more potatoes. They help absorb some heat.
Garnishing for Presentation
Serve your Colorado green chili in deep bowls. This gives it a nice look. Sprinkle fresh cilantro on top for color. A dollop of sour cream adds creaminess. Shredded cheese makes it even better. Warm tortillas on the side are perfect for dipping.
Kitchen Equipment Recommendations
Use a heavy pot, like cast iron or a Dutch oven. They hold heat well and cook evenly. A good knife helps with chopping. Keep it sharp for easy cutting. This makes prep work quick and safe. Having a sturdy wooden spoon is also helpful for stirring.
For the full recipe, check out the [Full Recipe].
Variations
Vegetarian Colorado Green Chili
To make a vegetarian version, you can swap meat for beans. Black beans or pinto beans work great. You can also use lentils for a hearty feel. This keeps the dish filling and tasty.
You should reduce cooking time when using beans. Beans usually cook faster than beef. Simmer the chili for about 30-45 minutes instead of the full 1.5 to 2 hours. This way, the flavors blend well without overcooking the beans.
Spice Levels
Colorado green chili can be mild or spicy. If you prefer mild, use fewer chiles. You can start with just two or three green chiles. You can also remove the seeds for less heat.
For a spicy kick, add more chiles. You can also mix in diced jalapeños or a pinch of cayenne pepper. Just remember to taste as you go. This helps you find the right heat level for you.
Regional Variations
Each county in Colorado has its unique spin on green chili. Some places use different types of chiles or add unique spices. The use of local ingredients can really change the flavor. For example, some areas might add corn or even beer.
Try exploring recipes from various regions. You’ll find exciting twists that make this dish even more delightful. You can also learn how to use local produce to add fresh flavors.
Storage Info
Best Practices for Storing Leftover Chili
After enjoying your Colorado green chili, let it cool down. Cooling it helps keep the flavor. Transfer your cooled chili into airtight containers. Make sure to seal them well. This keeps air out and avoids freezer burn. If you need to store it for a long time, consider freezing it.
Reheating Recommendations
When you reheat the chili, do it gently. Use a pot on low heat to warm it up. Stir often to keep the heat even. If you prefer, you can microwave it in short bursts. This method keeps the flavor strong. To avoid mushy texture, don’t overcook it again.
Freezing Colorado Green Chili
You can freeze Colorado green chili for later use. Pour it into freezer-safe containers or bags. Squeeze out any extra air before sealing. This helps prevent freezer burn. It can last in the freezer for up to three months. When you’re ready, just thaw and reheat. Check out [Full Recipe] for more details on making this delicious dish!
FAQs
What is the difference between green chili and chili verde?
Green chili and chili verde are not the same. Green chili uses roasted green chiles, beef, and spices. Chili verde, on the other hand, often uses tomatillos and pork. Both dishes are flavorful but differ in key ingredients and taste. Green chili is thick and hearty, while chili verde is more tangy and fresh.
Can I make Colorado Green Chili in a slow cooker?
Yes, you can use a slow cooker for Colorado Green Chili. Start by browning the beef in a pan. This step adds great flavor. Then, add all ingredients to the slow cooker. Set it on low for about 6 to 8 hours. This method lets the flavors blend beautifully.
Is Colorado Green Chili typically spicy?
Colorado Green Chili can be spicy, but it depends on the chiles you use. Hatch chiles are milder, while Anaheim chiles can pack a bit more heat. If you want less spice, remove the seeds and ribs from the chiles before adding them. You can also control heat by adjusting the number of chiles.
What can I serve with Colorado Green Chili?
Colorado Green Chili pairs well with several sides. Here are some great options:
– Warm tortillas for dipping
– Rice to soak up the sauce
– Cornbread for a sweet touch
– A simple salad for freshness
These sides enhance the meal and add variety to your plate. Enjoy experimenting with these pairings!
You now have the keys to making delicious Colorado Green Chili. We’ve covered essential ingredients, from chiles to spices, and step-by-step instructions for perfecting each bite. I shared cooking tips to enhance flavor and texture, along with variations for every taste. Plus, I detailed storage and reheating techniques to keep your chili fresh. Remember, cooking is about having fun and experimenting. Use this guide as your roadmap, and enjoy creating your own tasty versions of this classic dish. Happy cooking!
![- 2 tablespoons vegetable oil - 1 large onion, diced - 4 cloves garlic, minced - 2 pounds beef chuck, cut into 1-inch cubes - 4 cups beef broth The base of Colorado green chili starts with quality ingredients. Vegetable oil brings fat to the dish, which is key for cooking. I use one large onion, diced finely, to add sweetness and depth. Four cloves of minced garlic enhance the flavor profile, giving the chili a robust taste. Next, I add two pounds of beef chuck, cut into one-inch cubes. This cut is perfect for slow cooking and becomes tender over time. Four cups of beef broth create a rich, savory foundation. This broth helps meld all the flavors together as it simmers. For the chiles, I recommend using either Hatch or Anaheim. Hatch chiles have a smoky, rich flavor, while Anaheim chiles are milder and offer a fresh taste. Both types work well in this dish. To prepare the chiles, roast them over an open flame until their skin blisters. This step enhances their flavor. After roasting, place them in a paper bag for about 10 minutes. This makes peeling easy. Once cool, remove the skins and seeds, then dice them for your chili. I add two medium potatoes, peeled and diced, for texture and heartiness. They soak up all the flavors and make the chili more filling. Key spices include: - 1 teaspoon ground cumin - 1 teaspoon dried oregano - 1/2 teaspoon smoked paprika These spices give the chili its unique taste. Don't forget salt and pepper to taste; they balance the flavors and elevate the dish. You can find the full recipe for Colorado green chili [Full Recipe]. First, grab a large pot and heat 2 tablespoons of vegetable oil over medium heat. Once the oil is hot, add 1 diced large onion and 4 minced garlic cloves. Sauté these until the onion turns translucent, which takes about 5 minutes. You want to see a nice light golden color. This step builds a solid flavor base, so don't rush it. If the onions start to brown too quickly, lower the heat. Next, raise the heat to medium-high and add 2 pounds of beef chuck, cut into 1-inch cubes. Browning the meat is key for deep flavor. Cook the beef for about 8 to 10 minutes, turning to brown all sides. Get that nice crust, but avoid overcrowding the pot. If your pot is too full, the meat will steam, not brown. Once the beef is browned, pour in 4 cups of beef broth. Make sure the broth covers the meat. Then, stir in 6-8 roasted and diced green chiles, along with 2 diced medium potatoes. Add 1 teaspoon of ground cumin, 1 teaspoon of dried oregano, and 1/2 teaspoon of smoked paprika. Don't forget to season with salt and pepper! Stir everything together to mix well. The right consistency should be thick but soupy, perfect for a chili. Now, bring the pot to a boil. After that, reduce the heat to low, cover, and let it simmer. Cook for 1.5 to 2 hours. This slow cooking helps the flavors blend and the meat to become tender. Check the chili occasionally, stirring gently. It's done when the beef is soft and the flavors are rich. Enjoy this time; it’s all part of the process of making the perfect Colorado Green Chili. For the full recipe, check out the complete list of ingredients and steps. To make your beef tender, choose chuck. It has great fat and flavor. Sear the beef well for a rich taste. Cook on low heat to keep it juicy. Add the broth only after browning. This helps the meat soak in the flavors. For spice levels, taste as you go. Start with fewer chiles to avoid too much heat. You can always add more later. If it’s too spicy, add more potatoes. They help absorb some heat. Serve your Colorado green chili in deep bowls. This gives it a nice look. Sprinkle fresh cilantro on top for color. A dollop of sour cream adds creaminess. Shredded cheese makes it even better. Warm tortillas on the side are perfect for dipping. Use a heavy pot, like cast iron or a Dutch oven. They hold heat well and cook evenly. A good knife helps with chopping. Keep it sharp for easy cutting. This makes prep work quick and safe. Having a sturdy wooden spoon is also helpful for stirring. For the full recipe, check out the [Full Recipe]. {{image_2}} To make a vegetarian version, you can swap meat for beans. Black beans or pinto beans work great. You can also use lentils for a hearty feel. This keeps the dish filling and tasty. You should reduce cooking time when using beans. Beans usually cook faster than beef. Simmer the chili for about 30-45 minutes instead of the full 1.5 to 2 hours. This way, the flavors blend well without overcooking the beans. Colorado green chili can be mild or spicy. If you prefer mild, use fewer chiles. You can start with just two or three green chiles. You can also remove the seeds for less heat. For a spicy kick, add more chiles. You can also mix in diced jalapeños or a pinch of cayenne pepper. Just remember to taste as you go. This helps you find the right heat level for you. Each county in Colorado has its unique spin on green chili. Some places use different types of chiles or add unique spices. The use of local ingredients can really change the flavor. For example, some areas might add corn or even beer. Try exploring recipes from various regions. You’ll find exciting twists that make this dish even more delightful. You can also learn how to use local produce to add fresh flavors. After enjoying your Colorado green chili, let it cool down. Cooling it helps keep the flavor. Transfer your cooled chili into airtight containers. Make sure to seal them well. This keeps air out and avoids freezer burn. If you need to store it for a long time, consider freezing it. When you reheat the chili, do it gently. Use a pot on low heat to warm it up. Stir often to keep the heat even. If you prefer, you can microwave it in short bursts. This method keeps the flavor strong. To avoid mushy texture, don’t overcook it again. You can freeze Colorado green chili for later use. Pour it into freezer-safe containers or bags. Squeeze out any extra air before sealing. This helps prevent freezer burn. It can last in the freezer for up to three months. When you’re ready, just thaw and reheat. Check out [Full Recipe] for more details on making this delicious dish! Green chili and chili verde are not the same. Green chili uses roasted green chiles, beef, and spices. Chili verde, on the other hand, often uses tomatillos and pork. Both dishes are flavorful but differ in key ingredients and taste. Green chili is thick and hearty, while chili verde is more tangy and fresh. Yes, you can use a slow cooker for Colorado Green Chili. Start by browning the beef in a pan. This step adds great flavor. Then, add all ingredients to the slow cooker. Set it on low for about 6 to 8 hours. This method lets the flavors blend beautifully. Colorado Green Chili can be spicy, but it depends on the chiles you use. Hatch chiles are milder, while Anaheim chiles can pack a bit more heat. If you want less spice, remove the seeds and ribs from the chiles before adding them. You can also control heat by adjusting the number of chiles. Colorado Green Chili pairs well with several sides. Here are some great options: - Warm tortillas for dipping - Rice to soak up the sauce - Cornbread for a sweet touch - A simple salad for freshness These sides enhance the meal and add variety to your plate. Enjoy experimenting with these pairings! You now have the keys to making delicious Colorado Green Chili. We've covered essential ingredients, from chiles to spices, and step-by-step instructions for perfecting each bite. I shared cooking tips to enhance flavor and texture, along with variations for every taste. Plus, I detailed storage and reheating techniques to keep your chili fresh. Remember, cooking is about having fun and experimenting. Use this guide as your roadmap, and enjoy creating your own tasty versions of this classic dish. Happy cooking!](https://toastedrecipes.com/wp-content/uploads/2025/08/9b76e490-de1c-4498-a4e1-2670cb1f56c5-300x300.webp)