. {{image_2}} You can mix things up with this cheesecake in fun ways. One great option is the chocolate Cinnamon Toast Crunch cheesecake. Just add melted chocolate to the cheesecake batter. This adds a rich flavor that pairs well with the cinnamon crunch. Another tasty choice is a pumpkin spice version for fall. Add pumpkin puree and pumpkin spice to the batter. This brings warmth and comfort to your dessert. Both options will impress your guests! If you want a lighter version, try using low-fat cream cheese. This swap cuts calories but keeps the creamy texture. You can also use sugar alternatives like stevia or monk fruit. These options help you enjoy this cheesecake without feeling guilty. Serve your cheesecake with fresh fruits like strawberries or blueberries. They add a bright flavor that balances the richness. Another fun idea is to make mini cheesecakes in cupcake liners. Everyone loves individual treats! For the full recipe, check out the above sections to create your own version of this delightful dessert. Your cheesecake lasts about 5 to 7 days in the fridge. Keep it wrapped tight to prevent it from drying out. Use plastic wrap or foil for best results. You can also place it in an airtight container. This keeps it fresh and tasty for longer. To freeze your cheesecake, first, let it cool completely. Wrap it well in plastic wrap. Then, place it in a freezer-safe container. It can last up to 2 months in the freezer. When you're ready to enjoy it, move it to the fridge overnight to thaw. This helps it regain its creamy texture for the best taste. You can tell if cheesecake is done by checking a few signs. First, look at the edges. They should be set, while the center remains slightly jiggly. This jiggle is normal and will firm up as it cools. Another sign is the surface. It should look smooth and not cracked. Lastly, use a toothpick. Insert it in the center; if it comes out mostly clean, it’s done. Remember, don’t overbake. This will help keep the cheesecake creamy and soft. Yes, you can make this cheesecake ahead of time. In fact, I recommend it for the best flavor. Make it a day or two before your event. Once it cools, wrap it tightly in plastic wrap. Store it in the fridge. This keeps it fresh and tasty. If you want to serve it later, you can freeze it, too. Just make sure to wrap it well. Thaw it overnight in the fridge before serving. If you can’t find Cinnamon Toast Crunch at your local store, don’t worry! You can buy it online through many grocery delivery services. Websites like Amazon often have it in stock. You can also check big retailers, like Walmart or Target, for online orders. If you prefer going in-store, try looking at larger grocery chains or specialty food stores. They often carry popular cereals. This cheesecake is not gluten-free as it uses Cinnamon Toast Crunch, which contains gluten. However, you can make a gluten-free version easily. Use gluten-free cereal that has a similar flavor. There are many brands available now. Just check the label to be sure. You can also use gluten-free graham crackers for the crust. This way, you can still enjoy this dessert without the gluten! Cinnamon Toast Crunch cheesecake is a fun dessert to make. You learned about its key ingredients, like cereal and cream cheese. We covered how to prepare the crust and filling, along with baking tips for the perfect texture. You can try fun variations and healthier options too. Proper storage is key to keeping your cheesecake fresh. Remember to check when your cheesecake is done and enjoy it for days. Make it ahead of time for stress-free serving. Enjoy this delightful treat!](https://toastedrecipes.com/wp-content/uploads/2025/06/93c0066c-f409-4f75-bc60-570dd9dd51fa.webp)
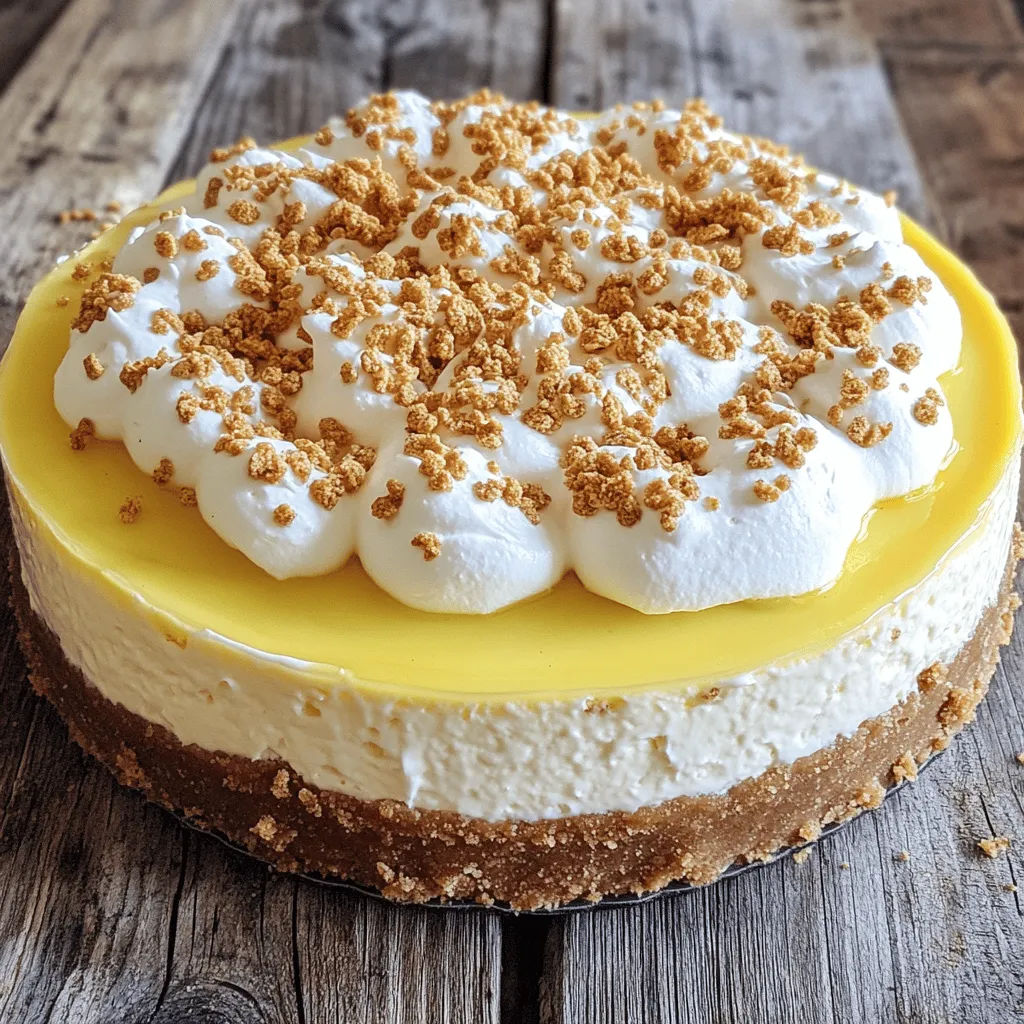
If you want a dessert that wows at every gathering, try my Cinnamon Toast Crunch Cheesecake! This creamy, crunchy treat combines the beloved cereal with rich cream cheese for a unique, tasty twist. I’ll guide you through each step, from making the crust to adding delicious toppings. Plus, I’ll share tips to avoid common mistakes. Ready to impress your friends and family with this divine dessert? Let’s get started!
Ingredients
Key Ingredients for Cinnamon Toast Crunch Cheesecake
– 1 ½ cups Cinnamon Toast Crunch cereal, crushed
– 3 (8-ounce) packages cream cheese, softened
– 3 large eggs
– 1 cup sour cream
The main star of this dessert is the Cinnamon Toast Crunch cereal. It brings that sweet, warm cinnamon flavor to the cheesecake. The cream cheese gives the cake its rich texture. Use softened cream cheese for the best mix. Eggs are key for binding it all together, while sour cream adds a nice tang. This makes the cheesecake creamy and delightful.
Optional Topping Ingredients
– Whipped cream
– Extra Cinnamon Toast Crunch for garnish
– Caramel or chocolate syrup for serving
Toppings can take your cheesecake to the next level. Add fluffy whipped cream on top for a lovely finish. Crushed Cinnamon Toast Crunch makes a fun garnish, adding a nice crunch. Drizzling caramel or chocolate syrup will enhance the sweetness, making every bite even better. You can mix and match these toppings based on your mood and taste.
For the full recipe, check out the detailed steps in the main article.
Step-by-Step Instructions
Preparing the Crust
To start, gather your ingredients. You need 1 ½ cups of crushed Cinnamon Toast Crunch cereal, 1/3 cup of sugar, and 1/2 cup of melted butter. In a medium bowl, combine the crushed cereal, sugar, and melted butter. Mix until the mixture looks crumbly.
Next, press this mixture firmly into the bottom of a 9-inch springform pan. Make sure it covers the entire bottom evenly. Bake the crust in a preheated oven at 325°F (160°C) for 10 minutes. Once baked, remove it and let it cool completely.
Making the Cheesecake Filling
Now, let’s make the filling. In a large bowl, beat 3 packages of softened cream cheese until it’s smooth. Gradually add 1 cup of sugar while mixing until well combined. This step is key for a creamy texture.
Next, mix in 1 teaspoon of vanilla extract, 1 teaspoon of cinnamon, and 1 cup of sour cream. Blend until everything is well mixed. This adds a rich flavor to your cheesecake.
Then, add 3 large eggs, one at a time. Mix gently after each egg. You want to combine them without overmixing.
Baking and Cooling Process
Pour the cheesecake mixture over the cooled crust in the springform pan. Gently tap the pan on the counter to release any air bubbles. Bake in the oven for 50 to 60 minutes. The center should be set but still a bit jiggly.
Once baked, turn off the oven and leave the cheesecake inside with the door slightly open for about 1 hour. This helps it cool down slowly. After that, refrigerate the cheesecake for at least 4 hours or overnight. This step is crucial for the best texture.
Enjoy the process! You’ll love the sweet smell that fills your kitchen. Check the full recipe for more details.
Tips & Tricks
Baking Tips for Perfect Cheesecake
To check if your cheesecake is done, look for a slight jiggle in the center. The edges should be set, but the middle can still move a bit. This means it will set perfectly when it cools.
Using a water bath is key for a creamy texture. Place your springform pan in a larger pan filled with hot water. This gentle heat helps prevent cracks and keeps your cheesecake moist.
Texture and Flavor Enhancements
Want to make your cheesecake even better? Add a pinch of nutmeg or ginger for extra flavor. These spices work well with cinnamon and give a warm taste.
You can also try different toppings! Fresh fruits like berries or bananas add color and taste. Chocolate sauce or caramel drizzled on top makes it extra special.
Common Mistakes to Avoid
Avoid overmixing the batter. Mix just until everything is combined. Overmixing can add air and lead to cracks in your cheesecake.
Cooling is important. After baking, let the cheesecake cool in the oven for an hour. This helps it set and reduces the risk of cracking. Then, chill it in the fridge for at least four hours.
For the full recipe, check out the [Full Recipe](#).
Variations
Flavor Variations
You can mix things up with this cheesecake in fun ways. One great option is the chocolate Cinnamon Toast Crunch cheesecake. Just add melted chocolate to the cheesecake batter. This adds a rich flavor that pairs well with the cinnamon crunch.
Another tasty choice is a pumpkin spice version for fall. Add pumpkin puree and pumpkin spice to the batter. This brings warmth and comfort to your dessert. Both options will impress your guests!
Healthier Alternatives
If you want a lighter version, try using low-fat cream cheese. This swap cuts calories but keeps the creamy texture. You can also use sugar alternatives like stevia or monk fruit. These options help you enjoy this cheesecake without feeling guilty.
Serving Suggestions
Serve your cheesecake with fresh fruits like strawberries or blueberries. They add a bright flavor that balances the richness. Another fun idea is to make mini cheesecakes in cupcake liners. Everyone loves individual treats!
For the full recipe, check out the above sections to create your own version of this delightful dessert.
Storage Info
Refrigeration Guidelines
Your cheesecake lasts about 5 to 7 days in the fridge. Keep it wrapped tight to prevent it from drying out. Use plastic wrap or foil for best results. You can also place it in an airtight container. This keeps it fresh and tasty for longer.
Freezing Instructions
To freeze your cheesecake, first, let it cool completely. Wrap it well in plastic wrap. Then, place it in a freezer-safe container. It can last up to 2 months in the freezer. When you’re ready to enjoy it, move it to the fridge overnight to thaw. This helps it regain its creamy texture for the best taste.
FAQs
How do you know when cheesecake is done?
You can tell if cheesecake is done by checking a few signs. First, look at the edges. They should be set, while the center remains slightly jiggly. This jiggle is normal and will firm up as it cools. Another sign is the surface. It should look smooth and not cracked. Lastly, use a toothpick. Insert it in the center; if it comes out mostly clean, it’s done. Remember, don’t overbake. This will help keep the cheesecake creamy and soft.
Can I make this cheesecake ahead of time?
Yes, you can make this cheesecake ahead of time. In fact, I recommend it for the best flavor. Make it a day or two before your event. Once it cools, wrap it tightly in plastic wrap. Store it in the fridge. This keeps it fresh and tasty. If you want to serve it later, you can freeze it, too. Just make sure to wrap it well. Thaw it overnight in the fridge before serving.
Where can I buy Cinnamon Toast Crunch if not available?
If you can’t find Cinnamon Toast Crunch at your local store, don’t worry! You can buy it online through many grocery delivery services. Websites like Amazon often have it in stock. You can also check big retailers, like Walmart or Target, for online orders. If you prefer going in-store, try looking at larger grocery chains or specialty food stores. They often carry popular cereals.
Is this cheesecake gluten-free?
This cheesecake is not gluten-free as it uses Cinnamon Toast Crunch, which contains gluten. However, you can make a gluten-free version easily. Use gluten-free cereal that has a similar flavor. There are many brands available now. Just check the label to be sure. You can also use gluten-free graham crackers for the crust. This way, you can still enjoy this dessert without the gluten!
Cinnamon Toast Crunch cheesecake is a fun dessert to make. You learned about its key ingredients, like cereal and cream cheese. We covered how to prepare the crust and filling, along with baking tips for the perfect texture.
You can try fun variations and healthier options too. Proper storage is key to keeping your cheesecake fresh. Remember to check when your cheesecake is done and enjoy it for days. Make it ahead of time for stress-free serving. Enjoy this delightful treat!
. {{image_2}} You can mix things up with this cheesecake in fun ways. One great option is the chocolate Cinnamon Toast Crunch cheesecake. Just add melted chocolate to the cheesecake batter. This adds a rich flavor that pairs well with the cinnamon crunch. Another tasty choice is a pumpkin spice version for fall. Add pumpkin puree and pumpkin spice to the batter. This brings warmth and comfort to your dessert. Both options will impress your guests! If you want a lighter version, try using low-fat cream cheese. This swap cuts calories but keeps the creamy texture. You can also use sugar alternatives like stevia or monk fruit. These options help you enjoy this cheesecake without feeling guilty. Serve your cheesecake with fresh fruits like strawberries or blueberries. They add a bright flavor that balances the richness. Another fun idea is to make mini cheesecakes in cupcake liners. Everyone loves individual treats! For the full recipe, check out the above sections to create your own version of this delightful dessert. Your cheesecake lasts about 5 to 7 days in the fridge. Keep it wrapped tight to prevent it from drying out. Use plastic wrap or foil for best results. You can also place it in an airtight container. This keeps it fresh and tasty for longer. To freeze your cheesecake, first, let it cool completely. Wrap it well in plastic wrap. Then, place it in a freezer-safe container. It can last up to 2 months in the freezer. When you're ready to enjoy it, move it to the fridge overnight to thaw. This helps it regain its creamy texture for the best taste. You can tell if cheesecake is done by checking a few signs. First, look at the edges. They should be set, while the center remains slightly jiggly. This jiggle is normal and will firm up as it cools. Another sign is the surface. It should look smooth and not cracked. Lastly, use a toothpick. Insert it in the center; if it comes out mostly clean, it’s done. Remember, don’t overbake. This will help keep the cheesecake creamy and soft. Yes, you can make this cheesecake ahead of time. In fact, I recommend it for the best flavor. Make it a day or two before your event. Once it cools, wrap it tightly in plastic wrap. Store it in the fridge. This keeps it fresh and tasty. If you want to serve it later, you can freeze it, too. Just make sure to wrap it well. Thaw it overnight in the fridge before serving. If you can’t find Cinnamon Toast Crunch at your local store, don’t worry! You can buy it online through many grocery delivery services. Websites like Amazon often have it in stock. You can also check big retailers, like Walmart or Target, for online orders. If you prefer going in-store, try looking at larger grocery chains or specialty food stores. They often carry popular cereals. This cheesecake is not gluten-free as it uses Cinnamon Toast Crunch, which contains gluten. However, you can make a gluten-free version easily. Use gluten-free cereal that has a similar flavor. There are many brands available now. Just check the label to be sure. You can also use gluten-free graham crackers for the crust. This way, you can still enjoy this dessert without the gluten! Cinnamon Toast Crunch cheesecake is a fun dessert to make. You learned about its key ingredients, like cereal and cream cheese. We covered how to prepare the crust and filling, along with baking tips for the perfect texture. You can try fun variations and healthier options too. Proper storage is key to keeping your cheesecake fresh. Remember to check when your cheesecake is done and enjoy it for days. Make it ahead of time for stress-free serving. Enjoy this delightful treat!](https://toastedrecipes.com/wp-content/uploads/2025/06/93c0066c-f409-4f75-bc60-570dd9dd51fa-300x300.webp)