Salads

For a great pea salad, use fresh or frozen peas. I like to use two cups of peas. If you choose frozen, just thaw them first. Then, add one cup of diced cucumber. It adds crunch. Next, include half a cup of diced red bell pepper for sweetness and color. A quarter cup of finely chopped red onion gives a nice bite. Finally, toss in a quarter cup of fresh mint leaves, chopped finely. Mint adds a bright flavor that makes the salad pop. You will need some pantry items for the dressing. Grab three tablespoons of olive oil for richness. Two tablespoons of fresh lemon juice add a zesty touch. Salt and pepper will enhance all the flavors. These simple ingredients work well together to create a delicious dressing. When picking peas, look for bright green colors. Fresh peas should feel firm and smooth. If you choose cucumbers, select ones that are firm with no soft spots. For bell peppers, look for shiny skin. The red onion should feel heavy for its size. Fresh mint should smell fragrant and have vibrant green leaves. Quality ingredients make your salad taste even better. Enjoy the fresh flavors of your pea salad delight! For the complete recipe, check out the Full Recipe. Start with fresh or frozen peas. If you use frozen peas, thaw them first. Drain any water. For fresh peas, blanch them in boiling water for about 2-3 minutes. Then, cool them in ice water to stop cooking. This keeps them bright green and crisp. In a large mixing bowl, add the prepared peas. Then, chop one cup of cucumber and dice half a cup of red bell pepper. Next, finely chop one-fourth of a cup of red onion. Add all these vegetables to the bowl along with one-fourth of a cup of chopped fresh mint leaves. Mix everything gently to combine. In a small bowl, whisk together three tablespoons of olive oil and two tablespoons of fresh lemon juice. Add salt and pepper to taste. Mix well until the dressing is smooth. Pour the dressing over the vegetable mixture. Toss gently so that all the veggies are coated. Finally, sprinkle one-fourth of a cup of crumbled feta cheese on top. Give it one last gentle toss. If needed, taste and adjust the seasoning. Let the salad sit for about ten minutes before serving. This allows the flavors to blend perfectly. For a complete guide, check out the Full Recipe. To boost flavor, use fresh herbs. Mint is a great choice, but you can also add parsley or dill. A pinch of garlic powder or onion powder adds depth too. For a kick, sprinkle in some red pepper flakes. When mixing your dressing, taste it before adding to the salad. Adjust with salt and pepper as needed for balance. Serve your pea salad in a clear bowl. This shows off the vibrant colors. You can layer the salad in a mason jar for a fun look. Top it with extra mint leaves or a sprinkle of feta for flair. For a picnic, use small cups for easy serving. Use a large mixing bowl to combine the ingredients. A whisk helps blend the dressing well. A sharp knife and cutting board make chopping easy. For serving, try a salad spoon or tongs. These tools make it simple to toss or serve your delicious pea salad. For the complete recipe, check out the Full Recipe section. {{image_2}} Add a savory twist to your pea salad with crispy bacon. Start by frying 4 strips of bacon until crisp. Chop the bacon into pieces and mix it into your salad. The salty, smoky flavor pairs well with the fresh peas. This option adds great crunch and taste. For a creamy version, use mayonnaise or Greek yogurt. Mix 1 cup of mayonnaise or yogurt with the dressing ingredients. This adds a rich texture and enhances the flavors. You can also mix in some sour cream for an extra tang. A creamy salad is great for gatherings and barbecues. If you have dietary needs, there are plenty of swaps. For a vegan salad, skip the feta and use avocado for creaminess. If you need gluten-free options, this salad is already safe. You can swap the olive oil with a nut oil for a unique flavor. Explore these variations to suit your needs. For the full recipe, check the details above. To keep your pea salad fresh, store it in an airtight container. This helps prevent air from spoiling the salad. Place the container in the fridge right after serving. Always let the salad cool to room temperature before sealing it. This step keeps extra moisture out and helps maintain texture. Pea salad lasts about three days in the fridge. After that, the taste can change, and the veggies may get mushy. It’s best to eat it within this time for the best flavor. Always check for any off smells or changes in color before eating leftovers. Freezing pea salad is not ideal. The fresh ingredients can lose their crunch and flavor. If you must freeze it, use a freezer-safe container. However, I suggest freezing only the peas, not the whole salad. You can add fresh ingredients later after thawing. This keeps the salad tasty and fresh when you serve it later. For a full recipe, check out the Refreshing Minty Pea Salad. Yes, you can use frozen peas. They are quick and easy. Just thaw them before use. Frozen peas taste sweet and fresh too. They save time and reduce waste. You can skip the blanching step for frozen peas. This makes your prep faster. Peas are small but mighty! They are low in calories yet packed with nutrients. Peas provide protein, fiber, and vitamins. They support digestion and help keep you full. They also have antioxidants, which are great for your health. Eating peas can boost your heart health too. Making a vegetarian version is simple! Start with the base recipe. Use fresh or frozen peas, cucumbers, and peppers. Skip the feta cheese if you want it dairy-free. You can add nuts or seeds for crunch. Try using a vegan cheese for added flavor. You can find the full recipe above. You learned about fresh ingredients and pantry staples for making pea salad. I shared tips for choosing quality items and step-by-step instructions for each part of the dish. We explored ways to enhance flavors and make your salad look great. You can also try fun variations, like adding bacon or creamy dressings. Finally, we covered how to store leftovers and answered common questions. Pea salad is easy, tasty, and versatile. Enjoy creating your own version!
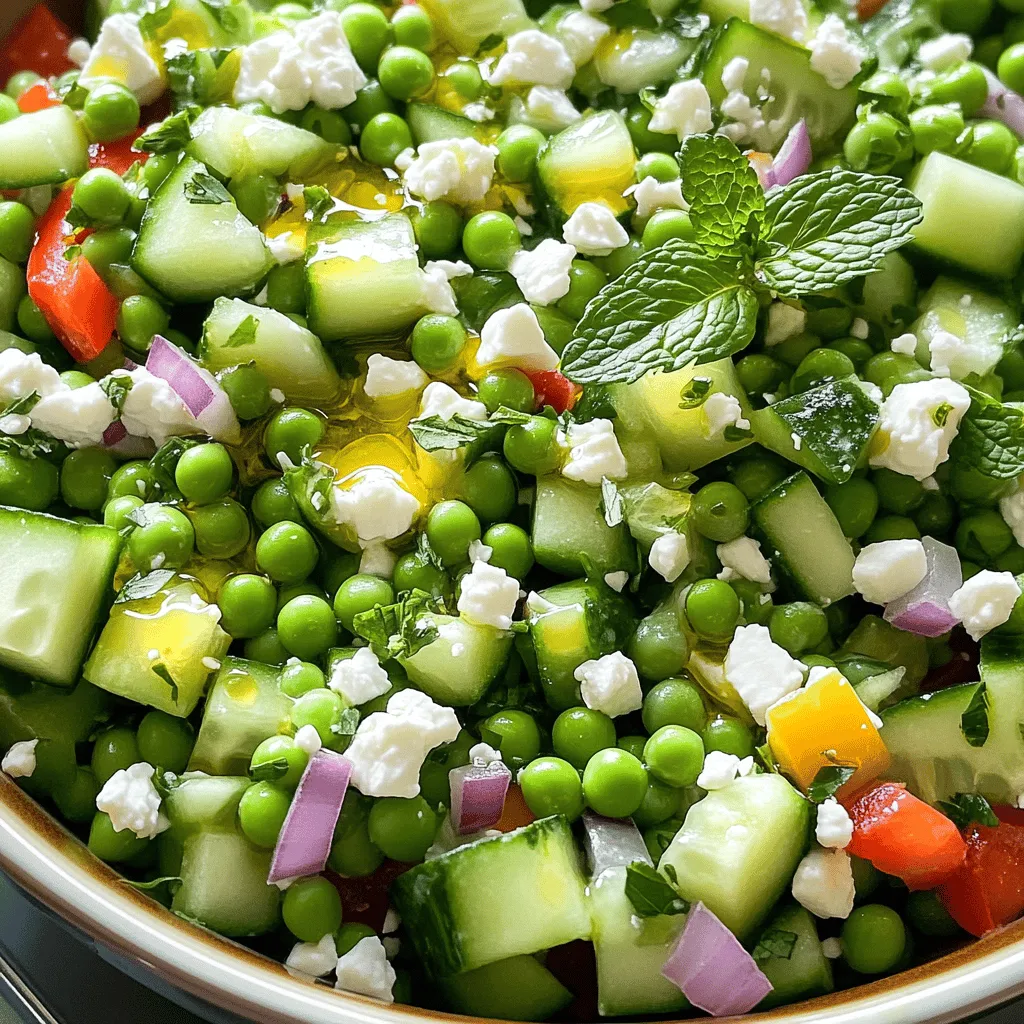
Pea Salad Delight Simple and Fresh Recipe Guide
Are you ready to enjoy a fresh, vibrant pea salad? In my simple recipe guide, I’ll show you how to create a delightful dish that’s
- 2 cups mixed greens (spinach, arugula, and romaine) - 1 cup cherry tomatoes, halved - 1 cup cucumber, diced - 1 cup red bell pepper, diced - 1 cup shredded carrots - 1 cup sweet corn (fresh or canned) - 1 avocado, sliced - 1/2 cup red onion, finely sliced - 1/4 cup feta cheese, crumbled - 1/4 cup sunflower seeds - 1/4 cup fresh parsley, chopped - 3 tablespoons olive oil - 2 tablespoons apple cider vinegar - 1 tablespoon honey - 1 teaspoon Dijon mustard - Salt and pepper to taste You can add more toppings to make your salad shine. Consider adding nuts, seeds, or fresh herbs. These can boost flavor and crunch. You might also try different cheeses or beans. Each choice adds a new twist to the classic recipe. Feel free to explore unique flavors that suit your taste. This salad is a canvas, and you are the artist! Check out the Full Recipe for all the details. To start, I take a large salad bowl and layer 2 cups of mixed greens as the base. I like to use a mix of spinach, arugula, and romaine for great taste and texture. Next, I arrange the vegetables artistically on top of the greens. I start with 1 cup of halved cherry tomatoes. Their bright color adds a fun touch. Then, I add 1 cup of diced cucumber and 1 cup of diced red bell pepper. These add crunch and freshness. After that, I sprinkle on 1 cup of shredded carrots and 1 cup of sweet corn. This gives the salad a lovely rainbow look. To finish off the base, I place sliced avocado on top. The avocado adds creaminess and makes it feel special. For the dressing, I grab a small bowl and mix together 3 tablespoons of olive oil, 2 tablespoons of apple cider vinegar, and 1 tablespoon of honey. I also add 1 teaspoon of Dijon mustard. This mix gives the dressing a balance of sweet and tangy flavors. To make sure the dressing is smooth, I whisk it well. I taste it and add salt and pepper to suit my liking. If I want a creamier dressing, I can add a bit more olive oil. Just before serving, I drizzle the dressing over the salad. It's important to do this right before serving so the greens stay crisp. After drizzling, I gently toss the salad. I want to make sure every bite is coated in that delicious dressing. For serving, I like to garnish with 1/4 cup of crumbled feta cheese and 1/4 cup of sunflower seeds. These add great flavor and crunch. I also sprinkle fresh parsley on top for a pop of color. This salad looks and tastes amazing! You can find the Full Recipe for more detailed steps. To make your salad burst with taste, try adding fun ingredients. Here are some ideas: - Nuts: Walnuts or almonds can add crunch. - Fruits: Slices of apple or orange can bring sweetness. - Herbs: Fresh basil or mint can lift the flavor. Seasoning is key. I suggest using a pinch of salt and a dash of pepper. You can also add a squeeze of lemon for brightness. Experiment with spices like cumin or paprika for a twist. A beautiful salad is always more exciting to eat. Here are some ways to make it pop: - Layering: Use a clear bowl to show off the colors. - Garnishes: Sprinkle fresh herbs on top for a fresh look. - Serving: Use individual bowls for each person. Add a slice of lemon or lime on the side for fun. For a unique touch, serve the salad in a hollowed-out cucumber or bell pepper. This makes for a great centerpiece at any meal. {{image_2}} You can easily change the ingredients in this salad. If you have dietary needs, swap out items. For a vegan option, replace feta cheese with avocado or tofu. If you want gluten-free options, this salad is already safe! Seasonal ingredients can also add fresh flavors. In summer, try peaches or strawberries. In fall, add roasted squash or apples. These changes keep your salad exciting and fun. Dressings can change the flavor of your salad. A few easy alternatives are balsamic vinaigrette or a creamy yogurt dressing. Both bring a new twist to your meal. When choosing a dressing, think about the salad's ingredients. Use tangy dressings with sweet fruits. For a rich taste, creamy dressings pair well with crunchy veggies. Mixing and matching can create a new family favorite! For the full recipe, check out the Family Favorite Crunchy Rainbow Salad. To store leftovers, place the salad in an airtight container. This keeps it fresh longer. If you have dressing left, store it separately. This prevents sogginess. Keep ingredients fresh by prepping them properly. Wash and dry the vegetables before storing. Use paper towels to absorb excess moisture. It helps keep your greens crisp. For meal prep, chop veggies and store them in separate containers. This way, you can mix them when ready to serve. It makes the salad feel fresh. The salad stays fresh for about two days in the fridge. After that, the greens may wilt. To enjoy the best taste, consume within the first day. You can find the full recipe for this delightful salad above. It’s simple and perfect for family meals! Can I make this salad ahead of time? Yes, you can make this salad a few hours before serving. Just keep the dressing separate. This way, the greens stay fresh and crisp. When you are ready to eat, drizzle the dressing and toss the salad. It will taste just as great! What can I substitute for feta cheese? If you need a feta substitute, try crumbled goat cheese or cotija. These cheeses offer a similar texture and tangy flavor. You can also use a dairy-free cheese if you prefer a plant-based option. How do I make salad dressings without oil? You can make oil-free dressings using yogurt or mashed avocado as a base. For a tangy touch, add lemon juice or vinegar. Also, blend in herbs or spices to boost flavor. This keeps your dressings light and fresh. What are some good add-ins for a salad? You can add many tasty items to your salad. Nuts, seeds, or dried fruit can add crunch and sweetness. Grains like quinoa or farro make it hearty. Try adding beans for protein, or fruits like apples or berries for a sweet twist. This blog post guided you through the art of crafting a delicious salad. You learned about fresh ingredients and how to create a tasty dressing. We discussed tips for enhancing flavors and ways to present your salad nicely. You can customize your salad for special diets and store it effectively for freshness. With these ideas, making salads will be fun and easy. Enjoy creating your perfect bowl of greens and flavors!
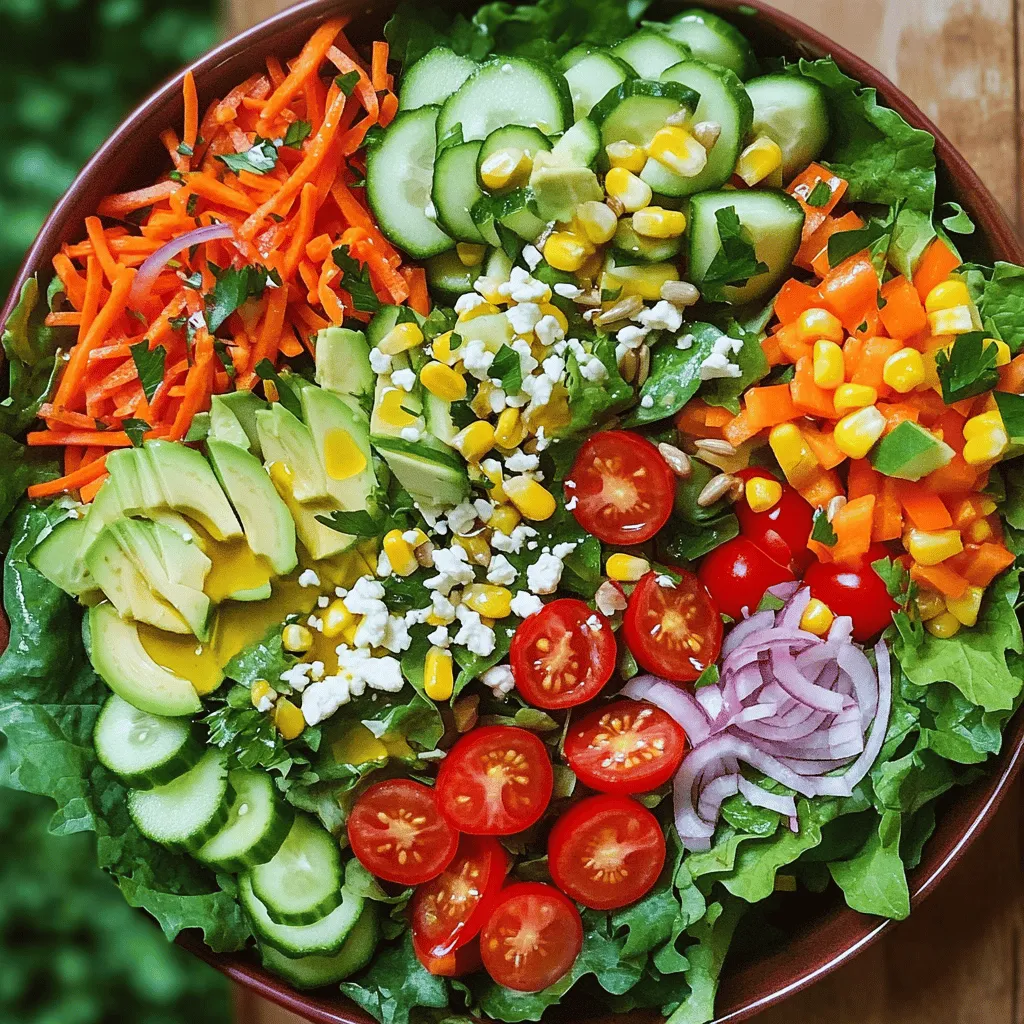
Family Favorite Salad Recipe Fresh and Simple Delight
Are you looking for a delicious and easy salad that your whole family will love? I’ve got just the thing! My Family Favorite Salad Recipe
The Spicy Southwest Chicken Salad needs fresh and tasty ingredients. Here’s what you need: - 2 cups cooked chicken breast, shredded - 1 can black beans, rinsed and drained - 1 cup corn kernels (fresh or frozen) - 1 red bell pepper, diced - 1 avocado, diced - 1/2 red onion, finely chopped - 1 cup cherry tomatoes, halved - 1/4 cup fresh cilantro, chopped - 1/4 cup lime juice (about 2 limes) - 2 tablespoons olive oil - 1 tablespoon chili powder - 1 teaspoon cumin - Salt and pepper to taste - Tortilla strips, for garnish (optional) Each ingredient adds a burst of flavor and color. The chicken provides protein, while beans add fiber. Corn brings sweetness, and bell pepper offers crunch. Avocado gives creaminess, and tomatoes add freshness. Cilantro brightens the dish, making it lively. The lime juice and olive oil create a zesty dressing. Chili powder and cumin give the salad its spicy kick. Salt and pepper enhance all the flavors. You can add tortilla strips for crunch, too! This salad is perfect for lunch or dinner. You can enjoy it fresh or chill it for later. For the complete preparation, check the Full Recipe. This salad comes together quickly. You can make it in just 15 minutes. Gather your ingredients first. This helps keep things organized. You will need cooked chicken, beans, corn, and veggies. Start by taking a large mixing bowl. Add the shredded chicken, black beans, corn, diced red bell pepper, and avocado. Then, toss in the finely chopped red onion and halved cherry tomatoes. Finally, add the fresh cilantro. Mix everything gently. You want all the flavors to combine without smashing the veggies. In a separate small bowl, whisk together the lime juice and olive oil. Add the chili powder, cumin, salt, and pepper. Mix until you see a nice blend. This dressing adds zest to your salad. You can adjust the spices to fit your taste. If you like it spicier, add more chili powder. Pour the dressing over your chicken and veggie mix. Gently toss it all together. Make sure everything is well coated. Taste the salad and adjust the seasoning if needed. If you want, add more salt, pepper, or lime juice. For extra crunch, sprinkle tortilla strips on top. If you are not serving right away, chill it for 30 minutes. This allows all the flavors to meld together beautifully. Don't forget to check out the Full Recipe for more details! To boost the taste of your Spicy Southwest Chicken Salad, try using fresh herbs. Fresh cilantro adds brightness and depth. You can also add jalapeños for extra heat. If you want a smoky flavor, consider adding smoked paprika. Don't forget to adjust the lime juice for a zesty kick. Tasting as you go is key. It helps you find the right balance. Meal prep makes this salad quick and easy. Cook your chicken ahead of time. You can use leftover chicken or store-bought rotisserie chicken. Chop your veggies in advance, too. Just store them in separate containers. Mix the dressing separately to keep it fresh. You can assemble the salad when you are ready to eat. This method keeps everything crisp. Serve this salad in a big bowl for sharing. You can also plate it individually for a nice touch. Top each serving with tortilla strips for crunch. Pair it with a refreshing drink like iced tea or lemonade. This salad is great for lunch or dinner. You can even serve it at parties. It's colorful and appealing, so your guests will love it! For the complete recipe, check out the Full Recipe. {{image_2}} You can swap some ingredients to fit your taste. If you don’t like black beans, try kidney beans instead. You can also use chickpeas for a different flavor. If you can’t find red bell peppers, yellow or green peppers work too. For the avocado, you can use guacamole as a quick fix. If you want more crunch, add some jicama or radishes. These swaps keep the salad fresh and fun. Chicken is great, but you have other choices. You can use grilled shrimp for a seafood twist. If you prefer beef, try shredded taco meat. For a lighter option, use turkey breast or tofu. Each protein adds its own unique flavor. Feel free to mix and match proteins based on what you have at home or your mood. The dressing is key to making this salad shine. If you want a creamier texture, try adding Greek yogurt to the lime dressing. A spicy ranch dressing can also add a kick. For a citrusy twist, use orange juice instead of lime. You can even make a vinaigrette with balsamic vinegar. Each dressing gives the salad a new life and taste. Remember, your salad should reflect what you love! Store your Spicy Southwest Chicken Salad in an airtight container. This keeps it fresh. Make sure the salad is cool before sealing it. If you have leftovers, add the tortilla strips just before serving. This keeps them crunchy. Your salad lasts about 3 to 4 days in the fridge. The flavors blend well over time. However, the avocado may brown. To slow this, sprinkle lime juice on it. This keeps the salad looking fresh. You can eat the salad cold, which is great for hot days. If you prefer it warm, reheat the chicken only. Place it in a microwave-safe dish. Heat it for about 30 seconds, then mix it back into the salad. Enjoy your tasty meal! For the complete recipe, check the Full Recipe section. You can add jalapeños for heat. Fresh or pickled jalapeños work well. You might also try hot sauce, cayenne pepper, or chili flakes. Each option adds a kick to your salad. Adjust the amount based on your taste. Yes, you can make this salad ahead of time. Just keep the dressing separate until you are ready to serve. This keeps the salad fresh and crisp. You can store it in the fridge for up to two days. Just remember to mix in the dressing before serving. Absolutely! You can swap the chicken for grilled tofu or chickpeas. Both options add protein and flavor. This way, you keep the salad hearty and satisfying. You can also replace the chicken with extra beans or avocado. You can find the Full Recipe by following the link in this article. It contains all the steps and tips needed to create this tasty dish. Enjoy making your own Spicy Southwest Chicken Salad! This blog post covered everything you need to make a delicious salad. You learned about key ingredients, step-by-step prep, and tips to boost flavor. We explored variations for your taste and storage tips to keep it fresh. Remember, this salad is flexible. You can customize it to fit your needs. Enjoy creating your own tasty dish that everyone will love!
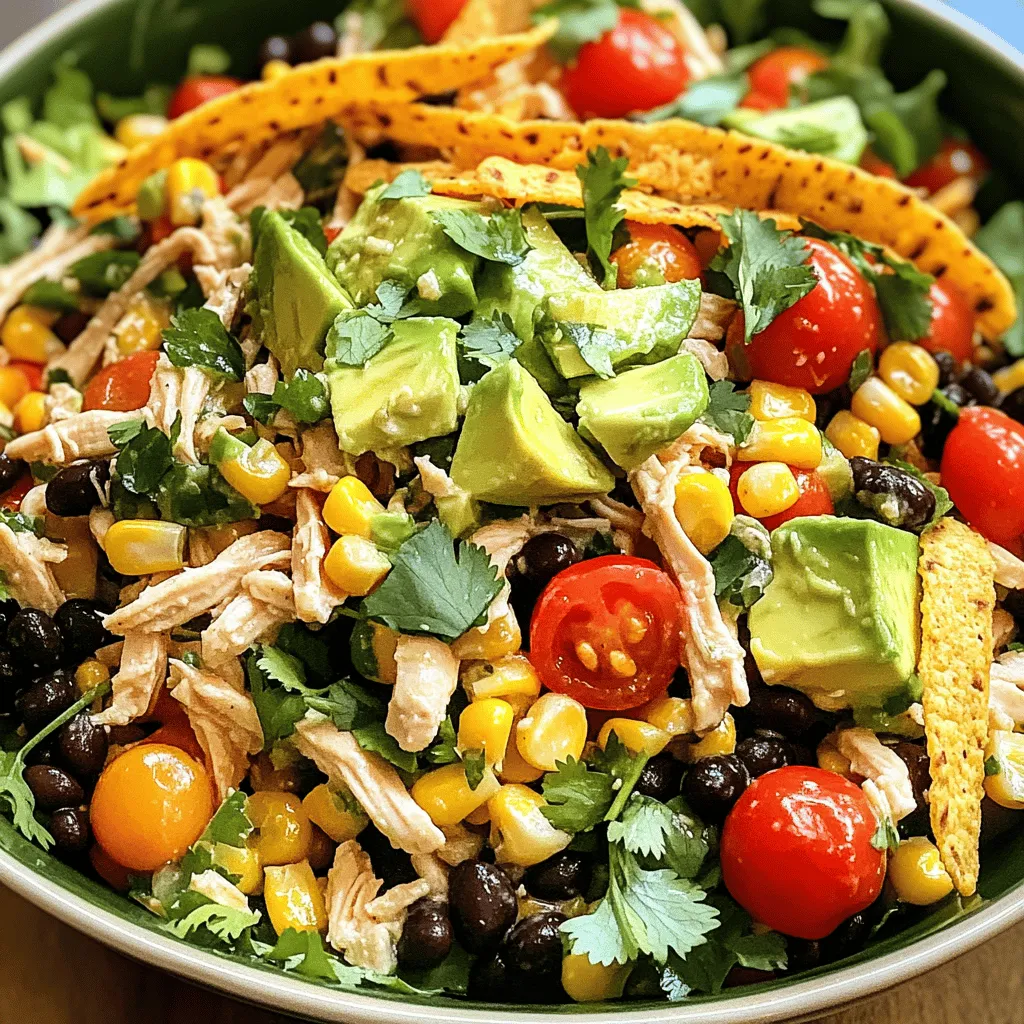
Spicy Southwest Chicken Salad Flavorful and Fresh Meal
Looking for a fresh and tasty meal that packs a punch? Let me introduce you to my Spicy Southwest Chicken Salad. This vibrant dish combines
- 1 head of romaine lettuce, chopped - 2 cups mixed greens - 1 cup cherry tomatoes, halved - 1/2 red onion, thinly sliced - 1/2 cucumber, sliced - 1/2 cup pepperoncinis, sliced - 1/3 cup black olives, pitted and sliced - 1/3 cup feta cheese, crumbled - 1/3 cup shredded carrots - 1/4 cup Italian dressing (homemade or store-bought) - Salt and pepper to taste - Fresh parsley, chopped for garnish To make the Olive Garden salad, you need fresh and vibrant ingredients. The romaine lettuce gives a nice crunch. The mixed greens add flavor and color. Cherry tomatoes bring a sweet bite. Red onion adds a sharp taste. Cucumber keeps it refreshing. Pepperoncinis give a little kick. Black olives add depth. Feta cheese adds creaminess. Shredded carrots give sweetness. Finally, the Italian dressing ties it all together. You can add extra toppings for more flavor. Try grilled chicken or shrimp for protein. Avocado gives a creamy touch. You can also use sunflower seeds for crunch. If you want a spicy kick, add sliced jalapeños. These choices can change the taste and nutrition. This salad fits many diets. It is gluten-free and vegetarian. For a vegan option, skip the feta cheese. You can use a vegan dressing instead. This salad is versatile and easy to modify. It can fit many food needs. Enjoy it however you like! To start, you need to prepare the lettuce and greens. First, wash the romaine lettuce under cold water. This step is vital for removing dirt and chemicals. After washing, chop it into bite-sized pieces. Next, take the mixed greens and rinse them as well. You want them fresh and crisp. Once clean, gently pat both the romaine and mixed greens dry with a clean kitchen towel. This keeps the salad from getting soggy later. Now, let’s mix the salad ingredients. In a large salad bowl, add your chopped romaine and mixed greens first. This creates a colorful base. Next, add the halved cherry tomatoes and sliced cucumbers for sweetness and crunch. Carefully toss in the thinly sliced red onion, pepperoncinis, and black olives. It’s best to mix these ingredients gently to avoid bruising the greens. Once everything is in the bowl, sprinkle the crumbled feta and shredded carrots on top. This adds both flavor and texture. Dressing the salad is where the magic happens. Use about 1/4 cup of Italian dressing. Drizzle it evenly across the top of your salad. This ensures every bite has flavor. After that, gently toss everything together. Make sure all the greens and toppings are coated in dressing. Finally, season your salad with salt and pepper to taste. Adjust the seasoning based on what you like. For a final touch, garnish with freshly chopped parsley. This not only looks nice but also boosts the flavor. Serve immediately for the best taste. Check out the Full Recipe for more details! To keep your greens crisp, choose fresh ingredients. Look for vibrant, firm leaves. Rinse your romaine and mixed greens in cold water. Dry them well using a salad spinner or paper towels. This step helps remove excess moisture, which can lead to soggy greens. Store your salad in the fridge until serving. This keeps everything fresh and crunchy. To boost the flavor of your Olive Garden salad, consider these tips. Use fresh herbs like parsley or basil for a fragrant touch. Adding a squeeze of lemon juice brightens the taste. Try using different dressings. A balsamic vinaigrette or a zesty lemon dressing can elevate the salad. You can also toss in some nuts or seeds for crunch and added flavor. Presentation is key when serving your salad. Use a large, colorful bowl for a vibrant look. Layer your ingredients for visual appeal. Start with greens, then add tomatoes and cucumbers. Sprinkle cheese and olives on top for a beautiful finish. Serve immediately for the best taste. This way, guests enjoy the salad while it is fresh. For an extra touch, garnish with fresh parsley. It adds color and a hint of flavor. For the full recipe, check out the Garden Fresh Olive Garden Salad. {{image_2}} You can swap ingredients in this Olive Garden salad to fit your taste. If you don’t like feta, try goat cheese or mozzarella. For a crunchier texture, add radishes instead of cucumbers. If pepperoncinis are too spicy, use sweet bell peppers. You can also add chickpeas for a vegetarian protein boost. Change the salad with the seasons for fresh flavors. In spring, add peas and asparagus for a bright touch. During summer, use ripe peaches or strawberries for sweetness. In fall, add roasted butternut squash and walnuts for warmth. In winter, use hearty greens like kale or spinach to keep it fresh. Want to make your salad more filling? Add grilled chicken or shrimp for lean protein. For fiber, mix in black beans or quinoa. Nuts and seeds can give a crunchy texture, too. These add-ins will help you create a more balanced meal while keeping it tasty. For the full recipe, check out the complete guide. To store your Olive Garden salad, first, keep it in a container with a lid. Make sure to separate any dressing to keep the greens fresh. If you mix it all together, the salad may get soggy. Place the container in the fridge right away. This keeps the salad crisp and tasty. Your prepared salad lasts about 3 days in the fridge. After that, the greens lose their crunch. If you see any brown spots, it's time to toss it. Always check for freshness before enjoying leftovers. You should not reheat your salad. It tastes best cold. Heating can wilt the greens and change the texture. Enjoy it straight from the fridge for a refreshing bite. For more tips, you can check the Full Recipe. The Olive Garden Salad recipe is a fresh and colorful mix of greens and toppings. People love this salad for its bright flavors and crunchy textures. It typically includes romaine lettuce, mixed greens, cherry tomatoes, red onion, cucumber, pepperoncinis, black olives, feta cheese, and shredded carrots. This salad often comes with Italian dressing, making it extra tasty. It's a favorite at Olive Garden and has a strong fan base worldwide. The combination of ingredients gives it a unique flavor profile. If you want to try it at home, you can find the full recipe online. To make the Olive Garden Salad healthier, you can try a few simple swaps. First, use a lighter dressing, like a vinaigrette, instead of creamy options. You can also cut down on cheese or use a lower-fat version of feta. If you want more veggies, add extra cucumbers or bell peppers. You might also try swapping black olives for green olives, which can reduce sodium. Adding more leafy greens can boost fiber without adding many calories. These small changes can make a big difference. Yes, you can make the Olive Garden Salad ahead of time! This salad keeps well in the fridge for a day or two. To do this, prepare the veggies and store them in an airtight container. Keep the dressing separate until you are ready to eat. Add the dressing right before serving to keep the greens crisp. You can also prep individual servings in jars, layering the ingredients. This method makes it easy to grab a salad on the go. This blog post covered how to create a delicious salad, focusing on key ingredients and their preparation. We explored options for dietary needs and added tips to enhance flavor and texture. You can adapt the recipe with substitutions for different seasons and nutrition boosts. Remember to store your leftovers properly to keep them fresh. With this knowledge, you can enjoy a fresh, homemade salad anytime you desire. Embrace your creativity and enjoy healthy eating!
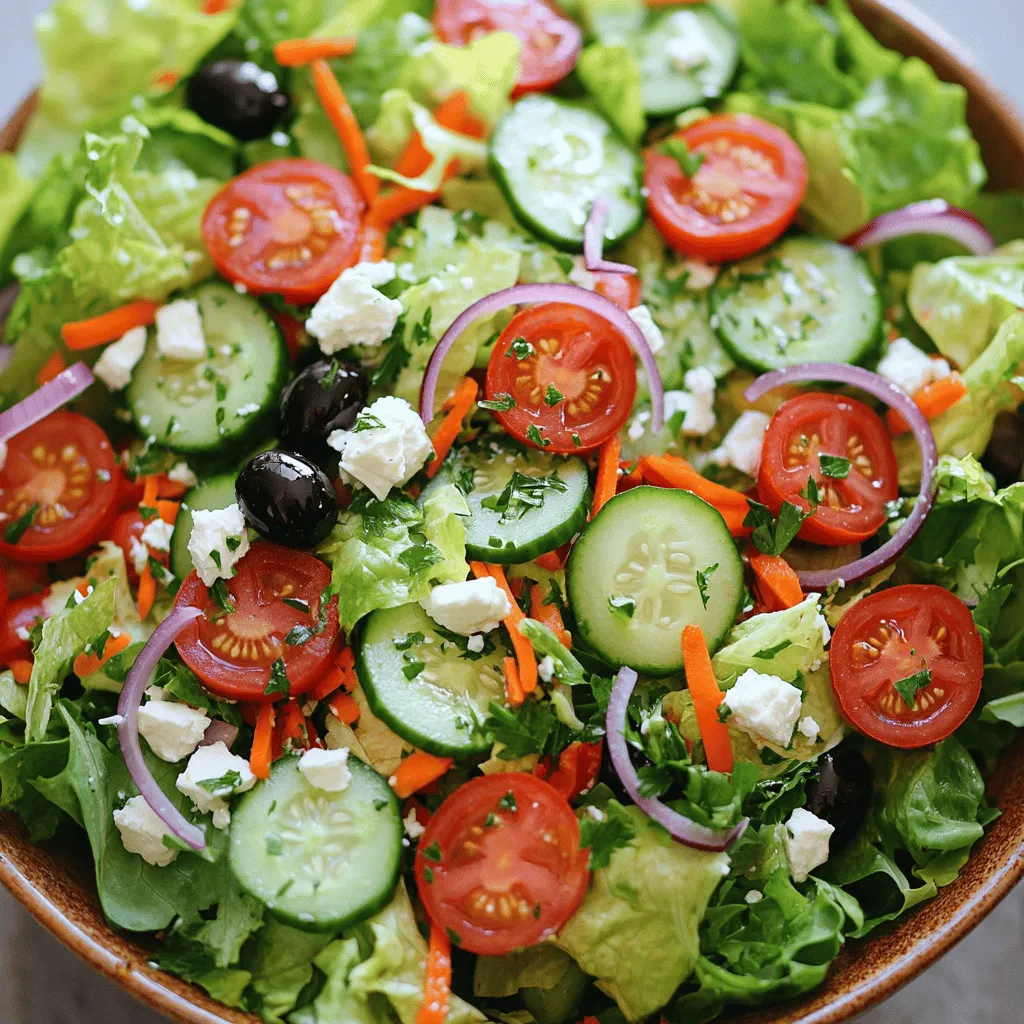
Olive Garden Salad Flavorful and Fresh Recipe Guide
Craving that iconic Olive Garden salad? You’re in the right place! This guide gives you everything you need to recreate that fresh, flavorful experience right
When you think about salads, fresh and bright ingredients come to mind. Here are key items that help make a great salad: - Leafy greens (like romaine, spinach, or kale) - Fresh vegetables (such as tomatoes, cucumbers, and bell peppers) - Fruits (like apples, berries, or avocados) - Proteins (think beans, chickpeas, or grilled chicken) - Nuts and seeds (almonds, sunflower seeds, or walnuts) - Cheese (feta, goat cheese, or mozzarella) - Herbs (like basil, cilantro, or parsley) These ingredients add taste, texture, and nutrients. You can mix and match them based on your preferences. Knowing the health benefits of your salad ingredients helps you make better choices. Here’s a quick look at some common ingredients: - Leafy Greens: Low in calories, rich in vitamins A, C, and K. They support eye health and boost immunity. - Tomatoes: High in vitamin C and antioxidants. They may lower heart disease risk. - Cucumbers: Hydrating and low calorie. Great for refreshing salads. - Chickpeas: Packed with protein and fiber. They help you feel full longer. - Avocados: High in healthy fats. They support heart health and brain function. These ingredients not only taste good but also help keep you healthy. Choosing fresh produce can make your salad shine. Here are some simple tips: - Look for vibrant colors: Bright and rich colors usually signal freshness. - Check for firmness: Fruits and vegetables should feel firm, not soft or mushy. - Smell the produce: Fresh fruit and veggies have a pleasant aroma. - Know the seasons: Buy seasonal produce for the best flavor and price. By following these tips, you can make your salads not only tasty but also visually appealing. For a delicious start, try the Rainbow Quinoa Salad for a burst of flavors and textures. See the [Full Recipe]. To make the Rainbow Quinoa Salad, you start by cooking the quinoa. Here’s how to do it: 1. In a medium saucepan, add 1 cup of rinsed quinoa and 2 cups of water or vegetable broth. 2. Bring it to a boil over high heat. 3. Once boiling, reduce the heat to low and cover. Let it simmer for about 15 minutes. 4. When done, remove the pot from heat and let the quinoa cool a bit. Now, let’s mix the salad: 1. In a large bowl, combine the cooked quinoa with: - 1 diced red bell pepper - 1 diced yellow bell pepper - 1 cup halved cherry tomatoes - 1 diced cucumber - 1/2 finely chopped red onion - 1 diced avocado 2. In a small bowl, whisk together: - Juice of 2 limes - 3 tablespoons olive oil - Salt and pepper to taste - 1/4 teaspoon cumin (optional) 3. Pour the dressing over the salad and mix gently. 4. Top with 1/4 cup of chopped fresh cilantro before serving. Making the Mediterranean Chickpea Salad is quick and easy. Here’s the plan: 1. In a large bowl, mix together: - 1 can (15 oz) drained and rinsed chickpeas - 1 cup halved cherry tomatoes - 1 diced cucumber - 1/2 finely chopped red onion - 1/2 cup crumbled feta cheese - 1/4 cup pitted and sliced Kalamata olives 2. For the dressing, whisk in a small bowl: - Juice of 1 lemon - 3 tablespoons olive oil - Salt and pepper to taste 3. Drizzle the dressing over the salad and toss to combine. 4. Finally, add 2 tablespoons of chopped fresh parsley on top before serving. The Tropical Fruit Salad is a sweet treat. Here’s how to whip it up: 1. In a large bowl, combine: - 1 cup diced pineapple - 1 cup diced mango - 1 cup sliced strawberries - 1 sliced banana - 1/2 cup blueberries 2. In a small bowl, mix: - Juice of 1 lime - 1 tablespoon honey (optional) 3. Drizzle the lime-honey mixture over the fruit and toss gently. 4. Finish by sprinkling 1/4 cup of shredded coconut on top and adding fresh mint leaves for garnish. These recipes are simple, fresh, and perfect for any meal. Enjoy every bite! To cook quinoa well, start by rinsing it. This step removes the bitter coating, called saponin. Use a ratio of 1 cup of quinoa to 2 cups of water or broth. Bring it to a boil, then lower the heat and cover. Cook for about 15 minutes until it absorbs the liquid. Let it rest for a few minutes off the heat. Fluff it with a fork for the perfect texture. Dressings can change how a salad tastes. A simple mix of oil and acid works great. Use 3 parts oil to 1 part acid, like lemon juice or vinegar. Add salt and pepper to taste. For extra flavor, mix in herbs, garlic, or mustard. Let the dressing sit for a bit to blend the flavors. Pour it over your salad right before serving for the best taste. A beautiful salad catches the eye. Use colorful ingredients like cherry tomatoes, bell peppers, and greens. Cut veggies in fun shapes for added interest. Layer the salad in a clear bowl to show off the colors. Sprinkle fresh herbs or seeds on top for a pop of color. Serve in individual bowls for a special touch. These small changes can make your salad look gourmet, just like my Rainbow Quinoa Salad. [Full Recipe] {{image_2}} You can make classic salads fun with new flavors. Think of a Caesar salad. Add roasted chickpeas for crunch. You can also try a Caprese salad. Add sliced peaches instead of tomatoes for a sweet twist. Try mixing greens like spinach and arugula. This gives a fresh taste. Use different cheeses like goat cheese or feta. They add creaminess and flavor. Salads can be both gluten-free and vegan. You can use quinoa as a base. It is full of protein and easy to cook. Mix in your favorite veggies like bell peppers and carrots. For dressings, use olive oil and lemon juice. They add great flavor without any allergens. Avocado is another good option. It makes salads creamy and rich. Seasonal ingredients make salads exciting all year. In spring, use fresh peas and radishes. In summer, add juicy tomatoes and cucumbers. Fall calls for roasted squash and apples. Winter salads can include hearty greens like kale and citrus fruits. You can also change your dressings. Use lighter dressings in summer and richer ones in winter. This keeps flavors fresh and fun. For a colorful dish, try the Rainbow Quinoa Salad. It is a feast for the eyes and the stomach. For the full recipe, check out the Rainbow Quinoa Salad above. To keep your leftover salad fresh, store it in the fridge right away. Use a clean container with a lid. If your salad has dressing, keep it separate. This way, the greens stay crisp. If you have cut fruits or avocados, add lemon or lime juice. This helps stop browning. Keep salad ingredients fresh by following these simple tips: - Wash and dry greens before storage. Moisture can cause wilting. - Store cucumbers and peppers in a separate bag. They release gases that can spoil other veggies. - Use paper towels in your container. They absorb extra moisture and keep greens crisp. - Check your fridge's temperature. It should be around 35-38°F (1.7-3.3°C) for best results. The right container makes all the difference. Here are my top picks: - Glass jars: These are great for single servings. They seal well and keep salads fresh. - Plastic containers: Choose BPA-free ones. They are lightweight and easy to stack. - Bento boxes: These are perfect for salads with multiple ingredients. They keep everything separate. - Vacuum-sealed bags: Use these for short-term storage. They reduce air and help keep salads fresh longer. For a delicious salad, try the Rainbow Quinoa Salad. You can find the Full Recipe above. To make a salad more filling, add protein. Try grilled chicken, beans, or tofu. Whole grains like quinoa or brown rice also help. Nuts and seeds add crunch and keep you full longer. Don't forget healthy fats like avocado or olive oil for richness. The best dressings are simple yet tasty. A classic vinaigrette made from olive oil and vinegar works well. Creamy dressings like ranch or Caesar are popular too. For a fresh twist, use citrus dressings with lemon or lime juice. You can even make your own dressing with yogurt or tahini. Salads last about 3 to 5 days in the fridge. It depends on the ingredients. Leafy greens may wilt faster, while hearty veggies last longer. Keep dressings separate until serving to maintain freshness. Store salads in airtight containers to prevent spoilage. Building a great salad is simple and fun. We explored key ingredients, preparation steps, and creative variations. You learned how to make salads that are fresh, tasty, and healthy. Remember to store your leftovers right to keep them fresh. With these tips, you can create exciting salads year-round. Enjoy the flavors and benefits of salads in your meals!
Every Single Salad Recipe Simple and Fresh Ideas
Welcome to Every Single Salad Recipe: Simple and Fresh Ideas. Are you looking to mix up your meals with bright, tasty salads? Whether you want
- 4 cups fresh broccoli florets - 1 cup bell peppers, diced - 1/2 cup red onion, finely chopped Fresh ingredients are key to a tasty broccoli salad. The vibrant colors and crisp textures make every bite exciting. I love using bright bell peppers, as they add sweetness and crunch. Red onion gives a nice bite that balances well with the other flavors. - 1/2 cup raisins - 1/2 cup sunflower seeds - 1/2 cup cooked quinoa Optional add-ins can take your salad to the next level. Raisins add a sweet touch, while sunflower seeds give a nice crunch. If you want more texture, mix in some cooked quinoa. It also adds protein, making the salad more filling. - 1/2 cup Greek yogurt - 2 tablespoons apple cider vinegar - 1 tablespoon honey or maple syrup - Salt and pepper to taste - A pinch of garlic powder (optional) The dressing is where the magic happens. Greek yogurt gives a creamy base. Apple cider vinegar adds tang, while honey or maple syrup brings sweetness. Adjust the salt and pepper for flavor. If you like, add a pinch of garlic powder for extra depth. This dressing ties all the flavors together nicely. For the complete details, check out the [Full Recipe]. - Blanching in boiling water First, bring a pot of water to a rolling boil. Add the fresh broccoli florets to the pot. Blanch them for about 2 minutes. This keeps the bright green color and the crunch. - Transferring to ice water After 2 minutes, scoop the broccoli out and place it in a bowl of ice water. This stops the cooking. Let it sit for 5 minutes. Then, drain the broccoli and pat it dry with a towel. - Combining salad components In a large mixing bowl, add the cooled broccoli. Then, toss in diced bell peppers, finely chopped red onion, raisins, and sunflower seeds. If you want extra texture, add cooked quinoa. - Preparing the dressing In a separate bowl, whisk together Greek yogurt, apple cider vinegar, honey or maple syrup, salt, pepper, and a pinch of garlic powder. Mix until it’s smooth and creamy. - Tossing salad and dressing Pour the dressing over the salad ingredients in the large bowl. Gently toss everything together until all the ingredients are well coated with the dressing. - Adjusting seasoning Taste your salad and adjust the seasoning. Add more salt or pepper if needed. This step makes all the flavors pop. - Chilling the salad Place the salad in the refrigerator for at least 30 minutes. This allows the flavors to blend together nicely. Enjoy your crunchy broccoli bliss salad! For the complete recipe, check the [Full Recipe]. To keep your broccoli crisp, blanch it quickly. Boil for just 2 minutes. Then, plunge it into ice water. This stops cooking and locks in color. For bell peppers, pick vibrant ones. Red, yellow, and orange add sweetness. Green peppers can be more bitter. Choose your favorite colors for a bright salad. Want more flavor? Try adding spices like smoked paprika or cumin. These spices give depth. You can also use fresh herbs like dill or basil. To balance sweetness in the dressing, adjust honey or maple syrup. If it's too sweet, add more vinegar. This creates a nice contrast. Serve your salad in a large bowl. This makes it look inviting. Sprinkle extra sunflower seeds on top for crunch. Fresh herbs like cilantro or parsley add color and freshness. You can also use a colorful plate to enhance the dish's appeal. People eat with their eyes first! For a special touch, check out the Full Recipe for more tips. {{image_2}} You can change the flavor of your broccoli salad with different dressings. Creamy dressings, like ranch or yogurt-based ones, add a rich taste. Vinaigrettes offer a tangy kick and are lighter. You can mix in herbs, like basil or dill, for a fresh twist. A little lemon juice also brightens the flavor. Try different spices too, like cumin or paprika, to make it unique. Feel free to swap nuts and seeds based on your taste. Almonds or walnuts can replace sunflower seeds. You can also add proteins for heartiness. Grilled chicken or baked tofu boosts the salad's protein. For a fun twist, add chickpeas or edamame for extra texture and flavor. In summer, fresh fruits can really make your salad pop. Try adding diced apples or juicy berries for sweetness. In fall, roasted squash adds warmth and depth. You can even toss in some pomegranate seeds for a festive touch. Seasonal ingredients keep your salad exciting all year long. For the full recipe, check out the Crunchy Broccoli Bliss Salad 🥦. To keep your broccoli salad fresh, store it in an airtight container. This helps lock in flavor and crunch. Place it in the fridge right after serving. To prevent sogginess, layer paper towels on top of the salad. They will absorb extra moisture. You can freeze broccoli salad, but some textures change. If you want to freeze it, omit the dressing first. Freeze the salad in a safe container or bag. To thaw, place it in the fridge overnight. Serve cold for the best taste. In the refrigerator, your broccoli salad lasts about 3 to 5 days. Keep an eye on its freshness. Signs of spoilage include a sour smell, slimy texture, or discoloration. If any of these occur, it’s best to toss the salad. To enhance your broccoli salad, think about adding different flavors. Here are some tips: - Add cheese: Feta or shredded cheddar adds creaminess. - Use nuts: Almonds or walnuts bring crunch and flavor. - Try fruits: Apples or oranges can add a sweet touch. - Spice it up: A dash of cayenne or paprika gives a kick. - Fresh herbs: Chopped basil or parsley brightens the dish. These simple changes can elevate your dish and make it more exciting. Yes, broccoli salad is very healthy! Here are some benefits of its main ingredients: - Broccoli: Packed with vitamins C and K, great for immunity. - Bell peppers: High in vitamin A, which is good for the eyes. - Red onion: Contains antioxidants that are good for heart health. - Raisins: Provide natural sweetness and iron. - Sunflower seeds: Full of healthy fats and protein. This salad is not just tasty; it also helps you stay healthy. Yes, you can prepare broccoli salad ahead of time. Here’s how to do it: - Prep in advance: You can chop all ingredients and store them separately. - Make the dressing: Prepare the dressing and keep it in the fridge. - Combine later: Mix everything together just before serving. This keeps the salad fresh and crunchy. If you store the salad properly, it can last for a couple of days in the fridge. This blog post covered how to make a delicious broccoli salad. We talked about fresh ingredients like broccoli, bell peppers, and red onion. You learned about optional add-ins, dressings, and step-by-step instructions. I also shared tips for perfecting texture, enhancing flavor, and presenting your dish. Don’t forget you can swap ingredients and store leftovers properly. With these ideas, your salad will not only taste great but also look amazing. Enjoy experimenting and make this dish your own!
Broccoli Salad Simple and Tasty Recipe Guide
Looking to brighten up your meals with something fresh? This Broccoli Salad is your answer! Packed with crunchy veggies and flavor, it’s both simple to
- 2 cups cooked chicken, shredded or diced - 4 cups romaine lettuce, chopped - 1 cup cherry tomatoes, halved - 1 cup crispy lettuce, chopped - 1/2 cup cucumber, diced - 1/4 cup red onion, thinly sliced - 4 slices of crispy turkey bacon, chopped In this salad, I use cooked chicken as the main protein. You can shred or dice it. Romaine lettuce adds a nice crunch. I love adding cherry tomatoes for a burst of flavor. Crunchy lettuce gives extra texture. Diced cucumber cools the salad, while red onion adds a slight bite. Crispy turkey bacon brings in that classic BLT flavor. - 1/2 cup mayonnaise - 2 tablespoons Greek yogurt - 1 tablespoon lemon juice - 1 teaspoon garlic powder - Salt and pepper to taste - Fresh chives, chopped, for garnish For the dressing, I mix mayonnaise and Greek yogurt for creaminess. Lemon juice brightens the flavors. Garlic powder adds depth. I always taste and adjust the salt and pepper, so it’s just right. Finally, I sprinkle fresh chives on top for a pop of color and flavor. You can find the full recipe at the end of the article. To start, gather your ingredients. In a large bowl, combine: - 2 cups cooked chicken, shredded or diced - 4 cups romaine lettuce, chopped - 1 cup cherry tomatoes, halved - 1 cup crispy lettuce, chopped - 1/2 cup cucumber, diced - 1/4 cup red onion, thinly sliced - 4 slices of crispy turkey bacon, chopped Once you have everything in the bowl, toss gently to mix all ingredients. This helps each bite to be full of flavor. Next, let’s make the dressing. In a small bowl, whisk together: - 1/2 cup mayonnaise - 2 tablespoons Greek yogurt - 1 tablespoon lemon juice - 1 teaspoon garlic powder - Salt and pepper to taste Mix until smooth and creamy. This dressing adds a rich taste to our salad. Now it's time to bring it all together. Pour the dressing over the salad mixture. Toss until coated. Make sure every piece of chicken and veggie has dressing. This will make the salad taste amazing. Let the salad sit in the refrigerator for about 10 minutes. This allows the flavors to blend. If you want, you can garnish with fresh chives before serving. For the full recipe, check the details above. Enjoy your fresh and flavorful BLT Chicken Salad! For your BLT Chicken Salad, you can use shredded or diced chicken. Shredded chicken gives a softer texture. Diced chicken adds more bite. Both work well, so choose what you like best. Cook the chicken by roasting, grilling, or boiling. Roasting or grilling often brings out the best flavors. Use leftover chicken to make your prep easier. Letting the salad sit for at least ten minutes makes a big difference. This time allows the flavors to blend better. Adjusting the seasoning is key too. After mixing, taste the salad. If it needs more salt or pepper, add it slowly. A little goes a long way, so mix well after each addition. Serve your salad in a big bowl for sharing. For a fun twist, use individual bowls. Pair the salad with crusty bread or fresh rolls. You can also serve it with a side of fruit. This balance makes for a great meal. For the full recipe, check the section above. {{image_2}} You can change the protein in your BLT Chicken Salad. Try using different types of cooked chicken like grilled, roasted, or even smoked. Each type brings a new flavor. If you're looking for a meatless option, tofu or beans are great substitutes. Tofu absorbs flavors well, while beans add fiber and protein. To add more crunch, think about using other veggies. Carrots, bell peppers, or radishes can give your salad a nice bite. You can also use nuts or seeds like almonds, walnuts, or sunflower seeds. These options add flavor and texture. They also boost the salad's nutrition. You can switch up the dressing too. A vinaigrette-style dressing made with olive oil and vinegar is light and zesty. If you want a creamy option, try yogurt or avocado-based dressings. These alternatives keep the salad fresh while adding a unique taste. For the full recipe, check out the details above! To store leftovers, place the salad in an airtight container. Keep it in the fridge. Use it within three days for the best taste. After that, the ingredients may lose their freshness. You can freeze some components of the salad but not the whole dish. Freeze the cooked chicken and bacon in separate bags. Avoid freezing lettuce and dressing, as they do not thaw well. When ready to eat, thaw chicken and bacon overnight in the fridge. To reheat chicken, use a microwave or stovetop. Warm it gently to keep its juicy texture. Avoid reheating the salad as a whole. Instead, mix in fresh ingredients like lettuce or tomatoes before serving. This keeps everything crisp and tasty. BLT Chicken Salad lasts about three to four days in the fridge. To keep it fresh, store it in an airtight container. The freshness can change based on the chicken's quality and how well you seal the container. If you notice any odd smells or changes in color, it's best to toss it. Yes, you can make this salad ahead of time. I recommend preparing the salad base without the dressing. You can mix the chicken, lettuce, and veggies and store them in the fridge. Just add the dressing right before serving to keep everything crisp. This way, you save time and enjoy fresh taste. The best chicken for this salad is cooked and shredded or diced chicken breast. It has a mild flavor that blends well with other ingredients. You can use rotisserie chicken for ease and flavor. Just remember to remove the skin and bones before using it in the salad. Yes, this recipe is very easy to customize. You can swap out the chicken for turkey or even tofu for a vegetarian option. Feel free to add your favorite veggies, like bell peppers or corn. You can also mix in different dressings to match your taste. Enjoy making it your own! This blog post covered key ingredients and steps to make a tasty BLT Chicken Salad. You learned how to mix fresh greens, seasoned chicken, and a creamy dressing. We also discussed tips for enhancing flavor and storage methods to keep your salad fresh. You can easily swap proteins or add crunch to fit your taste. In summary, this salad is adaptable and simple, perfect for any meal. Enjoy creating your own version!
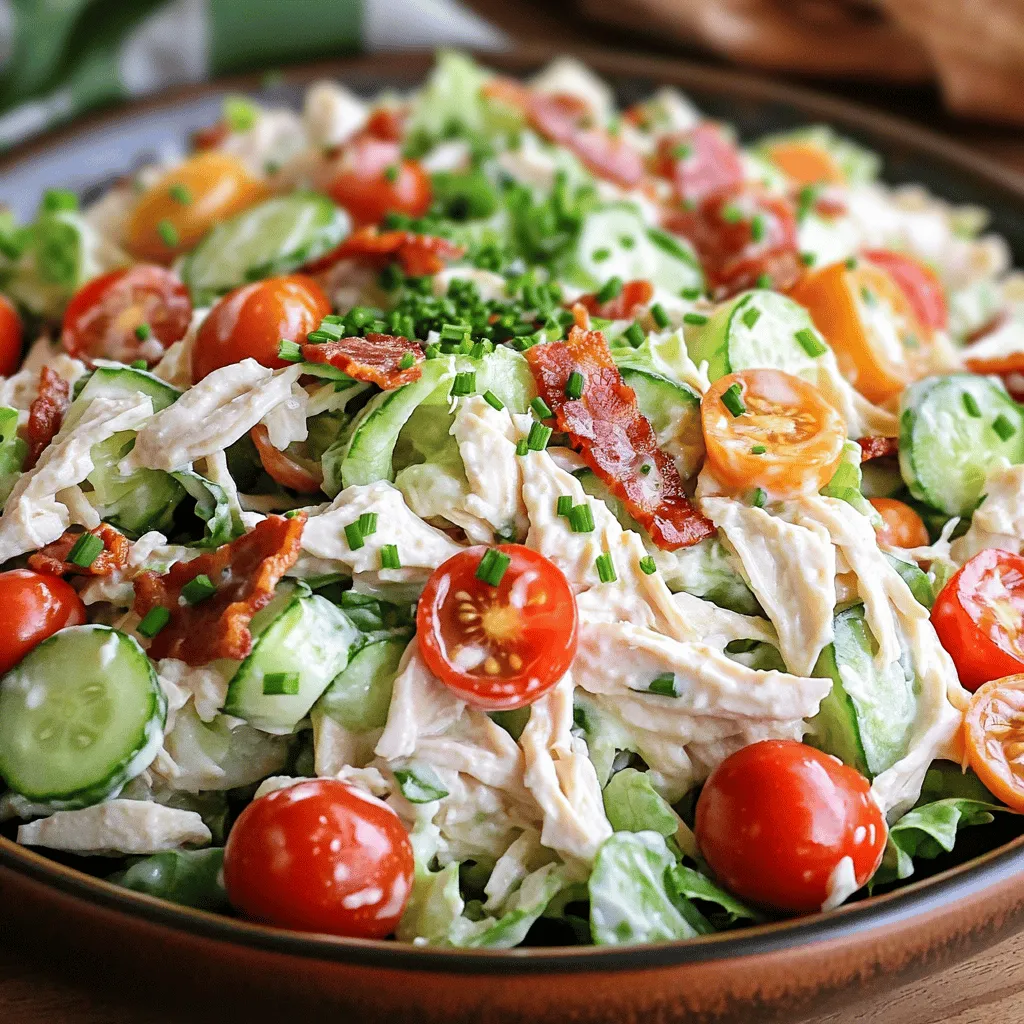
BLT Chicken Salad Fresh and Flavorful Delight
Looking for a fresh and tasty meal? You’ll love this BLT Chicken Salad! It merges juicy chicken, crispy bacon, and vibrant veggies into one bowl
Cowboy Salad is vibrant and packed with flavor. Here’s what you need: - 2 cups romaine lettuce, chopped - 1 cup cherry tomatoes, halved - 1 cup bell peppers (red and yellow), diced These fresh vegetables form the base of your salad. Romaine lettuce offers a nice crunch. Cherry tomatoes add sweetness, while bell peppers bring colorful layers. - 1 cup canned black beans, rinsed and drained - 1 cup corn, fresh or canned Black beans add protein and fiber. Corn sweetens the dish and gives it heartiness. Together, they make the salad filling and nutritious. - 1 avocado, diced - 1/2 red onion, finely chopped - 1/2 cup shredded cheddar cheese - 1/4 cup cilantro, chopped - 1/2 cup tortilla chips, crushed (for topping) Avocado provides creaminess. Red onion adds a mild bite. Cheddar cheese introduces richness, and cilantro gives a fresh taste. The crushed tortilla chips add a fun crunch at the end. - 1/4 cup olive oil - 2 tablespoons lime juice - 1 teaspoon cumin powder - Salt and pepper to taste The dressing ties everything together. Olive oil and lime juice create a zesty base. Cumin adds warmth, while salt and pepper enhance all the flavors. You can find the full recipe for Cowboy Salad in the next section. Enjoy crafting this flavorful dish! 1. Layering the salad base Start by taking a large salad bowl. Add 2 cups of chopped romaine lettuce as your base. This gives your salad a crisp and fresh start. 2. Adding the salad ingredients Next, layer the other ingredients. First, add 1 cup of halved cherry tomatoes. Then, add 1 cup of canned black beans that you rinsed and drained. Follow this with 1 cup of corn, fresh or canned. Now, add 1 diced avocado, 1 cup of diced bell peppers, and 1/2 a finely chopped red onion. Finally, sprinkle 1/2 cup of shredded cheddar cheese and 1/4 cup of chopped cilantro on top. 3. Whisking the dressing ingredients together In a small bowl, combine 1/4 cup of olive oil, 2 tablespoons of lime juice, 1 teaspoon of cumin powder, and salt and pepper to taste. Whisk these ingredients together until they blend well. This dressing adds a zesty kick to your salad. 4. Tossing the salad gently Drizzle the dressing over your salad. Use a spoon to toss the salad gently. Be careful not to mash the avocado. You want each bite to be fresh and colorful. 5. Tips for adding tortilla chips Right before serving, add 1/2 cup of crushed tortilla chips on top. This gives your salad a nice crunch. If you like, you can serve the chips on the side for a fun touch. For the full recipe, check out the details above. Enjoy making this fresh and flavorful Cowboy Salad! Using fresh ingredients makes a big difference. Fresh veggies taste better and add crunch. For canned items, choose good quality brands. They save time and still taste great. Rinse canned black beans well to remove extra salt. When picking avocados, look for ripe ones. A ripe avocado feels slightly soft when you press it. If it’s hard, let it ripen on your counter. You can speed up ripening by putting it in a paper bag with a banana. Adjust the seasoning to fit your taste. If you like it spicy, add some chili powder. For a zesty kick, increase the lime juice. Taste as you go to get it just right. You can swap the olive oil for avocado oil if you want a different flavor. For a creamy dressing, mix in some Greek yogurt. It will change the texture and taste while still being healthy. Serve your Cowboy Salad in a big bowl for gatherings. This makes it easy for everyone to help themselves. You can also layer the salad in mason jars for meal prep. Start with dressing on the bottom, then add the lettuce, beans, and toppings. This keeps everything fresh and pretty. For a fun touch, add some extra cilantro and lime wedges on the side. It looks nice and gives a fresh flavor boost to each bite. {{image_2}} Cowboy salad is versatile. You can change it to fit your needs and tastes. Here are some fun ideas. For a vegan option, skip the cheese. You can add nutritional yeast for a cheesy taste. For a vegetarian version, keep the cheese and load up on veggies. If you need gluten-free options, use corn chips that are certified gluten-free. They add a tasty crunch without the gluten. Adding proteins makes your salad heartier. Grilled chicken or steak works well. You can also use shrimp or tofu for a different twist. Try different dressings too. A zesty ranch or chipotle dressing adds a nice kick. You can even make a creamy avocado dressing for extra flavor. You can make a Southwestern Cowboy Salad. Add jalapeños, black olives, and a chipotle dressing for a spicy twist. For a Mexican-inspired salad, toss in corn salsa and top it with fresh cilantro. You can also include diced mango for a sweet touch. For the complete recipe, check out the Full Recipe above. To store leftovers of your Cowboy Salad, place it in an airtight container. This keeps it fresh and tasty. You can store it in the fridge for about three days. If you notice the lettuce wilting, it’s time to toss it. I recommend eating your stored salad within three days for the best taste. After this, the ingredients can lose flavor and texture. Avoid freezing salad components like lettuce and avocado. They do not freeze well and can turn mushy. Instead, refrigerate and enjoy fresh. To keep your salad ingredients crisp, separate them before storing. Keep the dressing in a small container. Add it right before you eat. For avocado, sprinkle some lime juice on it to slow browning. This way, your Cowboy Salad stays fresh and vibrant! Cowboy salad is a colorful dish that blends fresh veggies and beans. It reflects the hearty flavors of the American Southwest. This salad often includes ingredients like romaine lettuce, black beans, and corn. It’s a great way to enjoy a mix of textures and tastes. People love it for its bold flavors and vibrant colors, making it a popular choice for gatherings. Yes, you can make cowboy salad ahead of time. To do this, prepare the ingredients separately. Keep the dressing in a jar and the salad in a bowl. This keeps the salad fresh and crisp. Just combine everything right before serving. If you store it this way, the flavors will blend nicely without making the ingredients soggy. If you don’t have black beans, you can use other beans. Great options include kidney beans or pinto beans. Chickpeas work well too, adding protein and a nice taste. For a meatier option, try diced grilled chicken or beef. These alternatives will give your salad a different twist while still being delicious. Cowboy salad is packed with healthy ingredients. It has plenty of fresh veggies, which provide vitamins and fiber. Black beans add protein and help keep you full. Avocado gives healthy fats, while corn offers sweetness. Together, these ingredients make a balanced meal that supports a healthy diet. Cowboy salad can last about 3 days in the fridge. Make sure to store it in an airtight container. Check for signs of spoilage like wilted lettuce or sour smells. If everything looks fresh, it’s still good to eat. Enjoy your salad, but try to finish it within a few days for the best taste. For the full recipe, check out the Cowboy Salad section! In this post, we explored the vibrant ingredients of Cowboy Salad and how to prepare it. Fresh veggies, proteins, and flavor enhancers create a satisfying dish. We also shared tips for perfecting your salad and offered variations for different diets. Remember, you can adjust ingredients and dressings to your taste. This salad not only delights your palate but also provides essential nutrients. Enjoy making your Cowboy Salad as a fun, healthy meal choice!
Cowboy Salad Recipe Fresh and Flavorful Delight
Looking for a fresh and tasty salad that packs a punch? The Cowboy Salad is your answer! This colorful mix of crisp veggies, hearty proteins,
- 2 cups fresh broccoli florets - 1 large Honeycrisp apple, cored and diced - 1 cup shredded carrots - 1/2 cup red onion, thinly sliced - 1/2 cup dried cranberries - 1/2 cup toasted walnuts (or pecans) - 1/4 cup plain Greek yogurt - 2 tablespoons apple cider vinegar - 1 tablespoon honey - Salt and pepper to taste - Prep Time: 10 minutes - Total Time: 40 minutes - Servings: 6 The key to my Honeycrisp Apple Broccoli Salad is fresh, quality ingredients. The crispness of the Honeycrisp apple adds a sweet bite that pairs well with the crunchy broccoli. I always choose a bright green broccoli, as it means it's fresh and full of nutrients. The sweet and tangy dried cranberries add another layer of flavor. Using plain Greek yogurt in the dressing gives it a creamy texture while keeping it healthy. I prefer this over sour cream, as it provides a protein boost too. Apple cider vinegar brings a nice tang to the mix, enhancing the overall taste. I love how quick this recipe is. It takes only 10 minutes to prep. You can enjoy it in just 40 minutes, which makes it perfect for a busy day. You can find the full recipe above. To start, blanch the broccoli florets in boiling water for 2-3 minutes. This helps keep them bright green and crisp. After that, quickly transfer them to an ice bath. This stops the cooking right away. Drain the broccoli and set it aside. It should have a nice crunch. Next, grab a large mixing bowl. Combine the diced Honeycrisp apple, shredded carrots, red onion, dried cranberries, and toasted walnuts in the bowl. This mix adds color and texture to your salad. Each bite will be full of sweet and savory flavors. In a separate small bowl, whisk together the Greek yogurt, apple cider vinegar, honey, salt, and pepper. This dressing brings a creamy and tangy taste. Make sure it is smooth and well-mixed. It adds a delicious layer to the salad. Now, pour the dressing over the salad mixture. Toss gently until all the ingredients are well-coated. Then, add the blanched broccoli. Toss again to combine all the flavors. You want every piece to be dressed nicely. Finally, let the salad chill in the refrigerator for at least 30 minutes. This resting time allows the flavors to meld together. It enhances the taste and makes the salad even more refreshing. For the full recipe, check out the details in the recipe section. To get that perfect crunch in your Honeycrisp apple broccoli salad, blanch the broccoli florets. Boil them for just 2-3 minutes. This brightens their color and keeps them crisp. After boiling, transfer the florets to an ice bath. This stops the cooking process and locks in that fresh taste. Remember, a little time in boiling water goes a long way. Let the salad rest in the fridge for at least 30 minutes. This step allows the flavors to blend well and enhances the taste. When you serve it, you will notice how the ingredients come together beautifully. Presentation matters, especially when serving guests. Garnish your salad with extra walnuts and a sprinkle of cranberries on top. This not only adds color but also enhances the flavor. For events, consider using individual serving cups. This makes it easy for guests to enjoy and adds a fun touch to your table. Honeycrisp apples and broccoli pack a nutritional punch. Broccoli is full of fiber, vitamin C, and other nutrients. It helps keep your heart healthy and supports your immune system. Honeycrisp apples add sweetness and are rich in antioxidants. The combination makes this salad both tasty and nutritious. Using Greek yogurt in your dressing adds creaminess without too many calories. Greek yogurt is high in protein and calcium, which can help you feel full longer. It’s a smart choice for a healthy salad dressing. For the full recipe, check out the detailed instructions above. {{image_2}} You can easily change this salad to fit your diet. For a vegan twist, try using cashew cream or ripe avocado instead of Greek yogurt. This keeps the creamy texture while making it plant-based. If you need a nut-free salad, simply omit the nuts or swap them for seeds like sunflower or pumpkin. Both options provide crunch without the allergens. Feel free to get creative with your fruit choices. Add in some diced pears or halved grapes for extra sweetness. You can also try mixing in different greens like fresh spinach or hearty kale. These options give you new flavors and textures, making this salad even more exciting. Want a lighter dressing? Swap the Greek yogurt for a dairy-free yogurt. This change keeps the salad creamy while catering to different diets. You can also make a homemade vinaigrette. A simple mix of olive oil, vinegar, and herbs can brighten the salad and add a fresh taste. After enjoying the Honeycrisp apple broccoli salad, store any leftovers in an airtight container. This keeps the salad fresh and crunchy. It tastes best within 2-3 days. If you wait too long, the texture may change, and the flavors could fade. If you want to freeze the salad, separate the components first. Freeze the broccoli and apples in one bag. Place the dressing in another. This keeps each part fresh. However, be aware that freezing can change the texture when thawed. Broccoli may become softer, and apples might lose some crunch. You can serve the salad cold or warm. If you prefer it warm, gently reheat in a skillet over low heat. Avoid high heat to prevent overcooking. Warm it just enough to take the chill off. This way, you keep the freshness and flavor intact. Yes, you can prepare this salad ahead of time. To keep the salad fresh, follow these tips: - Prep the ingredients separately: Chop the apples, broccoli, and other veggies, but keep them apart. - Mix the dressing in advance: Combine the yogurt, vinegar, honey, salt, and pepper. Store it in the fridge. - Assemble close to serving: Mix everything together just before you plan to eat. This keeps the salad crunchy! If you can't find Honeycrisp apples, here are a few great substitutes: - Granny Smith apples: They are tart and crisp. - Fuji apples: These are sweet and juicy. - Gala apples: They add a mild sweetness. Each of these options will change the flavor a bit, but they still work well! Yes, this salad is gluten-free! All the ingredients are naturally free of gluten. The broccoli, apples, and yogurt are safe for those with gluten issues. Always check labels on packaged items, like yogurt, to be sure. To turn this salad into a more filling meal, consider adding these ingredients: - Cooked chicken or turkey: Shredded or diced, it adds protein. - Quinoa or farro: These grains bring extra fiber and nutrients. - Chickpeas: They add protein and a nice texture. With these additions, your salad will be hearty and satisfying! For the full recipe, visit the [Full Recipe]. This blog post provided a simple and tasty way to make Honeycrisp Apple Broccoli Salad. We covered fresh produce, additional ingredients, and how to prepare everything. You saw tips for the best texture and presentation ideas that make your dish stand out. Remember to chill the salad for deeper flavors. Enjoy your delicious, healthy creation! With these easy steps, your kitchen will be a place of fresh and fun meals.
Honeycrisp Apple Broccoli Salad Fresh and Crunchy Mix
Looking for a fresh and delicious salad that combines sweet and savory? Try my Honeycrisp Apple Broccoli Salad! This crunchy mix features crisp broccoli, sweet
To make a delicious creamy cucumber salad, you need fresh and simple ingredients. Here’s the list: - 2 large cucumbers, thinly sliced - 1 cup Greek yogurt - 2 tablespoons sour cream - 1 tablespoon fresh dill, chopped - 1 teaspoon garlic powder - 1 tablespoon lemon juice - Salt and pepper to taste - 1/4 teaspoon chili flakes (optional) - 1/4 cup red onion, finely chopped These ingredients work well together to create a light and refreshing dish. The Greek yogurt adds creaminess, while the dill gives a fresh taste. The garlic powder and lemon juice add a nice kick. If you want some heat, the chili flakes can spice things up. You can find the full recipe [here](#). - First, wash the cucumbers well under cold water. - Next, slice the cucumbers into thin rounds. - If you want a smoother texture, you can peel the cucumbers. - In a mixing bowl, combine 1 cup of Greek yogurt and 2 tablespoons of sour cream. - Then, add 1 tablespoon of fresh dill, 1 teaspoon of garlic powder, 1 tablespoon of lemon juice, salt, and pepper. - Mix all these ingredients until they blend well into a creamy dressing. - Toss the sliced cucumbers with the creamy dressing until they are well coated. - Fold in 1/4 cup of finely chopped red onion for added flavor and crunch. - If you enjoy a bit of heat, sprinkle in 1/4 teaspoon of chili flakes. Chilling the salad for about 30 minutes helps the flavors mix. This salad is a perfect side dish for any meal. You can find the full recipe above for more details! To make your creamy cucumber salad even better, you can adjust the seasoning to your taste. Start with salt and pepper, then add more as needed. Let the salad chill for at least 30 minutes. This time helps all the flavors blend together. The chill also makes every bite refreshing. When it comes to serving, you have options. You can serve the salad in a large bowl for sharing or in individual dishes for a nice touch. To make it look even better, garnish with fresh dill or a sprinkle of extra chili flakes. This adds color and a little kick. You don’t need much to make this salad. Here are the tools you will need: - Mixing bowl - Knife and cutting board - Measuring spoons {{image_2}} You can change up the salad by adding herbs and veggies. Fresh mint or parsley can brighten the dish. Just chop them finely and mix them in. You can also add color and crunch with sliced bell peppers or tomatoes. These additions make the salad even more refreshing and fun! If you want a dairy-free option, try using vegan yogurt instead of Greek yogurt. It keeps the creamy texture while being plant-based. For a low-calorie version, you can use yogurt alternatives that have fewer calories. This way, you can enjoy the salad while sticking to your diet goals. To give your salad a tangy kick, add a splash of vinegar. It balances the creaminess of the yogurt. If you enjoy a bit of saltiness, mix in some crumbled feta cheese. This twist adds a rich flavor and makes your salad even more delicious. For the full recipe, refer back to the Cool & Creamy Cucumber Delight section. To keep your creamy cucumber salad fresh, store it in the fridge. Place any leftovers in an airtight container. This helps keep moisture in and prevents odors from other foods. Glass or BPA-free plastic containers work best. These options do not interact with food and keep flavors intact. You can expect your salad to last about 3 to 5 days in the fridge. Check for signs of spoilage, like a sour smell or watery texture. If the cucumbers look mushy or the dressing separates, it’s time to toss it out. Keeping an eye on these signs ensures you enjoy your salad at its best. To make this salad vegan, you can swap Greek yogurt and sour cream for plant-based options. Use unsweetened coconut yogurt or almond yogurt for a creamy base. You can also mix in some tahini for extra creaminess. Adding nutritional yeast can enhance the flavor, giving a cheesy taste. Yes, you can prepare this salad ahead of time! To keep it fresh, mix the cucumbers and dressing separately. Combine them right before serving. This will prevent the cucumbers from getting too watery. If you want to save time, slice the cucumbers and store them in the fridge. Just remember to add the dressing later. Creamy cucumber salad pairs well with many dishes. Try serving it with grilled chicken, fish, or lamb. It also works great with quinoa or rice dishes. For a light meal, enjoy it with pita bread or falafel. This salad can be a refreshing side for any summer barbecue or picnic. This creamy cucumber salad is easy and fun to make. Use fresh ingredients for great taste. You can adjust this recipe with herbs, veggies, or dairy-free options. Letting it chill enhances flavor, so don’t skip that step. Store leftovers properly to keep them fresh. Enjoy this salad at your next meal or gathering. It adds a refreshing touch and pairs well with many dishes. Try out these tips, and make it your own!
Creamy Cucumber Salad Refreshing and Easy Recipe
Looking for a quick and tasty dish that screams summer? This Creamy Cucumber Salad is your answer! With just a handful of fresh ingredients, you