Salads
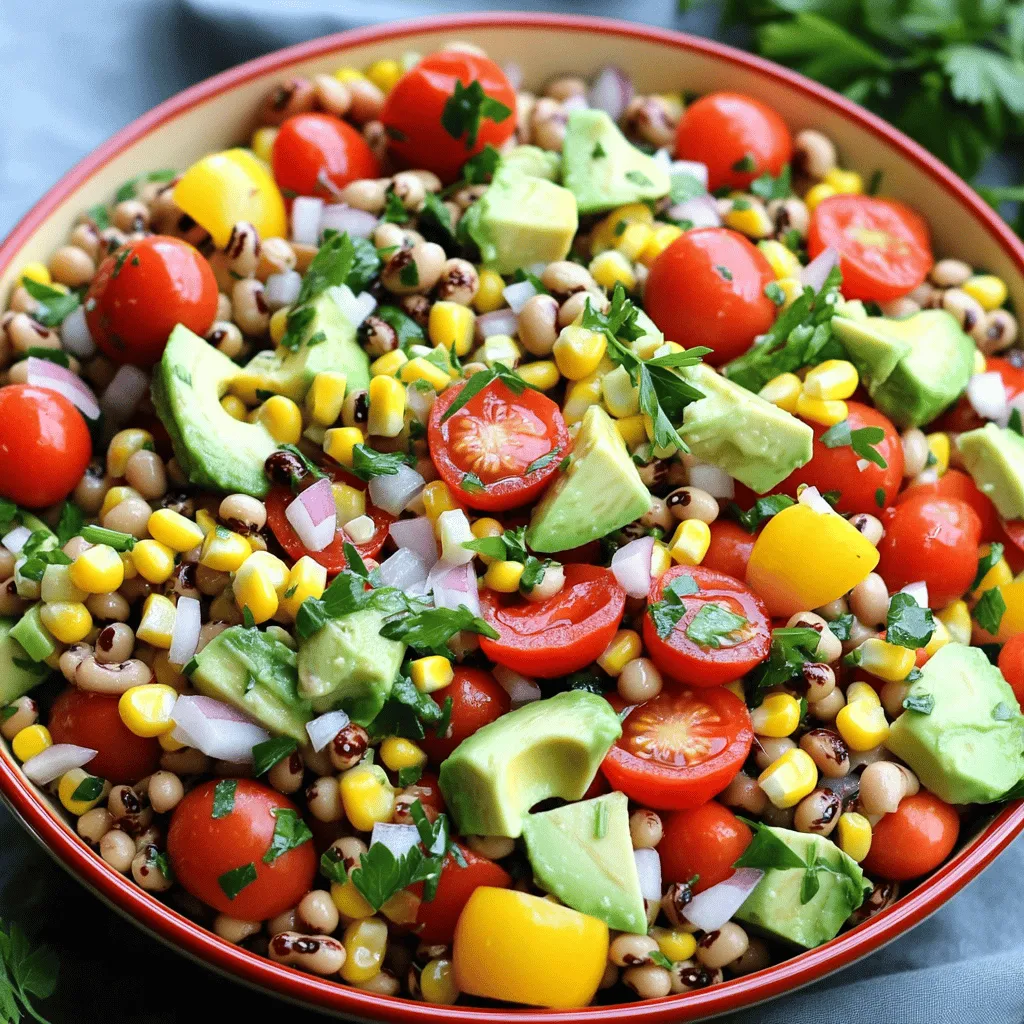
Black Eyed Pea Salad for New Year’s Luck Delight
Are you ready to kick off the New Year with a tasty dish that brings luck? Black-eyed peas have a special meaning, and they make
![For a tasty Spicy Southwest Chicken Salad, you need: - 2 boneless, skinless chicken breasts - 4 cups mixed salad greens (romaine, spinach, arugula) - 1 cup black beans, rinsed and drained - 1 cup corn (canned or frozen, thawed if frozen) - 1 cup cherry tomatoes, halved - ½ red onion, thinly sliced - 1 avocado, diced - ½ cup cilantro, chopped These main ingredients give the salad its fresh and hearty feel. The chicken adds protein, while the salad greens provide crunch. Black beans and corn add texture and flavor, making it filling and satisfying. To bring out the flavors, you will need: - 1 tablespoon olive oil - 1 teaspoon paprika - 1 teaspoon cumin - ½ teaspoon cayenne pepper (adjust to taste) - Salt and black pepper to taste - Juice of 1 lime - ½ cup ranch or cilantro-lime dressing The olive oil and spices create a mouthwatering coating for the chicken. The lime juice adds a bright touch, balancing the spices. You can choose either ranch or cilantro-lime dressing for a creamy finish that ties everything together. Explore the [Full Recipe] for detailed steps and perfect preparation tips! To start, we need to grill the chicken. First, heat your grill to medium. In a bowl, mix olive oil, paprika, cumin, cayenne pepper, salt, and black pepper. This spice mix gives the chicken a great kick. Rub it all over the chicken breasts. Make sure to coat them well for full flavor. Now, grill the chicken for about 6 to 7 minutes on each side. You want it cooked through and no longer pink inside. After grilling, let it rest for a few minutes. This step is key; it helps keep the chicken juicy. Then, slice the chicken into strips. Next, grab a large salad bowl. Combine the mixed salad greens, cherry tomatoes, black beans, corn, and red onion. Mix these ingredients well. They bring fresh flavors and colors to the dish. Now, add the grilled chicken strips and diced avocado on top. These ingredients make the salad hearty and filling. Drizzle the lime juice and dressing over everything. I like to use ranch or cilantro-lime dressing, but you can choose your favorite. Toss the salad gently to mix all the ingredients. For the final touches, toss the salad again to ensure every bite is flavorful. Top it off with chopped cilantro for that fresh burst of flavor. When serving, use large bowls to show off your work. Garnish with extra cilantro and lime wedges for a fresh look. Arrange the avocado slices neatly on top for a beautiful presentation. Enjoy your spicy southwest chicken salad made with love and care! For the full recipe, check it out [here](insert link). To make the best chicken for your salad, start with even cooking. First, pat the chicken dry with a paper towel. This helps the spices stick better. Next, make sure your grill is hot. I like to preheat it for at least 10 minutes. Using a meat thermometer is key. Cook the chicken until it reaches 165°F. This ensures it is safe to eat. Insert the thermometer into the thickest part of the chicken. If you skip this step, you might end up with dry or undercooked chicken. Adding toppings gives your salad a fun twist. Try crumbled feta cheese for a salty kick. You can also sprinkle some tortilla strips on top for crunch. Both add texture and flavor. Fresh herbs can brighten your dish. I love using cilantro, but others like parsley or basil work well too. Chop them finely and mix them in. This small step makes a big difference. It elevates your salad and adds depth to the flavors. For the full recipe, check out the Spicy Southwest Chicken Salad. Enjoy your cooking! {{image_2}} If you want to switch up the protein, shrimp or tofu work great. Shrimp adds a nice taste and cooks fast. Just grill them like the chicken. Season with paprika and cayenne for a spicy kick. Tofu is a fantastic option too. It absorbs flavors well. Use firm tofu for the best results. Press it to remove excess water, then marinate. Grill or sauté it until golden brown. This is a perfect vegetarian substitute. You can also try chickpeas for a meatless meal. They are packed with protein and add a nice texture. Just rinse them well and toss them in with your salad. Feel free to change the greens in your salad. Instead of mixed greens, use kale or arugula. These options give a different taste and texture. Romaine adds crunch, while spinach is mild and tender. You can switch up the dressing too. If you want something zesty, try a vinaigrette. A lime or avocado dressing can enhance the flavors. For a creamier option, mix Greek yogurt with herbs. No matter the swap, keep the salad fresh and tasty. Explore different flavors that suit your taste. To store your Spicy Southwest Chicken Salad, follow these easy steps: - Place leftovers in an airtight container. - Store in the fridge for up to three days. - Keep the dressing separate for best taste and texture. For containers, use glass or plastic that seals well. This keeps your salad crisp and fresh. Avoid metal containers, as they can affect the flavor. You can enjoy this salad cold or reheated. If you like it warm, heat the chicken gently in a pan. - Use low heat to avoid drying it out. - Add a splash of lime juice to boost flavor. If you eat it cold, the flavors mix well after sitting. Just toss it lightly before serving. You can even add extra dressing or fresh herbs for a zesty kick! To make your Spicy Southwest Chicken Salad spicier, start with cayenne pepper. You can add more than the half teaspoon in the recipe. Taste as you go, so it isn't too hot for you. Here are some other spicy ingredients to consider: - Jalapeños: Fresh or pickled, they add a nice kick. - Hot sauce: A few dashes can boost the heat. - Chipotle peppers: These add both heat and smokiness. Yes, you can prepare this salad in advance. This makes it perfect for meal prep. Cook the chicken and chop the veggies ahead of time. Store them separately until you're ready to eat. Here are some tips for meal prepping: - Keep dressing separate: This keeps your salad fresh and crisp. - Chill ingredients: Cold salads taste better. Add last-minute ingredients for freshness: - Avocado: It browns quickly, so add it just before serving. - Cilantro: Fresh herbs lose flavor over time. This salad packs a punch of healthy ingredients. You get lean protein from the chicken and fiber from the beans. The greens offer vitamins and minerals. Here’s a quick overview of its nutritional benefits: - Mixed salad greens: Low in calories, high in nutrients. - Black beans: Great source of protein and fiber. - Avocado: Adds healthy fats that are good for your heart. As for caloric information, one serving has about 400 calories. Adjust portion sizes based on your meal plan. For a lighter option, use less dressing or skip the avocado. This blog post covered how to make a Spicy Southwest Chicken Salad. You learned about main ingredients like chicken, greens, and black beans. We discussed seasoning and ways to prepare, assemble, and serve the salad. Tips were shared for grilling chicken and enhancing flavors. Variations included protein swaps and ingredient changes. Lastly, we talked about storage and meal prep tips. Enjoy making this salad your own. With these easy steps, you'll have a tasty dish ready to share. Happy cooking!](https://toastedrecipes.com/wp-content/uploads/2025/05/d2888f08-8457-4122-90ee-bde9c82b04f3.webp)
Spicy Southwest Chicken Salad Flavorful and Fresh Meal
Are you ready to spice up your meal routine? My Spicy Southwest Chicken Salad is your go-to dish for a quick, fresh, and flavorful meal.
![To make a bright and tasty Greek chickpea salad, gather these fresh ingredients: - 1 can (15 oz) chickpeas, drained and rinsed - 1 cup cherry tomatoes, halved - 1 cucumber, diced - 1/2 red onion, finely chopped - 1/2 bell pepper (any color), diced - 1/2 cup Kalamata olives, pitted and halved - 1/3 cup feta cheese, crumbled - 2 tablespoons fresh parsley, chopped - 3 tablespoons olive oil - 2 tablespoons red wine vinegar (or lemon juice for a twist) - 1 teaspoon dried oregano - Salt and pepper to taste This Greek chickpea salad is not just delicious; it is also healthy. A serving provides: - High protein from chickpeas - Fiber for digestion - Healthy fats from olive oil - Vitamins from fresh veggies - Calcium from feta cheese This makes it a great choice for a light meal or a side dish. You can swap ingredients to suit your taste or dietary needs: - Use canned black beans instead of chickpeas for a different flavor. - Try different cheese, like goat cheese, if you dislike feta. - Add avocado for creaminess instead of feta. - Use red wine vinegar or lemon juice based on your preference. - Swap parsley for basil or mint for a fresh twist. These changes will keep your salad exciting and full of flavor! For the complete recipe, check out the [Full Recipe]. Start by gathering all your ingredients. You will need chickpeas, tomatoes, cucumber, red onion, bell pepper, olives, feta cheese, and parsley. In a large bowl, add the drained chickpeas. Next, add the halved cherry tomatoes, diced cucumber, and chopped red onion. Toss in the diced bell pepper and halved olives. Mix these gently to combine. Take a small bowl. Add olive oil, red wine vinegar, dried oregano, salt, and pepper. Whisk these ingredients together. Make sure the dressing is well mixed. Pour this dressing over the salad. Toss gently to coat all the ingredients evenly. Once you have mixed the salad, add crumbled feta cheese and chopped parsley. Fold these in carefully so the feta stays intact. Taste your salad and adjust the seasoning as needed. If you want more flavor, add a bit more salt or lemon juice. Cover the salad and chill it for at least 30 minutes. This helps the flavors blend. Serve it cold or at room temperature for a fresh taste. Enjoy this delightful Greek Chickpea Salad! You can find the Full Recipe for more details. You can prepare Greek chickpea salad a day in advance. This allows the flavors to blend well. Just follow the recipe, then cover and store it in the fridge. The salad stays fresh for up to three days. Just remember to add feta just before serving to keep it crumbly and nice. To boost the taste, try adding more fresh herbs like dill or mint. A splash of lemon juice brightens the salad and gives it a fresh zing. You can even add a pinch of red pepper flakes for some heat. Experiment with different vinegars, too. Apple cider vinegar can add a nice twist. For a stunning presentation, serve the salad in a large bowl with a drizzle of olive oil on top. You can also layer the salad in individual glasses for a fun look. Garnish with extra herbs and a lemon wedge. This makes the dish look vibrant and inviting. Feel free to explore more ideas in the Full Recipe! {{image_2}} Greek chickpea salad is great for everyone. If you want a vegetarian version, just skip the feta cheese. You can use a plant-based feta instead. This keeps the salad tasty and creamy. For a vegan option, use the same plant-based cheese. It helps keep the salad fresh and healthy. You can customize this salad to fit your needs. If you don't like olives, swap them for artichoke hearts or sun-dried tomatoes. These add flavor and texture. If you're watching carbs, leave out the chickpeas. Instead, try diced zucchini or cauliflower. Both options keep the salad light and fresh. Want to make this salad heartier? You can add proteins or grains. Grilled chicken or shrimp works well. If you prefer a plant-based option, add quinoa or farro. They are both nutritious and filling. Just mix them in after you combine the veggies. This way, you get a full meal in one bowl. For the full recipe, check out the details above. To keep your Greek chickpea salad fresh, store it in an airtight container. This helps lock in moisture and flavor. Glass containers work great since they do not hold odors. Always refrigerate the salad after serving. This keeps it safe and tasty. When stored properly, Greek chickpea salad lasts about 3 to 5 days in the fridge. It’s best to eat it within this time frame for the best taste. If you notice any changes in color or smell, it’s best to discard it. Remember, flavors deepen as it sits, so it tastes even better the next day. Freezing Greek chickpea salad is tricky. The texture of fresh veggies can change after thawing. If you must freeze it, try only freezing the chickpeas and dressing. Keep the fresh veggies out until you are ready to serve. When you’re ready, thaw the chickpeas in the fridge overnight. Then, mix in fresh veggies and enjoy! For the full recipe, check out the Greek Chickpea Salad recipe above. You can use goat cheese as a great swap for feta. It has a similar creamy texture. If you want a vegan choice, try crumbled tofu or a vegan feta. Both options will keep your salad tasty and fresh. This salad stays good for about three to five days in the fridge. Just make sure to store it in an airtight container. The flavors blend even better after a day, making it a perfect dish for meal prep. Yes! Feel free to add any veggies you like. Carrots, bell peppers, or even radishes work well. Just chop them small so they mix nicely with the other ingredients. Your salad will be even more colorful and nutritious. Yes, this Greek chickpea salad is naturally gluten-free. Chickpeas are a great source of protein and fiber. You can enjoy this dish without worrying about gluten at all. Serve this salad chilled or at room temperature. It pairs well with grilled meats or as a side for sandwiches. Use a large bowl for sharing or individual plates for a more formal setting. For the full recipe, check out the earlier section. This post covered the key ingredients and steps for making a Greek chickpea salad. I shared tips on flavor enhancement, meal prep, and storage. You can easily adapt this recipe to fit your tastes and dietary needs. Whether you add proteins, swap ingredients, or enjoy it vegetarian, there’s a version for everyone. Remember, making this salad can be simple and fun. Get creative and enjoy the fresh flavors!](https://toastedrecipes.com/wp-content/uploads/2025/05/3a86a777-9f04-44fb-9623-0b9e1c9c5ea3.webp)
Greek Chickpea Salad Fresh and Flavorful Recipe
Looking for a fresh and tasty salad? This Greek Chickpea Salad recipe is just for you! Packed with vibrant flavors and healthy ingredients, it’s perfect
![- Honeycrisp apples - Mixed salad greens - Feta cheese - Toasted walnuts - Dried cranberries - Olive oil - Apple cider vinegar - Honey - Salt and pepper This dish shines because of its fresh and vibrant ingredients. Honeycrisp apples are sweet and crisp, making them perfect for salads. I love using mixed salad greens like arugula, spinach, and kale for a nice variety of textures and tastes. Feta cheese adds a salty kick. I always prefer crumbled feta because it spreads its flavor well. Toasted walnuts give a nice crunch and nutty taste, while dried cranberries add a sweet touch. For the dressing, I mix olive oil and apple cider vinegar. Adding honey sweetens it just right. A dash of salt and pepper rounds out the flavor. - Large mixing bowl - Small whisk or fork - Measuring cups and spoons - Salad serving platter You will need a large mixing bowl to toss everything together. A small whisk or fork works well for making the dressing. You should also have measuring cups and spoons to get the amounts just right. Finally, a nice salad serving platter makes your dish look great when serving. For the full recipe, check out the [Full Recipe]. To start, grab a large bowl. This will hold your salad base. Next, add the mixed salad greens. I love using a mix of arugula, spinach, and kale. This blend adds flavor and color. For slicing the Honeycrisp apples, use a sharp knife. Cut the apples into thin slices. Aim for about a quarter-inch thickness. This size helps them mix well without getting mushy. I suggest slicing them right before you serve. This keeps them fresh and crisp. Now, let’s layer the ingredients. Place the thin apple slices on top of the greens. Make sure they spread evenly. This creates a beautiful look. Next, add crumbled feta cheese. Then, sprinkle on the toasted walnuts and dried cranberries. Each layer adds a nice touch of flavor and texture. Making the dressing is easy. In a small bowl, combine the olive oil, apple cider vinegar, honey, salt, and pepper. Use a whisk or fork for this. Whisk until everything blends well. You want a smooth dressing that coats the salad nicely. When you are ready to dress the salad, drizzle the dressing over it. Do this just before serving. This keeps the greens crisp. Toss gently to mix the salad. Be careful not to bruise the apple slices. For a nice touch, serve the salad in a large bowl or on individual plates. You can garnish it with extra apple slices and a sprinkle of feta. This adds elegance and invites everyone to dig in. Enjoy this refreshing dish! For the complete recipe, check out Full Recipe. To make your Honeycrisp apple feta salad even better, consider adding more toppings. Nuts like sliced almonds or pecans add crunch. Fresh herbs like basil or mint can brighten the taste. Feel free to toss in some sliced strawberries or blueberries for a sweet twist. When selecting ripe Honeycrisp apples, look for firm, unbruised fruit. The skin should be smooth with a vibrant color. If they smell sweet, they are likely ripe. Choose apples that feel heavy for their size. This often means they are juicy. Prepping your ingredients in advance saves time. Slice the apples and chop the nuts the day before. Store them in airtight containers to keep them fresh. You can mix the salad greens and feta cheese in a bowl ahead of time as well. If you are serving larger groups, make a big batch of the salad. Use a large bowl to mix everything together. Make extra dressing and keep it on the side. This way, guests can add their desired amount just before serving. {{image_2}} You can easily switch up the greens in this salad. If you want a different taste, try using baby kale or romaine. These options add crunch and flavor. You can also mix in some watercress for a peppery kick. When it comes to cheese, feta is a star. But you can use goat cheese or blue cheese if you want something bolder. Each cheese gives a unique twist to the salad. In fall, consider adding roasted sweet potatoes or sliced pears. They pair well with the Honeycrisp apples. In winter, add pomegranate seeds for a bright pop of color and flavor. They also bring extra nutrients to your dish. Fresh herbs like parsley or mint can lift this salad. They add a burst of freshness. Just sprinkle chopped herbs on top before serving for a nice touch. If you want a different taste, try using balsamic vinegar instead of apple cider vinegar. It gives a sweet and tangy flavor to the dressing. You can also mix in some Dijon mustard for a little heat. For a creamier dressing, blend Greek yogurt with the olive oil and vinegar. This will make your salad rich and smooth. Another great option is to add sour cream for a tangy twist. For the full recipe, check out the Honeycrisp Apple Feta Salad. It is a delightful dish to try! To keep your Honeycrisp Apple Feta Salad fresh, store it in an airtight container. This helps prevent wilting and keeps the flavors bright. If you have leftovers, try to eat them within two days for the best taste. For the dressing, store it separately. This way, the salad greens won’t get soggy. Use a small jar or container with a lid. The dressing stays fresh for up to a week in the fridge. You can prepare this salad in advance for busy days. Start by washing and cutting the apples and greens. Store them in separate containers. This keeps everything crisp and fresh until you are ready to eat. Portion the salad for quick meals. Use small containers for each serving. This makes it easy to grab and go. You can also layer the ingredients, with the apples on top to keep them from browning. Enjoy your salad anytime with this simple prep! Can I use different kinds of apples? Yes, you can use other apples. Try Fuji or Gala apples for a sweet flavor. Each type gives a unique taste and texture. Just make sure they are crisp and fresh. How long will the salad last in the fridge? This salad stays fresh for about two days in the fridge. Keep it in an airtight container. If you can, store dressing separately to keep apples crunchy. Is there a vegan option for this salad? Yes! You can replace feta cheese with a vegan cheese. Use nuts or seeds for added crunch. This keeps the salad tasty and plant-based. What are the calories per serving? Each serving has about 200 calories. This includes all the ingredients in the Full Recipe. It’s a light dish packed with nutrients. Can this salad be suitable for a low-carb diet? This salad has some carbs due to apples and dried cranberries. If you want lower carbs, skip the cranberries. You can add more nuts for healthy fats. How can I thicken the dressing? To thicken the dressing, add a little more honey. You can also mix in some Greek yogurt. This gives it a creamy texture and boosts flavor. What herbs pair well with apple and feta flavors? Fresh mint or basil works well with this salad. They add a bright flavor and nice aroma. You can sprinkle them on top for a refreshing touch. This blog post shared various ways to create a delicious Honeycrisp apple salad. We explored the ingredients, equipment, and step-by-step instructions for preparation and assembly. I also highlighted tips for enhancing flavor and how to store leftovers. Making this salad is simple and rewarding. You can enjoy it fresh, customize it, or prep it in advance. With a few easy steps, you can serve a vibrant, tasty dish. Enjoy your salad adventures!](https://toastedrecipes.com/wp-content/uploads/2025/05/a417833b-429f-4043-b239-c676b7a0c427.webp)
Honeycrisp Apple Feta Salad Refreshing and Simple Dish
Looking for a light and tasty dish that will wow your guests? Try my Honeycrisp Apple Feta Salad! This simple salad brings together crisp Honeycrisp
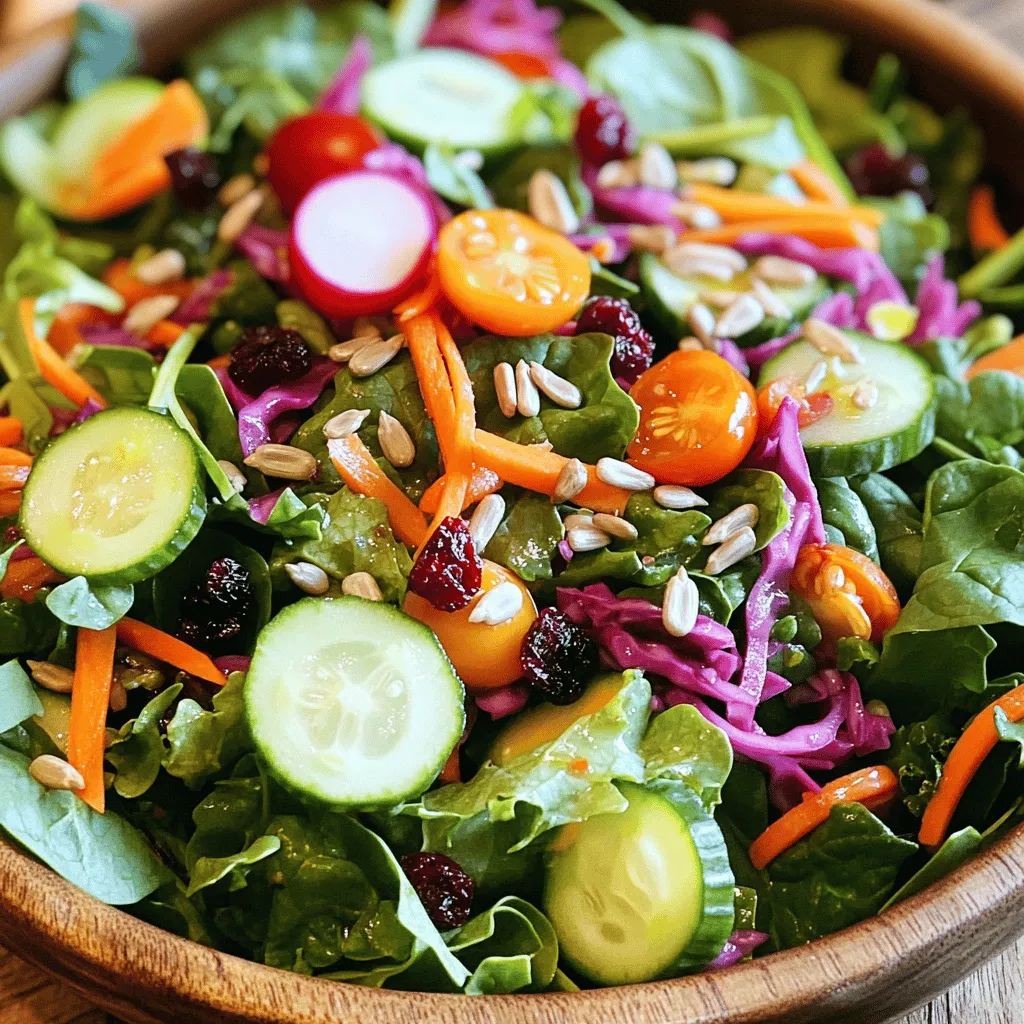
Crunchy Detox Salad Fresh and Flavorful Delight
If you’re craving something fresh, vibrant, and full of flavor, look no further! This Crunchy Detox Salad has all the goodness you need. Packed with
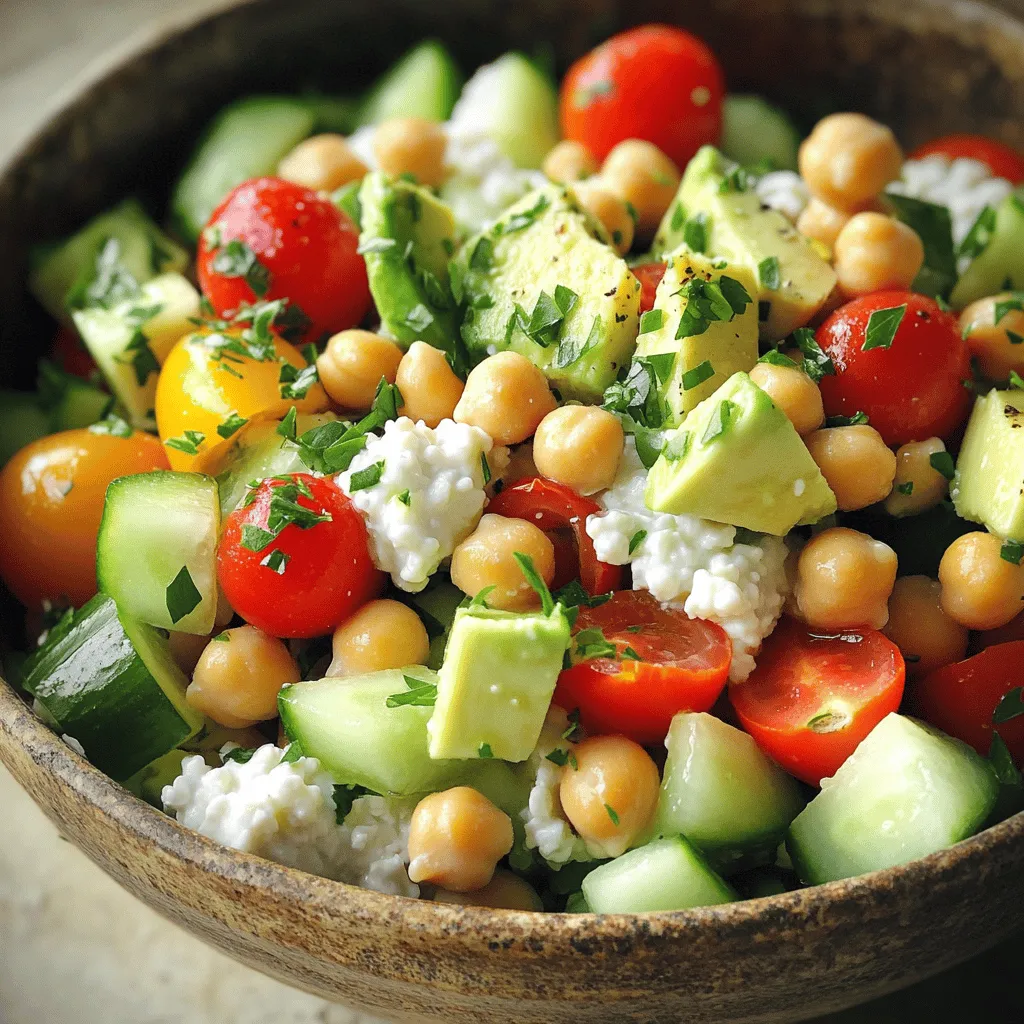
Cottage Cheese and Chickpea Salad Fresh and Simple Recipe
Looking for a fresh and tasty dish that’s easy to make? This Cottage Cheese and Chickpea Salad is your answer! With just a few simple
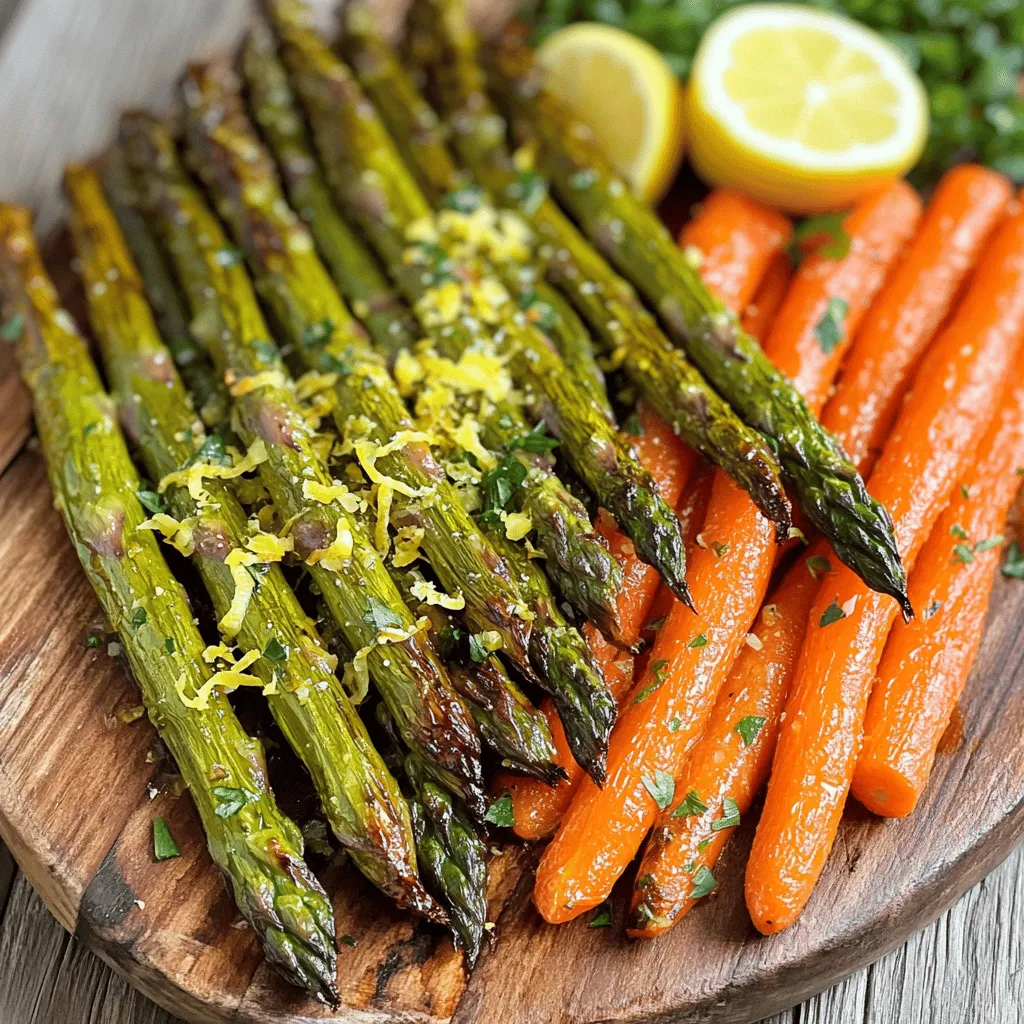
Delicious Roasted Asparagus and Carrots Recipe
Looking for a simple yet flavorful side dish? This Delicious Roasted Asparagus and Carrots Recipe is your answer! Fresh asparagus and sweet carrots roast to
. Can I use frozen asparagus and carrots for roasting? Yes, you can use frozen asparagus and carrots. However, fresh veggies give better taste and texture. If using frozen, thaw them first. Pat them dry to remove excess moisture. This helps them crisp up nicely. What are the best ways to season roasted vegetables? You can use many seasonings to enhance roasted vegetables. Here are some ideas: - Garlic powder adds a nice kick. - Onion powder gives a sweet flavor. - Dried herbs like thyme or oregano work well. - Spices like smoked paprika add depth. - Don’t forget salt and pepper to taste. Feel free to experiment with your favorite spices and herbs. This makes each dish unique! How do I know when asparagus is properly roasted? Asparagus is done when it is tender and slightly caramelized. It should be bright green and have a little bite. Use a fork to check. If it goes through easily, it’s ready! What can I do with leftover roasted asparagus and carrots? You can use leftovers in many ways. Try adding them to salads for extra flavor. They also work great in wraps or sandwiches. You can blend them into a soup or toss them with pasta. Get creative and enjoy! This blog post showed how to roast asparagus and carrots perfectly. You learned the best ingredients, like olive oil and seasonings, to make them tasty. The step-by-step guide made the process easy. Tips helped you avoid common mistakes. You also found out how to store leftovers and reheat them well. Roasting vegetables can be fun and healthy. Feel free to try new flavors and mixtures. Enjoy your cooking!](https://toastedrecipes.com/wp-content/uploads/2025/05/7d681a9a-ca99-4410-878a-d5ff0a01bb79.webp)
Roasted Asparagus & Carrots Flavorful Veggie Dish
Are you ready to elevate your veggie game? Roasted Asparagus & Carrots is not just a dish; it’s a flavorful delight that your taste buds
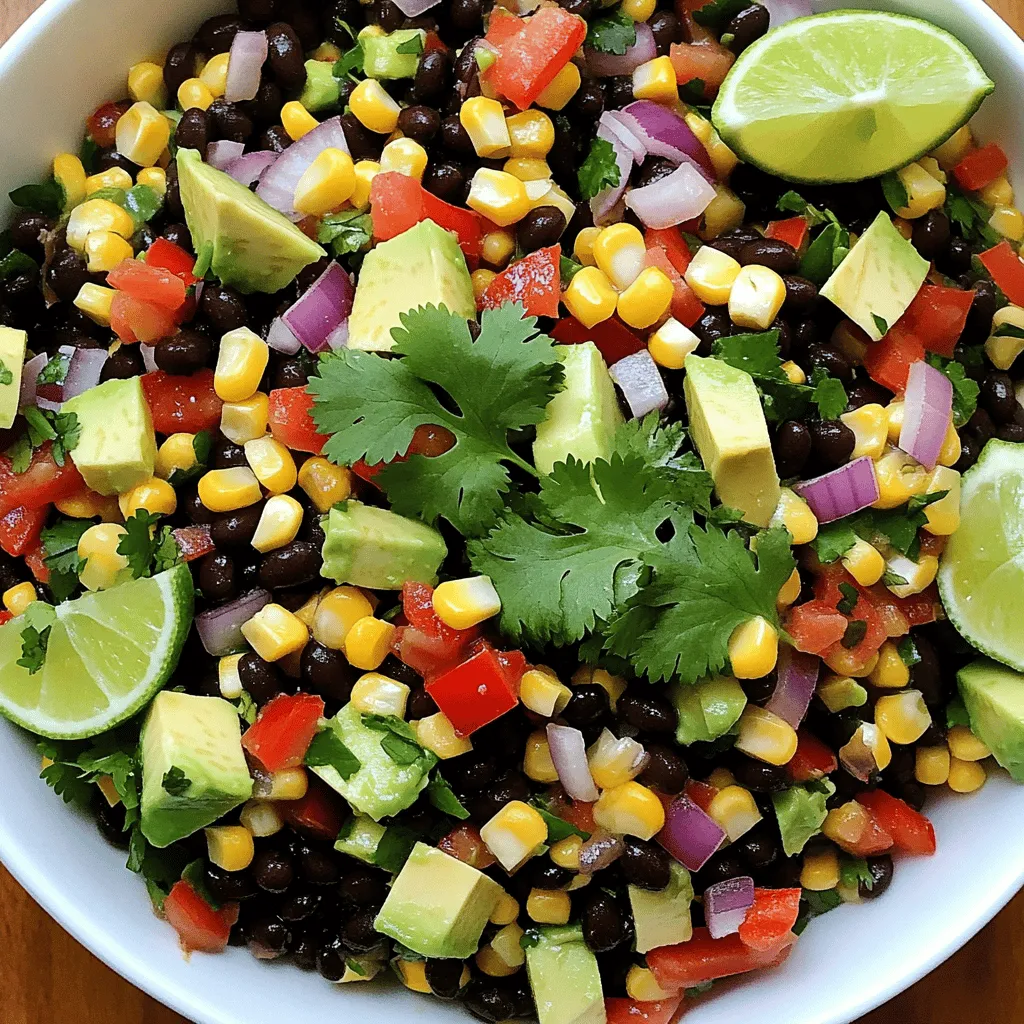
Black Bean Corn Salad Simple and Flavorful Treat
Looking for a deliciously simple salad that packs a punch? You’ve found it! Black Bean Corn Salad is fresh, flavorful, and easy to make. Perfect
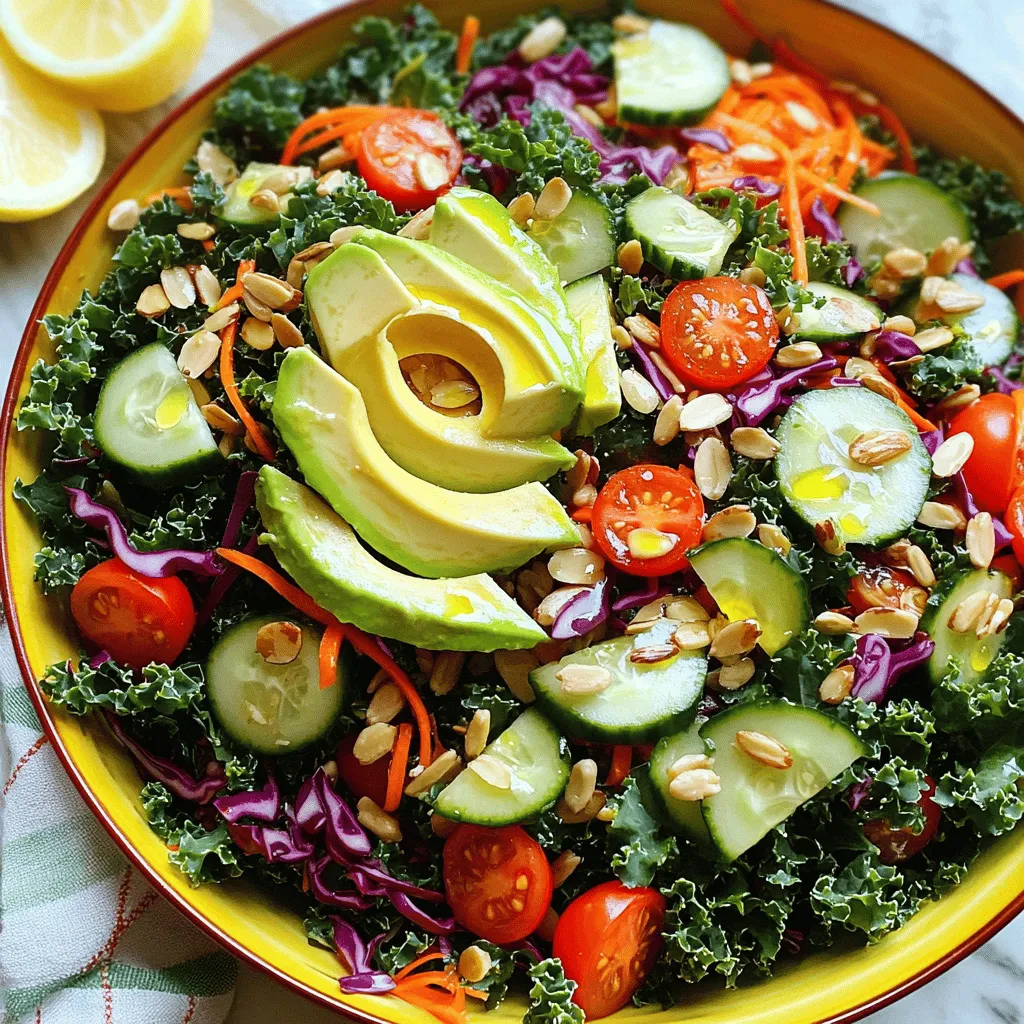
Crunchy Detox Salad Fresh and Healthy Delight
Are you ready to boost your health with a Crunchy Detox Salad? This vibrant dish, packed with fresh veggies and crunchy nuts, will delight your