Salads
![To make a delightful fruit salad with condensed milk, you need fresh fruit and creamy goodness. Here’s what you will need: - 1 cup diced pineapple - 1 cup diced mango - 1 cup strawberries, sliced - 1 cup kiwi, peeled and sliced - 1 cup grapes, halved - 1 can (14 oz) sweetened condensed milk - 1 tablespoon fresh lime juice - 1 teaspoon vanilla extract - Mint leaves for garnish These ingredients create a fresh, colorful dish. The fruits offer natural sweetness and bright flavors. The sweetened condensed milk adds creaminess and a touch of luxury. The lime juice brightens the taste, while vanilla brings warmth. Mint leaves not only garnish but also add fresh notes. This combination makes each bite delightful. For the complete recipe, check out the [Full Recipe]. Enjoy mixing these ingredients together for a fun, tasty treat! Start by washing all your fruits. Use fresh and ripe options for the best taste. - Dicing and slicing fruit: Cut the pineapple and mango into small cubes. Slice strawberries and kiwi. Halve the grapes. Aim for similar sizes to make it pretty. - Mixing technique: In a big bowl, toss all the diced fruits gently. This helps blend the flavors well. This part adds the sweet and creamy touch to your salad. - Whisking methods: In a small bowl, pour the sweetened condensed milk. Add fresh lime juice and vanilla extract. Use a whisk to mix until smooth. - Importance of consistency: The mixture should be thick yet pourable. This helps it coat the fruit nicely. Now, it's time to bring everything together. - Folding technique: Pour the condensed milk mixture over the fruit. Use a spatula to fold it in gently. This keeps the fruit intact. - Taste adjustments: After mixing, taste your salad. If it needs more sweetness, add a bit more condensed milk. If it’s too sweet, a splash of lime juice helps balance it. For the full recipe, check out the Tropical Indulgence Fruit Salad. Enjoy your delightful and fresh creation! Choosing ripe fruits is key. Look for fruits that smell sweet. They should feel slightly soft but not mushy. For this salad, fresh and juicy fruits work best. You want a mix of colors and textures. This makes the dish more appealing. Balancing sweetness with acidity is also important. Sweet fruits like mango and pineapple need a bit of tang. Lime juice adds that fresh zing. It helps cut through the creaminess of the condensed milk. Start with a small amount and taste as you go. Adjust until it feels just right. Presentation matters. Use a clear glass bowl or individual cups. This shows off the vibrant colors of the fruits. You can also add mint leaves on top. They add a nice pop of green and freshness. For best serving vessels, think about your gathering. If it’s a party, go for a large bowl. If it’s a small meal, individual cups work well. You can serve it chilled or at room temperature. Either way, it’s sure to impress! For the full recipe, check out the Tropical Indulgence Fruit Salad section. {{image_2}} You can mix many fruits in this salad. Start with seasonal fruits for the best taste. In summer, use juicy watermelon and peaches. In winter, try apples and oranges for a fresh twist. You can also pick tropical fruits like mango and pineapple. These fruits add a sweet and bright flavor. If you love berries, combine strawberries, blueberries, and raspberries. The sweet and tart mix works well with the creamy sauce. Each fruit brings its own taste, making your salad colorful and fun. While condensed milk is sweet and creamy, you can try other dressings too. A yogurt-based dressing adds a tangy touch. Mix yogurt with honey and lemon for a fresh flavor. This option is great for a lighter salad. Nut butter is another yummy choice. Almond or peanut butter can add richness. Just mix a bit of nut butter with some water to thin it out. This gives your salad a nutty twist that’s sure to please. For the full recipe, check out the Tropical Indulgence Fruit Salad. To keep your fruit salad fresh, store it in the fridge. Use an airtight container to block air and moisture. This helps maintain the flavors and textures. If you have leftovers, try to eat them within a day or two. The sooner you enjoy it, the better it will taste. When serving, avoid letting the salad sit out too long. If it's hot, return it to the fridge after serving. This keeps it cool and safe to eat. In the fridge, your fruit salad can last about 2 to 3 days. After that, the fruits may start to lose their crunch. Check for signs of spoilage. If the fruit looks mushy or smells off, it's time to toss it. Condensed milk can also change the texture as time goes on. If you see water separation, that's a sign it’s past its prime. Enjoy your Tropical Indulgence Fruit Salad while it’s fresh for the best taste! You can use many fruits with condensed milk. Here are some great choices: - Pineapple - Mango - Strawberries - Kiwi - Grapes These fruits add sweetness and texture to your fruit salad. Pineapple brings a tropical flair. Mango adds creaminess. Strawberries give a burst of color. Kiwi adds a tangy twist. Grapes provide crunch and juiciness. Mix and match to find your favorite blend! Yes, you can prepare this salad ahead of time! Here are some prep and storage tips: - Chop fruits a few hours before serving. - Store them in an airtight container. - Add the condensed milk mixture just before serving. This keeps the fruits fresh and the salad creamy. You can also store leftovers in the fridge. Use them within two days for the best taste. Absolutely! You can make this recipe dairy-free. Here are some substitutes for condensed milk: - Use coconut milk instead of condensed milk. - Blend coconut milk with a sweetener like maple syrup. This will give you a similar creamy texture. Enjoy the same delightful flavors without dairy! In this blog post, we explored how to create a delicious fruit salad. We covered the best fruits to use, like pineapple and mango, and how to mix them with sweetened condensed milk and fresh lime juice. I shared tips on preparing your ingredients and ensuring the right texture. Remember to choose ripe fruits for the best flavor. You can adjust the sweetness and try different dressings. Following these steps will help you enjoy a fresh, tasty fruit salad that looks great on any table. Enjoy your creation!](https://toastedrecipes.com/wp-content/uploads/2025/05/bb76833d-d7e4-4f73-8a6a-0e916d02ee24.webp)
Fruit Salad With Condensed Milk Delightful and Fresh
Are you ready to elevate your fruit salad game? In this article, I’ll guide you through making a delightful and fresh fruit salad with sweetened
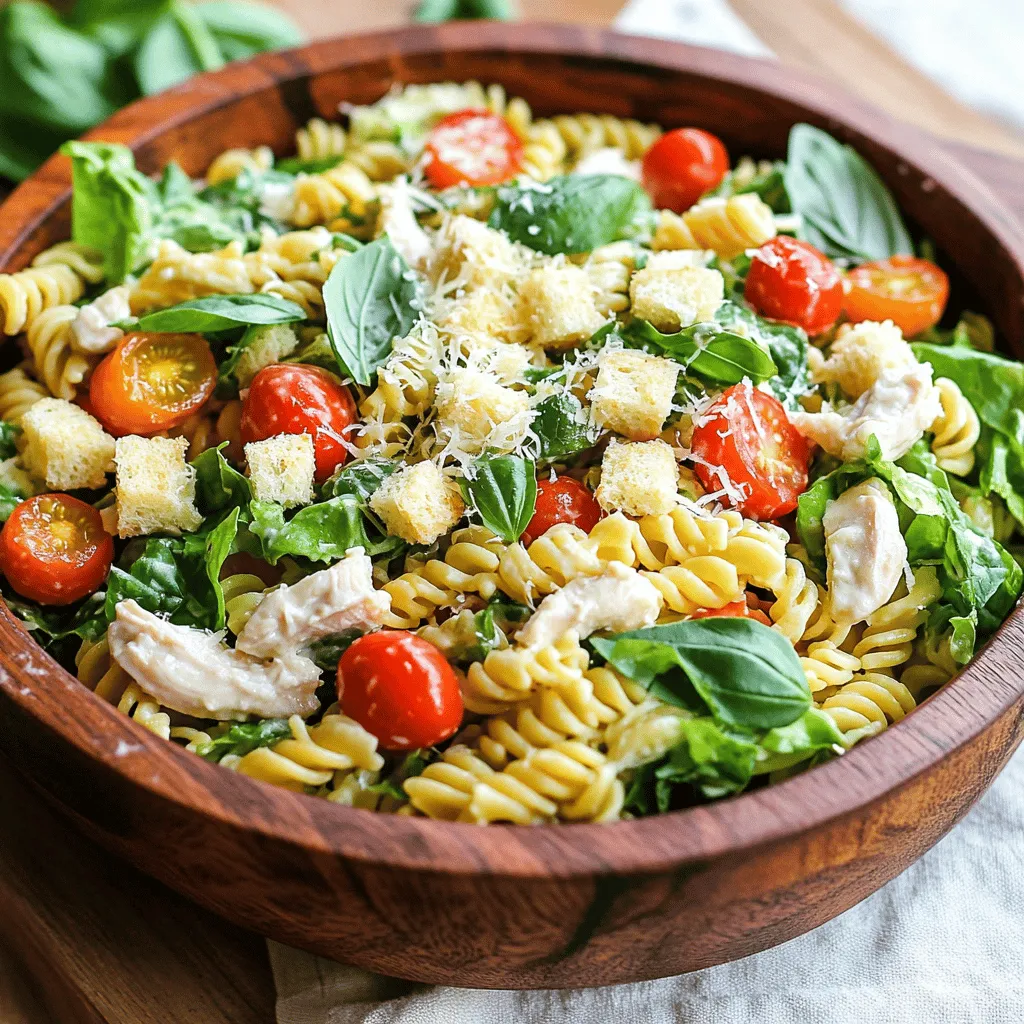
Savory Chicken Caesar Pasta Salad Quick and Easy Meal
Looking for a quick and tasty meal? You’ll love this easy Chicken Caesar Pasta Salad! With fresh ingredients and a creamy dressing, it’s perfect for
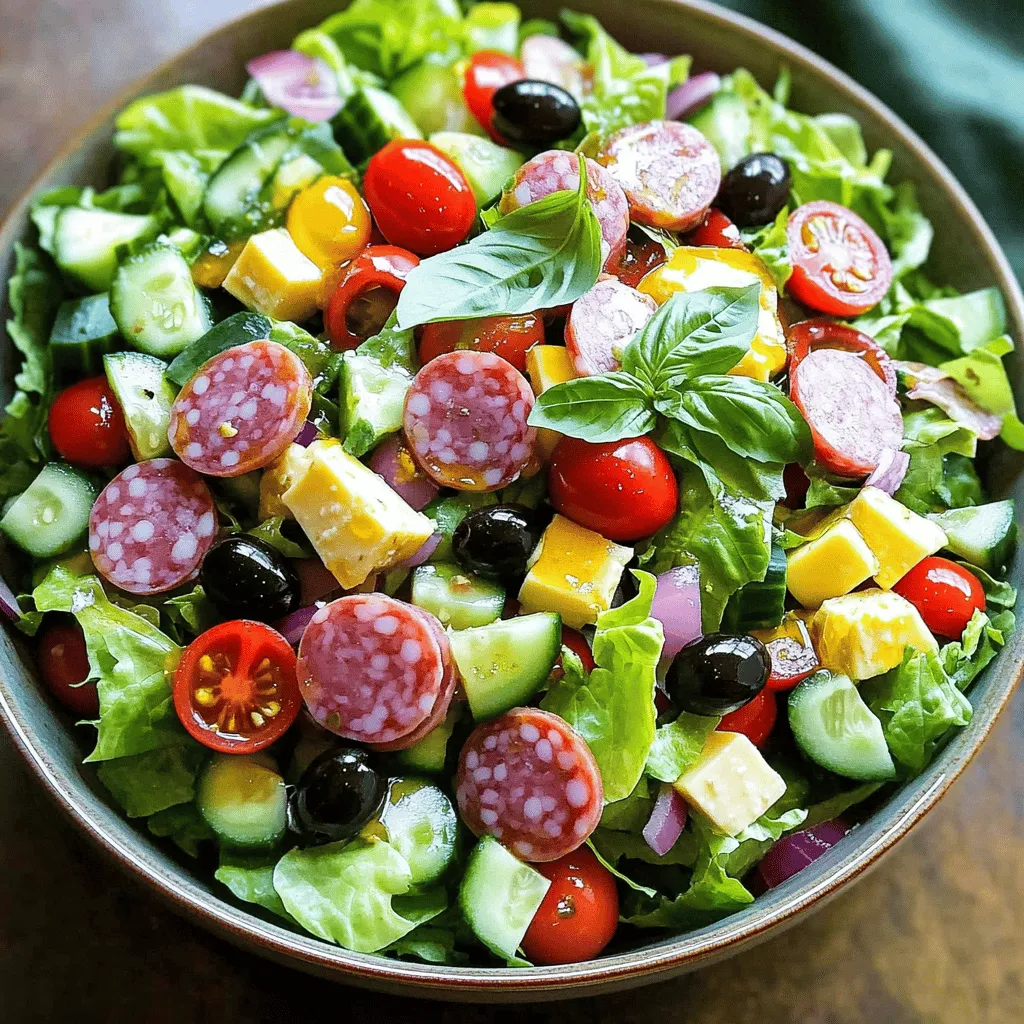
Low Carb Italian Grinder Salad Fresh and Flavorful Meal
Looking for a satisfying meal that doesn’t pack on the carbs? You’re in for a treat! This Low Carb Italian Grinder Salad is fresh, flavorful,
![To make a Blueberry Peach Feta Salad, gather these main ingredients: - 2 ripe peaches, sliced - 1 cup fresh blueberries - 100g feta cheese, crumbled - 1 cup baby spinach or mixed greens - 1/4 cup pecans, chopped These ingredients blend well together. The sweet peaches and blueberries shine. The feta adds a salty kick. The greens provide a fresh base. Pecans give a nice crunch. For the dressing, you will need: - 2 tablespoons honey - 2 tablespoons balsamic vinegar - 1 tablespoon olive oil - Salt and pepper to taste This dressing ties the salad together. Honey brings sweetness, while balsamic adds tang. Olive oil makes it smooth. A pinch of salt and pepper enhances all the flavors. To make your salad even prettier, consider these garnishes: - Extra blueberries - A drizzle of honey Adding extra blueberries makes the salad pop with color. A drizzle of honey on top makes it look fancy. These garnishes also add taste and texture. For the full recipe, check the details above. Enjoy making this fresh blend of flavors! Mixing the Base Ingredients Start by gathering all your fresh ingredients. Take 2 ripe peaches and slice them into thin wedges. Next, add 1 cup of fresh blueberries to the bowl. These berries bring a sweet and juicy burst. Now, toss in 1 cup of baby spinach or mixed greens. Mix these well to blend the colors and flavors. Creating the Dressing In a separate small bowl, whisk together 2 tablespoons of honey, 2 tablespoons of balsamic vinegar, and 1 tablespoon of olive oil. This mixture adds a sweet and tangy touch. Don’t forget a pinch of salt and pepper to season. Whisk until smooth and well combined. Combining Everything Drizzle the dressing over the fruit and greens mixture. Gently toss everything together to coat the salad evenly. Now, add 100g of crumbled feta cheese and 1/4 cup of chopped pecans on top. Give it another light toss. This adds crunch and creaminess. Taste your salad and adjust the seasoning with more salt and pepper if needed. Serve immediately for the best flavor. You can also refrigerate it for up to 30 minutes to let the flavors mix. For the full recipe, check out the [Full Recipe]. For a tasty Blueberry Peach Feta Salad, use fresh fruits. Look for ripe peaches that give slightly when pressed. Fresh blueberries should be firm and shiny. If you can, buy organic. They often taste better and are safer. Choose greens that are bright and crisp. Baby spinach or mixed greens work well. Always wash your produce before using it. This step helps remove dirt and pesticides. Serve this salad fresh for the best taste. You can use a large bowl or individual plates. For a nice touch, sprinkle extra blueberries on top. Drizzle a bit of honey for sweetness. This salad pairs well with grilled chicken or fish. It’s also great as a side for barbecues. If you want to impress, serve it during summer parties. To boost the flavor, add a squeeze of lemon juice. This adds brightness and balances the sweetness. You can also try adding fresh herbs like mint or basil. They bring a refreshing twist to the salad. If you want crunch, toast the pecans lightly. This enhances their flavor. Lastly, serve immediately after mixing. This keeps the salad fresh and crisp. For the full recipe, check the details above. {{image_2}} You can boost the salad's nutrition by adding protein. Grilled chicken or shrimp works well. For a plant-based option, try chickpeas or black beans. These additions make the salad filling and tasty. If you have dairy issues, replace feta with a vegan cheese. Tofu or avocado also adds creaminess without dairy. For nut allergies, skip the pecans and add seeds like sunflower or pumpkin. This keeps the crunch while making it safe for everyone. In summer, use ripe strawberries or raspberries instead of blueberries. In fall, try apples or pears for a sweet twist. Each season brings fresh flavors that change the salad's profile. Enjoy experimenting with what’s in season! To keep your Blueberry Peach Feta Salad fresh, store it in an airtight container. This helps prevent air from spoiling the ingredients. If you have leftover dressing, store it separately. Keeping the salad and dressing apart keeps the greens crisp. Use the salad within two days for the best taste and texture. When stored correctly, the salad lasts up to two days in the fridge. After that, the peaches may get mushy, and the greens can wilt. If you notice any off smells or changes in color, it’s best to toss it out. Always check before you dig in! This salad is best served cold, so no reheating is needed. If you want to enjoy it warm, consider adding grilled chicken or shrimp separately. Mix these in just before serving. To refresh the salad, add a drizzle of olive oil or a splash of balsamic vinegar right before you eat. For the complete recipe, refer to the Full Recipe section. Yes, you can make this salad ahead of time. However, I suggest you wait to add the feta cheese and dressing until just before serving. This keeps the salad fresh and crunchy. If you mix in the dressing early, the greens might wilt. You can prep the fruits and greens and store them in the fridge. Just mix everything together when you are ready to eat. If you want to change the dressing, try these options. You can use lemon juice instead of balsamic vinegar for a bright taste. A yogurt-based dressing can add creaminess. You can also mix olive oil with a splash of apple cider vinegar for a tangy twist. Feel free to explore what fits your taste! Choosing ripe peaches is easy if you know what to look for. Pick peaches that feel slightly soft when you press them. They should have a sweet smell. Look for a golden color, avoiding any green spots. If they are firm, leave them at room temperature for a few days until ripe. Ripe peaches will add a juicy and sweet flavor to your salad. Yes, you can use frozen blueberries. They are handy if fresh ones are not available. Just thaw them first and pat them dry. Keep in mind that frozen blueberries may be softer and release more juice. This can change the texture but still taste great! To make the salad more filling, add protein like grilled chicken, chickpeas, or quinoa. These options enhance the nutrition and keep you satisfied for longer. Nuts, like almonds or walnuts, can also add crunch and protein. Just sprinkle them on top for added flavor. You can add other fruits to this salad for variety. Try strawberries, blackberries, or even diced apples. These fruits will mix well with the peaches and blueberries. Experiment with what you love or what is in season. Enjoy your creative touch! Yes, you can use different greens! While baby spinach is great, you can try arugula for a peppery kick. Mixed greens or kale also work well. Just make sure they are fresh and washed before use. This way, you can add your personal style to the salad. This blog post covers how to make a tasty Blueberry Peach Feta Salad. We discussed the main ingredients, dressing options, and fun garnishes. I shared steps for mixing the salad, creating the dressing, and combining it all. You learned tips for using fresh ingredients and enhancing flavors. We also explored variations, storage tips, and answered common questions. Now you’re ready to enjoy this salad any time. It's simple, fresh, and packed with flavor. Dive in and make your own version!](https://toastedrecipes.com/wp-content/uploads/2025/05/1ef4aeb1-4a29-474f-899f-f06e98ad1810.webp)
Blueberry Peach Feta Salad Fresh and Flavorful Delight
Looking for a salad that’s fresh, flavorful, and easy to make? The Blueberry Peach Feta Salad is your answer! This vibrant dish combines juicy peaches,
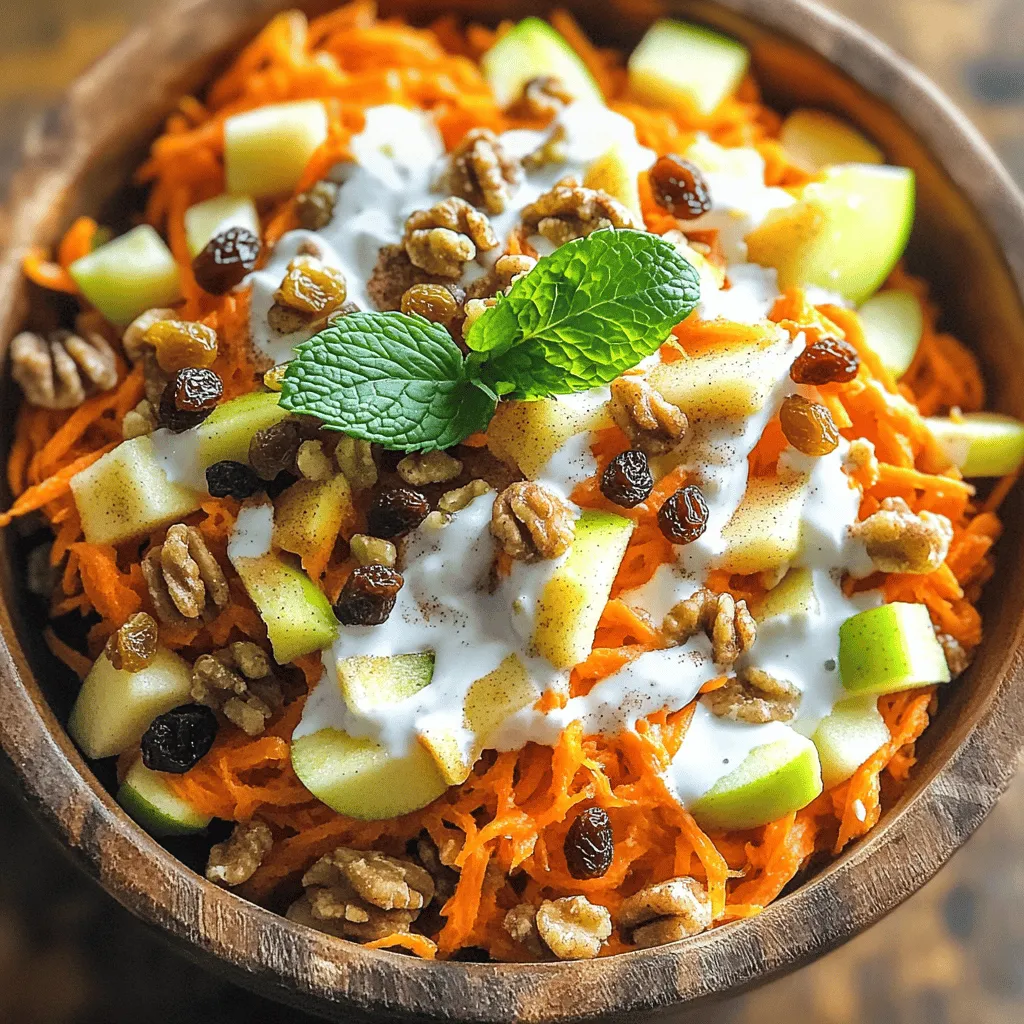
Carrot Apple Salad Crisp and Refreshing Delight
Are you ready to enjoy a salad that’s both tasty and healthy? This Carrot Apple Salad is a crisp and refreshing delight! With grated carrots
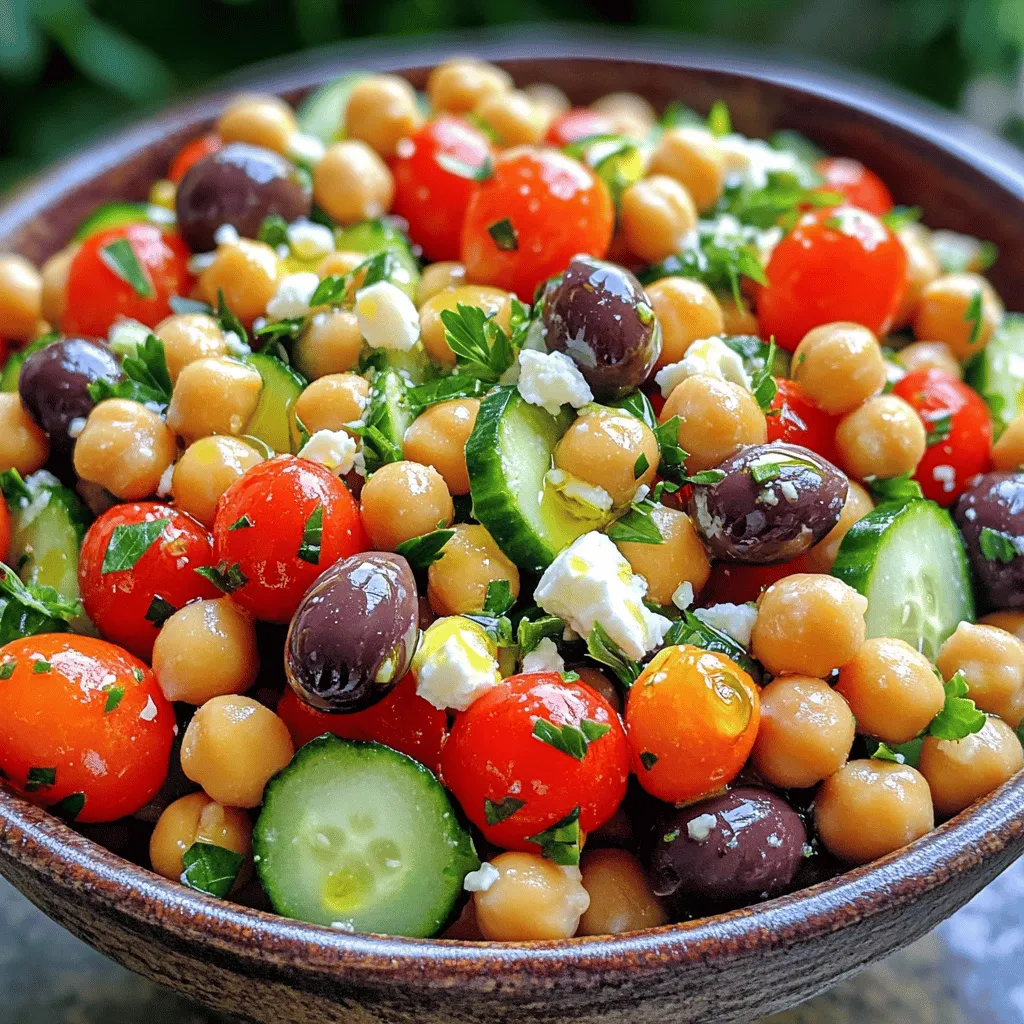
Mediterranean Chickpea Salad Healthy and Flavorful Dish
Looking for a fresh and tasty dish? This Mediterranean Chickpea Salad is just what you need! Packed with nutritious ingredients, it’s perfect for any meal.
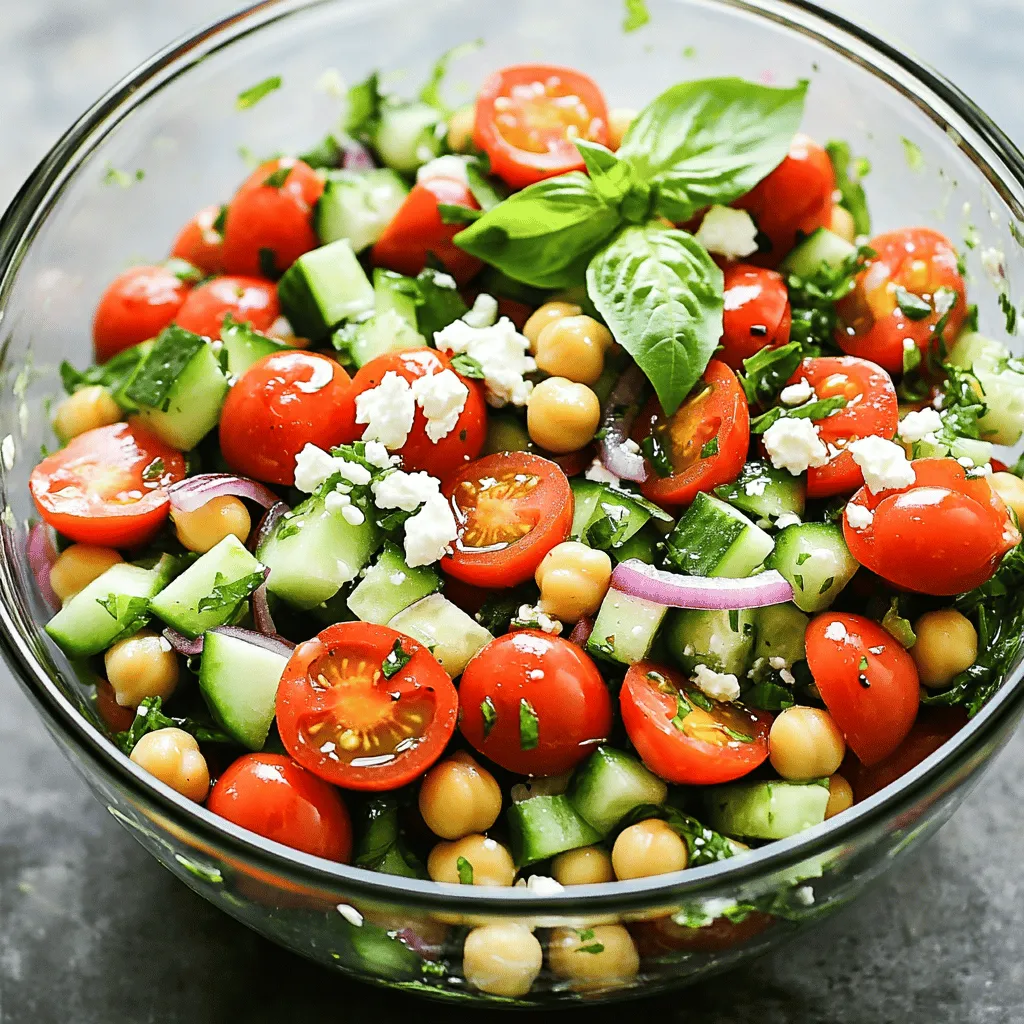
High Protein Chickpea, Basil & Tomato Salad Delight
Looking for a tasty way to boost your protein intake? Try my High Protein Chickpea, Basil & Tomato Salad Delight! This colorful dish is packed
![To make a vibrant Mediterranean Orzo Salad, gather these fresh ingredients: - 1 cup orzo pasta - 1 cup cherry tomatoes, halved - 1 cucumber, diced - 1 bell pepper (red or yellow), diced - 1/2 red onion, finely chopped - 1/2 cup Kalamata olives, pitted and sliced - 1/2 cup feta cheese, crumbled - 1/4 cup fresh parsley, chopped - 1/4 cup olive oil - 2 tablespoons lemon juice - 1 teaspoon dried oregano - Salt and pepper to taste You can easily swap ingredients if needed. For example: - Substitute orzo with quinoa for a gluten-free option. - Use any olives you like, such as green olives. - If you don’t have feta, try goat cheese or skip it entirely. - Replace parsley with basil or mint for a different flavor. These swaps keep the salad fresh while catering to your taste. Fresh ingredients make this salad shine. They boost flavor and nutrition. Fresh tomatoes and cucumbers provide crispness. High-quality olive oil enhances the taste. Using fresh herbs adds a burst of flavor. Always choose the best ingredients you can find. This choice ensures your Mediterranean Orzo Salad is not just good but truly great. For the full recipe, check out [Full Recipe]. First, boil water in a pot. Add a pinch of salt to the water. Once boiling, pour in 1 cup of orzo pasta. Stir the orzo gently to prevent sticking. Cook it according to the package instructions, usually about 8-10 minutes. You want the pasta to be al dente, which means it should be firm but not hard. When done, drain the orzo in a colander. Rinse it with cold water to stop the cooking. This keeps the orzo from getting mushy. Set it aside to cool while you prepare the rest of the salad. In a large mixing bowl, add the fresh vegetables. Start with 1 cup of halved cherry tomatoes. Then, add 1 diced cucumber and 1 diced bell pepper. You can use red or yellow for a pop of color. Next, chop 1/2 of a red onion finely and toss it in. Finally, add 1/2 cup of sliced Kalamata olives. Mix everything well with a spoon. This veggie mix adds crunch and flavor to the dish. Now, let’s make the dressing! In a small bowl, combine 1/4 cup of olive oil and 2 tablespoons of fresh lemon juice. Add 1 teaspoon of dried oregano for an herby touch. Season the dressing with salt and pepper to taste. Whisk everything together until it’s smooth. This dressing is bright and will bring all the flavors together. Pour the dressing over the orzo and vegetable mix. Toss gently to coat all the ingredients. This salad will taste even better after it sits for a bit. For the final touch, fold in 1/2 cup of crumbled feta cheese and 1/4 cup of chopped fresh parsley. You can find the Full Recipe for more details. To boost the flavors in your Mediterranean Orzo Salad, use fresh herbs. Fresh parsley adds brightness. You can also add fresh mint for a cool twist. Toasted nuts, like pine nuts or walnuts, give a nice crunch. A pinch of red pepper flakes adds heat without overpowering the salad. For a tangy kick, swap regular olives for spicy green olives. Finally, let the salad sit before serving. This time allows the flavors to mix and deepen. This salad shines at picnics and barbecues. Serve it in a large bowl for sharing. For a more formal setting, use individual bowls. Garnish each portion with extra feta and parsley. This adds color and makes it look appetizing. Pair it with grilled chicken or fish for a complete meal. It also works well as a side dish with your favorite protein. If you need a gluten-free version, use gluten-free orzo. Many stores sell it now. For a vegan option, skip the feta cheese or use a plant-based alternative. You can add chickpeas for protein instead. If you want to cut calories, use less olive oil or replace it with lemon juice. Always taste and adjust seasoning to suit your needs. Your salad can be as flexible as you want. For the full recipe, check out the details above. {{image_2}} You can boost the nutrition of your Mediterranean orzo salad easily. Consider adding: - Chickpeas: They provide protein and fiber. One cup adds a nice texture. - Spinach or kale: These greens pack vitamins and minerals. Just a handful works well. - Artichoke hearts: They offer a tangy flavor and are rich in antioxidants. - Avocado: This adds creaminess and healthy fats. Half an avocado is perfect. - Roasted nuts: Almonds or pine nuts add crunch and healthy fats. Use a small handful. These add-ins not only enhance nutrition but also make the salad more filling. While the olive oil and lemon dressing is classic, you can switch it up. Here are some tasty alternatives: - Balsamic vinaigrette: This adds a sweet and tangy flavor. Just mix balsamic vinegar and olive oil. - Greek yogurt dressing: Combine yogurt, lemon juice, and herbs. This adds creaminess and a cooling effect. - Tahini dressing: Blend tahini with lemon juice and garlic. It adds a nutty taste to the salad. These dressings offer new flavors and can change the dish’s style. You can adjust this salad based on the seasons. In summer, add fresh fruits like watermelon or peaches for sweetness. In fall, include roasted butternut squash for warmth. Winter can see you adding roasted Brussels sprouts or even pomegranate seeds for color and crunch. Spring is perfect for fresh herbs and asparagus. These seasonal changes keep your Mediterranean orzo salad fresh and exciting all year long. For the full recipe, check out the details above. To keep your Mediterranean Orzo Salad fresh, store it in the fridge. Place the salad in an airtight container. This helps protect the flavors and textures. If you have extra dressing, keep it separate. This way, it won’t make the salad soggy. When you’re ready to eat, just mix in the dressing again. I recommend using glass containers for storage. They are safe for food and easy to clean. If you want something lighter, plastic containers work too. Just ensure they seal well. This keeps air out and freshness in. Your salad will stay good for about 3 to 5 days in the fridge. After that, the veggies may start to lose their crunch. If it looks or smells off, it’s best to toss it out. For the best taste and texture, enjoy it within the first few days. Mediterranean Orzo Salad comes from the sunny shores of the Mediterranean. This region values fresh ingredients and bold flavors. The salad blends classic Mediterranean foods like olives, feta, and fresh veggies. It reflects the vibrant culture and healthy eating found there. Each bite brings a taste of the sea and sun, making it a favorite for many. Yes, you can make this salad ahead of time! It stays tasty in the fridge for a day or two. Make sure to keep it in an airtight container. If you want the best flavor, let it sit for at least 15 minutes before serving. This allows the dressing to soak into the ingredients. If you make it too far in advance, the veggies might get too soft. Orzo pasta is not gluten-free. It is made from wheat, which contains gluten. If you need a gluten-free option, look for gluten-free orzo or use another gluten-free pasta. Many stores sell rice or corn-based pasta that works well. This way, you can enjoy the same great taste without the gluten! This blog post covered how to make a delicious Mediterranean Orzo Salad. We looked at key ingredients and substitutions. Fresh ingredients are vital for great taste. I shared simple cooking steps and helpful tips to boost flavors. You can use different dressings and add-ins for your diet. Storing leftovers correctly helps keep your salad fresh longer. Finally, I answered common questions about the dish. Enjoy making this salad your own, and savor every bite!](https://toastedrecipes.com/wp-content/uploads/2025/05/81f5bb62-7de3-4ac0-a0ed-fd2c43c0857e.webp)
Mediterranean Orzo Salad Fresh and Flavorful Recipe
Looking for a vibrant dish that bursts with flavor? This Mediterranean Orzo Salad checks all the boxes! With fresh veggies, a zesty dressing, and delightful
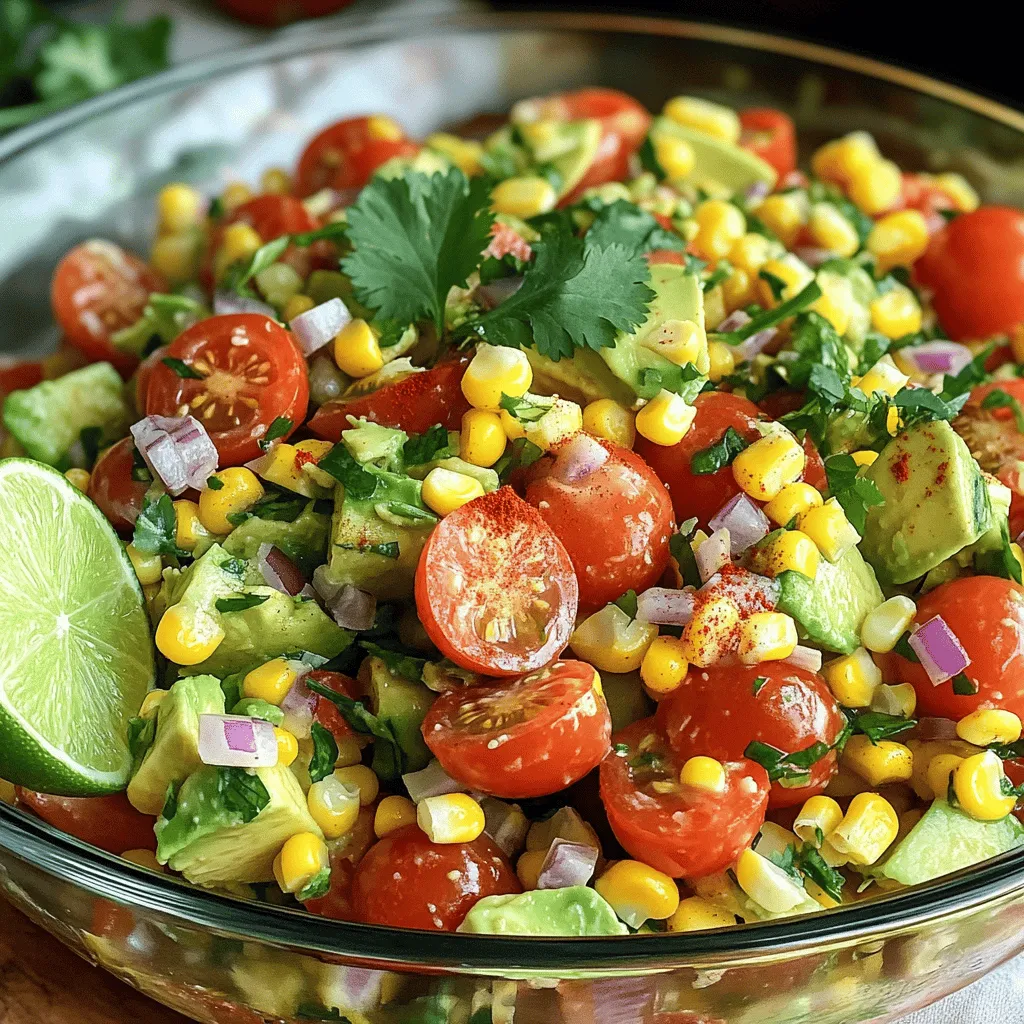
Tomato Avocado Corn Salad Fresh and Flavorful Delight
Are you searching for a fresh and tasty dish that’s quick to make? Look no further than this Tomato Avocado Corn Salad! Bursting with the
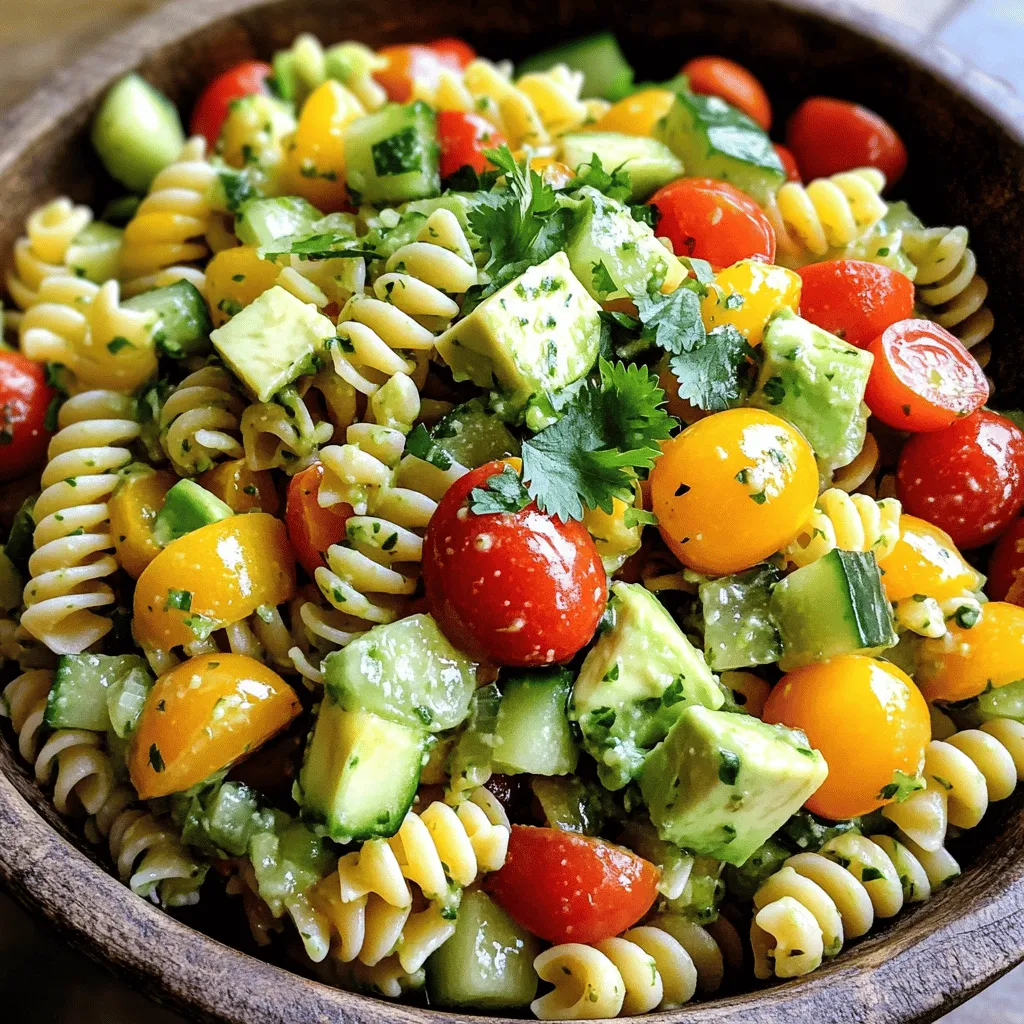
Cilantro Lime Pasta Salad Fresh and Flavorful Meal
Are you looking for a bright and zesty meal that bursts with flavor? My Cilantro Lime Pasta Salad is the perfect dish to brighten your