Salads
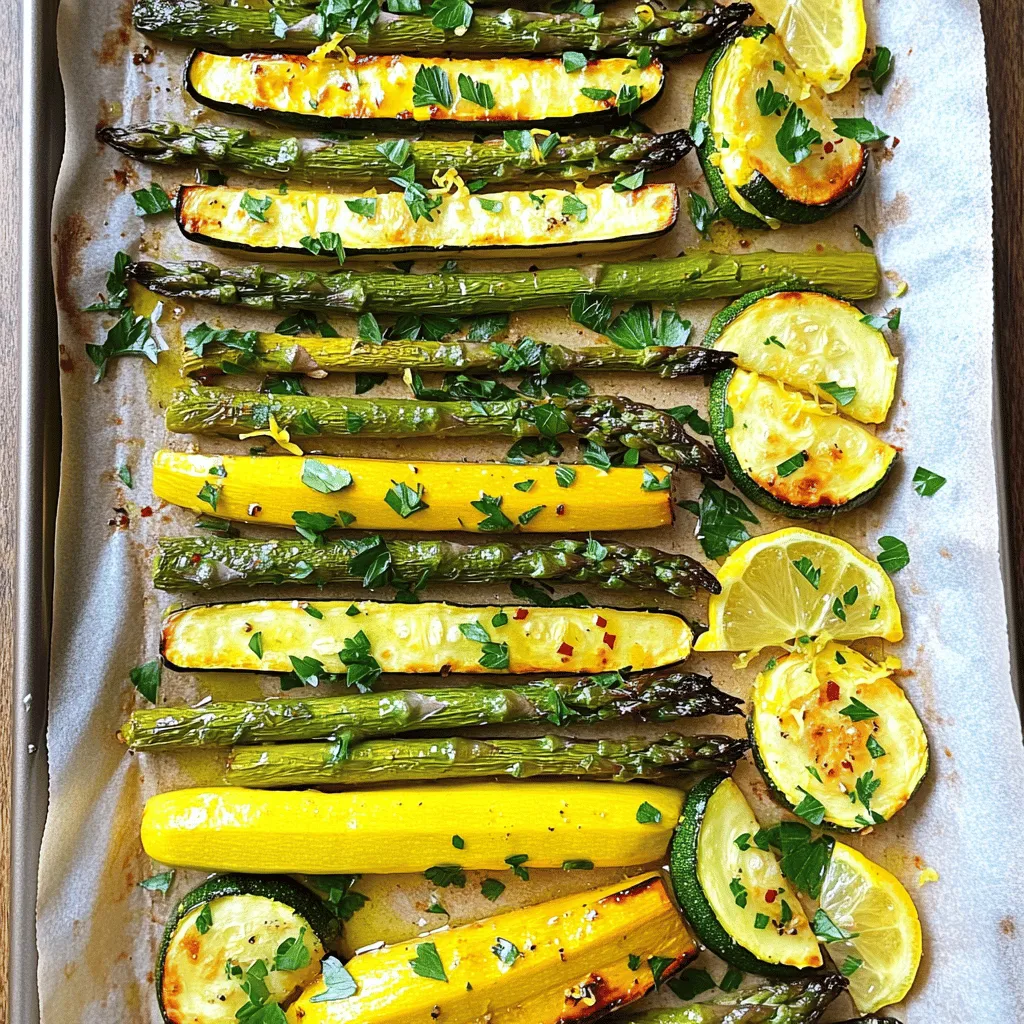
Flavorful Asparagus with Zucchini and Squash Recipe
Looking to brighten up your dinner table? This Flavorful Asparagus with Zucchini and Squash recipe is packed with fresh, vibrant veggies and zesty flavors. With
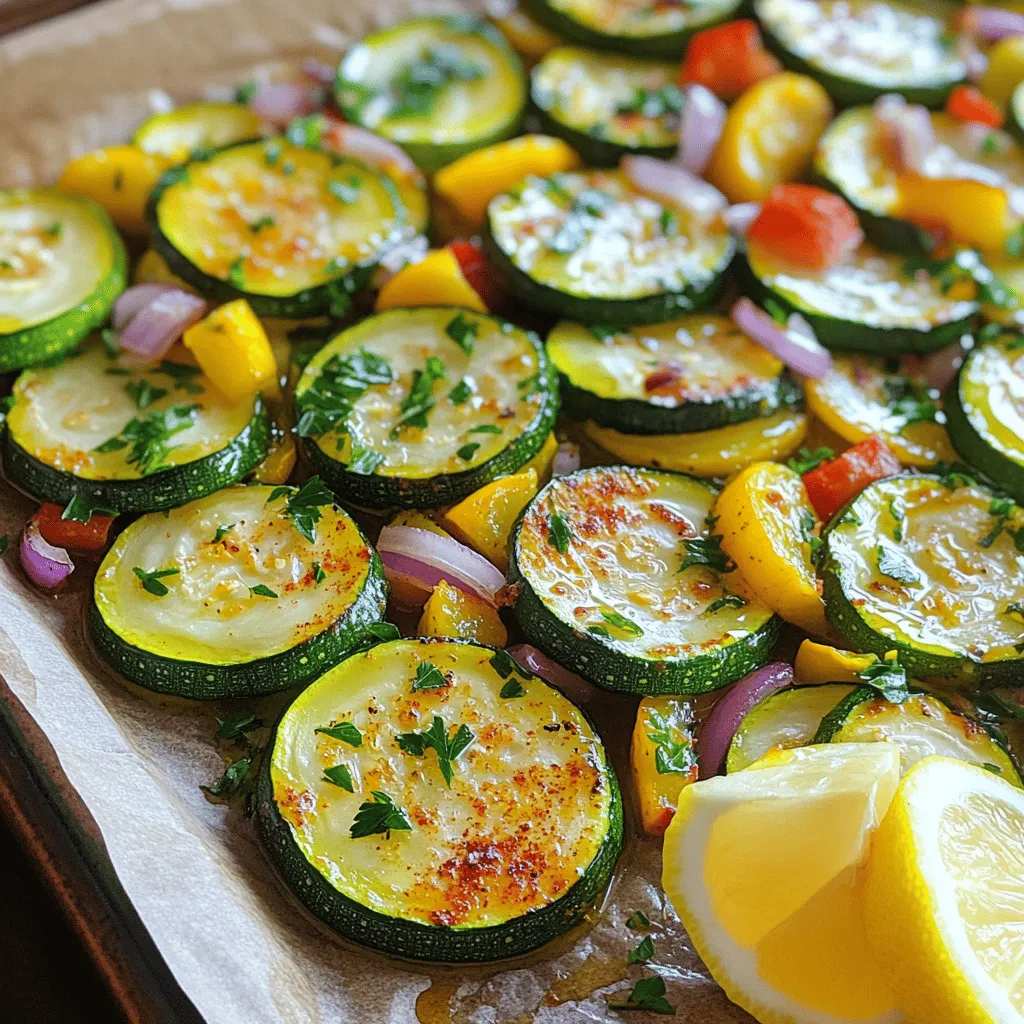
Roasted Zucchini and Squash Flavorful Side Dish
Looking to spice up your dinner? Roasted zucchini and squash makes a perfect side dish! This colorful mix of veggies is easy to make and
![To make Asian pickled cucumbers, gather these key ingredients: - 2 large English cucumbers - Rice vinegar - Soy sauce - Sugar - Sesame oil These ingredients work together to create a bright and tangy flavor. English cucumbers are perfect because they have fewer seeds and a crisp texture. You can add a few optional ingredients to enhance the flavor: - Fresh herbs like cilantro or mint - Additional spices, such as chili flakes or black sesame seeds These add-ins can give your pickles a unique twist. Feel free to experiment! You'll need a few simple tools to prepare your pickled cucumbers: - Bowls and utensils for mixing - A jar or airtight container for storage Using the right equipment helps ensure your cucumbers stay fresh and flavorful. Remember, a clean jar is key to safe storage. For the complete step-by-step guide, check out the Full Recipe. First, take your two large English cucumbers. Slice them thinly. Place the cucumber slices in a big bowl. Add one teaspoon of salt. Toss them well, so the salt coats all the slices. Let them sit for about 15 minutes. This step draws out the moisture, which makes the cucumbers crunchier. After 15 minutes, rinse the cucumbers under cold water. This removes the excess salt. Drain them well in a colander. You want to get rid of all the water. This helps the flavors of the pickling mixture stick better. While the cucumbers rest, grab a separate bowl. Combine half a cup of rice vinegar, a quarter cup of granulated sugar, one tablespoon of soy sauce, and one tablespoon of sesame oil. Add one teaspoon of grated ginger and two cloves of minced garlic. For a kick, include one teaspoon of red pepper flakes. Whisk these ingredients until the sugar dissolves completely. Mixing well ensures that all flavors blend together for a tasty pickle. This pickling mixture is what makes your cucumbers so flavorful! Now, it’s time to mix everything. Add the drained cucumbers into the bowl with the pickling liquid. Stir gently to coat each cucumber slice evenly. You want to make sure every piece gets that delicious flavor. Once mixed, transfer the cucumber mixture to a clean jar or an airtight container. Ensure the cucumbers are submerged in the liquid. This helps them pickle evenly. Sprinkle one tablespoon of sesame seeds on top for extra crunch. Seal the jar tightly and place it in the fridge. Let the cucumbers sit for at least two hours, but overnight gives the best flavor. You can find the full recipe [here]. Enjoy your Asian pickled cucumbers as a refreshing side dish! Marinating your cucumbers is key. The longer they sit, the better the flavor. Aim for at least two hours. For the best taste, let them chill overnight. This will let the flavors meld perfectly. Layering flavors is also important. Use fresh ingredients like garlic and ginger. These add depth to your pickles. Combine them well with the vinegar and sugar. Each bite should burst with taste. Want a kick? Red pepper flakes are your friend. They enhance the flavor without overwhelming it. If you like it spicier, add more flakes. You can also try chili oil for a different heat. Experiment with heat to find your sweet spot. Start with a small amount and adjust based on your taste. Remember, it’s easier to add than to take away! Asian pickled cucumbers pair well with many dishes. They are great as a side with rice or noodles. You can also serve them on top of grilled meats. Their crunch adds a nice texture to any meal. Get creative! Use them in salads or as a topping for tacos. You can even make a simple sandwich more exciting with these pickles. They bring brightness and freshness to your plate. For the complete recipe, check out the Full Recipe. {{image_2}} You can play with sweet and spicy flavors in your Asian pickled cucumbers. If you love sweetness, add more sugar. Try 1/4 cup instead of 1/8 cup for a sweeter bite. On the other hand, if you want some heat, add chili oil. Just a tablespoon can give your cucumbers a nice kick. Adjust the spice to match your taste. Vinegar is key to great pickles. While rice vinegar is classic, you can try others. Apple cider vinegar adds fruity notes, while white vinegar gives a sharper taste. Each type changes the flavor. Experiment and see what you like best! Asian cultures have unique takes on pickled cucumbers. In Korea, you might find spicy gochugaru in the mix. Japanese pickles use mirin for sweetness. Thai versions might add fish sauce for umami. Explore these ingredients for fun twists. Each region brings its own flavor to this dish! For storing your Asian pickled cucumbers, use a clean glass jar. A quart-sized mason jar works well. Make sure the lid seals tightly. This helps keep the cucumbers fresh. If you have a vacuum sealer, use it for extra freshness. Remove all air before sealing. This prevents spoilage and keeps the flavors strong. In the fridge, your pickled cucumbers can last up to two weeks. Store them in the jar with the liquid. If you see any mold or an off smell, it’s time to throw them out. Always trust your senses. If something seems wrong, it likely is. You can freeze pickled cucumbers, but they may lose crunch. If you want to try, pack them in a freezer bag. Remove as much air as possible before sealing. They can last up to three months in the freezer. When you’re ready to eat them, thaw in the fridge overnight. Enjoy them within a few days for the best taste. Asian pickled cucumbers use simple but flavorful ingredients. The main components are cucumbers, rice vinegar, sugar, and soy sauce. Here’s a quick list of key ingredients: - 2 large English cucumbers - 1/2 cup rice vinegar - 1/4 cup granulated sugar - 1 tablespoon soy sauce - 1 tablespoon sesame oil - 1 teaspoon grated ginger - 2 cloves garlic, minced - 1 teaspoon red pepper flakes This mix brings out a tangy, sweet, and savory flavor. Each ingredient plays a role in creating that perfect taste you will love. The marinating time is key for great flavor. After you prepare the cucumbers, let them sit in the pickling liquid. I recommend chilling them for at least 2 hours. However, for the best taste, refrigerate overnight. This allows the flavors to blend well. The longer they sit, the more delicious they become. Yes, you can get creative! While cucumbers are classic, many other veggies work well too. Here are some ideas for pickling: - Carrots - Radishes - Green beans - Bell peppers Each vegetable adds its own unique taste and crunch. Experiment with different flavors and find your favorites! In this guide, we explored making Asian pickled cucumbers. We reviewed essential ingredients like cucumbers, rice vinegar, and soy sauce. I shared tips for perfect flavor and storage practices. You can customize your pickles with herbs and spices to suit your taste. Pickling is simple and fun. You can create delicious dishes with your pickled cucumbers. Enjoy exploring different variations and methods. Plus, you’ll impress family and friends with your skills! Get started and have fun experimenting with flavors.](https://toastedrecipes.com/wp-content/uploads/2025/07/fc09dd67-bf69-40e0-b94f-ef309c6e64c7.webp)
Asian Pickled Cucumbers Flavorful and Simple Recipe
Dive into the tangy world of Asian Pickled Cucumbers! With just a few simple ingredients, you can make a delicious side dish that adds flavor
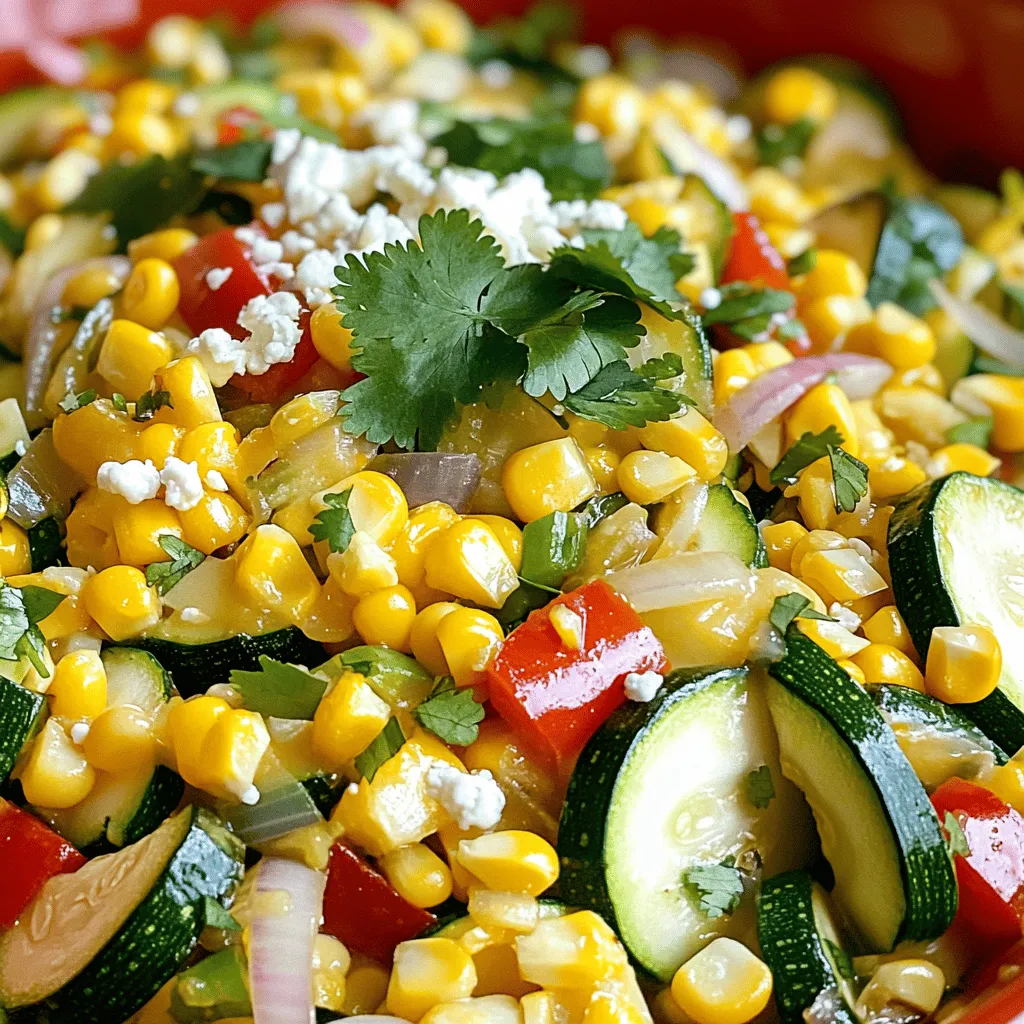
Calabacitas: Zucchini and Corn Flavorful Dish
Are you ready to spice up your meals? Let’s dive into Calabacitas, a colorful dish that mixes zucchini and corn. This tasty recipe is simple
![For this BBQ Chicken Skewer Salad, you need fresh, vibrant ingredients. Here’s what you will gather: - 2 chicken breasts, cut into 1-inch cubes - 1 red bell pepper, cut into chunks - 1 yellow bell pepper, cut into chunks - 1 red onion, cut into wedges - 1 zucchini, sliced into half-moons - 4 cups mixed greens (spinach, arugula, romaine) - 1 avocado, sliced - ½ cup cherry tomatoes, halved - Fresh cilantro, for garnish These ingredients bring color and taste to your dish. The mix of veggies adds crunch and sweetness. The chicken provides protein, and the greens offer freshness. Next, let’s talk about the marinade and dressing. You will need: - 3 tablespoons BBQ sauce (your favorite brand) - 1 tablespoon olive oil - Salt and pepper to taste The marinade is key to great flavor. The BBQ sauce adds sweetness and tang, while olive oil keeps the chicken moist. Salt and pepper boost all the flavors. The Full Recipe will guide you through creating this dish step by step. Enjoy preparing this fresh and flavorful delight! To prepare the chicken, start by marinating it. In a bowl, mix the cubed chicken with olive oil, BBQ sauce, salt, and pepper. This step is key for great flavor. Let it marinate for at least 30 minutes. This time allows the chicken to soak up the tasty BBQ sauce. If you are using wooden skewers, pre-soak them in water for 15 minutes. This helps prevent them from burning on the grill. Now it's time to assemble the skewers. Take a skewer and start threading the marinated chicken. Alternate the chicken with chunks of red and yellow bell peppers, onion wedges, and zucchini slices. This mix adds color and flavor to your meal. Next, heat your grill to medium-high. Place the skewers on the grill. Cook them for about 10-12 minutes. Turn them occasionally. This ensures the chicken cooks evenly and gets those nice grill marks. While the skewers are grilling, prepare your salad. In a large bowl, toss the mixed greens with sliced avocado and halved cherry tomatoes. This mix adds freshness and creaminess to the dish. Once the chicken skewers are done, remove them from the grill. Serve the salad on individual plates or a large platter. Top it with the grilled chicken skewers. Drizzle more BBQ sauce on top for extra flavor. Finish by garnishing with fresh cilantro. This adds a pop of color and freshness to your BBQ chicken skewer salad. For the full recipe, check out the earlier section. To get juicy chicken skewers, make sure your grill is hot. Preheat it to medium-high heat. This helps cook the chicken evenly. Turn the skewers often to avoid burning. Use a meat thermometer to check if the chicken hits 165°F. To prevent sticking, oil your grill grates. Before placing the skewers, brush them with oil. You can also spray the grill lightly with cooking spray. This keeps the chicken from tearing as you turn it. You can customize BBQ sauce to fit your taste. Try mixing in honey for sweetness or hot sauce for heat. You can even blend in mustard for a tangy twist. This lets you create a flavor profile that excites your taste buds. Using fresh herbs can make your dish pop. Chop fresh cilantro or parsley and add it to your marinade. You can also sprinkle herbs on the salad just before serving. This adds brightness and freshness to every bite. To make your salad look great, layer your ingredients. Start with mixed greens, then add avocado and cherry tomatoes. Place the grilled skewers on top for height. This makes the dish visually appealing. Garnishing is key for both flavor and looks. A sprinkle of fresh cilantro on top adds color. Drizzling extra BBQ sauce over the skewers makes them shine and taste even better. This small touch can elevate your meal. For the Full Recipe, follow the steps outlined to ensure a delicious BBQ Chicken Skewer Salad. {{image_2}} You can switch the chicken for shrimp or tofu. Shrimp cooks fast and adds a sweet flavor. Just marinate it the same way. For tofu, use firm or extra-firm, and press it to remove extra water. Cut it into cubes and marinate like the chicken. Both options make this salad unique and tasty. Feel free to mix in seasonal veggies. Try asparagus in spring or sweet corn in summer. You can also add carrots or snap peas for extra crunch. For a nice twist, toss in some radishes or cucumber slices. These veggies will add color and texture to your salad. While BBQ sauce is great, you can try different dressings too. A zesty vinaigrette, made with lemon juice and olive oil, works well. You might also enjoy ranch or a honey mustard dressing for a sweet touch. For a homemade dressing, mix olive oil, vinegar, and your favorite herbs. This way, you can customize the flavors to fit your taste. For the complete recipe, check out the [Full Recipe]. To keep your BBQ chicken skewer salad fresh, proper storage is key. Start by letting the salad cool to room temperature. Then, place it in an airtight container. This helps prevent any unwanted odors or moisture. - Duration for Freshness: Store the salad in the fridge for up to three days. After that, the flavors may fade, and the veggies could become soggy. When it comes time to enjoy leftovers, reheating is simple. Remove the chicken skewers from the salad. You want to keep the greens crisp and fresh. - Best Practices for Reheating Skewers: Use a microwave or grill. If using a microwave, heat them in short bursts. This prevents overcooking. If grilling, warm them up on low heat until heated through, about 5 minutes. - Re-assembling the Salad for Serving: Once the skewers are warm, toss the salad ingredients together again. Add the skewers back on top for a fresh look. Drizzle with extra BBQ sauce for added flavor. Enjoy your meal just like the first time! To make BBQ Chicken Skewer Salad, start by marinating the chicken. Mix the cubed chicken with olive oil, BBQ sauce, salt, and pepper. Let it sit for at least 30 minutes. Meanwhile, soak wooden skewers in water if you use them. After marinating, thread the chicken and veggies onto the skewers. Grill the skewers until the chicken is cooked through. While grilling, toss mixed greens with avocado and cherry tomatoes. Once done, serve the skewers over the salad, drizzling extra BBQ sauce on top. For the full recipe, check out the detailed steps. Yes, you can use store-bought BBQ sauce. It saves time and still adds great flavor. Look for sauces with high-quality ingredients. Some brands even offer unique flavors like chipotle or honey. These can add new twists to your salad. If you prefer homemade sauce, you can mix ketchup, vinegar, and spices for a quick option. You can add many ingredients to boost your BBQ Chicken Skewer Salad. Consider these options: - Corn for sweetness - Black beans for protein - Sliced jalapeños for heat - Crumbled feta or queso fresco for creaminess - Fresh herbs like basil or mint for freshness Feel free to mix and match based on your taste! Yes, this recipe works well for meal prep. You can grill the chicken and veggies in advance. Store them in airtight containers in the fridge. When ready to eat, quickly toss the salad and add the skewers. This way, you can enjoy fresh lunches or dinners throughout the week. Marinate the chicken for at least 30 minutes. This time allows the flavors to soak in. You can marinate it longer, up to 4 hours, for even more flavor. Just remember to keep it in the fridge while marinating. This ensures your chicken stays safe and delicious! This blog post covered how to make a tasty BBQ Chicken Skewer Salad. We talked about the main ingredients, like chicken and fresh veggies, and how to marinate them. I shared step-by-step instructions for preparing the skewers and creating a vibrant salad. Don’t forget the tips to enhance flavor and presentation. You can also try different proteins and dressings for variety. With proper storage and reheating advice, your leftovers will stay fresh. Enjoy this simple, delicious meal that’s great for gatherings or meal prep!](https://toastedrecipes.com/wp-content/uploads/2025/06/1b3c07cb-3686-45af-a616-84b213e11e7b.webp)
BBQ Chicken Skewer Salad Fresh and Flavorful Delight
Are you ready to enjoy a BBQ Chicken Skewer Salad that’s bursting with flavor? This dish combines tender chicken, vibrant veggies, and fresh greens for
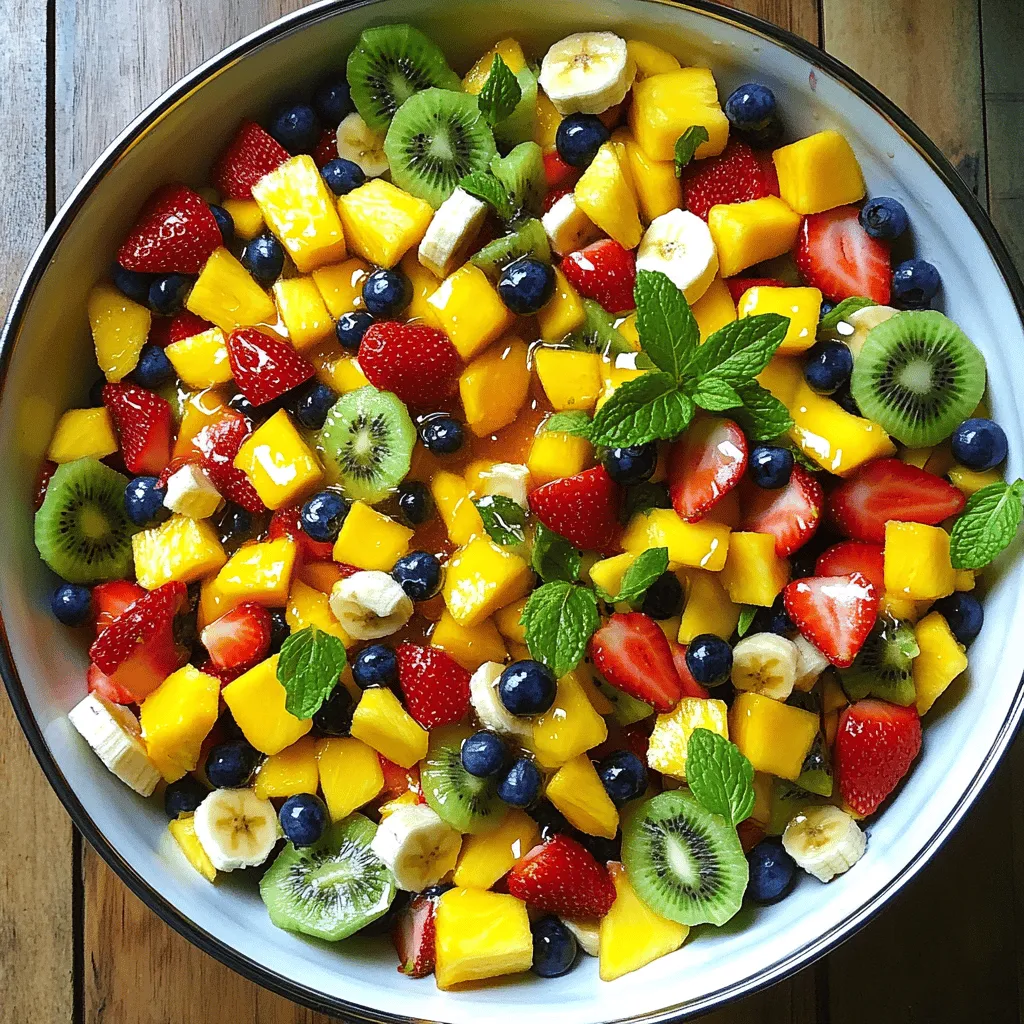
Breakfast Fruit Salad Fresh and Healthy Delight
Are you ready to brighten your mornings with a fresh and healthy breakfast fruit salad? This delightful dish is packed with vibrant flavors and essential
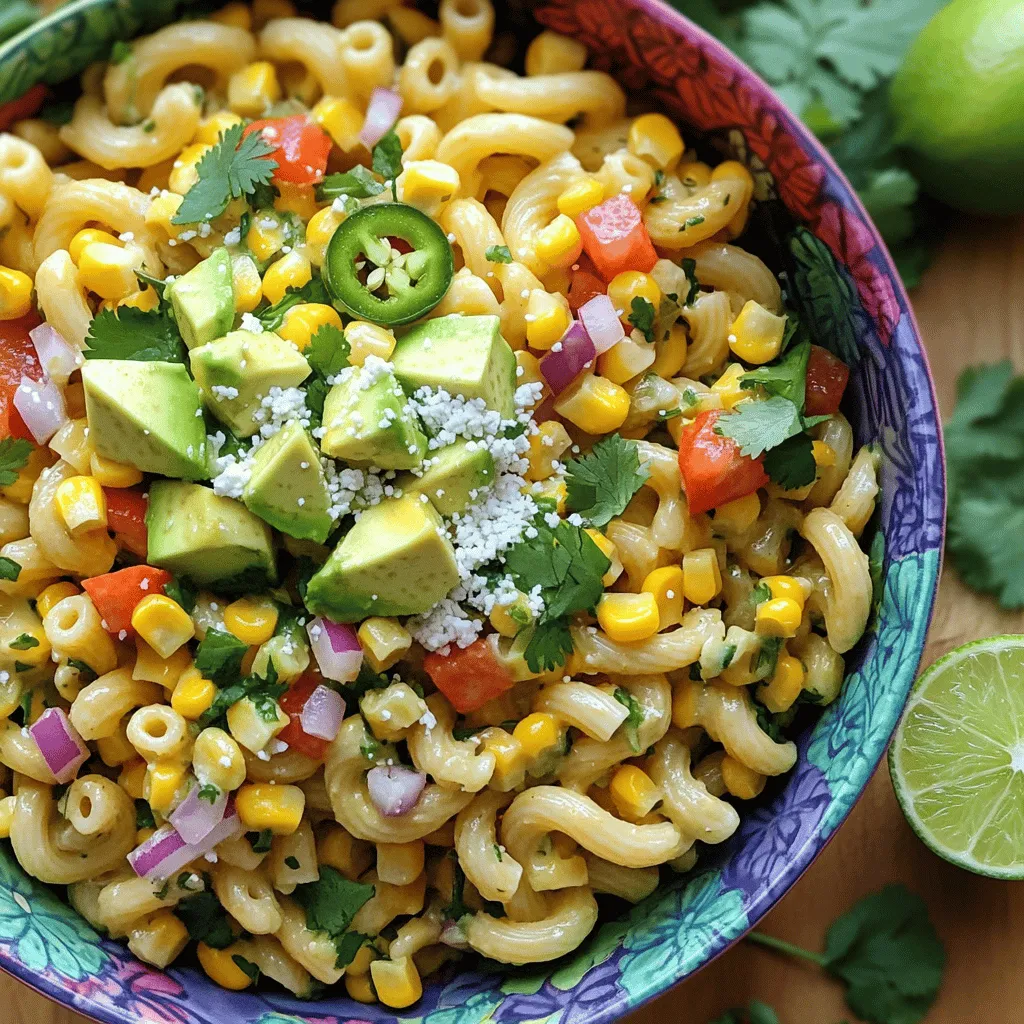
Mexican Street Corn Pasta Salad Flavorful and Fresh
Are you ready to dive into a vibrant dish that captures the essence of summer? Mexican Street Corn Pasta Salad blends fresh corn, zesty lime,
. Burger bowls are a fun and tasty way to enjoy your favorite burger flavors. You learned about key ingredients like ground meat, seasonings, and fresh greens. I shared how to prepare, cook, and assemble these bowls. You got tips for juicy patties and common mistakes to avoid. Exploring variations lets you personalize your dish for any season. Finally, proper storage keeps leftovers fresh. Now, you can create the perfect burger bowl tailored to your taste! Enjoy your cooking adventure.](https://toastedrecipes.com/wp-content/uploads/2025/06/9ed4ef59-05a7-49a5-b6a7-09fd9f1c71aa.webp)
Burger Bowls Flavorful and Wholesome Meal Idea
Looking for a tasty and simple meal idea? Try burger bowls! They’re not just burgers but a fun twist on your favorite dish. You start
![To make this loaded potato salad, you need: - 2 pounds baby potatoes, halved - 1 cup sour cream - 1/2 cup mayonnaise - 1 cup shredded sharp cheddar cheese - 6 strips crispy turkey bacon, crumbled - 1/2 cup green onions, finely chopped - 1/4 cup dill pickles, diced - 1 tablespoon Dijon mustard - 1 teaspoon garlic powder - Salt and pepper to taste The main stars of this dish are the baby potatoes and the creamy dressing. Baby potatoes are great because they are small and tender. They cook quickly and add a nice texture. Sour cream and mayonnaise create a rich, creamy base that balances flavors. The sharp cheddar cheese gives a wonderful taste, while crispy turkey bacon adds crunch. Green onions bring freshness, and dill pickles add a tangy kick. You can always make your potato salad special. Here are some fun ideas: - Add hard-boiled eggs for extra protein. - Use Greek yogurt instead of sour cream for a lighter option. - Swap out the cheddar for pepper jack cheese for a spicy twist. - Mix in roasted garlic for a deeper flavor. - Top with fresh herbs like parsley or dill for more color and taste. Feel free to experiment! You can find the Full Recipe for more details. Start by filling a large pot with water. Add a good amount of salt for flavor. Bring the water to a boil. Once boiling, carefully add the halved baby potatoes. Cook them for about 15 to 20 minutes. You want them fork-tender but still firm. Drain the potatoes and let them cool for a few minutes. While the potatoes cool, it’s time to make the dressing. Grab a large mixing bowl. Add the sour cream and mayonnaise. Then mix in the Dijon mustard, garlic powder, and a pinch of salt and pepper. Stir well until the dressing is smooth and creamy. This will give your salad a rich flavor. Once the potatoes are cool enough to touch, add them to the bowl with the dressing. Gently fold them in to coat each piece. Now it’s time to add the fun stuff! Sprinkle in the shredded cheddar cheese, crumbled turkey bacon, chopped green onions, and diced dill pickles. Stir everything together until well combined. Taste your salad and add more salt and pepper if needed. Cover the bowl with plastic wrap and chill it in the fridge for at least an hour. This helps the flavors blend. Before serving, give the salad a gentle stir. Feel free to top it with more bacon and green onions for a nice finish. Enjoy this delightful dish! For the complete list of ingredients and detailed instructions, check out the Full Recipe. To get the best texture in your loaded potato salad, start with baby potatoes. They cook evenly and taste great. Boil them until fork-tender but firm, about 15-20 minutes. If you overcook them, they can become mushy. Drain them well and let them cool. This keeps them from absorbing too much dressing. You want to serve loaded potato salad cold. Chill it in the fridge for at least one hour. This time helps the flavors mix well. If you serve it too warm, the dressing can become runny. A cold salad tastes crisp and refreshing. Seasoning is key to great flavor. Start with salt and pepper to taste. You can also add more garlic powder for a punch. Fresh herbs like dill or parsley can brighten the dish. If you want a kick, try a dash of hot sauce. These small tweaks make a big difference in taste. For the full recipe, check out the [Full Recipe]. {{image_2}} You can make your loaded potato salad a bit lighter. Try using Greek yogurt instead of sour cream. It adds creaminess and a nice tang. You can also use low-fat mayo for a healthier twist. Both options cut calories and add protein. Feel free to swap out the cheese. A mix of mozzarella and pepper jack gives a fun twist. If you like a strong flavor, try blue cheese or feta. For a vegan option, use dairy-free cheese. These changes keep the salad exciting and fresh. You can create themed potato salads too. For a BBQ twist, add grilled corn and smoked paprika. It gives a great smoky flavor. You could also mix in some barbecue sauce for an extra kick. Or, try adding cooked ham and sweet pickles for a southern flavor. Each theme can change the whole dish. Explore these ideas to find your favorite! For the full recipe, check out Loaded Potato Salad. To keep your loaded potato salad fresh, store it in an airtight container. Plastic or glass containers work well. Make sure to cover it tightly to prevent air from getting in. This helps maintain its creamy texture and flavor. Loaded potato salad can stay good in the fridge for about 3 to 5 days. After that, it may lose its taste. Always check for signs of spoilage, like a strange smell or discoloration. If you see these signs, it's best to throw it away. To enjoy it later, always label your container with the date you made it. Reheating loaded potato salad can be tricky. I recommend enjoying it cold, as it tastes best that way. If you must reheat, do it gently in the microwave. Use low power and stir every 30 seconds. This helps keep it creamy and delicious. Avoid high heat, which can make the potatoes mushy. For a fresh taste, consider adding a bit more sour cream or mayo after reheating. This can revive the flavors nicely. For the full recipe, check out the earlier section. Yes, you can make Loaded Potato Salad ahead of time. This dish is great for meal prep. Make it up to a day in advance. Just cover it and store it in the fridge. The flavors get better as it sits. You can use Greek yogurt instead of sour cream. It gives a nice tang and creamy texture. You can also try cottage cheese for a lighter option. Both substitutes work well in this recipe. To make Loaded Potato Salad gluten-free, check all your ingredients. Use gluten-free mayonnaise and mustard. Most baby potatoes are gluten-free, so you’re safe there. This way, everyone can enjoy this tasty dish. Loaded potato salad is a simple treat that blends taste and texture. I covered the main ingredients, the step-by-step instructions, and useful tips that can help you master this dish. You can easily customize it to fit your taste and needs, from healthier swaps to themed variations. Remember to store it properly for the best results. Try making it ahead of time or swapping ingredients to fit your diet. Enjoy crafting your version of this classic dish, making meals fun and easy.](https://toastedrecipes.com/wp-content/uploads/2025/06/c39f192e-9a3a-4c1c-b5b6-934f61da35d4.webp)
Loaded Potato Salad Delightfully Creamy Recipe
Are you ready to elevate your picnic game? My Loaded Potato Salad is delightfully creamy and packed with flavor! This recipe brings together simple ingredients
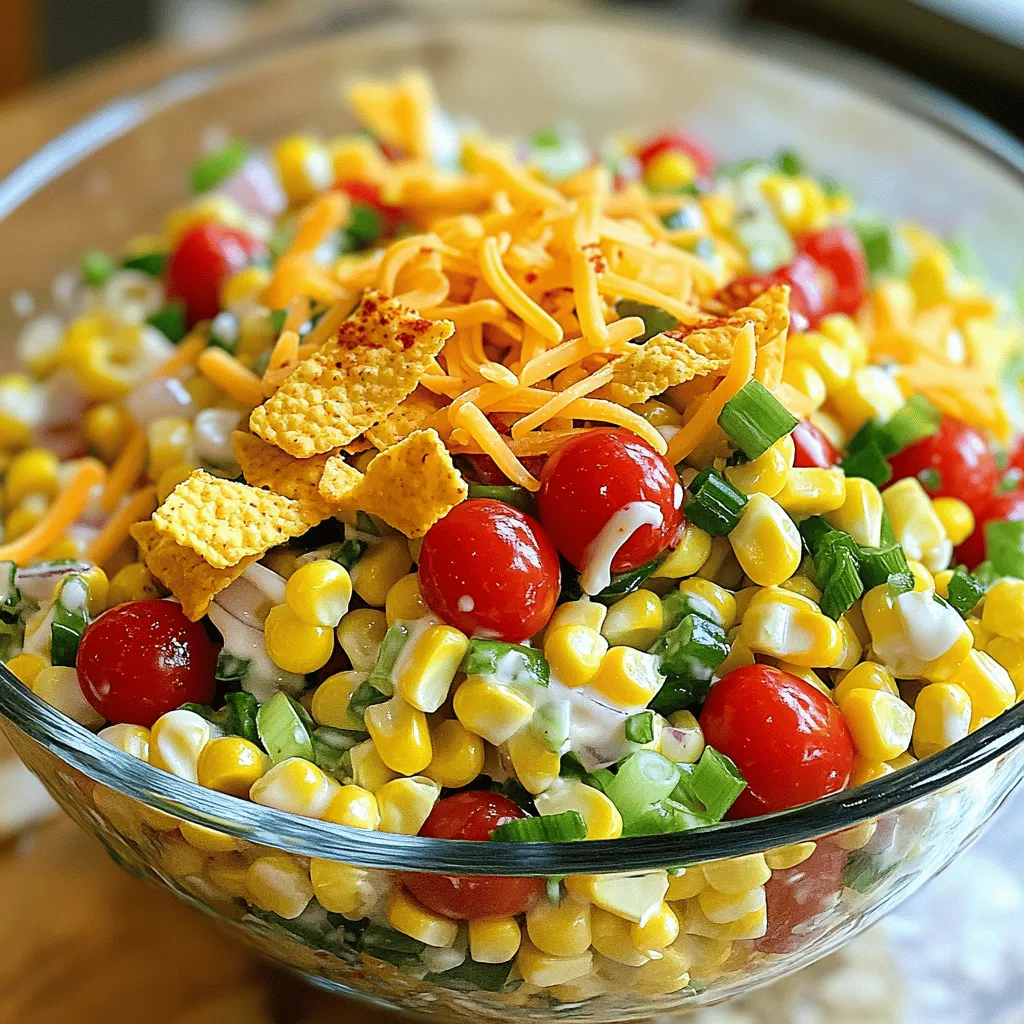
Fritos Corn Salad Flavorful and Easy Side Dish
If you’re on the hunt for a quick and tasty side dish, look no further! This Fritos Corn Salad packs a punch of flavor and