Salads
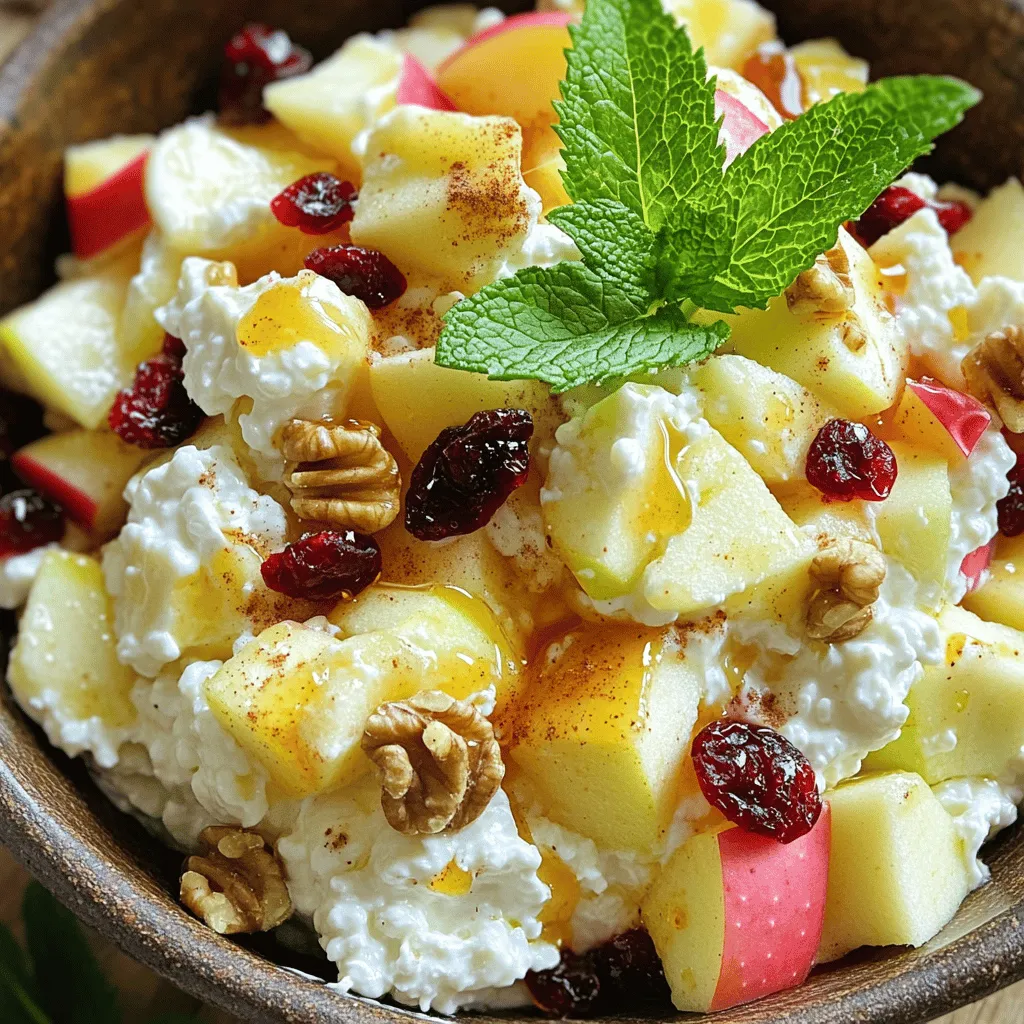
Cottage Cheese and Apple Salad Simple Fresh Delight
Are you ready for a fresh twist on your salad routine? My Cottage Cheese and Apple Salad offers a simple, delicious way to combine protein
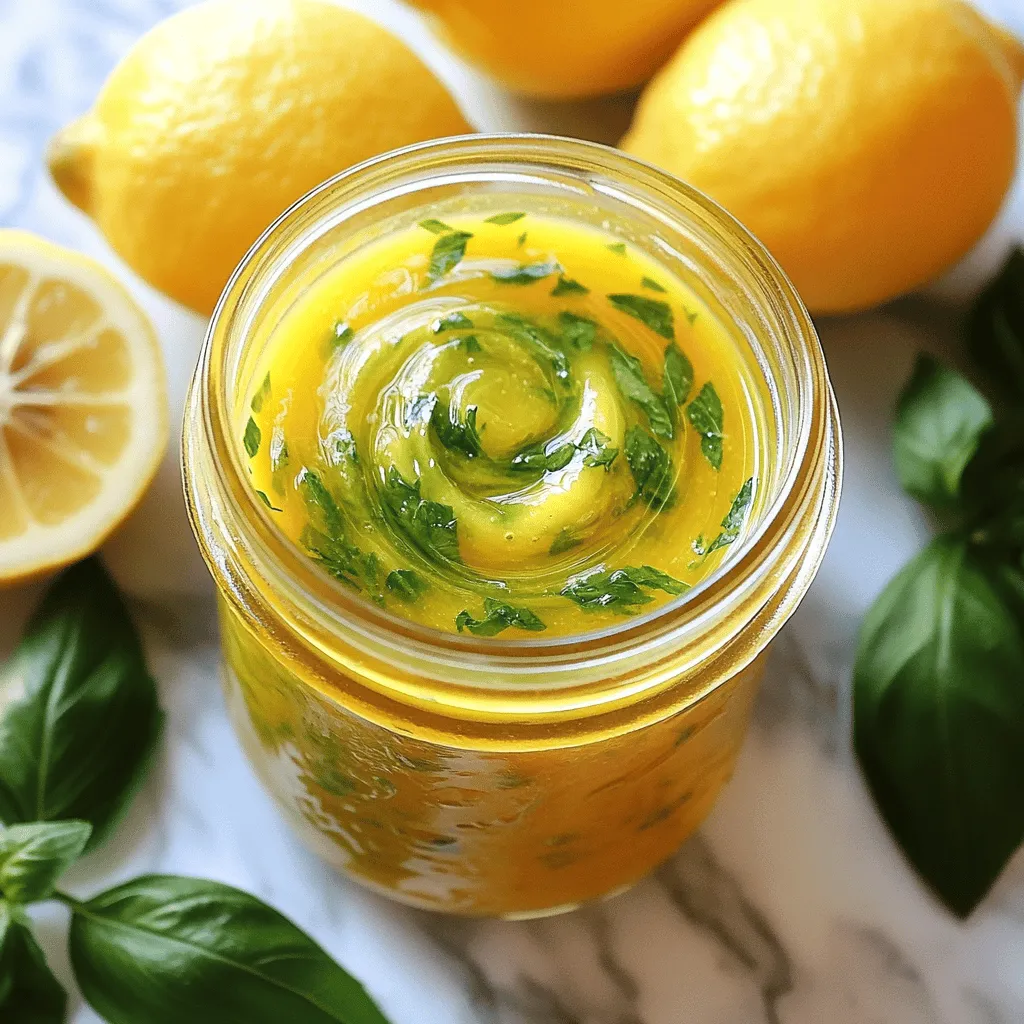
Healthy Lemon Basil Vinaigrette Zesty Flavor Boost
Looking to add a zesty boost to your salads? This Healthy Lemon Basil Vinaigrette is the answer! Packed with fresh flavors, it’s easy to make
![Making a homemade balsamic dressing is simple. You need just a few key ingredients for a fresh and tasty mix. Here’s what you will need: - Balsamic vinegar - Olive oil - Dijon mustard - Sweetener options (honey or maple syrup) - Garlic - Seasonings (salt, pepper, oregano, basil) This vinegar gives your dressing its rich, tangy flavor. It pairs well with many salads and dishes. Olive oil adds a smooth texture. It balances the acidity of the balsamic vinegar. Dijon mustard acts as an emulsifier. It helps blend the oil and vinegar smoothly. You can use honey for a touch of sweetness. Maple syrup is a great vegan option. Minced garlic adds a bold flavor. It gives your dressing a nice kick. Salt and pepper enhance the overall taste. Oregano and basil bring in extra flavors. You can use fresh or dried herbs for variety. These ingredients come together to create a delicious dressing. For the full recipe, check out the details below. Making this dressing takes just a few minutes and elevates any meal! 1. In a medium mixing bowl, combine 1/2 cup balsamic vinegar, 1 tablespoon Dijon mustard, 1 tablespoon honey, and 1 clove minced garlic. Whisk them together until smooth. This mix forms the dressing's base. 2. Slowly drizzle in 1/4 cup olive oil while whisking. This action creates an emulsion, giving your dressing a silky texture. Keep whisking until it looks well blended. 3. If you want extra flavor, stir in 1 teaspoon of dried oregano and 1 teaspoon of freshly chopped basil. Both add a nice herbal note to the dressing. 1. Season your dressing with salt and pepper to taste. You can adjust the sweetness by adding more honey if you like. 2. Let the dressing sit for at least 15 minutes before serving. This waiting time allows the flavors to meld together. It makes a big difference in taste. 3. For any leftovers, store your dressing in an airtight container in the fridge for up to a week. Remember to shake it well before each use. By following these steps, you’ll create a fresh and flavorful balsamic dressing that enhances any salad or dish. For the complete recipe, check out the Full Recipe section. To make a great balsamic dressing, it’s key to add oil slowly. This helps create a smooth mix. When you whisk in the oil slowly, it blends better with the vinegar. This step gives your dressing a nice creamy texture. Use a whisk for this task. A fork can work too, but a whisk is best. If you have a jar with a lid, you can shake it. This is another fun way to mix your dressing. Sweetness is important in this dressing. It should taste balanced, not too sweet or sour. You can adjust this by adding more honey or maple syrup. Start with a tablespoon and taste it. If you want it sweeter, add a little more. When it comes to seasonings, don’t be afraid to play around. If you love garlic, add more. If you want it milder, cut back. You can also add fresh herbs. Try using thyme or rosemary for a twist. Remember, taste as you go to find what you like best. For the full recipe, check out the instructions above. {{image_2}} You can easily change the taste of your balsamic dressing. Adding fresh herbs can make it special. Try thyme or rosemary for a fresh twist. These herbs add depth. They bring a touch of nature to your dish. Just chop them finely and mix them in. You can also use flavored olive oils. Garlic or lemon oils work great. Garlic oil will add a nice punch. Lemon oil gives a bright, fresh taste. Just swap out regular olive oil for these. This small change boosts flavor without extra work. If you want a vegan option, replace honey with maple syrup. Maple syrup still gives a nice sweetness. It blends well with balsamic vinegar. You won’t even miss the honey! Use the same amount of maple syrup. It’s simple, and it keeps your dressing delicious. You can find more tips and ideas in the [Full Recipe]. To keep your homemade balsamic dressing fresh, use an airtight container. Glass jars work well. They don’t hold odors and are easy to clean. You can also use plastic containers if they are safe for food. Store your dressing in the fridge right after making it. This helps keep the flavors bright. To keep it fresh longer, shake the container before each use. This will mix the ingredients well. Homemade balsamic dressing lasts about a week in the fridge. After that, the taste may fade. Always check for freshness before using. Look for signs like a change in color or smell. If it smells off or looks cloudy, it’s time to toss it. Trust your senses! For the full recipe, check out the Zesty Homemade Balsamic Dressing section. Yes, you can make balsamic dressing without mustard. Mustard helps thicken the dressing and adds flavor. If you skip it, try using other thickening agents. You can use mashed avocado or plain yogurt for a creamy texture. Both will change the taste a bit but still work great. Letting the dressing sit is important. I recommend at least 15 minutes. This time allows the flavors to mix well. When you let it rest, the garlic and herbs share their taste with the dressing. It makes each bite more flavorful and delicious. You can freeze homemade balsamic dressing, but it’s not the best idea. Freezing may change the texture. If you want to freeze it, use an airtight container. Leave some room for expansion. When thawing, do it slowly in the fridge. Shake or stir well before using to blend the flavors back together. In this post, we explored how to make a simple balsamic dressing. We covered key ingredients, from balsamic vinegar to seasonings. The step-by-step instructions help you create a flavorful dressing. Remember the tips for emulsifying well and adjusting flavors to your taste. You can also experiment with variations and storage methods for freshness. With these insights, you can make a delicious dressing anytime. Enjoy your culinary adventure!](https://toastedrecipes.com/wp-content/uploads/2025/07/2cb775ce-4b28-4d75-abc9-0c40be789977.webp)
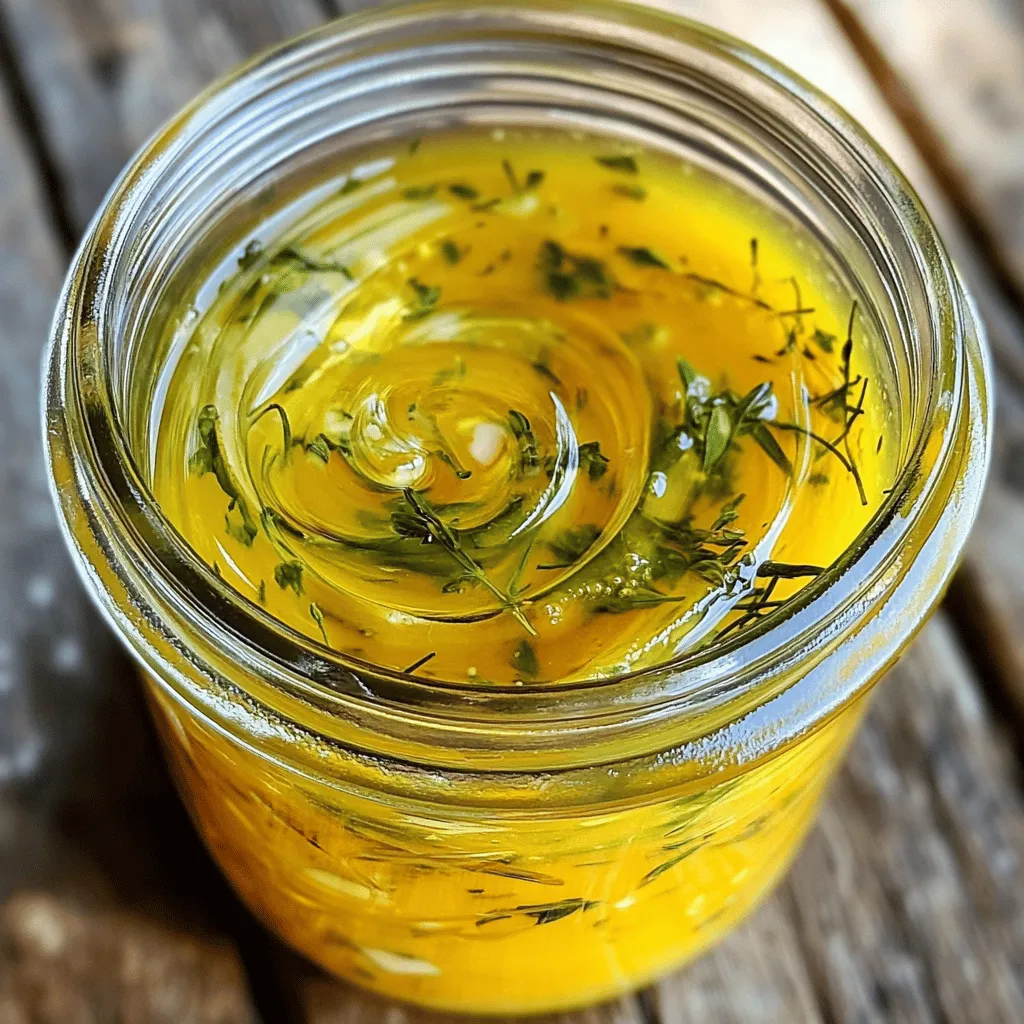
Homemade Balsamic Dressing Fresh and Flavorful Mix
Homemade balsamic dressing can transform any salad into a delicious dish. With just a few simple ingredients, you can whip up a fresh and flavorful
![To make a marinated tomato and burrata salad, gather the following ingredients: - 3 cups cherry tomatoes, halved - 1 cup fresh basil leaves, torn - 1 tablespoon balsamic vinegar - 2 tablespoons extra virgin olive oil - 1 teaspoon honey - Salt and pepper, to taste - 8 oz burrata cheese - 1 teaspoon red pepper flakes (optional for heat) Each ingredient plays a key role in this dish. The cherry tomatoes offer a sweet burst of flavor. Fresh basil adds a fragrant note that brightens up the salad. Balsamic vinegar brings acidity, while olive oil gives richness. Honey balances the tang and enhances the overall taste. Burrata cheese makes this salad creamy and luxurious. If you like heat, add red pepper flakes for a spicy kick. Gather these ingredients, and you’ll be ready to create this delightful dish. For the complete preparation details, check the Full Recipe above. 1. Combine tomatoes and basil: In a large bowl, mix the halved cherry tomatoes with the torn basil leaves. This will start to bring out the fresh flavors. 2. Prepare the dressing: In a small bowl, whisk together one tablespoon of balsamic vinegar, two tablespoons of extra virgin olive oil, one teaspoon of honey, and a pinch of salt and pepper. This sweet and tangy dressing adds depth to the salad. 3. Marinate the tomato mixture: Pour the dressing over the tomatoes and basil. Toss gently so each piece gets coated. Let the mixture sit at room temperature for at least 30 minutes. This marinating time helps flavors blend nicely. 4. Serve with burrata: When you are ready to eat, tear the burrata cheese into pieces and place it on top of the marinated tomatoes. If you like a bit of heat, sprinkle on some red pepper flakes. Finish with a drizzle of olive oil and a little more salt if you want. - Prep time: 10 minutes - Marinating time: 30 minutes - Total time: 40 minutes For the full recipe, check out the Marinated Tomato and Burrata Salad recipe section above. Enjoy creating this delightful dish! Marinating is key to great flavor. Always let your tomato mixture sit at room temperature. This helps the flavors come alive. Aim for at least 30 minutes of marinating time. The longer you wait, the better the taste. For a stunning dish, serve your salad in a shallow bowl. Arrange the marinated tomatoes around the burrata. This makes it look fresh and inviting. Add some extra basil leaves on top for a splash of color. You can pair this salad with grilled chicken or crusty bread. Both options complement the dish well. Balance the flavors with balsamic vinegar and honey. The vinegar adds a tangy kick, while honey brings sweetness. If you like some heat, sprinkle in red pepper flakes. They can give your salad a fun twist. Adjust the amount based on your heat tolerance. For more details, check out the [Full Recipe]. {{image_2}} You can have fun with your tomatoes. Try heirloom tomatoes for a sweet twist. They come in many colors and shapes. You might also use beefsteak or vine-ripened tomatoes for a hearty bite. Each type brings its own taste and charm to the dish. When it comes to cheese, burrata is a star. But you can switch it up! Fresh mozzarella works great in this salad. It has a soft texture and mild flavor. Feta cheese can add a salty kick, while goat cheese gives it an earthy touch. Feel free to mix and match based on what you enjoy! Want to boost the taste? Add minced garlic or sliced shallots to the mix. They bring a savory bite and depth. Just a little bit can change the whole dish. If you love crunch, try adding nuts or seeds. Pine nuts, walnuts, or sunflower seeds add a delightful texture. Embrace the seasons in your cooking! Fresh herbs can elevate your salad. In summer, use basil or mint. In winter, try parsley or dill for a fresh flavor. You can also add seasonal veggies. Think of bell peppers in the fall or cucumbers in summer. This keeps your salad fresh and exciting throughout the year. For the full recipe, check out the [Full Recipe]. Store any leftover salad in an airtight container. This keeps it fresh and tasty. Place it in the fridge right away. The cold air helps maintain the flavor. Try to eat it within two days for the best taste. You don’t need to heat this salad. It’s best served cold. If you want to refresh it, add a little olive oil. This helps keep the tomatoes juicy and the burrata creamy. A sprinkle of fresh basil also perks it up. The salad lasts up to two days in the fridge. After that, the tomatoes may become mushy. The burrata can lose its creamy texture too. For optimal taste and quality, enjoy it fresh. You can find the full recipe earlier in the article. You can prepare this salad up to a day in advance. Start by marinating the tomatoes and basil. Follow all steps except for adding the burrata. Store the marinated mix in the fridge. When you are ready to serve, gently add the burrata and enjoy! Yes, you can! Some great alternatives include mozzarella, feta, or goat cheese. Each cheese brings its own flavor. Try mozzarella for creaminess or feta for a salty kick. Be creative and choose what you like. This salad pairs well with grilled chicken or fish. You can also serve it with crusty bread or pasta. For a light meal, enjoy it with a simple soup. It adds freshness to any dish, making it a great choice! This blog post covered how to make a marinated tomato and burrata salad. You learned about key ingredients, step-by-step prep, and tips for the best flavors. I shared ways to enhance your dish and suggestions on how to store leftovers. Enjoy this fresh salad as a tasty side or a light meal. Experiment with variations and find what you love most. Happy cooking!](https://toastedrecipes.com/wp-content/uploads/2025/07/82b5ed18-ff0e-45af-b49e-e66a088bf0bf.webp)
Marinated Tomato and Burrata Salad Delightful Dish
Welcome to a taste adventure! This Marinated Tomato and Burrata Salad is a vibrant mix of flavors. Juicy cherry tomatoes meet creamy burrata, all brought
Easy Summer Salad Dressing Fresh and Flavorful Recipe
Summer is the perfect time for fresh salads, and a delicious dressing can make all the difference. In this post, I’ll share my easy summer
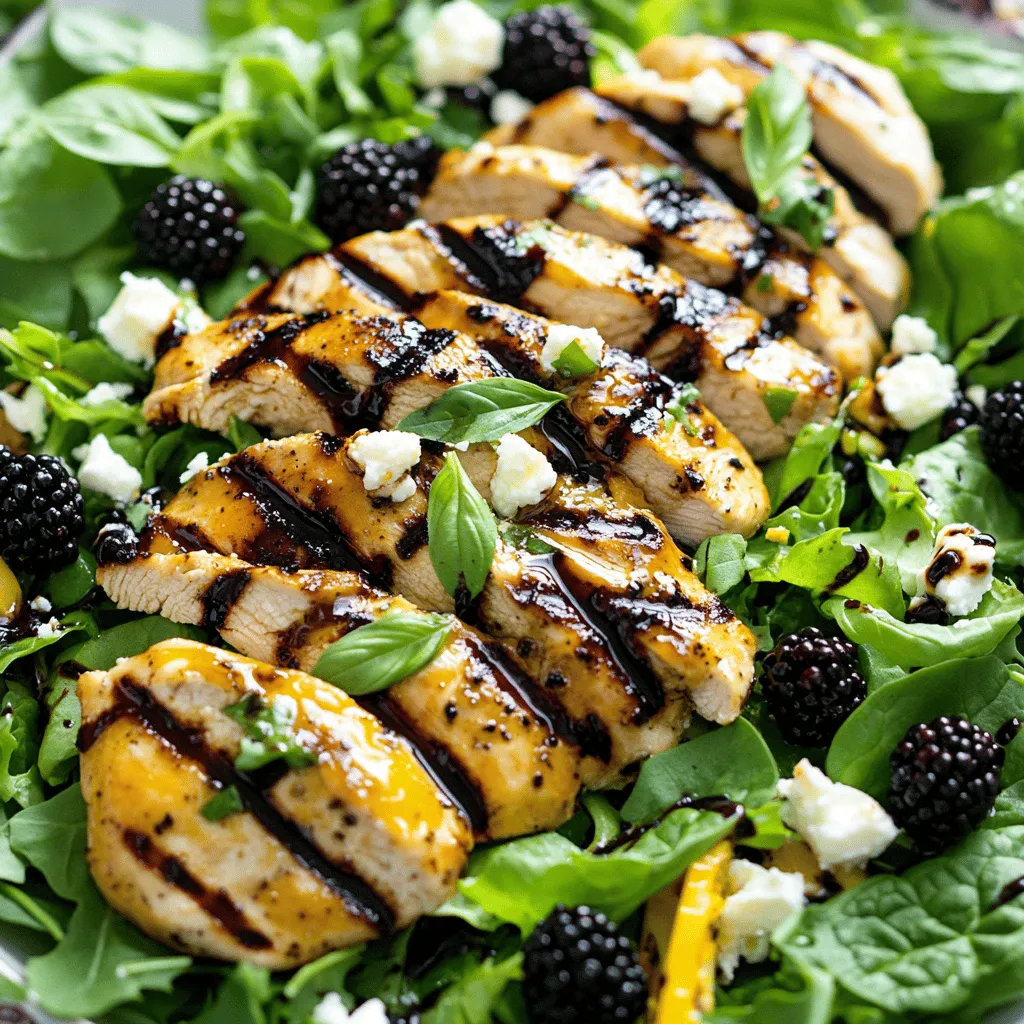
Blackberry Basil Grilled Chicken Salad Fresh Delight
Craving a fresh and flavorful meal? Let me introduce you to my Blackberry Basil Grilled Chicken Salad. This dish bursts with bright flavors and is
![- Mixed greens options: Use arugula, spinach, or baby kale. Each adds a unique flavor. - Fresh strawberries: Choose ripe strawberries. Hull and slice them for easy eating. - Additional toppings: - Feta cheese: Crumbled for a creamy contrast. - Sliced almonds: Toasted to add crunch. - Avocado: Diced for creaminess and healthy fats. - Red onion: Thinly sliced to enhance flavor. This combination makes the salad bright and tasty. Each ingredient works together, creating a lovely mix. The richness of feta pairs well with the sweet strawberries. The nuts bring a nice crunch, while the greens provide a fresh base. For the full recipe, you can refer to the Strawberry Delight Mixed Green Salad 🥗. Enjoy creating this delicious dish! Start by rinsing the mixed greens well under cool water. Use a salad spinner to dry them. This step keeps the greens crisp. If you don’t have a spinner, pat them dry with a clean towel. For the best bite, tear larger leaves into smaller pieces. Aim for bite-sized pieces that fit easily on your fork. In a large salad bowl, layer your ingredients. Start with the mixed greens as the base. Then, add the sliced strawberries evenly across the top. Sprinkle the crumbled feta and diced avocado next. Add the toasted almonds and sliced red onion last. This order helps each bite have a mix of flavors. For even distribution, gently toss the ingredients with your hands. To make the dressing, whisk together the balsamic glaze and olive oil in a small bowl. Mix until both liquids blend well. Drizzle this dressing over the salad. Use a large spoon to toss the salad gently. Make sure every ingredient gets coated in the dressing. Finally, season with salt and pepper to taste. Adjust these seasonings to your liking. Enjoy your Strawberry Mixed Green Salad right away for the best flavor. For the full recipe, check out the earlier section. For a stunning presentation, I like to use large shallow bowls or a beautiful platter. This salad looks best with vibrant colors on display. To make it pop, garnish with extra strawberries and toasted almonds on top. You can also serve it in individual bowls for a personal touch. Want to impress your guests? Try adding edible flowers like nasturtiums. They add color and a unique flair. You can also serve the salad alongside grilled chicken or shrimp for a complete meal. To take the flavor up a notch, consider adding other fruits like blueberries or raspberries. They blend well with strawberries and add a burst of sweetness. You can also use different cheeses, such as goat cheese or blue cheese, for a richer taste. For garnishes, fresh mint or basil works wonders. They add a refreshing note that complements the salad perfectly. Try pairing your salad with a light, citrusy vinaigrette for an extra zing. If you want to prepare this salad in advance, it’s best to store ingredients separately. Keep the mixed greens, strawberries, and other toppings in different containers. This way, they stay fresh and crisp. You can also make the dressing ahead of time. Just store it in a jar and shake it before use. When you’re ready to serve, combine all the ingredients for a fresh taste. This method keeps everything looking great and tasting even better. For the full recipe, check out Strawberry Delight Mixed Green Salad. {{image_2}} You can change the fruits in your salad based on what’s fresh and in season. In summer, try peaches or blueberries. In fall, apples and pears add a nice crunch. Each fruit brings its own unique flavor, making your salad exciting. Different greens can change the taste too. You can use kale for a hearty bite or butter lettuce for a soft feel. Spinach is great for a mild flavor. Each green adds new benefits, like iron or vitamins. If you want a vegan option, swap feta for avocado or nuts. This change still adds creaminess and flavor. For dressings, use lemon juice with olive oil instead of balsamic glaze. This keeps your salad fresh and light. If you need a gluten-free option, this salad works perfectly. All the ingredients are naturally gluten-free. Just check any packaged items, like nuts or dressings, to be sure. Add local ingredients to give your salad a unique flair. If you live by the coast, try adding shrimp or crab. If you’re in the Midwest, use local cheese or nuts. Different cuisines can inspire your salad too. A sprinkle of chili powder gives it a kick, or a drizzle of sesame oil adds a hint of Asia. Mixing these ideas keeps your salad fun and flavorful. For the full recipe, check out [Full Recipe]. To keep your Strawberry Mixed Green Salad fresh, store leftovers in the fridge. Place the salad in an airtight container. This helps prevent moisture loss and keeps flavors intact. If you have dressing left, store it separately. You don't want the greens to get soggy. Use small jars or squeeze bottles for easy pouring later. The salad stays fresh for about 1 to 2 days in the fridge. The mixed greens can wilt quickly, so enjoy your salad soon. To avoid spoilage, check for signs of wilting or brown spots. If you notice these, toss the salad. Always make sure to seal your container tightly after each use. This keeps air out and helps your ingredients stay crisp. For more details, check the Full Recipe to ensure you get the best flavors from your salad! You can add many tasty items to your salad. Here are some ideas: - Grilled chicken: This adds protein and makes it filling. - Shrimp: Cooked shrimp gives a nice touch and flavor. - Chickpeas: They are great for a vegetarian option. - Cucumbers: These add crunch and freshness. - Bell peppers: They bring color and sweetness. Feel free to mix and match. You can also switch up the greens. Try kale or romaine for a different taste. Yes, you can prepare this salad in advance. Here are some tips: - Prep the ingredients: Wash and slice the strawberries and veggies. - Store separately: Keep the mixed greens and dressing apart until serving. - Add dressing last: This keeps the greens crisp and fresh. If stored properly, the salad stays fresh for a day. Just toss it just before eating. Absolutely! This salad works well for meal prep. Here’s how to store it: - Use airtight containers: This helps keep everything fresh. - Layer wisely: Place hard veggies at the bottom and greens on top. - Keep dressing aside: Storing it separately prevents sogginess. You can prepare several servings for the week. It’s a quick grab-and-go meal. Many dressings complement this salad. Here are some favorites: - Balsamic vinaigrette: It pairs perfectly with strawberries. - Honey mustard: This adds a sweet and tangy flavor. - Lemon vinaigrette: This gives a bright and zesty kick. You can even make your own dressing! Just mix olive oil, balsamic glaze, salt, and pepper. This recipe yields about four servings. Each serving is a good portion for one person. If you plan to serve a crowd, you can easily double the recipe. It’s perfect for gatherings or picnics. Enjoy sharing the deliciousness with friends and family! This salad uses fresh greens, strawberries, and tasty toppings. You learned how to prepare, mix, and dress your salad with expert tips. Try creative serving ideas and seasonal twists to keep it exciting. Proper storage keeps leftovers fresh for longer. Remember, this salad works well for meal prep or gatherings. Enjoy customizing it to fit your taste and dietary needs. You can make each salad unique while keeping it healthy and delicious. Now, go out and create your perfect Strawberry Mixed Green Salad!](https://toastedrecipes.com/wp-content/uploads/2025/07/6fd17e83-a314-412c-9c52-d450a268eec7.webp)
Strawberry Mixed Green Salad Flavorful and Fresh Dish
Are you ready to elevate your salad game? Our Strawberry Mixed Green Salad is a burst of fresh flavors and vibrant colors! Packed with mixed
![- 4 ripe peaches, sliced - 2 cups baby spinach - 1 cup arugula Fresh produce is key to a great salad. Start with ripe peaches. When you slice them, they should be juicy and fragrant. The sweetness of the peaches shines in every bite. Baby spinach adds a tender green base. Its mild flavor pairs well with the fruits. Next, include arugula for a peppery kick. This mix of greens creates a delightful balance. - 1/2 cup crumbled feta cheese - 1/3 cup toasted pecans Now, let’s add some creaminess and crunch. Crumbled feta cheese brings a salty taste. It adds richness and pairs perfectly with the sweet peaches. Toasted pecans bring a nutty flavor. They also add a crunchy texture, making the salad more exciting. - 1/4 cup dried cranberries - 2 tablespoons honey - 2 tablespoons balsamic vinegar - 1 tablespoon olive oil - Salt and pepper Next, we need some sweetness and tang. Dried cranberries add a chewy texture and a burst of flavor. Honey gives the salad a natural sweetness. Balsamic vinegar adds a tangy taste, while olive oil brings richness. Don’t forget salt and pepper. They enhance all the flavors in the mix. With these ingredients, your Millionaire Peach Salad packs a punch of flavor. You can find the full recipe in this article to guide you through making it! First, we need to mix fresh ingredients. Take a large mixing bowl and add the sliced peaches. Then, add the baby spinach and arugula. These greens give a nice balance to the sweet peaches. Next, toss in the crumbled feta cheese, toasted pecans, and dried cranberries. Gently fold everything together with a spatula. This keeps the peaches whole and juicy. Now, let’s make the dressing. In a small bowl, whisk together the honey, balsamic vinegar, olive oil, salt, and pepper. Whisk until it blends well. This dressing will bring all the flavors together. Next, we combine the salad. Drizzle the dressing over the salad mixture. Use a spatula to toss everything very gently. You want the dressing to coat the peaches and greens without smashing them. This step is key to keeping the salad light and fresh. For presentation, transfer the salad to a beautiful serving platter. You can also serve it in individual bowls. This makes it easy for guests to take what they want. To garnish, sprinkle extra feta and pecans on top. This adds a nice touch and makes the salad look even more inviting. For the full recipe, check the detailed instructions above. Enjoy your Millionaire Peach Salad! Pick the best peaches for your salad. I love using yellow peaches. They have a sweet and juicy taste. White peaches are also good. They are sweeter and less acidic. Look for peaches that feel slightly soft when you press them. This means they are ripe and ready to eat. Peach season runs from late spring to early fall. The best time to buy is mid-summer. During this time, peaches are at their peak sweetness. To make your salad pop, add extra spices. A pinch of cinnamon or nutmeg can work wonders. You can also try fresh herbs. Basil or mint adds a nice twist. For texture, mix in crunchy ingredients. Toasted pecans give a great crunch. You can also use walnuts or almonds. They add richness to the dish. Cleaning up after cooking can be a breeze. Use a cutting board to slice your peaches. This keeps your counter clean. For easy washing, soak your mixing bowl in warm soapy water. Keep a dish towel handy for quick spills. Wipe as you go, and it will save time later. Enjoy your cooking and the fun of making Millionaire Peach Salad! {{image_2}} You can easily change up the nuts and cheeses in this salad. Instead of pecans, try walnuts or almonds. Both add a great crunch. For cheese, goat cheese works well if you want a creamier taste. You can also use a sharp cheddar for a stronger flavor. Seasonal fruits can make this salad even better. When peaches are out of season, try using nectarines or plums. Berries like strawberries or blueberries add a nice burst of flavor. You can even add sliced apples or pears for a sweet crunch. If you want a vegan version, skip the feta cheese. You can use avocado instead for creaminess. Nutritional yeast provides a cheesy flavor without the dairy. It’s a great way to keep things tasty. For gluten-free eaters, this salad is already a good choice. Just make sure any nuts or toppings you use are certified gluten-free. Enjoy the fresh flavors without worrying about gluten. This salad pairs well with various proteins. Grilled chicken or shrimp adds a nice touch. You can also serve it with salmon for a healthy meal. Using this salad as a side dish works great too. It complements grilled meats or sandwiches. Serve it at barbecues or picnics for a refreshing bite. You can find the full recipe to make this delicious Millionaire Peach Salad [Full Recipe]. To store leftover Millionaire Peach Salad, place it in an airtight container. Make sure to keep it in the fridge. This salad stays fresh for about 2 days. The peaches may soften, but the flavors will still shine. If you want to keep the crunch, store the dressing separately. This way, you can add it just before eating. You can prepare many parts of this salad ahead of time. Slice the peaches and mix them with lemon juice to stop browning. You can wash and dry the spinach and arugula a day in advance. Crumble the feta cheese and toast the pecans ahead too. Assemble the salad right before serving for the best taste. You can find the full recipe to get all the details. To make this salad shine, focus on ripe peaches. They should be sweet and juicy. Fresh baby spinach and arugula add a nice crunch. Combine textures by using crunchy toasted pecans. The feta cheese gives a creamy touch. Balance flavors with honey and balsamic vinegar for sweetness and tang. Toss gently to keep the peaches intact. This way, every bite bursts with flavor. You can prepare parts of this salad ahead of time. Slice the peaches a few hours before serving. Store them in lemon juice to stop browning. You can also wash and dry the greens ahead. Mix the dressing and store it separately. Combine everything just before serving for the best taste and texture. This salad is packed with nutrients. Peaches are rich in vitamins A and C. They support skin health and boost immunity. Spinach and arugula are full of iron and calcium. They help with energy and bone strength. Pecans add healthy fats and protein. Feta cheese provides calcium and flavor. Together, they create a healthy and delicious meal. This article shared all you need to know about making a delicious peach salad. We covered fresh ingredients, creamy cheese, sweet dressings, and helpful tips. You learned how to mix and serve this dish beautifully. I hope you feel ready to recreate this fruity delight. Enjoy trying different swaps and variations. Remember, salads can be fun and made to suit your taste. Keep the leftovers fresh and prep ahead if you want. With these tips, your peach salad will be a hit every time. Happy cooking!](https://toastedrecipes.com/wp-content/uploads/2025/07/f3d6f758-9f2c-45bc-bba8-216c306d1558.webp)
Millionaire Peach Salad Tasty and Refreshing Dish
If you’re craving a light and delicious dish, look no further than the Millionaire Peach Salad! This tasty salad combines juicy peaches, fresh greens, and
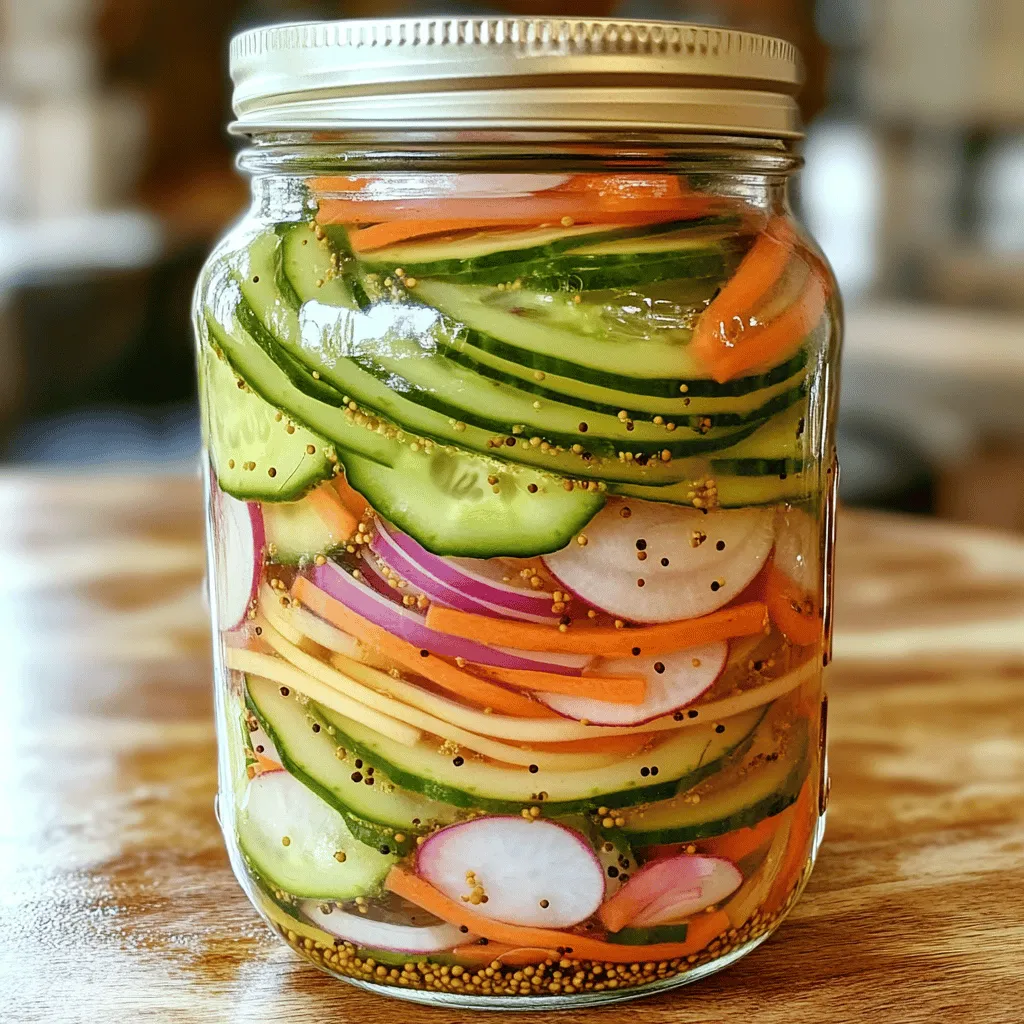
Quick Pickled Vegetables Crisp and Flavorful Recipe
Are you ready to transform your favorite veggies into a crispy, tangy delight? In this blog post, I’ll show you how to make quick pickled
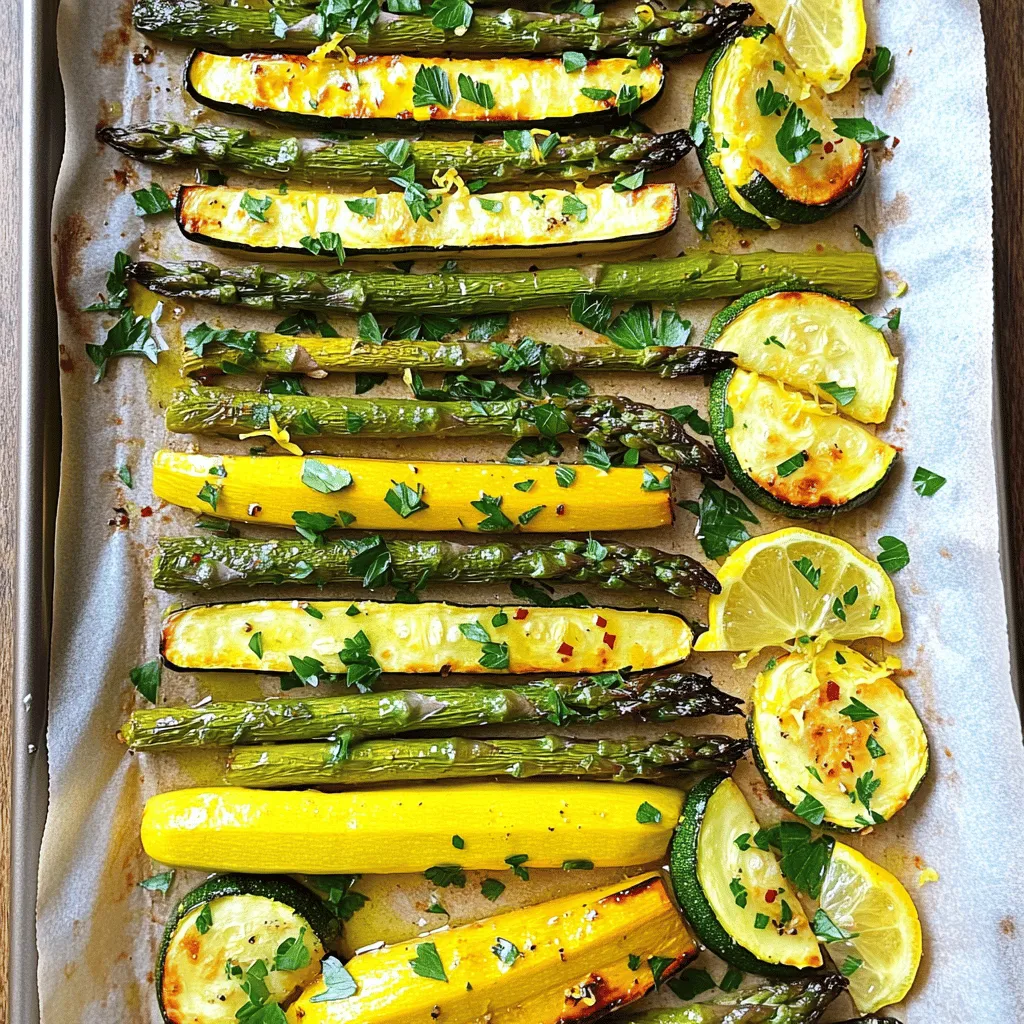
Flavorful Asparagus with Zucchini and Squash Recipe
Looking to brighten up your dinner table? This Flavorful Asparagus with Zucchini and Squash recipe is packed with fresh, vibrant veggies and zesty flavors. With