Dinner

- 4 medium zucchinis, thinly sliced - 2 medium yellow squash, thinly sliced - 1 large onion, diced - 2 cloves garlic, minced - 1 cup corn kernels (fresh or frozen) - 1 cup shredded cheddar cheese - 1 cup sour cream - 2 large eggs, beaten - 1 teaspoon dried thyme - 1 teaspoon paprika - 1 cup crushed buttery crackers - 2 tablespoons olive oil - Salt and pepper to taste You can swap out the squash for other veggies like bell peppers or mushrooms. Use egg substitutes like flaxseed or applesauce for a vegan option. If you want to skip dairy, try using plant-based sour cream. Nutritional yeast can add cheesy flavor without the dairy. When shopping for squash, look for firm ones with shiny skin. Avoid any with soft spots or blemishes. Fresh produce makes a big difference in flavor. Southern cooking relies on quality ingredients, so take your time at the market. Start by preheating your oven to 350°F (175°C). This step ensures even cooking. Grease a 9x13-inch baking dish with a bit of oil or butter. This helps prevent sticking and makes cleanup easier. Next, heat 2 tablespoons of olive oil in a large skillet over medium heat. Add 1 large diced onion and 2 minced garlic cloves. Sauté for about 3 to 4 minutes until they are soft and clear. This process boosts the flavor of your casserole. Then, add 4 thinly sliced zucchinis and 2 thinly sliced yellow squash to the skillet. Cook these for 5 to 7 minutes until they are slightly tender. Stir in 1 cup of corn kernels, seasoning with 1 teaspoon of dried thyme, 1 teaspoon of paprika, salt, and pepper to taste. Once mixed, remove it from heat. In a large bowl, mix 2 large beaten eggs and 1 cup of sour cream. Stir until smooth to create a creamy base. Fold in the sautéed vegetable mixture, making sure everything is well combined. Now, pour the mixed ingredients into the greased baking dish. Spread it evenly, so every bite has the same great taste. Top this with 1 cup of shredded cheddar cheese and finish off with 1 cup of crushed buttery crackers. The crackers add a nice crunch to your dish. Place the dish in the preheated oven and bake for 30 to 35 minutes. Look for a golden brown top and bubbles around the edges. This means it is done and ready to enjoy. Once baked, remove the casserole from the oven and let it sit for about 10 minutes. This helps it firm up a bit, making it easier to serve. Enjoy your Cozy Southern Squash Casserole, a warm and comforting dish perfect for any gathering! For more details, check the Full Recipe. - Overcooking squash for texture balance: Squash cooks quickly. If you overcook it in the skillet, it can turn mushy. Aim for tender but firm slices. This keeps the texture pleasant in the casserole. - Incorrect oven temperature and its effects: Baking at the wrong temperature can lead to uneven cooking. Always preheat the oven to 350°F. This ensures a nice golden crust on top and a well-cooked filling. - Best practices for sautéing vegetables: Start with a hot skillet and enough oil. Add onions first and let them soften. Then, add the garlic for flavor. Finally, add the squash and corn. This order builds layers of flavor. - Achieving the right consistency with the sauce: Mix the eggs and sour cream until smooth. This creamy mix binds the casserole together. If it's too thick, add a splash of milk to loosen it up for a great texture. - Pairing the casserole with traditional Southern entrees: Cozy Southern squash casserole goes well with fried chicken or baked ham. These hearty dishes complement the creamy flavors of the casserole. - Suggested side dishes to complement the casserole: Serve with cornbread for a true Southern feel. A fresh salad or coleslaw adds a crisp contrast. These sides balance the richness of the casserole for a complete meal. {{image_2}} You can make this cozy squash casserole even more special. Try adding spices like cayenne or red pepper flakes for a kick. Southern cooking loves bold flavors, so don't be shy! You can use seasonal veggies too. Instead of zucchini, add in some fresh tomatoes or bell peppers. Each season brings unique tastes that can change your dish. If you need a gluten-free option, swap the cracker topping with crushed gluten-free crackers. It keeps the crunch without the gluten. For a vegetarian twist, add more veggies like spinach or mushrooms. You can also use a dairy-free cheese for the topping, making it friendly for all diets. Need to feed a crowd? Just double the recipe! Use a larger baking dish and increase the cook time a bit. For smaller meals, you can make individual portions. Use ramekins for a cute presentation. These personal servings are great for meal prep and make it easy to enjoy this dish throughout the week. For the full recipe, check out Cozy Southern Squash Casserole. To keep your Cozy Southern Squash Casserole fresh, you should store it properly. Place leftovers in an airtight container. Glass or plastic containers work well for this. If you have no container, wrap the dish tightly with plastic wrap or aluminum foil. Store the casserole in the fridge if you plan to eat it soon. For longer storage, freeze it. Just remember to label your container with the date. This helps you know when you made it. When you want to reheat your casserole, do it safely. The best way is to use the oven. Preheat the oven to 350°F (175°C). Place the casserole in a baking dish and cover it with foil. Heat for about 20-25 minutes. This helps keep it moist. If you want to revive creaminess, add a dollop of sour cream or a splash of milk before reheating. Stir it gently to mix. In the fridge, your casserole lasts about 3-4 days. In the freezer, it can last up to 3 months. Always check for signs of spoilage. If you see mold or it smells off, it’s best to throw it away. Also, if the texture seems strange or watery, do not eat it. Trust your senses! Yes, you can prepare the casserole a day ahead. To do this, follow these steps: - Prepare all the ingredients as directed in the Full Recipe. - Mix the sautéed squash with the egg and sour cream. - Transfer the mixture to a greased baking dish. - Cover it tightly with plastic wrap or foil. - Store it in the fridge overnight. When you're ready to bake, remove it from the fridge. Let it sit at room temp for about 30 minutes. Then, bake as directed. This way, it'll be fresh and tasty. Cozy Southern Squash Casserole pairs nicely with various dishes. Here are some ideas: - Grilled chicken or pork for a hearty meal. - Baked ham adds a nice touch of sweetness. - Cornbread or biscuits can enhance the Southern feel. - A fresh garden salad provides a crisp contrast. These pairings make a complete meal and bring out the casserole's flavor. Yes, this casserole is great for meal prep. Here are some tips: - Portion the casserole into individual servings after baking. - Use airtight containers to keep them fresh. - Store in the fridge for up to four days. For reheating, pop them in the microwave or oven. To revive creaminess, add a splash of milk or cream before reheating. This makes for a quick and tasty meal anytime! This blog post outlined a tasty recipe for Cozy Southern Squash Casserole. I shared ingredient details and cooking steps to help you create this dish perfectly. We explored ways to customize the recipe and avoid common mistakes. Remember, using fresh ingredients makes a difference in flavor. Store leftovers properly to enjoy them later. My final thought: this casserole is a great addition to any meal, and easy to adjust to your tastes. Enjoy cooking and savor the delicious results!
Cozy Southern Squash Casserole Savory and Satisfying Dish
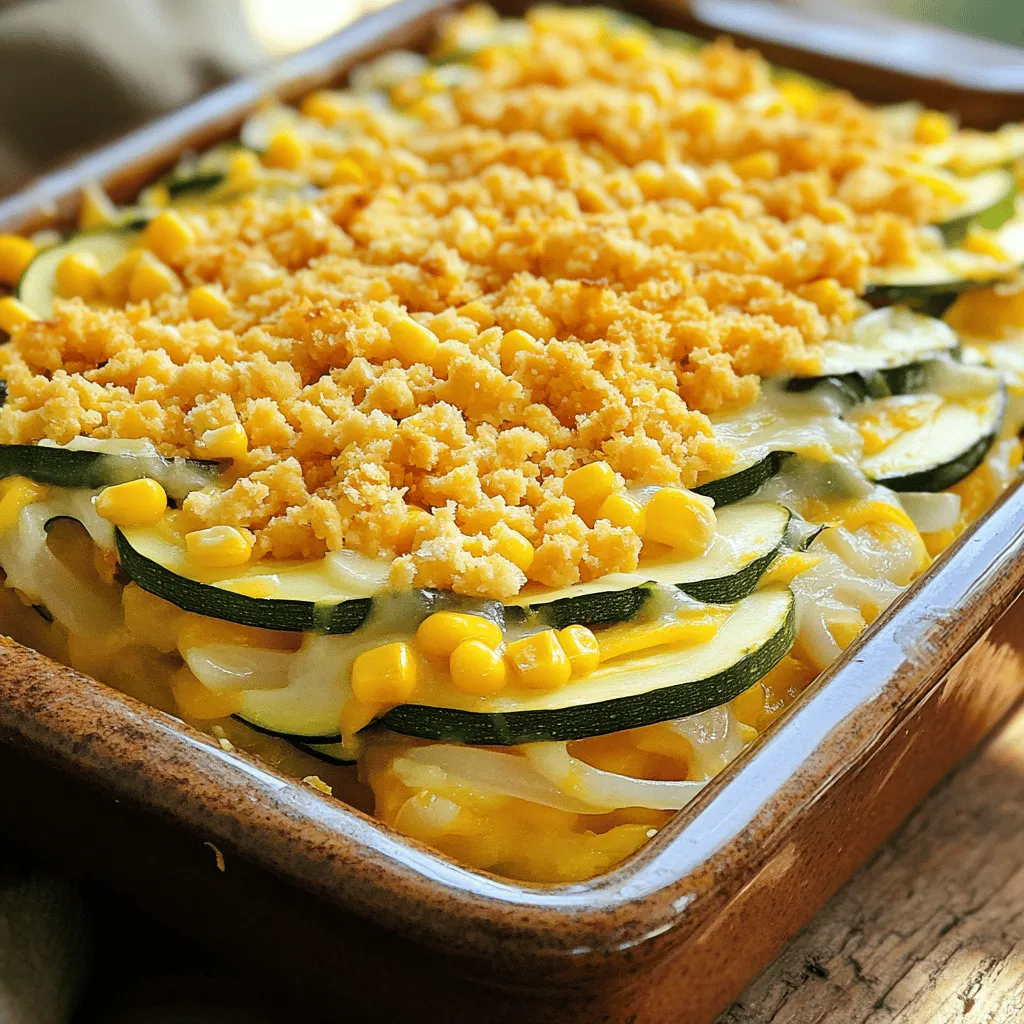
When comfort food calls, the Cozy Southern Squash Casserole answers with warmth and flavor. This savory dish brings together the best ingredients from the garden,
- 4 medium yellow squashes, sliced into thin rounds - 1 cup shredded sharp cheddar cheese - 1 cup shredded mozzarella cheese - 1 small onion, finely chopped - 2 cloves garlic, minced - 1 cup breadcrumbs (preferably panko for extra crunch) - 1/2 cup grated Parmesan cheese - 2 large eggs - 1/2 cup whole milk - 1 tsp dried oregano - Salt and pepper to taste - 2 tbsp olive oil - Fresh basil leaves for garnish (optional) The star of this dish is the yellow squash. It brings a sweet, mild flavor and a nice texture. Yellow squash is healthy and adds a colorful touch to your plate. The combo of sharp cheddar and mozzarella cheese gives a rich, creamy taste. They melt beautifully, making the bake gooey and satisfying. Onion and garlic add depth to the dish. They offer a savory aroma that fills your kitchen. Breadcrumbs, especially panko, create a crunchy topping that contrasts with the soft squash. Eggs and milk help bind everything together, making each bite cohesive and delicious. If you don’t have yellow squash, zucchini works well too. It has a similar texture and taste. You can swap cheddar for gouda or Swiss cheese for a different flavor. For a lighter option, use low-fat milk instead of whole. If you need a gluten-free version, use gluten-free breadcrumbs. You can also leave out the breadcrumbs for a lighter, lower-carb dish. Fresh herbs like thyme or parsley can replace oregano for a new twist. Use what you have and make this dish your own! For the full recipe, click here. First, gather all your ingredients. You will need four medium yellow squashes, cheese, eggs, and more. Next, preheat your oven to 375°F (190°C). This step is key for even cooking. While the oven heats, slice the squash into thin rounds. Set them aside. In a large skillet, heat two tablespoons of olive oil over medium heat. Once hot, add one small chopped onion and sauté it for about three to four minutes. The onion should become clear. Then, add two minced garlic cloves and cook for one more minute. This will fill your kitchen with a great smell. After that, remove the skillet from the heat. Now, take a large bowl and toss the yellow squash slices with salt. Let them sit for about ten minutes. This helps to draw out excess moisture. After ten minutes, pat the squash dry with paper towels. In another bowl, whisk together two large eggs, half a cup of whole milk, one teaspoon of dried oregano, and a pinch of salt and pepper. Next, combine the sautéed onion and garlic into the egg mixture. Fold in half a cup of sharp cheddar cheese, half a cup of mozzarella cheese, and half of the breadcrumbs. Mix everything well until it’s smooth. Grease a 9x13 inch baking dish. Start layering by placing half of the yellow squash slices at the bottom. Spread half of the egg mixture over the squash. Add the remaining squash slices on top, followed by the rest of the egg mixture. Now, sprinkle the remaining cheddar and mozzarella cheese on top. Add the grated Parmesan cheese and the rest of the breadcrumbs. Drizzle a bit of olive oil over the top to help with browning. Finally, bake your Cheesy Yellow Squash Bake in the oven for 35 to 40 minutes. It’s done when the top is golden brown and the squash is tender. Remove it from the oven and let it cool for about five minutes. Garnish with fresh basil leaves if you like. Enjoy your delicious creation! For the full recipe, check out the ingredients and steps detailed above. To make a perfect Cheesy Yellow Squash Bake, start with fresh yellow squash. Look for firm, bright ones. Slice them thin for even cooking. Letting the squash sit with salt removes moisture. This step helps your bake stay firm. Use quality cheese. Sharp cheddar gives great flavor, while mozzarella adds creaminess. Mixing the cheeses ensures every bite is cheesy. For a crunchy top, use panko breadcrumbs instead of regular ones. They create a delightful texture. One common mistake is not salting the squash. This can lead to a watery dish. Make sure to dry the squash well after salting. Another mistake is overcrowding the baking dish. This prevents even cooking and browning. Layer the ingredients evenly for best results. Don't skip the resting time after baking. Let your dish sit for five minutes. This helps it set and makes serving easier. If you rush, it might fall apart. Here are some tools I recommend for this recipe: - Large skillet for sautéing - Mixing bowls for combining ingredients - Whisk for mixing eggs and milk - 9x13 inch baking dish for layering - Knife and cutting board for slicing squash - Measuring cups and spoons for accuracy - Paper towels for drying squash These tools make the cooking process smooth and fun. Having the right equipment helps you focus on creating a delicious dish. For the full recipe, check the link above! {{image_2}} You can easily add protein to your Cheesy Yellow Squash Bake. Try cooked, crumbled sausage or shredded chicken for a heartier dish. For a meat-free option, consider using lentils or chickpeas. These will boost flavor and protein without adding too many calories. Mix your choice of protein into the egg mixture before layering. This step ensures even distribution throughout the bake. If you want to keep it vegetarian but still crave more flavor, consider adding spinach or kale. Sauté these greens with the onion and garlic. They will add a nice color and healthy nutrients. You can also use mushrooms. They bring a rich, umami flavor that pairs well with the cheese. Feel free to experiment with different veggies like bell peppers or zucchini, too! Seasonal vegetables can elevate your Cheesy Yellow Squash Bake. In spring, try asparagus or peas for a fresh taste. In summer, mix in diced tomatoes or fresh corn for a burst of flavor. Fall brings great options like butternut squash or sweet potatoes. Winter is perfect for hearty root vegetables like carrots or parsnips. Just adjust your cooking times if you use veggies that need longer to cook. This way, your dish stays perfectly tender and tasty. For the full recipe, check the section above. To store leftovers, let the Cheesy Yellow Squash Bake cool down. Then, transfer it to an airtight container. You can keep it in the fridge for up to four days. This helps maintain its flavor and texture. If you want, you can cover it with foil before sealing the container. When you want to enjoy the leftovers, preheat your oven to 350°F (175°C). Place the squash bake in a baking dish. Cover it with foil to keep it moist. Heat for about 20 minutes or until warmed through. You can also use a microwave. Just place a portion in a microwave-safe dish and heat for 1-2 minutes. If you want to save the dish for later, freezing is a great option. First, let the bake cool completely. Then, cut it into individual portions. Wrap each piece in plastic wrap and place them in a freezer-safe bag. Label the bags with the date. You can freeze it for up to three months. To reheat, thaw in the fridge overnight and follow the reheating instructions. For a great cheesy flavor, I recommend using sharp cheddar and mozzarella. Sharp cheddar gives a nice tang, while mozzarella adds that lovely stretch. You can mix these cheeses for a balanced taste. Feel free to experiment with other cheeses like Gouda or Monterey Jack for unique flavors. Yes, you can easily make this dish gluten-free! Just swap the breadcrumbs with gluten-free options. Look for gluten-free panko or even crushed gluten-free crackers. This change keeps the crunch while making it safe for those with gluten sensitivities. You can tell the squash is done when it feels tender. Use a fork to poke through the layers. If it slides in easily, it’s ready! The top should be golden brown and crispy. Keep an eye on it towards the end of the baking time for the best result. For the complete recipe, check out the [Full Recipe]. In this post, we explored how to make Cheesy Yellow Squash Bake. We covered ingredients, step-by-step cooking, and tips to get it right. You now know ingredient substitutes, variations, and storage info. Remember, using the best cheese makes a big difference. Avoid common mistakes for a perfect dish. Experiment with proteins and seasonal veggies for fun flavors. Enjoy your cooking and savor each bite!
Cheesy Yellow Squash Bake Delightful and Easy Recipe
Are you ready to enjoy a delicious dish that’s both cheesy and easy? This Cheesy Yellow Squash Bake will become your new favorite! Packed with
- 300g whole wheat pasta (your choice) - 2 cups cherry tomatoes, halved - 1 zucchini, diced - 1 red bell pepper, diced - 1 yellow bell pepper, diced - 1 red onion, cut into wedges - 4 cloves garlic, whole - 3 tablespoons olive oil - 1 teaspoon dried oregano - 1/2 teaspoon red pepper flakes (optional) - Salt and pepper to taste Whole wheat pasta gives this dish a nice bite and adds fiber. Fresh vegetables like cherry tomatoes, zucchini, and bell peppers bring color and flavor. Garlic adds depth to the taste. Olive oil helps roast the veggies and adds richness. Dried oregano gives a nice herb taste, while red pepper flakes add a little heat. You can adjust the salt and pepper to your liking. - Grated Parmesan cheese - Fresh basil Adding grated Parmesan cheese at the end gives a creamy touch. Fresh basil leaves make the dish smell great and look pretty. You can skip these if you want a lighter meal. - Baking sheet - Large mixing bowl - Pasta pot You will need a baking sheet to roast the veggies. A large mixing bowl helps combine everything easily. A pasta pot is essential for cooking the pasta just right. These tools make cooking simple and fun. For a complete guide on how to make Tasty Roasted Vegetable Pasta, check out the Full Recipe. First, preheat your oven to 425°F (220°C). This step is key for getting great flavor. While the oven warms up, grab a large bowl. Add your cherry tomatoes, diced zucchini, red and yellow bell peppers, red onion, and whole garlic cloves. Now, drizzle three tablespoons of olive oil over the veggies. Sprinkle on one teaspoon of dried oregano, half a teaspoon of red pepper flakes, and a pinch of salt and pepper. Toss everything well. You want each piece coated with oil and seasonings for the best taste. Next, spread the veggies onto a baking sheet. Make sure they lie in a single layer. This helps them roast evenly. Place the baking sheet in the preheated oven. Roast for about 20 to 25 minutes. Stir the vegetables halfway through to ensure they cook evenly. You’ll know they are ready when they look tender and slightly caramelized. While the veggies are roasting, it’s time to cook your pasta. Bring a pot of water to a boil. Add 300 grams of whole wheat pasta and cook it according to the package instructions until it is al dente. Once it’s cooked, drain the pasta and set it aside. After the vegetables are done, remove them from the oven. Let them cool for a minute. Squeeze the roasted garlic from its skins. Mash it slightly with a fork. Now, in a large mixing bowl, combine the cooked pasta, roasted vegetables, and the mashed garlic. Toss to mix everything well. Adjust the seasoning if needed. Serve this tasty dish warm, and if you like, top it with fresh basil and grated Parmesan cheese. Enjoy your flavorful and satisfying roasted vegetable pasta! For the full recipe, check out the details provided earlier. Choose seasonal vegetables for the best flavor. In summer, use zucchini, bell peppers, and tomatoes. In fall, try squash, carrots, and Brussels sprouts. Mix different colors for a vibrant dish. Red, yellow, and green vegetables not only look good but also taste amazing together. Set your oven to 425°F (220°C). This high heat caramelizes the veggies and brings out their sweetness. Check them at 20 minutes. If they need more time, give them a few extra minutes. Stir halfway through to ensure even cooking. Add herbs like thyme or rosemary for a fresh taste. You can also sprinkle some red pepper flakes for heat. Cheese makes it rich. Use grated Parmesan or feta for extra creaminess. Top with fresh basil for a burst of flavor. {{image_2}} If you want to enjoy this dish without gluten, you have great choices. You can use gluten-free pasta made from brown rice or chickpeas. These options cook well and taste good. You may need to adjust the cooking time. Always check the package for the best results. To adapt the recipe, just follow the same steps. Toss your gluten-free pasta with roasted veggies. The flavors will still shine through. For a heartier meal, you can add protein. Chicken works great. Cook it in a pan until it’s golden and tender. Shrimp is another tasty option. Toss it in the oven with the veggies for a quick cook. If you prefer plant-based options, beans like chickpeas fit well too. When adding protein, balance the flavors. Use herbs and spices to tie it all together. For example, lemon juice can brighten the dish. Using seasonal vegetables makes this dish even better. In fall, think about adding butternut squash or Brussels sprouts. They bring warmth and earthiness. In summer, mix in zucchini, corn, or fresh peas. These ingredients add a fresh burst of flavor. By changing up the veggies, you can create new tastes each season. It keeps the dish exciting and fun to make. For the full recipe, dive into the detailed steps and enjoy your cooking adventure! After enjoying your tasty roasted vegetable pasta, store any leftovers in an airtight container. This method keeps your dish fresh. Place it in the fridge within two hours of cooking. It will stay good for about three to five days. When you’re ready to enjoy it again, reheat portions in the microwave or on the stove. If using the stove, add a splash of water or olive oil to keep it moist. To freeze your roasted vegetable pasta, portion it into freezer-safe containers. Make sure to leave some space at the top for expansion. It’s best to freeze within two days of cooking for the best taste. When you want to eat it, take the container out of the freezer. Let it thaw overnight in the fridge. Reheat in the microwave or on the stove, adding a little water if needed. Cooked pasta can last in the fridge for about three to five days. If kept in the freezer, it can last up to three months. Look for signs of spoilage, like an off smell or mold. If you see these signs, it’s best to toss the pasta. Keeping your food safe is key to enjoying every bite of your delicious meal, so always check before you dig in! Yes, you can prep this dish in advance. Cook the pasta and roast the veggies earlier in the day. Store them separately in the fridge. When you're ready to eat, just combine them. Heat gently in a pan or microwave. This helps the flavors mix well and saves you time. If you want a dairy-free option, try nutritional yeast. It gives a cheesy flavor without dairy. You can also use a vegan cheese that melts well. Crushed nuts, like cashews, can add texture and taste too. They work well as a sprinkle on top. To adjust the heat, add more or less red pepper flakes. If you like it spicy, increase the amount. You can also use fresh chili peppers for extra heat. For milder flavor, skip the flakes. Other spices, like smoked paprika or black pepper, can add depth without heat. You learned how to make a tasty whole wheat pasta dish. We discussed ingredients like fresh vegetables, olive oil, and herbs. You now know how to roast veggies and cook pasta properly. I shared tips for picking the best seasonal veggies and achieving the perfect roast. Don't shy away from trying variations, like gluten-free pasta or adding protein. Remember, storing leftovers correctly keeps them fresh longer. With these steps, you can create a dish that suits your taste and makes meals easy. Enjoy your cooking journey!
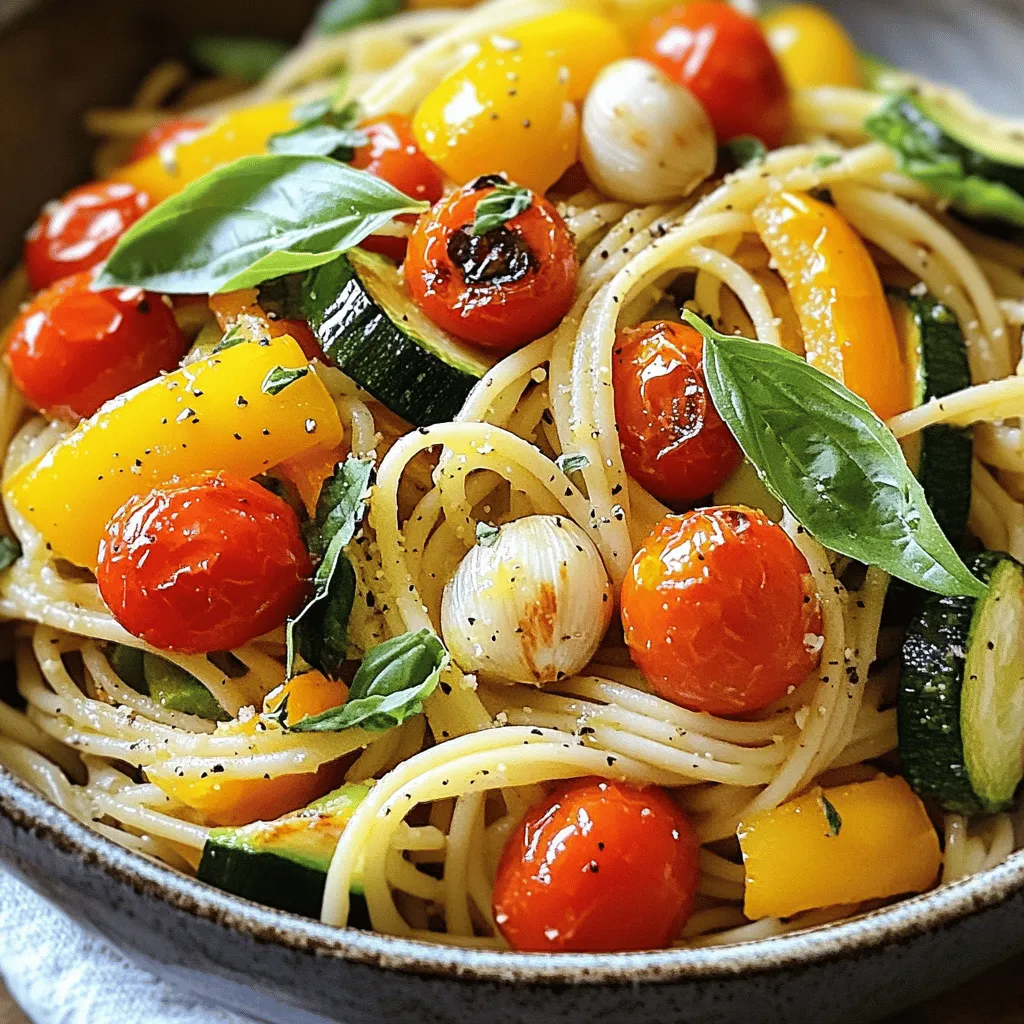
Tasty Roasted Vegetable Pasta Flavorful and Satisfying
If you’re looking for a meal that’s both tasty and healthy, then Tasty Roasted Vegetable Pasta will hit the spot! This dish combines whole wheat
Here’s what you need for Keto Garlic Mushroom Chicken Casserole: - 2 cups cooked chicken, shredded - 2 cups mushrooms, sliced - 4 cloves garlic, minced - 1 cup heavy cream - 1 cup shredded mozzarella cheese - 1/4 cup grated Parmesan cheese - 1 cup spinach, chopped - 1 teaspoon dried thyme - 1 teaspoon paprika - Salt and pepper to taste - 2 tablespoons olive oil - Fresh parsley, for garnish This casserole is not just tasty; it’s also nutritious. Each serving packs a punch with protein and healthy fats. Here is a quick look at the nutritional breakdown: - Calories: Approximately 450 - Protein: 35g - Fat: 30g - Carbohydrates: 6g - Fiber: 2g This makes it perfect for a keto diet. For this recipe, I recommend using cooked chicken. You can use rotisserie chicken for ease, or bake your own chicken breast. Both options work well. You could also use thighs for more flavor and moisture. Just ensure your chicken is fully cooked and shredded for the best texture in the casserole. If you want to explore more about the recipe, check out the Full Recipe for detailed steps! First, gather your ingredients. For this dish, you need: - 2 cups cooked chicken, shredded - 2 cups mushrooms, sliced - 4 cloves garlic, minced - 1 cup heavy cream - 1 cup shredded mozzarella cheese - 1/4 cup grated Parmesan cheese - 1 cup spinach, chopped - 1 teaspoon dried thyme - 1 teaspoon paprika - Salt and pepper to taste - 2 tablespoons olive oil - Fresh parsley, for garnish Next, preheat your oven to 375°F (190°C). This ensures even cooking when you bake the casserole. In a large skillet, pour the olive oil and heat it over medium heat. Once hot, add the sliced mushrooms. Sauté them for about 5 minutes until they turn golden and brown. This step brings out their rich flavor. Now, add the minced garlic to the skillet. Cook it for 1-2 minutes until you can smell its aroma. Garlic adds a nice taste to the dish. Next, stir in the chopped spinach, dried thyme, paprika, salt, and pepper. Cook this mixture until the spinach wilts, which takes about 2 minutes. The colors will be vibrant and inviting. In a mixing bowl, combine the heavy cream, shredded mozzarella, and grated Parmesan cheese. Stir well until it forms a smooth mixture. In a large casserole dish, spread the cooked chicken evenly on the bottom. Pour the mushroom and spinach mixture over the chicken. Now, pour the cheese mixture on top. Make sure to spread it evenly so every bite is cheesy. Finally, bake the casserole in the preheated oven for 25-30 minutes. Look for a golden and bubbly top. Once it's done, take it out and let it sit for 5 minutes. This helps the flavors settle. Garnish with freshly chopped parsley before serving. This adds a lovely touch and color. Enjoy your Keto Garlic Mushroom Chicken Casserole! For the full recipe, check out the above details. To make your casserole shine, focus on these tips: - Use fresh mushrooms for a rich taste. - Sauté them until they are golden. This brings out their flavor. - Mix the cheeses well for a creamy texture. - Let the casserole sit after baking. This helps it set and makes serving easier. - Garnish with fresh parsley for a nice touch. Avoid these common pitfalls: - Don't skip the sauté step for mushrooms. This step adds depth to the dish. - Overcooking the casserole can make it dry. Keep an eye on the oven timer. - Forgetting to season can lead to bland flavors. A pinch of salt and pepper makes a big difference. - Using low-quality chicken may affect the dish's overall taste. Choose tender, juicy meat for the best results. Here are some must-have tools for this recipe: - A large skillet for sautéing. - A mixing bowl to combine your cheese and cream. - A casserole dish for baking. Choose one that holds at least 2 quarts. - A wooden spoon for easy mixing. - An oven mitt to protect your hands when removing the hot dish. For the Full Recipe, refer back to the ingredients and steps outlined. Happy cooking! {{image_2}} You can easily swap out some ingredients in this recipe. If you don’t have cooked chicken, use rotisserie chicken. It saves time and adds flavor. For the mushrooms, any type works. You can choose button, cremini, or even shiitake mushrooms. If you’re out of mozzarella, try cheddar or gouda for a new taste. If you want to make this dish even lower in carbs, you can replace the heavy cream with unsweetened almond milk. It cuts calories without losing creaminess. You can also add zucchini noodles instead of chicken. This adds a fresh crunch and keeps the meal light. For a dairy-free option, use cashew cream instead of cheese. To boost flavor, add a splash of white wine to the skillet when cooking the mushrooms. It adds depth and richness. You can also mix in some sun-dried tomatoes for a tangy twist. Fresh herbs like basil or oregano can brighten the dish. If you want some heat, sprinkle in red pepper flakes for a spicy kick. For the full recipe, check out the details provided earlier. Store your Keto Garlic Mushroom Chicken Casserole in an airtight container. This helps keep it fresh. Let the casserole cool down first. Then, put it in the fridge. It will last for about 3 to 4 days. When you want to reheat, you have a few options. You can use the oven or the microwave. If using the oven, set it to 350°F (175°C). Place the casserole in a baking dish and cover it with foil. Heat for about 15 to 20 minutes. If you're in a hurry, the microwave works too. Heat in short bursts of 1 to 2 minutes. Stir in between to ensure even heating. You can also freeze the casserole. First, let it cool completely. Then, wrap it tightly in plastic wrap and foil. This keeps out air and moisture. Label the container with the date. It can stay in the freezer for up to 3 months. When ready to eat, thaw it in the fridge overnight before reheating. This keeps the texture nice and creamy. For the full recipe, check out the details earlier in this article. Yes, you can make this dish ahead of time. Prepare the casserole up to the baking step. Cover it and store it in the fridge for up to 24 hours. When you are ready, just bake it as directed. This method saves time on busy days. Absolutely! This casserole is great for meal prep. You can portion it into individual servings. Store them in airtight containers. This way, you have tasty meals ready to go for the week. Just reheat in the oven or microwave before enjoying. Serve this casserole hot right from the oven. It looks great with a sprinkle of fresh parsley on top. You can also let it cool for a few minutes before serving. This helps the flavors settle. Use a spatula to scoop it onto plates. Some great side dishes include: - Steamed broccoli - Zucchini noodles - Salad with vinaigrette dressing - Cauliflower rice These options add freshness and balance to the meal. They keep the meal low-carb while adding more nutrition. For the full recipe, check out the details above. This blog post covered all you need for a delicious Keto Garlic Mushroom Chicken Casserole. You learned about key ingredients, proper cooking and baking methods, and smart storage tips. I shared useful tools and common mistakes to avoid. We also explored tasty variations to keep the dish exciting. As you try this recipe, remember to adjust it to your taste. Enjoy cooking and experimenting with flavors!
Keto Garlic Mushroom Chicken Casserole Easy Recipe
If you’re looking for a satisfying and easy dinner, this Keto Garlic Mushroom Chicken Casserole is your answer. Packed with flavor and simple to make,
- Medium zucchinis - Sesame oil - Soy sauce - Minced garlic The main stars of this dish are the zucchinis. I like to use medium zucchinis. They are tender and perfect for this recipe. The sesame oil adds a rich flavor that makes every bite special. The soy sauce brings a salty and savory touch. Minced garlic adds depth and aroma. - Grated ginger - Sugar - Green onion - Sesame seeds Grated ginger is my secret weapon. It gives a fresh, zesty kick. A little sugar balances the flavors, making the dish pop. Chopped green onion adds a nice crunch and color. Don't forget the sesame seeds! They give a lovely nutty flavor and a nice visual appeal. - Salt - Other spices or herbs While salt is optional, it can enhance the taste. You might also want to explore other spices or herbs. A touch of chili flakes can add heat, while fresh herbs like cilantro can brighten the dish. Feel free to experiment! - Rinse and julienne the zucchinis - Measure and prepare the remaining ingredients Start by rinsing the zucchinis under cool water. This step helps remove any dirt. Trim the ends of each zucchini. Then, cut them into thin strips, known as julienne. Aim for even pieces to ensure they cook uniformly. Next, gather your other ingredients. Measure out the sesame oil, soy sauce, minced garlic, and grated ginger. Having everything ready makes cooking much easier. - Heat sesame oil in a skillet - Sauté zucchini and add seasonings In a large skillet, heat the sesame oil over medium heat. You want the oil to shimmer, not smoke. Once it’s ready, add the julienned zucchini. Sauté for about 2-3 minutes. Stir gently until the zucchini starts to soften. Next, add the minced garlic, grated ginger, and soy sauce. Stir well to combine. Cook this mixture for another 2 minutes. The aroma will be fantastic! - Sweeten with sugar - Garnish and serve Now, sprinkle in the sugar. Mix until it dissolves. This step helps caramelize the dish lightly. Let it cook for an additional 1-2 minutes. You want the zucchini tender but not mushy. Once done, take the skillet off the heat. Stir in the chopped green onion and season with salt to taste. Transfer the zucchini to a serving dish. Finally, garnish with sesame seeds before serving. Enjoy your Korean zucchini delight! For the full recipe, check the earlier section. To start, look for zucchinis that feel firm. Fresh zucchinis have smooth skin without bruises. A shiny skin is a good sign of freshness. Choose medium-sized zucchinis, as they have the best flavor. Avoid large zucchinis, as they can be watery and less tasty. A dark green color usually means it’s ripe and ready to eat. Cooking time matters for tenderness. If you like your zucchini soft, cook it a bit longer. For a firmer bite, reduce the cooking time to just a few minutes. To avoid soggy zucchini, don’t overcrowd the skillet. This keeps the heat high and helps them sauté rather than steam. Stir gently to ensure even cooking without crushing the pieces. When serving, arrange your zucchini in a nice dish. You can layer them or pile them high for a lovely look. For garnish, sprinkle sesame seeds on top. Chopped green onions add color and a fresh touch. You can also serve this dish with rice or noodles for a full meal. {{image_2}} You can change the main ingredient if you want. Instead of zucchini, try eggplant or bell peppers. Both add great taste and texture. You can also switch oils. Use olive oil or avocado oil if you prefer. Each oil brings a different flavor to the dish. To spice things up, add chili flakes for heat. A pinch will make the dish lively! You can also mix in other vegetables. Carrots or bell peppers can add sweetness and color. This gives your dish a fun twist while keeping it healthy. Serve this zucchini side with rice or noodles for a complete meal. It pairs well with both! If you want protein, add grilled chicken or tofu. These choices will make the meal more filling and balanced. For the full recipe, check out the Korean Zucchini Delight section. After you enjoy your Korean zucchini side dish, let it cool down. Place leftovers in a container. I recommend using an airtight container. This keeps the zucchini fresh for about 3 to 4 days in the fridge. When you want to eat it again, just reheat it in a pan over medium heat. This method helps keep the texture nice. If you want to save your zucchini for later, freezing is a great option. Start by letting it cool completely. Then, place it in a freezer-safe bag. Try to remove as much air as possible to prevent freezer burn. Your zucchini side dish can last up to 2 months in the freezer. When you’re ready to use it, take it out and let it thaw in the fridge overnight. To reheat, warm it up on the stove over low heat until hot. To keep your zucchini fresh, use glass or plastic containers. They help lock in moisture and flavor. Avoid using metal containers, as they can react with the food. When reheating, do it gently. This keeps the zucchini from getting mushy. Adding a splash of water while reheating can help maintain its texture and flavor. The best way to cook zucchini is to sauté it. This method keeps the zucchini tender but not mushy. You can also grill or roast it for a smoky flavor. Here’s how I do it: - Sauté: Heat sesame oil over medium heat. Add julienned zucchini, and cook for 2-3 minutes. - Grill: Slice zucchini into rounds. Brush with oil and grill until tender. - Roast: Cut zucchini into chunks, toss with oil, and roast at 400°F for 15-20 minutes. Cooking zucchini this way makes it taste great and keeps it healthy. Yes, you can make this dish ahead of time. It’s great for meal prep. Just follow these steps: - Cook the zucchini as instructed. - Let it cool completely. - Store it in an airtight container in the fridge. You can keep it for up to three days. Just reheat in a pan when you’re ready to eat. Korean zucchini pairs well with many dishes. Here are some ideas: - Serve it with rice or noodles. - Pair it with grilled chicken or fish. - Add it to a vegetable platter. These options make it a versatile side dish for any meal. You can easily adjust flavors for dietary needs. Here are some tips: - Vegan: Use soy sauce or tamari for a vegan option. Skip any animal products. - Gluten-free: Choose gluten-free soy sauce or coconut aminos. These swaps keep the dish tasty for everyone. For the full process, check out the detailed preparation above for the Korean Zucchini Delight recipe. In this blog post, we explored how to make a tasty Korean zucchini dish. We covered essential ingredients, cooking steps, and tips for storing. Each section helps you create the best meal possible. Remember, you can adjust ingredients to fit your taste. Don’t be afraid to try different flavors and pairings. Enjoy cooking and sharing this delicious dish with others!
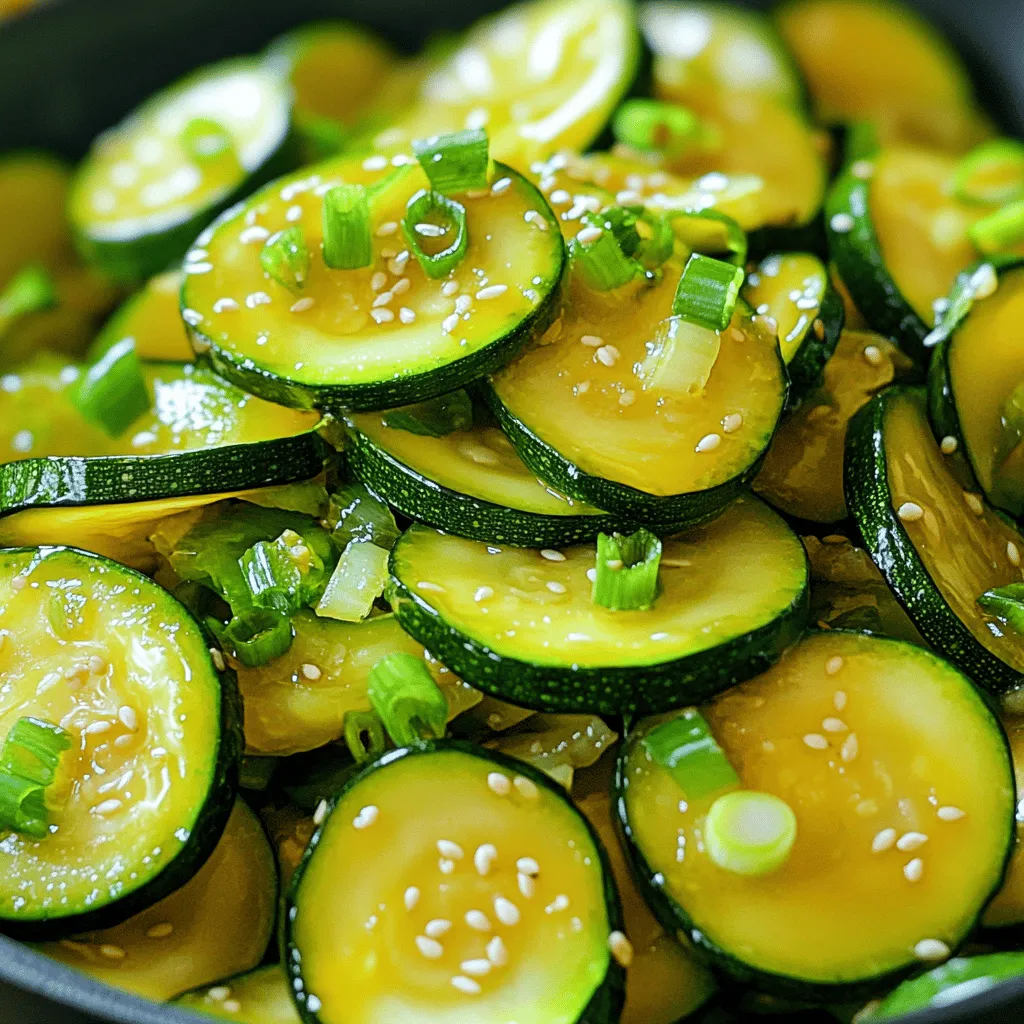
Korean Zucchini Side Dish Flavorful and Simple Recipe
Looking for a tasty side dish that’s quick and easy? The Korean Zucchini Side Dish packs a punch with flavor while being simple to make!
- 4 medium zucchinis - 1 cup quinoa, rinsed and cooked - 1 cup cherry tomatoes, halved - 1 bell pepper (any color), diced - 1 small onion, finely chopped - 2 cloves garlic, minced - 1 teaspoon Italian seasoning - ½ teaspoon smoked paprika - ½ cup grated Parmesan cheese (optional) - ½ cup fresh basil, chopped - Salt and pepper to taste - 2 tablespoons olive oil Zucchini boats shine with fresh ingredients. Each component plays a vital role. The zucchinis act as the perfect vessel for the filling. Quinoa adds protein and a nice texture. Cherry tomatoes bring sweetness, while bell peppers give a crunch. Onion and garlic provide depth of flavor. Italian seasoning and smoked paprika add warmth and spice. When selecting ingredients, freshness matters. Always opt for firm zucchinis. They hold their shape during cooking. The ideal size for stuffing is medium. They should be large enough to scoop out but not too big to handle. - Calories per serving: Approximately 250 - Macronutrient breakdown: - Protein: 10g - Carbohydrates: 30g - Fats: 10g This dish is a healthy choice for many diets. It’s filling and low in calories. Each serving provides a good mix of protein, carbs, and healthy fats. - Look for firmness: Choose zucchinis that feel solid. - Ideal size for stuffing: Medium zucchinis work best. They are easier to scoop and fill. For a full recipe on how to make these savory stuffed zucchini boats, check out the [Full Recipe]. First, preheat your oven to 375°F (190°C). This helps cook the zucchini evenly. Next, take your medium zucchinis and cut them in half lengthwise. Use a spoon to scoop out the center. This creates the boat shape you need. Make sure to leave enough zucchini on the edges for strength. In a skillet, heat two tablespoons of olive oil over medium heat. Add one small chopped onion and two minced garlic cloves. Sauté them until they become soft, about 3-4 minutes. Then, toss in one diced bell pepper and one cup of halved cherry tomatoes. Cook for another 3-4 minutes. This brings out their lovely flavors. Once your filling is ready, mix in one cup of cooked quinoa. Add seasonings like one teaspoon of Italian seasoning and ½ teaspoon of smoked paprika. Don’t forget to sprinkle in salt and pepper to taste. Remove the skillet from heat. Fold in ½ cup of fresh chopped basil and half of the grated Parmesan cheese if you choose to use it. Now it’s time to fill your zucchini boats. Pack the mixture into each half gently. Top each boat with the remaining Parmesan cheese. Now, cover the baking dish with aluminum foil. Bake for 25 minutes. After that, remove the foil and bake for an additional 10 minutes. This will make the cheese golden and the zucchini tender. Your savory stuffed zucchini boats will be ready to enjoy! For the full recipe, check out the details above. To make the best stuffed zucchini boats, focus on cooking time. Avoid overcooking the zucchinis. They need to stay firm so they hold their shape. A few minutes in the oven is enough. You want them tender, not mushy. You can also customize the texture with different grains. While quinoa is great, try using rice or couscous. Each grain offers a unique taste and feel. Mixing grains can also add fun flavors. Garnish your stuffed zucchini with fresh basil. It adds a bright flavor and looks pretty. You can also drizzle a bit of olive oil on top. This small touch makes a big difference. Pair your zucchini boats with side salads or dips. A light salad adds crunch. Dips like hummus or tzatziki can bring extra flavor. This makes for a complete meal. One common mistake is not salting the zucchini. Salting helps draw out moisture. This keeps your boats from getting soggy. It’s a simple step to enhance flavor. Another mistake is overstuffing the boats. While you want a hearty filling, too much can cause a mess. Press down gently to pack the filling, but don’t go overboard. Keep it neat for the best presentation. {{image_2}} You can easily make your stuffed zucchini boats vegetarian. First, swap quinoa for rice or couscous. Both work well and give a nice texture. Next, feel free to add different vegetables or beans. Try black beans, corn, or even spinach for added flavor and nutrients. This allows you to customize your dish based on what you have at home. For those who want more protein, include ground turkey or beef in your filling. Brown the meat in the skillet before adding veggies. If you prefer a meatless option, use tofu as a meat substitute. Crumble firm tofu and sauté it with the onions and garlic. This adds a great texture and helps soak up all the flavors. To elevate your dish, experiment with different herbs or cheeses. Fresh herbs like parsley or dill can brighten the flavors. You can also try adding spices like cumin or chili powder for a kick of heat. This small change can really transform the taste of your zucchini boats. Enjoy discovering new flavor combinations that excite your palate! For the complete recipe, check out the Full Recipe. To keep your stuffed zucchini boats fresh, store them in an airtight container. This will help maintain their taste and texture. I recommend eating them within three days. After that, they may start to lose their flavor. The best way to reheat stuffed zucchini boats is in the oven. Preheat your oven to 350°F (175°C). Place the boats on a baking sheet and cover them with foil. Heat for about 15-20 minutes. This method keeps the zucchini tender and the filling moist. If you want to use a microwave, heat them for 1-2 minutes. Check to see if they are warm throughout. Yes, you can freeze stuffed zucchini boats! To do this, let them cool completely. Wrap each boat tightly in plastic wrap. Then, place them in a freezer-safe bag or container. This prevents freezer burn. They can last up to three months in the freezer. When you're ready to eat, thaw them overnight in the fridge before reheating. You’ll still enjoy great flavor with these frozen delights! For the full recipe, check out the full recipe section above. Stuffed zucchini boats stay fresh for about three to five days in the fridge. Store them in an airtight container to keep moisture in. If they start to look or smell off, it's best to toss them. Yes, you can prep stuffed zucchini boats ahead of time. You can make the filling a day before and store it in the fridge. Just stuff the zucchini when you're ready to cook. This saves time and makes meal prep easy. If you want to switch out quinoa, try brown rice or couscous. You can also use lentils for a hearty texture. Cauliflower rice is a great low-carb option. Feel free to mix and match vegetables to create new flavors. You learned how to make tasty stuffed zucchini boats with simple ingredients. We covered the best ways to prepare, season, and store them. Remember to pick firm zucchinis and avoid common mistakes like overcooking. You can also swap ingredients to fit your taste. These boats are easy to customize and make a great meal for any occasion. Try this recipe for a healthy dish that everyone will love. Enjoy your cooking!
Savory Stuffed Zucchini Boats Flavorful and Healthy Dish
Are you ready to enjoy a dish that’s both flavorful and healthy? Savory stuffed zucchini boats are a perfect way to boost your meals with
- 4 boneless, skinless chicken breasts - 1 cup fresh mozzarella cheese, sliced - 1 cup cherry tomatoes, halved - 1 cup fresh basil leaves, chopped - 3 tablespoons olive oil - 2 cloves garlic, minced - Salt and pepper to taste - 1 teaspoon dried oregano - Balsamic glaze for drizzling (optional) When you measure ingredients, precision is key. For chicken, use a kitchen scale if you have one. Each chicken breast should weigh about 6 ounces. For cheese, I recommend using a cup measure. Fresh mozzarella has a soft texture, so be gentle when slicing. Use a measuring cup for oil, and a teaspoon for oregano. This helps keep the flavors balanced. You can change some ingredients if needed. If you can’t find fresh mozzarella, try shredded mozzarella or provolone cheese. For tomatoes, grape tomatoes work well too. If you want a different herb, use parsley or thyme instead of basil. You can also use chicken thighs if you prefer dark meat. If you want a vegan option, substitute the chicken with eggplant or tofu. This recipe is versatile and works with many flavors. For a fun twist, add some spinach or artichokes! Start by gathering your ingredients. You will need: - 4 boneless, skinless chicken breasts - 1 cup fresh mozzarella cheese, sliced - 1 cup cherry tomatoes, halved - 1 cup fresh basil leaves, chopped - 3 tablespoons olive oil - 2 cloves garlic, minced - Salt and pepper to taste - 1 teaspoon dried oregano - Balsamic glaze for drizzling (optional) Next, preheat your oven to 400°F (200°C). This step is important for even cooking. In a large oven-safe skillet, heat olive oil over medium heat. When the oil is hot, add minced garlic. Sauté for about 30 seconds until it smells great. Now, season the chicken breasts with salt, pepper, and oregano. Place the chicken in the skillet. Cook each side for about 5-6 minutes until golden brown. Make sure not to rush this step; it adds flavor. While the chicken cooks, scatter the halved cherry tomatoes and chopped basil around it. This will add freshness and color to your dish. Once the chicken reaches an internal temperature of 165°F (75°C), it's time to add the cheese. Place a slice of mozzarella on top of each chicken breast. Now, transfer the skillet to your preheated oven. Bake for 10-12 minutes or until the cheese melts and bubbles. After baking, carefully remove the skillet from the oven. If you like, drizzle some balsamic glaze on top for added flavor. Garnish with extra fresh basil before serving. For a beautiful presentation, serve the chicken on a large platter. Add extra cherry tomatoes and basil around it for a colorful look. This dish looks great and tastes even better! For more details, check the Full Recipe. To cook perfect chicken, start with fresh chicken breasts. Trim any fat, so they cook evenly. Season well with salt and pepper. I love using dried oregano for added flavor. Sear the chicken on medium heat for a nice golden crust. This step locks in the juices. Always check the internal temperature. It should reach 165°F (75°C) for safety. Let the chicken rest before serving for the best texture. Serve Quick Mozzarella Chicken on a large platter. This makes it look inviting. I like to scatter fresh basil leaves and halved cherry tomatoes around the chicken. This adds color and freshness. You can also drizzle balsamic glaze on top for a sweet touch. For a complete meal, serve with crusty bread or garlic knots. This helps soak up the delicious juices. Pair this dish with a fresh salad. A simple arugula salad with lemon vinaigrette complements the flavors. You could also serve it with steamed vegetables. Broccoli or green beans work well. For drinks, try a light white wine or sparkling water. These drinks enhance the meal without overpowering it. Don't forget to check the Full Recipe for more tips on preparation! {{image_2}} For a Mediterranean twist, add some olives and artichokes. These flavors blend well with the chicken. Use feta cheese instead of mozzarella for a salty kick. This version tastes fresh and summery. Serve it with a side of couscous or a green salad. Do you like heat? Add red pepper flakes or sliced jalapeños to the dish. This spice boosts the flavor and gives a nice kick. You can also use pepper jack cheese instead of mozzarella. It adds a creamy, spicy taste. Pair it with rice or a cooling yogurt sauce. If you want a meat-free meal, use eggplant or zucchini. Slice them thick and grill or bake just like the chicken. Top with mozzarella and veggies for a hearty option. You can also make stuffed peppers with the same ingredients. This keeps the dish colorful and tasty. You can find the full recipe for mozzarella chicken to try these variations. After making your Quick Mozzarella Chicken, let it cool. Place it in an airtight container. This helps keep flavors fresh. Store it in the fridge for up to three days. Make sure to label it with the date. This way, you can enjoy it later without worry. To freeze, wrap the chicken tightly. Use foil or plastic wrap. Then, place it in a freezer-safe bag. This method keeps it safe for about three months. When you're ready to eat, thaw overnight in the fridge. This keeps the chicken moist and tasty. To reheat, preheat your oven to 350°F (175°C). Place the chicken in an oven-safe dish. Cover it with foil to keep it from drying out. Heat for about 15-20 minutes, or until warm. You can also use a microwave. Heat in short bursts, checking often. This way, your chicken stays juicy and delicious. For the best taste, enjoy it fresh from the oven! If you want the cheese to melt again, pop it under the broiler for a minute or two. Don't forget to check the Full Recipe for more tips! It takes about 30 minutes from start to finish. You can prep the ingredients in just 15 minutes. The cooking time is around 15 minutes, making it perfect for a quick dinner. Yes, you can use other cheeses if you prefer. Provolone or gouda can work well. Cheddar will give a sharper taste. Just make sure to slice it thin so it melts nicely. You can pair Quick Mozzarella Chicken with various sides. A fresh salad adds a nice crunch. Garlic bread complements the dish well, too. Roasted vegetables or pasta are excellent options as well. To keep the chicken juicy, do not overcook it. Use a meat thermometer to check for doneness. Aim for an internal temperature of 165°F. Also, let the chicken rest after cooking for a few minutes. This helps the juices stay inside. For the full recipe, click on the link. In this post, I shared how to make Quick Mozzarella Chicken. We covered ingredients, measurements, and substitutes. I provided step-by-step cooking instructions, along with helpful tips. You learned about tasty variations and proper storage. Remember, cooking is fun. Use these tips to create your best dish. Enjoy your meal!
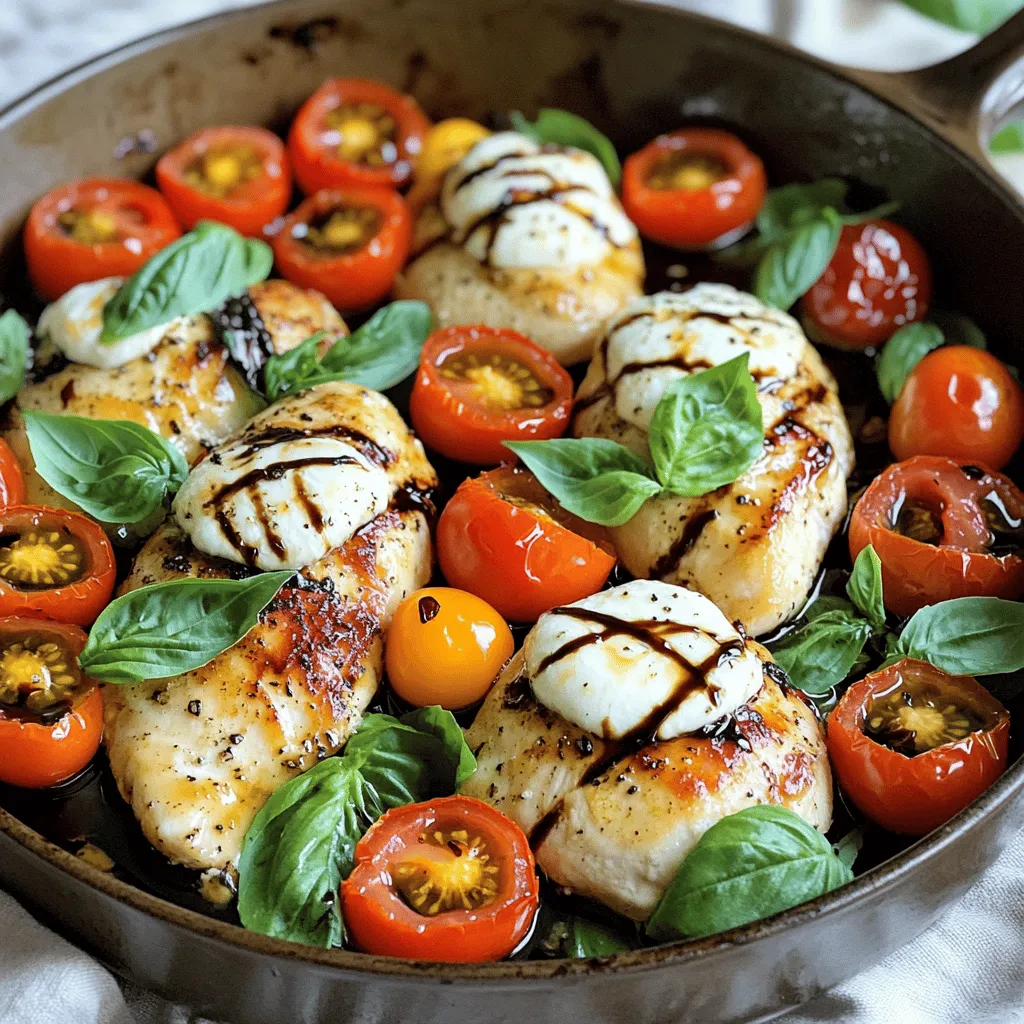
Quick Mozzarella Chicken Tasty and Simple Dinner Dish
Looking for a simple yet delicious dinner? You’re in the right spot! This Quick Mozzarella Chicken recipe is tasty and easy to whip up, perfect
- 2 medium zucchinis, grated - 1 cup sharp cheddar cheese, shredded - 1 ½ cups all-purpose flour - 1 teaspoon baking powder - ½ teaspoon baking soda - ½ teaspoon salt - 2 large eggs - ½ cup plain Greek yogurt - ¼ cup olive oil - 1 tablespoon fresh thyme leaves (or 1 teaspoon dried thyme) - 1 tablespoon fresh chives, chopped To create this savory cheddar zucchini bread, you need key ingredients. Zucchini adds moisture and nutrition. Sharp cheddar cheese gives a rich flavor. All-purpose flour forms the base. Baking powder and baking soda help it rise. Eggs and Greek yogurt bind everything together. Olive oil keeps the bread moist. Fresh herbs like thyme and chives add freshness. - ½ teaspoon black pepper for extra flavor - 1 teaspoon dried thyme - Additional cheese variations You can enhance the flavor with optional ingredients. Black pepper adds a hint of spice. Dried thyme can replace fresh thyme if needed. You can also try different cheese types like mozzarella or feta for a unique taste. Feel free to get creative! For the full recipe, check the Full Recipe section above. 1. Preheat the Oven Start by preheating your oven to 350°F (175°C). This helps the bread bake evenly. 2. Grate Zucchini and Prepare Loaf Pan Grate two medium zucchinis. If they are very watery, squeeze out the excess moisture. Grease a 9x5-inch loaf pan or line it with parchment paper. This step keeps the bread from sticking. 3. Mix Dry Ingredients In a large bowl, mix 1 ½ cups of all-purpose flour, 1 teaspoon of baking powder, ½ teaspoon of baking soda, ½ teaspoon of salt, and optional ½ teaspoon of black pepper. Stir well to combine. 1. Whisk Wet Ingredients In a separate bowl, beat two large eggs. Add ½ cup of plain Greek yogurt and ¼ cup of olive oil. Mix until everything is smooth. 2. Combine Mixtures Carefully Gradually add the wet mix to the dry ingredients. Stir gently until just combined. Be careful not to overmix; this keeps the bread light and fluffy. 3. Pour Batter Into Pan Fold in the grated zucchini and shredded cheddar cheese, along with fresh thyme and chives. Pour the batter into the prepared loaf pan, smoothing the top with a spatula. 1. Baking Time and Temperature Place the loaf pan in the oven. Bake for 45-50 minutes. The bread should rise and turn golden brown. 2. Checking for Doneness Use a toothpick to check if it's done. Insert it into the center; if it comes out clean, the bread is ready. Let it cool in the pan for 10 minutes before moving it to a wire rack. Follow these steps for your Savory Cheddar Zucchini Bread, and enjoy the tasty results! For a complete guide, check the Full Recipe. - Squeezing Excess Moisture from Zucchini Zucchini holds a lot of water. If you don't squeeze it, your bread may turn soggy. After grating, place the zucchini in a clean dish towel. Twist the towel to wring out the water. This simple step helps keep your bread light and fluffy. - Avoiding Overmixing When you combine the wet and dry ingredients, mix gently. Stir just until the flour disappears. Overmixing makes the bread dense. You want it to rise and be soft, not tough. - Adding Fresh Herbs Fresh herbs add a burst of flavor. Try adding basil, dill, or parsley. They complement the cheese and zucchini well. Chop them finely and mix them in with the other ingredients for a fresh taste. - Using Different Cheese Varieties While sharp cheddar is classic, feel free to experiment. Try mozzarella for a milder taste or feta for some tang. Mixing cheeses can create a unique flavor profile that makes your bread stand out. - How to Serve Savory Cheddar Zucchini Bread Slice the bread warm or at room temperature. Serve it on a wooden board for a rustic look. You can spread a little butter or olive oil on top for added richness. - Pairing Suggestions with Meals This bread pairs well with soups or salads. It can also be a great side for a grilled chicken dish. Try serving it alongside a fresh tomato salad for a delightful meal. For a snack, enjoy it with a slice of cheese or some fresh herbs. You can find the Full Recipe above to create this irresistible dish! {{image_2}} Substitute for Greek Yogurt You can swap Greek yogurt with sour cream or buttermilk. These options keep the bread moist. They add a slight tang, enhancing the flavor. You can also use unsweetened applesauce for a dairy-free alternative. This change will make your bread a bit sweeter and softer. Gluten-Free Options To make this bread gluten-free, use a gluten-free flour blend. Many blends work well in baking. Look for one that includes xanthan gum. This helps with texture. Almond flour is another option. It gives a nutty flavor and moistness. Just remember, it may alter the final texture a bit. Incorporating Other Vegetables You can add other veggies for more flavor. Carrots, corn, or bell peppers blend nicely. They add color and taste. Grated carrots will sweeten the bread. Chopped bell peppers bring a nice crunch. Sweet vs. Savory Additions You can play with flavors by adding sweet or savory items. For a sweet twist, consider adding a bit of honey or maple syrup. Dried fruits like cranberries or raisins can work too. For savory, mix in cooked bacon or sun-dried tomatoes. These additions will give your bread a unique flair. Using a Mini Loaf Pan If you prefer smaller portions, use a mini loaf pan. This gives you cute, individual servings. Bake the mini loaves for about 25-30 minutes. Just keep an eye on them to avoid overbaking. Recipe Adaptations for Muffins To make muffins, pour the batter into muffin tins. Fill them about two-thirds full. Bake at the same temperature for 20-25 minutes. This makes for easy snacking and quick breakfasts. You can grab them on the go! For the full recipe, check out the Savory Cheddar Zucchini Bread section above. Best Practices for Refrigeration To keep your Savory Cheddar Zucchini Bread fresh, wrap it tightly in plastic wrap. You can also store it in an airtight container. Place it in the fridge if you plan to eat it within a week. This helps lock in moisture and flavor. Freezing Savory Cheddar Zucchini Bread If you want to save some for later, freezing is a great option. Slice the bread first, then wrap each slice in plastic wrap. Place the wrapped slices in a freezer-safe bag. This way, you can easily grab a slice whenever you crave it. It can last up to three months in the freezer. How to Reheat for Best Texture To enjoy the best texture, reheat your Savory Cheddar Zucchini Bread in the oven. Preheat your oven to 350°F (175°C). Place the slices on a baking sheet and cover them with foil. Heat for about 10-15 minutes. This keeps the bread moist and ensures it warms evenly. Suggestions for Serving Warm Serving the bread warm enhances its cheesy flavor. You can add a pat of butter on top for extra richness. Pair it with a light salad or soup for a complete meal. Enjoy the blend of flavors and the warm, comforting texture of the bread. How long does Savory Cheddar Zucchini Bread last? Savory Cheddar Zucchini Bread lasts about 3-5 days when stored in the fridge. Keep it in an airtight container for best results. You can also freeze it for up to 3 months. Can I make this recipe without cheese? Yes, you can make Savory Cheddar Zucchini Bread without cheese. You may want to add more herbs or spices to keep the flavor strong. What can I serve with Savory Cheddar Zucchini Bread? You can serve this bread with soups, salads, or even as a side for grilled meats. It pairs well with a light dip or spread too. What can I substitute for eggs? You can use applesauce or mashed banana as egg substitutes. Use 1/4 cup for each egg. Can I use frozen zucchini? Yes, you can use frozen zucchini. Just thaw and squeeze out excess water before using it in the recipe. Is there a dairy-free option? To make it dairy-free, use a dairy-free yogurt and omit the cheese. You can add nutritional yeast for a cheesy flavor. Can I use a blender for mixing? You can use a blender for mixing the wet ingredients. Just be careful not to blend the zucchini with it. How do I know when the bread is done? Check if the bread is done by inserting a toothpick into the center. If it comes out clean, your bread is ready. The top should also be golden brown. This blog post covered everything you need to make Savory Cheddar Zucchini Bread. We discussed key ingredients like zucchini, sharp cheddar cheese, and Greek yogurt. I provided step-by-step instructions, tips for perfect texture, and ideas for variations. This bread is easy to customize and great for any meal. Remember, enjoy experimenting with flavors and ingredients. Your next favorite dish is just a loaf away!
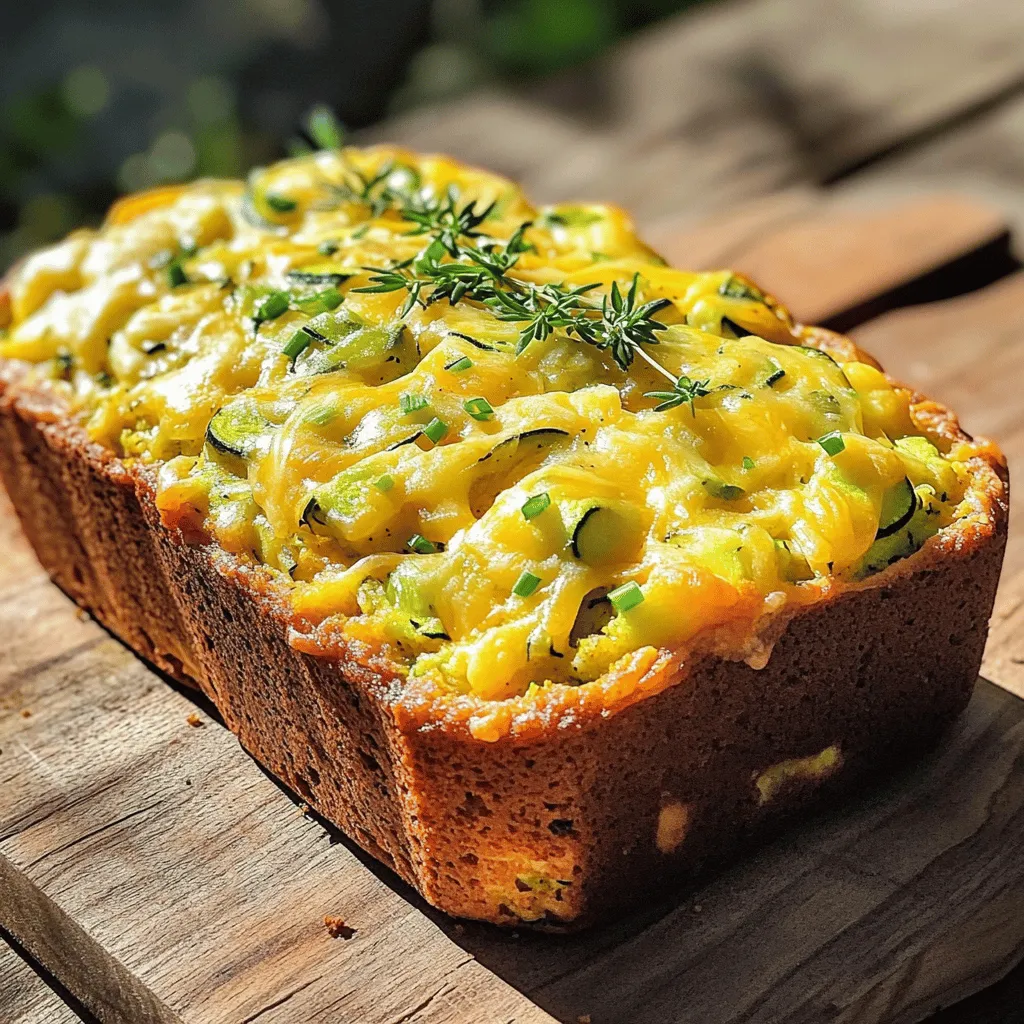
Savory Cheddar Zucchini Bread Irresistibly Delicious Recipe
Are you ready to elevate your baking game? This Savory Cheddar Zucchini Bread combines fresh zucchini and sharp cheddar for a delightful twist on traditional
To make a delicious Zucchini Grilled Cheese, gather these simple ingredients: - 2 medium zucchinis, sliced into 1/4 inch rounds - 4 slices of whole grain bread - 1 cup shredded sharp cheddar cheese - 1/2 cup mozzarella cheese - 2 tablespoons olive oil - 1 teaspoon garlic powder - 1 teaspoon dried oregano - Salt and pepper to taste - Fresh basil leaves for garnish (optional) These ingredients blend well to create a savory treat. Zucchini adds moisture and flavor, while the cheeses melt beautifully. Whole grain bread gives a nice crunch. Use fresh ingredients for the best taste. You can find the Full Recipe to explore each step in detail. - Preheat your grill or griddle to medium-high heat. - Slice the zucchini into 1/4 inch rounds. - Brush both sides of the zucchini slices with olive oil. - Season the slices with garlic powder, oregano, salt, and pepper. - Place the zucchini slices on the grill. - Grill them for about 3-4 minutes on each side. - Look for tender slices with nice grill marks. - Once cooked, remove and set aside. - Take one slice of whole grain bread. - Layer on some cheddar cheese and a few grilled zucchini slices. - Sprinkle mozzarella cheese on top. - Place another slice of bread on top. - Repeat this for the second sandwich. - Add a bit more olive oil to the grill if needed. - Place the assembled sandwiches on the grill. - Grill each sandwich for 3-4 minutes on one side. - Carefully flip them and grill for another 3-4 minutes. - Make sure the cheese is melted and the bread is golden brown. - Remove the sandwiches from the heat. - Let them cool for a minute and then slice. - Optionally, garnish with fresh basil leaves. For the full recipe of this delightful dish, check out the above sections. Enjoy your savory and simple zucchini grilled cheese! - Optimal grill temperature: Set your grill to medium-high heat. This gives a nice char and cooks the zucchini well. - Avoiding sogginess: Make sure to slice the zucchini thin. Brush both sides with olive oil. This helps prevent excess moisture. - Additional herbs and spices: Try adding thyme or rosemary for a unique twist. A pinch of red pepper flakes can add a nice kick. - Cheese combinations for varied taste: Mix sharp cheddar with gouda for a rich flavor. You can also use pepper jack for some heat. - Low-fat cheese options: Look for reduced-fat cheddar or mozzarella. These can cut calories while still being tasty. - Whole grain vs. white bread: Whole grain bread adds more fiber and nutrients. It also complements the zucchini well. For the full recipe, check out the Zucchini Grilled Cheese Delight. It’s a tasty way to enjoy a classic! {{image_2}} You can switch up the cheese for more flavor. Gouda or Swiss cheese works great. Both melt well and add a nice taste. If you follow a vegan diet, choose vegan cheese alternatives. Many brands offer tasty options that melt nicely. The type of bread you use can change the dish. Sourdough bread adds a tangy flavor. If you need gluten-free options, try gluten-free bread. It’s easy to find in stores. You can also pick your toasting method. A panini press gives a nice crunch, while a skillet works well too. You can make your sandwich even better with add-ins. Fresh tomatoes add sweetness and moisture. Spinach adds a nice green touch and boosts nutrition. Don’t be afraid to experiment with spreads. Try pesto or hummus for a new flavor twist. These will enhance your zucchini grilled cheese. For the full recipe, check out the complete details above. To store leftovers, wait until the zucchini grilled cheese cools. Place the sandwiches in an airtight container. This keeps them fresh and protects them from drying out. Use a container made of glass or plastic. These types help maintain flavor and texture. For the best reheating, use a skillet. Heat the skillet over medium-low heat. Add a tiny bit of olive oil to help crisp the bread. Place the sandwich in the skillet. Cook each side for about 3 minutes until warm and crispy. You can also use a toaster oven. This method makes sure the bread stays crunchy. You can freeze zucchini grilled cheese before grilling. Wrap each sandwich tightly in plastic wrap. Then, place them in a freezer bag. This keeps them fresh for up to three months. If you freeze after grilling, allow the sandwiches to cool first. Then, store them in a similar manner. They will last about one month. Yes, you can! Other great veggies to use include: - Bell peppers - Spinach - Eggplant - Mushrooms These veggies add different flavors and textures. Feel free to mix and match! To make this dish gluten-free, use: - Gluten-free bread - Gluten-free cheese options These swaps keep the taste while fitting your needs. Always check the labels for any hidden gluten. Yes, you can bake it! Here’s how: 1. Preheat the oven to 375°F (190°C). 2. Place the assembled sandwiches on a baking sheet. 3. Bake for about 15-20 minutes, flipping halfway. This method gives a nice crisp without grilling. Grilling zucchini takes about 3-4 minutes on each side. Watch for grill marks and tenderness. Overcooked zucchini can become mushy, so keep an eye on it! Zucchini is low in calories and high in vitamins A and C. It also has fiber, which aids digestion. The cheese adds calcium and protein, making this a balanced meal. Enjoy the flavors while also nourishing your body! You can make delicious zucchini grilled cheese sandwiches with just simple ingredients. Start by grilling the zucchini and layering it with cheese on whole grain bread. Remember to explore variations with different cheeses and add-ins. Storing leftovers is easy, and reheating them can keep your sandwich crispy. You have options for gluten-free or oven-baked versions too. Enjoy experimenting, and find the mix that suits your taste best!
Zucchini Grilled Cheese Savory and Simple Delight
Are you ready to transform your lunch with a fresh twist? Zucchini Grilled Cheese is both savory and simple to make. It’s the perfect way
When making Cheesy Zucchini Rice, gather these simple ingredients: - 1 cup uncooked rice (white or brown) - 2 medium zucchinis, grated - 1 cup shredded cheddar cheese - 1/2 cup grated Parmesan cheese - 1 small onion, finely chopped - 3 cloves garlic, minced - 2 tablespoons olive oil - 1 cup vegetable or chicken broth - Salt and pepper to taste - Fresh parsley, chopped (for garnish) These items create a creamy, cheesy dish that is both tasty and filling. For this dish, I love using cheddar cheese. It melts well and adds a rich flavor. You can also mix in some mozzarella for extra creaminess. If you want a sharper taste, try using Gruyère or aged cheddar. Parmesan adds a nice salty kick, too. The choice of cheese can change the taste, so feel free to experiment! Fresh zucchini gives the best flavor and texture. It has a nice crunch when cooked. I recommend using fresh zucchini for this recipe. However, if you are short on time, frozen zucchini works as well. Just be sure to thaw and drain it well, as frozen zucchini can hold more water. This helps keep your dish from getting too soggy. Using the right zucchini makes your Cheesy Zucchini Rice taste even better! You can view the [Full Recipe] for more details on how to prepare this delicious dish. To start, you need to rinse the rice. Place it in a bowl and run cold water over it. Keep rinsing until the water is clear. This step removes excess starch and helps the rice cook better. After rinsing, drain the rice well. Next, gather your ingredients. You will need two medium zucchinis, one small onion, and three garlic cloves. Grate the zucchinis and finely chop the onion. Mince the garlic. This prep work makes cooking fast and easy. Now, let’s cook! Heat two tablespoons of olive oil in a large skillet over medium heat. Once the oil is hot, add the chopped onion. Sauté it for about three to four minutes until it softens. Then, stir in the minced garlic and grated zucchini. Cook for another two to three minutes. You want the zucchini to become tender. After that, add the rinsed rice to the skillet. Mix everything well. Pour in one cup of vegetable or chicken broth. Bring the mixture to a boil. Season it with salt and pepper to your taste. Once boiling, lower the heat, cover the skillet, and let it simmer. Cook for about 15 to 20 minutes, or follow the rice package instructions. The rice should absorb all the liquid and become tender. The key to perfect rice is to avoid lifting the lid while it cooks. This helps keep the steam inside. Another trick is to let the rice sit off the heat after cooking. This step allows flavors to blend better. When the rice is done, remove it from heat. Add one cup of shredded cheddar cheese and half a cup of grated Parmesan cheese. Stir until the cheese melts and combines with the rice. Taste and adjust the seasoning if needed. Let it rest for a few minutes before serving. Garnish with fresh parsley for a nice touch. For the full recipe, check out the complete details above. Enjoy your Cheesy Zucchini Rice! To make Cheesy Zucchini Rice even tastier, consider these tips: - Use fresh herbs: Fresh basil or thyme can add a nice touch. - Add spices: A pinch of paprika or cayenne gives warmth and depth. - Try different cheeses: Mixing Gouda or mozzarella with cheddar can create a unique taste. When making this dish, watch out for these common errors: - Skipping the rinsing step: Rinsing rice removes excess starch and prevents stickiness. - Overcooking zucchini: Cook it just until tender to keep some crunch. - Not seasoning enough: Salt and pepper enhance all the flavors. Don’t skip this! Having the right tools can make cooking easier: - Large skillet: A wide skillet helps with even cooking. - Rice cooker: This tool can simplify the rice cooking process. - Grater: A box grater works best for zucchini and cheese, making prep quick and easy. For the full experience, check out the Full Recipe to guide you through every step! {{image_2}} You can easily make Cheesy Zucchini Rice vegetarian by skipping the chicken broth. Use vegetable broth instead. To go vegan, swap the cheese for a plant-based option. Nutritional yeast adds a cheesy flavor without dairy. You can also use cashew cream for added creaminess. These changes keep the dish tasty and satisfying for everyone. You can customize Cheesy Zucchini Rice with various add-ins. Try adding cooked black beans or chickpeas for protein. Bell peppers, spinach, or peas will add more color and nutrition. For a spicy kick, mix in red pepper flakes or diced jalapeños. Fresh herbs like basil or thyme can lift the dish's flavors. Experiment with these options to find your favorite mix! If you want to change the grain, you have options. Quinoa or farro make great substitutes for rice. They add unique textures and flavors. Cauliflower rice can be a fun, low-carb option. Just remember to adjust cooking times as needed. Each grain brings its own taste, making the dish even more exciting. For the full recipe, check back to see how these variations fit in! To keep your cheesy zucchini rice fresh, place it in an airtight container. Make sure it cools down first. This helps keep the flavor and texture. Store it in the fridge for up to three days. If you want to enjoy it later, freezing is a great option. When you’re ready to eat, reheating is simple. You can use the microwave or the stove. For the microwave, place the rice in a bowl. Add a splash of water to keep it moist. Heat it for about 1-2 minutes, stirring halfway. On the stove, heat it in a pan over low heat. Stir often for even warming. This helps to revive the flavors and keeps it cheesy. Freezing cheesy zucchini rice is easy. Portion it into smaller containers. This way, you only thaw what you need. Make sure to label each container with the date. You can freeze it for up to three months. When you are ready to eat, thaw it in the fridge overnight. Then, reheat as mentioned above for a delicious meal. For the full recipe, check out Cheesy Zucchini Rice 🥒. Cheesy Zucchini Rice lasts about three to four days in the fridge. Make sure to store it in an airtight container. This helps keep it fresh and tasty. If you want to enjoy it later, let the rice cool before sealing it up. Yes, you can use other cheeses! Try mozzarella for a stretchier texture. Gouda adds a nice smoky flavor. You can mix different cheeses for even more taste. Just remember to adjust the amount based on how cheesy you want it. I recommend using either white or brown rice. White rice cooks faster and is soft. Brown rice is healthier but takes longer to cook. Both types work great and soak up the flavors well. For the best results, check the package instructions for cooking times. You can find the full recipe for more details. This blog post covered important parts of making Cheesy Zucchini Rice. We discussed the best ingredients, cooking steps, and tips for great taste. I shared common mistakes to avoid and tools you need. You also learned about tasty variations and how to store leftovers. In summary, enjoy experimenting with this dish to make it your own. It’s fun and easy to create delicious meals!
Cheesy Zucchini Rice Flavorful and Comforting Dish
Are you ready to elevate your meals with a dish that’s both cheesy and comforting? This Cheesy Zucchini Rice will wow your taste buds and