Dinner
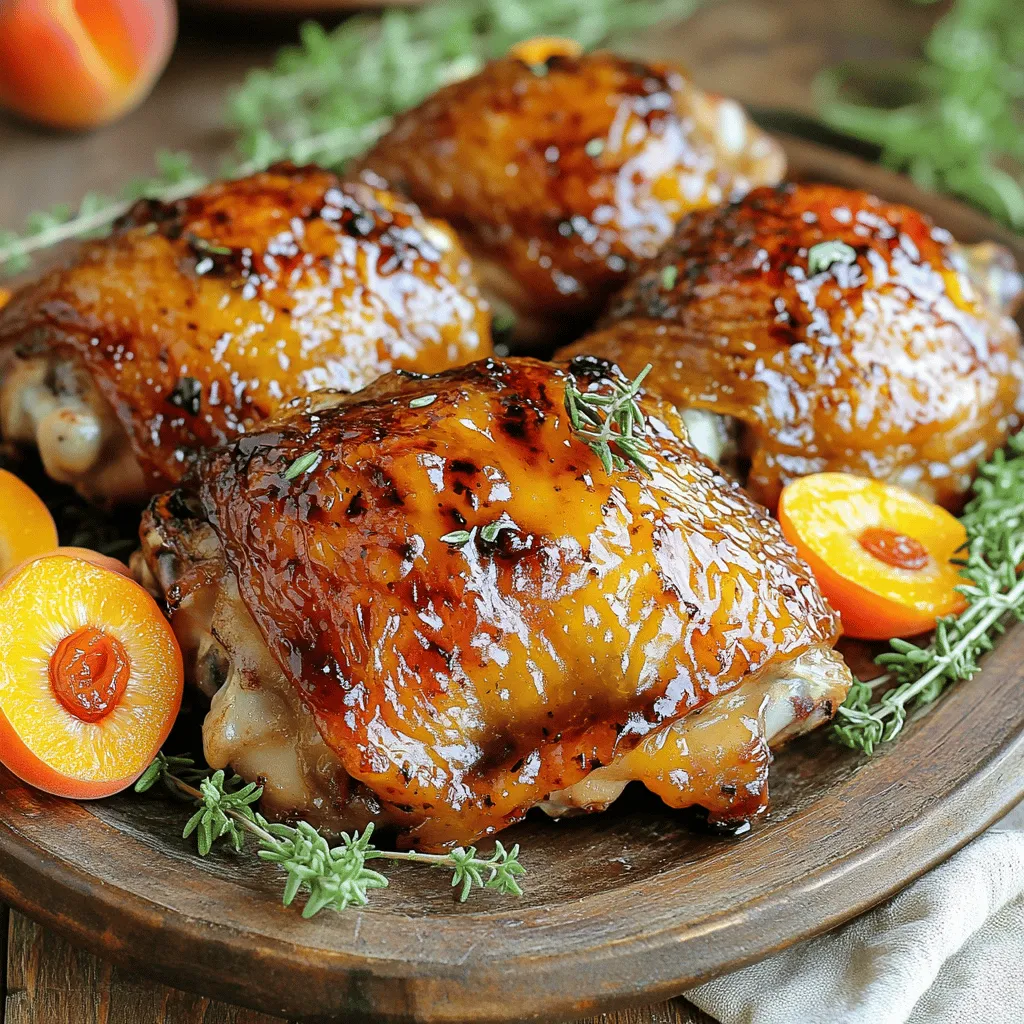
Balsamic Apricot Glazed Chicken Thighs Savory Delight
Looking for a dish that balances sweet and savory perfectly? You’re in for a treat! Balsamic Apricot Glazed Chicken Thighs bring a juicy, rich flavor
![To make the best green bean casserole, you need a few key ingredients. Here’s what you will need: - 1 pound fresh green beans, trimmed and cut into 2-inch pieces - 1 cup sliced mushrooms (button or cremini) - 1 medium onion, chopped - 2 cloves garlic, minced - 1 cup heavy cream - 1 cup vegetable broth - 1 tablespoon soy sauce - 1 teaspoon Dijon mustard - 1 teaspoon dried thyme - ½ teaspoon black pepper - 1 cup French fried onions (store-bought or homemade) - 1 cup shredded cheddar cheese - Salt to taste These ingredients blend together to create a rich, creamy dish with a delightful crunch on top. Not all fresh ingredients are always available. Here are some easy swaps: - Green Beans: You can use frozen green beans. They save time and work well. - Mushrooms: If you don’t have fresh mushrooms, use canned mushrooms. Just drain them well. - Heavy Cream: Substitute with half-and-half for a lighter option. - Vegetable Broth: Chicken broth works great if you’re not vegetarian. These substitutions help you make the casserole without losing its tasty charm. Want to make your casserole even better? Try these add-ins: - Bacon or Ham: Cooked and chopped, they add a smoky flavor. - Parmesan Cheese: Mix in some for a cheesy boost. - Corn: Sweet corn adds a nice pop of color and taste. - Spices: Try adding a pinch of cayenne pepper for some heat. These options let you customize your casserole to fit your taste. For the full recipe, check out the Ultimate Green Bean Casserole Delight. Making the best green bean casserole is easy and fun. First, you gather your ingredients. Next, you prep the green beans and sauté the mushrooms and onions. After that, you mix everything together. Finally, you bake it until golden brown. 1. Preheat your oven to 350°F (175°C). This helps cook the casserole evenly. 2. Blanch the green beans. Boil salted water in a large pot. Add the green beans and cook for 4-5 minutes. They should be bright green and slightly tender. Drain the beans and plunge them into ice water to stop cooking. Drain again and set aside. 3. Sauté the vegetables. In a skillet over medium heat, add chopped onion and sliced mushrooms. Cook for about 5 minutes until the onions are clear. Add minced garlic and stir for 1 more minute. 4. Mix the sauce. In a bowl, combine heavy cream, vegetable broth, soy sauce, Dijon mustard, dried thyme, black pepper, and salt. Whisk until smooth. 5. Combine ingredients. In a large bowl, mix the blanched beans, sautéed vegetables, and sauce. Add half the French fried onions and half the cheddar cheese. Stir well. 6. Transfer to a baking dish. Pour the mixture into a greased 9x13 inch dish. Smooth the top and sprinkle the remaining cheese and fried onions. 7. Bake the casserole. Place it in the oven for 25-30 minutes. It should be bubbly and the top golden brown. 8. Let it rest. After baking, let it sit for 5 minutes before serving. This helps it set. - When blanching, don’t overcook the beans. They should stay bright and crisp. - Stir the sautéed veggies often to prevent burning. - Whisk the sauce well for a smooth mix. This makes the casserole creamy. - Adjust the salt to taste as needed. Each broth can vary in saltiness. - Letting the dish sit after baking enhances the flavors. It also makes serving easier. This recipe is a foolproof way to make a warm, comforting green bean casserole. For the full recipe, check out Ultimate Green Bean Casserole Delight. One common mistake is overcooking the green beans. Blanch them just until bright green. This helps keep their crunch. Another mistake is not seasoning enough. Add salt and pepper to every layer for great flavor. Avoid using canned soup for the base; it lacks depth. Instead, make your own creamy mix with heavy cream and broth. To boost flavor, add fresh herbs like thyme or parsley. They add brightness and freshness. A splash of lemon juice can also enhance taste. For a savory kick, try adding bacon bits or crispy pancetta. Mixing in some cheese during cooking makes it rich and creamy. Use a blend of cheeses for more complexity. Texture is key for a good casserole. Start with blanched green beans for crunch. Combine the beans with sautéed mushrooms and onions for depth. Don’t skimp on the French fried onions. They add that crucial crunch on top. Bake it long enough for a golden finish, but don’t let it dry out. A perfect casserole should be creamy inside with a crispy topping. For the complete recipe, check out the [Full Recipe]. {{image_2}} You can make green bean casserole special for any season. For spring, add fresh peas for a bright touch. In fall, mix in roasted butternut squash for sweetness. During the holidays, try adding crispy bacon or ham for a savory twist. You can even use seasonal herbs like sage or rosemary for an extra flavor boost. If you want a lighter version, swap heavy cream for Greek yogurt. This keeps the creaminess but cuts the fat. Use vegetable broth to reduce calories too. For gluten-free options, choose gluten-free fried onions. You can also use almond milk instead of dairy cream for a dairy-free dish. Simply adjust the seasonings to match your taste. Making a smaller or larger casserole is easy. If you want less food, half the recipe and use a smaller dish. For a crowd, double the recipe and use a larger pan. This dish is great for gatherings, so you can always adjust it. Make sure to keep the same baking time, but check for doneness as sizes change. For the full recipe, check the Ultimate Green Bean Casserole Delight. Once you finish your meal, let the green bean casserole cool down. Store it in an airtight container. This keeps the flavors fresh and the dish safe. You can keep it in the fridge for up to three days. If you want to keep it longer, consider freezing it. When you're ready to enjoy leftovers, preheat your oven to 350°F (175°C). Place the casserole in an oven-safe dish. Cover it with aluminum foil to keep it moist. Heat for about 20-25 minutes or until it's hot all the way through. If you want a crispy top, remove the foil for the last 5 minutes. To freeze your green bean casserole, first let it cool completely. Then, place it in a freezer-safe container. Make sure to label it with the date. It can last up to three months in the freezer. When you're ready to eat it, thaw it in the fridge overnight. Then, reheat in the oven as mentioned above for the best taste. For the full recipe, check out the Ultimate Green Bean Casserole Delight. The key to a creamy green bean casserole is using heavy cream and a good broth. Heavy cream adds richness, while vegetable broth gives depth. Mixing them with seasonings, like soy sauce and Dijon mustard, enhances the flavor. You want a smooth sauce that coats the green beans well. This makes every bite rich and satisfying. Yes, you can prepare this dish ahead of time. It’s a great choice for busy days. You can assemble the casserole up to a day in advance. Just cover it and keep it in the fridge. When you're ready to eat, bake it straight from the fridge. Just add a few extra minutes to the baking time, so it heats through. Making green bean casserole without mushrooms is easy! You can replace mushrooms with sautéed onions or even diced bell peppers. Both options add flavor and texture. You can also use extra cheese to keep the creaminess. Adjust the seasonings to ensure it tastes great. Your dish will still be delicious and comforting! For the full recipe, check out the Ultimate Green Bean Casserole Delight. In this post, we explored how to make the best green bean casserole. We covered key ingredients, suggested substitutions, and optional add-ins. You learned the step-by-step process for perfect results and tips to enhance flavor and texture. We also discussed variations for different occasions and storage information. Green bean casserole is easy to adapt and makes a great dish for any meal. With practice, you can create your version that everyone will love. Enjoy making this tasty recipe your own!](https://toastedrecipes.com/wp-content/uploads/2025/07/5fc67d49-b7c6-4b68-abd5-5224b4861102.webp)
The Best Green Bean Casserole Easy and Flavorful Dish
Looking for the best green bean casserole recipe that will wow your family? You’re in the right place! I’ll guide you through easy steps to
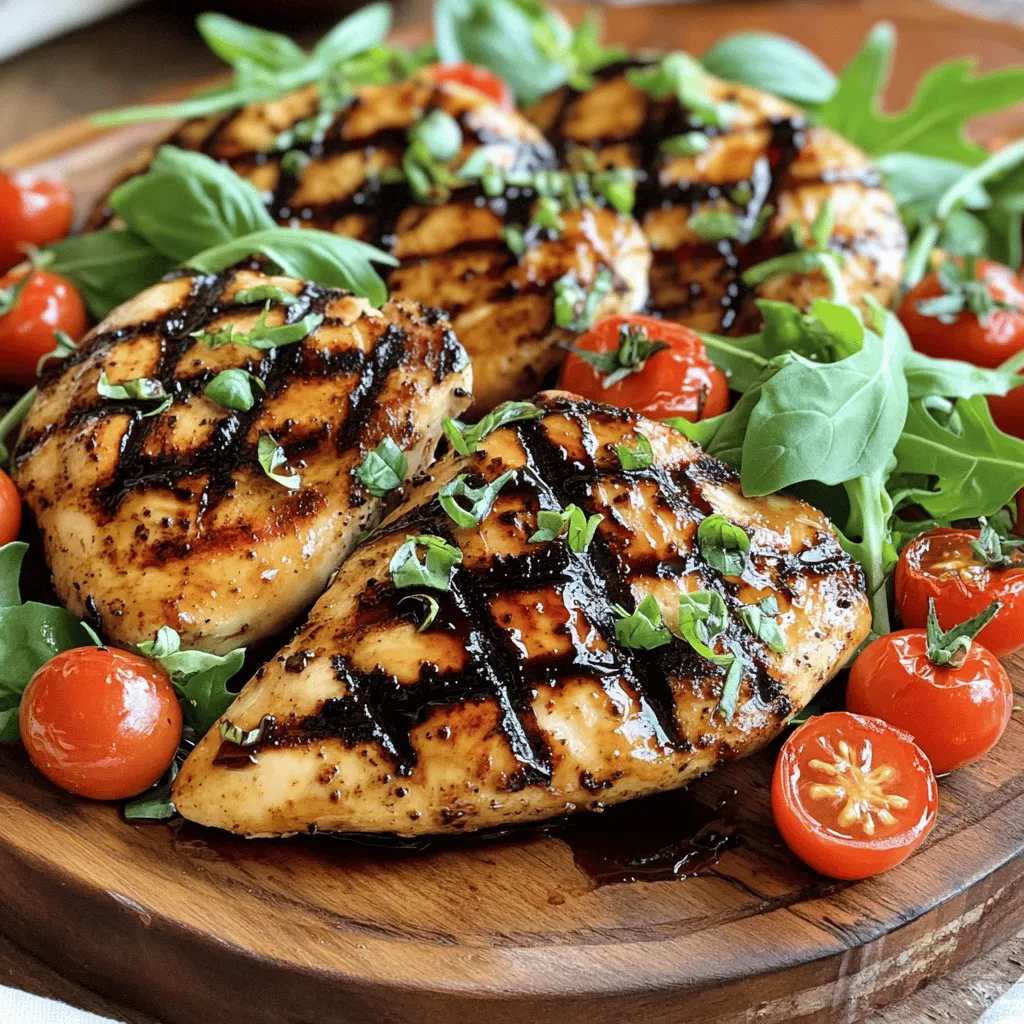
Grilled Chicken with Balsamic Glaze Savory Delight
Welcome to my savory delight: Grilled Chicken with Balsamic Glaze! This dish combines tender chicken with a sweet and tangy glaze, creating a taste that
. How do I avoid overcooking shrimp? To keep shrimp juicy, don’t leave them on the grill too long. Cook them for 2-3 minutes on each side. They turn pink and opaque when done. If you see that color, they are ready! What are the best grill temperature settings? Preheat your grill to medium-high heat. This range is around 400°F to 450°F. This temp helps cook shrimp evenly and gives them those nice grill marks. What additional ingredients can boost flavor? Consider adding lime zest for zestiness. Fresh jalapeños bring heat, while diced mango adds sweetness. You can also mix in some black beans for extra protein. How do I adjust seasoning levels? Taste the salsa as you mix. Add salt, pepper, or lime juice as needed. If you like it spicy, add more jalapeños. If it’s too tangy, balance it with honey or sugar. How can I create a beautiful bowl assembly? Start with a layer of quinoa at the bottom. Then, neatly arrange grilled shrimp on top. Spoon the salsa generously over the shrimp for a colorful look. What are some garnish ideas for visual appeal? Chop fresh cilantro and sprinkle it on top. You can add lime wedges on the side for color. Slices of avocado or edible flowers can also add a nice touch. For the complete recipe, check out the [Full Recipe]. {{image_2}} You can change the protein in this dish easily. If you prefer chicken, use diced chicken breast. Simply grill it like the shrimp. For a vegetarian option, tofu works well. Press and cube the tofu, then marinate it in the same mix as the shrimp. If you enjoy seafood, try scallops or a firm fish like salmon. These options add variety while keeping the dish tasty. Want to spice things up? Add jalapeños to the corn salsa for a kick. You can mix in black beans for added protein and fiber. Feta cheese can add a creamy, salty flavor that pairs well with the fresh ingredients. Get creative! You can even try adding fresh herbs like basil or mint to change the taste profile. Instead of quinoa, you can swap it for brown rice or couscous. Both grains add a nice texture and flavor. If you want a low-carb option, consider a lettuce base. Use large leaves like romaine or butter lettuce to hold everything. This creates a fresh and crunchy bowl that is fun to eat. Explore these variations to find your favorite mix for the grilled shrimp bowl with avocado corn salsa. For the full recipe, check out the details above! To store leftovers, place the grilled shrimp and avocado corn salsa in separate airtight containers. This helps keep both fresh longer. You can keep the shrimp in the fridge for up to three days. The salsa is best used within two days for great taste. You can freeze cooked shrimp for later use. Place the shrimp in a freezer-safe bag, removing as much air as possible. It will stay good for up to three months. For the salsa, avoid freezing it as the avocado will brown and change texture. If you must, freeze it without the avocado, and add fresh avocado when you thaw it. When reheating shrimp, the best method is to use a skillet over medium heat. Heat the shrimp for about two to three minutes until warm. Avoid cooking it too long, as this can dry it out. For the salsa, serve it cold or at room temperature to keep its fresh taste. If you need to warm it slightly, do so gently in a bowl over simmering water. To make this dish, follow these simple steps: 1. Marinate the Shrimp: Mix olive oil, smoked paprika, garlic powder, cumin, salt, and pepper in a bowl. Add the shrimp and toss to coat well. Let it sit for 15-20 minutes. 2. Prepare the Corn Salsa: In another bowl, combine diced avocado, corn, red onion, cherry tomatoes, and lime juice. Add salt and pepper to taste. Gently mix and set aside. 3. Grill the Shrimp: Preheat your grill to medium-high heat. If using wooden skewers, soak them in water for 30 minutes. Skewer the shrimp and grill for 2-3 minutes on each side until they turn opaque. 4. Assemble the Bowl: Place cooked quinoa at the bottom of each bowl. Top with grilled shrimp and spoon the avocado corn salsa generously over everything. 5. Garnish and Serve: Sprinkle fresh cilantro on top and serve with lime wedges for added flavor. You can find the complete recipe above. Yes, you can use frozen shrimp. Just make sure to thaw them first. Here’s how: - Thawing: Place frozen shrimp in the fridge overnight or run them under cold water for about 15 minutes. Avoid using hot water, as it can cook the shrimp. - Using Frozen Shrimp: Frozen shrimp may be slightly less tender than fresh shrimp. However, they can still taste great when cooked properly. You can enhance your meal with these side dishes: - Salads: A light mixed green salad pairs well with the shrimp bowl. - Grilled Veggies: Grilled zucchini, bell peppers, or asparagus add color and flavor. - Rice Dishes: Serve with cilantro lime rice for extra zest. - Bread: Warm, crusty bread or tortillas are great for scooping up the salsa. These sides will complement the flavors in your grilled shrimp bowl perfectly! This blog post explored making a grilled shrimp bowl with avocado corn salsa. We covered the key ingredients, from shrimp to fresh produce. You learned step-by-step how to marinate shrimp, prepare salsa, and assemble your dish. I shared expert tips for grilling, enhancing flavors, and presenting your bowl. Remember, feel free to customize this recipe with alternative proteins and grains. Enjoy the process of creating a flavorful, healthy meal that you can adapt to your tastes. Your new dish awaits!](https://toastedrecipes.com/wp-content/uploads/2025/07/0ea9bee0-fc87-4d63-8e92-f0541cc3821d.webp)
Grilled Shrimp Bowl with Avocado Corn Salsa Delight
Are you ready to take your taste buds on a delicious journey? In this Grilled Shrimp Bowl with Avocado Corn Salsa Delight, I’ll show you
![Hot Honey Feta Chicken needs simple but tasty ingredients. Here’s what you will use: - 4 boneless, skinless chicken breasts - 1 cup crumbled feta cheese - 1/3 cup hot honey - 2 tablespoons olive oil - 1 tablespoon fresh lemon juice - 3 cloves garlic, minced - 1 teaspoon dried oregano - Salt and pepper to taste - Fresh parsley, chopped Using fresh ingredients makes a big difference in flavor. Fresh chicken tastes better and cooks well. Fresh herbs, like parsley and oregano, add bright notes. Fresh lemon juice gives the dish a nice zing. If you can’t find hot honey, you can make your own. Just mix honey with red pepper flakes or hot sauce. You can use goat cheese instead of feta if you want. This swap still gives you a creamy texture. For the chicken, you can choose thighs if you like dark meat. The cooking time may change, so check the temperature. Use what you have to make this dish special. You can find the Full Recipe to guide you through the cooking! Prepping the Chicken and Marinade Start with fresh chicken breasts. Place four boneless, skinless chicken breasts in a baking dish. In a bowl, mix the hot honey, olive oil, lemon juice, minced garlic, oregano, salt, and pepper. This mix is your marinade. Pour it over the chicken, making sure to coat it well. Let the chicken marinate for at least 30 minutes. This helps the chicken soak up all the yummy flavors. Baking Instructions for Perfectly Cooked Chicken Preheat your oven to 400°F (200°C). After the chicken has marinated, sprinkle crumbled feta cheese evenly on top of each breast. Bake the chicken in the oven for 25 to 30 minutes. You want it to reach an internal temperature of 165°F (75°C). This ensures the chicken is safe to eat and stays juicy. Resting Time and Serving Suggestions When the chicken is done, take it out of the oven. Let it rest for 5 minutes. This helps the juices settle back into the meat. Before serving, garnish with chopped fresh parsley for a nice touch. Serve this dish with your favorite sides, like roasted veggies or rice, for a full meal. For the full recipe, check out the details above! To make your Hot Honey Feta Chicken shine, marinate the chicken for at least 30 minutes. This time lets the chicken soak up the tasty flavors. For a deeper flavor, try marinating it overnight in the fridge. Just cover it well to keep it fresh. When cooking chicken breasts, choose a uniform thickness. This helps them cook evenly. If they are thick, consider using a meat mallet to pound them gently. This brings a better texture and helps the marinade penetrate. Balancing sweetness and heat is key. Use just the right amount of hot honey. If you prefer more heat, add a pinch of red pepper flakes to the marinade. For less spice, reduce the hot honey slightly. Always taste the marinade before adding it to the chicken. Adjust to match your taste. These small steps make a big difference in flavor. For more details, check out the Full Recipe. {{image_2}} You can easily change up Hot Honey Feta Chicken with fun toppings and spices. Try adding sliced olives or sun-dried tomatoes for a burst of flavor. Fresh spinach or arugula can also give it a nice touch. For a spicy kick, sprinkle on some red pepper flakes. If you need a gluten-free dish, you are in luck! This recipe is naturally gluten-free. Just ensure your hot honey is also gluten-free. For a dairy-free option, swap out the feta cheese with a dairy-free cheese or leave it out entirely. Now, let’s talk about sides. Hot Honey Feta Chicken goes well with many sides. A fresh salad with mixed greens is great. Roasted vegetables, like broccoli or carrots, add color and taste. You can also serve it over rice or quinoa for a complete meal. I recommend checking the [Full Recipe] for more ideas on how to make this dish shine! To keep your Hot Honey Feta Chicken fresh, follow these steps: - Storing Leftovers: Once cooled, place leftovers in an airtight container. This keeps moisture in and prevents the chicken from drying out. Store it in the fridge for up to three days. - Reheating Tips: When it's time to enjoy your leftovers, reheat them in the oven. Place the chicken in a baking dish and cover it with foil. Set the oven to 350°F (175°C). Heat for about 15-20 minutes. This helps the chicken stay juicy and the feta creamy. - Freezing Instructions: If you want to save some for later, you can freeze it. Wrap each piece in plastic wrap, then place them in a freezer bag. It can last up to three months in the freezer. Thaw in the fridge overnight before reheating. By using these storage tips, you can enjoy your delicious Hot Honey Feta Chicken even after the first meal! If you want the full recipe, check back for more details. What can I substitute for feta cheese? You can use goat cheese or ricotta cheese instead of feta. Both will give you a creamy texture. If you need a dairy-free option, try using a vegan feta made from nuts. Can I make this dish ahead of time? Yes, you can prepare the chicken and marinate it a day in advance. Just keep it in the fridge until you are ready to bake. This will deepen the flavors. How do I know when the chicken is cooked through? Use a meat thermometer. The chicken should reach 165°F (75°C) in the thickest part. If you don't have a thermometer, cut into the chicken. The meat should be white, not pink. What sides would go well with Hot Honey Feta Chicken? Serve the chicken with a fresh salad or roasted vegetables. Rice or quinoa also makes a great side. For a nice touch, add some crusty bread to soak up the sauce. For the full recipe, check out this [Full Recipe]. In this blog post, we explored how to make Hot Honey Feta Chicken. We looked at key ingredients, cooking steps, and helpful tips to boost flavor. You learned about storage and how to handle leftovers. We even shared tasty variations and answered common questions. Cooking should be fun and rewarding. With these steps, you can make a delicious dish everyone will love. Enjoy experimenting with flavors and sharing your meals. Happy cooking!](https://toastedrecipes.com/wp-content/uploads/2025/07/c0ed0054-8a8d-4075-8791-ccdde11df470.webp)
Hot Honey Feta Chicken Flavorful and Easy Recipe
Looking to spice up your dinner routine? Dive into my Hot Honey Feta Chicken recipe! This dish combines sweet, spicy, and tangy flavors for a
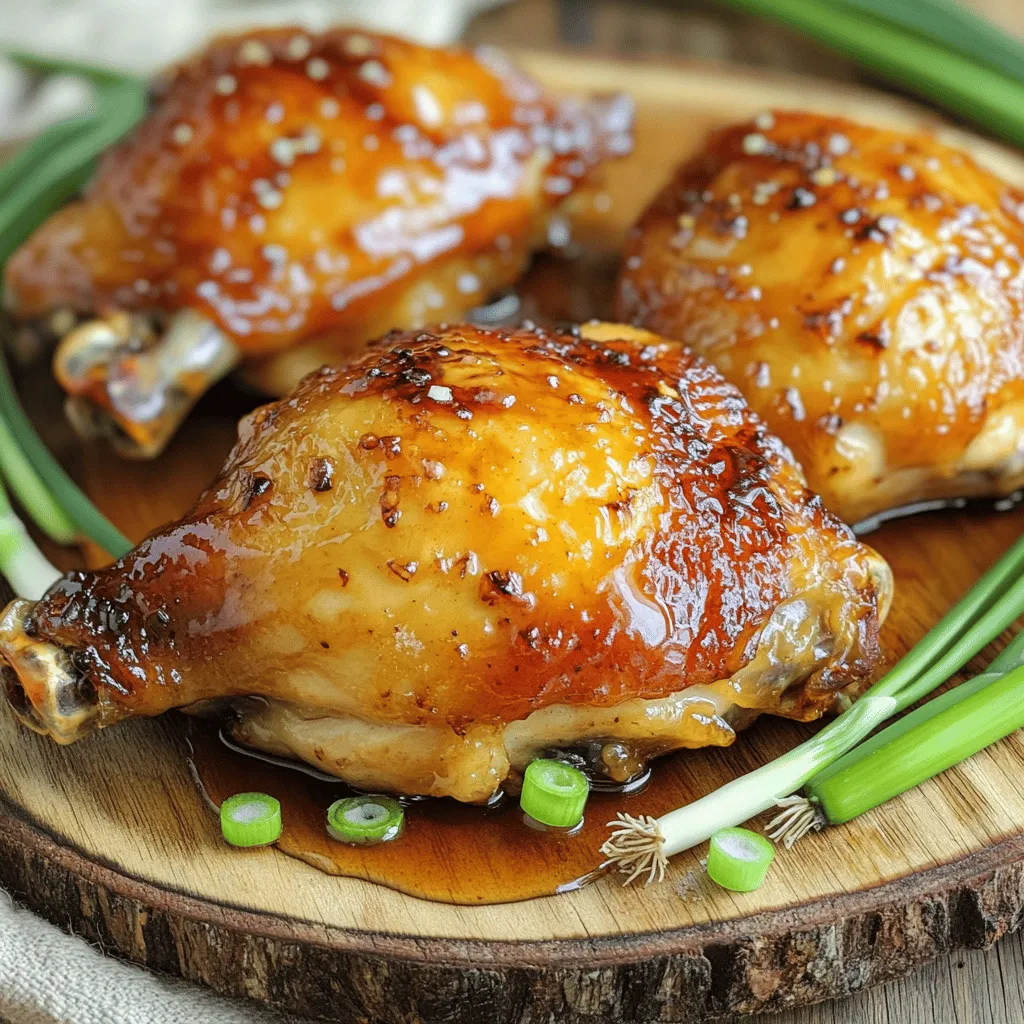
Maple Glazed Chicken Tasty and Simple Dinner Recipe
Are you searching for an easy yet delicious dinner idea? Look no further than maple glazed chicken! This recipe combines juicy chicken breasts with a
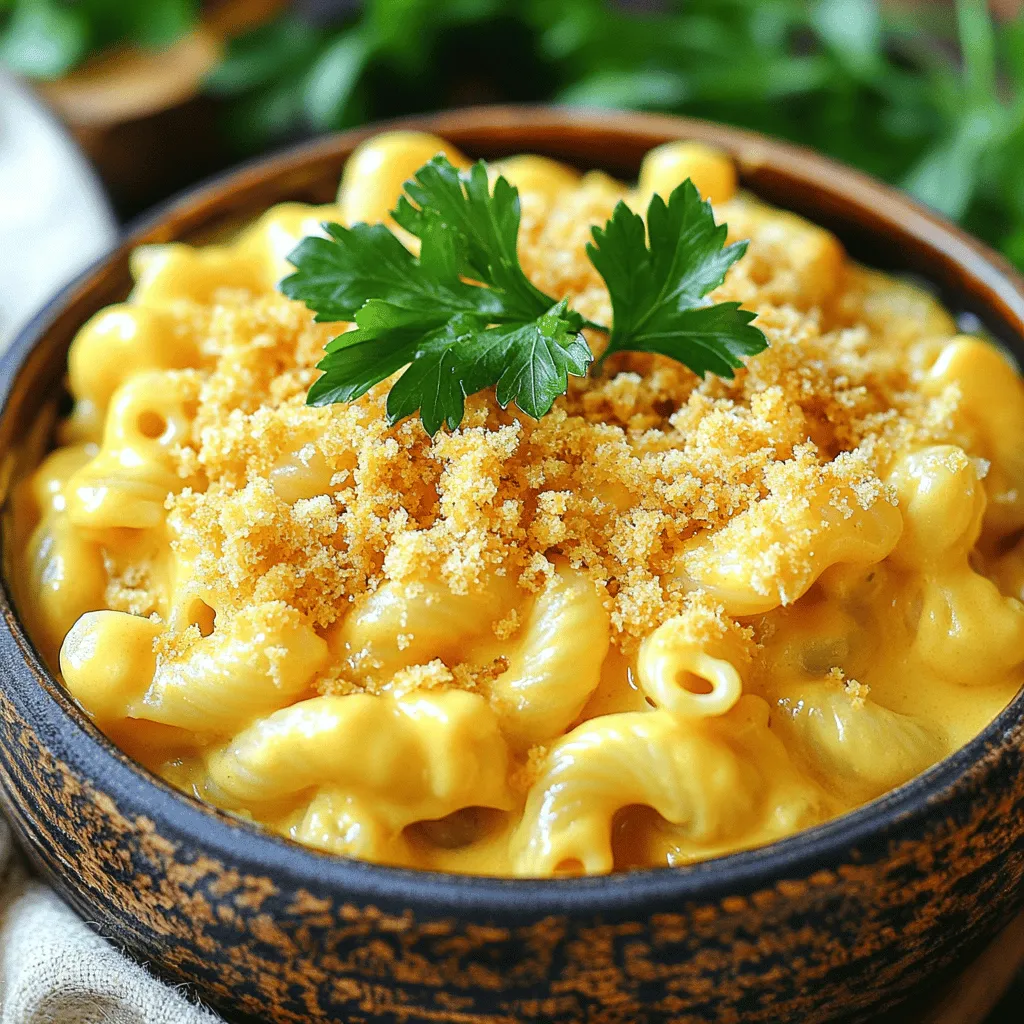
Creamy Crockpot Mac and Cheese Easy Family Favorite
Are you ready for a dish that’s creamy, cheesy, and oh-so-easy? My Creamy Crockpot Mac and Cheese is a family favorite that you can whip
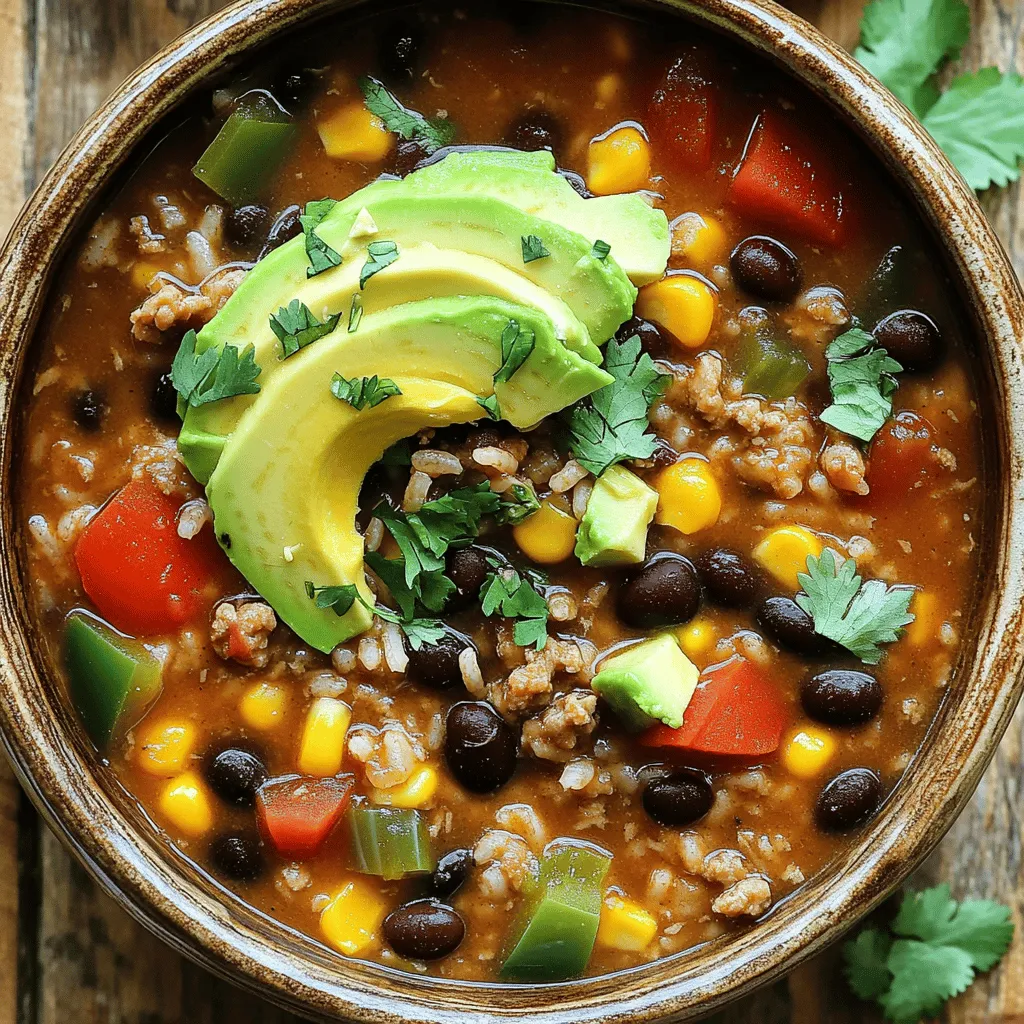
Crockpot Taco Rice Soup Hearty and Flavorful Dish
Looking for a warm, hearty meal that’s easy to make? Look no further than Crockpot Taco Rice Soup! This dish combines ground meat, beans, and
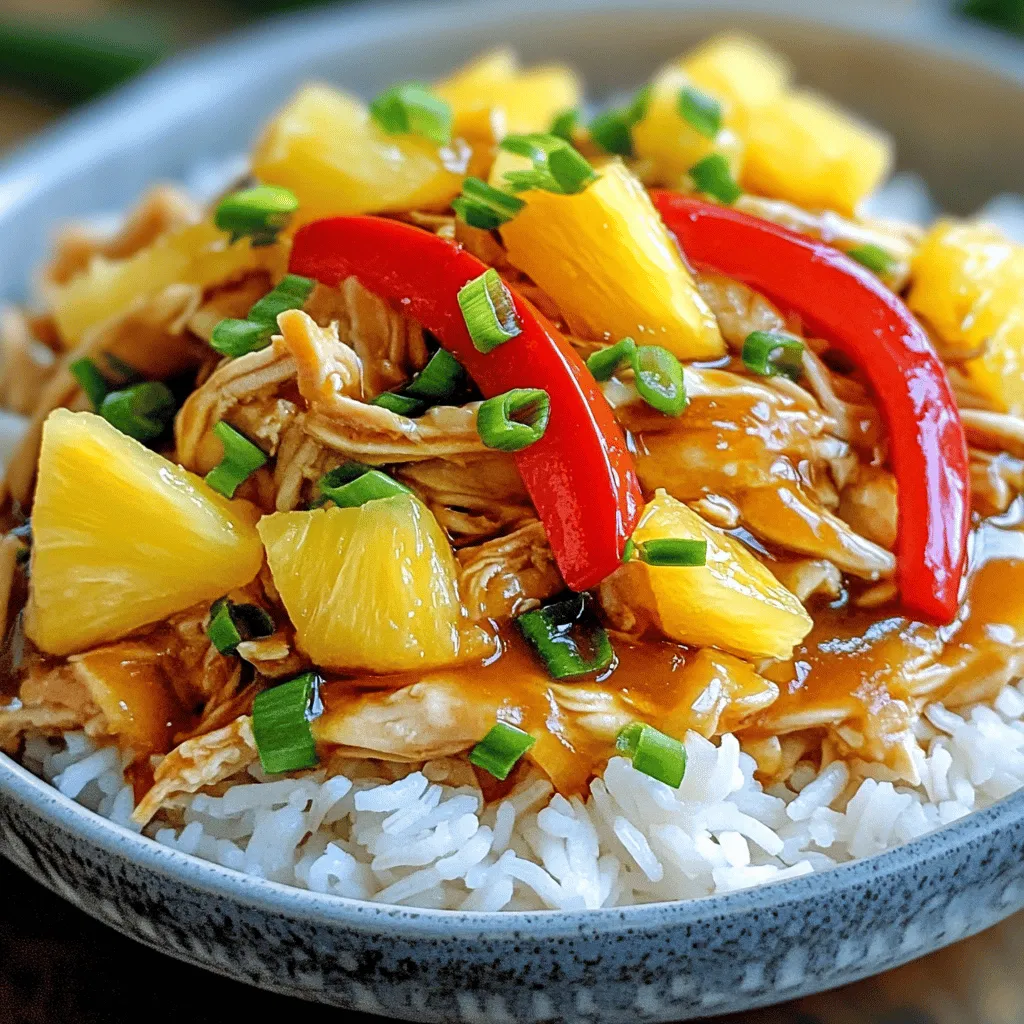
Easy Slow Cooker Hawaiian Chicken Delightful Recipe
Welcome to your new favorite dish: Easy Slow Cooker Hawaiian Chicken! If you crave sweet and savory flavors in a simple recipe, you’re in the
![To make garlic ginger green beans, you will need: - 1 pound fresh green beans, trimmed - 3 tablespoons olive oil - 4 cloves garlic, minced - 1 tablespoon fresh ginger, minced - 1 tablespoon soy sauce (or tamari for gluten-free) - 1 teaspoon sesame oil - 1 teaspoon red pepper flakes (adjust based on heat preference) - Salt and pepper to taste - 2 tablespoons toasted sesame seeds (for garnish) - Fresh cilantro or green onions (for garnish) If you don’t have some ingredients on hand, here are a few swaps: - Olive oil can be replaced with avocado oil or vegetable oil. - Soy sauce can be substituted with coconut aminos for a low-sodium option. - Fresh ginger can be swapped with ground ginger in a pinch, but use less. - If you want less heat, skip the red pepper flakes or use paprika instead. When selecting green beans, look for these traits: - Choose bright green beans without brown spots or blemishes. - The beans should feel firm and snap easily. - Avoid limp or dull-looking beans, as they may not be fresh. - If possible, buy organic green beans to ensure better quality and taste. Using quality ingredients will make your garlic ginger green beans shine. Check out the Full Recipe to get all the details! First, we need fresh green beans. Trim the ends and rinse them. Next, bring a pot of salted water to a boil. Add the green beans and blanch them for 2 to 3 minutes. They should be bright green and tender-crisp. Drain the green beans and move them to an ice bath. This stops the cooking and keeps them crunchy. After a minute, drain them again and set them aside. Now it’s time to heat things up. In a large skillet or wok, pour in 3 tablespoons of olive oil. Turn the heat to medium-high. Once the oil is hot, add 4 minced cloves of garlic and 1 tablespoon of minced ginger. Sauté these for about 30 seconds to 1 minute. You want them fragrant but not burned. The smell will be amazing! Add the blanched green beans to the skillet. Toss them for about 3 to 5 minutes. We want them heated through and slightly tender. Now, drizzle 1 tablespoon of soy sauce and 1 teaspoon of sesame oil over the green beans. Sprinkle in 1 teaspoon of red pepper flakes, plus salt and pepper to taste. Toss everything together. Make sure the green beans are well-coated with the flavors. It’s time to serve! Transfer the green beans to a serving dish. For a finishing touch, sprinkle 2 tablespoons of toasted sesame seeds on top. You can also add fresh cilantro or sliced green onions for garnish. These green beans pair well with rice or grilled meats. Enjoy your delicious garlic ginger green beans! For the full recipe, check out the earlier section. To boost the taste, try adding a squeeze of lemon juice. This adds a bright note. You can also toss in sliced bell peppers for color and crunch. Another option is to mix in sliced mushrooms for a rich, earthy flavor. If you like nuts, add chopped almonds or cashews for a nice crunch. These additions make the dish even better. One mistake is overcooking the green beans. They should be bright green and crisp. Another error is skipping the ice bath after blanching. This keeps them vibrant and crunchy. Avoid using too much soy sauce, as it can make the dish too salty. Lastly, don't forget to taste as you cook. Adjust the seasoning to suit your taste. To cook green beans just right, start with fresh beans. Look for ones that are bright and firm. Blanch them in boiling water for 2-3 minutes. Then, quickly transfer them to an ice bath. This halts the cooking process and locks in color. When stir-frying, keep the heat high and stir often. This ensures that they cook evenly and stay crisp. For the best results, follow the Full Recipe carefully. Enjoy your tasty green beans! {{image_2}} You can easily add protein to garlic ginger green beans. Tofu or chicken works great. For tofu, use firm or extra-firm. Cut it into cubes and sauté it in the skillet before adding the garlic and ginger. This way, the tofu gets crispy and has flavor. If using chicken, cut it into bite-sized pieces. Cook the chicken until it is no longer pink, then add the garlic and ginger. This makes your dish heartier and more filling. Feel free to mix in other vegetables too. Carrots, bell peppers, or broccoli can add color and crunch. Slice the carrots thinly so they cook quickly. Bell peppers can be cut into strips for a nice texture. Broccoli florets can be blanched with the green beans. Just remember to adjust cooking time based on the veggies you choose. This not only adds variety but also boosts the dish's nutrition. You can control the heat in this dish easily. If you like it mild, skip the red pepper flakes or use less. On the other hand, if you want it spicy, add more flakes or even a dash of hot sauce. You could also try fresh chili peppers for a different flavor. Adjusting spice levels lets you cater the dish to your taste. This makes garlic ginger green beans a versatile side for any meal. Try these variations to keep your cooking exciting and fresh. For the full recipe, check out the details above. Store leftover garlic ginger green beans in an airtight container. Place them in the fridge. They will last for about 3 days. Make sure they cool down before sealing. This keeps them fresh and tasty. To reheat, use a skillet on medium heat. Add a splash of olive oil. Heat for about 3-4 minutes, stirring often. This helps retain the crunch. You can also use the microwave. Heat for 30 seconds, stir, then heat again if needed. You can freeze garlic ginger green beans for longer storage. First, blanch them for 2 minutes. Drain and cool them in ice water. After that, dry them thoroughly. Place in freezer bags and remove excess air. They can stay fresh for up to 3 months. When ready to use, thaw in the fridge overnight. Then reheat as usual. For the full recipe, check out the details above. I like to use fresh green beans. They taste better and have a nice crunch. Look for beans that are bright green and firm. Avoid beans with brown spots or wrinkles. You can use haricots verts for a more delicate flavor. Yes, you can make garlic ginger green beans ahead. Cook the beans and store them in the fridge for up to three days. When you are ready to serve, just heat them up in a skillet. This keeps them fresh and tasty. Absolutely! You can use tamari for a gluten-free option. If you want a soy-free choice, try coconut aminos. They add a nice umami flavor while keeping it vegetarian. This dish has roots in Asian cuisine, where garlic and ginger are popular. It combines simple and fresh flavors. Many cultures use green beans in stir-fries, making it a versatile dish worldwide. To spice it up, add more red pepper flakes. You can also use fresh chili peppers for an extra kick. If you like heat, try adding sriracha or chili oil when serving. Yes, you can use frozen green beans. They are quick and easy to prepare. Just thaw them and skip the blanching step. However, fresh beans will give you a better texture and flavor. For the best results, follow the [Full Recipe]. In this blog post, we explored the essential ingredients, preparation steps, and tips for cooking garlic ginger green beans. We discussed how to enhance flavors, avoid mistakes, and use different variations. Finally, I shared smart ways to store and reheat leftovers. The right approach can make your green beans shine. Try these ideas, and enjoy a tasty dish that impresses everyone at your table. Your cooking will become more fun and rewarding!](https://toastedrecipes.com/wp-content/uploads/2025/07/4c2c7d0a-5ff6-4521-a217-69b1c6b4c062.webp)
Garlic Ginger Green Beans Quick and Flavorful Dish
Looking for a quick and delicious way to enjoy your veggies? Garlic Ginger Green Beans are just what you need! This simple dish combines fresh