Dinner
. To make a creamy sauce, use heavy cream. It gives the best richness. Stir the cream gently into the beef mix. Add the grated Parmesan cheese slowly. This helps it melt evenly. If it seems too thick, add a little pasta water. This adds creaminess without losing flavor. Start with high-quality ground beef. Season it well while cooking. Salt and pepper are key. You can also add Italian seasoning early. It blends into the beef. If you like heat, add red pepper flakes too. This gives depth and a little kick. Cook rigatoni until it's al dente. This means it should be firm to the bite. Make sure to salt the water well. This enhances the pasta's flavor. Reserve a cup of pasta water before draining. You may need it to adjust the sauce later. Garnish your dish with fresh parsley. It adds color and freshness. You can also sprinkle more Parmesan cheese on top. For extra flavor, add a drizzle of olive oil. This gives a nice shine and richness. Enjoy your beautiful plate! For the full recipe, check out the detailed instructions. {{image_2}} You can switch the rigatoni for any pasta you like. Penne, fusilli, or even spaghetti work well. Each shape holds the sauce differently, giving you a new taste. Try using whole wheat or gluten-free pasta for a healthier twist. Feel free to add veggies for extra flavor and nutrition. Spinach, bell peppers, or zucchini blend well with this dish. You can sauté them with the onion and garlic. This makes your meal colorful and more filling. You don’t have to stick with beef. Ground turkey or chicken can be great swaps. If you want a meatless option, try cooked lentils or mushrooms. Each protein choice changes the meal's taste but keeps it tasty. If you need a dairy-free option, use coconut cream instead of heavy cream. Nutritional yeast can replace Parmesan cheese while adding a cheesy flavor. Always check your ingredients for hidden dairy. You can still enjoy creamy goodness without the dairy! You can find the Full Recipe for the Creamy Parmesan Beef Rigatoni [here]. To store leftover Creamy Parmesan Beef Rigatoni, place it in an airtight container. Make sure it cools down first. This keeps the pasta fresh and prevents moisture loss. Store it in the fridge for up to three days. Label the container with the date for easy tracking. When you're ready to eat, reheat the rigatoni in a skillet. Add a splash of water or cream to keep it moist. Heat over medium-low heat, stirring often. You can also use the microwave. Place it in a microwave-safe bowl, cover it, and heat in short bursts. Stir between each burst to ensure even warming. If you want to keep it longer, freezing is a great option. Place the cooled rigatoni in a freezer-safe container. Leave some space at the top for expansion. It can last for up to three months in the freezer. To thaw, move it to the fridge overnight before reheating. This helps maintain its creamy texture. For quick thawing, place it in cold water for about an hour. To make a vegetarian version, you can swap the ground beef for lentils or mushrooms. Use the same amount of lentils or finely chopped mushrooms. Cook them until soft. You can also add spinach or zucchini for extra flavor. The creamy sauce remains the same, so you’ll still enjoy that rich taste. If you want a lighter option, you can use half-and-half or whole milk. For a dairy-free choice, use coconut milk or cashew cream. Each of these options will change the flavor a bit, but they still create a creamy sauce. Just remember to adjust the seasoning to taste. Leftover rigatoni can last about 3 to 5 days in the fridge. Store it in an airtight container to keep it fresh. When you want to eat it, just reheat it on the stove or in the microwave. Add a splash of milk or cream to make it creamy again. Yes, you can make this dish ahead of time. Cook the rigatoni and prepare the sauce. Store them separately in the fridge. When you're ready to eat, combine them and heat through. This makes it easy to enjoy a hot meal with little effort. For the full recipe, check out the details earlier in the article. This post shared a simple way to make Creamy Parmesan Beef Rigatoni. We looked at the ingredients, step-by-step instructions, and tips for perfecting your dish. You learned about variations, storage methods, and answers to common questions. Remember, cooking is fun and lets you be creative. Try different ingredients or add your own twist. Enjoy making this meal with family or friends. Keep experimenting and savor every bite!](https://toastedrecipes.com/wp-content/uploads/2025/06/7a353121-4cc2-47f1-acca-116b1b6e2095.webp)
Creamy Parmesan Beef Rigatoni Quick and Easy Meal
If you’re looking for a quick and tasty dinner, then Creamy Parmesan Beef Rigatoni is the answer! This dish combines flavorful beef, creamy sauce, and
![- 1 pound ground beef - 1 cup cooked macaroni - 1 cup shredded sharp cheddar cheese - 1/2 cup milk - 1/2 cup breadcrumbs - 1/4 cup grated Parmesan cheese - 1/4 cup chopped fresh parsley - 2 large eggs - 1 teaspoon garlic powder - 1 teaspoon onion powder - Salt and pepper to taste - 1 cup canned diced tomatoes (with juices) Each ingredient plays a vital role in this mac and cheese meatloaf casserole. The ground beef brings protein and heartiness. The cooked macaroni adds a comforting texture. Sharp cheddar cheese gives that signature cheesy flavor. Milk helps keep it moist, while breadcrumbs bind everything together. The Parmesan cheese adds a nice salty kick, and fresh parsley brightens the dish. Eggs are key for binding, ensuring the casserole holds its shape. Garlic and onion powders bring depth without overpowering. For seasoning, adjust salt and pepper to your taste. The diced tomatoes add moisture and a slight acidity. If you want, you can mix in other veggies, too. This list of ingredients comes together to create a cozy meal. For the complete recipe, check out the Full Recipe. - Preheat your oven to 350°F (175°C). - In a large mixing bowl, combine the ground beef, cooked macaroni, and sharp cheddar cheese. - Add milk, breadcrumbs, Parmesan cheese, chopped parsley, eggs, garlic powder, onion powder, salt, and pepper. - Mix until the ingredients are well combined and hold together. - Grease a medium-sized casserole dish and transfer the mixture into it. - Cover with diced tomatoes and bake as directed. This dish blends two classics into one warm, hearty meal. The creamy mac and cheese pairs perfectly with the savory meatloaf. You can find the full recipe to make this lovely casserole in the section above. Enjoy every bite! - Make sure the meatloaf mixture is thick enough to hold together. This helps it slice well. - Let the casserole rest for about ten minutes before slicing. This improves how it looks on the plate. - Serve it warm, and add more fresh parsley on top. This makes it look great. - Pair it with a green salad to add color and crunch. The salad balances the rich flavors. - Use a medium-sized casserole dish for even baking. It helps cook the meatloaf evenly. - For mixing, a large bowl and sturdy spoon work best. This makes prep easy and quick. For the full recipe, check out the detailed instructions above. {{image_2}} You can easily change the meat in this dish. Substitute ground turkey or chicken for ground beef. This keeps the flavor but makes it lighter. You can also switch up the cheese. Using mozzarella or pepper jack adds new tastes. Each cheese brings its own magic to the dish. Want to make your casserole even better? Try adding veggies! Bell peppers or spinach mix right into the meat. They add great color and nutrients. You can also spice things up. Adding paprika or cayenne pepper gives it a fun kick. Just a little can change the whole flavor. If you need to make it gluten-free, use gluten-free bread crumbs. It still tastes great! For those avoiding dairy, there are options too. You can use almond milk and dairy-free cheese. This way, everyone can enjoy the comfort of mac and cheese meatloaf casserole. Check out the Full Recipe for more ideas! To keep your mac and cheese meatloaf casserole fresh, cool it first. Let it sit at room temperature for about 10 minutes. Then, cover it tightly with plastic wrap or foil. Store it in the fridge. Make sure to eat it within three to four days. When reheating, use the oven for best results. Preheat to 350°F (175°C). Place the casserole in an oven-safe dish. Cover it with foil to keep moisture in. Heat for about 20 minutes. You can also use the microwave, but be careful. Microwaving may dry it out. Heat in short bursts and check often. Yes, you can freeze the casserole! After it cools, wrap it tightly in plastic wrap. Then, place it in a freezer-safe bag. It can stay frozen for up to three months. When you're ready to eat, move it to the fridge to thaw overnight. To reheat from frozen, preheat your oven to 350°F (175°C). Remove the plastic wrap and cover with foil. Bake for about 60 minutes or until hot all the way through. In the fridge, the casserole lasts for about three to four days. If you freeze it, it can last for up to three months. Always check for any off smells or changes in texture before eating. Enjoy this comforting meal when you can! For more details, check the Full Recipe. To keep your meatloaf casserole moist, use fresh ground beef. The fat in the beef adds flavor and moisture. You can also mix in ingredients like milk and eggs. These help bind the mixture and keep it tender. Avoid overcooking it. Check the internal temperature, which should reach 160°F (71°C). Letting it rest after baking helps retain moisture too. Yes, you can prep this casserole in advance. Mix all the ingredients and place them in the casserole dish. Cover it tightly with plastic wrap or foil. Store it in the fridge for up to 24 hours before baking. When ready, just remove the wrap and bake as per the [Full Recipe]. This saves time on busy days. This casserole pairs well with many sides. A fresh green salad adds color and crunch. You can also serve steamed broccoli or roasted vegetables. For a heartier meal, garlic bread complements the flavors well. Consider a simple coleslaw for a nice contrast in texture. To check if your casserole is done, use a meat thermometer. The thickest part should reach 160°F (71°C). If you do not have a thermometer, look for clear juices. The top should be lightly browned and firm to the touch. If the center feels soft, give it a bit more time in the oven. This blog post covered how to make a tasty mac and cheese meatloaf casserole. We discussed key ingredients like ground beef, macaroni, and cheddar cheese. You learned step-by-step cooking instructions and important tips for success. Consider fun variations to keep things exciting and ways to store leftovers. With these insights, you'll create a flavorful dish that friends and family will love. Enjoy your cooking journey and make this meal your own!](https://toastedrecipes.com/wp-content/uploads/2025/06/63d5c95d-15e7-41ad-a53d-13b3db2b1370.webp)
Mac and Cheese Meatloaf Casserole Savory Comfort Food
Craving comfort food that hits the spot? Look no further! This Mac and Cheese Meatloaf Casserole blends flavors you love into one easy dish. Ground

Taco Bell Beefy Melt Burrito Delicious and Easy Recipe
Craving that delicious Taco Bell Beefy Melt Burrito? You’re in the right place! In this post, I’ll walk you through an easy recipe to make
. Start by preheating your oven to 375°F (190°C). This step warms the oven for even cooking. While the oven heats, gather your ingredients. You will need ground beef, onion, garlic, potatoes, diced tomatoes, cheese, sour cream, and spices. Make sure your potatoes are thinly sliced. This helps them cook evenly. In a large skillet, add the olive oil and heat it over medium heat. Next, add the diced onion and minced garlic. Sauté them for about 3-4 minutes. You want them to turn soft and clear. Then, add your ground beef to the skillet. Break it apart with a spatula. Cook until it is browned, about 5-7 minutes. Drain any extra fat from the pan. Now, stir in the drained diced tomatoes, Worcestershire sauce, paprika, oregano, salt, and pepper. Mix well and let it simmer for about 3 minutes. Now it’s time to layer the casserole. Grease a 9x13 inch baking dish for easy serving. Start with half of the sliced potatoes and layer them evenly on the bottom. Next, spread half of the beef mixture over the potatoes. Follow this with half of the shredded cheddar cheese. Repeat this step with the remaining potatoes, beef, and cheese. Finally, spread the sour cream on top. Smooth it out evenly across the casserole. Cover the dish with aluminum foil and bake it in the preheated oven for 30 minutes. After that, remove the foil and bake for another 15 minutes. Your casserole should be bubbly and the potatoes tender. Let it cool for a few minutes before slicing. You can garnish with fresh parsley for a nice touch. For the full recipe, check the previous section. To get the best potatoes, slice them thin. Thin slices cook faster and mix well with the beef. I suggest using a mandoline for even slices. Soak the sliced potatoes in cold water for 30 minutes. This removes extra starch and keeps them from turning mushy. Drain them well and dry with a towel before layering. Cheese adds richness to your casserole. I love using sharp cheddar for its bold taste. You can also try Monterey Jack for a milder flavor. Mixing cheeses can create a unique taste. If you want something extra, sprinkle some mozzarella on top for a gooey finish. One mistake is not browning the beef well. This step adds flavor to your dish. Another pitfall is overcooking the potatoes. They should be tender but not mushy. Lastly, don’t skip the layering step. Proper layers help all the flavors blend better. For the complete details, check the Full Recipe. {{image_2}} You can make a tasty vegetarian version. Replace the ground beef with lentils or mushrooms. Both options add great flavor and texture. Use the same spices to keep it savory. You’ll still layer potatoes, cheese, and sauce for a satisfying dish. This version is still filling and full of taste. If you like heat, add some spice. Mix in jalapeños or crushed red pepper to the beef. You can also use pepper jack cheese for an extra kick. This change brings a whole new level of flavor to the dish. Your family will enjoy the spicy twist while they dig in. Adding veggies boosts nutrition and flavor. Try layering in spinach, bell peppers, or zucchini. Chop them small so they blend well with the potatoes and beef. This will enhance the dish's color and make it even healthier. It’s an easy way to sneak more greens into your meal. For more ideas, check the Full Recipe. Storing leftover casserole is easy. First, let it cool to room temperature. Then, cover it tightly with plastic wrap or aluminum foil. You can also use an airtight container. This way, it stays fresh for up to three days in the fridge. When you want to eat it, just take it out and enjoy! You can freeze Hamburger Potato Casserole for later. First, let it cool fully. Then, cut it into portions. Wrap each piece in plastic wrap, then in aluminum foil. This helps prevent freezer burn. You can freeze it for up to three months. When you're ready to eat, just thaw it overnight in the fridge before reheating. Reheating is simple and quick. If your casserole is in the fridge, just preheat your oven to 350°F (175°C). Place the casserole in an oven-safe dish. Cover it with foil to keep it moist. Bake for about 20-30 minutes until it is hot throughout. If you froze it, let it thaw first. Then, follow the same steps to reheat. Enjoy your delicious meal! Yes, you can make Hamburger Potato Casserole ahead of time. It’s great for busy days. Just prepare the casserole, cover it, and store it in the fridge. You can keep it there for up to a day. When you're ready to eat, bake it as directed. If it's cold from the fridge, it may need a few extra minutes in the oven. You can serve many sides with Hamburger Potato Casserole. Here are some tasty options: - A fresh green salad - Steamed broccoli or green beans - Garlic bread or rolls - Pickles for a tangy crunch These sides add balance and make your meal more fun. Hamburger Potato Casserole can be gluten-free with small changes. The main ingredients like beef, potatoes, and vegetables are gluten-free. However, check the Worcestershire sauce label. Some brands add gluten. You can find gluten-free Worcestershire sauce or make your own. This way, you can enjoy a safe dish without gluten. For the full recipe, you can refer back to the ingredients and steps above. Hamburger Potato Casserole is easy to make and full of flavor. You learned about key ingredients, cooking steps, and helpful tips. We discussed tasty variations like vegetarian and spicy options. Plus, we covered how to store and reheat your casserole. Remember, making this dish can fit many dietary needs. With the right ingredients and a bit of care, you can enjoy this comforting meal anytime. Try it out and bring new flavors to your table today!](https://toastedrecipes.com/wp-content/uploads/2025/06/2c2f148e-2cc0-4128-8f41-705c675b063e.webp)
Savory Hamburger Potato Casserole Easy Family Meal
If you’re looking for a hearty, easy family meal, this Savory Hamburger Potato Casserole is your answer! Packed with flavor and simple to make, it’s
![To create a hearty and tasty Ground Beef and Potato Taco Bowl, gather these key ingredients: - 1 lb ground beef - 2 medium potatoes, diced into small cubes - 1 tablespoon olive oil - 1 small onion, finely chopped - 2 cloves garlic, minced - 1 bell pepper (any color), diced - 1 packet taco seasoning (or homemade: 1 tsp chili powder, 1 tsp cumin, 1 tsp paprika, 1/2 tsp onion powder, 1/2 tsp garlic powder, salt to taste) - 1 cup corn kernels (fresh or frozen) - 1 can (15 oz) black beans, drained and rinsed - 1 cup diced tomatoes (fresh or canned) - 1 cup shredded cheese (cheddar or a Mexican blend) - Fresh cilantro for garnish - Sour cream or Greek yogurt for topping (optional) Each ingredient plays a role in building the flavor. The ground beef brings richness, while the potatoes add a nice texture. The taco seasoning is key for that classic taste. You can swap out the ground beef for turkey or chicken if you prefer. For a veggie twist, use lentils or mushrooms instead of meat. If you want to skip potatoes, try quinoa or rice for a different base. Toppings can vary too. Add avocado, jalapeños, or salsa for extra zest. This dish is flexible, so feel free to mix and match based on what you like or have on hand. For the full recipe, check out the detailed steps to make this delicious meal. To make the Ground Beef and Potato Taco Bowl, follow these simple steps. 1. Heat the Olive Oil: Start by heating 1 tablespoon of olive oil in a large skillet over medium heat. This sets the stage for cooking. 2. Sauté the Potatoes: Add 2 medium potatoes, diced into small cubes. Cook them for about 8-10 minutes. You want them to soften and turn golden brown. Stir them often. 3. Add the Veggies: Once the potatoes are ready, add 1 small onion (finely chopped), 2 cloves of minced garlic, and 1 diced bell pepper. Cook for another 5 minutes until the vegetables are tender. 4. Cook the Beef: Push the veggies to one side of the skillet. Add 1 pound of ground beef to the center. Break it apart with a spatula. Cook the beef until it is browned, which takes about 5-7 minutes. 5. Drain and Season: After the beef is fully cooked, drain any excess fat. Stir in 1 packet of taco seasoning, 1 cup of corn kernels (fresh or frozen), and 1 can of black beans (drained and rinsed). Mix everything well and let it cook for 5 more minutes. 6. Add Tomatoes: Stir in 1 cup of diced tomatoes. Heat everything through for another 3-4 minutes. This step adds freshness to the dish. 7. Melt the Cheese: Remove the skillet from heat. Sprinkle 1 cup of shredded cheese over the mixture. Cover the skillet with a lid for a couple of minutes. This melts the cheese perfectly. 8. Serve: Serve the taco bowl warm. Garnish with fresh cilantro and a dollop of sour cream or Greek yogurt if you want. - Keep an eye on the potatoes. You want them golden, not burnt. - Check the beef for doneness. It should be brown with no pink spots. - Use a spatula to mix well. It helps blend all the flavors together. This method ensures a flavorful meal that warms your soul. You can find all the details in the Full Recipe. Enjoy! To get the best flavor from your Ground Beef and Potato Taco Bowl, follow these tips: - Sautéing Potatoes: Start with a hot skillet. Heat olive oil before adding the diced potatoes. Cook until golden brown, which takes about 8-10 minutes. This step ensures they become crispy outside but soft inside. - Browning Beef: When adding ground beef, let it sit for a minute before stirring. This helps it brown better. Use a spatula to break it up as it cooks. Once it turns brown, drain any excess fat to keep it from being greasy. - Enhancing Flavors: Use taco seasoning for a quick flavor boost. You can also add extra garlic or chili powder for more heat. Fresh herbs like cilantro can brighten the dish. - Cooking Tools: A large skillet is essential for even cooking. Use a wooden spatula to stir and scrape up brown bits from the pan. This adds depth to your sauce. Now, let's talk about how to serve this delicious taco bowl: - Plating: Layer the beef and potato mix in bowls. Top with shredded cheese while it’s hot. This allows the cheese to melt nicely. Add a sprinkle of fresh cilantro for color. - Pairing Options: Serve with tortilla chips for crunch. A side of guacamole or fresh salsa adds a nice dip. For drinks, try a light beer or a refreshing limeade. - Meal Prep: This dish is perfect for meal prep. You can make it ahead and store it in the fridge. It keeps well for up to three days. To save time, chop the veggies in advance. You can also double the recipe for easy lunches throughout the week. For the complete recipe, check the [Full Recipe]. {{image_2}} You can easily adapt this taco bowl to fit various diets. For gluten-free options, use gluten-free taco seasoning. Always check labels on canned ingredients like beans and corn. If you want a dairy-free meal, skip the cheese and sour cream. Instead, try avocado or a dairy-free yogurt. For those following a keto diet, swap the potatoes for cauliflower rice. This keeps the meal low in carbs while adding a tasty texture. You can also use a sugar-free taco seasoning to stay on track. If you want to make a vegetarian version, replace the ground beef with lentils or black beans. Both add great flavor and protein. You can also use mushrooms for a meat-like texture. Spice up your taco bowl by trying different spice blends. Instead of taco seasoning, use fajita seasoning or chili powder. You can also mix in some smoked paprika for a deeper flavor. Adding extra veggies is a great way to boost nutrition. Try corn, zucchini, or spinach. These will give your bowl more color and flavor. For toppings, experiment with different cheeses. Queso fresco or pepper jack cheese works well. You can also add fresh toppings like jalapeños, salsa, or avocado to enhance the taste. For the full recipe, check the complete list of ingredients and cooking steps. To store your Ground Beef and Potato Taco Bowl, place leftovers in an airtight container. This keeps them fresh and safe. You can store it in the fridge for up to three days. When you want to eat it again, reheat in a skillet over medium heat. This helps keep the potatoes crisp and the beef juicy. Stir occasionally for even heating. You can also use a microwave, but the skillet gives better texture. If you want to keep your taco bowl longer, freezing is a great option. Allow the bowl to cool completely before freezing. Use a freezer-safe container or bag to avoid freezer burn. The dish can stay good for up to three months. When you’re ready to eat it, thaw it in the fridge overnight. Reheat in a skillet or microwave until hot. This ensures the flavors stay rich and tasty. For the full recipe, check the earlier sections. You can use ground turkey or chicken as a leaner option. For a vegetarian dish, try lentils or black beans. Both options provide great flavor. Yes, you can prepare the taco bowl a day ahead. Cook the ingredients and store them in the fridge. Reheat before serving for the best taste. To make taco seasoning, mix these spices: - 1 tsp chili powder - 1 tsp cumin - 1 tsp paprika - 1/2 tsp onion powder - 1/2 tsp garlic powder - Salt to taste This mix gives your bowl a tasty kick. Taco bowls pair well with: - Rice or quinoa - Fresh salsa - Guacamole - Tortilla chips These sides add extra flavor and fun! Absolutely! The Ground Beef and Potato Taco Bowl is perfect for meal prep. It stores well in the fridge and reheats nicely. Enjoy a quick meal all week long! This blog post shared a clear guide to making delicious Ground Beef and Potato Taco Bowls. We discussed the key ingredients, including beef, potatoes, and seasonings, plus optional toppings. I provided step-by-step instructions for cooking and helpful tips for flavor and presentation. You can customize this dish for different diets. Don't forget about storage and reheating tips to enjoy your meal later. With these insights, you can create a tasty bowl that fits your needs. Enjoy making this dish your own!](https://toastedrecipes.com/wp-content/uploads/2025/06/e2d5a773-d23b-4f85-b13a-06e29c31d01b.webp)
Ground Beef and Potato Taco Bowl Flavorful Comfort Meal
Looking for a tasty and comforting meal? The Ground Beef and Potato Taco Bowl is your answer! Packed with flavor and easy to make, it’s

White Cheddar and Spinach Chicken Burgers Delight
Looking for a fresh twist on burger night? Try my White Cheddar and Spinach Chicken Burgers! These juicy, flavorful patties combine ground chicken, creamy white

Addictive Dan Dan Noodles Easy and Flavorful Recipe
Are you ready to dive into a bowl of irresistible flavor? My easy and flavorful Addictive Dan Dan Noodles will take your taste buds on

Homemade Hamburger Helper Simple and Savory Meal
Looking to whip up a quick and tasty dinner? My Homemade Hamburger Helper is here to save the day. Packed with ground beef, elbow macaroni,

Cajun Potato Soup Flavorful and Hearty Comfort Food
If you crave warmth and bold flavors, you must try Cajun Potato Soup. This dish is not just filling; it’s packed with spicy goodness and
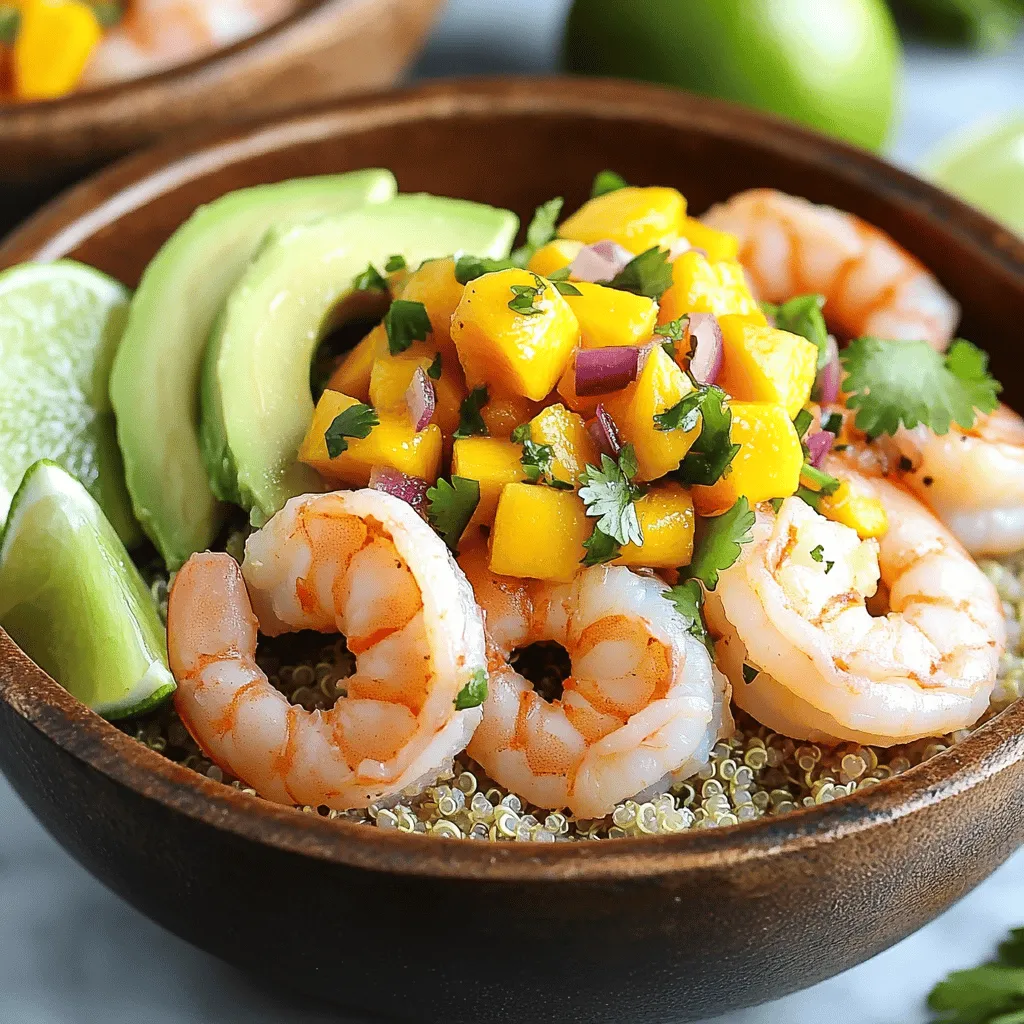
Savory Shrimp and Avocado Bowls with Mango Salsa
Dive into the vibrant flavors of my Savory Shrimp and Avocado Bowls with Mango Salsa! This dish combines juicy shrimp, creamy avocado, and fresh mango