Dinner
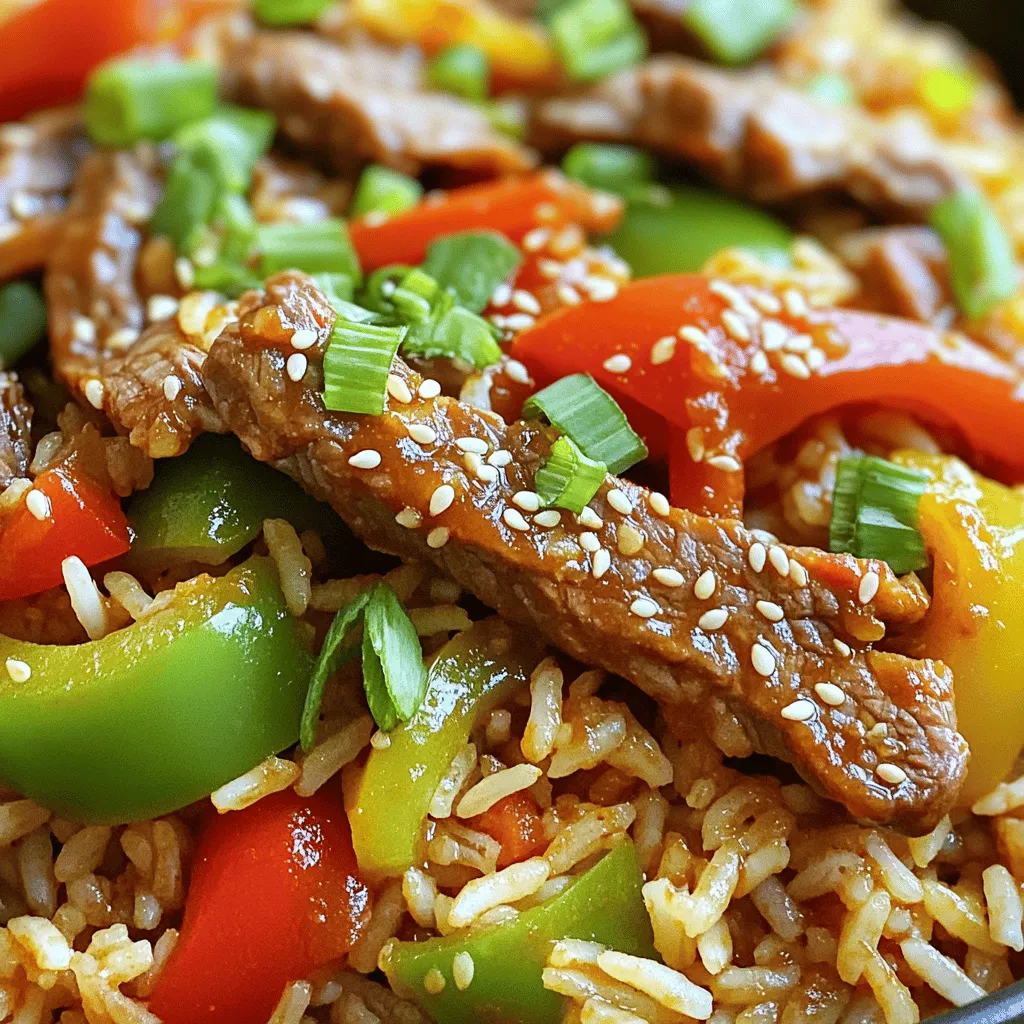
Crispy Chilli Beef Rice Quick and Flavorful Meal
If you’re craving something quick yet packed with flavor, look no further than Crispy Chilli Beef Rice. This dish combines tender beef, fresh veggies, and
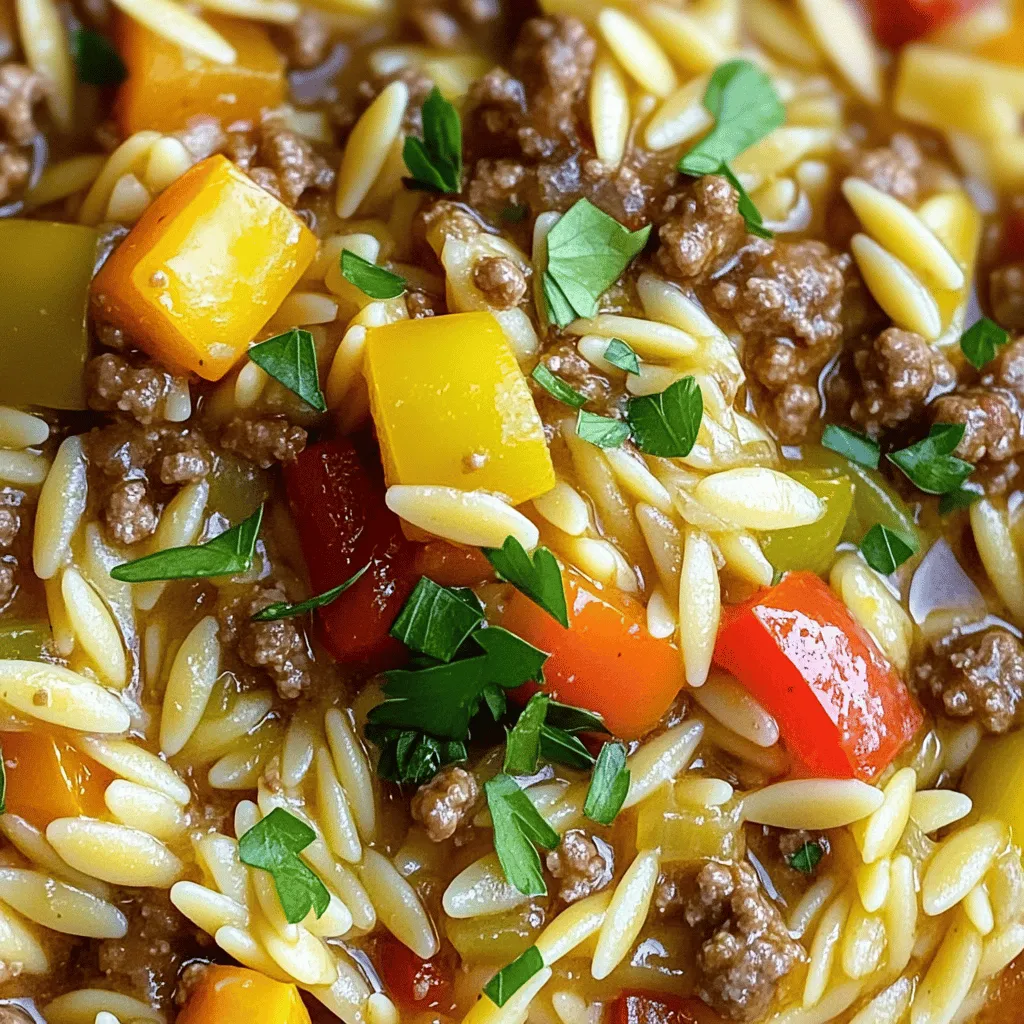
Savory Ground Beef Orzo Hearty and Flavorful Meal
Are you ready for a hearty meal that bursts with flavor? Savory Ground Beef Orzo is the perfect choice! This dish combines tender ground beef,
. This blog post covered how to make delicious balsamic glazed chicken and veggies. You learned about the key ingredients, cooking methods, and tips to perfect your dish. Remember to marinate the chicken well and use fresh produce for the best flavor. You can also adjust the recipe to fit your taste. Exploring variations keeps this meal exciting. In the end, you'll enjoy a healthy and tasty dish that works for any meal.](https://toastedrecipes.com/wp-content/uploads/2025/06/cde017f2-9720-4ba3-8519-586b017e81cc.webp)
Balsamic Glazed Chicken and Veggies Simple Recipe
If you’re searching for a quick, tasty meal, I’ve got the perfect recipe for you! Balsamic Glazed Chicken and Veggies is simple and packed with
![- 12 jumbo pasta shells - 1 lb ground beef - 1 small onion, diced - 2 cloves garlic, minced - 1 can (15 oz) tomato sauce - 1 cup ricotta cheese - 1 cup shredded mozzarella cheese - 1 cup sour cream - 1/2 cup grated Parmesan cheese - Salt and pepper to taste Jumbo pasta shells are key to this dish. They hold the rich filling well. Ground beef adds hearty flavor. Diced onion and minced garlic give a lovely base. Tomato sauce ties all the flavors together, making it comforting. - 1 teaspoon dried oregano - 1 teaspoon dried basil - Fresh parsley for garnish (optional) Dried oregano and basil bring out the best in beef. These herbs add warmth and depth. Fresh parsley gives a nice touch of color and freshness. You can add it on top just before serving. - 1 cup ricotta cheese - 1 cup shredded mozzarella cheese - 1/2 cup grated Parmesan cheese Ricotta cheese makes the filling creamy and smooth. Mozzarella adds a nice stretch when melted. Parmesan gives a sharp taste that rounds out the flavors. Combining these cheeses creates a delicious filling that makes each bite special. For the full recipe, check out the details above. Enjoy cooking this rich and hearty dish! To start, we need to cook the jumbo pasta shells. Bring a big pot of salted water to a boil. Add the shells and cook them until they are al dente. This usually takes about 10 minutes. Once done, drain the shells and set them aside to cool. Next, we will brown the ground beef. Heat a large skillet over medium heat. Add the ground beef and cook it until it turns brown. This should take about 5 to 7 minutes. Make sure to drain any excess fat to keep the dish lighter. Now, let’s mix the cheese filling. In a bowl, combine the ricotta cheese, half of the mozzarella cheese, sour cream, and Parmesan cheese. Stir it well until all the ingredients blend together nicely. Time to stuff the pasta shells! Take each cooked shell and fill it with the cheese mixture. Place them in a single layer in a 9x13 inch baking dish. For layering, spread a thin layer of the beef mixture on the bottom of the baking dish. Arrange the stuffed shells on top. Then, pour the remaining beef mixture over the shells. Make sure each shell gets a good coating. Lastly, top it off with the rest of the mozzarella cheese. Cover the dish with aluminum foil and bake it in the preheated oven at 350°F for 25 minutes. After that, remove the foil and bake for another 10 to 15 minutes. This will make the cheese bubbly and golden. Let the casserole cool for a few minutes before serving. If you like, you can garnish it with fresh parsley. Enjoy this rich and comforting creamy beef shells casserole! For the complete details, check out the Full Recipe. To make your creamy beef shells truly shine, focus on balancing seasonings. Use herbs like oregano and basil to add depth. Taste as you cook to adjust salt and pepper. This keeps the flavors bright and fresh. For a creamy texture, mix ricotta, sour cream, and mozzarella well. This blend gives a smooth filling. If you want extra creaminess, add a splash of milk or cream. This tip helps make each bite melt in your mouth. Avoiding soggy pasta is key. Cook the jumbo shells until just al dente. This means they should still have a bit of bite. Drain and cool them before stuffing. This keeps them firm and ready for the oven. Check cooking times for the beef. Cook it until browned but not dry. The beef should be juicy and flavorful. Follow the instructions closely to keep the right texture in your dish. When serving, pair the casserole with a simple salad. A fresh garden salad brightens the meal. Add a light vinaigrette for a nice contrast. This helps balance the richness of the casserole. For presentation, sprinkle fresh parsley on top. It adds a pop of color and fresh flavor. Serve the casserole hot from the oven for the best taste. To impress your guests, use a nice serving dish that highlights the layers. If you're curious about the full recipe, check out the [Full Recipe]. {{image_2}} You can switch the ground beef for other meats. Try ground turkey or chicken for a lighter meal. If you prefer a plant-based option, use lentils or mushrooms. These alternatives add unique flavors and textures. For dairy-free options, replace ricotta and sour cream with cashew cream or tofu. Nutritional yeast can add a cheesy flavor too. This way, everyone can enjoy the casserole. Adding vegetables can boost nutrition and flavor. Spinach, zucchini, or bell peppers work well. Just sauté them with the beef for a few minutes. This adds color and freshness to the dish. You can also play with spices. Try adding chili powder for heat or smoked paprika for depth. Experimenting with spices can make your casserole stand out. You can make a single-layer casserole for a quick meal. Just layer the stuffed shells and sauce. For a more impressive dish, create a multi-layer version. Alternate layers of pasta, sauce, and cheese. Different sauces can change the whole dish. Swap the tomato sauce for Alfredo for a creamy twist. Or, use pesto for a fresh and herbal flavor. These variations keep the recipe exciting and new. For a full recipe, check out the main section on Rich and Comforting Creamy Beef Shells Casserole. To keep your creamy beef shells casserole fresh, store it properly. Place leftovers in an airtight container. This way, it won't absorb other smells from the fridge. It’s best to refrigerate within two hours after baking to ensure food safety. When you want to reheat, set your oven to 350°F (175°C). Cover the dish with foil to keep moisture in. Heat for about 20-25 minutes or until warmed through. Freezing is a great option if you want to save some for later. Let the casserole cool completely before freezing. Use a freezer-safe container or wrap it tightly in foil. Make sure to label it with the date. To thaw, place it in the fridge overnight. This keeps the texture nice. If you're in a hurry, you can thaw it in the microwave on the defrost setting. In the fridge, the creamy beef shells casserole lasts about 3-4 days. If you freeze it, it can last for up to 3 months. After that, it may lose flavor and texture. Always check for any signs of spoilage before eating. To prevent the shells from breaking, handle them gently. After cooking, drain and cool the pasta. Use a large spoon to scoop them out. Avoid stacking them on top of each other. When stuffing, fill each shell carefully. If you drop a shell, pick it up right away. Yes, you can make this casserole ahead of time. Prepare it up to the baking step. Cover it tightly and store it in the fridge. It will stay fresh for up to two days. When ready to bake, let it sit at room temperature for 30 minutes. This helps it heat evenly. This casserole pairs well with a variety of sides. Here are some ideas: - Garlic bread - Steamed broccoli - Mixed green salad - Roasted vegetables - Simple coleslaw These sides will add fresh flavors and textures. Enjoy your meal! You can find the full recipe [here](#). This blog post covered the key ingredients, steps, and tips for making creamy beef shell casserole. You learned about essential items like jumbo pasta shells, ground beef, and flavorful cheeses. I shared ways to prep and assemble your dish for the best results. Use my tips to avoid soggy pasta and enhance flavor. Finally, explore variations or storage options to make this recipe your own. Now it's time to get cooking and enjoy a delicious meal!](https://toastedrecipes.com/wp-content/uploads/2025/06/dbdc4dee-b942-490c-bb61-e6507a53b566.webp)
Rich and Comforting Creamy Beef Shells Casserole Dish
Craving comfort food that warms the soul? Look no further than this Rich and Comforting Creamy Beef Shells Casserole! You’ll love how easy it is
![When making One-Pan Chicken and Pineapple Tacos, gather these fresh ingredients: - 2 chicken breasts, diced - 1 cup fresh pineapple, diced - 1 red bell pepper, sliced - 1 small red onion, chopped - 2 cloves garlic, minced - 1 tablespoon olive oil - 1 teaspoon ground cumin - 1 teaspoon smoked paprika - 1 teaspoon chili powder - Salt and pepper to taste - 8 small corn tortillas - Fresh cilantro leaves, for garnish - Lime wedges, for serving These ingredients blend to create a mix of sweet and savory flavors. The chicken gives you protein, while the pineapple adds a nice, sweet touch. The spices bring warmth and depth. Using fresh ingredients makes a big difference. They enhance the taste and keep the meal vibrant. You’ll want to use ripe pineapple for the best flavor. This recipe is simple yet satisfying. You can find the [Full Recipe] to follow along. First, heat the olive oil in a large skillet over medium heat. Once hot, add the diced chicken. Cook the chicken until it turns brown, about 5 to 6 minutes. This step is key for flavor. Next, stir in the chopped red onion and minced garlic. Cook for another 2 to 3 minutes. You want the onion to be soft and clear. Now, add the sliced red bell pepper and diced pineapple to your skillet. Sprinkle in the ground cumin, smoked paprika, and chili powder. Mix everything well. Season with salt and pepper to your taste. Let this cook together for another 5 to 7 minutes. Stir occasionally. This helps all the flavors blend nicely. While the chicken and pineapple mix cooks, warm the corn tortillas in another skillet or microwave. This makes them soft and easy to fold. To assemble the tacos, place a good amount of the chicken and pineapple mix onto each tortilla. Garnish with fresh cilantro leaves. Serve with lime wedges on the side. Squeeze the lime over the tacos for a zesty kick. For the full recipe, check out the details above. - Ensuring chicken remains juicy Keep the heat medium. This helps cook the chicken evenly. If it cooks too fast, it can dry out. Use a meat thermometer to check if it reaches 165°F. This way, you know it’s safe and juicy. - Perfecting pineapple caramelization Add the pineapple last. This allows it to cook just enough to brown. Stir it gently to coat it with spices. Use fresh pineapple for the best taste. The sugar in the fruit will help it caramelize nicely. - Garnishing for visual appeal Fresh cilantro adds a pop of green. Sprinkle it on top after assembling the tacos. You can also add lime wedges for color and a burst of flavor. A colorful plate makes the meal more inviting. - Serving suggestions for enhanced flavor Serve with extra lime for squeezing. This adds brightness to every bite. You can add a side of black beans or corn salad for a full meal. These sides complement the tacos and make for a vibrant plate. For the full recipe, check out the Tropical Chicken & Pineapple Tacos section. {{image_2}} You can easily change the protein in these tacos. Try using shrimp, pork, or tofu. Each option adds a new taste. For a lighter meal, use turkey instead of chicken. You also have fun with the veggies. Instead of red bell peppers, use green or yellow ones. Zucchini or mushrooms can also work well in this dish. Feel free to add fresh corn for extra sweetness. Adjusting spice levels is simple. If you like heat, add more chili powder or some diced jalapeños. For a milder flavor, skip the chili powder altogether. Toppings can change the game too. Try adding avocado slices for creaminess. You can also mix in diced tomatoes or shredded cheese. Each choice makes your tacos unique and tasty. For more ideas, check out the Full Recipe for Taco inspiration! To keep your tacos fresh, store leftovers in an airtight container. Place them in the fridge for up to three days. This helps maintain taste and texture. If you want to keep them longer, freeze the chicken and pineapple mixture. Use a freezer-safe bag or container. It can stay good for about three months. When freezing, remove as much air as possible. This prevents freezer burn. For reheating, use a skillet over medium heat. This method helps keep the texture nice. Stir frequently and add a splash of water if needed. You can also use a microwave. Heat in short bursts to avoid overheating. Aim for an internal temperature of 165°F. This ensures your meal is safe and delicious. Enjoy your tacos warm, topped with fresh cilantro and a squeeze of lime. For the full recipe, click here! Can I use canned pineapple? Yes, you can use canned pineapple. Just drain the juice well. Fresh pineapple adds a nice texture, but canned works in a pinch. It saves time and still gives great flavor. How do I make this dish gluten-free? To make this dish gluten-free, use corn tortillas. They have no gluten. Always check labels to ensure no hidden gluten ingredients. This way, everyone can enjoy the tacos. Can I prepare the chicken in advance? Yes, you can prepare the chicken in advance. Cook the chicken and pineapple mixture, then store it in the fridge. Reheat it when ready to serve. This saves time on busy nights. What would go well with these tacos? These tacos pair well with rice, beans, or a fresh salad. You can also serve them with guacamole or salsa on the side. These sides add flavor and color to your meal. For the full recipe, check the section above. This blog post covered a tasty taco recipe made with chicken and fresh pineapple. You learned about the key ingredients and step-by-step instructions to prepare the dish. We shared helpful tips to keep the chicken juicy and improve presentation. You can also explore ingredient swaps for different tastes. Remember, cooking can be creative. Try your own flavor twists and enjoy delicious meals!](https://toastedrecipes.com/wp-content/uploads/2025/06/3b3c627f-0923-4029-a209-fd30843b510c.webp)
One-Pan Chicken and Pineapple Tacos Delightful Meal
Looking for a fun and tasty dinner idea? You’ve come to the right place! One-pan chicken and pineapple tacos are a quick and easy way

Broccoli and Cheddar Twice-Baked Potatoes Delight
Are you ready to take your potatoes to the next level? Broccoli and Cheddar Twice-Baked Potatoes are the perfect blend of creamy, cheesy goodness and
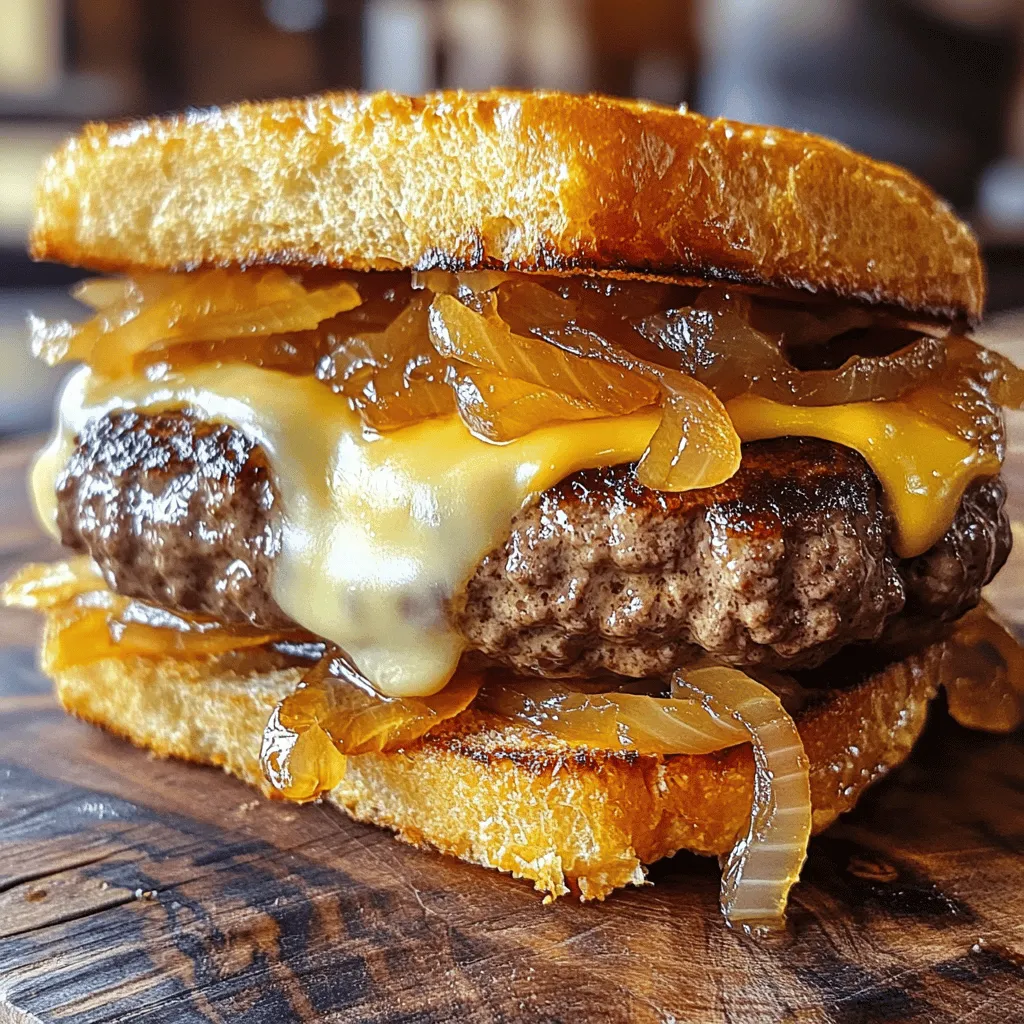
The Best Patty Melt Recipe Easy and Delicious Guide
Get ready to savor a classic American favorite with my easy and delicious Patty Melt recipe! This guide covers everything, from mixing the perfect patty
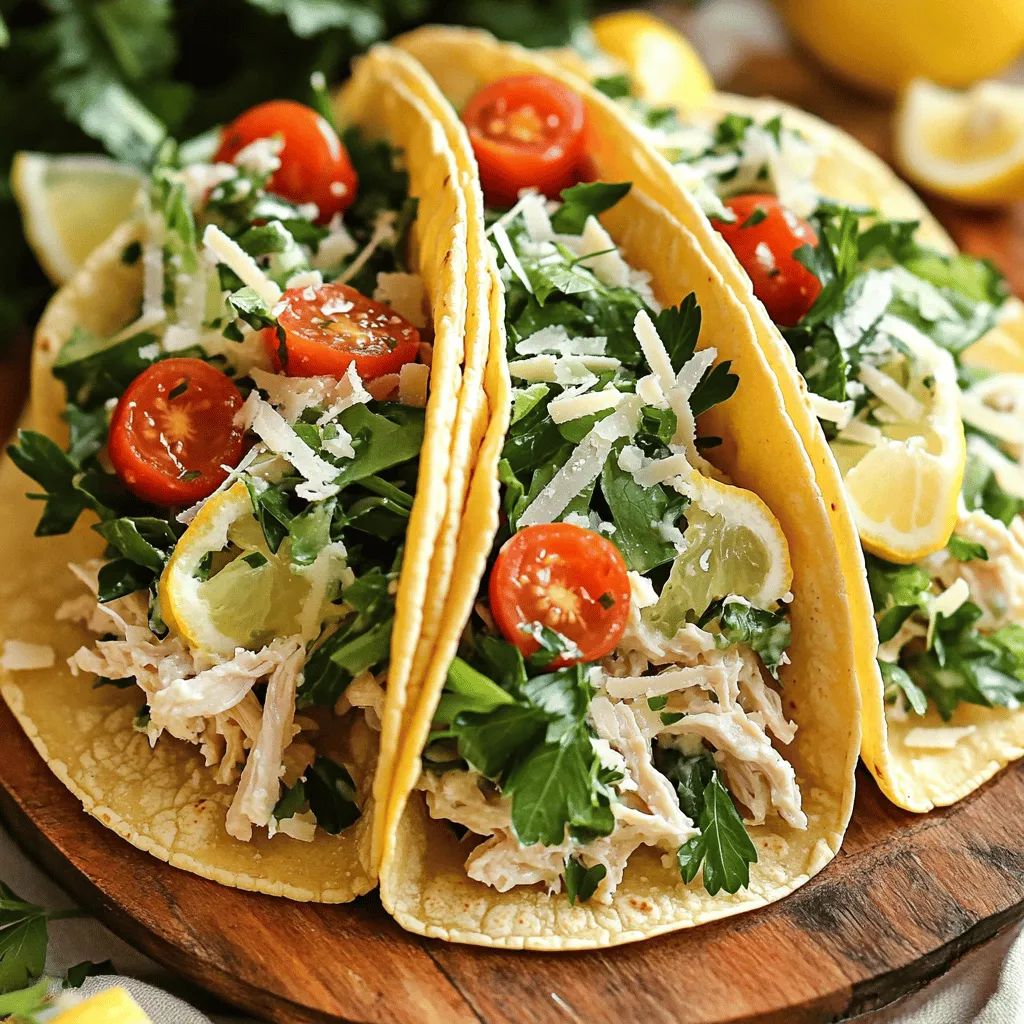
Smash Chicken Caesar Tacos Flavorful and Fun Meal
Are you ready to transform taco night? Smash Chicken Caesar Tacos bring bold taste and fun to your table. This dish combines grilled chicken, fresh
![To make BBQ Chicken & Roasted Sweet Potato Bowls, you need simple ingredients. Here’s what you need: - 2 boneless, skinless chicken breasts - 1 cup BBQ sauce (your favorite, homemade or store-bought) - 2 medium sweet potatoes, peeled and diced - 2 tablespoons olive oil - 1 teaspoon smoked paprika - 1/2 teaspoon garlic powder - 1/2 teaspoon ground cumin - Salt and pepper to taste These main ingredients create a tasty and filling meal. The sweet potatoes add sweetness, while the BBQ sauce gives a smoky flavor to the chicken. You can make your bowls even better with some fun toppings. Here are some ideas: - 1 avocado, sliced - 1 cup cherry tomatoes, halved - 1/4 cup chopped fresh cilantro - 2 tablespoons lime juice These toppings add color and freshness to your dish. The avocado makes it creamy, and the lime juice adds a nice zing. This meal is not just tasty; it’s also good for you! Each serving contains: - Protein from the chicken - Fiber and vitamins from the sweet potatoes - Healthy fats from the avocado These bowls are balanced and fill you up without weighing you down. Enjoy this delicious meal while feeling great about what you eat. For the full recipe, check the section above. Start by preheating your oven to 425°F (220°C). This temperature gives a nice roast. While the oven warms up, take two medium sweet potatoes. Peel them and dice them into small cubes. In a mixing bowl, toss the sweet potato cubes with 2 tablespoons of olive oil. Add 1 teaspoon of smoked paprika, 1/2 teaspoon of garlic powder, and 1/2 teaspoon of ground cumin. Don’t forget salt and pepper to taste. Mix it all well. This mix will make the sweet potatoes flavorful. Spread the seasoned sweet potatoes on a baking sheet lined with parchment paper. Make sure they are in a single layer. This helps them cook evenly. Roast them in the oven for about 25-30 minutes. Flip them halfway through to ensure they caramelize nicely. You want them to be tender and golden brown. While the sweet potatoes roast, it’s time for the chicken. Take 2 boneless, skinless chicken breasts. You can grill them or pan-sear them over medium-high heat. Cook each side for 6-7 minutes. Use a meat thermometer to check that the internal temperature reaches 165°F (75°C). This ensures the chicken is safe to eat. During the last 2 minutes of cooking, brush 1/2 cup of BBQ sauce on each chicken breast. Let it caramelize a bit. This adds a deep flavor to the chicken. Once done, remove the chicken from heat. Let it rest for 5 minutes before slicing it into strips. Resting helps retain the juices. Now it’s time to put everything together. In serving bowls, start with a layer of roasted sweet potatoes. Next, add the sliced BBQ chicken on top. Then, add avocado slices and halved cherry tomatoes for color and freshness. Drizzle some of the remaining BBQ sauce over the top. Sprinkle with fresh cilantro for a burst of flavor. Finally, squeeze some lime juice over everything. This will brighten the dish. Enjoy your BBQ Chicken & Roasted Sweet Potato Bowls with your family and friends. Check the [Full Recipe] for more details! Roasting sweet potatoes brings out their natural sweetness. First, cut them into even cubes. This helps them cook at the same rate. Use parchment paper on your baking sheet. It keeps the sweet potatoes from sticking. Toss them in olive oil and spices for extra flavor. I love using smoked paprika; it gives a nice depth. Make sure to flip them halfway through roasting. This ensures they brown evenly and get crispy. For juicy chicken, start with boneless, skinless breasts. They cook quickly and stay moist. Preheat your grill or skillet to medium-high heat. This step helps the chicken sear. Cook each side for about 6-7 minutes. Use a meat thermometer to check for doneness. It should read 165°F (75°C). In the last two minutes, brush on BBQ sauce. This caramelizes the sauce and adds richness. Allow the chicken to rest before slicing. This helps keep the juices inside. Marinades add great flavor to your chicken. You can use BBQ sauce as a marinade too. Just coat the chicken and let it sit for at least 30 minutes. If you want something different, try a mix of lime juice, garlic, and cumin. This adds a fresh taste. Fresh herbs like cilantro or parsley can brighten the dish. Don’t forget to drizzle more BBQ sauce when serving. It ties all the flavors together nicely. For the full recipe, check out the cooking instructions above. Enjoy your cooking! {{image_2}} You can easily swap chicken for plant-based protein. Try using chickpeas or tofu instead. Both options soak up flavor well. Season them with BBQ sauce for a tasty twist. If you want a hearty texture, use tempeh or seitan. These options add protein and keep the dish filling. BBQ sauce is great, but don’t stop there! You can try different sauces to change the flavor. For a spicy kick, use buffalo sauce. For a sweet touch, consider teriyaki sauce or honey mustard. If you want a tangy bite, ranch dressing works well too. Feel free to mix and match sauces for fun flavor combos! Instead of just sweet potatoes, add a grain base. Quinoa is a great choice because it’s easy to cook and full of protein. Brown rice or farro also works well for added texture. If you want something lighter, try cauliflower rice. This adds a fresh touch and keeps the dish low-carb. Choose any grain you like to make your bowl unique. For the full recipe, see the section above. Store any leftover BBQ chicken and roasted sweet potatoes in airtight containers. This keeps them fresh. Make sure to let them cool before sealing. Place the containers in the fridge. They will last for about 3 to 4 days this way. To reheat, use an oven or microwave. For the oven, preheat it to 350°F (175°C). Place the food in an oven-safe dish and cover it with foil. This keeps it moist. Heat for about 15 to 20 minutes until warm. In the microwave, use a microwave-safe dish and cover it. Heat in 30-second bursts, stirring in between. This prevents hot spots and keeps the food tasty. You can freeze the chicken and sweet potatoes for later use. Place them in freezer bags or airtight containers. Label them with the date. They can stay fresh for up to 3 months. When ready to eat, thaw in the fridge overnight. Reheat as mentioned above for the best taste. It takes about 12-14 minutes to cook BBQ chicken. I recommend grilling or pan-searing the chicken for 6-7 minutes on each side. Always check the internal temperature. It should reach 165°F (75°C). This ensures it is safe and fully cooked. Yes, you can make this recipe ahead of time. Cook the chicken and sweet potatoes in advance. Store them in the fridge for up to three days. When you’re ready to eat, just reheat them. This saves time on busy days and keeps meals easy. The best sides for BBQ chicken are coleslaw, baked beans, or corn on the cob. These sides add flavor and texture. You can also serve a fresh salad for a light touch. They complement the sweet and smoky flavors of the chicken well. For more details, check the Full Recipe. In this blog post, we explored a tasty BBQ chicken and roasted sweet potato bowl. We covered the key ingredients, step-by-step cooking instructions, and helpful tips. You learned how to customize the dish with various toppings and alternatives. Remember, storing leftovers properly keeps your meals fresh. Try this recipe for a quick, nutritious meal. Enjoy the flavors, and share your creations!](https://toastedrecipes.com/wp-content/uploads/2025/06/0709f63b-fc49-411d-a10a-b36b35af433a.webp)
BBQ Chicken & Roasted Sweet Potato Bowls Recipe
Looking for a tasty meal that’s both easy and satisfying? Try my BBQ Chicken & Roasted Sweet Potato Bowls! This dish combines juicy BBQ chicken
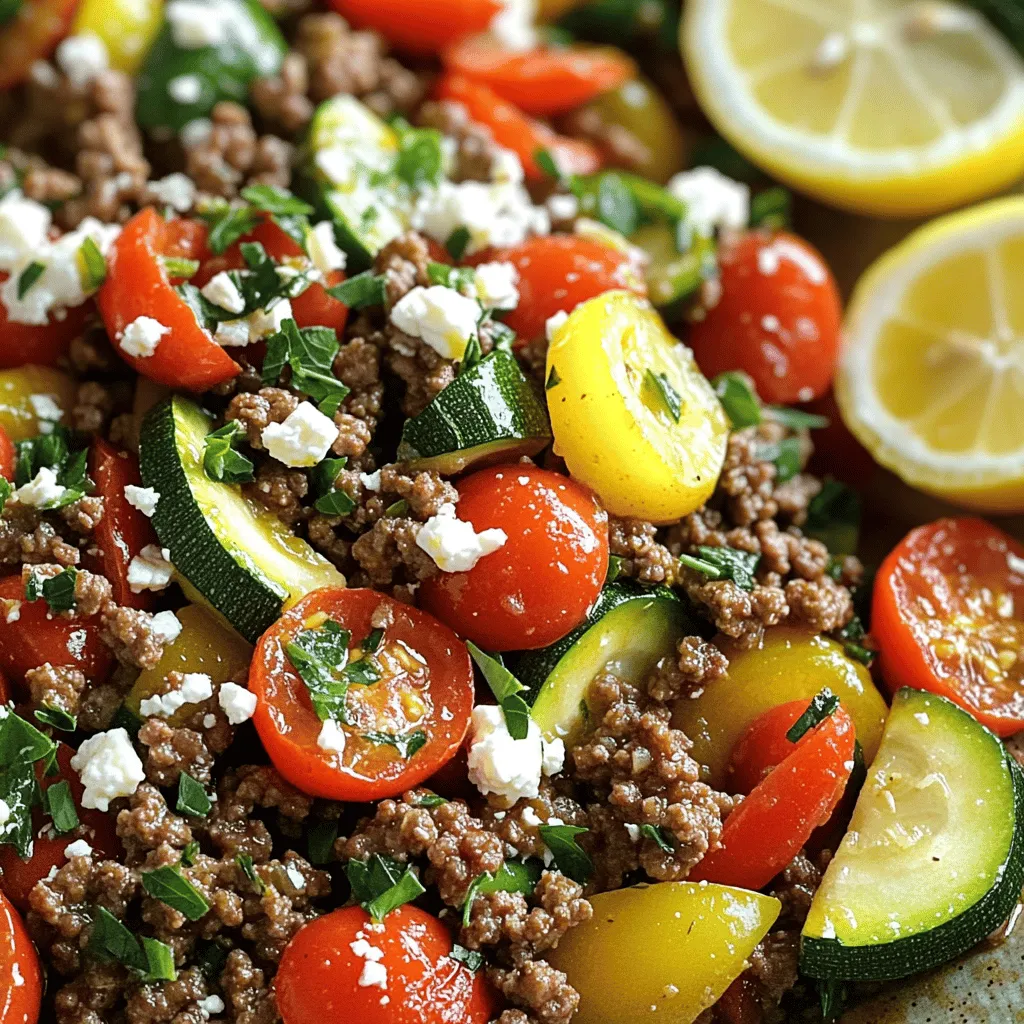
Mediterranean Ground Beef Stir-Fry Flavorful Delight
Looking for a tasty twist on dinner? My Mediterranean Ground Beef Stir-Fry is packed with flavor and easy to make. You’ll love the combination of