Dinner

Savory Honey Sriracha Salmon Bowls Quick and Easy Meal
Craving a quick and tasty meal that excites your taste buds? Look no further! My Honey Sriracha Salmon Bowls are not only easy to make
![- 500g boneless chicken thighs - 2 tablespoons black peppercorns - 3 cloves garlic - 1 tablespoon ginger - 1 green bell pepper - 1 red bell pepper - 1 medium onion - 3 tablespoons soy sauce - 1 tablespoon honey - 2 tablespoons cornstarch - 3 tablespoons vegetable oil - Salt to taste - Fresh cilantro for garnish Black pepper is the star of this dish. It adds a warm, spicy kick. The crushed black peppercorns enhance the chicken’s flavor. They bring depth and complexity to each bite. I prefer chicken thighs over other cuts for their juiciness. Chicken thighs stay tender and flavorful during cooking. They absorb the sauce well, giving you more taste. Cornstarch plays a key role in the dish's texture. It helps create a nice, crispy coating on the chicken. This gives you that perfect crunch when you bite into it. With these ingredients, you create a dish full of flavor. Each component works together, making your cooking exciting and tasty. For the complete recipe, check out the [Full Recipe]. - Marinating the chicken Start by cutting the chicken thighs into bite-sized pieces. Place them in a bowl and add the crushed black peppercorns, cornstarch, a pinch of salt, and one tablespoon of soy sauce. Mix everything well. Let the chicken sit for at least 30 minutes. This step helps to tenderize the meat and boost the flavor. - Slicing vegetables While the chicken marinates, slice the green and red bell peppers and the onion. Aim for uniform pieces. This way, they will cook evenly and look great in the dish. - Cooking chicken to golden perfection Heat two tablespoons of vegetable oil in a large skillet or wok over medium-high heat. Add the marinated chicken pieces. Cook them until they turn golden brown and are fully cooked. This usually takes about 5 to 7 minutes. Once done, remove the chicken from the skillet and set it aside. - Sautéing garlic, ginger, and vegetables In the same skillet, if needed, add one more tablespoon of oil. Toss in the minced garlic and ginger. Sauté them for about 30 seconds until they become fragrant. Then, add the sliced onions and bell peppers. Cook for about 3 to 4 minutes until they start to soften. - Combining ingredients Return the cooked chicken to the skillet. Drizzle in the remaining two tablespoons of soy sauce and one tablespoon of honey. Toss everything together to coat the chicken and veggies evenly. Stir-fry for an additional 2 to 3 minutes to blend the flavors. - Adjusting seasoning before serving Taste your dish and adjust the seasoning if needed. You can add more salt or black pepper based on your preference. Once you’re happy with the flavor, remove the skillet from heat. Garnish with fresh cilantro before serving. For the complete recipe, check out [Full Recipe]. Enjoy your flavorful black pepper chicken! - Best practices for stir-frying: Use high heat to cook quickly. This keeps the chicken juicy and tender. Make sure to prep all your ingredients ahead of time. Once you start cooking, things move fast! Stir constantly to avoid burning. - Tips for achieving the right level of tenderness: Marinate your chicken for at least 30 minutes. This helps the meat absorb flavors and stay moist. Cook chicken pieces in small batches. This prevents steaming, keeping the meat tender and golden. - Plating tips with rice: Serve your Black Pepper Chicken over fluffy jasmine rice. The white rice looks great against the dark chicken. Make a slight well in the rice to hold the sauce. This adds a nice touch! - Garnishing ideas for visual appeal: Top your dish with fresh cilantro. It adds color and a fresh taste. You can also sprinkle extra crushed black pepper on top. This gives a nice pop and hints at the dish's flavor. - Adding spices or sauces: For extra depth, consider adding a splash of sesame oil. This adds a nutty flavor that pairs well with the black pepper. You can also try a dash of chili sauce for heat. - Customizing heat levels: If you like more spice, add sliced fresh chilies. You can also use more black pepper if you enjoy that kick. Adjust to your taste for a perfect blend of flavors. With these tips and tricks, your Black Pepper Chicken can shine on any table. For the full details, check out the Full Recipe. {{image_2}} You can switch out chicken for other proteins. Tofu is a great choice for a vegetarian dish. It soaks up flavors well and adds a nice texture. Shrimp is another tasty option. It cooks fast and pairs nicely with the black pepper. For a plant-based meal, you can use tempeh or seitan. Both give a hearty feel and work well in stir-fries. Feel free to mix in seasonal veggies. Bell peppers are classic, but try zucchini or snap peas too. They add crunch and color to your dish. You can also add greens like bok choy. It cooks fast and adds a fresh taste. Just slice it thin and toss it in during the last few minutes of cooking. Black Pepper Chicken is not just for rice. You can wrap it in lettuce for a fresh bite. This adds a crunchy texture and is fun to eat. You can also use tortillas for a tasty twist. Serving it over salads is a great idea too. It adds protein and flavor to your greens. Try it with a light dressing to keep it fresh. For the full recipe, check out the details above. To keep your Black Pepper Chicken fresh, follow these tips: - Refrigerate leftovers: Place cooled chicken in an airtight container. Store it in the fridge for up to 3 days. - Freezing options: You can freeze the chicken for up to 2 months. Use a freezer-safe container or bag for best results. When it's time to enjoy leftovers, use these methods: - Microwave: Heat on medium power. Stir halfway through for even warming. - Skillet: Warm in a skillet over low heat. This helps keep the chicken juicy. - Avoid sogginess: Don't cover the dish tightly while reheating. This helps prevent steam buildup. To ensure safe eating, note these details: - In the fridge: Keep for up to 3 days. After that, the taste and quality decline. - Signs of spoilage: Look for off smells, changes in color, or slimy texture. If you see any of these signs, it's best to toss it. Black Pepper Chicken is a spicy and savory dish. It features tender chicken pieces tossed in crushed black pepper. The dish also includes garlic, ginger, and colorful bell peppers. You will love the bold flavors from soy sauce and honey. This dish is easy to make and very satisfying. Yes, you can prepare Black Pepper Chicken in advance. Marinate the chicken for up to a day. Store the marinated chicken in the fridge until you are ready to cook. You can also cook the dish and refrigerate it. Just reheat it gently on the stove or in the microwave. This makes it great for meal prep! You can serve Black Pepper Chicken with several tasty sides. Here are some popular options: - Jasmine rice - Steamed broccoli - Fried rice - Noodles - A fresh salad These sides enhance the meal and balance the spice of the chicken. Yes, you can easily modify this recipe. For a gluten-free version, use tamari instead of soy sauce. If you want a low-carb option, swap the chicken for tofu or shrimp. You can also add more vegetables to make it heartier. These changes keep the dish tasty while meeting your dietary needs. This dish showcases the joy of cooking with simple, fresh ingredients. You learned how to marinate chicken and layer flavors using black pepper, garlic, and ginger. The tips for cooking techniques and serving suggestions help elevate your meal. Don't forget, you can also adapt the recipe with different proteins and veggies. Storing and reheating leftovers properly ensures great taste every time. I encourage you to try this recipe and make it your own. Happy cooking!](https://toastedrecipes.com/wp-content/uploads/2025/06/6e22f42c-6dd1-4ee0-ab48-7ce7df6a47d2.webp)
Black Pepper Chicken Flavorful and Savory Delight
Are you ready to spice up your dinner routine? Black Pepper Chicken is not just a dish; it’s a bold and savory delight that can
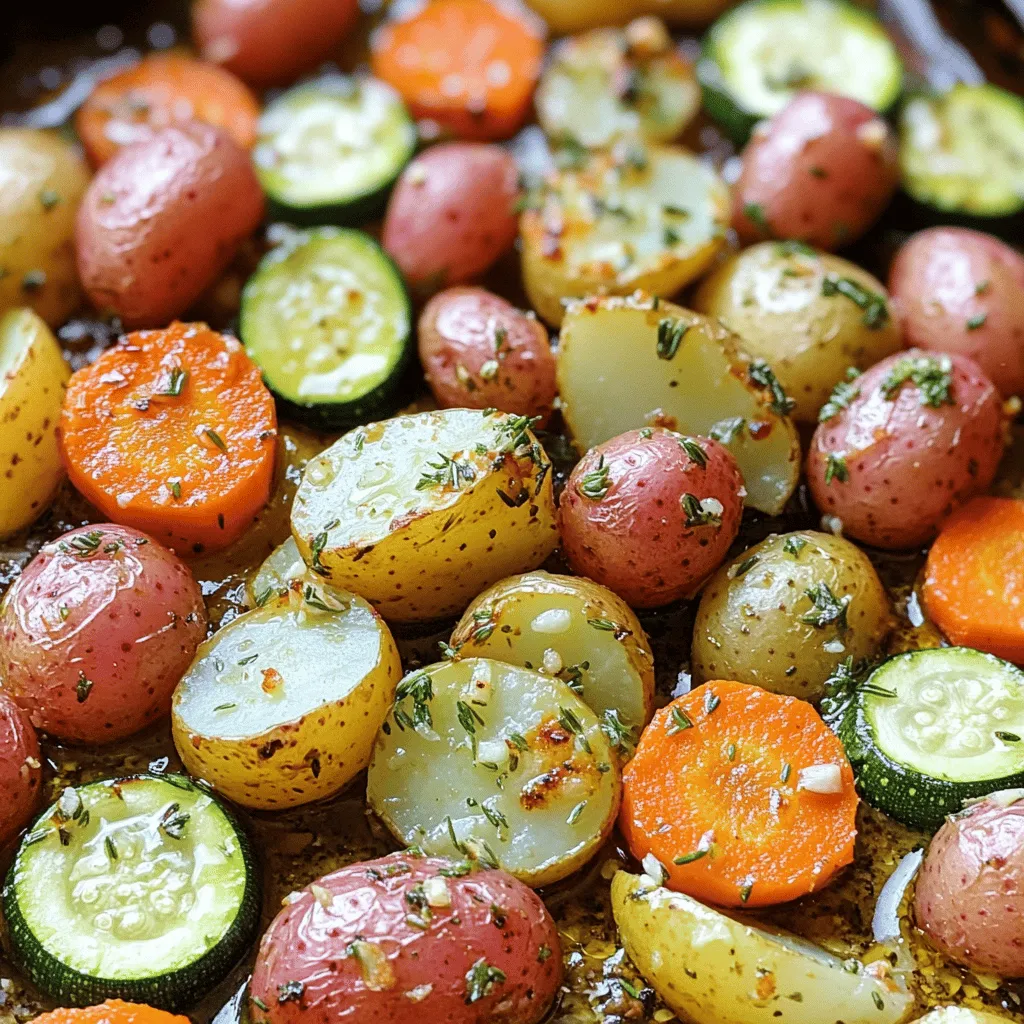
Garlic Herb Roasted Potatoes, Carrots, and Zucchini Dish
If you’re looking for a simple and tasty side dish, then you’ve found it! This Garlic Herb Roasted Potatoes, Carrots, and Zucchini recipe is easy
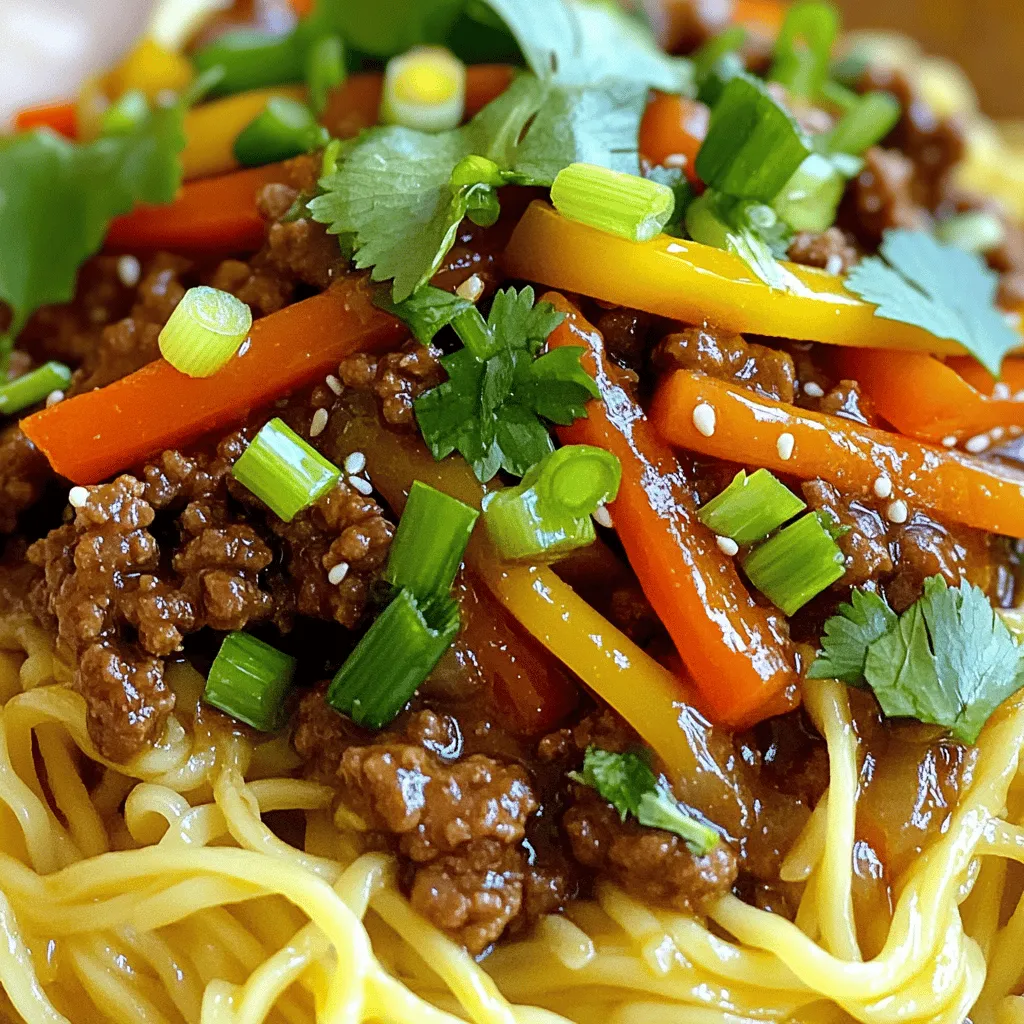
Mongolian Ground Beef Noodles Flavorful and Simple Dish
Craving a warm, savory meal that’s easy to make? Look no further than Mongolian Ground Beef Noodles! This flavorful dish combines tender beef with soft

Big Mac Style Smash Burger Tacos Flavorful Bite Delight
Get ready for a flavor explosion with Big Mac Style Smash Burger Tacos! Imagine crispy, juicy patties bursting with yummy toppings, all wrapped in warm

Mediterranean Ground Beef Stir Fry Tasty and Easy Meal
Looking for a quick and tasty dinner idea? Mediterranean Ground Beef Stir Fry is your answer! This meal is not only simple to make but
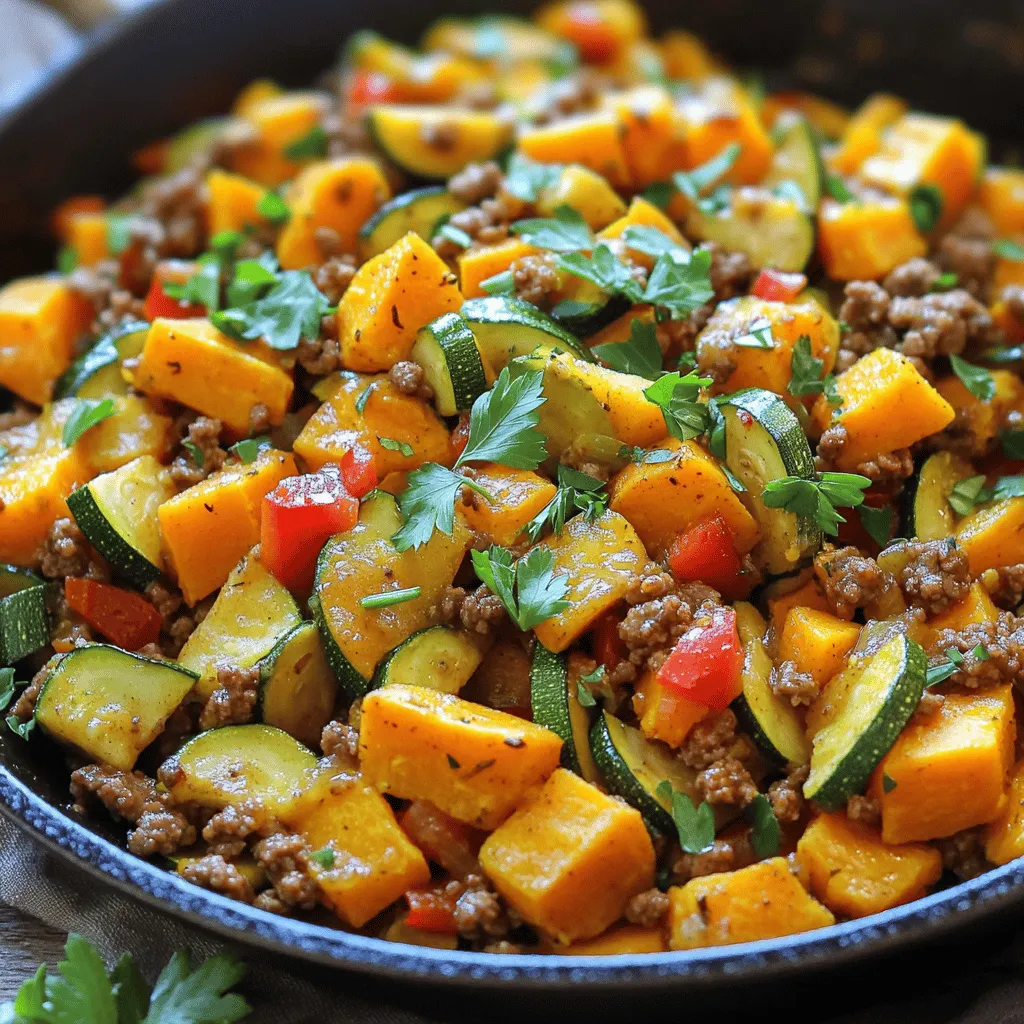
Ground Beef Zucchini Sweet Potato Skillet Recipe
Looking for a tasty, quick meal that packs a nutritious punch? This Ground Beef Zucchini Sweet Potato Skillet recipe is your answer! You’ll love how
. Start by gathering your ingredients. You will need orzo pasta, olive oil, onion, garlic, bell peppers, celery, Cajun seasoning, smoked paprika, diced tomatoes, vegetable broth, okra, cooked chicken, salt, pepper, and parsley. This dish is quick to make, taking about 30 minutes total. 1. Heat two tablespoons of olive oil in a large skillet over medium heat. 2. Add one diced onion. Sauté for 3 to 4 minutes until it turns clear. 3. Stir in three minced garlic cloves and cook for one minute. You want it fragrant. 4. Next, add one diced red bell pepper, one diced green bell pepper, and one stalk of diced celery. Cook for five minutes until they soften. 5. Sprinkle in one teaspoon of Cajun seasoning and half a teaspoon of smoked paprika. Mix well and let it cook for one minute. 6. Now add one cup of orzo. Stir it with the veggies to toast for about two minutes. 7. Pour in one can of diced tomatoes with their juice, plus three cups of vegetable broth. Mix everything well. 8. Bring the mixture to a gentle simmer. Cover the skillet and let it cook for 10 to 12 minutes, stirring now and then until the orzo is soft. 9. Add one cup of sliced okra and one and a half cups of shredded chicken. Mix well and heat for another five minutes. 10. Taste and add salt and pepper as you like. 11. Remove from the heat, sprinkle fresh parsley on top, and serve warm. If you use a gas stove, keep the heat medium. This way, the orzo cooks evenly. For electric stoves, the heat may vary. You might need to increase the cooking time slightly. Keep an eye on the orzo to avoid burning. If you're using a slow cooker, transfer the sautéed veggies and orzo mixture, then add the liquids. Cook on low for about 2 hours. For the full recipe and more details, refer to the recipe above. Enjoy your cooking! To boost the flavor of your One Pan Cajun Dirty Orzo, start with fresh herbs. Fresh parsley adds brightness. You can also use thyme or basil for extra depth. When you sauté the onion, let it cook until golden. This caramelization brings out sweet notes. Stir in the garlic, too, but don’t let it burn. Cooking the garlic just enough makes it fragrant without bitterness. Adding a splash of lemon juice before serving brightens the dish. It cuts through the richness and adds zing. If you like a kick, toss in some cayenne pepper or hot sauce. You can adjust the heat to your taste. This dish loves bold flavors, so don’t hold back. One mistake is overcooking the orzo. It should be al dente, or firm to the bite. Monitor the cooking time closely. Stir the mixture occasionally to prevent sticking. Another issue is not seasoning enough. Taste as you cook, and adjust the salt and pepper. The canned tomatoes can be salty, so be careful with extra salt. Don’t skip the sauté step with the spices. This helps release their oils and flavors. If you add them too late, you miss out on that great taste. Lastly, avoid crowding the pan. Cook in batches if needed to keep the heat consistent. For a beautiful presentation, serve the orzo in shallow bowls. This allows the colorful veggies to shine. Garnish each bowl with fresh parsley. You can also add a sprinkle of paprika for color. A wedge of lemon on the side looks nice and adds flavor. If you want to impress, pair the dish with a simple green salad. A light vinaigrette complements the spiced flavors. For added texture, consider serving with crusty bread. This makes for a lovely meal that looks as good as it tastes. For the complete recipe, check the Full Recipe section. {{image_2}} You can change the protein in this dish to fit your taste. For a meaty meal, try shrimp or sausage. Both pair well with Cajun spices. To keep it light, use turkey or lean chicken. If you prefer seafood, add diced fish for a fresh twist. You can easily make this dish meat-free. Swap the chicken for chickpeas or lentils. They add protein and texture without meat. Use vegetable broth instead of chicken broth. For a creamier base, add coconut milk. This gives the dish a nice richness. If you love heat, boost the spice level. Add more Cajun seasoning or a pinch of cayenne pepper. Fresh jalapeños can also add a nice kick. For a smoky flavor, try adding chipotle peppers. Adjust the spice to match your taste and enjoy the heat! To keep your One Pan Cajun Dirty Orzo fresh, use an airtight container. Let it cool first. Then, transfer the orzo into the container. This helps lock in moisture and flavor. Store it in the fridge for best results. When it's time to eat again, reheating is easy. You can use a microwave or stovetop. For the microwave, place the orzo in a bowl and cover it. Heat it in short bursts, stirring in between. On the stovetop, add a little water and warm it on low heat. Stir often to prevent sticking. Your leftovers will stay fresh for about 3 to 4 days in the fridge. If you want to keep it longer, consider freezing it. In the freezer, it can last for up to 3 months. Just remember to use freezer-safe containers. When you're ready to eat, thaw it overnight in the fridge before reheating. For the full recipe, check the link above. Yes, you can use other pasta shapes. If you want a fun twist, try penne or fusilli. Each type will change the texture a bit, but they will still taste great. Just make sure to adjust the cooking time. Orzo cooks quickly, so larger pasta may need more time in the pan. If you don’t have Cajun seasoning, you can mix your own. Use paprika, garlic powder, onion powder, and cayenne pepper. You can also use Italian seasoning for a milder flavor. Adjust the spices based on how spicy you like your food. To make this dish gluten-free, swap orzo for gluten-free pasta. Look for brands that use rice or corn. Always check labels to ensure the product is gluten-free. The rest of the ingredients are usually safe, but double-check any added sauces or broths for hidden gluten. For the full recipe, check the details above. In this article, we covered key ingredients, preparation steps, and helpful tips for cooking. We looked at how to choose fresh produce and adjust cooking times. I shared advice on enhancing flavor and avoiding common mistakes. We also explored variations to suit different diets and preferences. Lastly, I provided storage tips to keep your meal fresh. Cooking can be fun and easy with the right knowledge. Apply these tips, and enjoy your delicious creation!](https://toastedrecipes.com/wp-content/uploads/2025/06/dfc295f4-2e67-4e2c-8656-f337c1fcfd1a.webp)
One Pan Cajun Dirty Orzo Flavorful Weeknight Meal
Looking for a quick and tasty dinner? Try my One Pan Cajun Dirty Orzo. This dish is packed with flavor and cooks in just one

Big Mac Casserole Easy and Tasty Family Meal
Looking for a fun family meal? Try my Big Mac Casserole! It’s an easy way to enjoy all the flavors of a classic Big Mac
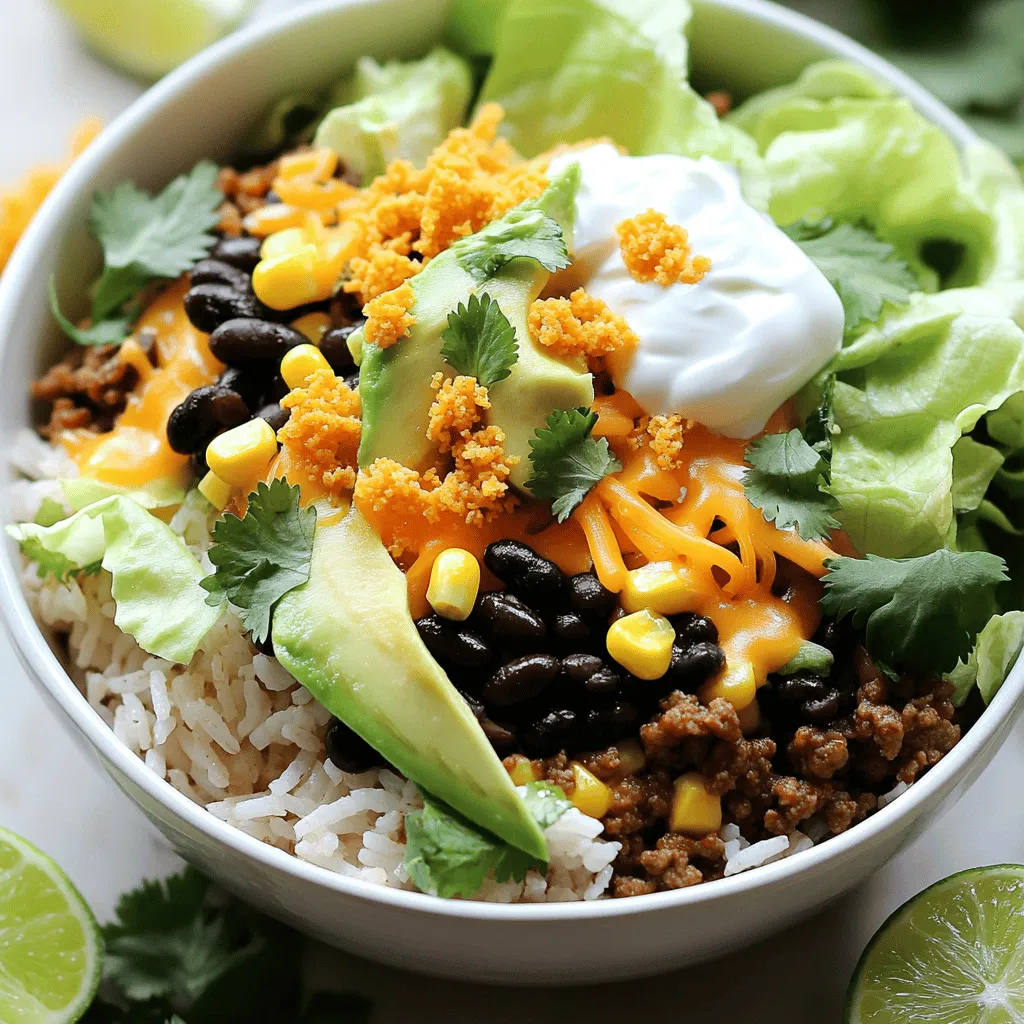
Savory Taco Rice Bowl with Doritos Delightful Meal
Are you ready to spice up your meal routine? The Savory Taco Rice Bowl with Doritos is your answer! This easy, fun dish is packed