Desserts
![To make the best zucchini chocolate chip muffins, you need a few key items. Here’s a quick list: - 1 cup grated zucchini (squeezed of excess moisture) - 1 cup all-purpose flour - 1/2 cup whole wheat flour - 1/2 cup granulated sugar - 1/4 cup brown sugar These ingredients create a nice, moist base for the muffins. Grated zucchini adds moisture and nutrition. The blend of all-purpose and whole wheat flour gives a lovely texture. The sugars provide sweetness and help with browning. Next, we add some more ingredients to enhance flavor and moisture: - 1/2 cup unsweetened applesauce - 2 large eggs - 1 teaspoon vanilla extract - 1 teaspoon baking soda - 1/2 teaspoon baking powder - 1/2 teaspoon ground cinnamon - 1/4 teaspoon salt Applesauce is a great way to keep the muffins moist without added fat. Eggs help bind everything together. The baking soda and baking powder give the muffins a nice rise. Cinnamon adds warmth, and salt balances the sweetness. For a little extra fun, consider these optional ingredients: - 1 cup semi-sweet chocolate chips - 1/4 cup chopped walnuts or pecans Chocolate chips make these muffins a treat! Nuts add crunch and nuttiness. You can mix and match depending on your taste. Check out the Full Recipe for all the details you need to start baking! First, preheat your oven to 350°F (175°C). This step is key for even baking. While it heats, prepare your muffin tin. You can line it with paper liners or spray it with non-stick spray. This keeps the muffins from sticking and makes cleanup easy. Next, grab a large mixing bowl. Combine 1 cup of grated zucchini, 1/2 cup of unsweetened applesauce, 2 large eggs, and 1 teaspoon of vanilla extract. Whisk these ingredients together until they blend well. This mixture gives the muffins moisture and flavor. In a separate bowl, mix the dry ingredients. Use 1 cup of all-purpose flour, 1/2 cup of whole wheat flour, 1/2 cup of granulated sugar, and 1/4 cup of brown sugar. Add 1 teaspoon of baking soda, 1/2 teaspoon of baking powder, 1/2 teaspoon of ground cinnamon, and 1/4 teaspoon of salt. Stir these together until fully combined. This blend provides structure and sweetness. Now, gently add the dry mixture to the wet ingredients. Use a spatula to fold them together, being careful not to overmix. Overmixing can make the muffins tough. Once combined, fold in 1 cup of semi-sweet chocolate chips. If you like nuts, you can add 1/4 cup of chopped walnuts or pecans at this stage. Using a scoop or spoon, fill each muffin cup about two-thirds full. This allows room for the muffins to rise. Bake them in the preheated oven for 18-20 minutes. To check for doneness, insert a toothpick into the center of a muffin. If it comes out clean, they are ready. After baking, let the muffins cool in the tin for about 5 minutes. Then, transfer them to a wire rack to cool completely. For serving, enjoy them warm. You can dust them with powdered sugar or add a dollop of whipped cream for a special touch. For the full recipe, you can refer back to the earlier section! To get the best muffin texture, avoid overmixing. When you mix too much, the muffins can turn out dense. Mix just until the dry ingredients are wet. This keeps them light and fluffy. Moisture is key in baking. For these muffins, the grated zucchini adds moisture. Make sure to squeeze out excess moisture before mixing. This helps keep the batter from being too wet. You can adjust the sweetness in your muffins. If you like them sweeter, add a bit more sugar. You can also use honey or maple syrup for a fun twist. Adding spices can really change the flavor. Try cinnamon, nutmeg, or even a dash of cardamom. Flavor extracts, like almond or orange, can add a unique touch too. These muffins are perfect on their own. You can also enjoy them with a smear of butter or cream cheese. They taste great warm with a cup of coffee or tea. Want something special? Serve them with whipped cream on top or a scoop of ice cream. This makes a tasty treat for breakfast or dessert. For the full recipe, check out the [Full Recipe] section. {{image_2}} You can make Zucchini Chocolate Chip Muffins even healthier. Try replacing sugar with natural sweeteners like honey or maple syrup. These options add sweetness without refined sugar. You can also substitute applesauce with plain yogurt. This swap adds creaminess and protein to your muffins. Want to mix things up? Add different types of chocolate chips! Dark chocolate or white chocolate can change the taste. You can also incorporate fruits like blueberries or spices like nutmeg. These additions bring new flavors and keep things exciting. If you need gluten-free muffins, use almond flour or gluten-free flour blends. These options work well and keep the muffins tasty. For a vegan version, replace the eggs with flaxseed meal mixed with water. You can also use a plant-based yogurt instead of applesauce. These changes make the muffins fit for many diets. Try these variations to create your perfect Zucchini Chocolate Chip Muffins. For the full details, check out the Full Recipe. To keep your zucchini chocolate chip muffins fresh, store them in an airtight container. If you plan to eat them within a couple of days, room temperature works well. Just place them on the counter, away from direct sunlight. For longer storage, the fridge is a better choice. It helps prevent mold and keeps them moist. Make sure to wrap them well before putting them in the fridge. Freezing is a great way to save muffins for later. First, let them cool completely. Then, wrap each muffin tightly in plastic wrap. Place the wrapped muffins in a freezer-safe bag or container. Remember to label it with the date. To thaw, simply take one out and let it sit at room temperature for a few hours. You can also heat them in the microwave for a quick treat. When stored properly, zucchini chocolate chip muffins can last about 3 days at room temperature. In the fridge, they remain fresh for about a week. If you freeze them, they can last up to 3 months. Just remember to check for any signs of freezer burn before enjoying a frozen muffin. These tips ensure you enjoy your muffins at their best! Yes, you can use frozen zucchini. Here are some pros and cons: - Pros: - Frozen zucchini is ready to use. - It saves prep time. - Cons: - Frozen zucchini has more water content. - It can affect the muffin's texture. If you use frozen zucchini, squeeze out extra moisture before adding it to the mix. If you need an egg substitute, you have several options: - Unsweetened applesauce: Use 1/4 cup for each egg. - Mashed banana: Use 1/4 cup for each egg. - Flaxseed meal: Mix 1 tablespoon of flaxseed meal with 2.5 tablespoons of water. Let it sit for 5 minutes. These alternatives work well and keep the muffins moist. To check if your muffins are done, use a toothpick. - Insert the toothpick into the center of a muffin. - If it comes out clean or with a few crumbs, the muffins are ready. This simple test helps you avoid underbaking or overbaking your tasty treats. Zucchini chocolate chip muffins are a delightful treat. We covered essential ingredients like zucchini, flour, and sugars. You learned how to mix, bake, and cool your muffins to perfection. Remember to avoid overmixing for the best texture and to explore flavor variations. Storing your muffins well keeps them fresh longer. Enjoy these muffins as a tasty snack or breakfast option. With a little creativity, you can make these muffins your own. Happy baking!](https://toastedrecipes.com/wp-content/uploads/2025/07/0e8163c1-ae80-4d00-ac6e-c9a331d8ea8d.webp)
Zucchini Chocolate Chip Muffins Fresh and Tasty Snack
Looking for a tasty snack that’s both delicious and a bit healthy? Zucchini chocolate chip muffins are the perfect treat! These muffins blend fresh zucchini
![To make the Healthy Black Bean Chocolate Cake, gather these ingredients: - 1 can (15 oz) black beans, rinsed and drained - 3 large eggs - 1/2 cup unsweetened cocoa powder - 1/4 cup honey or maple syrup - 1/4 cup coconut oil, melted - 1 teaspoon vanilla extract - 1/2 teaspoon baking powder - 1/2 teaspoon baking soda - Pinch of salt - Optional: 1/2 cup dark chocolate chips Black beans are the star of this recipe. They add fiber and protein, making the cake rich and filling. They also help keep the cake moist without extra fat. Cocoa powder gives a deep chocolate flavor while being low in sugar. Eggs provide structure and richness, keeping the cake fluffy. Using honey or maple syrup adds natural sweetness. Coconut oil adds a hint of flavor and healthy fats. Baking powder and baking soda help the cake rise, giving it a nice texture. The pinch of salt balances the sweetness and enhances the chocolate taste. For a fun twist, you can add dark chocolate chips. They melt into gooey pockets of chocolate goodness, making each bite even more delightful. This combination of ingredients makes the Healthy Black Bean Chocolate Cake not just tasty but also a smart choice for dessert. You can enjoy a slice without guilt, knowing it’s made with good-for-you foods. For the complete recipe, check out the [Full Recipe]. Preparation Steps To make this rich and moist black bean chocolate cake, follow these steps closely. 1. Prepare Your Oven and Pan Preheat your oven to 350°F (175°C). Grease an 8-inch round cake pan or line it with parchment paper. 2. Mix the Batter In a food processor, add the rinsed black beans, eggs, cocoa powder, honey or maple syrup, melted coconut oil, vanilla extract, baking powder, baking soda, and salt. Blend the mixture until smooth. Make sure to scrape down the sides as needed. This should take about 1-2 minutes. 3. Add Chocolate Chips If you want, fold in 1/2 cup of dark chocolate chips gently into the batter. This step adds extra chocolate flavor and texture. 4. Pour and Smooth Pour the batter into the prepared cake pan. Use a spatula to spread it evenly. 5. Bake the Cake Place the cake in the preheated oven. Bake for 25-30 minutes. Check if it’s done by inserting a toothpick in the center. If it comes out clean, your cake is ready. 6. Cool the Cake Let the cake cool in the pan for about 10 minutes. After that, transfer it to a wire rack to cool completely. This cooling step is key to avoid sogginess. 7. Serve and Enjoy Once cooled, slice the cake as you wish. For a fun twist, dust it with cocoa powder or serve it with fresh berries. For a full recipe, you can check out the detailed instructions. Enjoy your baking! To get a rich and moist texture for your cake, use fresh black beans. Rinse and drain them well. This helps remove extra starch. Blend the beans until smooth. This gives your cake that perfect texture. Adjusting baking times is key. If you live at a higher altitude, your cake may need more time. Check it a few minutes earlier if you are at sea level. Each oven is different, so always do a toothpick test. Insert a toothpick in the center to check for doneness. If it comes out clean, your cake is ready. Storing leftover cake is simple. Let it cool completely first. Then wrap it in plastic wrap or foil. This keeps it fresh for up to three days. You can also store it in an airtight container. For longer storage, consider freezing it. Slice your cake and wrap each piece. Use freezer-safe bags or containers. It can last up to three months in the freezer. When you are ready, just thaw it overnight in the fridge. Enjoy your Healthy Black Bean Chocolate Cake any time! For the full recipe, check out the detailed instructions above. {{image_2}} You can boost your cake with fun flavors. Try adding a teaspoon of cinnamon for warmth. A dash of espresso can deepen the chocolate taste. Both spices blend well with the rich cocoa. For sweeteners, honey works great, but maple syrup adds a nice twist. You can also use agave nectar for a lighter touch. Each option gives your cake a unique flair. Want a gluten-free cake? Just swap regular cocoa powder with a gluten-free brand. This change keeps the taste while meeting dietary needs. If you prefer a vegan version, replace the eggs with flaxseed meal. Mix one tablespoon of flaxseed with three tablespoons of water. Let it sit for a few minutes to thicken. This simple swap makes your cake plant-based while still delicious. For more details, check the Full Recipe. The Healthy Black Bean Chocolate Cake packs a punch in nutrition. Each slice has protein, fiber, and healthy fats. This cake is not just a treat; it’s a step toward better health. Black beans are the star here. They provide protein and fiber, which help you feel full longer. Fiber also aids digestion, making this dessert a smarter choice. Plus, black beans add moisture without extra fat. This keeps the cake rich and fudgy. When you compare this cake to a traditional chocolate cake, the difference is clear. Regular cakes often have high sugar and low fiber. They can spike your blood sugar. In contrast, the Healthy Black Bean Chocolate Cake uses natural sweeteners like honey or maple syrup. This means less sugar and more nutrients. Eating healthy doesn’t mean giving up dessert. You can enjoy the rich flavor of chocolate while fueling your body. If you want to explore more, check the Full Recipe for all the details! Can I taste the black beans in the cake? No, you cannot taste the black beans at all. They blend smoothly and add moisture. The cocoa powder and other flavors take center stage. You get rich chocolate taste without any bean flavor. How can I make this cake ahead of time? You can bake the cake a day in advance. After it cools, wrap it tightly in plastic wrap. Store it at room temperature or in the fridge. This helps the flavors meld and makes it even tastier. What are some recommended toppings or frostings? You can enjoy this cake plain, but toppings add fun. Try whipped cream, fresh berries, or a sprinkle of cocoa powder. For a richer dessert, use a light chocolate ganache or a creamy frosting. Substitutions for eggs in the recipe If you need a substitute for eggs, try using flaxseed meal. Mix 1 tablespoon of flaxseed meal with 2.5 tablespoons of water. Let it sit for five minutes to thicken. This will work great in the cake. Tips for adjusting sweetness levels If you prefer a less sweet cake, reduce the honey or maple syrup. Start with 2 tablespoons instead of 1/4 cup. Taste the batter before baking. You can always add more if needed. Is this cake suitable for children? Yes, this cake is very suitable for kids. It is rich, moist, and full of chocolate flavor. Plus, it sneaks in healthy black beans. Your children will love this treat without knowing it’s good for them. In this article, you learned how to make a Healthy Black Bean Chocolate Cake. We covered the key ingredients and their benefits. I shared step-by-step instructions to ensure your cake turns out great. You also found useful tips for baking and storing the cake. Plus, we explored fun variations and answered common questions. Remember, this cake is a tasty, healthy option that fits many diets. Enjoy your baking journey, and share this treat with family and friends!](https://toastedrecipes.com/wp-content/uploads/2025/07/91c7c3fb-2fb2-4fb2-96eb-a6d91ec37b10.webp)
Healthy Black Bean Chocolate Cake Rich and Moist Dessert
Looking for a dessert that’s both delicious and healthy? You’re in the right place! This Healthy Black Bean Chocolate Cake is rich, moist, and packed
![To make a delicious blueberry zucchini bread with lemon glaze, gather these ingredients: - 1 cup grated zucchini (squeezed to remove excess moisture) - 1 cup fresh blueberries (or frozen, thawed) - 1 ½ cups all-purpose flour - 1 teaspoon baking powder - 1 teaspoon baking soda - ½ teaspoon salt - 1 teaspoon ground cinnamon - ½ cup granulated sugar - ½ cup brown sugar, packed - 2 large eggs - ½ cup vegetable oil - 1 teaspoon vanilla extract - Zest of 1 lemon - 1 tablespoon lemon juice For the Lemon Glaze: - 1 cup powdered sugar - 2 tablespoons lemon juice - Zest of 1 lemon Using fresh ingredients is key. The zucchini keeps the bread moist while the blueberries add a burst of flavor. The lemon glaze gives a bright finish. For the complete recipe, check the [Full Recipe]. This mix of flavors makes each bite a treat. First, you need to preheat your oven to 350°F (175°C). This temperature is perfect for baking your bread. Next, grease a 9x5-inch loaf pan with butter or oil. You can also line it with parchment paper. This makes it easy to take the bread out later. In a medium bowl, combine 1 ½ cups of all-purpose flour, 1 teaspoon of baking powder, and 1 teaspoon of baking soda. Add ½ teaspoon of salt and 1 teaspoon of ground cinnamon to the mix. Stir it well to blend all the dry ingredients. In a large bowl, whisk together ½ cup of granulated sugar and ½ cup of brown sugar. Crack in 2 large eggs and add ½ cup of vegetable oil. Pour in 1 teaspoon of vanilla extract and the juice from 1 tablespoon of lemon. Mix until everything is combined and smooth. Now, slowly add the dry ingredients to the wet ingredients. Stir gently until just combined. Don’t overmix! Next, fold in 1 cup of grated zucchini and 1 cup of fresh blueberries. Make sure they are evenly mixed into the batter. Then, pour the batter into your prepared loaf pan. Smooth the top with a spatula. Place the loaf pan in your preheated oven. Bake for 55 to 65 minutes. To check if it's done, insert a toothpick into the center. It should come out clean when the bread is ready. After baking, let the bread cool in the pan for about 10 minutes. Then, transfer it to a wire rack to cool completely. For the full recipe, check the details above. To make a great blueberry zucchini bread, start with the zucchini. Zucchini holds a lot of water. To avoid a soggy loaf, grate the zucchini and then squeeze it in a clean towel. This step removes excess moisture. Next, when mixing your batter, be gentle. Overmixing can lead to a tough texture. Mix just until you see no dry flour. This keeps the loaf tender and airy. To boost flavor, consider adding spices. A pinch of nutmeg or ginger can make a big difference. You can also use vanilla extract or almond extract for a twist. When it comes to blueberries, fresh is best. However, frozen blueberries work too. If you use frozen blueberries, thaw them first. Pat them dry to prevent extra moisture in the batter. For serving, slice the bread and place it on a nice plate. You can layer it with more blueberries for a vibrant look. For garnish, add thin lemon slices on top and sprinkle with fresh blueberries. This adds color and makes the dish more appealing. A drizzle of lemon glaze on top will enhance both flavor and beauty. For the complete recipe, check out the [Full Recipe]. {{image_2}} You can swap regular flour for gluten-free flour. This works well with blends like almond or coconut flour. Just make sure to adjust the liquid. For dairy-free needs, use plant-based milk and substitute eggs with flax seeds or applesauce. These changes keep the bread moist and tasty. Think about adding nuts or seeds for a crunch. Walnuts or sunflower seeds match nicely with blueberries. You can also play with spices like nutmeg or cardamom. These spices add warmth and depth to the bread's flavor. If you want to try different toppings, consider a cream cheese frosting. This adds a rich and creamy layer. You could also mix in orange zest for a citrus twist. This gives your lemon glaze a new and bright flavor. Check out the Full Recipe for more ideas. You can store blueberry zucchini bread at room temperature or in the fridge. If you plan to eat it within two days, keep it on the counter. Wrap it in plastic wrap or place it in an airtight container. This keeps it moist and fresh. If you want it to last longer, store it in the fridge. The cool air helps prevent mold and keeps the bread good for up to a week. To freeze your blueberry zucchini bread, wrap it tightly in plastic wrap. Then, place it in a freezer-safe bag or container. This prevents freezer burn and keeps it fresh. You can freeze the bread for up to three months. When you are ready to eat it, take it out and thaw it in the fridge overnight. For a quick thaw, you can leave it at room temperature for a few hours. This way, your bread stays tasty and moist, even after freezing! Yes, you can use frozen zucchini. The texture may change a bit. Frozen zucchini can be more watery, so it is important to drain it well. To defrost, place the zucchini in the fridge overnight or use the microwave on low. After thawing, squeeze it in a clean towel to remove extra moisture. This helps keep your bread from getting soggy. A few easy swaps can lighten this dish. You can reduce the sugar by half. Try using honey or maple syrup for natural sweetness. Switching to whole-grain flour adds fiber. You can also add more fruits or veggies. Try mixing in applesauce or extra zucchini. These changes keep your bread moist and tasty while boosting nutrition. If your bread doesn't rise, check your leavening agents. Old baking powder or soda can cause flat bread. Always use fresh ingredients. Also, measure your flour correctly. Too much flour makes bread dense. If your bread sinks in the middle, it may have been undercooked. Use a toothpick to check if it comes out clean. Follow the Full Recipe for best results. This blog post covered a delicious zucchini bread recipe and its many tips. We discussed the key ingredients you need, from zucchini to blueberries, and how to mix them correctly. You learned the steps for preparing and baking your bread, along with storage tips for freshness. Finally, we explored variations and ways to enhance flavor. Enjoy this simple recipe which can easily adapt to your taste. Cooking should be fun and rewarding!](https://toastedrecipes.com/wp-content/uploads/2025/07/9fff50cd-053a-4b72-a314-0448d98c7718.webp)
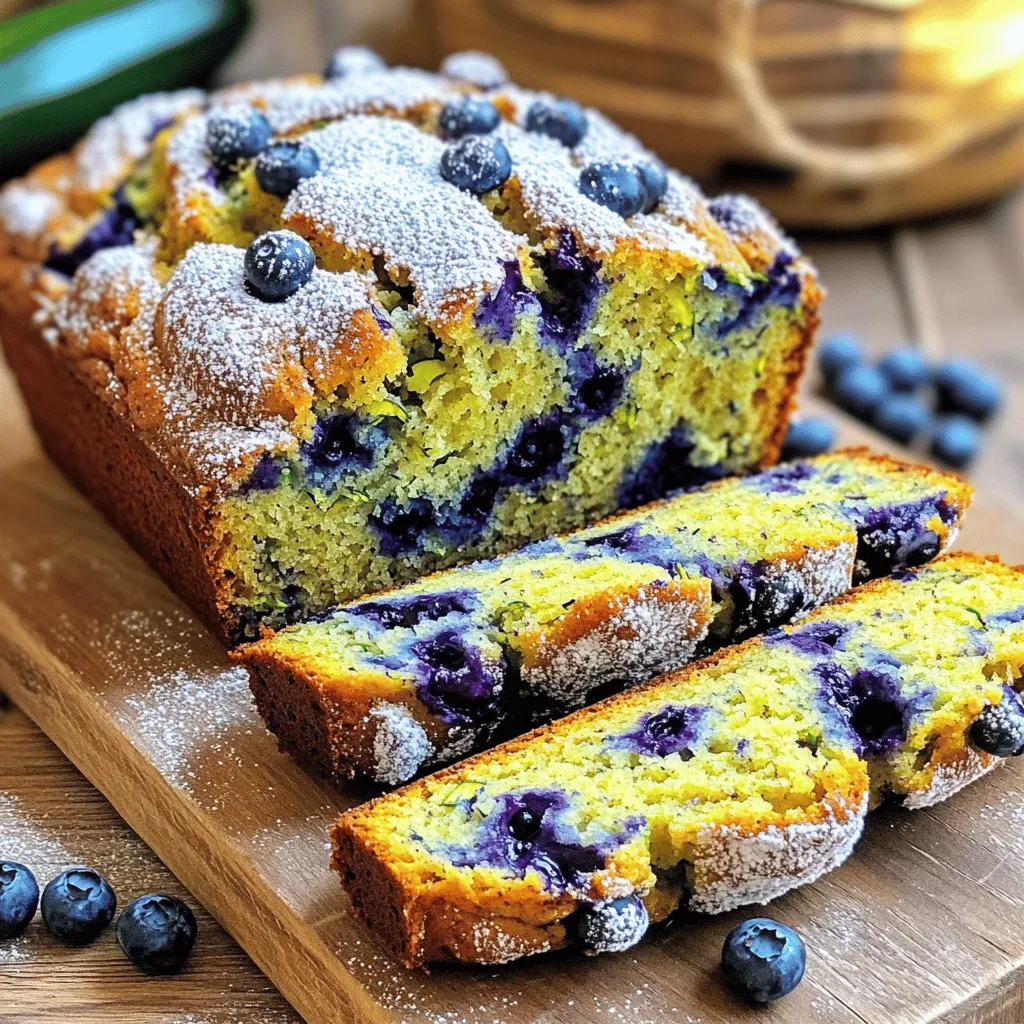
Blueberry Zucchini Bread with Lemon Glaze Delight
Are you ready to bake something that’s both delicious and healthy? Blueberry Zucchini Bread with Lemon Glaze is the perfect treat! With fresh blueberries, tender
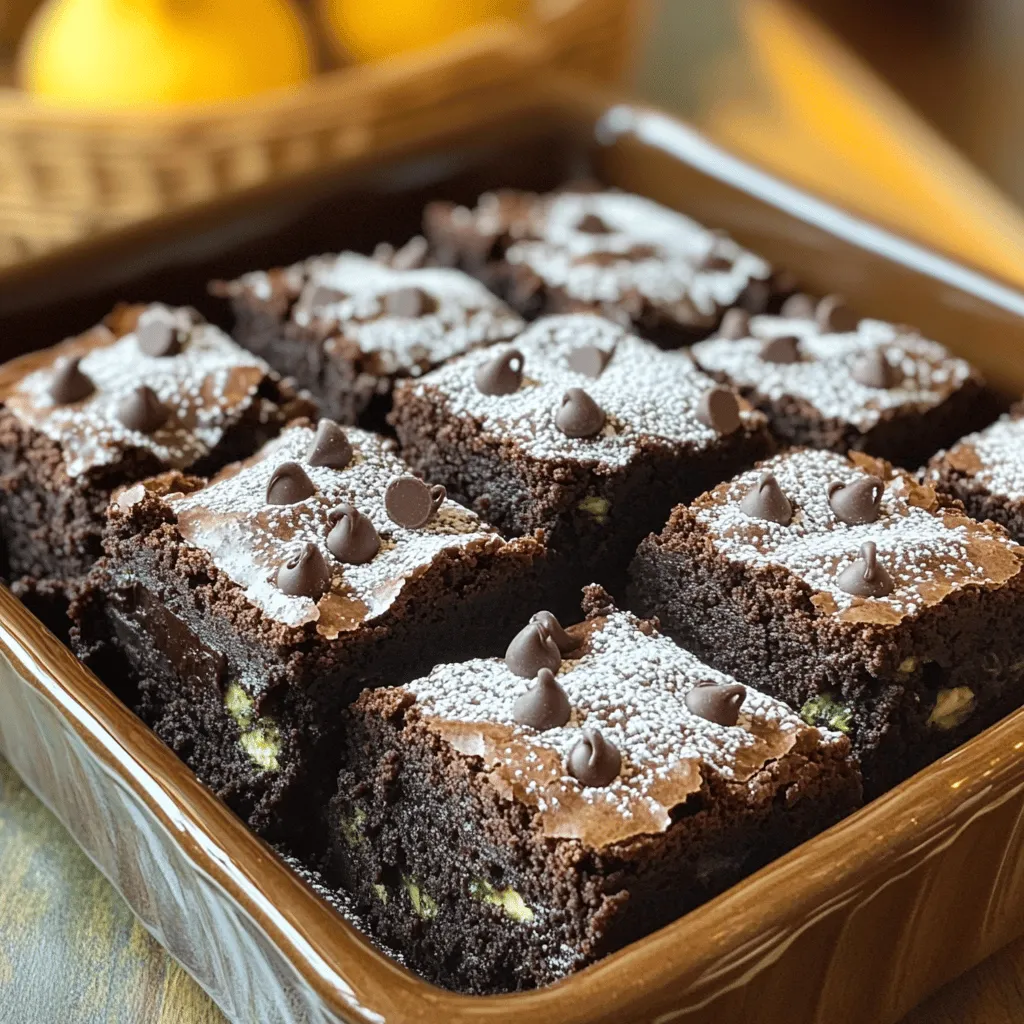
The Best Zucchini Brownies You’ll Ever Eat Delight
Looking for a tasty treat that sneaks in some veggies? You’ve found it! My zucchini brownies are the best you’ll ever eat. They’re rich, moist,

Neapolitan 5-Layer Birthday Cake Delightful Recipe
Ready to celebrate in style? This Neapolitan 5-Layer Birthday Cake is sure to wow your guests! With layers of rich chocolate, fresh strawberry, and creamy
![To make the perfect blueberry torte, gather these key ingredients: - 1 cup almond flour - 1 cup all-purpose flour - 1 teaspoon baking powder - 1/2 teaspoon baking soda - 1/4 teaspoon salt - 1/2 cup unsalted butter, softened - 1 cup granulated sugar - 3 large eggs - 1 teaspoon vanilla extract - 1/2 cup Greek yogurt - 2 cups fresh blueberries - Powdered sugar for dusting (optional) These simple ingredients come together to create a moist and flavorful torte. Almond flour adds a nutty taste and helps keep the torte tender, while fresh blueberries burst with flavor. If you have dietary needs, don’t worry! Here are some easy substitutes: - Replace almond flour with oat flour for a gluten-free option. - Use coconut oil instead of butter for a dairy-free torte. - Swap Greek yogurt with dairy-free yogurt or applesauce for a lighter touch. - If you need a vegan option, use flax eggs instead of regular eggs. These swaps maintain the integrity of the torte while catering to different diets. You can enjoy this treat without missing out. When measuring your ingredients, use the right tools for accuracy. Here are some tips: - Use a kitchen scale for precise measurements, especially for flours. - Always sift your flour to avoid lumps and ensure even mixing. - Choose fresh blueberries that are firm and plump for the best flavor. Quality ingredients make a big difference in taste. Opt for organic where possible, especially for fruits. This will elevate your blueberry torte. For the full recipe, check the earlier section. First, set your oven to 350°F (175°C). This is the perfect temperature to bake your torte. Next, take a 9-inch round cake pan. Grease the sides and bottom with butter. Then, line the bottom with parchment paper. This will help the torte come out easily later. Now, grab a medium bowl. Add 1 cup of almond flour, 1 cup of all-purpose flour, 1 teaspoon of baking powder, 1/2 teaspoon of baking soda, and 1/4 teaspoon of salt. Whisk these together. Make sure there are no lumps. This step is crucial for a smooth torte. In a large bowl, beat 1/2 cup of softened butter and 1 cup of granulated sugar. Use an electric mixer on medium speed. Mix until the mixture is light and fluffy. This takes about 3 to 5 minutes. Then, add 3 large eggs, one by one. Mix well after each egg. Now, add 1 teaspoon of vanilla extract and 1/2 cup of Greek yogurt. Mix until smooth and creamy. Next, it's time to combine the mixtures. Gradually add the dry ingredients to the wet mixture. Use a spatula to fold them gently. Be careful not to overmix. Now, gently fold in 2 cups of fresh blueberries. Save some blueberries for the top. This adds a nice look and taste. Pour the batter into the prepared cake pan. Spread it evenly with a spatula. Sprinkle the reserved blueberries on top. Place the pan in the oven and bake for 30 to 35 minutes. To check if it’s done, stick a toothpick in the center. If it comes out clean, it’s ready. After baking, let the torte cool in the pan for 10 minutes. Then, move it to a wire rack to cool completely. If you like, dust it with powdered sugar before serving. Enjoy your delicious treat! For the full recipe, check back to the earlier sections. To keep your blueberry torte moist, use fresh blueberries. Their juice helps add moisture as they bake. Another tip is to use Greek yogurt. It adds creaminess and keeps the texture soft. Mixing the wet and dry ingredients just until combined also helps. Overmixing can lead to a dry torte. Always preheat your oven to 350°F (175°C) before baking. This step ensures even cooking. Grease your cake pan well and use parchment paper. It helps the torte come out easily. Check the torte at 30 minutes. Insert a toothpick; if it comes out clean, it’s ready. If not, bake a few more minutes. For a lovely presentation, dust the cooled torte with powdered sugar. Top it with fresh blueberries for color. You can also add a dollop of whipped cream. Serve it on rustic plates to enhance the look. Pair it with vanilla ice cream for a tasty treat. For the full recipe, check out the details above. {{image_2}} To make a gluten-free blueberry torte, swap the all-purpose flour for a gluten-free blend. Almond flour works great because it adds moisture and flavor. Combine it with a good gluten-free mix. This way, everyone can enjoy a slice! You can add more zing with lemon zest. Just grate the outer peel of a lemon. Mix in about a tablespoon with the wet ingredients. This small change brightens the torte and brings out the blueberries. You could also try orange zest for a different twist. While powdered sugar is nice, you can dress your torte in other ways. Fresh whipped cream adds creaminess. You might try a scoop of vanilla ice cream for warmth. If you love crunch, sprinkle some sliced almonds or granola on top. Each option gives a new layer of taste! To keep your blueberry torte fresh, store it in an airtight container. This method prevents it from drying out. Place the torte at room temperature for up to three days. If you won't eat it in that time, refrigeration is best. Cover it well with plastic wrap before placing it in the fridge. This keeps moisture in and protects it from other odors. You can freeze blueberry torte for up to three months. First, let it cool completely. Then, wrap it tightly in plastic wrap. After that, place it in a heavy-duty freezer bag. Make sure to remove as much air as possible. When you want to enjoy it, thaw the torte in the fridge overnight. This keeps the texture nice and soft. To enjoy warm blueberry torte, you can reheat it easily. Preheat your oven to 300°F (150°C). Place slices on a baking sheet. Cover them lightly with foil. Heat for about 10-15 minutes, or until warm. You can also microwave a slice for about 20-30 seconds. Just be careful not to overheat it, or it may dry out. Enjoy your delicious treat again! You can use frozen blueberries. First, do not thaw them. Just add them straight into the batter. This keeps them from getting mushy. The torte will still taste great. Frozen berries also add a nice chill to the cake. Yes, you can switch the blueberries. Try raspberries, strawberries, or peaches. Each fruit will change the flavor. Adjust the sugar if you use tart fruits. Experimenting keeps baking fun! Serve slices warm or at room temp. Add whipped cream or ice cream on top. Fresh berries make a beautiful garnish. You can also dust it with powdered sugar for a sweet touch. You can keep it for about two days at room temp. Just cover it with plastic wrap or a cake dome. If you want it to last longer, store it in the fridge. It can stay fresh for up to a week. A slice has about 250 calories. It contains 10 grams of fat and 30 grams of carbs. It also provides some protein from the Greek yogurt and eggs. To get more details, check the [Full Recipe]. Making a blueberry torte is easy and fun. You learned about key ingredients like blueberries, flour, and sugar. We discussed tips for keeping your torte moist and tasty. You also saw ways to modify the recipe for different diets. In the end, this torte brings joy to anyone who tries it. Enjoy every slice, and share this delicious dessert with friends and family. Happy baking!](https://toastedrecipes.com/wp-content/uploads/2025/07/193efc74-dfed-486b-92d7-c6d104426faf.webp)
Blueberry Torte Recipe Simple and Delicious Treat
Are you ready for a sweet treat that’s both simple and delicious? My Blueberry Torte Recipe brings a burst of flavor with minimal fuss. With
Easy Blueberry Zucchini Bread Quick and Simple Recipe
Are you ready to try a delicious twist on classic zucchini bread? This Easy Blueberry Zucchini Bread recipe is quick, simple, and packed with flavor.

Irresistible Zucchini Cake Easy and Delicious Recipe
Are you ready to bake something incredible? This easy and delicious Irresistible Zucchini Cake will wow your taste buds. With soft, moist layers and creamy

Baked Neapolitan Doughnuts Delightful and Easy Recipe
Do you crave a sweet treat that’s both fun and easy to make? Baked Neapolitan doughnuts are your answer! With their rich chocolate, creamy vanilla,
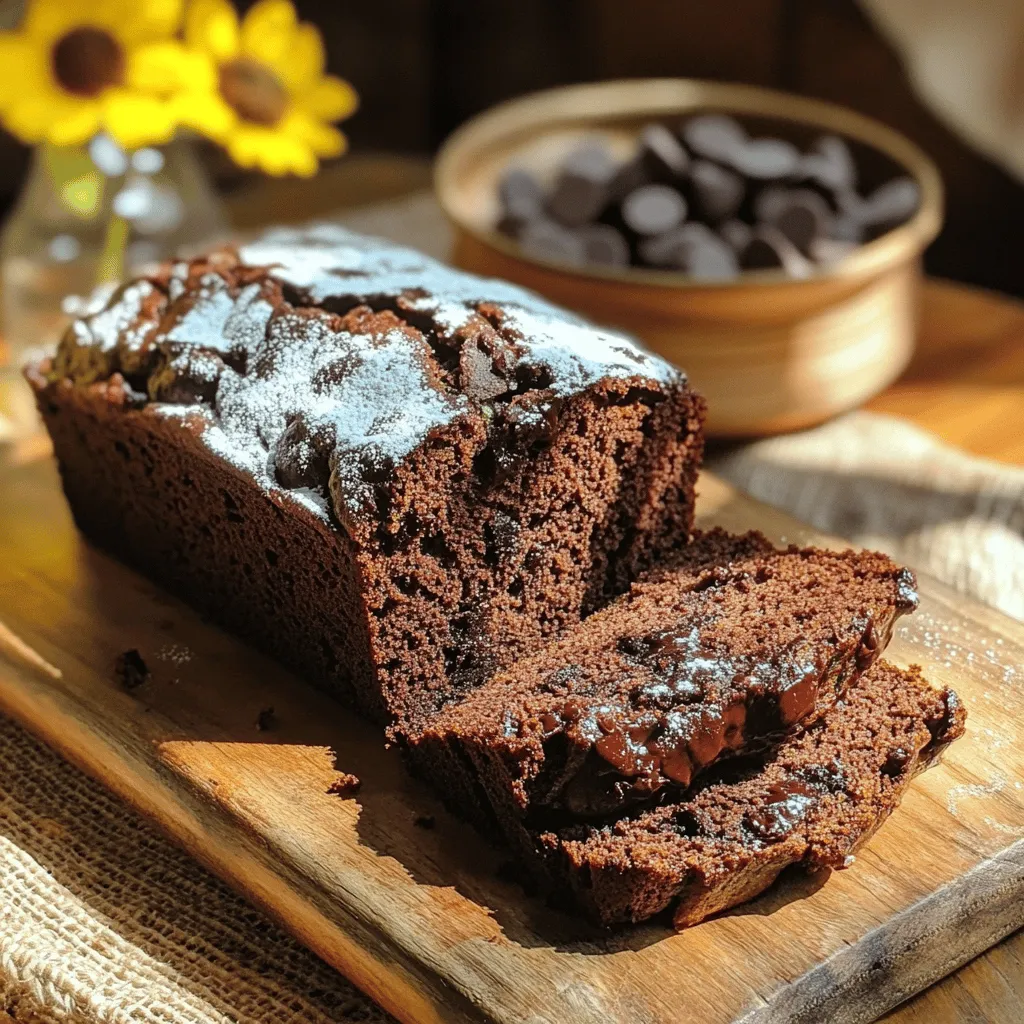
Gluten-Free Chocolate Zucchini Bread Delightful Treat
Are you looking for a delicious way to enjoy gluten-free baking? This Gluten-Free Chocolate Zucchini Bread is a true delight. It’s rich, moist, and packed