Desserts

- 1 cup unsalted butter, softened - 3/4 cup granulated sugar - 3/4 cup packed brown sugar - 2 large eggs - 2 teaspoons vanilla extract These ingredients form the base of your cookies. The butter gives them that rich taste. The sugars help create a soft and chewy texture. Eggs bind everything together while adding moisture. Vanilla adds a lovely flavor that enhances the sweetness. - 2 1/4 cups all-purpose flour - 1 teaspoon baking soda - 1/2 teaspoon salt Flour is key for structure. It creates the cookie's backbone. Baking soda helps the cookies rise and become fluffy. Salt balances the sweetness and makes the flavors pop. - 1 cup white chocolate chips - 1/2 cup chopped macadamia nuts (optional) - 1/4 teaspoon almond extract White chocolate chips bring creaminess and sweetness. Macadamia nuts add a nice crunch, but they are optional. Almond extract gives a unique twist that some may love. These extras let you customize your cookies to match your taste. For the complete step-by-step guide, check out the Full Recipe. - Preheat the oven to 350°F (175°C). - In a large bowl, cream 1 cup of softened butter with 3/4 cup of granulated sugar and 3/4 cup of brown sugar. Mix until the mixture is light and fluffy. This takes about 2 to 3 minutes. - Add in 2 large eggs, one at a time. Mix well after each egg. - Next, pour in 2 teaspoons of vanilla extract and 1/4 teaspoon of almond extract. This adds a nice twist to the flavor. - In another bowl, whisk together 2 1/4 cups of all-purpose flour, 1 teaspoon of baking soda, and 1/2 teaspoon of salt. - Slowly add the dry mix to the wet mixture. Stir until just combined; don’t overmix. - Gently fold in 1 cup of white chocolate chips and 1/2 cup of chopped macadamia nuts if you want more crunch. - Use a cookie scoop to portion the dough. Place rounded balls on prepared baking sheets, leaving about 2 inches between each one. - Bake in the preheated oven for 10 to 12 minutes. Look for lightly golden edges and slightly underbaked centers. This keeps them soft and chewy. - Once baked, let the cookies cool on the sheets for 5 minutes before moving them to a wire rack. For the full recipe, check the earlier section! To make these cookies soft and chewy, cream the butter and sugars well. Start with softened butter. Mix it with granulated sugar and brown sugar until it turns light and fluffy. This step adds air to the dough, helping the cookies rise. Underbaking the cookies is key. Pull them out of the oven when the edges are slightly golden but the middle looks soft. They will continue to cook on the baking sheet for a few minutes. This extra time will ensure a soft, chewy center. For a unique taste, add almond extract to your dough. Just a little goes a long way. Mix it in when you add the vanilla extract. The almond flavor pairs well with white chocolate. If you're looking to swap ingredients, consider using dark chocolate chips instead of white. You can also try adding chopped nuts or dried fruits for extra flavor and texture. Serve your cookies on a bright plate to make them pop. A few extra white chocolate chips on top can add a nice touch. Pair these cookies with a glass of cold milk or a cup of coffee for a tasty treat. For a decorative display, stack the cookies in a clear jar or on a tiered stand. This makes them look inviting and fun at any gathering. {{image_2}} You can easily change the flavor of your cookies. One fun swap is using semi-sweet chocolate chips instead of white chocolate. This will add a rich, deep taste. You can also mix in dried fruits like cranberries or raisins. Nuts, such as walnuts or pecans, add crunch and flavor. Try adding a pinch of cinnamon for warmth. Each choice makes the cookies unique. Get creative with how you serve your cookies. You can make cookie sandwiches by pairing two cookies with frosting or a scoop of ice cream in the middle. This makes a fun treat for kids or parties. Another option is to turn the dough into bars. Spread the dough in a baking pan and bake it. Once cooled, cut it into squares for easy serving. This style is perfect for potlucks or school events. If you have dietary needs, you can still enjoy these cookies. For gluten-free options, use a gluten-free all-purpose flour blend. This ensures you can savor every bite without worry. If you prefer a vegan version, swap the eggs for flaxseed meal or applesauce. Use coconut oil instead of butter. These changes keep the cookies soft and chewy while fitting your diet. You can find the Full Recipe to try out these variations and more! To keep your soft and chewy white chocolate chip cookies fresh, store them in an airtight container. This helps lock in moisture and keeps them soft. Place a piece of bread in the container. The cookies absorb moisture from the bread, staying chewy for longer. Keep the container at room temperature, away from direct sunlight. Your cookies can last about 5 to 7 days this way. If you want to save cookies for later, freezing is a great option. Let the cookies cool completely before freezing. Place them in a single layer on a baking sheet. Freeze them for about 1 hour. Once frozen, transfer the cookies to a freezer bag or airtight container. Label the bag with the date. They can last up to 3 months in the freezer. You can also freeze the cookie dough. Just scoop the dough balls onto a baking sheet, freeze, then store in a bag. When ready to bake, just add a few extra minutes to the baking time. To rewarm cookies for the best taste, preheat your oven to 350°F (175°C). Place the cookies on a baking sheet lined with parchment paper. Heat them for about 5 to 7 minutes. This warms them up and softens them nicely. You can also use a microwave. Heat each cookie for about 10-15 seconds. Just make sure not to overheat, or they will become hard. Enjoy your warm cookies with a glass of milk for a perfect treat! To make your cookies chewier, adjust baking time and ingredient ratios. Bake them for a shorter time. Aim for about 10 to 12 minutes. The edges should be lightly golden, while the centers look soft. Adding more brown sugar also helps. Brown sugar has moisture, which keeps cookies soft. Yes, you can substitute ingredients for dietary needs. For nut allergies, skip the macadamia nuts. You can use dark chocolate chips instead of white. If you need gluten-free cookies, swap all-purpose flour for gluten-free flour. Always check labels for hidden allergens. Look for signs to know when cookies are done. The edges will be golden brown, while the centers will look slightly underbaked. This helps keep them soft and chewy. You can also gently touch the top. If it springs back, they are ready. Yes, these cookies can be frozen. Freeze them after they cool completely. Place them in a single layer on a baking sheet first. Once frozen, transfer them to an airtight container. To thaw, leave them out for a few hours or heat them in the oven briefly. If your dough is too sticky, add a little more flour. Start with one tablespoon at a time. Mix well before adding more. You can also chill the dough for 30 minutes. Chilling firms it up, making it easier to handle. You can find the Full Recipe for these delightful cookies with all the steps and tips included. Enjoy baking! This post shared how to make delicious cookies from scratch. We covered essential and optional ingredients, plus step-by-step instructions. I shared tips for perfect texture and flavor. You can get creative with variations or dietary swaps. Don’t forget how to store and reheat your cookies for the best taste. Baking cookies is fun, and each batch can be a little different. Enjoy experimenting with flavors and make them your own!
Soft and Chewy White Chocolate Chip Cookies Delight
Craving something sweet? Soft and Chewy White Chocolate Chip Cookies Delight is here to help! In this post, I’ll share the secrets to creating cookies
- 1/2 cup (1 stick) unsalted butter - 1 cup granulated sugar - 2 large eggs - 1 teaspoon vanilla extract - 1/3 cup unsweetened cocoa powder - 1/2 cup all-purpose flour - 1/4 teaspoon salt - 1/4 teaspoon baking powder - 1/2 cup semi-sweet chocolate chips Using quality ingredients is key for a great brownie layer. Unsalted butter gives you control over salt. Granulated sugar helps create that nice chew. The eggs add moisture and binding. When measuring, use dry measuring cups for flour and cocoa. Fill them lightly, then level off with a knife. This helps avoid too much dry mix, which can make brownies dry. - 1/2 cup (1 stick) unsalted butter, softened - 1/2 cup brown sugar - 1/4 cup granulated sugar - 1 large egg - 1 teaspoon vanilla extract - 1 1/4 cups all-purpose flour - 1/2 teaspoon baking soda - 1/4 teaspoon salt - 1/2 cup semi-sweet chocolate chips Brown sugar adds moisture and a hint of caramel flavor. Granulated sugar helps with the cookie's spread. Softened butter is important too. It mixes better with sugars, giving the right texture. Room temperature butter blends easily. If it's too cold, it won't mix well. If you forgot to set it out, microwave it for 10 seconds. This will soften it just right for mixing. For the full recipe, check the detailed instructions for this delicious treat. First, gather your tools. You will need a medium saucepan, mixing bowls, a whisk, and a spatula. Also, grab a 9x9 inch baking pan. Grease it or line it with parchment paper for easy removal. This will help make your brookies come out nice and clean. To make the brownie layer, start by melting the unsalted butter in a saucepan over low heat. Be careful to stir it often, so it doesn’t burn. Once melted, take it off the heat. Next, mix in the granulated sugar, eggs, and vanilla extract. Stir until everything is well combined. Now, add in the cocoa powder, flour, salt, and baking powder. Mix this until just combined. Don’t overmix, or your brownies may become tough. Finally, fold in the semi-sweet chocolate chips. This brownie batter will be rich and fudgy. Pour it into your prepared pan and spread it evenly across the bottom. For the cookie layer, cream the softened butter with the brown and granulated sugars. Mix until it feels light and fluffy. Then, add the egg and vanilla extract. Beat these together until smooth. In a separate bowl, combine the flour, baking soda, and salt. Gradually add the dry mix to the wet mix. Stir until you just see no dry flour. Fold in the chocolate chips. The dough should be thick and slightly sticky, but not too wet. If it feels too dry, add a tiny splash of milk. Now it’s time to assemble! Take spoonfuls of the cookie dough and dollop them on top of the brownie layer. Spread it out gently, but leave some brownie visible. This is key for the swirl effect. You want to see both layers. Using a spatula, you can lightly swirl the cookie dough into the brownie layer. Be careful not to mix them completely. Bake your brookies in the preheated oven at 350°F (175°C) for 25-30 minutes. To check for doneness, stick a toothpick in the center. It should come out with a few moist crumbs, not wet batter. Once done, let them cool in the pan for about 10-15 minutes. This cooling time is important. It helps them set and makes cutting easier. After cooling, transfer them to a wire rack to cool completely. Now, you're ready to enjoy your delicious brookies! For the full recipe, check out the details above. To get that perfect fudgy texture, keep an eye on your oven's temperature. If it runs hot, your brookies can bake too fast. Use an oven thermometer to check the heat. I recommend baking at 350°F. This temperature lets the brownies stay soft inside while the top gets a nice crust. Adjusting baking time is key. Start checking your brookies at 25 minutes. Insert a toothpick into the center. If it comes out with a few moist crumbs, they are ready. Overbaking can ruin that gooey texture you want. Mix-ins can take your brookies to the next level. Try adding nuts, caramel bits, or even peanut butter swirls. These add fun textures and flavors. You can also use different types of chocolate chips. Dark chocolate gives a rich taste, while white chocolate adds sweetness. Quality matters too. Use high-quality chocolate for the best results. Good chocolate melts beautifully and enhances the flavor of your brookies. Always taste your chocolate before using it. Watch out for issues with batter ratios. If you add too much flour, your brookies will be dry. Always measure carefully. I use a kitchen scale for the best accuracy. Overbaking is another common mistake. If your brookies bake too long, they lose that chewy texture. Keep an eye on them and trust your toothpick test. Underbaking can be tricky too. If your brookies are too gooey, they may fall apart when cutting. Aim for that perfect balance. For the full recipe, check out The BEST Fudgy Chewy Brookies. {{image_2}} You can make brookies even more fun by adding nuts or caramel. Try walnuts for a nice crunch. Or, swirl in caramel for a sweet surprise. You can also experiment with different types of chocolate chips. Use dark chocolate for a rich taste. Or, try white chocolate for a creamy twist. If you need gluten-free options, swap all-purpose flour for a gluten-free blend. This will keep your brookies tasty and safe. For vegan substitutions, use plant-based butter and a flaxseed egg instead of regular eggs. Mix one tablespoon of flaxseed meal with three tablespoons of water for each egg. These changes help everyone enjoy brookies! Get creative with holiday-themed ingredients. Add peppermint extract for a wintery flavor. Or, mix in chopped dried fruit in the fall. This gives your brookies a seasonal touch. You can also incorporate flavors like pumpkin spice or gingerbread for festive vibes. These variations make your brookies special for any occasion. For more detailed instructions, check out the Full Recipe. To keep your brookies fresh, let them cool completely. This step is key. If you store warm brookies, moisture builds up. It makes them soggy. Place the brookies on a wire rack. This helps air flow around them, ensuring they cool down well. Once cooled, pack them in an airtight container. A glass or plastic container works best. This keeps them soft and chewy for days. Want to save some brookies for later? You can freeze them! First, cut them into squares. Wrap each piece in plastic wrap. Then, place the wrapped brookies in a freezer bag. Remove as much air as you can. This helps prevent freezer burn. To thaw, take them out and leave them at room temperature. For the best taste, enjoy them within three months. To enjoy brookies warm, preheat your oven to 350°F (175°C). Place a few brookies on a baking sheet. Heat for about 5-10 minutes. This warms them up without drying them out. You can also use a microwave. Heat for just 10-15 seconds. This keeps the center gooey. Enjoy your brookies warm, with a scoop of ice cream for an extra treat! To make brookies from scratch, follow these steps: 1. Preheat Your Oven: Set your oven to 350°F (175°C). Grease or line a 9x9 inch pan. 2. Make the Brownie Layer: Melt butter, mix in sugar, eggs, and vanilla. Add cocoa, flour, salt, and baking powder. Fold in chocolate chips. Pour into the pan. 3. Prepare the Cookie Layer: Cream butter and sugars, then mix in egg and vanilla. Combine flour, baking soda, and salt in a bowl. Mix dry ingredients into the wet. Fold in chocolate chips. 4. Assemble the Brookies: Spoon cookie dough over the brownie layer, leaving some brownie visible for swirls. 5. Bake: Bake for 25-30 minutes. Check doneness with a toothpick. 6. Cool and Serve: Let cool for 10-15 minutes, then cut into squares. If your brookies lack chewiness, a few factors might be at play: - Overmixing: Mixing too much can lead to tough brookies. Mix just until combined. - Baking Time: Overbaking dries them out. Check for moist crumbs. - Flour Type: Using too much all-purpose flour can affect chewiness. Measure accurately and use a scale if possible. Yes, you can use different flours, but it changes the texture: - Whole Wheat Flour: Adds a nutty flavor but can make them denser. - Almond Flour: Creates a moist brookie but may need extra binding. - Gluten-Free Flour: Use a blend designed for baking for best results. If you need egg substitutes, try these options: - Flaxseed Meal: Mix 1 tablespoon of flaxseed with 3 tablespoons of water for one egg. - Applesauce: Use 1/4 cup of unsweetened applesauce per egg. - Mashed Banana: Substitute 1/4 cup of mashed banana for each egg. To check if your brookies are done: - Toothpick Test: Insert a toothpick in the center. It should come out with a few moist crumbs. - Visual Cues: Edges should look set, while the center may still be soft. Yes, you can prepare brookies ahead of time: - Pre-baking: You can mix the batters and store them in the fridge for up to 24 hours. - Baked Brookies: Store in an airtight container at room temperature for up to 3 days. For longer storage, freeze them. In this blog post, we explored the delicious world of brookies, blending brownies and cookies. I shared key ingredients and their importance, including tips for perfecting texture and flavor. We covered each step, from making layers to achieving the perfect swirl. Also, I provided handy tips and variations to tailor your brookies to your taste. Now, with storage advice and answers to your FAQs, you're ready to bake. Enjoy your brookies warm or chilled, and remember: practice makes perfect!
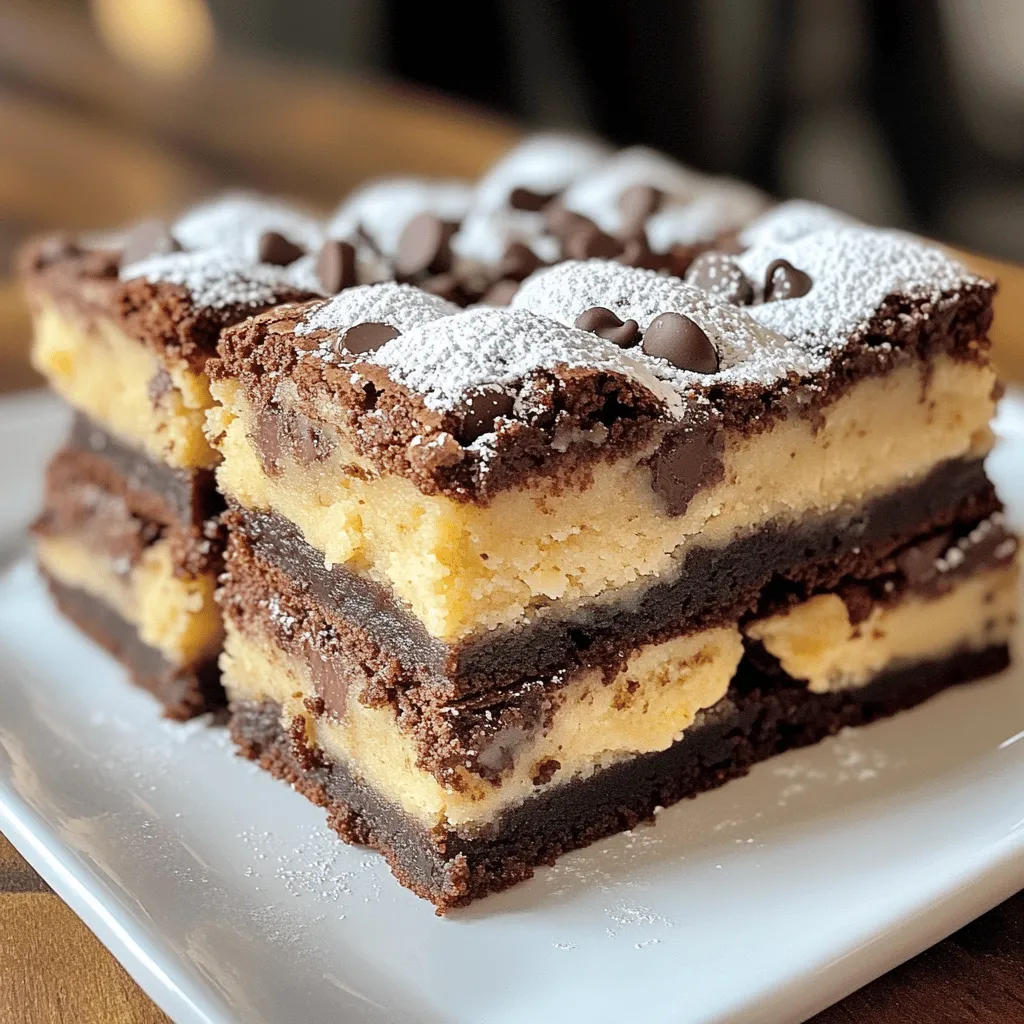
The BEST Fudgy Chewy Brookies Delightful and Easy Treat
If you crave a treat that combines the rich taste of brownies with the classic cookie goodness, you’re in for a delight! Today, I’ll share
- 1 ½ cups graham cracker crumbs - ½ cup unsalted butter, melted - 2 cups cream cheese, softened - 1 cup sugar - 3 large eggs - 1 cup sour cream These key ingredients form the base of our red velvet cheesecake. The graham cracker crumbs create a nice crust. The unsalted butter binds the crumbs together. Cream cheese gives the cheesecake its rich and creamy texture. Sugar sweetens the filling. Eggs help set the cheesecake. Sour cream adds a nice tanginess. - 1 tablespoon cocoa powder - 1 tablespoon red food coloring - ½ teaspoon baking soda - ½ teaspoon salt Here, we add special ingredients for flavor and color. Cocoa powder gives a hint of chocolate flavor. Red food coloring makes the cheesecake vibrant and eye-catching. Baking soda helps the cheesecake rise. Salt enhances all the flavors. These ingredients make the cheesecake unique and delicious. - Whipped cream - Fresh raspberries or strawberries For a finishing touch, consider optional toppings. Whipped cream adds a light, fluffy layer on top. Fresh raspberries or strawberries give a pop of color and freshness. They also provide a nice tart contrast to the sweet cheesecake. You can get creative with these toppings. For the full recipe, check out the [Full Recipe]. - Preheat the oven to 325°F (163°C). - In a bowl, combine 1 ½ cups of graham cracker crumbs, ½ cup of melted unsalted butter, and 1 tablespoon of sugar. Mix these ingredients well until the crumbs are moistened. Then, press this mixture firmly into the bottom of a 9-inch springform pan. This forms a solid base for your cheesecake. Bake the crust for 10 minutes. Once done, take it out and let it cool while you make the filling. - In a large bowl, beat 2 cups of softened cream cheese until it’s smooth. - Gradually add 1 cup of sugar and 1 teaspoon of vanilla extract. Mix until well combined. Add 3 large eggs one at a time, mixing well after each. Then, stir in 1 cup of sour cream. Next, add 1 ½ cups of all-purpose flour, 1 tablespoon of cocoa powder, 1 tablespoon of red food coloring, ½ teaspoon of baking soda, and ½ teaspoon of salt. Mix everything until the batter is smooth and creamy. - Pour the cheesecake batter into the cooled crust. - Tap the pan gently on the counter to remove any air bubbles. Place the pan in the preheated oven and bake for about 55-60 minutes. You know it's done when the edges are set and the center jiggles slightly. Once baked, turn off the oven and crack the door. Let the cheesecake cool inside for 1 hour. After that, move it to the fridge to chill for at least 4 hours or overnight for the best taste. To learn more about how to make this dessert, check the Full Recipe for all the details. To get the best texture for your red velvet cheesecake, start with room temperature ingredients. This means letting your cream cheese and eggs sit out for about 30 minutes before you mix them. Room temperature ingredients blend better and create a smooth batter. Next, avoid overmixing. Mix just until the ingredients combine. Overmixing adds too much air and can make your cheesecake crack. Gentle mixing helps keep it creamy and dense. Monitoring your oven temperature is key. An oven thermometer can help ensure the heat is just right. Too hot, and the cheesecake can bake too fast. Too cool, and it might not set properly. After baking, let the cheesecake cool gradually. Turn off the oven, crack the door, and let it sit for an hour. This helps prevent sudden changes in temperature that can cause cracks. Then, chill it in the refrigerator for at least four hours or overnight for the best flavor. When it’s time to serve, slice your cheesecake with a hot knife. Dip the knife in hot water, wipe it, then cut. This helps make clean slices and shows off the beautiful layers. For pairing, consider fresh fruits like berries. Their tartness balances the rich cheesecake. A drizzle of chocolate or caramel sauce can add extra sweetness. Another fun option is a scoop of vanilla ice cream on the side. Want more tips? Check the Full Recipe for more ideas. {{image_2}} You can make red velvet cheesecake even more fun by adding different flavors. One popular choice is chocolate swirl red velvet cheesecake. To make this, simply add melted chocolate to half of the cheesecake batter. Swirl it gently into the plain batter before baking. This gives you rich chocolate flavor and a beautiful look. Another fun option is Neapolitan-style variations. You can divide the batter into three parts: red velvet, chocolate, and vanilla. Layer them in the pan to create a lovely three-color cheesecake. This mix of flavors makes for a delightful treat. If you need gluten-free options, you can easily make a gluten-free crust. Use gluten-free graham crackers instead of regular ones. You can also use almond flour mixed with melted butter for a tasty crust. For a vegan red velvet cheesecake, replace cream cheese with vegan cream cheese. Use flax eggs or a commercial egg replacer instead of real eggs. You can also swap sour cream with a non-dairy yogurt. These ideas will help you enjoy cheesecake while sticking to your diet. You can make red velvet cheesecake fit any holiday. For example, during Christmas, add peppermint extract to the batter. Top it with crushed candy canes for a festive touch. In summer, fresh berries are a great topping. Use strawberries, blueberries, or raspberries to add color and flavor. This makes your cheesecake even more appealing and refreshing. For the full recipe, check out the complete instructions to create these variations. Refrigerate any leftover red velvet cheesecake. Place it in an airtight container. You can also cover it with plastic wrap. This keeps it fresh and prevents it from drying out. You can freeze red velvet cheesecake for up to three months. First, let it cool completely. Wrap it tightly in plastic wrap, then in aluminum foil. This method protects it from freezer burn. To thaw, place it in the fridge overnight. This keeps the texture smooth and creamy. Leftover cheesecake lasts about five days in the fridge. After that, it may lose taste and texture. Always check for signs of spoilage before eating. If it looks or smells off, it’s best to throw it away. Enjoy your dessert while it’s fresh! For the full recipe, check out the Red Velvet Cheesecake . Red velvet cake is a soft, moist cake with a hint of cocoa. It has a rich, buttery flavor and often includes cream cheese frosting. Cheesecake, on the other hand, is a creamy dessert made from cheese, sugar, and eggs. Red velvet cheesecake combines both, giving you a cake-like texture with creamy cheese filling. Yes, you can use other pans for your cheesecake. If you do not have a springform pan, use a regular cake pan. Just remember to line it with parchment paper. A cast-iron skillet also works well for a unique look. Just make sure the pan can handle the heat. Cracking happens for a few reasons. If the oven is too hot, the cheesecake cooks too fast. This causes cracks. Overmixing the batter can also lead to air bubbles that expand and crack the top. To prevent this, bake at a lower temperature and mix just until smooth. Cheesecake should not stay out for long. It is best to keep it in the fridge when not serving. If you leave it out, don’t let it sit for more than two hours. After that, it can spoil and become unsafe to eat. For best results, enjoy your cheesecake chilled. You can find the full recipe for making red velvet cheesecake in the previous sections. You now have a complete guide to making red velvet cheesecake. We covered key ingredients, step-by-step instructions, and tips for the best results. Remember to monitor your baking for perfect texture and presentation. You can also explore variations, dietary changes, and storage tips to enjoy later. Red velvet cheesecake is fun to make and share. Try different flavors or toppings for a twist. Enjoy making this sweet treat that impresses every time. Now it’s your turn to bake!
Red Velvet Cheesecake Irresistible and Easy Recipe
Do you crave something rich, creamy, and simply delicious? Then you’re in for a treat! My Red Velvet Cheesecake combines classic velvety cake flavors with
- 1 cup powdered sugar - 2 tablespoons fresh orange juice - 1 tablespoon cranberry juice - Zest of 1 orange - 1 tablespoon unsalted butter, melted - Pinch of salt You need these items to make a tasty orange cranberry bread glaze. The sweetness of powdered sugar pairs perfectly with the tartness of cranberry juice. Fresh orange juice adds a bright citrus flavor. The zest of one orange gives a nice aroma. Melted butter adds richness, while a pinch of salt balances the sweetness. - Vanilla extract for added flavor - Extra citrus zest for more tanginess You can mix in vanilla extract for a warm flavor boost. Adding more citrus zest gives your glaze a fun tang. These add-ins can take your glaze to the next level. - Substitute lemon juice for orange juice - Use maple syrup instead of powdered sugar for a different sweetness If you don’t have orange juice, lemon juice works well. It gives a bright flavor too. For a healthier option, you can use maple syrup in place of powdered sugar. This change will make your glaze sweeter and richer. To start, sift 1 cup of powdered sugar. This helps remove any lumps. A smooth glaze is key for a nice look and taste. Next, combine 2 tablespoons of fresh orange juice and 1 tablespoon of cranberry juice with the sifted sugar. This mix brings a bright flavor. Then, add the zest from 1 orange and 1 tablespoon of melted butter. The butter makes the glaze rich and smooth. Now, stir until the mixture is well blended and thick. If it feels too thick, add a few drops of water or more juice. This helps reach your perfect thickness. Let the glaze rest for about 5 minutes. This time allows it to thicken more. Use this glaze on your orange cranberry bread for a delicious finish. If you want the full recipe, check out the [Full Recipe]. To get a smooth glaze without lumps, start by sifting the powdered sugar. This step helps to break up any clumps. Next, when you mix in the juices, do it slowly. Stir gently to combine all the ingredients well. If the glaze feels too thick, add just a drop of water or juice. This will help you find the right consistency. When drizzling the glaze over your bread, use a spoon or a small squeeze bottle. Hold the bottle close to the bread, so you control the flow. Move in a zigzag pattern to cover the surface evenly. This method gives a nice look and taste with each bite. To boost the citrus flavor, use fresh orange juice and zest. You can also add a splash of lemon juice for extra zing. If you love warm spices, try adding a pinch of cinnamon or nutmeg. These spices add warmth and depth to the glaze. Just remember, a little goes a long way! For a beautiful presentation, drizzle the glaze while the bread is still warm. This allows the glaze to spread and soak into the bread. To make it even prettier, sprinkle some extra orange zest on top. Whole cranberries can also add a pop of color. Place them around the bread for a festive look. Enjoy the process, and let your creativity shine! {{image_2}} You can switch up the juices for fun flavors. Using lemon or lime juice gives the glaze a bright and zesty kick. The tartness balances well with the sweetness of the sugar. If you want something unique, try adding pomegranate juice. This juice adds a lovely pink hue and a sweet-tart flavor that can surprise your taste buds. For those who want a healthier glaze, it's easy to cut down on sugar. You can use a low-sugar version by mixing powdered sugar with a sugar substitute. This keeps the glaze sweet but reduces calories. If you need a vegan option, use plant-based butter in place of regular butter. This way, everyone can enjoy the glaze! You can adapt the glaze for any season. For the holidays, add festive spices like cinnamon or nutmeg. These spices bring warmth and make the glaze feel cozy. In summer, use lighter flavors. A splash of coconut milk can create a refreshing twist. Try these variations to keep your glaze exciting all year! To store leftover glaze, place it in an airtight container. I recommend using a glass jar or a plastic container with a tight lid. This keeps the glaze fresh and prevents it from absorbing other odors from the fridge. You can freeze the glaze for future use. Simply pour it into an ice cube tray or a freezer-safe bag. Once frozen, transfer the cubes to a bag. To thaw, remove the desired amount and let it sit at room temperature. You can also microwave it for a few seconds for quicker access. In the refrigerator, the glaze stays fresh for about a week. Always check for signs of spoilage. If the glaze changes color or has an unusual smell, it is best to discard it. Yes, you can make this glaze ahead of time. Prepare the glaze and store it in the fridge. Use an airtight container to keep it fresh. Take it out about 15 minutes before you need it. This helps it warm up and become easier to drizzle. If the glaze is too thick, it won't drizzle well. Add a few drops of water or juice. Mix well until you reach your desired thickness. If it’s too thin, add a bit of powdered sugar. This will help thicken it without losing flavor. Absolutely! This glaze works great on many treats. Try it on muffins, cakes, or scones. The bright citrus flavor pairs well with various baked goods. You can even use it on pancakes for a fun twist! You can find the full recipe in this article. It includes all the steps to make the glaze perfectly. Just follow the instructions for a tasty treat! This blog post covered how to make a tasty glaze for your baked goods. We looked at the required ingredients, optional add-ins, and easy substitutions. I walked you through the simple steps and tips for the best texture and flavor. Variations help you customize the glaze for different occasions. Lastly, proper storage ensures your glaze stays fresh. With these insights, you can impress with your baking. Enjoy creating your own delicious glaze and make every treat shine!
Orange Cranberry Bread Glaze Flavorful and Easy Recipe
Transform your baking with my easy Orange Cranberry Bread Glaze! This bright, tangy glaze adds the perfect finish to your cranberry bread and is a
To make these delightful Strawberry Oatmeal Bars, gather these simple ingredients: - 2 cups rolled oats - 1 cup almond flour - 1/2 cup brown sugar (or coconut sugar) - 1/2 teaspoon baking powder - 1/4 teaspoon salt - 1/2 cup unsalted butter, melted (or coconut oil for a dairy-free option) - 1/4 cup honey (or maple syrup for a vegan option) - 1 teaspoon vanilla extract - 2 cups fresh strawberries, hulled and sliced - 1 tablespoon cornstarch - 1 tablespoon lemon juice These bars are not just tasty; they also have good nutrition. Each serving offers: - Calories: 180 - Protein: 3g - Carbohydrates: 25g - Fat: 8g - Fiber: 3g You get a nice mix of carbs and healthy fats. The fresh strawberries add vitamins and antioxidants, making these bars a smart snack. You can easily swap some ingredients based on your needs: - Almond flour: Use oat flour or whole wheat flour. - Butter: Coconut oil works well for a dairy-free option. - Brown sugar: Maple syrup or agave can replace it for sweetness. - Fresh strawberries: Try blueberries or raspberries for a different flavor. These swaps keep the taste great while fitting your diet! For the full recipe, check the section above. First, gather your ingredients. You will need rolled oats, almond flour, brown sugar, baking powder, salt, melted butter, honey, vanilla, fresh strawberries, cornstarch, and lemon juice. Preheat your oven to 350°F (175°C). Grease a 9x9 inch baking pan or line it with parchment paper. This helps with easy removal later. In a large bowl, mix the oats, almond flour, brown sugar, baking powder, and salt. Stir well so all dry ingredients blend. In another bowl, combine the melted butter, honey, and vanilla. Stir until smooth. Pour this mix into the dry ingredients. Mix until crumbly. Save 1 cup of this mixture for the topping. Now, pour the remaining mixture into your pan. Press it down firmly to make a flat base. Bake this base for 10 minutes. While the base bakes, let’s prepare the strawberry filling. In a bowl, add sliced strawberries, cornstarch, and lemon juice. Gently stir to coat the strawberries. After 10 minutes, take the base out of the oven. Spread the strawberry mixture evenly on top. Next, crumble the reserved oat mix over the strawberries. This will create a nice topping. Return the pan to the oven. Bake for another 25-30 minutes. You want the topping golden and the strawberries bubbly. Once baked, it’s time to cool. Let the bars sit in the pan for at least 15 minutes. This helps them set. After that, transfer the bars to a wire rack to cool completely. Once cool, cut them into squares or bars for serving. Enjoy these delicious strawberry oatmeal bars! For a complete guide, refer to the Full Recipe. To get the best texture, use rolled oats. They give a nice chew. Almond flour adds a soft bite. Mix your dry and wet ingredients well. This keeps your bars from being too crumbly. Let the base bake for just 10 minutes before adding the strawberries. This step helps it stay firm. To boost flavor, add lemon juice to your strawberries. It brightens up the taste. You can also use different sweeteners like maple syrup. For a twist, add a pinch of cinnamon to the dry mix. It gives warmth without being too strong. Don't skip the vanilla extract; it adds depth to the bars. One common mistake is overmixing the dough. This can make the bars tough. Also, ensure your strawberries are fresh and ripe. Old strawberries can taste bland. When baking, keep an eye on the time. You want a golden topping, not a burnt one. Allow the bars to cool completely before cutting. This helps them hold their shape better. For the full recipe, make sure to follow the steps closely for a perfect outcome. {{image_2}} To make gluten-free strawberry oatmeal bars, swap almond flour for a gluten-free flour blend. You can also use certified gluten-free oats. These changes help keep the bars safe for those with gluten issues. Gluten-free baking can differ, so watch your baking time. You may need to adjust it slightly. For a vegan version, use coconut oil instead of butter. Replace honey with maple syrup. Both swaps keep the bars tasty and plant-based. You can also try using flaxseed meal mixed with water as an egg replacer, if you want a firmer texture. This simple change makes these bars a hit with everyone. While strawberries shine in this recipe, feel free to try other fruits. Blueberries, raspberries, or even peaches can work well. You can also mix fruits for a fun twist. Add spices like cinnamon or nutmeg for extra warmth. These small changes can make the bars unique and exciting every time you bake! To keep your strawberry oatmeal bars fresh, store them in an airtight container. You can place parchment paper between the layers to prevent sticking. Keep them in a cool, dark spot, like your pantry. If you plan to eat them in a few days, they will stay fresh at room temperature. For longer storage, the fridge is your best option. They can last up to a week this way. Freezing is a great way to save these bars for later. First, let the bars cool completely. Then, cut them into squares. Wrap each square tightly in plastic wrap. Place the wrapped bars in a freezer-safe bag or container. They can last up to three months in the freezer. When you want to enjoy them, just thaw in the fridge or at room temperature. If you prefer warm bars, reheating is simple. Take a bar out of the fridge or freezer. For a quick warm-up, use the microwave. Heat for about 10-15 seconds. If it was frozen, it may need a bit longer. You can also reheat in the oven. Preheat the oven to 350°F (175°C) and warm for about 5-10 minutes. Enjoy the gooey, warm goodness! To make these bars dairy-free, simply swap out the unsalted butter. Use coconut oil instead. It works great and adds a nice flavor. You can also replace honey with maple syrup for a vegan option. This way, you can enjoy the bars without any dairy. You can use many fruits in this recipe. Try blueberries, raspberries, or blackberries. Peaches or apples can also work well. Just make sure to chop them if they are larger. Each fruit gives a unique taste to your bars. Mix and match fruits to find your favorite combo! Yes, you can use quick oats. However, the texture might change. Quick oats make the bars softer and more chewy. If you love the classic chewy texture, I recommend sticking with rolled oats. They hold up better and give a nice bite to your bars. This blog post covered everything you need to know about strawberry oatmeal bars. We explored the key ingredients, step-by-step instructions, and helpful tips. You learned about variations and storing options to keep your bars fresh. With these details, you can make delicious bars tailored to your taste. Remember, simple swaps can enhance your recipe. Enjoy baking, and don't hesitate to experiment with flavors. Happy cooking!
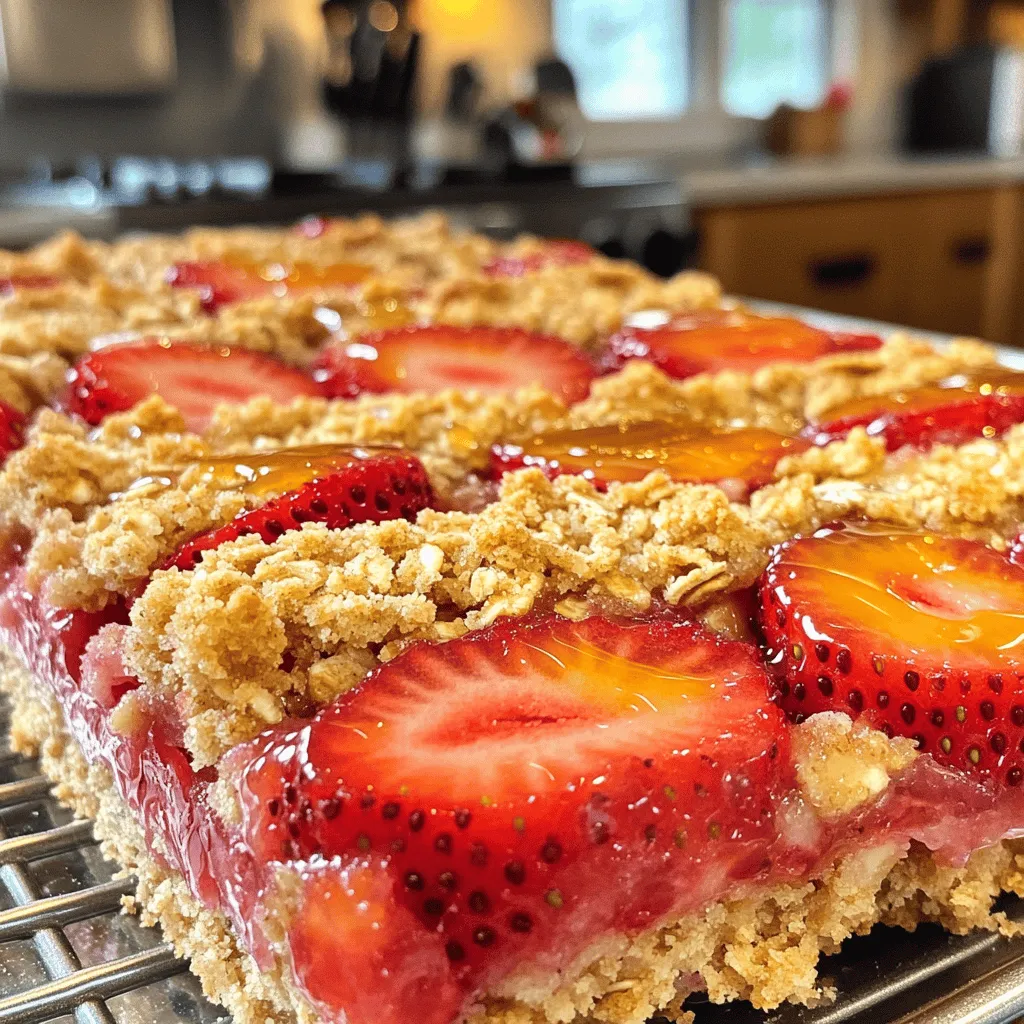
Strawberry Oatmeal Bars Delightful and Simple Recipe
Are you ready to enjoy a tasty treat that is both easy to make and healthy? These Strawberry Oatmeal Bars are just the thing. They
To make a German chocolate sheet cake, you will need the following: - 2 cups all-purpose flour - 2 cups granulated sugar - 1 cup unsweetened cocoa powder - 1 ½ teaspoons baking powder - 1 teaspoon baking soda - 1 teaspoon salt - 4 large eggs - 1 cup buttermilk - 1 cup vegetable oil - 2 teaspoons vanilla extract - 1 cup boiling water - 1 cup shredded coconut - 1 cup chopped pecans - 1 cup sweetened condensed milk - ½ cup unsalted butter - 2 cups powdered sugar This list shows everything needed for the cake and its rich topping. When you gather these items, make sure they are fresh for the best flavor. Using quality brands can make a big difference. Here are my top picks: - Flour: King Arthur Flour - Sugar: Domino Sugar - Cocoa Powder: Ghirardelli Unsweetened Cocoa - Buttermilk: Organic Valley - Vanilla Extract: Nielsen-Massey These brands offer great taste and quality. They help make your cake stand out. If you can't find an ingredient, don't worry! Here are some easy swaps: - All-purpose flour: You can use gluten-free flour for a gluten-free cake. - Buttermilk: Mix one cup of milk with one tablespoon of vinegar or lemon juice. - Vegetable oil: Canola oil works just as well. - Eggs: Use 1/4 cup of unsweetened applesauce for each egg. - Coconut: Try almond flour if you want a different flavor. These substitutions keep your cake delicious. You can still enjoy a great dessert! For the full recipe, check out the additional details provided. Start by preheating your oven to 350°F (175°C). Get a large sheet cake pan ready by greasing and flouring it well. In a big mixing bowl, sift together these dry ingredients: 2 cups of all-purpose flour, 2 cups of granulated sugar, 1 cup of unsweetened cocoa powder, 1 ½ teaspoons of baking powder, 1 teaspoon of baking soda, and 1 teaspoon of salt. Next, add 4 large eggs, 1 cup of buttermilk, 1 cup of vegetable oil, and 2 teaspoons of vanilla extract to the dry mix. Use a mixer on medium speed for about 2 minutes. You want everything to blend well. Then, slowly stir in 1 cup of boiling water. The batter will look thin, but that's just right. Now, pour the batter into your prepared sheet pan. Make sure it spreads evenly. Place it in your preheated oven. Bake for 30 to 35 minutes. To check if it’s done, insert a toothpick into the center. If it comes out clean, it's ready. Let the cake cool in the pan for about 10 minutes before you take it out. While the cake bakes, you can make the coconut-pecan frosting. In a saucepan over medium heat, mix 1 cup of sweetened condensed milk, ½ cup of unsalted butter, and the yolks of 3 eggs. Stir this mixture constantly for about 10 minutes. You want it to thicken nicely. Once it thickens, remove it from heat. Stir in 1 cup of shredded coconut and 1 cup of chopped pecans. Let this frosting cool a bit. When the cake is cool enough to touch, spread the frosting on top while it’s still warm. This helps it stick better. Now your German chocolate sheet cake is ready to impress! For the full recipe, check out the details above. To keep your German chocolate sheet cake moist, use buttermilk. Buttermilk adds flavor and moisture. Don't skip the boiling water in the batter. It helps create a soft texture. Bake your cake just until a toothpick comes out clean. Overbaking dries out the cake, so check early. Let the cake cool in the pan for a short time. This helps it stay moist before you frost it. For a great look, frost your cake while it’s still warm. This helps the frosting spread smoothly. Use a spatula to spread the frosting evenly. You can also add a sprinkle of coconut or chocolate shavings on top. Cut the cake into squares for nice serving pieces. Serve on decorative plates to make it look special. One common mistake is not measuring ingredients correctly. Use a scale for precision. Another mistake is not cooling the cake enough before frosting. This can cause the frosting to melt. Be careful not to rush the baking time. Each oven is different, so check your cake often. If you follow these tips, you will have a lovely cake. For the full recipe, check the earlier section. {{image_2}} If you want to change the frosting, you have options. A classic chocolate buttercream is rich and smooth. Simply mix soft butter with cocoa powder, powdered sugar, and a splash of milk. You can also try cream cheese frosting for a tangy twist. This pairs well with the chocolate cake and offers a thicker texture. For a lighter option, whipped cream frosting is airy and sweet. Just whip heavy cream with sugar until fluffy. You can make this cake gluten-free with a few swaps. Use gluten-free all-purpose flour instead of regular flour. Most brands have a blend that works well in cakes. Check that your baking powder and cocoa powder are gluten-free too. The cake's texture may differ slightly, but it will still taste great. Be sure to follow the same mixing and baking steps from the Full Recipe. Want to add more flavor? Try adding coffee or espresso. Just mix one tablespoon of instant coffee granules into the boiling water. This gives the cake a deeper chocolate taste. You can also add a splash of almond extract for a nutty flavor. If you like spice, consider a dash of cinnamon or nutmeg. These simple tweaks can make your cake unique and exciting! To keep your German chocolate sheet cake fresh, store it in an airtight container. This will help keep the cake moist and prevent it from drying out. If you don't have a container, you can cover the cake with plastic wrap. Make sure to store it at room temperature for up to three days. If you need to keep it longer, consider freezing. You can freeze this cake to enjoy later. First, let the cake cool completely. Once cooled, cut it into squares. Wrap each piece tightly in plastic wrap. Then, place the wrapped pieces in a freezer-safe bag. Be sure to label the bag with the date. This way, you will know when you made it. The cake can last in the freezer for up to three months. When you're ready to eat, thaw the cake in the fridge overnight. When stored correctly, the cake lasts about 3 to 4 days at room temperature. If you store it in the fridge, it can last up to a week. Freezing extends its life to about three months. Enjoy this delicious treat whenever you crave a sweet bite! For the complete process, check out the Full Recipe. German chocolate is not from Germany. It comes from a man named Samuel German. He made a dark chocolate for baking in 1852. This chocolate is sweeter and milder than regular chocolate. It has a rich flavor that makes it perfect for desserts. In German chocolate cake, we add coconut and pecans to the frosting. This extra texture and taste set it apart from other chocolate cakes. Yes, you can use milk instead of buttermilk in this recipe. Buttermilk adds a tangy taste and helps the cake rise. If you don’t have buttermilk, mix one cup of milk with one tablespoon of vinegar or lemon juice. Let it sit for about five minutes. This will mimic buttermilk and keep your cake moist and fluffy. To check if your cake is done, use a toothpick. Insert it in the center of the cake. If it comes out clean or with a few crumbs, the cake is ready. If there is wet batter on the toothpick, bake it a little longer. Keep an eye on it, so it doesn’t overbake. A perfect cake is soft and springy to touch. You can use several options as egg substitutes. Each option gives your cake the right texture. Some good choices include: - 1/4 cup unsweetened applesauce per egg - 1/4 cup mashed banana per egg - 1 tablespoon ground flaxseed mixed with 3 tablespoons water per egg These substitutes work well in cake recipes. They help keep your cake moist and delicious, just like the original! For the full recipe, check out the details above. This guide covered everything you need for a great German chocolate sheet cake. We explored the essential ingredients and shared brand recommendations. You learned step-by-step instructions for baking and making frosting. Tips and tricks helped you avoid common mistakes. Variations let you customize the cake to your taste. Finally, storage tips ensure your leftovers stay fresh. With these tools, you can bake a delicious cake and impress everyone around you. Happy baking!
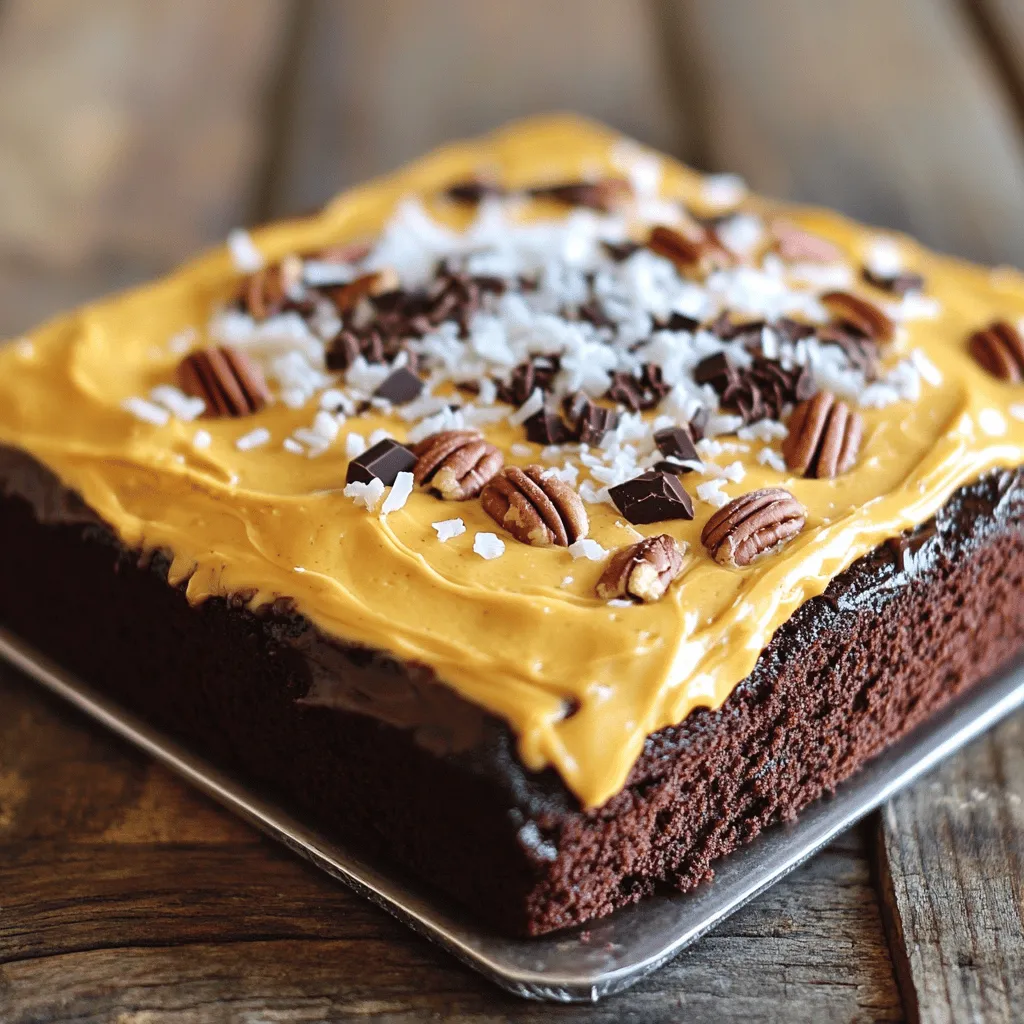
German Chocolate Sheet Cake Simple and Delicious Treat
If you love rich, chocolate desserts, you’ll adore German Chocolate Sheet Cake. This treat is simple to make and perfect for any occasion. With a
For the base of these decadent oatmeal fudge bars, you need three key ingredients: - 2 cups rolled oats - 1 cup almond flour - 1/2 cup coconut sugar (or brown sugar) These main ingredients give the bars a chewy texture and rich flavor. Rolled oats provide fiber and heartiness. Almond flour adds a nutty taste and helps bind the ingredients together. Coconut sugar offers a lower glycemic index, making it a great alternative to regular sugar. Next, let's add some delightful extras to make these bars pop: - 1 cup chocolate chips (semi-sweet or dark) - 1/2 cup chopped walnuts (optional) - 1/4 cup almond butter or peanut butter Chocolate chips bring sweetness and richness. You can use semi-sweet or dark, depending on your taste. Chopped walnuts add crunch and a nutty flavor. Almond butter or peanut butter adds creaminess and enhances the fudge aspect. Finally, don't forget these essential seasonings to boost the flavors: - 1/2 teaspoon baking soda - 1/4 teaspoon salt - 1 teaspoon vanilla extract Baking soda helps the bars rise, making them light. Salt enhances all the flavors, balancing the sweetness. Vanilla extract adds a warm, inviting aroma that makes the bars irresistible. These ingredients combine to create a treat that is not only delicious but also satisfying. For the complete recipe, check out the [Full Recipe]. First, preheat your oven to 350°F (175°C). This step is key for even baking. Next, line an 8x8 inch baking dish with parchment paper. Leave some overhang, which helps with easy removal later. In a large bowl, combine the dry ingredients. This includes rolled oats, almond flour, coconut sugar, baking soda, and salt. Mix well to ensure everything blends together. In another bowl, whisk the melted coconut oil, maple syrup, and vanilla extract. Pour this wet mixture into the dry ingredients. Stir until everything comes together. Now, press about two-thirds of the oat mixture firmly into the bottom of your baking dish. This creates the base layer. In a small bowl, mix the almond butter with the remaining oat mixture. Spoon dollops of this mixture over the base and gently swirl them in with a knife. This step gives your bars a beautiful marbled effect. Bake the bars in your preheated oven for 20-25 minutes. Look for golden brown edges and a set center. Once baked, remove them from the oven. Let them cool in the pan for about 10 minutes. Then, lift them out using the parchment overhang. Allow the bars to cool completely on a wire rack. Once cooled, cut them into squares or bars to enjoy. For the full recipe, check out the complete guide to make these delicious treats! To get the right texture in your decadent oatmeal fudge bars, focus on moisture levels. Use the correct amount of coconut oil and maple syrup. If you find the mixture too dry, add a splash of almond milk. This small change keeps the bars soft and fudgy. Overmixing can ruin your bars. Once you combine the wet and dry ingredients, mix just until everything is blended. This helps keep the bars chewy and tender. A gentle hand goes a long way. Want to add more flavor? Consider mixing in a teaspoon of cinnamon or a pinch of nutmeg. These spices give your bars a warm, cozy taste. You can even toss in dried fruits like cranberries or raisins for a sweet surprise. If you want to switch up the nut butter, try using sunflower seed butter or cashew butter. Both options add a unique twist to the bars. They also cater to different dietary needs. When it comes to presentation, stack the bars on a nice plate. Drizzle some extra melted chocolate or almond butter on top. This adds a touch of elegance that impresses guests. A sprinkle of chopped walnuts on top makes it look even better. Pair these bars with a scoop of vanilla ice cream for an extra treat. The cold ice cream contrasts with the warm bars, creating a delightful experience. You can also serve them with a cup of coffee or tea for a cozy afternoon snack. {{image_2}} To make these bars gluten-free, choose gluten-free oats. Regular oats may contain gluten. You can also use other flour substitutes like coconut flour or rice flour. These options keep the bars tasty and safe for those with gluten sensitivities. You can add spices for extra depth. A pinch of cinnamon or nutmeg adds warmth. Mixing in fruits can also brighten the flavor. Try dried cranberries or fresh berries for a fruity touch. Each choice brings a new twist to your decadent oatmeal fudge bars. If you want to make these bars healthier, consider reducing the sugar. Use less coconut sugar or substitute with a sugar alternative. You can also add protein sources like protein powder or nuts. These swaps keep the bars delicious and boost their nutritional value. For the full recipe, check out the details above! To keep your decadent oatmeal fudge bars fresh at room temperature, place them in an airtight container. This helps prevent them from drying out. They stay tasty for about three days. If you want to keep them longer, consider refrigeration. Just wrap them well in plastic wrap or foil before placing them in the fridge. For long-term storage, freezing is the best choice. Cut the bars into squares and place them in a single layer on a baking sheet. Freeze them for one hour, then transfer the squares to a freezer-safe bag or container. This method helps prevent them from sticking together. They can last up to three months in the freezer. When you want to enjoy them, simply take out the desired number of bars and let them thaw on the counter for about 30 minutes. For the best texture, you can also reheat them in the microwave for 10-15 seconds. These bars are best enjoyed fresh, but they can last up to a week at room temperature. If you store them in the fridge, they can last about two weeks. The flavors will deepen over time, making each bite even more delightful. Just remember, the sooner you eat them, the more enjoyable they will be! For the full recipe, refer to the detailed instructions provided earlier. Yes, you can swap almond flour with other flours. Oat flour works well and keeps the flavor. Whole wheat flour is another choice. Both options will change the texture slightly. Oat flour creates a softer bar, while whole wheat adds a bit of density. Look for golden edges and a firm center. If you insert a toothpick, it should come out clean. For a chewy bar, bake less time. For a firmer texture, bake a bit longer. Keep an eye on the color to avoid overbaking. Absolutely! Use flaxseed meal mixed with water instead of eggs. Mix one tablespoon of flaxseed meal with three tablespoons of water. Let it sit for five minutes until it thickens. This will help bind the bars without eggs. Try dried fruits like raisins or cranberries for a sweet twist. You can also use nuts for crunch. If you want a fun flavor, swap in butterscotch or white chocolate chips. Each option adds a unique taste to your bars. Yes, they can be! Use sugar alternatives like stevia or erythritol. These options keep the sweetness without raising blood sugar levels. Just remember to adjust the amount in the recipe. Each substitute has a different sweetness level, so taste as you go. For the full recipe, check out the Decadent Oatmeal Fudge Bars! In this post, we covered the key ingredients for making delicious bars. You learned how to mix, bake, and store them. I shared tips for getting the best texture and flavor. Each step leads to tasty, healthy results. Explore variations to fit your needs. These bars are simple and fun to make. Enjoy your baking, and feel free to get creative with flavors! Remember, your bars can be unique and flavorful. Happy baking!
Decadent Oatmeal Fudge Bars Irresistible Dessert Treat
Craving a sweet treat that won’t ruin your healthy goals? Look no further! These Decadent Oatmeal Fudge Bars combine wholesome ingredients with rich, satisfying flavors.
- 1 cup all-purpose flour - 1/2 cup unsalted butter, softened - 1 cup chocolate chips - 1 large egg - 8 oz cream cheese, softened - 1/4 cup granulated sugar - 1 tablespoon lemon juice - 1 egg yolk - Additional flavorings (e.g., chocolate chips, nuts) - Serving suggestions (e.g., ice cream, whipped cream) When making cheesecake stuffed chocolate chip cookies, start with the main ingredients. The all-purpose flour gives structure. Softened unsalted butter adds rich flavor. Chocolate chips bring sweetness and texture. Using one large egg binds everything together. For the cheesecake filling, cream cheese is key. It gives that smooth, creamy center. Granulated sugar sweetens the filling. Lemon juice adds a bright note, while the egg yolk helps with richness. Feel free to add optional ingredients. You can mix in more chocolate chips or nuts for texture. Serve these cookies warm with a scoop of ice cream or a dollop of whipped cream for a special treat. For the full recipe, check above. 1. Preheat the oven and line the baking sheet: Start by preheating your oven to 350°F (175°C). While it heats, grab a baking sheet and line it with parchment paper. This keeps your cookies from sticking. 2. Mix dry ingredients: In a small bowl, whisk together 1 cup of all-purpose flour, 1/2 teaspoon of baking soda, and 1/4 teaspoon of salt. Set this mixture aside. 3. Cream butter and sugars: In a large mixing bowl, beat together 1/2 cup of softened unsalted butter, 1/2 cup of packed brown sugar, and 1/4 cup of granulated sugar. Mix until the mixture is creamy and light in color. 4. Add egg and vanilla: Next, mix in 1 large egg and 1 teaspoon of vanilla extract. Blend until everything is well combined. 5. Combine wet and dry mixtures: Gradually add the dry mixture to the wet mixture. Mix until just combined. Fold in 1 cup of chocolate chips for that sweet touch. 6. Prepare cheesecake filling: In a separate bowl, beat together 8 oz of softened cream cheese, 1/4 cup of granulated sugar, 1/2 teaspoon of vanilla extract, 1 tablespoon of lemon juice, and 1 egg yolk. Mix until smooth and creamy. 7. Assemble and bake the cookies: Scoop a tablespoon of the cookie dough and flatten it in your palm. Place a teaspoon of the cheesecake filling in the center. Fold the dough around the filling, rolling it into a ball. Place these on the prepared baking sheet, leaving space between them. Bake for 12-15 minutes, or until the edges are golden. Now, you have a delightful treat that combines the best of cookies and cheesecake. For a complete guide, check the Full Recipe. To make the best cheesecake stuffed chocolate chip cookies, start with the right oven temperature. Preheat your oven to 350°F (175°C). This heat is perfect for baking. It gives the cookies a nice golden edge while keeping the center soft. After baking, let your cookies cool for about five minutes on the sheet. This helps them set up and hold their shape. One common issue is cookie spread. To avoid this, chill your dough for 30 minutes before baking. This makes the butter firm up, which helps the cookies keep their shape. Also, when you form the cookies, ensure the dough fully encloses the cheesecake filling. If the filling leaks, it can make a mess. To boost flavor, consider adding spices like cinnamon or nutmeg to the cookie dough. These spices add warmth and depth to the taste. For the cheesecake filling, try adding a bit of cocoa powder for a chocolate twist. You can also mix in some crushed fruit, like strawberries or raspberries, for a fresh flavor. These small changes can make your cookies even more exciting. For the complete recipe, check out the Full Recipe. {{image_2}} You can easily switch up the cheesecake filling. One great choice is peanut butter cheesecake. This rich filling pairs well with chocolate chip cookies. Just mix in half a cup of smooth peanut butter with the cream cheese. It adds a nutty twist that everyone will love. Another fun option is to play with chocolate chips. You can use regular chocolate chips or go for white chocolate. White chocolate gives a sweet balance to the cream cheese filling. Try both in one batch for a unique mix! If you need gluten-free cookies, use gluten-free flour instead of all-purpose flour. Most of the other ingredients are already gluten-free. Just make sure to check the labels on your chocolate chips. For vegan-friendly cookies, swap the egg for a flax egg. Mix one tablespoon of ground flaxseed with three tablespoons of water. Let it sit for about five minutes to thicken. Use vegan butter and dairy-free cream cheese for the filling. These adjustments keep the taste amazing while meeting dietary needs. To make your cookies stand out, add decorative toppings. You can drizzle melted chocolate or sprinkle crushed nuts on top. This adds color and texture. For serving, think about how you want to impress your guests. Arrange the cookies on a platter with small paper cups. Pair them with a scoop of ice cream or a dollop of whipped cream for a fun dessert. These simple touches make your cookies look as good as they taste! For the complete recipe, check out the Full Recipe section. To keep your cheesecake stuffed chocolate chip cookies fresh, store them properly. You can keep them at room temperature for a day or two. Just place them in an airtight container. If you want them to last longer, put them in the fridge. They can stay fresh for about a week in the fridge. For long-term storage, freeze your cookies. Wrap them tightly in plastic wrap or foil. Then, place them in a freezer bag. This way, they can last for up to three months. When you're ready to enjoy them, just thaw them in the fridge overnight. To reheat your stuffed cookies, use an oven or microwave. If you use the oven, preheat it to 350°F (175°C). Place the cookies on a baking sheet for about 5-10 minutes. This keeps the cookie crispy outside and warm inside. If you prefer the microwave, heat them for 10-15 seconds. This makes them warm but may soften the texture. Enjoy your cookies while they are warm for the best taste! These cookies last for about a week at room temperature. In the fridge, they can stay fresh for up to one week. If you freeze them, they last for three months. Keep an eye out for signs of spoilage. If you notice any mold, a strange smell, or changes in texture, it’s time to toss them. Enjoy your delicious treats while they are fresh! For the full recipe, check out the earlier section. Yes, you can prepare the cookie dough in advance. This makes it easy to bake fresh cookies later. Just mix the dough as directed. Then, wrap it in plastic wrap. Store it in the fridge for up to 2 days. You can also freeze it for up to 3 months. When ready to bake, let it thaw in the fridge overnight. This way, you can enjoy warm cookies anytime! Visual and tactile cues help you know when the cookies are done. Look for golden edges and a soft center. The cookies will look slightly puffy. Gently press the top with your finger; it should spring back. If it leaves an imprint, bake a few minutes longer. Trust your gut! Each oven is different, so keep an eye on them. Yes, you can substitute some ingredients in the recipe. For example, if you need dairy-free options, try using vegan butter and cream cheese. You can also swap out all-purpose flour for gluten-free flour. If you don't have lemon juice, try using vinegar instead. Feel free to experiment with flavors, like adding nuts or different chocolate types. The key is to keep the ratios similar for the best results! In this blog post, we explored how to make delicious stuffed cookies with cheesecake filling. We covered all the essential ingredients, detailed step-by-step instructions, baking tips, and variations to suit your taste. Remember, perfect cookies come from the right mix of ingredients and careful baking. Try experimenting with flavors and presentations for a unique twist. Your baking journey can be fun and rewarding with these insights. Enjoy your delicious creations while sharing them with loved ones!
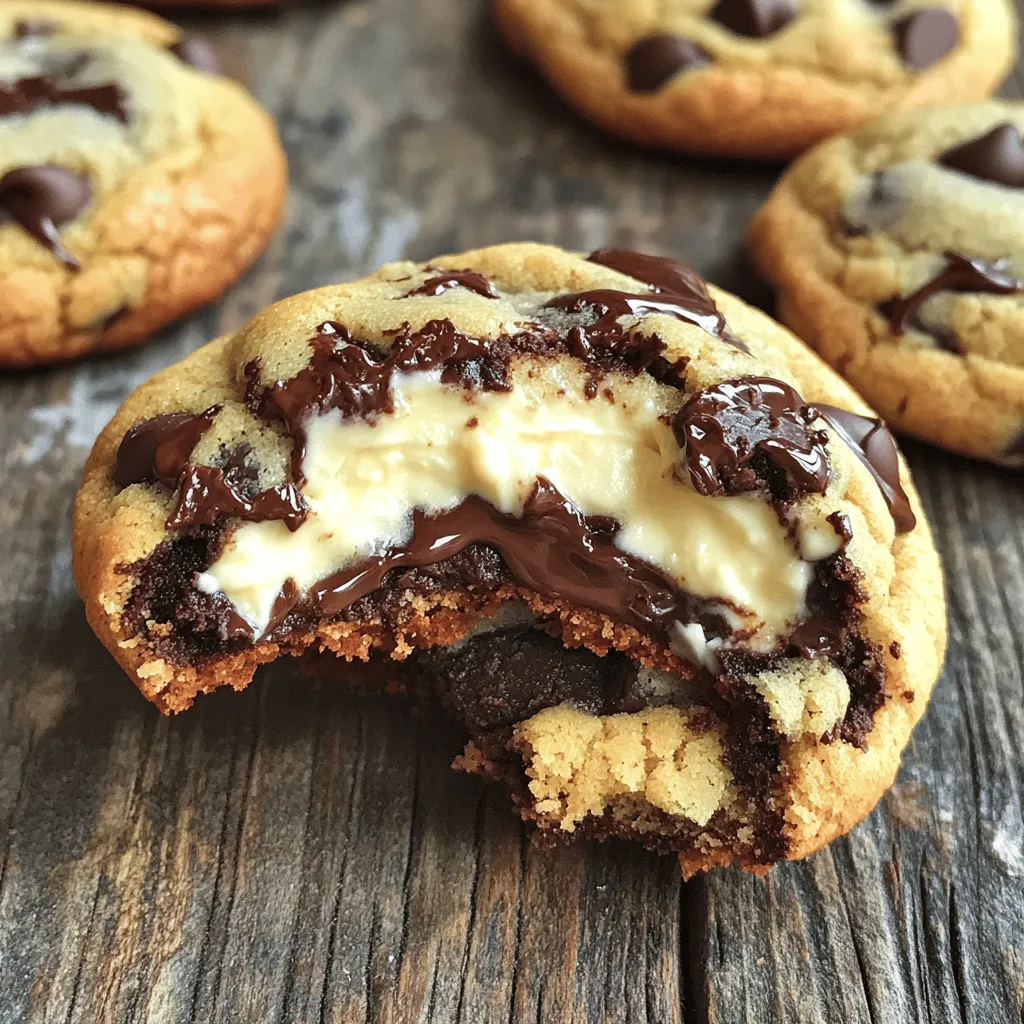
Cheesecake Stuffed Chocolate Chip Cookies Delight
Craving something sweet and satisfying? How about Cheesecake Stuffed Chocolate Chip Cookies? This mouthwatering treat pairs the classic chocolate chip cookie with rich, creamy cheesecake
- 1 cup unsalted butter, softened - 2 cups granulated sugar - 4 large eggs - 3 cups all-purpose flour - 1 tablespoon baking powder - 1 teaspoon vanilla extract - 1 cup buttermilk - 1 cup pecans, toasted and chopped - 1/2 teaspoon salt - 1/2 cup brown sugar, packed (for topping) - 1/4 cup additional chopped pecans (for topping) The key ingredients for Butter Pecan Cake are simple yet essential. First, we need unsalted butter. This butter gives the cake a rich, creamy taste without added salt. Then, granulated sugar sweetens the cake, making it delightful. Next, we have eggs. Eggs help bind the cake and add moisture. All-purpose flour gives the cake its structure. Baking powder acts as a leavening agent, making the cake rise. Don’t forget the vanilla extract! It adds a warm flavor that pairs well with pecans. Toasted pecans are very important. Toasting brings out their nutty flavor and adds a crunchy texture. This makes every bite special. For optional ingredients, you can add spices like cinnamon or nutmeg for warmth. You might also try a bit of maple syrup for extra sweetness. Using these ingredients, you can create a delicious Butter Pecan Cake that everyone will love. Check the Full Recipe for more details on how to combine these ingredients into a delightful treat. First, preheat your oven to 350°F (175°C). This step is key to getting a great rise. While the oven warms, grab your three 9-inch round cake pans. Grease them with unsalted butter and dust with flour. This helps the cakes release easily after baking. In a large bowl, cream 1 cup of softened unsalted butter with 2 cups of granulated sugar. Use a mixer to beat them together until the mix looks light and fluffy. This should take about 3 to 4 minutes. Next, add 4 large eggs, one at a time. Make sure to mix well after each egg. Then, stir in 1 teaspoon of vanilla extract for lovely flavor. In a different bowl, whisk together 3 cups of all-purpose flour, 1 tablespoon of baking powder, and 1/2 teaspoon of salt. This mix is your dry ingredients. Now, slowly add this to your butter mix. Alternate it with 1 cup of buttermilk. Start and end with the flour mix. Be careful not to overmix; stop as soon as you see no dry flour. Divide the cake batter evenly among the prepared pans. Bake for 25 to 30 minutes. To check if your cakes are done, stick a toothpick in the center. If it comes out clean, the cakes are ready. Once baked, cool the cakes in the pans for about 10 minutes before moving them to wire racks. Let them cool completely. This cooling time is important for the best texture. To bake a perfect Butter Pecan Cake, avoid common mistakes. One mistake is not measuring ingredients correctly. Always use measuring cups and spoons for accuracy. Another is overmixing the batter, which can make the cake tough. Mix just until combined for a light texture. The temperature of your ingredients matters. Room temperature eggs and buttermilk blend better. Cold butter can lead to lumps. Let your butter sit out for a bit before you start. This helps create that fluffy cake you want. For frosting, cream cheese or buttercream works best. Cream cheese gives a tangy taste. Buttercream is sweet and smooth. Both pair well with the nutty flavor of pecans. When applying frosting, use an offset spatula. This tool helps you spread the frosting evenly. Start with a thin layer to seal in crumbs. Then add a thicker layer for a nice finish. Serve your Butter Pecan Cake with coffee or tea. This adds warmth to the flavors. You can also pair it with vanilla ice cream. It creates a lovely contrast with the cake. For presentation, stack the cake layers neatly. Sprinkle additional chopped pecans on top for a crunchy look. You can also add a drizzle of caramel sauce. This makes it even more tempting! For the full recipe and detailed steps, check out the Full Recipe. {{image_2}} You can switch up the Butter Pecan Cake in fun ways. Try adding chocolate or caramel flavors. Melt chocolate into the batter for a rich taste. Swirl in caramel for a sweet twist. You can also use different nuts for new textures. Walnuts or almonds bring a nice crunch. Each nut adds its unique flavor, making the cake your own. If you need a gluten-free cake, it's easy to adapt. Substitute gluten-free flour for all-purpose flour. Look for a blend that works well for baking. You may need to adjust the baking time. Start checking for doneness a few minutes early. This helps ensure your cake stays moist and delicious. Want a vegan Butter Pecan Cake? You can replace eggs with flaxseed meal or applesauce. Use plant-based butter and milk instead of dairy. This keeps the cake moist and tasty. Make sure to check the texture. You want it fluffy and light, just like the original. To keep your leftover Butter Pecan Cake fresh, cover it tightly. Use plastic wrap or store it in an airtight container. This prevents the cake from drying out. Keep it at room temperature for up to three days. You can also refrigerate it, but it may change the texture slightly. Allow it to come back to room temperature before serving for the best taste. If you want to save the cake longer, freezing is a great option. First, wrap each layer in plastic wrap. Then, place them in a freezer-safe bag. This keeps out moisture and protects against freezer burn. You can freeze the cake for up to three months. When you’re ready to enjoy it, move the layers to the fridge overnight to thaw. After thawing, let it sit at room temperature before serving. This helps restore its wonderful texture and flavor. A Butter Pecan Cake stands out due to its rich, buttery flavor and crunchy pecans. The cake has a soft texture and a sweet, nutty taste. Pecans are essential because they add depth and a lovely crunch. Toasting the pecans enhances their flavor, making each bite delightful. Yes, you can use a Bundt pan. Just remember to adjust the baking time. A Bundt cake may need about 10 more minutes in the oven. Check for doneness by looking for a golden-brown color. Look for a few signs to know if your cake is ready. The edges should pull away from the pan. The top should spring back when touched. You can also check the color; it should be golden brown. Cooling the cake before cutting is crucial. It helps the cake set and makes it easier to slice. Pair your Butter Pecan Cake with a warm cup of coffee or a sweet tea. Both drinks enhance the cake's flavors. For side dishes, consider a light salad or some vanilla ice cream. These options balance the richness of the cake. You can prepare the cake layers a day in advance. Store them in an airtight container. If you make the cake earlier, you can freeze it. Wrap it well in plastic wrap and foil, then thaw before serving. Butter Pecan Cake can have allergen concerns. It contains gluten and dairy, which may not suit everyone. To modify, consider using gluten-free flour and dairy-free butter. Always check ingredient labels for hidden allergens. This Butter Pecan Cake is special thanks to its simple yet delicious ingredients. We discussed using unsalted butter and toasted pecans for the best flavor. I shared how to properly mix and bake your cake, plus tips to avoid common mistakes. Remember, you can customize with flavors like chocolate or go vegan if needed. Store your cake properly to keep it fresh for days. With these steps, you'll impress everyone with this delightful treat. Enjoy making and sharing your cake!
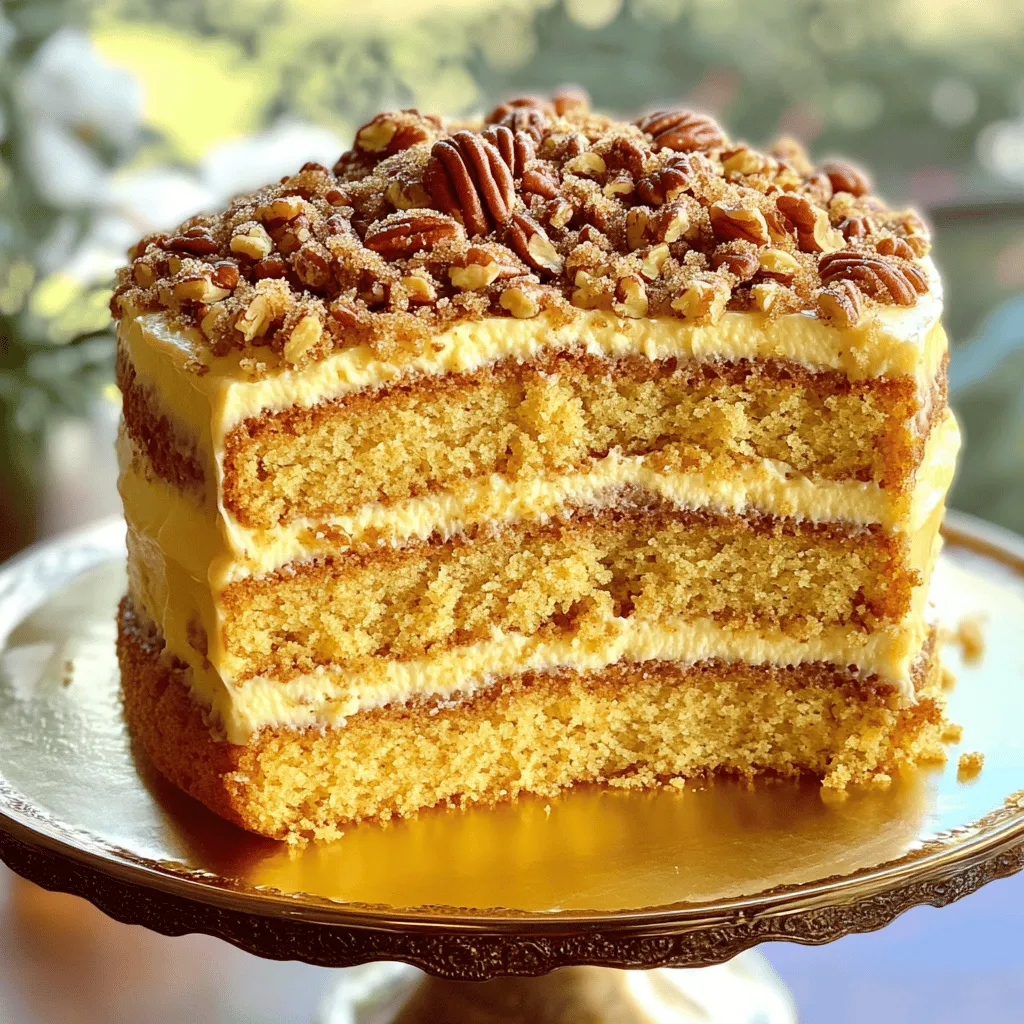
Butter Pecan Cake Delightful and Simple Recipe Guide
If you love baking and crave a treat that’s both rich and nutty, you’ll adore my Butter Pecan Cake. This delightfully simple recipe guides you
- 1 cup all-purpose flour - 1/2 cup unsalted butter, cold and cubed - 1/4 cup powdered sugar - 1/4 teaspoon salt The dough is key to making cannoncini. Start with all-purpose flour, which gives the right texture. Use cold unsalted butter for a tender crust. Powdered sugar adds sweetness without graininess. A pinch of salt balances the flavors. - 1/2 cup heavy cream - 1/2 cup mascarpone cheese - 1/4 cup granulated sugar - 1 teaspoon vanilla extract - Zest of 1 lemon The cream filling makes these treats shine. Heavy cream whips up light and airy. Mascarpone cheese gives a rich, creamy taste. Granulated sugar sweetens the mix. Vanilla extract adds warmth, while lemon zest brightens the flavor. - Extra powdered sugar for dusting Dusting with powdered sugar adds a lovely finish. It makes your cannoncini look more appealing. This little touch elevates the dessert. It’s a simple way to impress friends and family. For the full recipe, check below. This guide helps you create a delightful dessert treat! To make the dough, start by mixing the dry ingredients. In a large bowl, combine 1 cup of all-purpose flour, 1/4 cup of powdered sugar, and 1/4 teaspoon of salt. Next, add 1/2 cup of cold, cubed unsalted butter. Use your fingers or a pastry cutter to mix until it looks like coarse crumbs. Now, it's time to add the wet ingredients. Crack 2 large eggs into the bowl. Pour in 1/2 teaspoon of vanilla extract. Mix until the dough comes together. Wrap the dough in plastic wrap and chill it in the refrigerator for at least 30 minutes. This step helps the dough become easier to work with. Once the dough is chilled, preheat your oven to 400°F (200°C). On a floured surface, roll out the dough to about 1/8-inch thick. Cut long strips, about 1-inch wide. Take metal cannoncini tubes and wrap the dough strips around them, slightly overlapping. Place the wrapped tubes on a baking sheet lined with parchment paper. Bake for 15 to 20 minutes, or until they turn golden brown. After baking, let them cool for a few minutes. Carefully slide the pastry off the tubes. For the cream filling, start by beating 1/2 cup of heavy cream in a mixing bowl. Add 1/4 cup of granulated sugar and 1 teaspoon of vanilla extract. Beat until you see soft peaks form. Gently fold in 1/2 cup of mascarpone cheese and the zest of 1 lemon. This adds a refreshing flavor to your filling. Now, to assemble the cannoncini, use a piping bag fitted with a star nozzle. Carefully fill each cooled cannoncini shell with the cream mixture. After filling, lightly dust the tops with extra powdered sugar before serving. This adds a lovely touch and makes them look beautiful. For the complete recipe, check out the Full Recipe section. Enjoy your delicious Italian cream-filled cannoncini! To make the best cannoncini, you need cold ingredients. Cold butter helps keep the dough flaky. Use unsalted butter straight from the fridge. This step is key to great texture. Let the dough rest for at least 30 minutes. Chilling it helps the gluten relax, which makes rolling easier. Use a piping bag for filling. This tool gives you control and precision. Cut a small hole at the tip to avoid mess. Fill the bag with cream, then squeeze gently. Start from one end and fill to the other. This method ensures even filling and keeps the shells neat. Check your oven temperature with a thermometer. Oven settings can vary, affecting your bake. Preheat to 400°F (200°C) for a golden brown finish. After baking, let the shells cool slightly. This cooling time is vital before filling. Otherwise, the cream may melt and make the shells soggy. For the Full Recipe, be sure to follow the steps closely. Enjoy your delicious Italian cream-filled cannoncini! {{image_2}} You can change the cream filling to suit your taste. Here are two fun ideas: - Chocolate cannoli filling: Blend cocoa powder into your cream. This adds a rich chocolate flavor. Use about 1/4 cup of cocoa for a deep taste. - Citrus-infused variations: Add zest from oranges or limes to your cream. This gives a bright, fresh twist. You can use 1 teaspoon of zest for a hint of citrus. You can also tweak the dough for different diets or preferences: - Gluten-free flour options: Use a gluten-free flour blend in place of all-purpose flour. This makes the recipe friendlier for gluten-sensitive folks. Look for blends that include xanthan gum for the best results. - Substituting butter with oil: Replace the butter with vegetable oil or coconut oil. This can make the dough easier to work with. Use about 1/3 cup of oil instead of 1/2 cup of butter. How you serve cannoncini can make a big difference. Here are a couple of creative ideas: - Garnishing with fresh fruits: Top your filled cannoncini with berries or slices of kiwi. This adds color and freshness to the plate. It also adds a nice contrast to the creaminess. - Creative serving suggestions: Arrange the cannoncini on a cake stand for an impressive look. You can also place them in small cups with a side of chocolate sauce or fruit coulis for dipping. This makes for a fun dessert experience. Try these variations and ideas to make your Italian cream-filled cannoncini truly unique and delightful. For more detailed steps, check the Full Recipe. - Storing unfilled shells: Keep unfilled cannoncini shells in an airtight container. Place them in a cool, dry area. They stay fresh for about three days. Avoid stacking them to keep their shape. - Storing filled cannoncini: For filled cannoncini, store them in the fridge. Use a covered container to keep them fresh. Enjoy them within two days for the best taste and texture. - Duration for optimal freshness: Unfilled shells last up to three days at room temperature. Filled cannoncini are best within two days. - Signs of spoilage: Look for changes in texture or smell. If the cream filling smells sour or the shells feel soft, it’s time to toss them. - Best methods to restore crispness: To regain that crunch, briefly reheat unfilled shells in a 350°F oven. Bake for about 5 minutes until warm. - Serving after storage: For filled cannoncini, serve them chilled. Dust with powdered sugar right before serving for a fresh look. Cannoncini are small, crispy pastries filled with cream. They come from Italy, where they are a popular treat. The name "cannoncini" means "little tubes" in Italian. These pastries are usually made from a dough that wraps around small metal tubes, creating a hollow shape. Once baked, you fill them with a rich cream, often made from mascarpone cheese and whipped cream. The result is a delightful dessert that is both crunchy and creamy. Yes, you can freeze cannoncini. To freeze unfilled shells, place them in a single layer in an airtight container. Make sure they are cool before you pack them. You can freeze them for up to three months. When you want to eat them, just take them out and let them thaw at room temperature. For filled cannoncini, it’s best to eat them fresh. Freezing filled pastries can make them soggy. If you don’t have mascarpone cheese, you can use cream cheese. Mix cream cheese with a little heavy cream to soften it. You can also use ricotta cheese, but it will be less creamy. Adding a bit of sugar can help make it sweeter. Greek yogurt can work too, but it has a tangy flavor. Each option gives a different taste, so choose based on what you like. To keep your cannoncini shells crunchy, fill them just before serving. Avoid filling them too early. You can also bake the shells until they are golden brown. This helps them stay crispy. Store unfilled shells in an airtight container at room temperature. If they do get soggy, you can re-bake them for a few minutes to bring back the crunch. Cannoncini are delicious pastries filled with cream. We covered the key ingredients, how to prepare the dough, and tips for filling. You learned about variations, storage methods, and common questions. Making these treats can be fun and rewarding. With the right techniques, your cannoncini will impress everyone. Enjoy crafting and sharing these delightful pastries with friends and family!
Italian Cream-Filled Cannoncini Delightful Dessert Treat
Are you ready to indulge in a delightful dessert? Italian cream-filled cannoncini are the perfect treat for any occasion. These crispy pastry shells filled with