Desserts

Cookies and Cream Cake Jar Festive Dessert Delight
Get ready to indulge in a fun and delicious treat! This Cookies and Cream Cake Jar is the perfect festive dessert. With layers of moist
![To start, gather your dry ingredients. You will need: - 2 cups all-purpose flour - 2 teaspoons baking powder - ½ teaspoon baking soda - ½ teaspoon salt Mix these dry ingredients in a bowl. This helps to evenly distribute the baking powder and soda. Next, let's move to the wet ingredients. You will need: - ½ cup unsalted butter, softened - 1 ½ cups granulated sugar - 1 cup buttermilk - 3 large eggs - 1 teaspoon vanilla extract Cream the butter and sugar together. This step adds air and gives the cake a nice texture. Then, add the eggs one by one, mixing well. Finally, stir in the vanilla and buttermilk. Now for the fun part—flavor enhancers! You will need: - Zest of 2 lemons - 1 cup fresh strawberries, pureed - ¼ cup lemon juice (freshly squeezed) The lemon zest and juice give your cake a bright, fresh flavor. Pureed strawberries add sweetness and moisture. Mix them in gently to keep the batter light and airy. This recipe combines these ingredients in a way that delivers a delicious Strawberry Lemonade Layer Cake. For the full recipe, check the details above. - Preheat the oven to 350°F (175°C). - Grease and flour three 8-inch round cake pans. First, make sure your oven is hot enough to bake the cake. This helps the cake rise nicely. Greasing and flouring the pans will keep the cake from sticking. - Whisk together the flour, baking powder, baking soda, and salt. In a medium bowl, mix the flour, baking powder, baking soda, and salt. This step is key to a good rise. It helps create a soft cake texture. - Cream butter and sugar. - Incorporate eggs and vanilla. - Mix wet and dry ingredients together. In a large bowl, beat the softened butter and sugar until fluffy. This should take about three minutes. Next, add the eggs one at a time, mixing well. Then, stir in the vanilla. Now, alternate adding the dry mix and buttermilk. Start and end with the dry mix. - Fold in strawberry puree. - Bake and cool the cakes. Gently fold in the strawberry puree. This adds a vibrant flavor and color. Pour the batter evenly into the pans. Bake for 25-30 minutes. Check with a toothpick; it should come out clean. Once baked, let the cakes cool in the pans for ten minutes. Then, transfer them to a wire rack to cool completely. - Beat butter and add powdered sugar and cream. In a large bowl, beat the softened butter until creamy. Gradually mix in the powdered sugar, adding heavy cream. Keep mixing until smooth. Finally, add the lemon juice and vanilla for extra flavor. - Layer and frost cake, and decorate. Once the cakes are cool, place one layer on a platter. Spread frosting on top, then add another layer. Repeat this step with the last layer. Frost the entire cake, and finish with fresh strawberries and lemon slices. For fun, you can drizzle the remaining strawberry puree over the top. For the full recipe, check the recipe section above. Enjoy your delicious Strawberry Lemonade Layer Cake! To bake a perfect Strawberry Lemonade Layer Cake, timing is key. Bake the cakes for 25-30 minutes. Check for doneness with a toothpick. If it comes out clean, your cake is ready. If not, add a few more minutes. Using room temperature ingredients is very important. Take your butter, eggs, and buttermilk out of the fridge ahead of time. This helps your batter mix well and rise nicely. Cold ingredients can make your cake dense. Smoothing frosting can be tricky, but I have some tips for you. Use a spatula or an offset knife. Dip it in hot water, then dry it off. This helps smooth the frosting easily. For the right frosting consistency, it should be thick but spreadable. If it's too thick, mix in a bit more heavy cream. If it's too runny, add more powdered sugar slowly until you reach the desired thickness. Garnishing with fresh fruit makes this cake pop! Use sliced strawberries and lemon wedges on top. You can also drizzle some strawberry puree around the plate for a fancy touch. For serving, consider cutting the cake into fun shapes. Try using cookie cutters to create star or heart shapes. This adds a playful twist to your dessert table! If you want to impress, serve each slice with a dollop of whipped cream on the side. For the full recipe, check out the details above! {{image_2}} You can mix in other fruits to change the taste. Blueberries or raspberries add a fun twist. They bring a new flavor and color to the cake. Just make sure to mash them or puree them before adding. You can also try flavored frostings. Vanilla or cream cheese frosting pairs well with the cake. These flavors add depth and richness. You can make the frosting with less sugar for a lighter feel. If you need a gluten-free cake, you can swap all-purpose flour for a gluten-free blend. Make sure it works well for baking. This keeps the cake moist and tasty. For a lighter version, reduce the sugar by a cup. You can also use applesauce instead of butter. This change keeps the cake soft and adds a fruity note without extra calories. Want to switch things up? Combine this cake with other flavors, like chocolate or vanilla. Mixing different cakes gives a fun taste experience. You can try different frosting techniques, too. Use a spatula for smooth edges or a piping bag for a decorative look. Each method adds a unique touch to your cake. To store your Strawberry Lemonade Layer Cake at room temperature, wrap it tightly in plastic wrap. This keeps the cake moist and fresh. Place it in a cool, dry spot, away from direct sunlight. You can also use a cake dome for added protection. This method works well for up to two days. For longer storage, refrigerate or freeze your cake. To refrigerate, place the wrapped cake in the fridge. It stays fresh for about five days. For freezing, first slice the cake into pieces. Wrap each slice in plastic wrap, then place them in a freezer bag. This helps prevent freezer burn. To thaw, take a slice out and leave it at room temperature for about 30 minutes. Serve it once it’s soft again. This delicious cake stays fresh for about five days at room temperature. If stored in the fridge, it lasts up to a week. When frozen, the cake can maintain its quality for up to three months. Just remember, the sooner you eat it, the better it will taste! For the full recipe, check out the details above and enjoy your treat! To make this cake from scratch, follow these steps: 1. Preheat your oven to 350°F (175°C). Grease and flour three 8-inch round cake pans. 2. In a bowl, whisk together 2 cups of flour, 2 teaspoons of baking powder, ½ teaspoon of baking soda, and ½ teaspoon of salt. Set this aside. 3. In a large bowl, cream together ½ cup of softened butter and 1 ½ cups of granulated sugar until fluffy. 4. Add 3 large eggs, one at a time, mixing well after each. Then mix in 1 teaspoon of vanilla and the zest of 2 lemons. 5. Gradually add the dry mix to the butter mix, alternating with 1 cup of buttermilk. Start and end with the flour mix. 6. Gently fold in 1 cup of pureed fresh strawberries and ¼ cup of lemon juice. 7. Pour the batter evenly into the pans and bake for 25-30 minutes. Check with a toothpick; it should come out clean. 8. Cool the cakes in their pans for 10 minutes before moving them to a wire rack to cool fully. Yes, you can use frozen strawberries. Here are some tips: - Thaw the strawberries before using them. - Drain any excess juice to avoid adding too much liquid to the batter. - Blend them to a puree before folding into the cake mix. If you don’t have buttermilk, here are some alternatives: - Mix 1 cup of milk with 1 tablespoon of lemon juice or vinegar. Let it sit for 5 minutes. - Use plain yogurt or sour cream, thinning with a little water to match buttermilk's consistency. - For every cup, use ¾ cup of yogurt or sour cream mixed with ¼ cup of water. To keep your cake moist, try these tips: - Don’t overmix the batter. Mix just until combined. - Bake at the right temperature and check for doneness early. - Use simple syrup on the layers to add moisture before frosting. Yes, you can prepare this cake ahead: - Bake the cakes a day in advance. Store them wrapped in plastic wrap at room temperature. - Frost the cake on the day you plan to serve it. This keeps the cake fresh and moist. - You can also freeze the unfrosted cakes for up to a month. Thaw them overnight in the fridge before frosting. For the full recipe, click [Full Recipe]. In this article, we explored the full process of making a delicious Strawberry Lemonade Layer Cake. We discussed the essential dry and wet ingredients, flavor enhancers, and step-by-step instructions to create your cake. You learned helpful tips for perfecting your cake and ways to store it properly. Remember, baking is about fun and creativity. Enjoy experimenting with flavors and techniques, and share your tasty results with others! Your friends will surely love it.](https://toastedrecipes.com/wp-content/uploads/2025/05/9200d6e7-e925-47ae-be2e-bb7f5a6c8281.webp)
Strawberry Lemonade Layer Cake Refreshing and Tasty Treat
Are you ready to dive into a sweet, zesty delight? This Strawberry Lemonade Layer Cake is your new go-to treat for any occasion. Bursting with

Blueberry Cake Donuts Simple and Delicious Recipe
Do you love sweet treats? Then you’ll adore my Blueberry Cake Donuts! In this easy recipe, you’ll learn how to make soft and tasty donuts
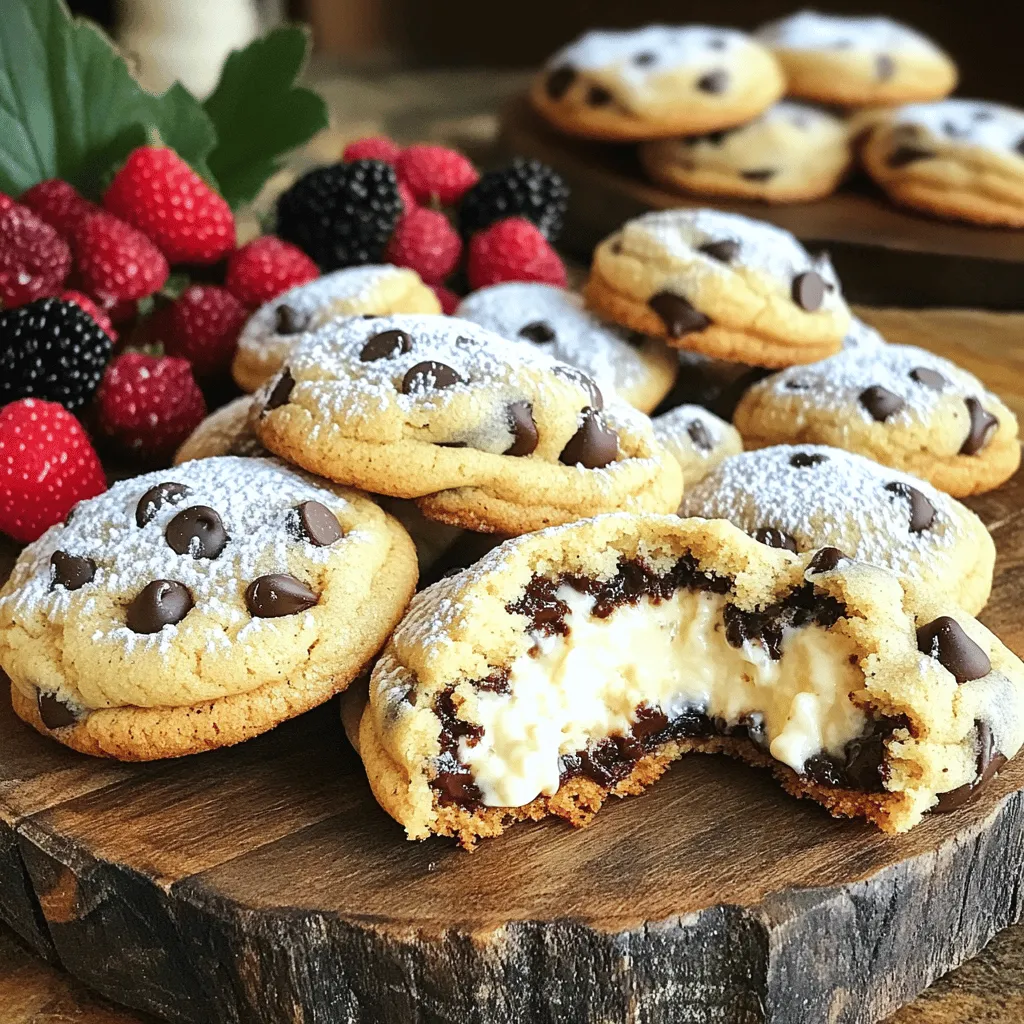
Cheesecake Stuffed Chocolate Chip Cookies Delight
Get ready for a sweet adventure with my Cheesecake Stuffed Chocolate Chip Cookies Delight! These cookies combine two favorite treats into one gooey, creamy masterpiece.
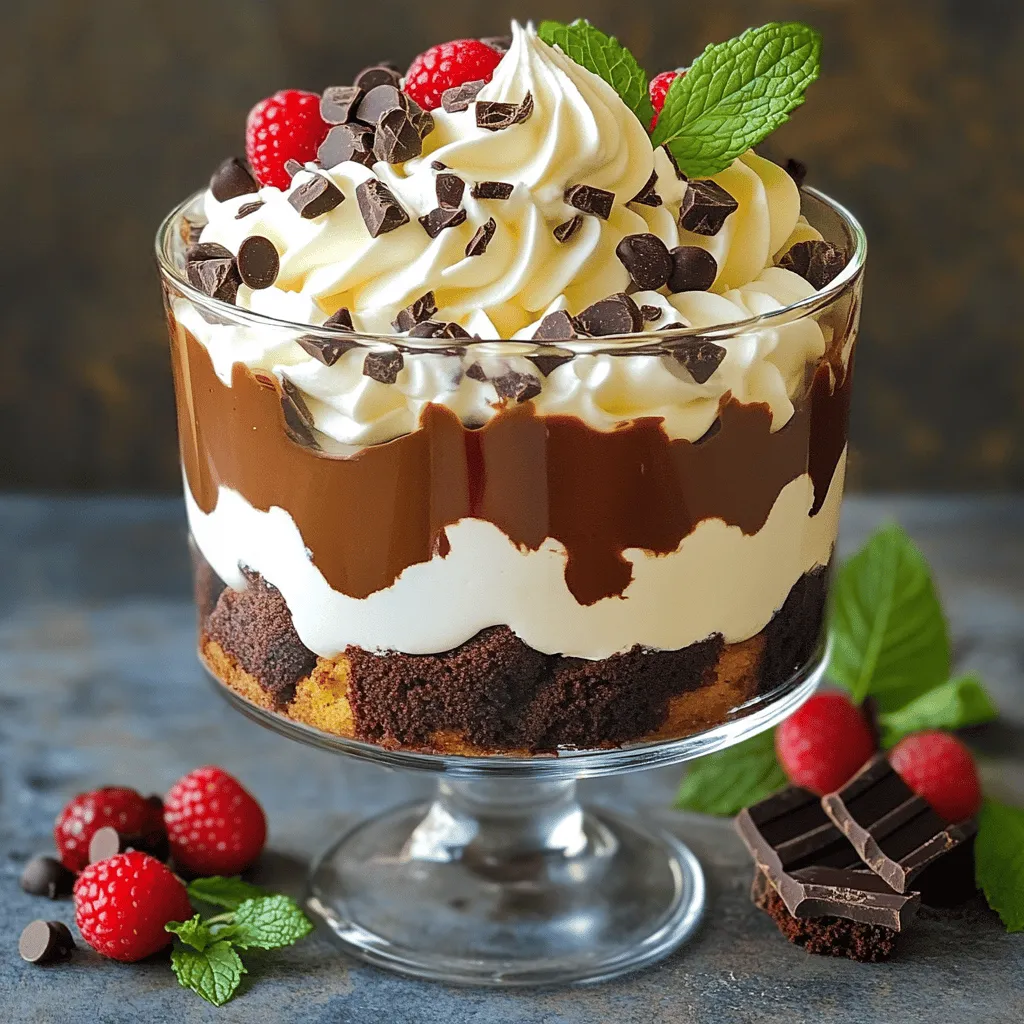
Irresistible Triple-Chocolate Trifle Easy Dessert Recipe
Craving something sweet and chocolatey? I have the perfect treat for you! This Irresistible Triple-Chocolate Trifle is rich, creamy, and easy to make. You’ll layer
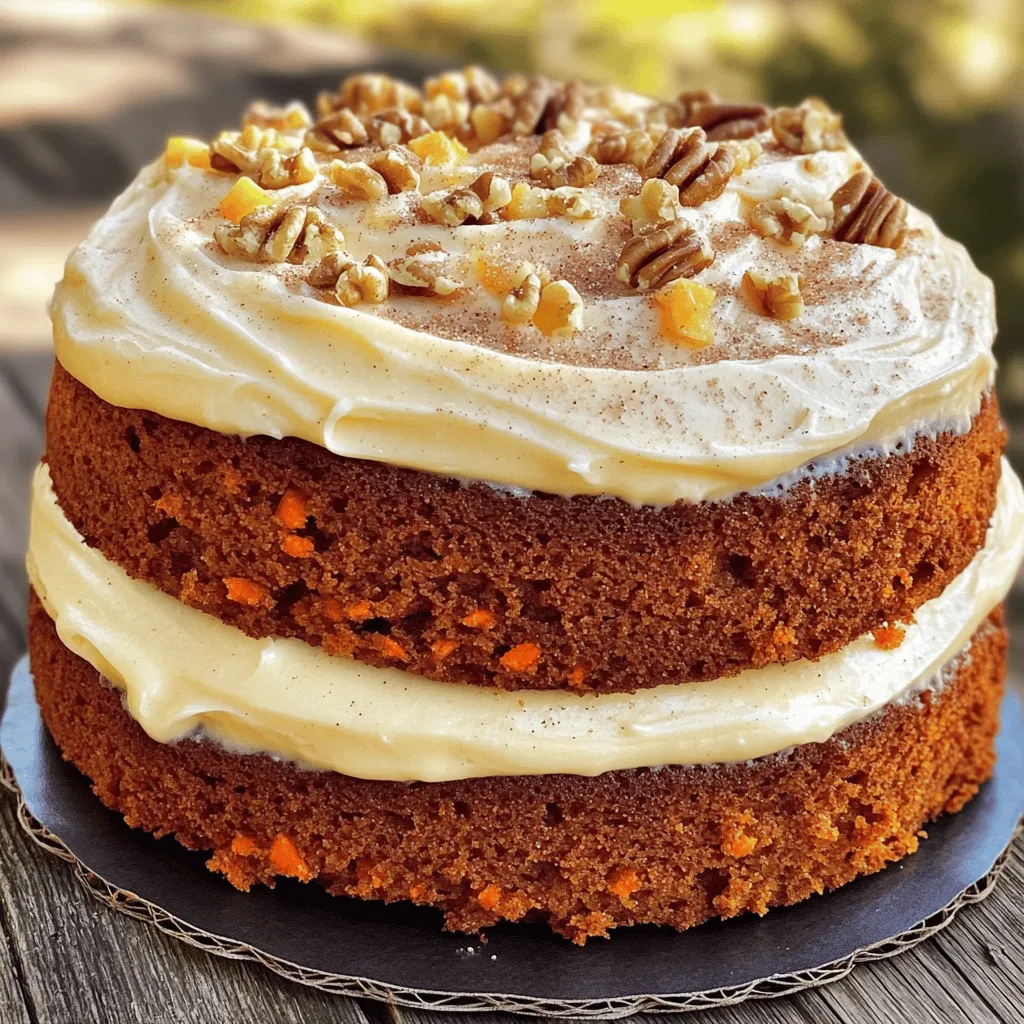
Carrot Cake with Cinnamon Butter Delightful Recipe
Carrot Cake with Cinnamon Butter is a delightful treat you can’t resist! In this recipe, I’ll show you how to make a moist cake packed
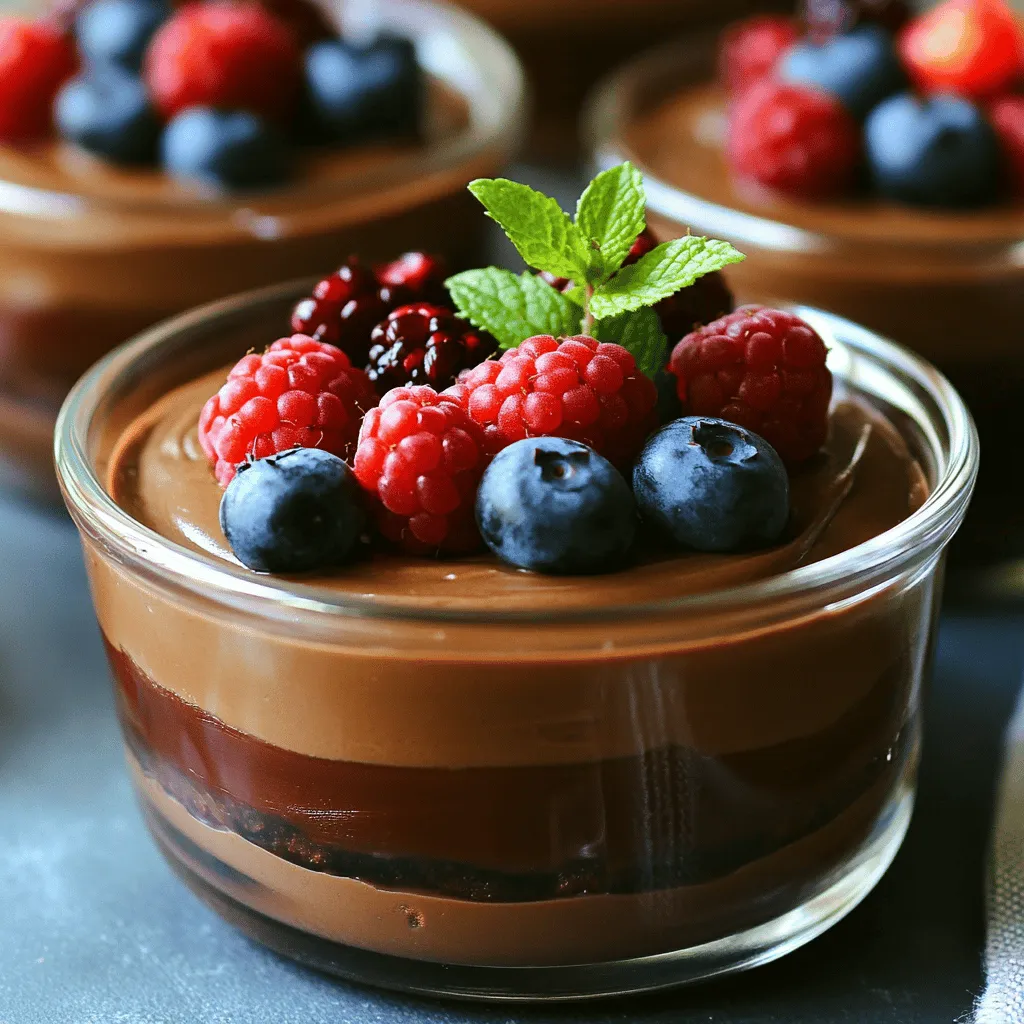
Easy Chocolate Mousse Cups Delightful and Simple Treat
Indulging in a creamy dessert doesn’t get easier than these Easy Chocolate Mousse Cups. Made with just a few simple ingredients, you can whip these
![Chia Banana Bread Energy Bites are simple to make. Here’s what you need: - 2 ripe bananas, mashed - 1 cup rolled oats - 1/4 cup chia seeds - 1/4 cup almond butter or peanut butter - 1/4 cup honey or maple syrup - 1 teaspoon vanilla extract - 1/2 teaspoon baking powder - 1/2 teaspoon cinnamon - A pinch of salt - Optional add-ins: 1/2 cup chopped walnuts or pecans, 1/2 cup dark chocolate chips Each ingredient plays a key role in flavor and texture. The bananas add natural sweetness. Chia seeds give a nice crunch and boost nutrition. Oats create a hearty base that holds everything together. Almond butter or peanut butter adds creaminess and richness. Honey or maple syrup sweetens the bites. Vanilla extract brings warmth. Baking powder helps them rise a bit while baking. Cinnamon and salt enhance the overall taste. If you want more crunch or sweetness, add walnuts or dark chocolate chips. You can find the full recipe for these tasty bites in the earlier section. Enjoy making them! Preheat your oven to 350°F (175°C). Line a baking sheet with parchment paper. This step helps prevent sticking and makes cleanup easy. In a large bowl, mix the mashed bananas, almond butter, honey, and vanilla extract. Stir until the mixture is smooth and creamy. This blend adds natural sweetness and moisture. In another bowl, combine the rolled oats, chia seeds, baking powder, cinnamon, and salt. This mix gives your energy bites a nice texture and flavor. Make sure to stir well so everything is evenly distributed. Gradually add the dry ingredients to the wet mixture. Stir gently until just combined. Avoid over-mixing, as this can change the texture of your bites. If you want, fold in chopped walnuts or dark chocolate chips for extra flavor. Shape the mixture into small balls, about 1 inch in diameter. Place them on the prepared baking sheet. Bake in the preheated oven for 12-15 minutes. Look for a golden brown color on the edges. Let them cool for a few minutes before moving them to a wire rack. Enjoy your tasty energy bites as a quick snack! For the full recipe, check out the details above. To get the right texture for your energy bites, follow a few simple steps. You want a soft yet firm mix. Use ripe bananas; they mash easily and add moisture. If the mix feels too dry, add a splash of almond milk. If it's too wet, sprinkle in more oats. Rolling the bites helps them hold shape. Aim for bites about one inch in size. This size cooks evenly and is easy to grab. Sweetness can change based on your taste. Honey adds a nice touch, while maple syrup gives a unique flavor. Start with a quarter cup, then taste the mix. If you want more sweetness, add a little more. You can also add chocolate chips for extra sweetness. This way, you tailor the energy bites to your liking. Serving these energy bites can be fun! Place them in a rustic bowl lined with parchment paper. You can sprinkle chia seeds on top for a nice look. They work well for parties, snacks, or even breakfast. Pair them with fruit slices or yogurt for a complete meal. You can also wrap them for easy on-the-go snacks. For the full recipe, check the recipe section above. {{image_2}} You can easily change the flavor of your Chia Banana Bread Energy Bites. Try adding spices like nutmeg or ginger for a warm twist. You can also mix in flavor extracts, like almond or coconut, to enhance the taste. If you want a chocolatey kick, add cocoa powder or even espresso powder for depth. The options are endless! If you need to make these energy bites gluten-free, use certified gluten-free oats. For a nut-free version, swap almond butter for sunflower seed butter. This keeps your bites tasty and safe for those with allergies. You can also adjust the sweetener to fit your dietary needs. Maple syrup works great for vegans. You can customize your energy bites with what you have at home. Instead of bananas, use applesauce for moisture. If you don’t have chia seeds, flaxseeds can work too. For the sweetener, you might use agave syrup or a sugar substitute. These small changes let you make the recipe work for you. For the full recipe, check out the [Full Recipe]. To keep your Chia Banana Bread Energy Bites fresh, store them in an airtight container. This helps prevent moisture and keeps them tasty. Place the bites in a single layer if you can. If stacking, add parchment paper between layers to avoid sticking. You can freeze these energy bites for longer-lasting freshness. After they cool completely, place them in a single layer on a baking sheet. Freeze them for about 1 hour. Once frozen, transfer the bites to a freezer-safe bag or container. Remember to label it with the date. They will stay fresh for about three months. In the refrigerator, your energy bites last up to one week. If you freeze them, they'll keep for about three months. Always check for any signs of spoilage before enjoying them after storage. This way, you can savor all the deliciousness without worry. To make Chia Banana Bread Energy Bites, follow these key steps: 1. Mix Wet Ingredients: In a bowl, mash ripe bananas. Stir in almond butter, honey or maple syrup, and vanilla extract until smooth. 2. Combine Dry Ingredients: In another bowl, mix rolled oats, chia seeds, baking powder, cinnamon, and salt. 3. Blend Mixtures: Gradually add the dry mix to the wet mix. Stir until just combined. 4. Form Bites: Shape the mixture into small balls, about 1 inch wide, and place them on a baking sheet. 5. Bake: Bake at 350°F (175°C) for 12-15 minutes. Look for golden edges. 6. Cool: Let them cool for a few minutes before enjoying your tasty snacks. For the full recipe, check the section above. Chia seeds pack a punch of nutrients. They are high in fiber, protein, and omega-3 fatty acids. This helps keep you full and may aid digestion. Bananas add natural sweetness and provide potassium. This mineral is vital for heart health and muscle function. Together, they create a nutritious energy bite that fuels your day. Yes, you can swap almond butter with other nut or seed butters. Peanut butter works well and has a stronger taste. Sunflower seed butter is a great nut-free option. Each butter gives a slightly different flavor and texture. Just keep in mind that this change may alter the final taste of your energy bites. Choose the one you enjoy most! These Chia Banana Bread Energy Bites are easy to make and very tasty. You need simple ingredients and a few steps. Preheat your oven, mix wet and dry ingredients, and shape the bites. Baking them takes just 12 to 15 minutes. Remember to store any extras in an airtight container. You can even freeze some for later. Try different flavors and ingredients to make this recipe your own. Enjoy these healthy snacks that fit your taste!](https://toastedrecipes.com/wp-content/uploads/2025/05/b79735c8-bdfc-40db-b365-742d9ab2026b.webp)
Chia Banana Bread Energy Bites Tasty and Simple Snack
Looking for a quick and tasty snack? Try these Chia Banana Bread Energy Bites! They’re packed with flavor and full of healthy ingredients like bananas
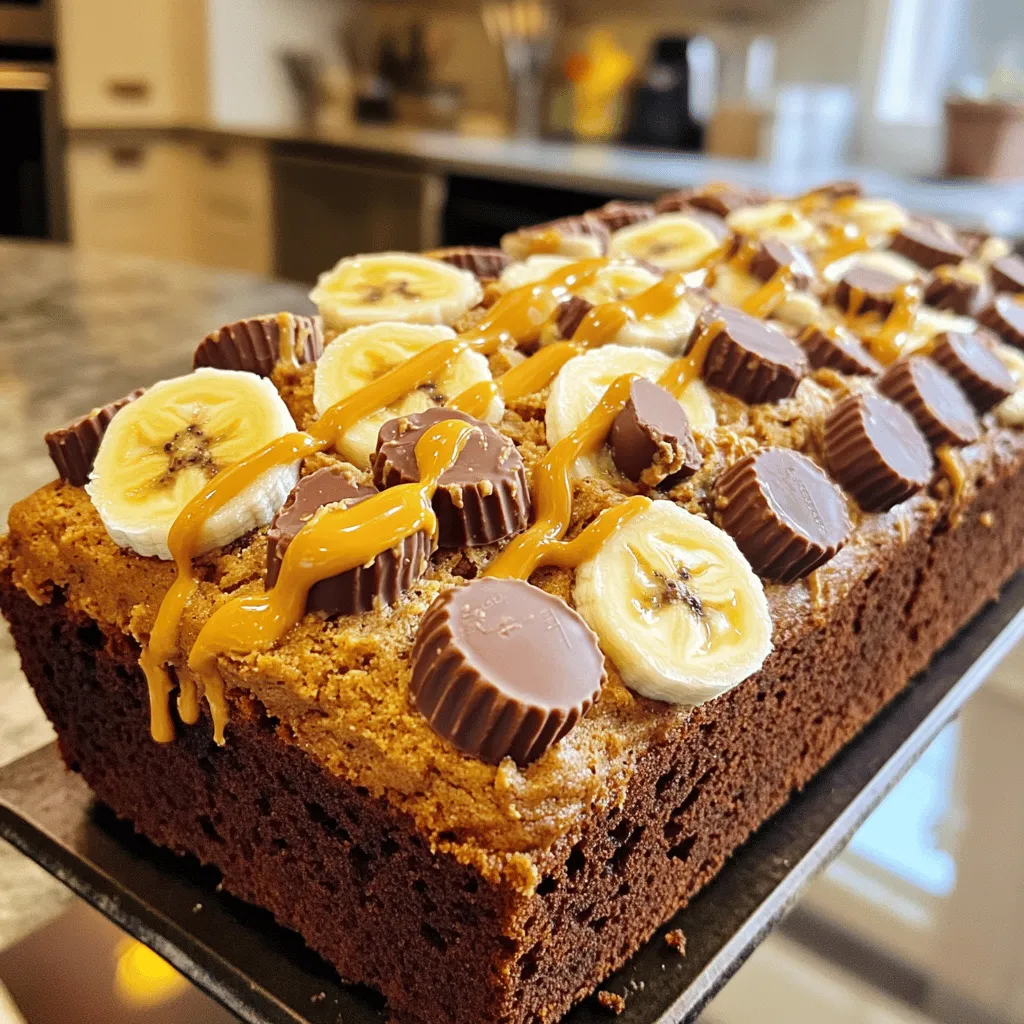
Reese’s Peanut Butter Banana Bread Easy and Delicious
Are you ready for a sweet twist on a classic? My Reese’s Peanut Butter Banana Bread is both easy and delicious. This recipe combines the
![To make Oreo brownie cookies, you need these tasty items: - 1 cup unsalted butter, melted - 1 1/4 cups granulated sugar - 1 cup brown sugar, packed - 2 large eggs - 2 teaspoons vanilla extract - 1 cup all-purpose flour - 3/4 cup unsweetened cocoa powder - 1 teaspoon baking powder - 1/2 teaspoon salt - 1 cup semi-sweet chocolate chips - 12 Oreo cookies, crushed (plus extra for topping) These ingredients blend together to create rich, gooey cookies. The butter adds moistness, while the sugars give sweetness. The cocoa powder provides that deep chocolate flavor we love. If you don’t have something on hand, don’t worry! Here are some swaps you can try: - Butter: Use coconut oil for a dairy-free option. - Granulated sugar: You can use coconut sugar instead for a healthier choice. - Eggs: Replace each egg with 1/4 cup unsweetened applesauce. - All-purpose flour: Use almond flour for a gluten-free version. - Chocolate chips: You can swap in white chocolate or dark chocolate. These substitutions keep the cookies delicious while catering to different diets. Fresh ingredients make the best cookies. Here are some tips to keep them fresh: - Butter: Store it in the fridge until you’re ready to use it. - Sugar: Keep it in an airtight container to prevent clumping. - Eggs: Use eggs that are within their expiration date for the best results. - Flour: Store flour in a cool, dark place to avoid bugs and spoilage. - Cocoa powder: Keep it sealed tightly to maintain its rich flavor. Using fresh ingredients will ensure your Oreo brownie cookies taste amazing. For the full recipe, check out the complete guide. Start by preheating your oven to 350°F (175°C). This step is key for even baking. While the oven warms up, grab a baking sheet. Line it with parchment paper. This will help the cookies release easily after baking. Make sure to space the cookies well on the sheet. This allows them to spread without sticking to each other. In a large bowl, combine the melted butter, granulated sugar, and brown sugar. Mix them until smooth and creamy. Next, add the eggs, one at a time. Then, stir in the vanilla extract. These wet ingredients create a rich base for your cookies. In a separate bowl, whisk the flour, cocoa powder, baking powder, and salt together. This step ensures no lumps in your cookie dough. Gradually mix the dry ingredients into the wet mixture. Stir until you just combine them. If you mix too much, the cookies may turn out tough. Now, fold in the semi-sweet chocolate chips and crushed Oreo cookies. Make sure they are evenly spread throughout the dough. Using a spoon or cookie scoop, drop generous tablespoons of dough onto your prepared baking sheet. Space them about 2 inches apart. To add a special touch, press extra Oreo pieces on top of each cookie. Bake the cookies in your preheated oven for 10-12 minutes. You want the edges set but the centers soft. Once they are done, take them out and cool them on the baking sheet for about 5 minutes. This helps them firm up a bit. After that, transfer the cookies to a wire rack to cool completely. These steps will guide you to delicious Oreo brownie cookies. For the full recipe, check the earlier section. To get the best cookie texture, focus on your mixing. Start by mixing the melted butter with sugars until smooth. This step adds air, helping your cookies rise. When you add the eggs, beat them in well, one by one. When combining dry and wet ingredients, mix gently. Overmixing can lead to tough cookies. Aim for a dough that is slightly thick but still soft. This balance gives you chewy edges and soft centers. If you have leftover cookies, store them in an airtight container. This keeps them fresh for days. If you want to keep them even longer, freeze them. Place the cookies in a freezer bag and remove as much air as possible. You can freeze them for up to three months. When you're ready to eat, let them thaw at room temperature. You can also warm them in the oven for a few minutes to restore their softness. One mistake is not measuring your ingredients accurately. Use a kitchen scale if you can. Another mistake is using cold eggs or butter. Room-temperature ingredients blend better. Also, avoid skipping the chilling time if your dough feels too warm. Chilling helps the cookies hold their shape. Finally, don’t forget to check your oven temperature. An oven that’s too hot can burn the edges. Always use an oven thermometer for accuracy. For the complete recipe, check the [Full Recipe]. {{image_2}} You can make these cookies even more fun by adding different types of chocolate. Try using white chocolate chips for a sweet, creamy twist. Milk chocolate adds a nice touch of sweetness too. Mix and match to find your favorite flavor combo. Each type of chocolate brings its own unique taste and texture to the cookies. If you need gluten-free cookies, switch to a gluten-free flour blend. This works great and keeps the cookies soft. For a vegan option, use plant-based butter and flax eggs. Just mix one tablespoon of flaxseed meal with three tablespoons of water. Let it sit until it thickens. This will help bind your cookie dough and keep it moist. Get creative with mix-ins! Chopped nuts like walnuts or pecans add a crunchy texture. Dried fruits, like cranberries or cherries, give a chewy bite and a hint of tartness. You can even toss in some mini marshmallows for a fun surprise. Mix in your favorites to make these Oreo brownie cookies truly your own. For the full recipe, check out the detailed steps above. Enjoy the fun of customizing your cookies! To keep your Oreo brownie cookies fresh, store them in an airtight container. This helps lock in moisture and keeps them soft. Place a piece of bread in the container with the cookies. The bread adds extra moisture and keeps the cookies from drying out. Keep the container at room temperature, away from heat and direct sunlight for the best results. If you want to save some cookies for later, freezing is a great option. First, let the cookies cool completely. Then, place them in a single layer on a baking sheet. Freeze them for about an hour. Once frozen, transfer the cookies to a freezer-safe bag. Squeeze out all the air before sealing. You can freeze them for up to three months. When ready to eat, just thaw them at room temperature. Oreo brownie cookies stay fresh for about one week at room temperature. If stored properly in an airtight container, they can last even longer. If you freeze them, they will be good for up to three months. Enjoy your cookies anytime by checking the date you made them. For the best taste, eat them within a week if kept at room temperature. Oreo brownie cookies are a tasty blend of brownies and cookies. They have a rich, chewy texture and a deep chocolate flavor. You mix in crushed Oreo cookies for added crunch and sweetness. The result is a cookie that is both soft and slightly crispy. Each bite has a delightful Oreo surprise. They are perfect for chocolate lovers! Yes, you can make Oreo brownie cookies ahead of time. Prepare the dough and scoop it onto a baking sheet. Freeze the cookie dough for up to a month. When you want fresh cookies, just bake them straight from the freezer. This method saves time and gives you warm cookies on demand. You can find pre-made Oreo brownie cookies at many grocery stores. Look in the cookie aisle or the bakery section. Some cafes and bakeries may also sell them. If you want a special treat, consider local bakeries; they might create their own unique versions. However, nothing beats the fun of making them at home using the Full Recipe! In this post, we explored the key ingredients for Oreo brownie cookies, how to create them, and useful tips. You learned about ingredient substitutes and how to keep everything fresh. I shared step-by-step instructions for mixing and baking, ensuring your cookies turn out great. Remember, tweaks like different chocolate types can make a big difference. Store your cookies properly to keep them fresh. Whether you're making them for a snack or a party, these cookies bring joy. Enjoy your baking journey!](https://toastedrecipes.com/wp-content/uploads/2025/05/4f8d1bb1-9808-4f91-835e-be4b88d45e40.webp)
Oreo Brownie Cookies Irresistible and Easy Recipe
Craving a treat that combines rich brownies and Oreos? You’re in the right place! These Oreo Brownie Cookies are not just delicious, but also easy