Desserts

For these heavenly summer peach bars, you need 2 cups of fresh peaches. Make sure to peel and dice them. Choose ripe peaches for the best flavor. They give the bars a sweet and juicy taste. You can use white or yellow peaches based on your preference. Next, gather the dry ingredients. You will need: - 1 cup all-purpose flour - 1 cup rolled oats - ½ cup brown sugar - ½ cup white sugar - 2 teaspoons baking powder - ½ teaspoon ground cinnamon - ¼ teaspoon salt These ingredients form the crust and topping. The oats add nice texture. The sugars give sweetness, while the baking powder helps the bars rise. Now, let's move to the wet ingredients. You need: - ½ cup unsalted butter, melted - 1 teaspoon vanilla extract - 1 tablespoon lemon juice The melted butter binds everything together. The vanilla adds a lovely aroma. Lemon juice keeps the peaches fresh and brightens their flavor. You can find the full recipe here. Start by preheating your oven to 350°F (175°C). Grease a 9x9-inch baking pan with butter or non-stick spray. This helps the bars come out easily after baking. Take 2 cups of fresh peaches. Peel and dice them into small pieces. Toss the diced peaches with 1 tablespoon of lemon juice. This adds flavor and keeps the peaches bright. Let them sit for about 10 minutes to soak in the juice. In a large bowl, mix together the dry ingredients. Combine 1 cup of all-purpose flour, 1 cup of rolled oats, ½ cup of brown sugar, ½ cup of white sugar, 2 teaspoons of baking powder, ½ teaspoon of ground cinnamon, and ¼ teaspoon of salt. Stir well to blend everything together. Melt ½ cup of unsalted butter and add it to the dry mixture. Also, mix in 1 teaspoon of vanilla extract. Stir until the mixture is crumbly. Press about half of this mixture into the bottom of your greased pan. Spread the marinated peaches evenly over the crust. If you want extra crunch, sprinkle 1 cup of granola on top. Finally, crumble the remaining mixture over the peaches. Bake in the preheated oven for 30-35 minutes. Check for a golden brown top and bubbly peaches. Once baked, remove the pan from the oven and let it cool completely. This step is key before cutting them into bars. Enjoy your heavenly summer peach bars! For the full recipe, check out the earlier section. For these peach bars, I recommend using ripe, fresh peaches. Look for peaches that are slightly soft to the touch. They should smell sweet and fragrant. Yellow peaches are great, but white peaches add a nice twist too. Avoid hard peaches; they won't soften well during baking. To get the right texture, you need to balance the wet and dry ingredients. Diced peaches add moisture, but do not overmix the batter. Mixing too much can lead to tough bars. Press half of the crumb mixture firmly into the pan for a sturdy base. This way, the top layer remains crumbly and light. To make your peach bars look stunning, dust them with powdered sugar before serving. You can also add fresh peach slices on top. A few mint leaves create a nice pop of color. Serve them on a pretty platter for a special touch. For a fun twist, drizzle some honey or caramel sauce over the bars. For the complete recipe, refer to the Full Recipe provided. {{image_2}} You can elevate your peach bars with spices. Cinnamon is a classic choice. It adds warmth and depth. A pinch of nutmeg can also work wonders. You might even try cardamom for a unique twist. Mix your chosen spice into the dry ingredients. Just a little adds a lot of flavor. If you need a gluten-free version, it's simple. Swap all-purpose flour for gluten-free flour. Many brands work well in baking. You can also use almond flour for a nutty taste. Just make sure your oats are certified gluten-free. This way, everyone can enjoy these bars. Adding nuts or seeds is a great way to boost texture. Chopped almonds or walnuts add crunch. They also give a nice nutty flavor. If you prefer seeds, try sunflower or pumpkin seeds. Just fold them into the crumb mixture. This makes your bars even more delicious and filling. For more delicious ideas, check out the Full Recipe. To keep your peach bars fresh, place them in an airtight container. Make sure to let them cool completely before sealing. Store them at room temperature for up to three days. If it’s hot, consider putting them in the fridge. This helps keep them from getting too warm and soft. You can freeze these peach bars for longer storage. First, let them cool fully. Wrap each bar in plastic wrap, then place them in a freezer bag. This keeps them fresh for up to three months. When you want to enjoy them, just take out a bar and let it thaw at room temperature. To reheat your peach bars, preheat the oven to 350°F (175°C). Place the bars on a baking sheet. Heat for about 10 to 15 minutes until warm. You can also use a microwave if you want a quicker option. Heat for 15 to 20 seconds at a time until they are warm but not hot. Enjoy your Heavenly Summer Peach Bars! For the full recipe, check the earlier section. You can tell when the peach bars are done by looking at the top. It should be a nice golden brown. You can also check if the peaches are bubbly around the edges. A toothpick can help too. Insert it in the center. If it comes out clean, your bars are ready! Yes, you can use frozen peaches! Just remember to thaw and drain them first. This helps remove excess water. You want your bars to stay firm and not too soggy. Fresh peaches give a better flavor, but frozen works in a pinch. If you need a butter substitute, try using coconut oil or applesauce. Both work well in baking. They add moisture and keep your bars soft. You can also use margarine if you prefer. Just make sure it’s a similar amount as the butter in the recipe. Peaches are tasty and good for you! They are low in calories and high in vitamins. They contain vitamin C, which helps your immune system. Peaches also have fiber, which is great for digestion. Eating peaches can support healthy skin, too. You can boost the nutrition of your peach bars easily! Add some chia seeds or flaxseeds into the mixture. This adds healthy fats and fiber. You can also swap some white flour for whole wheat flour. Using less sugar or natural sweeteners can make it even better. Check out the Full Recipe for more ideas! You learned about making delicious peach bars from fresh ingredients. We covered each step, from preparing peaches to baking them perfectly. I shared tips for texture, storage, and even variations to try. Remember, using the right peaches and adding your favorite ingredients can make a big difference. Enjoy your peach bars fresh or frozen, and feel free to get creative with flavors. With this guide, you can bake tasty snacks that everyone will love. Happy baking!
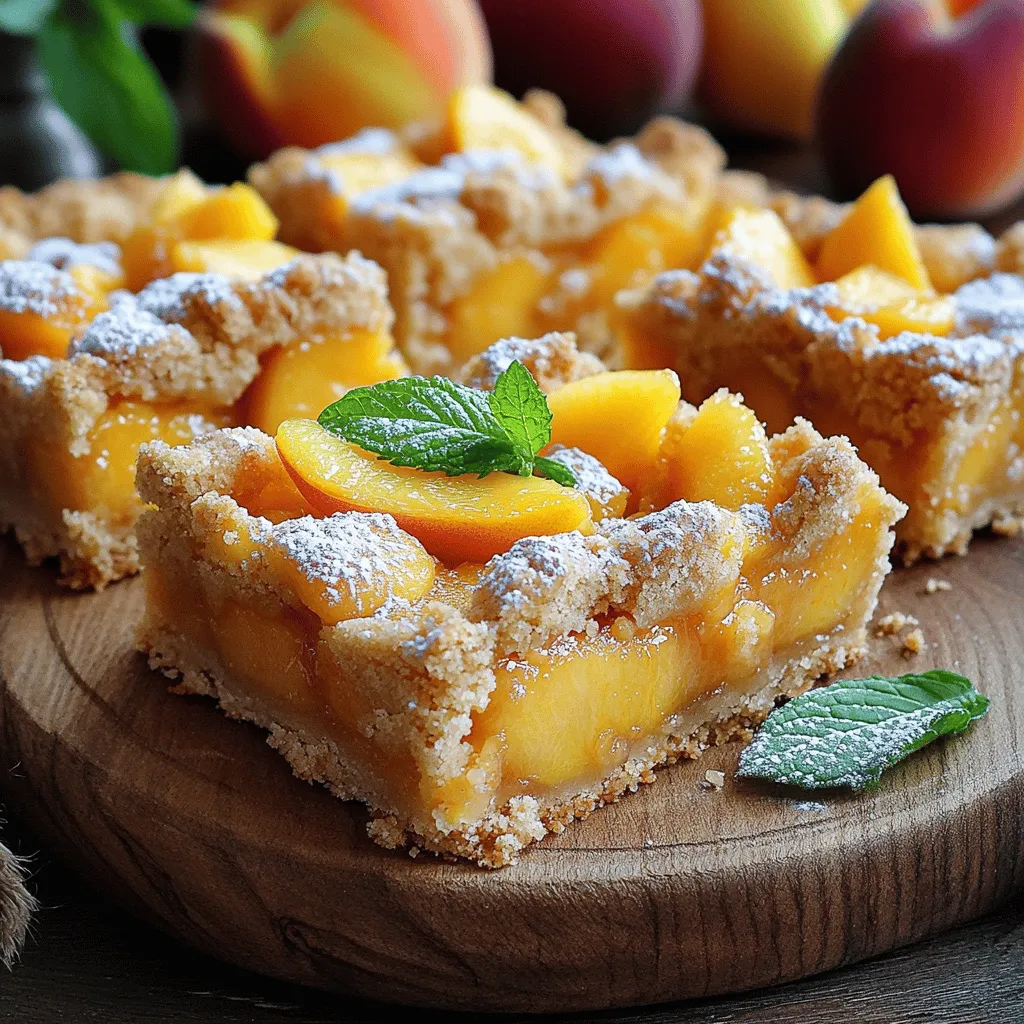
Heavenly Summer Peach Bars Easy and Delicious Treat
Summer is the perfect time to enjoy fresh peaches, and I’m excited to share my easy recipe for Heavenly Summer Peach Bars! These sweet treats
To make the easiest canned peach cobbler, you need just a few simple ingredients. This recipe is all about keeping it simple yet delicious. Here’s what you will need: - 2 cans of sliced peaches in syrup (15 oz each) - 1 cup all-purpose flour - 1 cup granulated sugar (divided) - 1 cup milk - 1/2 cup unsalted butter (melted) - 2 teaspoons baking powder - 1 teaspoon vanilla extract - 1/2 teaspoon ground cinnamon - A pinch of salt The canned peaches give this cobbler a sweet and juicy base. The sugar adds a nice touch of sweetness, while the flour helps create that perfect, thick batter. Milk and butter make the batter rich and creamy. Baking powder helps it rise, giving that lovely light texture. Feel free to explore optional toppings like whipped cream or vanilla ice cream to make it even better. These extras can turn an already tasty dessert into a showstopper. For the full recipe, check out the details provided above. - Preheating the oven Start by preheating your oven to 350°F (175°C). This step is key for even cooking. - Mixing the batter In a medium bowl, mix melted butter and 1 cup of sugar. Stir well to blend. Next, add flour, baking powder, milk, vanilla extract, ground cinnamon, and a pinch of salt. Mix until you have a thick batter. - Layering ingredients Pour the batter into a greased 9x13-inch baking dish. Spread it evenly. Carefully layer the canned peaches on top, including the syrup. Avoid stirring; the batter will rise around the peaches while baking. - Pouring and layering Once your peaches are layered, sprinkle the remaining 1/4 cup of sugar over the top. This adds extra sweetness and a nice finish. - Baking time and temperature Place the dish in your preheated oven. Bake for about 35-40 minutes. - Checking for doneness To check if it’s done, insert a toothpick into the center. It should come out clean. The top will be golden brown. Let it cool for about 10 minutes before serving. For the full recipe, check out the details above. Enjoy your peach cobbler! To make the best cobbler, you need a thick batter. This helps keep the peaches from sinking. When you mix the batter, do not overwork it. Just stir until the dry and wet ingredients blend. When layering peaches, spread them evenly over the batter. Pour the peaches gently on top. Let the batter rise around the peaches as it bakes. This creates a lovely texture. Keep an eye on the baking time. Bake at 350°F for 35-40 minutes. The top should turn a nice golden brown. Use a toothpick to check for doneness. If it comes out clean, your cobbler is ready! Serve your peach cobbler warm for the best taste. A scoop of vanilla ice cream adds a creamy touch. You can also use whipped cream for a lighter option. For garnish, sprinkle a bit of cinnamon on top. This adds flavor and makes it look nice. You can also add fresh mint leaves for a pop of color. Enjoy your delicious treat! {{image_2}} Adding spices Spices can boost the taste of your cobbler. Try adding nutmeg or ginger for a warm flavor. A dash of cardamom can also add a unique twist. Each spice gives a new taste that makes your cobbler special. Using different canned fruits You can switch out peaches for other canned fruits. Try using pears, cherries, or apricots. Each fruit offers a different flavor and sweetness. Mixing fruits can also create a fun, colorful cobbler. Incorporating nuts Nuts add crunch and flavor to your cobbler. Chopped pecans or walnuts work well. They also add healthy fats and protein. Sprinkle them on top before baking for a nice texture. Low-sugar options You can cut sugar in this recipe. Use half the amount or try a sugar substitute. Applesauce can also replace some sugar. This lets you enjoy the cobbler with less sweetness. Gluten-free substitutions If you need gluten-free options, use gluten-free flour instead of all-purpose flour. Many brands offer great taste and texture. This way, everyone can enjoy the cobbler without worry. Dairy-free options To make a dairy-free version, switch milk with almond or oat milk. Use vegan butter instead of regular butter. These swaps keep the cobbler rich and creamy without dairy. For the full recipe, follow the instructions carefully. Enjoy creating your own version of this easy canned peach cobbler! To keep your peach cobbler fresh, store it in the fridge. Place it in an airtight container or cover it tightly with plastic wrap. This will help avoid drying out or picking up other food smells. It should last up to four days in the fridge. If you want to save it longer, freezing is a great option. For freezing, first let the cobbler cool completely. Then, cut it into individual portions. Wrap each piece in plastic wrap, then place them in a freezer-safe bag. Remember to label the bag with the date. This way, you can enjoy your cobbler later, up to three months later. When it’s time to enjoy your leftovers, reheating is easy. For the best results, use the oven. Preheat it to 350°F (175°C). Place the cobbler in an oven-safe dish. Cover it with foil to keep it moist. Heat for about 15-20 minutes or until warmed through. If you’re in a hurry, the microwave works too. Place a serving in a microwave-safe bowl. Heat it in 30-second intervals until warm. Be careful, as it can get hot quickly. Enjoy your peach cobbler warm, just as it should be! Can I use fresh peaches instead? Yes, you can use fresh peaches. Peel and slice about 4-5 ripe peaches. This adds a fresh taste and makes your cobbler even better. Just make sure to adjust the syrup. You might need to add a bit of sugar to match the sweetness of canned peaches. How do I know when the cobbler is done? Check the cobbler after 35 minutes. The top should be golden brown. Insert a toothpick in the center. If it comes out clean, your cobbler is ready. If not, bake a little longer and check again. Can I make it ahead of time? Yes, you can make it ahead. Bake the cobbler and let it cool. Store it in the fridge for up to 2 days. Reheat it in the oven before serving. This keeps it warm and fresh. What to do if the cobbler is too soggy? If your cobbler is soggy, try baking it longer. Increase the time by 5-10 minutes. You can also cover the top with foil to prevent burning while it cooks more. Fixing a burnt top If the top is burnt, cover it with foil. This prevents further burning while the inside cooks. You can also serve it with whipped cream to hide any burnt parts. Adjusting for a thicker batter If your batter is too runny, add a little more flour. Start with 1 tablespoon and mix well. This should help thicken it up without changing the flavor. This blog post covered everything you need to know about making peach cobbler. We talked about the ingredients, preparation, baking process, and perfecting your dish. I shared tips on serving and variations for unique flavors. Lastly, we explored storage and reheating to keep your cobbler fresh. Remember, cooking is fun. Don’t hesitate to make it your own. Enjoy each bite of your homemade peach cobbler!
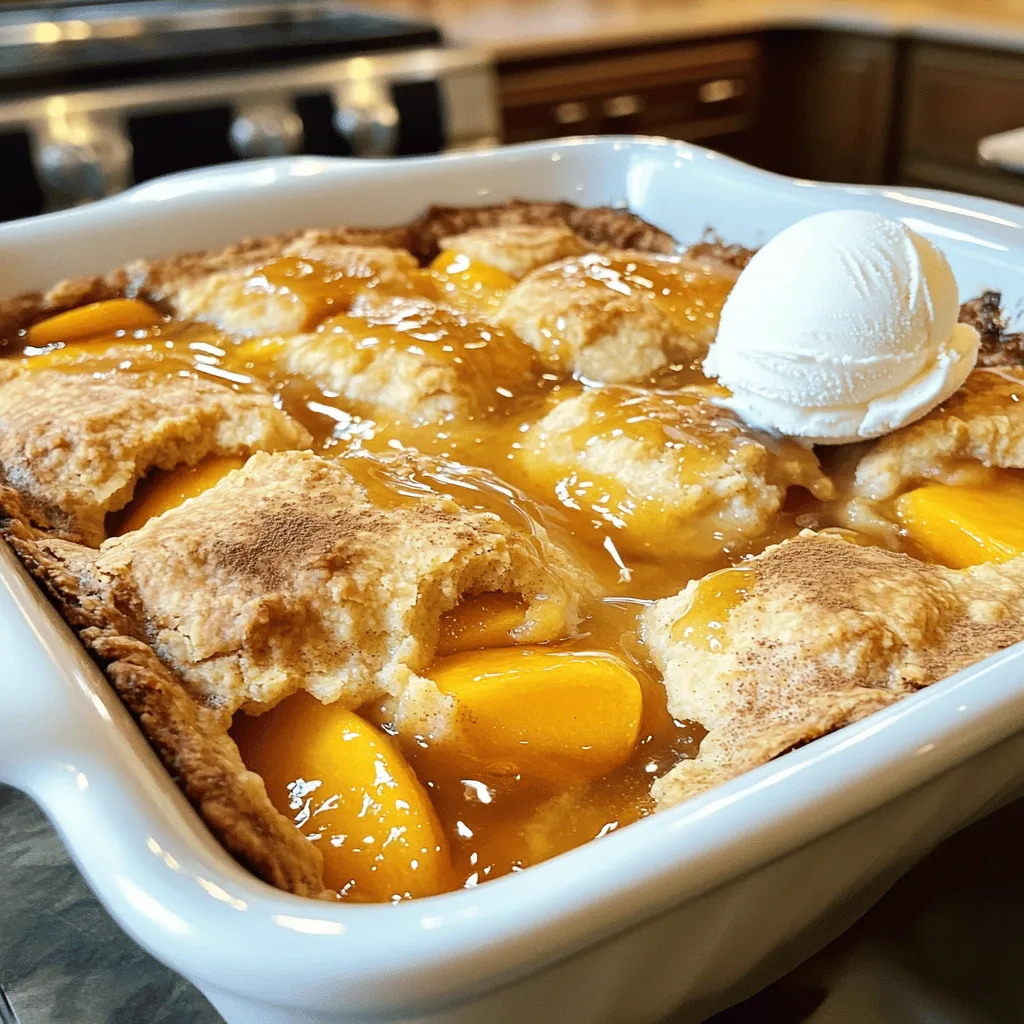
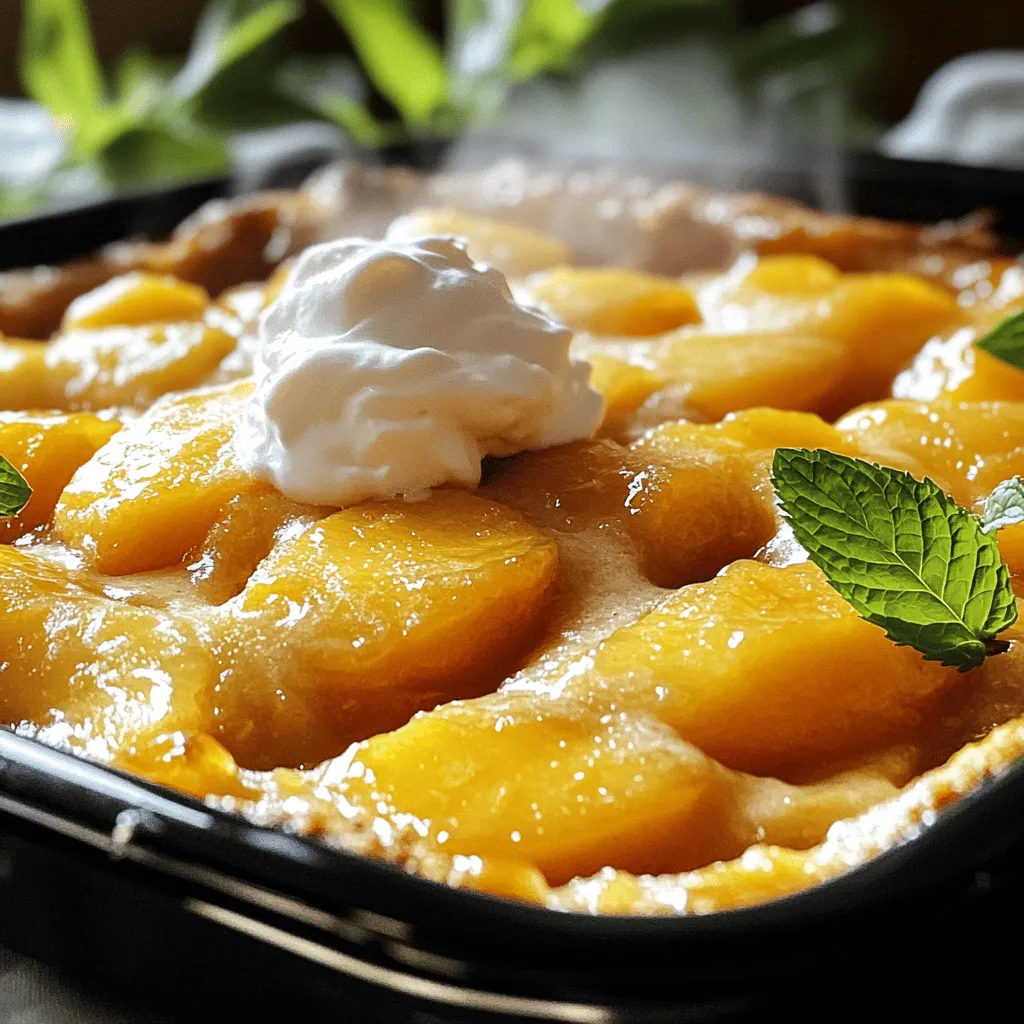
Easy Canned Peach Cobbler Simple and Tasty Delight
Craving a sweet treat that’s quick and easy? You’ll love this Easy Canned Peach Cobbler! With just a few simple ingredients, you can whip up
- 2 cups fresh raspberries - 2 cups fresh peaches, peeled and sliced - 1 cup granulated sugar, divided - 1 teaspoon ground cinnamon - 1 cup all-purpose flour - ½ teaspoon salt - 1 teaspoon baking powder - 1 tablespoon lemon juice - 1 teaspoon vanilla extract - 1 cup milk - ½ cup unsalted butter, melted When I make raspberry peach cobbler, the fresh fruit shines. I choose ripe raspberries and juicy peaches. These fruits are sweet and full of flavor. You can find them at local markets or stores. Fresh fruit makes the dish vibrant and tasty. For the dry ingredients, I use granulated sugar for sweetness. Ground cinnamon adds warmth and spice. All-purpose flour forms the base, giving structure to the cobbler. Baking powder helps it rise, while salt balances the sweetness. In the wet ingredients, I add lemon juice for brightness. Vanilla extract gives a lovely aroma. Milk makes the batter creamy. Finally, melted unsalted butter adds richness. Together, these ingredients create a delicious blend. I recommend using the [Full Recipe] for exact amounts and details. This cobbler is easy to make and a joy to serve! - Preheat your oven to 375°F (190°C). - Grease a 9x13-inch baking dish with cooking spray or butter. - Toss the fresh raspberries and sliced peaches in a large bowl. - Add ½ cup of granulated sugar, lemon juice, vanilla extract, and ground cinnamon. Mix well. - Spread the fruit mixture evenly in the bottom of your prepared baking dish. - In another bowl, mix the flour, baking powder, the remaining ½ cup of granulated sugar, and salt. - Pour in the milk and melted butter. Stir gently until just combined. - The batter will be lumpy, and that is okay. - Pour the batter over the fruit mixture in the baking dish. - Make sure it covers the fruit as evenly as possible. Some fruit may peek through. - Bake in the preheated oven for 35-40 minutes. The top should be golden brown. - Check doneness by inserting a toothpick into the cobbler; it should come out clean. Enjoy this delicious dessert! For the full recipe, check out the [Full Recipe]. To select ripe peaches, look for ones that give slightly when you squeeze them. They should smell sweet and have a warm, golden color. You want peaches that are juicy and flavorful. A good peach will make your cobbler shine. For a golden crust, keep an eye on your oven. Bake at 375°F (190°C) until the top turns golden brown. This usually takes about 35-40 minutes. You can brush the top with melted butter for extra color and flavor. When serving your cobbler, whipped cream or vanilla ice cream is a great choice. Both add a creamy touch that balances the fruit's tartness. You can also serve it warm for a cozy dessert experience. For drinks, consider pairing with sweet tea or a light white wine. These options enhance the fresh flavors of the cobbler. One common mistake is overmixing the batter. This can make your cobbler tough. Mix just until the dry ingredients are wet, and lumps are fine. Another mistake is not letting it cool before serving. Allow the cobbler to cool for about 10 minutes. This helps it set and makes it easier to serve. Enjoy your delicious creation! For the full recipe, check out the Raspberry Peach Cobbler Delight section above. {{image_2}} You can make this cobbler even more fun by adding other fruits. Blueberries and blackberries mix well with raspberries and peaches. They add a nice pop of flavor and color. You can also use frozen fruit instead of fresh. Just be sure to thaw and drain it first. This keeps your cobbler from getting too watery. If you need a gluten-free option, swap out regular flour for gluten-free flour. Many brands offer one-to-one substitutes, making it easy. You can also use almond flour or oat flour for a unique twist. Just remember to check labels to ensure they are gluten-free. Want to boost the flavor? Add spices like nutmeg or ginger. These spices bring warmth and depth to the dish. You can also use flavored extracts, like almond or coconut. Just a few drops can transform your cobbler into something special. For the full recipe, be sure to check the main section. To store your raspberry peach cobbler, let it cool completely. Place it in an airtight container. This keeps it fresh and tasty. You can also cover it with plastic wrap. In the fridge, it lasts about three to four days. If you want to keep it longer, freezing is a great option. For freezing, cut the cobbler into portions. Wrap each piece in plastic wrap tightly. Then place the wrapped pieces in a freezer bag. This helps prevent freezer burn. Your cobbler can stay frozen for up to three months. When you're ready to eat it, thaw the cobbler overnight in the fridge. To reheat, place it in an oven set to 350°F (175°C). Heat for about 20 minutes, or until warm. This keeps the crust nice and crisp. Enjoy your cobbler just like it was fresh! Raspberry peach cobbler is a warm dessert made with fresh fruit and a soft topping. It has roots in the Southern United States, where people often used local fruits. The dish combines sweet raspberries and juicy peaches, creating a perfect mix of flavors. The topping is like a cake that bakes over the fruit. This dessert is easy to make and delicious for any occasion. Yes, you can make cobbler ahead of time. Prepare the fruit mixture and batter separately. Store each in the fridge for up to two days. When ready to bake, combine them in the dish and bake as directed. This helps the flavors meld together. You can also bake it in advance and reheat it later. Just warm it gently in the oven before serving. Check for a golden brown top on the cobbler. Insert a toothpick into the center. If it comes out clean, the cobbler is ready. The fruit should be bubbling around the edges. If the top looks too dark, cover it with foil and bake a little longer. Enjoy your delicious dessert when it’s perfectly baked! Raspberry peach cobbler combines fresh fruit, simple ingredients, and easy steps. We learned how to prep the oven, mix fruits, and create a sweet batter. Tips can help you choose ripe peaches and avoid common mistakes. Whether you stick to the original recipe or explore variations, this dessert stays fun. Enjoy your cobbler warm, topped with ice cream or whipped cream. It’s simple yet satisfying. Make this delightful treat to share with friends or family and savor every bite!
Raspberry Peach Cobbler Delightful and Simple Recipe
Are you ready to indulge in a sweet and fruity treat? This Raspberry Peach Cobbler combines juicy raspberries and peaches for a delightful dessert. With
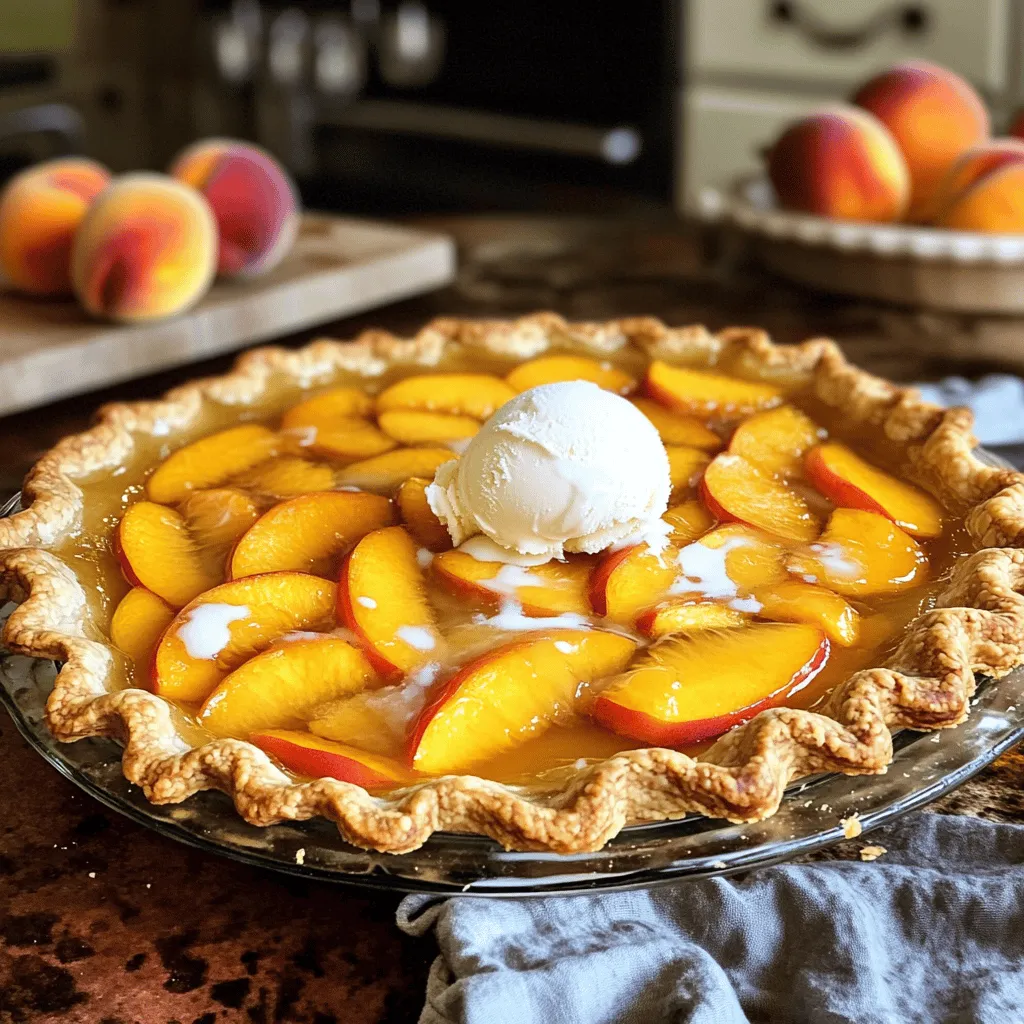
To make the best peach cobbler, start with ripe peaches. Look for fruit that is slightly soft to the touch. The skin should have a nice color, usually yellow or orange. A good peach smells sweet and fruity. If you can, pick local peaches; they often taste better. You need about four cups of sliced peaches for this recipe. Sugar is the main sweetener for this cobbler. I use granulated sugar for the filling. You can adjust the amount based on your taste. If you want a richer flavor, try brown sugar for the topping. You can also use honey or maple syrup, but remember, they add unique flavors. Keep in mind that the sweetness of the peaches matters too. For the batter, you'll need a few simple items. Here’s what you need: - 1 cup all-purpose flour - 1 tablespoon baking powder - ½ teaspoon salt - 1 cup milk - ½ cup unsalted butter, melted - 1 teaspoon vanilla extract - 1 tablespoon lemon juice - 1 teaspoon ground cinnamon Each ingredient plays a role in making the dish tasty. The flour helps create a nice texture, while the baking powder adds fluffiness. Milk makes the batter moist and rich. Don't forget the lemon juice; it brightens the peach flavor! This recipe is all about balance, and these ingredients work together to make a delicious dessert. You can find the full recipe in the earlier sections. To make peach cobbler, start by gathering all your ingredients. You need fresh peaches, sugar, lemon juice, cinnamon, vanilla, flour, baking powder, salt, milk, and butter. Preheat your oven to 350°F (175°C). This step helps the cobbler bake evenly. In a large bowl, mix the sliced peaches with half a cup of sugar, lemon juice, cinnamon, and vanilla. Toss gently to coat the peaches. Let them sit for about 10 minutes to soak in the flavors. In another bowl, whisk together the flour, baking powder, the rest of the sugar, and salt. Gradually add the milk to this mix. Stir until it is smooth. Finally, fold in the melted butter. Pour the batter into a greased 9x13 inch baking dish. Spread it evenly. Spoon the marinated peaches over the batter. Make sure to include the juices, but do not mix. Sprinkle brown sugar on top of the peaches. Place the dish in the oven and bake for 40-45 minutes. You know it’s done when the top is golden brown and a toothpick comes out clean. Let it cool for about 10 minutes before you dig in. For a treat, serve it warm with a scoop of ice cream. You can find the full recipe [here]. When picking peaches, look for ripe ones. They should feel soft but not mushy. The skin should be slightly fuzzy and have a warm color. I love using local peaches for the best flavor. If you can, buy them at a farmer's market. Fresh peaches taste sweet and juicy, making your cobbler shine. To get a great texture, mix your batter gently. Over mixing can make it dense. When you fold in the melted butter, do it slowly. This keeps air in the batter, making it light. Also, letting the peach mixture sit helps. It lets the juices soak into the batter as it bakes. For a crisp topping, sprinkle brown sugar on top before baking. Serve your peach cobbler warm for the best taste. A scoop of vanilla ice cream on top is a classic choice. The cold ice cream melts into the warm cobbler, creating a perfect mix. You can also pair it with whipped cream or yogurt. For a fun twist, try adding a sprinkle of cinnamon or nutmeg on top. Enjoy your sweet treat! Check out the Full Recipe for more details. {{image_2}} You can switch up the peaches for other fruits. Try fresh berries, apples, or even cherries. Each fruit adds a new taste. For example, blueberries bring a burst of sweetness. Apples offer a nice crunch. Mix and match your favorites for fun twists. You can make this dish gluten-free with simple swaps. Use gluten-free flour instead of all-purpose flour. Many brands work well in baking. Just ensure the baking powder is gluten-free too. This way, everyone can enjoy your cobbler. Adding spices and toppings can elevate your cobbler. Try a pinch of nutmeg for warmth. A splash of almond extract gives a unique flavor. Top with a sprinkle of oats or nuts for crunch. Serve it with whipped cream or yogurt for a fresh touch. For a classic feel, a scoop of vanilla ice cream is perfect. These tweaks make your cobbler even more special. For the full recipe, check this out: [Full Recipe]. To keep your peach cobbler fresh, let it cool down first. Cover it tightly with plastic wrap or aluminum foil. You can also place it in an airtight container. Store it in the fridge for up to four days. This way, you can enjoy your sweet treat later! Reheating peach cobbler is simple. Preheat your oven to 350°F (175°C). Place the cobbler in an oven-safe dish. Cover it with foil to prevent burning. Heat for about 20 minutes. If you want to microwave it, place a piece on a plate. Heat it for 30 seconds to 1 minute. Check if it's warm enough for you! You can freeze peach cobbler for later delight. Allow it to cool completely before freezing. Cut it into pieces and wrap each slice tightly in plastic wrap. Place the slices in a freezer bag or container. Label it with the date. It can last up to three months in the freezer. When you're ready to enjoy, thaw it in the fridge overnight before reheating. This way, you can savor that fresh peach flavor anytime! Yes, you can use canned or frozen peaches. They work well in a pinch. Just drain canned peaches before use. Frozen peaches should be thawed and drained of excess liquid. This helps keep your peach cobbler from getting too watery. However, fresh peaches give the best flavor and texture. They offer a juicy, sweet bite that canned or frozen options can't match. To ripen peaches, keep them at room temperature. Place them in a bowl, stem side up. Avoid the fridge until they ripen. Check them daily for softness. When they feel slightly soft, they are ripe and ready to use. You can also place them in a paper bag to speed up the process. Adding a banana to the bag helps too, as they release ethylene gas which helps peaches ripen faster. Your peach cobbler is done when the top is golden brown. A toothpick should come out clean when inserted in the center. The edges should bubble and look firm. If you notice a slight jiggle, let it bake a few more minutes. Don’t rush this step, as undercooked cobbler won’t taste as good. Let it cool for about 10 minutes before serving. This helps the juices set, making each bite more enjoyable. For the full recipe, check out the Sweet Southern Peach Cobbler section. In this blog post, we explored making peach cobbler. We picked fresh peaches and discussed sweeteners. I shared step-by-step instructions that guide you through preparation, mixing, and baking. Tips on texture, serving, and fruit choices enhance your dish. Storage methods help keep leftovers fresh. Finally, I answered common questions about ripening and using canned peaches. Peach cobbler is a fun and tasty treat. Enjoy your baking journey!
Fresh Southern Peach Cobbler Easy and Tasty Delight
Are you ready to dive into a delightful dessert? Fresh Southern Peach Cobbler is quick, easy, and oh-so-tasty. With just a few fresh peaches and
- 4 ripe peaches, peeled and sliced - 1 cup rolled oats - 1 cup all-purpose flour - ¾ cup brown sugar - ½ cup unsalted butter, melted - 1 teaspoon cinnamon - ½ teaspoon nutmeg - 1 cup chopped nuts (walnuts or pecans) - ¼ teaspoon salt - 1 teaspoon vanilla extract You can serve this delicious dessert with a scoop of ice cream. Vanilla pairs well with the warm peach flavors. For a fun twist, top it with whipped cream or yogurt. Presentation matters, too! You could serve the crisp directly from the baking dish for a casual vibe. Or, for a fancier touch, scoop it into individual bowls. A drizzle of honey and a mint sprig can elevate the look. Remember, the Full Recipe gives you all the steps to make this easy treat! Enjoy the sweet and crunchy goodness. First, you need to preheat your oven to 350°F (175°C). This ensures even cooking. While the oven heats, prepare your baking dish. Grease a 9x13 inch dish to prevent sticking. Next, take 4 ripe peaches. Peel and slice them thinly. In a large bowl, mix the sliced peaches with 1/4 cup of brown sugar and 1 teaspoon of vanilla extract. Toss them gently to coat. Once mixed, pour the peaches into your greased dish. Spread them out evenly across the bottom. Now, let’s make the crisp topping. In another bowl, combine 1 cup of rolled oats, 1 cup of all-purpose flour, 3/4 cup of brown sugar, 1 teaspoon of cinnamon, 1/2 teaspoon of nutmeg, and 1/4 teaspoon of salt. If you like nuts, add 1 cup of chopped walnuts or pecans. Stir everything well. Then, pour in 1/2 cup of melted unsalted butter. Mix until the mixture looks like wet sand. This crumbly texture will create the perfect topping. Sprinkle the oat mixture evenly over the peaches in the baking dish. Make sure to cover all the fruit. Bake in your preheated oven for 30-35 minutes. Keep an eye on it. When the top is golden brown and the peaches bubble, it’s done. After baking, remove it from the oven. Let it cool for a few minutes. This makes it easier to serve. You can enjoy your Peach Crisp Treat warm. For a special touch, add a scoop of vanilla ice cream on top. It’s a delightful combination! For the full recipe, check the instructions above. Choosing the right peaches is key. Look for ripe peaches that are slightly soft. They should have a sweet smell and a vibrant color. Avoid peaches with dark spots or hard skin. To get the perfect crisp topping, keep your butter cold. Mix the melted butter with dry ingredients until it looks crumbly. This ensures a nice texture. Don't overmix, or it will become too dense. One common mistake is overmixing the topping. This can make it tough instead of light and crispy. Mix just until you see the butter blended in. Another mistake is not letting the peaches macerate. This step draws out their juices and enhances their flavor. Mix the peaches with sugar and let them sit for at least 10 minutes. Adding spices can take your Peach Crisp Treat to the next level. Cinnamon and nutmeg are classic choices. You can also try a pinch of ginger for a warm kick. Using fresh peaches offers the best taste. However, canned peaches can work in a pinch. If you use canned, drain them well to avoid excess liquid. Fresh peaches often bring a brighter flavor that elevates the dish. For the full recipe, check out the complete instructions earlier in this article. {{image_2}} You can easily mix up your Peach Crisp Treat. Adding berries can brighten the dish. Blueberries, raspberries, or strawberries work well. You can also add other fruits like apples or pears. These fruits add new flavors and textures. Different nuts can also change the taste. Try using almonds or pistachios instead of walnuts or pecans. You can even add seeds like pumpkin or sunflower for a crunch. These small changes can make your dessert unique. If you're looking for healthier options, I have some great tips. You can replace sugar with honey or maple syrup. These options add sweetness without extra refined sugar. For butter, try coconut oil or applesauce. These substitutes can lower the fat content. If you need gluten-free options, use almond flour or oat flour instead of all-purpose flour. For oats, look for certified gluten-free oats. This way, everyone can enjoy your treat without worry. You can adapt this recipe for seasonal fruits too. In the fall, use ripe pears or apples for a cozy twist. During winter, try cranberries for a tart flavor. Each season offers new fruits to explore. For holidays, think about adding spices like nutmeg or ginger. These spices can give your crisp a festive touch. You can even serve it with a holiday-themed ice cream. Just think of the possibilities! To keep your Peach Crisp Treat fresh, store it in the fridge. Place it in an airtight container. This helps to keep the flavors in and the moisture out. You can store it this way for up to four days. After that, the topping may get soggy. If you want to save it for later, you can freeze Peach Crisp Treat. First, let it cool completely. Then, cut it into portions. Wrap each piece in plastic wrap. Place wrapped pieces in a freezer-safe bag. They can last up to three months in the freezer. To reheat after freezing, take a piece out and let it thaw in the fridge overnight. Then, preheat your oven to 350°F (175°C) and bake it for about 15-20 minutes. This will help restore that crispy topping. When you’re ready to enjoy your leftovers, you can reheat them in the microwave. Heat for about 30 seconds to 1 minute. If you prefer a crispy texture, use the oven. If you have stale leftovers, don’t worry! You can turn them into a delicious topping for yogurt or pancakes. Just crumble the crisp over your dish. It adds sweetness and crunch! Your Peach Crisp Treat is done when the top is golden brown. The peaches should bubble around the edges. If you poke the topping, it should feel firm but soft. Look for these signs, and you will know it is ready to enjoy! Yes, you can use frozen peaches! Just keep in mind that they may release more juice. To adjust, reduce the amount of sugar in the peach mixture. You might bake it a little longer to ensure it cooks through. This way, you still get that lovely peach flavor in every bite. There are many great options! You can serve it with whipped cream for a light touch. Greek yogurt also adds a creamy element. Try a drizzle of caramel sauce for extra sweetness. Fresh mint leaves on top add a nice color and flavor. Making this dessert vegan is simple! Substitute the butter with coconut oil or a vegan butter. Use maple syrup instead of brown sugar for added flavor. You can also find non-dairy ice cream to enjoy with your Peach Crisp Treat. These swaps keep it tasty and plant-based. Absolutely! You can prepare the peach layer ahead of time. Just store it in the fridge until you are ready to bake. You can also mix your topping and keep it in a separate container. When you're ready to bake, combine them and pop it in the oven. Enjoy the fresh-baked smell later! You can create a delicious Peach Crisp Treat with just a few simple ingredients. Remember to pick ripe peaches, mix the topping well, and avoid overbaking. Try different fruits or nuts to make it your own. Whether you enjoy it warm with ice cream or try a unique twist, this treat is sure to please. Store leftovers for later or freeze them for a future snack. Enjoy your baking, and make each bite count!
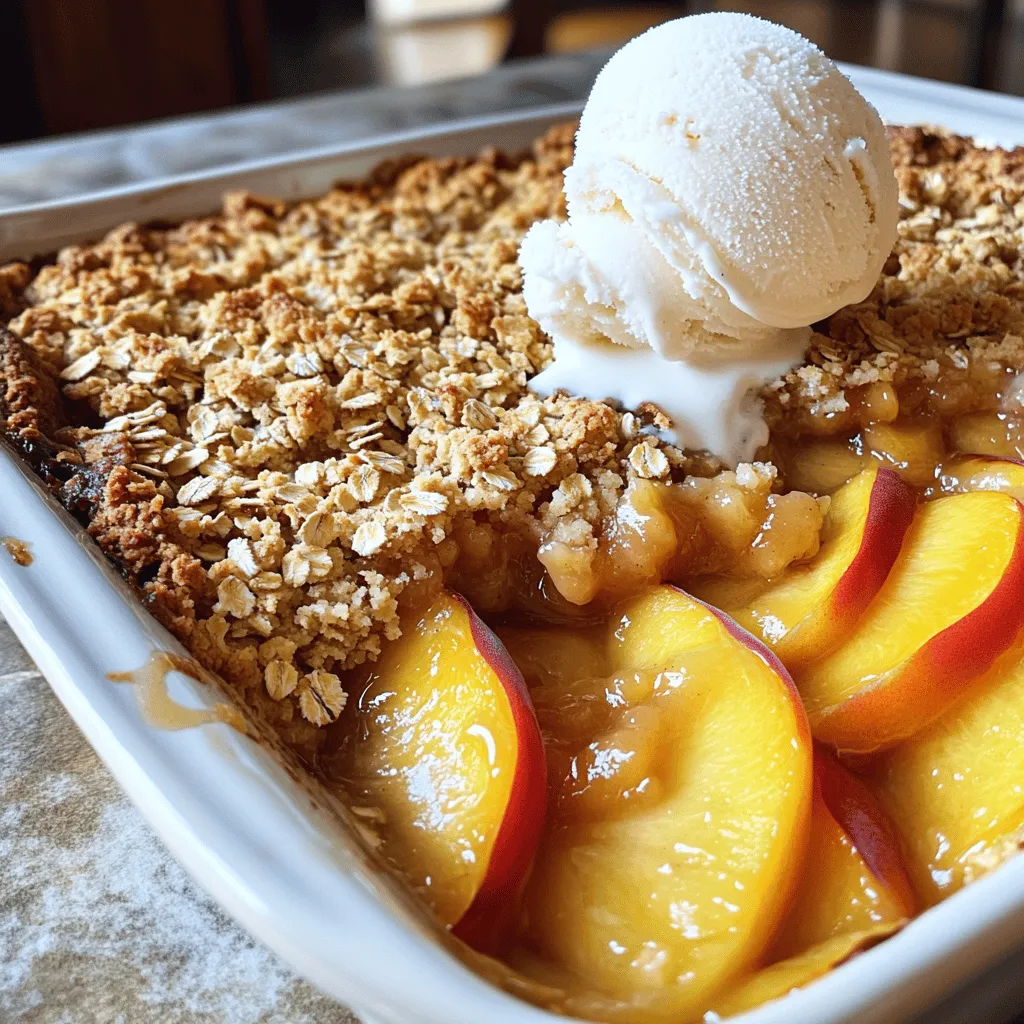
Peach Crisp Treat Delicious and Simple Dessert Recipe
Craving a dessert that’s both delicious and easy to make? Look no further than my Peach Crisp Treat! This simple recipe features ripe peaches and
When making a peach crumble pie, you need fresh and simple ingredients. Here’s the complete list of what you will need: - 6 ripe peaches, peeled and sliced - 1 cup granulated sugar - 1 tablespoon lemon juice - 1 teaspoon vanilla extract - 1 teaspoon cinnamon - 2 tablespoons cornstarch - 1 prepared pie crust (store-bought or homemade) - 1 cup all-purpose flour - 1 cup rolled oats - 1/2 cup packed brown sugar - 1/2 cup unsalted butter, melted - Pinch of salt Each ingredient plays a key role in making this pie flavorful and comforting. The peaches bring sweetness and juiciness. The sugar balances the tartness and adds shine. Lemon juice brightens the flavor, while vanilla and cinnamon add warmth. Cornstarch thickens the filling, so it’s not runny. The crust holds everything together. For the crumble topping, flour and oats create texture. Brown sugar adds a deeper sweetness, and butter binds it all. A pinch of salt enhances all these flavors. You can find the full recipe for this delightful dessert in the section above. Enjoy making this pie! 1. Preheat the oven: Set your oven to 350°F (175°C). This step helps cook the pie evenly. 2. Prepare your pie crust: Roll out your crust and fit it into a 9-inch pie dish. Trim the edges if needed. 3. Mix the peach filling: In a large bowl, combine the sliced peaches, granulated sugar, lemon juice, vanilla extract, cinnamon, and cornstarch. Stir well and let it sit for about 10 minutes. This allows the flavors to blend nicely. 4. Combine crumble topping: In another bowl, mix flour, oats, brown sugar, melted butter, and a pinch of salt. Stir until it looks crumbly. 1. Pour the peach mixture: Take your peach filling and pour it evenly into the crust. Make sure to spread it out. 2. Sprinkle the crumble topping: Evenly cover the peach filling with your crumble mix. This adds a tasty crunch. 3. Bake the pie: Place it in the oven and bake for 35-40 minutes. The topping should turn golden and the peaches should bubble up. 1. Let the pie cool: Once baked, remove the pie from the oven and let it cool for at least 15 minutes. This makes slicing easier. 2. Presentation suggestions: Serve warm slices with vanilla ice cream or whipped cream. Add a sprig of fresh mint for a lovely touch. For the full recipe, check out the Peachy Paradise Crumble Pie. How to ensure a flaky crust To get a flaky crust, use cold butter. Cut it into small pieces before mixing it into the flour. This helps create air pockets. Also, avoid overworking the dough. Just mix until it comes together. Chill the dough for at least 30 minutes before rolling it out. This makes all the difference. Best practices for slicing peaches When slicing peaches, use a sharp knife. Start by cutting around the pit. Twist gently to separate the halves. Remove the pit and slice the fruit into even pieces. This helps the peaches cook evenly. For best flavor, choose ripe peaches. They should be soft but not mushy. Achieving the perfect crumble texture For a great crumble, mix flour, oats, and brown sugar with melted butter. The mixture should look like wet sand. You want it to clump together but still have little bits. The key is not to overmix. Sprinkle it on top of the peach filling evenly for a nice crunch. Using vanilla bean for added flavor Instead of vanilla extract, try a vanilla bean for a richer taste. Split it open and scrape out the seeds. Mix these seeds into the peach filling. This adds a special touch that makes your pie unique and delicious. Experimenting with spices and herbs Don’t be afraid to play with spices! Cinnamon is great, but you can also add nutmeg or ginger for warmth. Fresh herbs like basil or mint can elevate the pie too. Just a little sprinkle can surprise your guests and add a fresh twist. For more ideas, check the Full Recipe. {{image_2}} You can switch up the fruit in your peach crumble pie. Try using nectarines; they give a sweet and juicy flavor. Blueberries also work great. They add a nice tartness that balances the sweet. You can even mix fruits. For example, combine peaches and blueberries for a colorful twist. Seasonal fruits can also shine in this pie. In fall, apples bring a warm and cozy feel. They pair well with cinnamon for a classic taste. In summer, use fresh berries to keep it light and refreshing. Each fruit has its own charm and can change the whole pie. If you need a gluten-free option, it’s easy to make the crust gluten-free. Many stores sell gluten-free pie crusts. You can also make your own using almond flour or gluten-free flour. This way, everyone can enjoy the pie. For those who follow a vegan diet, you can swap out dairy. Use coconut oil instead of butter. Almond milk or oat milk can replace regular milk in the filling. These simple changes keep the flavor rich while meeting dietary needs. Explore these variations and adjustments to make the peach crumble pie your own. For the full recipe, check out the Peachy Paradise Crumble Pie recipe. To keep your peach crumble pie fresh, store it in the fridge. Place the pie in an airtight container or cover it tightly with plastic wrap. This helps prevent it from drying out. The pie will stay good for up to 3 days in the fridge. If you want to enjoy it later, freezing is a great option. You can freeze the pie before or after baking. If you freeze it before baking, wrap it well in plastic wrap and then foil. This way, you can bake it fresh later. For frozen baked pie, let it cool completely first. Wrap it tightly and freeze. It will last for about 2 months. To reheat frozen pie, bake it straight from the freezer. Preheat your oven to 350°F (175°C). Bake for about 30-40 minutes or until warmed through. If the crust browns too quickly, cover it with foil. Enjoy this delicious treat again! For the full recipe, check out the Peachy Paradise Crumble Pie. Can I use canned peaches instead of fresh? Yes, you can use canned peaches. Just drain them well before mixing. They may be sweeter, so check the amount of sugar you add. How can I make my crumble topping crispier? To achieve a crispier topping, add more oats or a bit of chopped nuts. Bake the pie longer if needed, until golden. What’s the best way to serve peach crumble pie? Serve it warm with a scoop of vanilla ice cream. A sprig of mint adds a nice touch too. How to fix a soggy crust If your crust gets soggy, try pre-baking it for a few minutes. This helps it stay crisp. You can also sprinkle some flour or cornmeal on the crust before adding the filling. Adjusting sweetness if peaches are not ripe enough If your peaches are not sweet, add a little more sugar or honey to the filling. You can also mix in a bit of cinnamon for extra flavor. This blog post covered how to make a peach crumble pie. We looked at the ingredients, preparation steps, and baking process. You learned tips for baking, serving, and storing leftovers. Variations like using different fruits or adjusting for diets were also shared. Making this pie can be fun and rewarding. Baking brings joy and can create happy memories. Try it out, share it with friends, and enjoy every bite of your delicious creation. You won’t regret it!
Peach Crumble Pie Delicious Comforting Dessert Recipe
Are you ready to savor a slice of pure joy? My Peach Crumble Pie recipe is the perfect comfort dessert for any occasion. With ripe
For this Southern Peach Pudding, you will need: - 4 ripe peaches, peeled and sliced - 1 cup granulated sugar - 1/2 cup all-purpose flour - 1 teaspoon baking powder - 1/4 teaspoon salt - 1 cup whole milk - 1/2 cup unsalted butter, melted - 1 teaspoon vanilla extract - 1 teaspoon ground cinnamon - Whipped cream or vanilla ice cream for serving These ingredients create a warm, sweet, and comforting dessert that highlights the juicy peaches. You can enhance your Southern Peach Pudding with these optional ingredients: - A splash of almond extract for a nutty taste - Fresh mint leaves for a refreshing touch - Toasted nuts for a crunchy texture These additions can elevate your pudding, making it unique and delightful. If you don’t have something on hand, here are some easy swaps: - Use frozen peaches instead of fresh ones. Just thaw and slice them. - Swap granulated sugar for brown sugar for a richer flavor. - Use almond milk or oat milk in place of whole milk for a dairy-free option. These substitutions help you adapt the recipe to your pantry and taste. For the full recipe, check out the detailed instructions! Start by washing the peaches well. You want them clean. Next, peel the peaches. This step makes the pudding smooth. After peeling, slice the peaches into thin pieces. Place the slices in a bowl. Add 1/2 cup of sugar to the peaches. This helps bring out their sweet juice. Let them sit for about 10 minutes. This step is called macerating. The peaches will soften and become juicy. In a separate bowl, mix the dry ingredients. Combine 1/2 cup of sugar, flour, baking powder, and salt. Stir them well to blend. Now, pour in the milk and melted butter. Add the vanilla extract for flavor. Mix everything until it’s combined. Don’t worry if the batter is a bit lumpy. That’s perfectly fine! Gently fold in the peaches and their juices. This adds great flavor to the batter. Pour the batter into a greased 9x9-inch baking dish. Spread it out evenly. For an extra touch, sprinkle ground cinnamon on top. This adds a warm spice to your pudding. Preheat your oven to 350°F (175°C). Bake the pudding for 35-40 minutes. It should turn golden brown. To check if it's done, insert a toothpick in the center. If it comes out clean, your pudding is ready! Let it cool for about 10 minutes before serving. Enjoy it warm with whipped cream or vanilla ice cream. For an even sweeter treat, drizzle some peach juices on top. Check the Full Recipe for more details. To get the best texture in your Southern Peach Pudding, use ripe peaches. They should feel soft but not mushy. Macerating the peaches is key. This step helps them soften and release natural juices. When mixing the batter, stir gently to keep it a bit lumpy. A smooth batter can lead to a dense pudding. Bake until golden brown for that perfect finish. Let it cool slightly before serving to set the texture just right. Avoid rushing the maceration step. Letting the peaches sit in sugar for ten minutes is important. Don't skip the cinnamon sprinkle on top. It adds great flavor and aroma. Also, be careful not to overmix the batter. Overmixing leads to a tough pudding. Finally, check your oven temperature. An oven that is too hot can burn the top before cooking the inside. Serve your pudding warm for the best experience. Top it with a dollop of whipped cream or a scoop of vanilla ice cream. This contrast enhances the flavors and adds a creamy texture. Drizzle some extra peach juices over the top to make it more appealing. You can also pair it with a cup of sweet tea for a true Southern treat. For a twist, try adding some chopped nuts on top for crunch. If you want the full recipe, check out the complete instructions! {{image_2}} You can mix in other fruits to change the flavor. Try blueberries, strawberries, or even blackberries. Each fruit adds a unique taste to your Southern peach pudding. For example, blueberries pair well with peaches. Their sweetness blends nicely, creating a fruity delight. Just be sure to keep the same amounts for the other ingredients. This way, your pudding stays balanced and delicious. If you need a gluten-free option, you can swap all-purpose flour. Use almond flour or gluten-free flour blends instead. These options work well and keep the pudding tasty. Just remember, the texture might change slightly. Almond flour gives a nutty flavor, while gluten-free blends usually taste neutral. Either way, you can still enjoy this dessert without gluten. Spices can elevate your Southern peach pudding. Cinnamon is a classic choice. It adds warmth and depth to the dish. You can also try nutmeg or ginger for a twist. Just a pinch of these spices can make a big difference. If you love a sweet touch, consider adding a hint of cardamom. Play around with different spices to find your favorite mix. This creativity will make your pudding even more enjoyable. For the full recipe, check out the details above. To store your leftover Southern Peach Pudding, let it cool to room temperature. Place it in an airtight container. You can keep it in the fridge for up to three days. Make sure to cover it well to avoid drying out. When you're ready to enjoy the pudding again, preheat your oven to 350°F (175°C). Place the pudding in an oven-safe dish. Cover it loosely with foil. Heat for about 15-20 minutes, or until warm. You can also microwave individual portions for about 30-45 seconds. If you want to save some pudding for later, freezing works well! Cut the pudding into portions. Wrap each piece tightly in plastic wrap, then place them in a freezer-safe bag. It can stay frozen for up to three months. To thaw, move it to the fridge overnight before reheating. Enjoy your Southern Peach Pudding whenever you like! For the full recipe, check out the main article. Southern Peach Pudding is a warm dessert made with fresh peaches and a sweet batter. It blends juicy fruit with a rich, cake-like texture. This dish is often enjoyed during summer when peaches are in season. The combination of flavors creates a comforting treat that many love. You can prepare Southern Peach Pudding ahead of time by making the batter and slicing the peaches. Mix them together and store the mixture in the fridge. When you're ready to bake, just pour it into your dish and bake as usual. This way, the flavors meld nicely before you serve. Yes, you can use canned peaches if fresh ones are not available. Just drain the canned peaches well and chop them into bite-sized pieces. This keeps the dessert sweet and moist. However, fresh peaches provide a better flavor and texture. Serve Southern Peach Pudding warm from the oven. A scoop of vanilla ice cream or a dollop of whipped cream adds a nice touch. You can also drizzle extra peach juice over the top for added sweetness. This simple addition enhances the dish's appeal. For a fun twist, try serving it in individual cups for easy sharing. For the full recipe, check out the details above. Southern Peach Pudding is a treat made with fresh peaches and a simple batter. We covered key ingredients, step-by-step prep, and baking tips. You can add spices and substitute to fit your taste. For best results, avoid common mistakes and know how to store leftovers. Remember, you can even freeze it! This dessert is versatile and easy to make. I hope you enjoy your culinary adventure with this delightful dish!
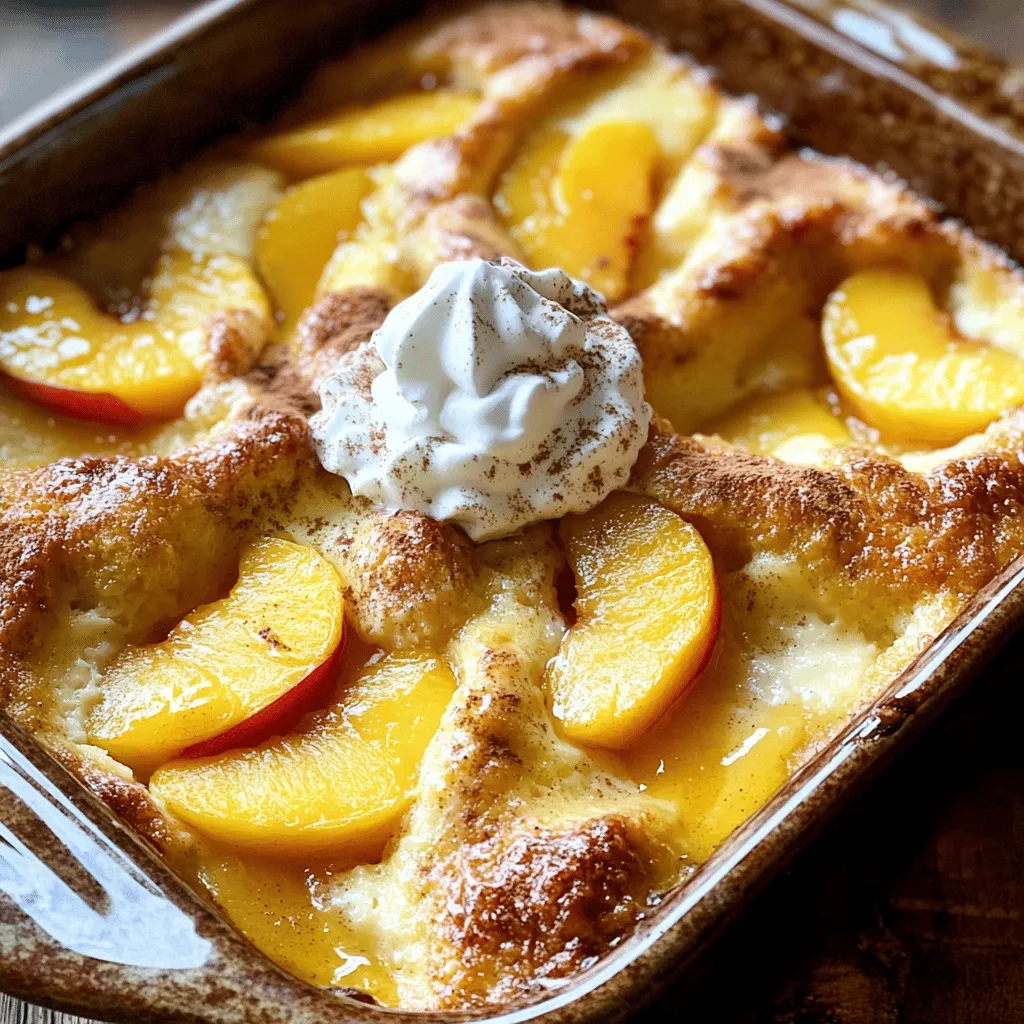
Southern Peach Pudding Delightful and Simple Recipe
Are you craving a sweet, comforting dish that’s as easy to make as it is delightful? In this post, I’ll share my simple recipe for
- 2 cups fresh strawberries, hulled and halved - 1 cup granulated sugar, divided - 2 tablespoons cornstarch - 1 tablespoon lemon juice - 1 teaspoon vanilla extract - 1 prepared pie crust (store-bought or homemade) - 1 tablespoon butter, diced - Whipped cream for serving (optional) When preparing your strawberries, make sure to wash them well. Use fresh, ripe strawberries for the best flavor. Remove the green tops, known as hulls, and cut each berry in half. This helps release their juices during baking. For the cornstarch, ensure it is fresh. Old cornstarch may not thicken the filling properly. If you want to mix it up, you can use other fruits. Blueberries or raspberries can work well. You can also try using honey instead of sugar. For a gluten-free crust, almond flour or gluten-free baking mixes are great options. If you want a vegan pie, use a plant-based butter and a dairy-free whipped cream. These swaps keep the pie delicious while catering to different diets. To start, you need to hull and halve your strawberries. Use a small knife to remove the green tops. Then, slice each berry in half. This process will help the strawberries mix well with the other ingredients. Let the halved strawberries rest for about 10 to 15 minutes. This time allows them to release their sweet juices. The flavor will be richer and brighter in your pie when you do this. Now, it’s time to combine the ingredients. In a bowl, mix the halved strawberries with ¾ cup of sugar, cornstarch, lemon juice, and vanilla extract. Stir until everything is well combined. This mixture is the heart of your pie. Next, pour the strawberry mixture into your prepared pie crust. Make sure to spread it evenly across the crust. This helps every slice have a good balance of filling and crust. Don’t forget to dot the top with diced butter for extra flavor. Preheat your oven to 425°F (220°C). This high heat will help the pie crust start baking perfectly. Bake the pie for 15 minutes. After 15 minutes, lower the oven temperature to 350°F (175°C). Continue baking for another 30 minutes. This step is key for a golden crust and bubbling filling. When done, let the pie cool on a wire rack for at least 2 hours. This cooling time helps the filling set. Afterward, you can serve your delicious pie. For a nice touch, top each slice with whipped cream if you like. Check out the Full Recipe for complete details. For the best pie crust, you can choose between homemade and store-bought. Homemade crusts offer fresh taste and texture. They also let you control the ingredients. Store-bought crusts save time and work well too. Just pick a good brand for better results. To avoid a soggy bottom, blind bake your crust. This means you bake it for a short time before adding the filling. Use pie weights or dried beans to hold it down. This keeps it firm and crisp. You can add spices or extracts for an extra twist. A pinch of cinnamon can add warmth. A dash of almond extract gives a nutty taste. Experiment to find your favorite mix. Lemon juice plays a key role in balancing sweetness. It cuts through the sugar and adds brightness. A tablespoon is enough to brighten the pie without making it sour. If your filling is too runny, don’t fret. You can thicken it by cooking it on the stove. Mix a little cornstarch with water, then stir it in. Cook until it thickens, then pour it back into the crust. For overbaked crusts, brush it with a little melted butter. This can help restore some moisture. You can also cover it with whipped cream when serving to mask any dryness. {{image_2}} You can switch up the strawberries for mixed berries. Raspberries, blueberries, and blackberries all work well. They each add their own twist. Try combining them for a berry medley. Seasonal fruits can also shine in this pie. Peaches in summer or apples in fall can create new flavors. Each fruit brings its own sweetness and tartness. If you need a gluten-free crust, try almond flour or oats. Both make tasty options for your pie base. You can also find gluten-free pie crusts in stores. For vegan choices, use coconut oil instead of butter. Maple syrup or agave can replace sugar to keep it plant-based. For toppings, use coconut whipped cream or a dairy-free alternative. These swaps keep the pie delicious while catering to dietary needs. To keep your leftover pie fresh, use an airtight container. This helps prevent the pie from drying out. You can also cover it with plastic wrap. Store the pie at room temperature for one day. If you want it to last longer, place it in the fridge. In the fridge, it can stay good for up to four days. When you want to enjoy a slice again, heat your oven to 350°F (175°C). Place the slice on a baking sheet. Warm it for about 10 minutes. This method keeps the crust crispy and the filling warm. Avoid using a microwave, as it may make the crust soggy. You can freeze the pie before or after baking. To freeze it before baking, wrap it well in plastic wrap and foil. This helps keep out air. You can bake it straight from the freezer. Just add about 10 extra minutes to the baking time. If you freeze it after baking, let it cool first. Then wrap it tightly and freeze. When you're ready to eat, thaw overnight in the fridge for the best taste and texture. The ultimate strawberry pie lasts about 3 to 4 days in the fridge. To keep it fresh, cover it tightly with plastic wrap or foil. If left out, the pie can spoil in just a few hours, especially in warm weather. Yes, you can make the pie ahead of time. It is best to bake the pie a day or two before serving. This way, the flavors can develop, and the pie will have time to cool properly. Serve the pie with whipped cream or a scoop of vanilla ice cream. Fresh mint leaves can add a nice touch too. You can also slice fresh strawberries on top for extra flavor and color. Yes, this recipe is great for beginners. The steps are simple and easy to follow. Just take your time, and you will create a beautiful pie that everyone will love. You know the pie is done when the filling bubbles and the crust turns golden brown. A good sign is when you see the juices from the strawberries bubbling up through the crust. This means it is ready to come out of the oven. For the full recipe, check out the Ultimate Strawberry Pie 🥧 section. The ultimate strawberry pie is a treat you can easily make at home. You learned how to prepare fresh strawberries, mix ingredients, and bake to perfection. Don't forget the tips for the best crust and flavor. You can even try different fruits or make it gluten-free or vegan. Store leftovers correctly for the best taste. Remember, making pie should be fun, so get creative! Enjoy each slice, and share the joy with others. Happy baking!
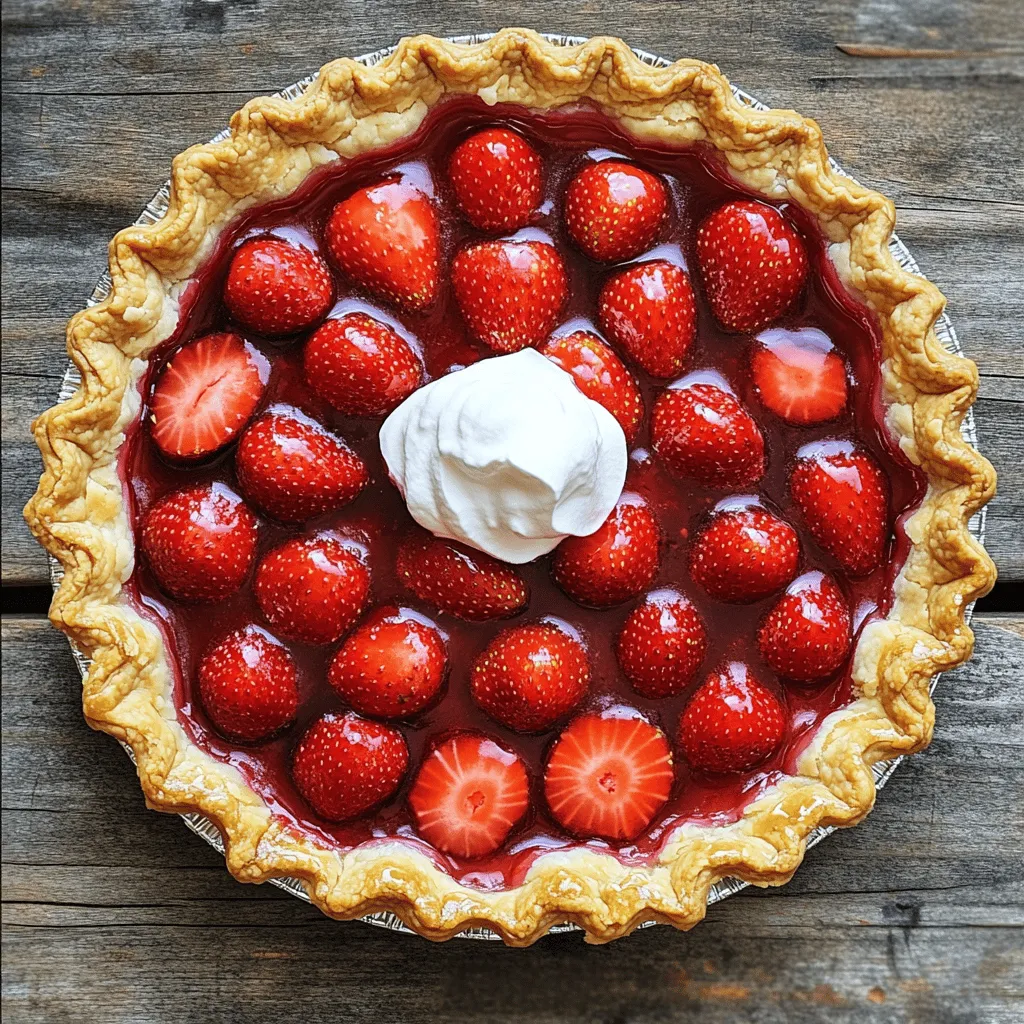
Ultimate Strawberry Pie Delicious Dessert Recipe
Are you ready to delight your taste buds with the Ultimate Strawberry Pie? This delicious dessert recipe combines fresh strawberries and a buttery crust, offering
- 4 cups fresh peaches, peeled and sliced - 1 cup granulated sugar (divided) - 1 cup all-purpose flour - 2 teaspoons baking powder - 1 tablespoon lemon juice - 1 teaspoon ground cinnamon - 1 teaspoon vanilla extract When choosing your peaches, look for ripe ones. They should feel soft but not mushy. Fresh peaches give the best taste. You can use white or yellow peaches for this recipe. Each type adds its own sweetness and flavor. For sweetness, I divide the sugar. Half goes with the peaches. The rest goes into the batter. This balance keeps the dessert from being too sweet. Let’s talk about flour. All-purpose flour works best for this cobbler. It creates a lovely, tender texture. The baking powder makes it rise nicely. Lemon juice brightens the peach flavor. It adds a fresh note. The ground cinnamon gives warmth and depth. Vanilla extract rounds out the flavor, making it even more tasty. Gather these ingredients to create Peach Cobbler Delight. For the complete recipe, check out the Full Recipe section. You'll make a dessert that everyone will love! - Preheat your oven to 350°F (175°C). - In a large bowl, combine 4 cups of sliced peaches with 1/2 cup of sugar, 1 tablespoon of lemon juice, 1 teaspoon of ground cinnamon, and 1 teaspoon of vanilla extract. Mix well and let it sit for about 10 minutes. This helps the peaches release their juices. - In another bowl, whisk together 1 cup of all-purpose flour, 2 teaspoons of baking powder, 1/2 teaspoon of salt, and the remaining 1/2 cup of sugar. - Then, pour in 1/2 cup of milk and 1/4 cup of melted butter. Mix until just combined. The batter will be a bit lumpy, so do not overmix. - Pour the peach mixture into a greased 9x13 inch baking dish, spreading it evenly. - Drop spoonfuls of the batter over the peach filling. Leave some gaps for the filling to bubble through while baking. - Bake for 40-45 minutes or until the batter turns golden brown. A toothpick inserted in the center should come out clean. For the full recipe, refer to the instructions above. To get juicy peaches, let them sit for about 10 minutes. This helps their natural juices flow. The more juice, the better the flavor! When making the batter, mix just until combined. If you overmix, your cobbler may turn out dense and heavy. A light batter leads to a fluffy topping that melts in your mouth. Serve this peach cobbler warm for the best taste. A dollop of whipped cream or a scoop of vanilla ice cream works well on top. The creaminess balances the sweet peaches. For a fun touch, add fresh mint leaves. They add color and a nice flavor that enhances the dish. Peach ripeness can change the sweetness of your cobbler. If your peaches are very sweet, cut back on the sugar. If they are less ripe, you may need a bit more. Taste your peach mixture before baking. Adjust the sugar so it matches the sweetness you like. This way, you get the perfect flavor in every bite! {{image_2}} You can easily make this dish vegan. Simply swap dairy milk for almond milk. Use coconut oil instead of butter. Many people enjoy this version just as much! For gluten-free options, try almond flour or oat flour. These flours work well in the recipe. They give a different texture but taste great too. Want to boost the flavor? Add chopped nuts like pecans or walnuts. They give a nice crunch! You can also sprinkle in some nutmeg for warmth. Seasonal fruits work wonders too. Instead of peaches, use fresh berries or apples. Each fruit brings its own unique taste to the dish. You can serve this dessert in individual cups. Just layer the peach filling and batter in small dishes. It looks cute and is easy to share. Cobbler parfaits are also a hit! Layer peach filling, cake, and whipped cream in a glass. It’s a fun way to enjoy this classic dessert. For the full recipe, check the earlier section. Enjoy your cooking adventure! To keep your peach cobbler fresh, let it cool first. Once cool, cover it tightly with plastic wrap or foil. You can also use an airtight container. Store it in the fridge for up to four days. To maintain the texture, avoid stacking other food items on top. This way, your cobbler stays fluffy and delicious. If you want to save portions for later, freezing works well. Cut the cobbler into squares and wrap each piece in plastic wrap. Then, place the wrapped pieces in a freezer bag. Make sure to squeeze out as much air as possible. To reheat, preheat your oven to 350°F (175°C). Place the cobbler on a baking sheet and heat for about 20 minutes. This keeps the flavor and texture just right. In the fridge, peach cobbler lasts about four days. If you freeze it, it can stay good for up to three months. Just remember to label your container with the date. This way, you can enjoy your dessert at its best! For more details on making this treat, check out the Full Recipe. To ripen peaches, place them in a brown paper bag. This method traps ethylene gas, which helps peaches ripen. You can also leave them at room temperature for a few days. Check them daily. Once they feel soft to touch, they are ripe and ready to use. Yes, you can use canned or frozen peaches. Canned peaches are convenient and save time. Just drain them well before using. Frozen peaches need to be thawed and drained too. Fresh peaches give the best flavor and texture, but canned and frozen options work well in a pinch. For a gluten-free option, use almond flour or oat flour. These alternatives can change the texture slightly. If you want a nut-free option, try using coconut flour. Adjust the amount, as these flours can absorb more liquid. Always check the package for specific measurements. For the full recipe, refer to the Peach Cobbler Delight section above. This blog post covered how to make a delicious peach cobbler. You learned about fresh ingredients, baking essentials, and flavor enhancers that make this dish special. The step-by-step instructions helped you prepare and bake it perfectly. Tips on texture, serving suggestions, and variations guided you through customization. Remember to store leftovers right and explore freezing options. Enjoy making and sharing this delightful treat with family and friends! Your peach cobbler will surely satisfy anyone's sweet tooth.
Peach Cobbler Delight Mouthwatering Easy Dessert Recipe
Are you ready to create a dessert that will steal the show? My Peach Cobbler Delight is a simple recipe packed with flavor. With just
To make the best peach pie, gather these ingredients: - 5 cups fresh peaches, peeled and sliced - 1 cup granulated sugar - 1/4 cup all-purpose flour - 1 teaspoon ground cinnamon - 1 tablespoon lemon juice - 1 teaspoon vanilla extract - 1/4 teaspoon salt - 2 tablespoons unsalted butter, cut into small pieces - 1 egg (for egg wash) - 1 double pie crust (store-bought or homemade) Accurate measuring is key to a great pie. Use dry measuring cups for flour and sugar. When measuring flour, spoon it into the cup and level it off. Don't scoop directly from the bag, as this packs the flour. For liquids, use clear measuring cups. Always check at eye level to ensure precise amounts. Choosing the right peaches is vital for flavor. Look for ripe, fresh peaches that smell sweet. They should feel slightly soft but not mushy. Yellow peaches work well because they are sweeter. If you can find them, pick freestone peaches. They are easier to slice and pit. Avoid any with bruises or dark spots. The better your peaches, the better your pie will be! To make the peach filling, start with fresh peaches. You will need five cups. Peel and slice them into thin pieces. In a big bowl, mix the peaches with sugar, flour, cinnamon, lemon juice, vanilla extract, and salt. Stir gently but well. Let the mixture sit for about 15 minutes. This helps the peaches release their juices. You will get a sweet and juicy filling for your pie. Now, it’s time to assemble the pie. Roll out one pie crust into a 9-inch pie pan. Press the crust into the bottom and sides. Make sure to leave some crust hanging over the edge. This helps with sealing later. Pour the peach mixture into the crust. Spread it evenly. Dot the top with small pieces of butter for added flavor. Next, roll out the second pie crust. You can lay it flat or cut it into strips for a nice lattice top. Seal the edges by crimping them with your fingers or a fork. Preheat your oven to 425°F (220°C). Brush the top crust with a beaten egg for a golden finish. Cut a few small slits in the top crust. This allows steam to escape while it bakes. Place the pie in the oven and bake for 45 to 50 minutes. Check for a golden crust and bubbling filling. If the edges brown too quickly, cover them with aluminum foil. Once done, remove the pie from the oven. Let it cool for at least an hour before slicing. This helps the filling set properly. Enjoy your delicious peach pie! To keep your pie crust crisp, use these key tips. Start with cold ingredients. Cold butter and cold water help create a flaky crust. Roll out the dough quickly to avoid warming it too much. When filling the pie, make sure your peach mixture sits for 15 minutes. This lets the juices mix with the sugar and flour. Drain excess liquid before adding the filling to the crust. You can sprinkle a layer of flour or cornmeal on the crust before adding the peaches. This forms a barrier against moisture. The right oven setting is crucial for perfect peach pie. Preheat your oven to 425°F (220°C) for a nice golden crust. Bake the pie for 45-50 minutes. Check it often during the last 10 minutes. It should bubble and the crust should brown nicely. If the edges brown too quickly, cover them with foil. This helps prevent burning while the rest of the pie cooks. If your pie does not set well, it may need more flour. Adding an extra tablespoon can help thicken the juices. If the filling is too runny, let it cool longer before slicing. For a burnt crust, reduce the oven temperature next time. If you see cracks in the crust, that means it was rolled too thin. Always roll to at least a 1/8-inch thickness. Using these tips, you can make the best peach pie ever, every time! For more detailed steps, check the Full Recipe. {{image_2}} You can easily change the flavor of your peach pie. Adding spices can bring out new tastes. For instance, try adding nutmeg or ginger for a warm kick. A pinch of cardamom can add a fragrant twist. Fresh herbs like basil or mint also work. Chop them finely and mix them into the peach filling. This can bring a surprising freshness to each slice. If you need a gluten-free crust, there are great options. You can use almond flour or a gluten-free blend. Make sure to follow a recipe that uses these flours well. For a vegan option, swap butter with coconut oil or a vegan butter substitute. You can also use almond milk instead of egg for the wash. These changes keep the pie delicious without any animal products. Mixing in other fruits can create fun flavor combinations. Berries like blueberries or raspberries pair well with peaches. They add tartness and color. You can also try adding strawberries for a sweeter taste. Even apples or pears can blend nicely into the filling. Just be sure to adjust the sugar to keep the balance right. Enjoy experimenting with different fruit mixtures to find your favorite! After baking, let your peach pie cool completely. This helps the filling set. Cover the pie with plastic wrap or aluminum foil. Place it in the fridge if you plan to eat it within a few days. This will keep it fresh and tasty. If you want to keep it longer, look to freezing. To freeze your peach pie, wrap it tightly in plastic wrap. Then, add a layer of aluminum foil. This protects it from freezer burn. Label the pie with the date. It can stay in the freezer for up to three months. When you are ready to eat it, thaw it in the fridge overnight. To reheat your peach pie, preheat the oven to 350°F (175°C). Remove any plastic wrap. Place the pie on a baking sheet. Bake for about 20-25 minutes. This warms the pie and makes the crust crispy again. If you want to serve it warm, it’s best to eat it right after reheating. You can find the Full Recipe for more details on making this delicious treat! Yes, you can use frozen peaches. Just thaw and drain them first. This helps remove excess water. They might be softer than fresh peaches. But they still taste great in the pie. If you use frozen peaches, add a bit more flour to the filling. This will help keep it from being too runny. You will know the pie is done when the crust is golden brown. The filling should bubble and look thick. If you see some juices oozing out, that’s a good sign! Bake for 45-50 minutes at 425°F (220°C). If the edges brown too fast, cover them with foil. This keeps your pie looking nice. Peach pie is wonderful on its own. But it’s even better warm with ice cream. Vanilla is a classic choice. You can also serve it with whipped cream or fresh peaches. For a fun twist, try serving it with a drizzle of caramel sauce. This adds a rich flavor that pairs well with peach pie. To wrap up, we explored how to make the best peach pie. We discussed key ingredients, measuring tips, and how to pick the best peaches. Next, we went through step-by-step instructions for filling, crust, and baking. I shared tips to avoid a soggy bottom and troubleshoot issues. We also looked at flavor variations and storage solutions to keep your pie fresh. Remember, baking is both science and art. With practice, you'll create peach pies that impress everyone. Enjoy the process and the tasty rewards!
The Best Peach Pie Ever Sweet and Flavorful Delight
Are you ready to make the best peach pie ever? This recipe is a sweet, flavorful delight that will impress your friends and family. I’ll