Desserts

To make a tasty apple zucchini bread, you need the following: - 1 cup grated zucchini (about 1 medium zucchini) - 1 cup grated apple (about 1 large apple) - 1 ½ cups all-purpose flour - 1 teaspoon baking soda - ½ teaspoon baking powder - ½ teaspoon ground cinnamon - ¼ teaspoon ground nutmeg - ¼ teaspoon salt - ½ cup granulated sugar - ½ cup packed brown sugar - 2 large eggs - ½ cup vegetable oil - 1 teaspoon vanilla extract You can add some fun extras to your bread. Consider mixing in: - ½ cup chopped walnuts - ½ cup raisins These add-ins give a nice crunch and sweetness. Feel free to skip them if you prefer a simpler bread. This recipe is great for many diets. It contains no nuts if you skip the walnuts. You can use gluten-free flour for a gluten-free version. For a lower sugar option, you can reduce the sugar or use a sugar substitute. Always double-check ingredients to fit your needs. Enjoy your baking! Start by preheating your oven to 350°F (175°C). This step ensures your bread bakes evenly. Grease and flour a 9x5-inch loaf pan. You can also line it with parchment paper. This makes for easy removal later. In a medium bowl, combine the dry ingredients. Add 1 ½ cups of all-purpose flour, 1 teaspoon of baking soda, ½ teaspoon of baking powder, ½ teaspoon of ground cinnamon, ¼ teaspoon of ground nutmeg, and ¼ teaspoon of salt. Mix them well. Set this bowl aside while you work on the wet ingredients. In a large bowl, whisk together the sugars and eggs. Use ½ cup of granulated sugar and ½ cup of packed brown sugar. Add 2 large eggs to the mix. Whisk until it’s smooth. Then, stir in ½ cup of vegetable oil and 1 teaspoon of vanilla extract. Make sure everything is well combined. Next, it’s time to add the stars of the show: zucchini and apples! Grate 1 cup of zucchini and 1 cup of apple. Stir these into your wet mixture until they blend in nicely. This adds moisture and flavor to your bread. Now, carefully fold the dry ingredients into the wet mixture. Do this gently until just combined. It’s okay if there are small lumps; don’t overmix! If you want to add texture, fold in ½ cup of chopped walnuts and ½ cup of raisins. Pour the batter into the prepared loaf pan. Smooth the top with a spatula. Bake for 50-60 minutes. Check with a toothpick; it should come out clean when done. Let it cool in the pan for about 10 minutes, then transfer it to a wire rack. Enjoy your homemade Apple Zucchini Bread! For the full recipe, check the previous section. To keep your Apple Zucchini Bread moist, use freshly grated zucchini and apple. The moisture from these ingredients is key. Squeeze out excess water from the zucchini before mixing. Adding a bit more oil can help too. If you want a softer texture, consider using applesauce instead of some oil. This adds moisture without extra fat. One common mistake is overmixing the batter. This can make the bread tough. Mix just until you see no dry flour. Another mistake is not measuring ingredients correctly. Use proper measuring cups for dry and wet ingredients. Lastly, don't skip the cooling time after baking. Letting the bread cool helps it finish setting up. Apple Zucchini Bread tastes great warm or cold. Serve it with butter for richness or honey for sweetness. A sprinkle of powdered sugar on top makes it look fancy. For a fun twist, try it with cream cheese or yogurt. Pair it with tea or coffee for a delightful snack or breakfast. If you want to impress guests, check out the Full Recipe for more serving ideas! {{image_2}} You can easily make this bread gluten-free. Use a gluten-free flour blend instead of all-purpose flour. Look for a blend that contains xanthan gum. This helps the bread rise and hold its shape. You may need to adjust baking time, so keep an eye on it while it bakes. If you prefer a less sweet bread, reduce the sugar. Try using ½ cup of sugar total. For a sweeter loaf, add an extra ¼ cup of sugar. You can also use honey or maple syrup as a sweetener. Just remember, liquid sweeteners may change the texture. Feel free to get creative with this recipe. You can add mashed bananas or grated carrots for new flavors. If you want a tropical twist, try adding crushed pineapple. Just make sure to drain any excess liquid to keep the bread from getting soggy. This is where you can explore your favorite fruits and veggies! Check out the Full Recipe for more ideas and ways to enjoy this delightful treat. To keep your apple zucchini bread fresh, let it cool. Once cooled, wrap it tightly in plastic wrap or foil. You can also place it in an airtight container. Store it at room temperature for up to three days. If you want to keep it longer, consider freezing it. Freezing is a great way to save some bread for later. First, slice the bread into pieces. Then, wrap each slice in plastic wrap. Place the wrapped slices into a freezer-safe bag. Make sure to squeeze out the air before sealing. This bread can stay fresh in the freezer for up to three months. To enjoy your bread again, you can reheat it. If it's frozen, let it thaw in the fridge overnight. Once thawed, preheat your oven to 350°F (175°C). Place the slices on a baking sheet and heat for about 10 minutes. You can also microwave a slice for about 15-20 seconds. This keeps it soft and tasty. For a special touch, add a pat of butter or a drizzle of honey before serving. Apple zucchini bread can last three to five days at room temperature. Keep it in an airtight container. If you store it in the fridge, it can last up to a week. For longer storage, freeze it. Wrap slices tightly in plastic wrap before freezing. Yes, you can use alternative sweeteners. Options like honey, maple syrup, or stevia work well. Keep in mind that these may change the bread's texture. Adjust the liquid in the recipe if needed to balance the moisture. Absolutely! Replace the eggs with flax eggs or applesauce for a vegan option. Use plant-based milk instead of dairy milk if needed. The bread will still taste great without dairy! Yes, yellow zucchini works just as well. It has a slightly different flavor but adds the same moisture. The color will make your bread look bright and fun! Zucchini is low in calories and high in fiber. It helps digestion and supports heart health. Apples add vitamins and antioxidants. They may help reduce the risk of chronic diseases. Together, they make this bread a tasty and healthy treat! Apple zucchini bread brings together simple ingredients and easy steps for great taste. We covered how to mix flavors and avoid common mistakes. You can even tweak the recipe to match your diet or taste. Store leftovers well to keep them fresh for longer. This bread is fun to make and share, perfect for any occasion. Enjoy your baking and the delicious results!
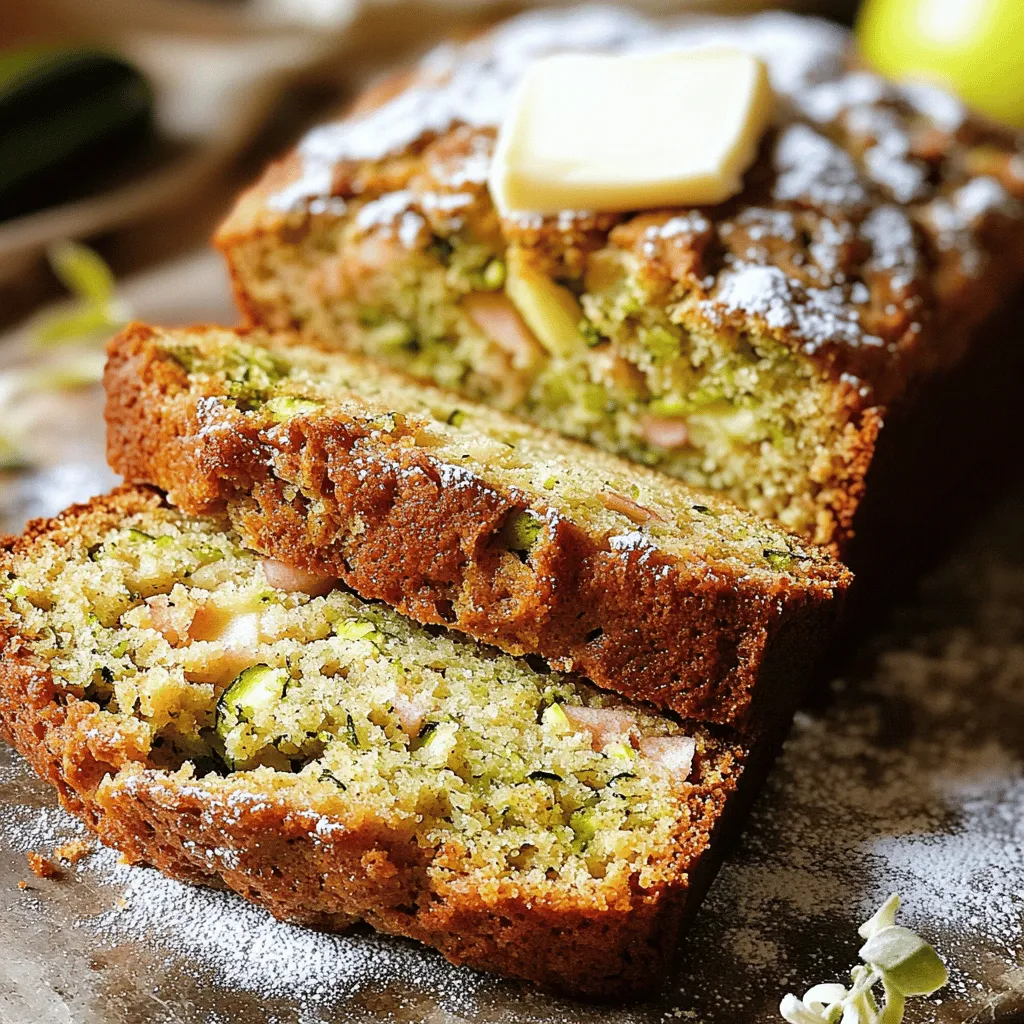
Apple Zucchini Bread Simple and Delicious Recipe
Looking for a tasty way to use up your zucchini? You’re in the right place! This Apple Zucchini Bread recipe is simple, delicious, and packed
Zucchini brownies use simple ingredients to create a delicious treat. Here’s what you need: - 1 cup grated zucchini - 1 cup all-purpose flour - 1/2 cup unsweetened cocoa powder - 1/2 teaspoon baking soda - 1/2 teaspoon baking powder - 1/4 teaspoon salt - 1 cup granulated sugar - 1/2 cup vegetable oil - 2 large eggs - 1 teaspoon pure vanilla extract - 1/2 cup chocolate chips (optional) - 1/4 cup chopped walnuts (optional) These ingredients blend to make rich, moist brownies. Grated zucchini adds moisture without changing the taste much. You won’t even notice it’s there! When choosing your ingredients, I recommend using fresh zucchini. It gives the best texture and flavor. For the cocoa powder, go for unsweetened. This keeps the brownies from being too sweet. If you want extra chocolate, add the optional chocolate chips. They melt and create gooey pockets throughout the brownies. If you like a crunch, toss in chopped walnuts. They add texture and a nutty flavor that pairs well with chocolate. Remember, you can always mix it up based on what you have at home. This recipe is flexible, and you can adjust it to fit your taste. For the full recipe, check the details above. Happy baking! - Preheat the oven to 350°F (175°C). Grease an 8x8-inch baking dish or line it with parchment paper. - In a medium bowl, combine 1 cup of grated zucchini, 1 cup of sugar, 1/2 cup of vegetable oil, 2 eggs, and 1 teaspoon of vanilla extract. Mix well until everything blends. - In another bowl, whisk together 1 cup of all-purpose flour, 1/2 cup of cocoa powder, 1/2 teaspoon of baking soda, 1/2 teaspoon of baking powder, and 1/4 teaspoon of salt. - Gradually add the dry mix to the wet mix. Stir until just combined. Avoid overmixing to keep the brownies soft. - If you want, fold in 1/2 cup of chocolate chips and 1/4 cup of chopped walnuts. These add great flavor and texture. - Pour the brownie batter into the prepared baking dish. Spread it evenly for even baking. - Bake in the oven for 25-30 minutes. Check for doneness by inserting a toothpick in the center. It should come out with a few moist crumbs. Enjoy making these delicious brownies! For more details, check the Full Recipe. - How to properly grate zucchini: Start with a fresh zucchini. Wash it well, then use a box grater or food processor. Grate the zucchini with the skin on for added flavor and nutrients. After grating, place the zucchini in a clean cloth and wring it out. This step removes excess moisture, helping your brownies stay firm. - Importance of not overmixing: When you mix the wet and dry ingredients, stir just until combined. Overmixing can make the brownies tough. You want a soft, fudgy texture. The batter should look slightly lumpy. Trust me, it's okay! - Cooling tips for best texture: After baking, let your brownies cool in the pan for about 10 minutes. Then transfer them to a wire rack. This helps them set. If you cut them too soon, they may fall apart. Patience is key! - Gluten-free flour options: If you need a gluten-free version, try using almond flour or a gluten-free all-purpose blend. These options work well and will keep the brownies moist. - Vegan alternatives for eggs and oil: You can replace the eggs with flaxseed meal. Mix one tablespoon of flaxseed meal with three tablespoons of water for each egg. For oil, use applesauce or mashed bananas. Both options keep your brownies soft and yummy. For the full recipe and more tips, check out the [Full Recipe]. {{image_2}} You can make zucchini brownies even more exciting with different ingredients. Here are two fun ideas: - Dark chocolate brownies: Swap regular cocoa powder for dark cocoa powder. This change gives your brownies a richer flavor and a deeper color. Dark chocolate pairs well with the moisture from the zucchini. - Nut-free options: If you want to avoid nuts, just leave out the walnuts. You can also add more chocolate chips for extra sweetness. Make sure to check your chocolate chips for nut-free labels. Serving your zucchini brownies can be just as fun as making them! Here are some tasty ideas: - Pairing with toppings or ice cream: Try serving the brownies warm with a scoop of vanilla ice cream. Drizzle some chocolate sauce on top for an extra treat. Fresh berries also add a nice touch. - Presentation ideas for gatherings: Use a rustic wooden platter to display your brownies. Dust them lightly with powdered sugar. This touch makes them look fancy and inviting. You can also slice them into fun shapes for parties. For more details on making these delicious brownies, check the Full Recipe! To keep your brownies fresh, store them at room temperature. Place them in an airtight container. This helps keep them soft and moist. If you want to keep them longer, you can freeze them. Wrap each brownie in plastic wrap or aluminum foil. Then, place them in a freezer bag. Make sure to remove as much air as possible. This keeps them from getting freezer burn. How long do zucchini brownies last? When stored properly, they can last about 4 to 5 days at room temperature. If frozen, they can stay good for up to 3 months. Just remember to thaw them in the fridge overnight before eating. Signs that brownies have gone bad include a dry texture and a strange smell. If you see mold or any discoloration, it’s best to throw them away. Enjoy your delicious treats while they are fresh! Can I make these brownies vegan? Yes, you can make zucchini brownies vegan. Replace the eggs with flax eggs or applesauce. Use a plant-based oil, like coconut or canola oil. Ensure your chocolate chips are dairy-free. What does zucchini do in brownies? Zucchini adds moisture and a soft texture to brownies. It helps keep them rich without adding a strong flavor. Plus, it sneaks in some veggies for extra nutrition! How can I tell if my brownies are done? To check if your brownies are done, insert a toothpick into the center. If it comes out with a few moist crumbs, they are ready. Do not overbake, or they will dry out. Can I use yellow squash instead of zucchini? Yes, yellow squash can work in place of zucchini. The flavor will be slightly different, but it will still add moisture. Grate it just like zucchini for the best results. What is the nutritional value of zucchini brownies? Zucchini brownies are a healthier dessert option. They contain fiber, vitamins, and minerals from the zucchini. Each brownie has fewer calories and less fat than traditional brownies. You can find the full recipe to see exact nutrition details. You can make delicious zucchini brownies with simple steps. First, combine grated zucchini with basic ingredients like flour, cocoa powder, eggs, and sugar. Then, mix and bake for a tasty treat. Remember to use tips like properly grating zucchini and not overmixing for the best results. You can even try different variations and store them well. These brownies are fun to make and enjoyable to share. Get baking and enjoy your tasty creation!
Zucchini Brownies Delicious and Healthy Dessert Recipe
Zucchini brownies are a game-changer for dessert lovers. They blend rich chocolate with healthy zucchini for a yummy treat that’s easy to make. You won’t
You can use fresh or canned peaches for your cobbler. Fresh peaches taste bright and juicy, which is great for summer. When choosing fresh peaches, look for ones that are firm but yield slightly to gentle pressure. They should smell sweet and fragrant. Canned peaches are a good option too. They save time and are available year-round. Just make sure to drain them well. The taste is still good, but fresh peaches have a special charm that shines in this dish. Spices make this cobbler stand out. You’ll need: - 1 teaspoon ground cinnamon - 1 tablespoon lemon juice - 1 teaspoon vanilla extract Cinnamon adds warmth and comfort to the dish. Lemon juice brightens the flavors and balances the sweetness. Vanilla extract gives a lovely depth. These spices create a perfect harmony with the peaches. You will also need some basic pantry items to complete the recipe. Gather these essential ingredients: - 1 cup granulated sugar, divided - 1 cup all-purpose flour - 2 teaspoons baking powder - 1/2 teaspoon salt - 1 cup milk - 1/2 cup unsalted butter, melted These items help create the batter and sweeten the fruit. They work together to give the cobbler its signature texture. For the full list and instructions, check out the Full Recipe. First, wash your peaches well. If you use fresh peaches, slice them into thin pieces. You need about four cups. If you choose canned peaches, drain them first. Combine your peaches in a large bowl. Add 1/2 cup of sugar, lemon juice, ground cinnamon, and vanilla extract. Mix gently. This step helps the peaches soak up the flavors. Pour this mixture into a greased 9x13-inch baking dish. Set it aside while you make the batter. In another bowl, whisk together the flour, the rest of the sugar, baking powder, and salt. This mix is the base of your batter. Gradually stir in the milk. Mix until just combined. Then fold in the melted butter. This will make your batter smooth and rich. Pour the batter over the peach mixture. Do not mix it; the batter will rise as it bakes. Preheat your oven to 350°F (175°C). Bake your cobbler for about 40-45 minutes. It is ready when the top turns golden brown. A toothpick should come out clean if you poke it in the center. Let it cool for 10-15 minutes. Then serve warm. For a treat, add a scoop of vanilla ice cream or a dollop of whipped cream on top. A sprig of mint can add a nice touch, too! Enjoy your homemade old fashioned peach cobbler! For the full recipe, check above. To make the best old fashioned peach cobbler, choose ripe peaches. Look for peaches that are slightly soft to the touch. They should have a sweet smell. If you can, buy them in late summer when they are in season. Avoid peaches with green spots or bruises. If they are not fully ripe, let them sit at room temperature for a few days. This will help them sweeten up. The texture of your cobbler is key. You want a golden, crispy top with a tender bottom. To achieve this, don’t overmix the batter. Just stir until the wet and dry ingredients combine. When you pour the batter over the peaches, don’t stir it in. Let it rise on its own while baking. This creates a nice layered effect. There are a few common mistakes to watch out for. First, don’t skip the lemon juice. It brightens the flavor of the peaches. Second, avoid using too much sugar. You want to enhance the peach flavor, not mask it. Lastly, don’t open the oven door while baking. This can make the cobbler sink. Follow these tips for a successful cobbler every time. For the full recipe, check out the Classic Southern Peach Cobbler. {{image_2}} You can switch things up with blueberries or blackberries. These fruits add a nice twist to the classic peach cobbler. Just swap in 4 cups of fresh or frozen berries instead of peaches. They will mix well with the sugar and spices. The baking time stays the same, so don’t worry. This change gives a new fruity taste while keeping the cobbler's warm charm. If you need a gluten-free option, it’s easy! Use gluten-free flour instead of regular flour. Look for a blend that works well in baking. This swap lets you enjoy the same great taste without gluten. Make sure to check that your baking powder is gluten-free too. Your cobbler will still be delicious and comforting. You can make this cobbler vegan with a few simple swaps. Use plant-based milk, like almond or soy milk, instead of regular milk. Replace the butter with coconut oil or a vegan butter spread. The result is a tasty dessert that everyone can enjoy. This way, you keep the joy of the cobbler while sticking to your diet needs. For the complete Old Fashioned Peach Cobbler recipe, check the Full Recipe section. After enjoying your peach cobbler, let it cool completely. Once cooled, cover it with plastic wrap or aluminum foil. Store it in the fridge for up to three days. Keeping it sealed helps maintain its moisture and flavor. If you have a lot left, consider cutting it into portions. This way, you can easily grab a piece when you want a sweet treat. You can freeze peach cobbler if you want to save some for later. First, let it cool fully. Then, cut it into squares and place them in an airtight container. Be sure to separate layers with parchment paper to prevent sticking. You can also wrap the whole dish tightly in plastic wrap. Frozen cobbler can last for up to three months. Just label it with the date to keep track. To reheat peach cobbler, preheat your oven to 350°F (175°C). Place the cobbler in a baking dish and cover it with foil. Heat for about 20 minutes, or until warmed through. If you prefer a crispier top, remove the foil for the last five minutes. You can also reheat individual servings in the microwave for about 30 seconds. Serve it warm with whipped cream or vanilla ice cream for extra yumminess. Yes, you can use frozen peaches. Just thaw them first. Drain any extra liquid. This helps keep your cobbler from being too watery. Frozen peaches work well and save time. They can be just as sweet as fresh ones. Peach cobbler lasts about 3 to 5 days in the fridge. Store it in an airtight container. This keeps it fresh and prevents it from drying out. Reheat slices in the microwave for a quick treat. You can serve many things with peach cobbler. A scoop of vanilla ice cream is classic. Whipped cream also adds a nice touch. For a fun twist, try serving it with yogurt. Fresh mint can brighten the dish too. The Full Recipe offers many serving ideas to explore. We explored how to make a delicious peach cobbler. First, we compared fresh and canned peaches. Then, we covered key spices and pantry staples. Next, I shared step-by-step instructions for prepping peaches, making batter, and baking. Tips on choosing ripe peaches and avoiding mistakes followed. Variations included twists with berries and options for gluten-free and vegan diets. Finally, I shared storage methods and answered common FAQs. Now, you can make a peach cobbler that suits your taste. Enjoy this classic dessert in your own special way!
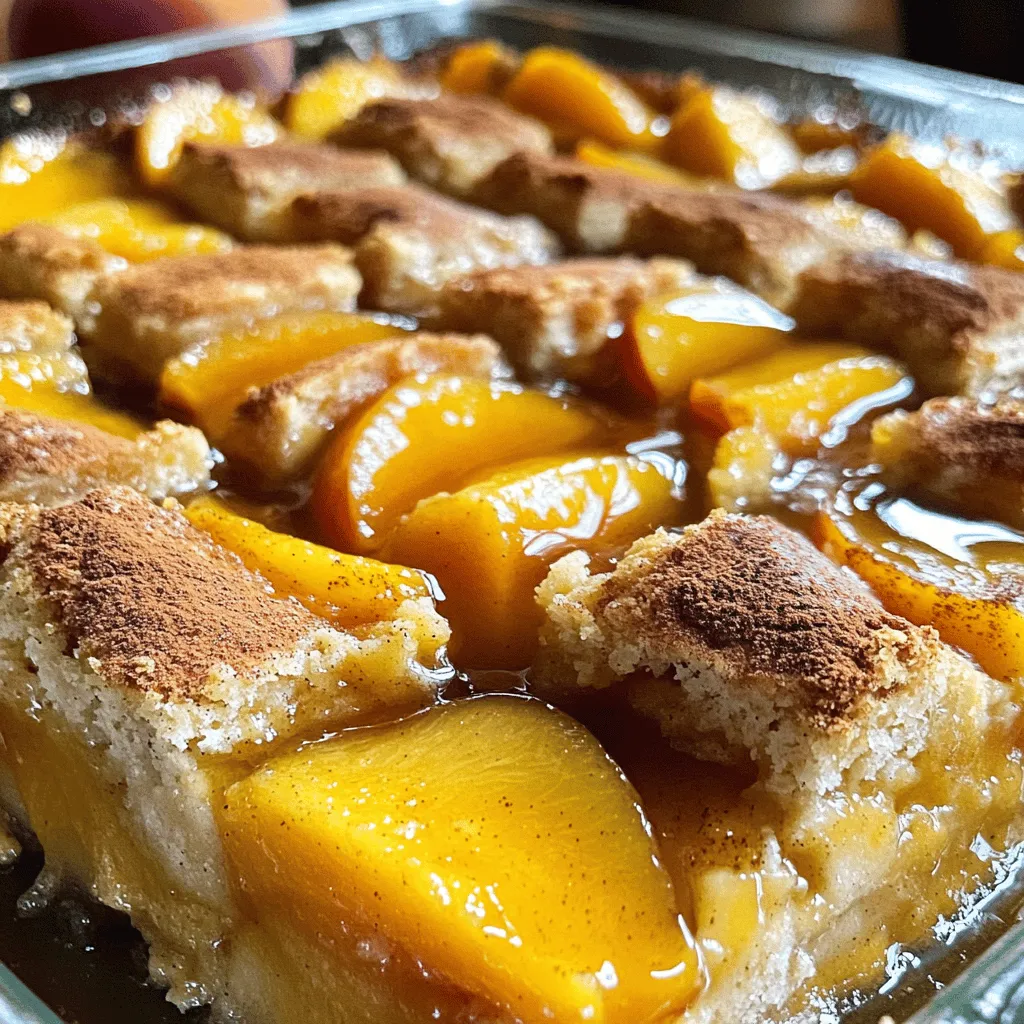
Old Fashioned Peach Cobbler Delicious and Easy Recipe
If you crave a sweet, warm dessert, I have just the recipe for you! My Old Fashioned Peach Cobbler is a simple yet delightful treat
To make a Peach Upside Down Cake, you will need the following: - 3 ripe peaches, pitted and sliced - 1/4 cup unsalted butter (for the topping) - 1/2 cup brown sugar - 1 cup all-purpose flour - 1 teaspoon baking powder - 1/4 teaspoon salt - 1/2 cup granulated sugar - 1 large egg - 1/2 cup milk - 1 teaspoon vanilla extract - 1/2 teaspoon cinnamon When you measure your ingredients, accuracy is key. Here are some tips: - Use measuring cups for dry and liquid ingredients. - Level off dry ingredients with a knife for precision. - Use a liquid measuring cup for milk and other liquids. - For brown sugar, pack it into the cup to get the right amount. You can make swaps if you need to. Here are some options: - If you don't have peaches, use other fruits like pears or pineapples. - Swap unsalted butter for coconut oil for a dairy-free version. - Use whole wheat flour instead of all-purpose flour for added fiber. - Substitute almond milk for regular milk for a nutty flavor. These tips will help you gather the right ingredients and make your cake tasty! For the full recipe, check out the Peachy Paradise Upside Down Cake. Start by preheating your oven to 350°F (175°C). This ensures even baking. Next, grab a 9-inch round cake pan. Melt 1/4 cup of unsalted butter in the pan. Once melted, sprinkle 1/2 cup of brown sugar over the butter. This mix will create a sweet base for the peaches. Now, take your 3 ripe peaches. Pitting and slicing them is easy. Arrange the peach slices over the brown sugar mix. Cover the bottom of the pan well and set it aside. In a bowl, mix 1 cup of all-purpose flour, 1 teaspoon of baking powder, 1/4 teaspoon of salt, and 1/2 teaspoon of cinnamon. This will be your dry mix. In another bowl, combine 1/2 cup of granulated sugar, 1 large egg, 1/2 cup of milk, and 1 teaspoon of vanilla extract. Mix until smooth. Gradually add the dry mix to the wet mix. Stir until just combined. Pour this batter over the peach slices in the pan. Smooth it out gently. Bake in your preheated oven for 30-35 minutes. Check with a toothpick. It should come out clean when the cake is done. Once baked, take the cake out and let it cool for about 10 minutes. Carefully invert the cake onto a serving plate. This step makes the peaches shine on top. If you want, let it cool a bit more before slicing. Serve it warm or at room temperature. Adding a dollop of whipped cream or a scoop of vanilla ice cream makes it even better. For the full recipe, visit the complete guide. Enjoy every bite of your peach upside down cake! To get the best texture for your Peach Upside Down Cake, focus on the mixing. Combine the wet and dry ingredients just until they blend. Overmixing can lead to a tough cake. Keep your butter at room temperature for easy creaming. This helps the cake rise well. Adding a bit of cinnamon enhances the flavor too. A few common mistakes can spoil your cake. First, do not skip the butter layer. It keeps the peaches moist. Also, ensure your oven is fully preheated. Baking at the wrong temperature can affect the texture. Lastly, avoid using unripe peaches; they won't bring the sweet flavor you want. Storing your cake correctly keeps it fresh. Once cooled, cover the cake with plastic wrap. You can also store it in an airtight container. This keeps it moist for up to three days. If you want to keep it longer, freeze it. Just wrap it tightly and it can last for up to three months. When ready to eat, let it thaw at room temperature. For the full recipe, check out the Peachy Paradise Upside Down Cake. {{image_2}} You can switch out peaches for other fruits. Apples, pineapples, or berries work well. Each fruit adds its own taste and charm. For apples, slice thinly and use a bit of lemon juice to keep them fresh. Pineapples add a tropical twist. Berries create a colorful and vibrant look. Mix and match to find your favorite! If you need a gluten-free cake, use almond flour or gluten-free flour blends. These options keep the cake moist and tasty. For a vegan version, replace the egg with a flax egg. Just mix one tablespoon of ground flaxseed with three tablespoons of water. Let it sit until it thickens. Use plant-based milk for a vegan treat. Add spices to make the cake more exciting. A pinch of cardamom or nutmeg can elevate the flavor. You could also add a splash of almond extract for a nutty twist. Want a richer taste? Try mixing in some chopped nuts or chocolate chips. These little tweaks can make your cake unique and delightful. For the full recipe, check out Peachy Paradise Upside Down Cake. You can add fun toppings to your peach upside down cake. A dollop of whipped cream makes it light and airy. You might also try a scoop of vanilla ice cream for a creamy touch. For a twist, drizzle warm caramel sauce over the slices. This sweet sauce pairs well with the juicy peaches and adds richness. If you want a bit of crunch, sprinkle some chopped nuts on top. This cake shines at gatherings. Serve it at birthday parties, family reunions, or summer picnics. It’s also great for brunch with friends. The warm peaches and sweet cake cheer everyone up. You can enjoy it after a nice dinner, too. It’s a lovely dessert that feels special but is simple to make. You can make your cake look fancy with some easy tricks. Slice the cake into wedges and place them on colorful plates. Add a mint leaf on top for a fresh touch. You can also serve it on a wooden board for a rustic feel. For a fun idea, stack slices with layers of whipped cream in a glass. This way, everyone sees the beautiful peaches inside. Serve it warm or at room temperature for the best taste. For the full recipe, check out the details above! You can swap peaches for other fruits. Pineapples, pears, or apples work well. Just slice them thin. Each fruit gives a unique flavor and texture. If you use canned fruit, drain it first. This way, your cake stays moist without being soggy. To check if the cake is ready, use a toothpick. Stick it in the center of the cake. If it comes out clean, your cake is done. If it has wet batter, bake a bit longer. The edges should pull away from the pan slightly too. Yes, you can make this cake ahead of time. Bake it, then let it cool completely. Cover it with plastic wrap and store it in the fridge. When you are ready to serve, warm it up in the oven for a few minutes. This helps the cake taste fresh. For the full recipe, check out the Peachy Paradise Upside Down Cake section. This blog post covered how to create a Peach Upside Down Cake. We explored key ingredients, precise measuring tips, and great substitutions. You learned step-by-step preparation, baking directions, and how to add final touches. We shared tips for perfecting cake texture and storage advice. I also discussed variations, including seasonal fruits and dietary options. To wrap up, use our serving suggestions to impress guests. With these insights, you're ready to bake a fantastic cake. Enjoy the process and share it with others!
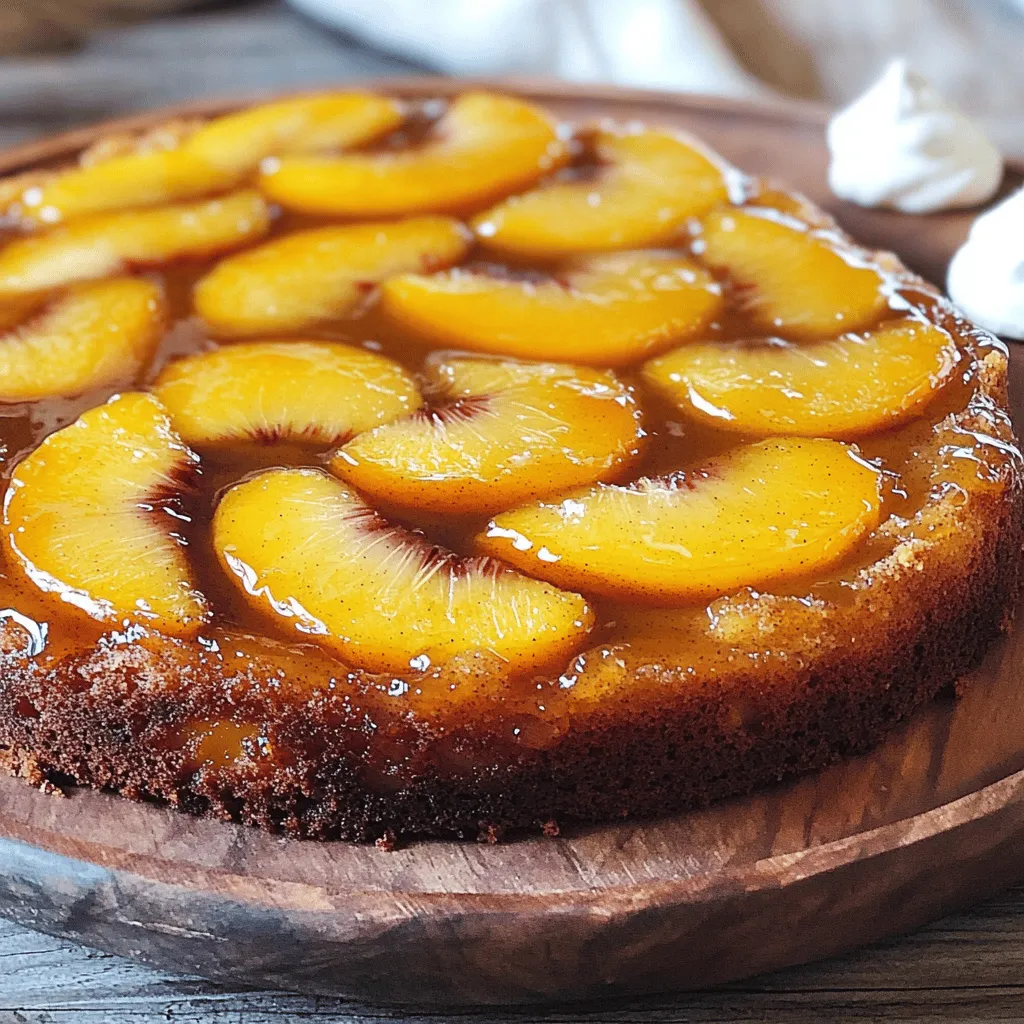
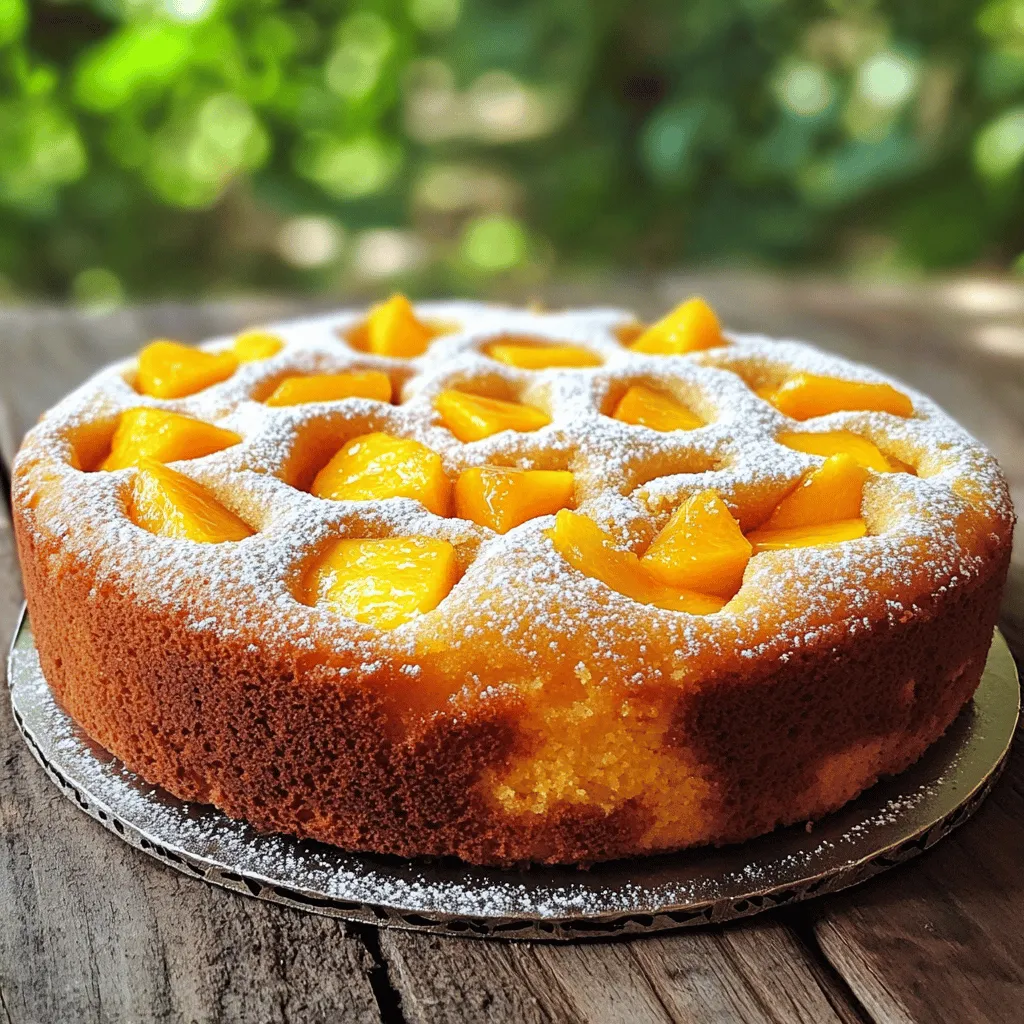
Peach Upside Down Cake Delightful and Simple Recipe
Are you ready to impress your friends with a delightful Peach Upside Down Cake? This simple recipe makes a stunning dessert that looks and tastes
To make this peach crisp, gather the following fresh ingredients: - 4 ripe peaches, sliced - 1 tablespoon lemon juice - 1/2 cup granulated sugar, divided - 1 cup rolled oats - 1/2 cup all-purpose flour - 1/2 teaspoon cinnamon - 1/4 teaspoon salt - 1/2 cup cold unsalted butter, cubed - 1/4 cup brown sugar - Vanilla ice cream (for serving, optional) These ingredients create a sweet and tart mix that sings summer. The peaches soften as they bake, while the topping becomes crunchy. For this recipe, you will need some handy tools: - 8x8-inch baking dish - Large mixing bowls - Measuring cups and spoons - A pastry cutter or your fingers to mix the butter into the dry ingredients - Oven mitts for safe handling Having the right tools makes cooking easier and more fun. If you do not have all the ingredients, here are some swaps you can try: - Use nectarines instead of peaches for a different flavor. - Swap lemon juice with lime juice if needed. - Replace all-purpose flour with almond flour for a gluten-free option. - Use coconut oil instead of butter for a dairy-free version. These substitutions can help you make this dessert with what you have on hand. The Full Recipe provides all the details to guide you through. Start by washing your peaches well. Slice them into thin wedges. You can leave the skin on for added texture. In a large bowl, add the sliced peaches. Pour in the lemon juice and sprinkle 1/4 cup of granulated sugar over them. Toss everything gently to coat. Let the mix sit for about 15 minutes. This step helps the peaches soften and release their juices. In another bowl, combine the rolled oats, flour, remaining granulated sugar, cinnamon, and salt. Mix these dry ingredients well. Now, add the cold, cubed butter to this mix. Use your fingers or a pastry cutter to blend the butter. Keep mixing until the mixture looks like coarse crumbs. This will give your crisp that nice crumbly texture. Preheat your oven to 350°F (175°C). Take an 8x8-inch baking dish and spread the peach mixture evenly in the bottom. Next, sprinkle the oat mixture over the peaches, making sure it covers them well. Then, evenly add the brown sugar on top of the oats. Bake everything in the oven for 30-35 minutes. Your crisp is ready when the topping is golden brown and the peaches start to bubble. Remove it from the oven and let it cool a little before serving. You can enjoy it warm or top it with vanilla ice cream for a special treat. For the Full Recipe, check the earlier section. To get a great texture, use ripe peaches. They should feel slightly soft. Adding lemon juice helps brighten the flavor and keeps the peaches fresh. When mixing the topping, make sure the butter is cold. This helps create that nice, crunchy topping. Mix the butter with the dry ingredients until it looks like coarse crumbs. This is key for a good crisp. Serving your peach crisp warm is the best way to enjoy it. A scoop of vanilla ice cream melts perfectly on top. The cold ice cream mixes well with the warm fruit and topping. For a twist, try adding a sprinkle of nuts on top before baking. This gives a nice crunch and adds flavor. One common mistake is using unripe peaches. They won't have the sweet flavor you want. Another mistake is overmixing the topping. You want some chunks of butter for a crunchy texture. Lastly, don’t skip letting the crisp cool slightly before serving. This helps the layers set and makes it easier to serve. Follow these tips, and you'll have a peach crisp that everyone loves! {{image_2}} You can easily make this peach crisp gluten-free. Just swap the all-purpose flour with gluten-free flour. Many brands offer great options that work well in baking. You can also check for oats that are labeled gluten-free. This small change keeps the dish tasty and safe for those with gluten issues. Want to add some crunch? Try mixing in chopped nuts like walnuts or almonds. They add a nice texture and taste. You could also toss in other fruits. Berries, apples, or pears blend well with peaches. This way, you create your own unique twist on the classic recipe. Flavoring can take your peach crisp to the next level. Consider adding a splash of almond extract for a nutty taste. You could also sprinkle in some ginger or nutmeg for warmth. Even a bit of citrus zest works wonders. These flavors enhance the sweetness of the peaches and elevate the dish overall. Try these variations to make the simple peach crisp your own and enjoy it even more! Check out the Full Recipe for more guidance. To keep your peach crisp fresh, store it in an airtight container. Let it cool down first. Place it in the fridge if you have leftovers. It will stay good for up to five days. When you're ready to enjoy your peach crisp again, preheat your oven to 350°F (175°C). Place the crisp in an oven-safe dish. Reheat for about 15-20 minutes. This helps the topping stay crisp. You can also microwave it for a quicker option. Heat it in 30-second bursts until warm. If you want to save it for later, freezing is a great option. First, let the crisp cool completely. Then, wrap it tightly in plastic wrap. Place it in a freezer-safe container or bag. It can last for up to three months. When you are ready to eat it, thaw it in the fridge overnight. Reheat it as explained earlier. Enjoy your peach crisp at any time! For the complete recipe, check out Full Recipe. Yes, you can use frozen peaches. Just thaw them first and drain any extra liquid. This will keep your crisp from becoming too soggy. The flavor will still be great, but fresh peaches give the best taste and texture. To ripen peaches fast, place them in a paper bag. Add an apple or banana to speed up the process. The gases from these fruits help peaches ripen faster. Check them daily. Once soft, enjoy your peaches in this recipe! Absolutely! You can double the recipe. Just use a larger baking dish. Make sure to adjust the baking time. Check for doneness by looking for a golden top and bubbly peaches. This simple peach crisp will please a crowd! For the full recipe, follow the steps above. This blog post covered everything you need to make a great peach crisp. We talked about the main ingredients and tools, plus how to prep and bake your dish. I gave tips on texture and delicious ways to serve it. You also learned about variations and storage methods. Peach crisp is simple and fun to make. Try new flavors or share with friends. Enjoy your cooking!
Simple Peach Crisp Tasty and Easy Dessert Recipe
Looking for an easy and delicious dessert? This Simple Peach Crisp recipe is your answer! With just a few simple ingredients, you can create a
- 2 cups fresh peaches, peeled and diced - 1 ½ cups all-purpose flour - 1 cup granulated sugar - ½ cup unsalted butter, softened - 2 large eggs - 1 cup buttermilk - 1 teaspoon vanilla extract - 1 tablespoon baking powder - ½ teaspoon baking soda - ½ teaspoon salt - 1 teaspoon ground cinnamon - ½ cup brown sugar (for crumb topping) - ½ cup rolled oats (for crumb topping) - ½ cup chopped pecans (optional, for crumb topping) - ½ teaspoon ground nutmeg (for crumb topping) When measuring your ingredients, accuracy is key. Use measuring cups for dry ingredients like flour and sugar. For liquids like buttermilk, a liquid measuring cup works best. Always level off your dry ingredients with a flat edge for precise amounts. This way, your cake will rise just right. Peaches are the star of this cake. They add sweetness and moisture, making each bite delicious. Using fresh peaches makes a big difference. The butter contributes to the cake's rich taste and tender texture. Buttermilk adds tang and helps keep the cake moist. Lastly, the crumb topping with oats and nuts gives a nice crunch and flavor contrast. You can find the Full Recipe for even more details. First, you need to preheat your oven. Set it to 350°F (175°C). This step is key for an even bake. While the oven heats, take a 9x13-inch baking dish. Grease it well with butter or cooking spray. This will help the cake come out clean and not stick. Now, let’s create the cake batter. In a large bowl, cream together the softened butter and granulated sugar. Mix until it looks light and fluffy. Then, add the eggs one at a time, mixing well after each egg. In another bowl, whisk together the flour, baking powder, baking soda, salt, ground cinnamon, and nutmeg. Gradually add this dry mix to the butter mixture. Alternate it with buttermilk and vanilla extract. Mix just until combined. Finally, gently fold in the diced peaches. This adds great flavor and texture. Next, let’s prepare the crumb topping. In a separate bowl, combine the brown sugar, rolled oats, and chopped pecans if you are using them. Add ground cinnamon and melted butter to this mix. Stir it all together until it is crumbly. This will give your cake a nice, sweet crunch on top. Now, it’s time to assemble and bake. Pour the batter into the greased baking dish. Spread it out evenly. Next, sprinkle the crumb topping generously over the batter. Bake in your preheated oven for 35-40 minutes. Check for doneness by inserting a toothpick into the center. If it comes out clean, it’s ready. Once baked, let the cake cool for about 10 minutes. Cut it into squares. You can serve it warm or at room temperature. For a special touch, dust with powdered sugar and add fresh peach slices. A scoop of vanilla ice cream is a perfect addition! To get the right crumb, use cold butter. Cold butter makes the topping crispy. Mix the brown sugar, oats, and nuts until crumbly. Don't over-mix; a few lumps add texture. Let the topping sit for a bit before using it on the cake. This helps it form a nice crust while baking. Serve Southern Peach Crumb Cake warm for the best taste. A scoop of vanilla ice cream on top makes it even better. You can also add whipped cream or drizzle honey for extra sweetness. For a fun twist, serve it with a side of yogurt and fresh mint. This adds a fresh touch to every bite. Want to take your cake to the next level? Add in some spices like cardamom or ginger for warmth. You can also mix in blueberries or raspberries with the peaches. Nuts like almonds or walnuts add a nice crunch. If you love a little zing, try adding lemon zest. These flavors make your cake unique and special. For the full recipe, check out the entire article. {{image_2}} You can change the fruit in this cake to suit your taste. Try using fresh blueberries, blackberries, or even strawberries. Each fruit adds a unique flavor to the cake. For a tropical twist, consider adding diced pineapple or mango. Just keep the same amount of fruit as in the original recipe. Want to make this cake gluten-free? You can easily swap the all-purpose flour for a gluten-free blend. Many good mixes work well and do not change the taste much. Just be sure to check the blend for baking powder and other ingredients to ensure it fits your needs. While pecans add a nice crunch, you can use other nuts or seeds. Walnuts or sliced almonds also work great. For a sweeter topping, try adding chocolate chips or a drizzle of caramel sauce. You can also sprinkle coconut flakes on top for a fun twist. These changes can give your cake a new look and taste. To keep your Southern Peach Crumb Cake fresh, store it in an airtight container. If you do not have a container, wrap the cake tightly in plastic wrap. This helps lock in moisture and keep the cake soft. Place the cake at room temperature for up to three days. If you want to keep it longer, consider freezing it. Freezing this cake is easy. First, let the cake cool completely. Then, cut it into squares. Wrap each piece in plastic wrap, then place them in a freezer-safe bag. Label the bag with the date. Your cake will stay good for about three months in the freezer. When you are ready to eat it, remove the desired pieces and let them thaw in the fridge overnight. To reheat the cake, preheat your oven to 350°F (175°C). Place the cake pieces on a baking sheet. Heat for about 10-15 minutes until warm. You can also microwave a piece for 20-30 seconds. Enjoy it warm! For an extra treat, serve it with a scoop of ice cream. This enhances the flavor and adds a nice touch. Yes, you can use canned peaches. Just make sure to drain them well. Canned peaches may be softer, so they can change the cake's texture a bit. Fresh peaches add more flavor and a firmer bite. To check if the cake is done, insert a toothpick into the center. If it comes out clean, the cake is ready. The edges may pull away slightly from the pan, and the top should be golden brown. You can add nutmeg, cardamom, or ginger for extra warmth. A pinch of allspice also works well. Just remember to start with a small amount and taste as you go. Southern Peach Crumb Cake comes from the Southern United States. Peaches are a popular fruit in this region. This cake celebrates the sweet, juicy peaches grown in the South. To make this recipe dairy-free, use plant-based butter and almond or oat milk. These swaps keep the flavor rich while meeting dietary needs. You won't miss the dairy at all! For the complete recipe, check out the Full Recipe above for exact measurements and steps! We covered how to make a delicious Southern Peach Crumb Cake. We discussed key ingredients, step-by-step instructions, and helpful tips for perfecting the crumb texture. You can also explore variations and storage info to keep your cake fresh. In summary, you now have all the tools needed for a tasty treat. Enjoy baking and sharing this delightful cake with family and friends.
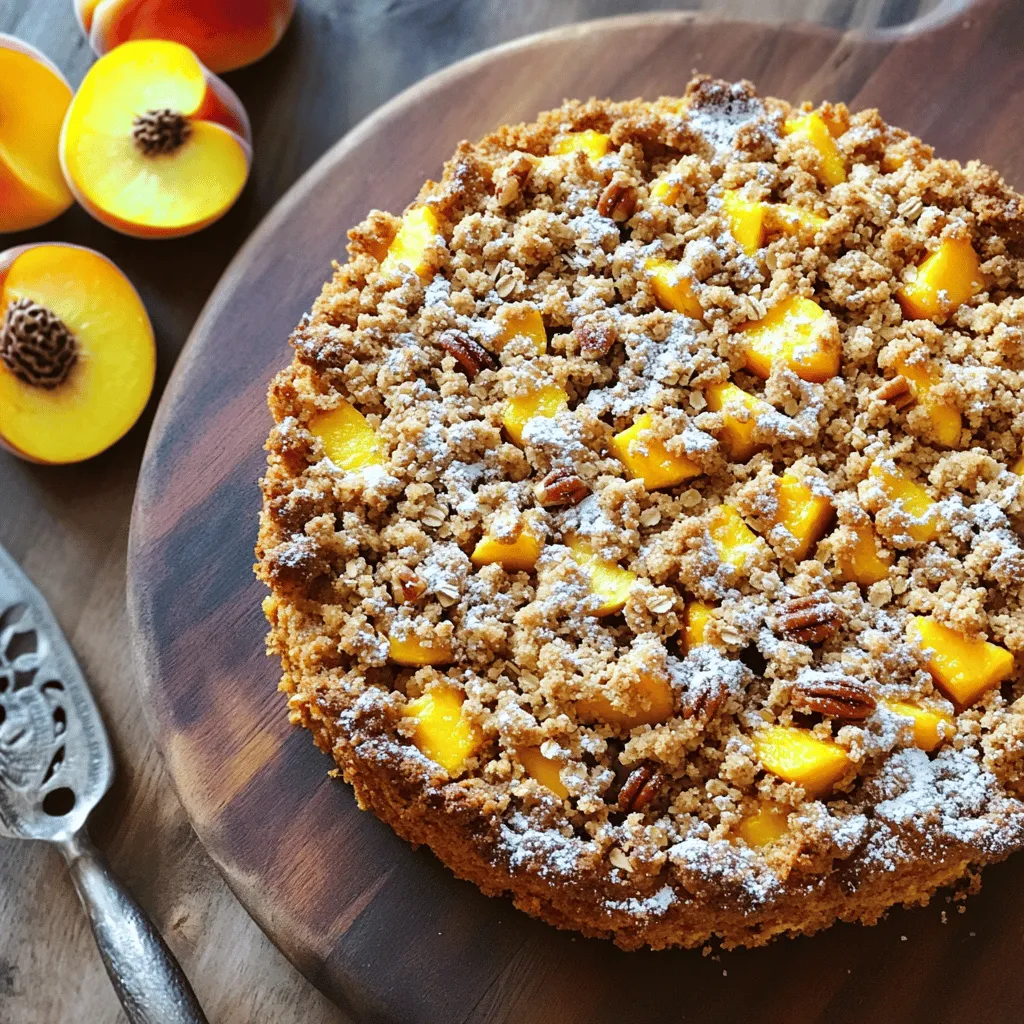
Southern Peach Crumb Cake Delightful and Easy Recipe
Are you ready for a sweet treat that screams summer? This Southern Peach Crumb Cake is easy to make and packed with juicy flavors. With
To make Ridiculously Easy Peach Cobbler, you will need some simple ingredients. Here’s what you’ll need for this delightful dessert: - 4 cups fresh peaches, sliced (or canned peaches in juice, drained) - 1 cup granulated sugar - 1 teaspoon ground cinnamon - 1 teaspoon vanilla extract - 1 cup all-purpose flour - 1 cup milk - 1/2 cup unsalted butter, melted - 1 tablespoon baking powder - 1/2 teaspoon salt These ingredients combine to create a sweet, fruity, and comforting dish. The fresh peaches add a juicy flavor, while the sugar and cinnamon give it that warm sweetness. You can also use canned peaches if you want to save time. Just drain them well. The flour, milk, and butter make a simple batter that rises beautifully while baking. This cobbler is perfect for sharing with friends or family. The recipe is easy to follow, and you can find the full recipe in the section above. Enjoy your baking! 1. Preheat your oven: Set your oven to 350°F (175°C). This step ensures your cobbler bakes evenly. 2. Combine peaches with sugar and cinnamon: In a large bowl, mix 4 cups of sliced peaches with 1/2 cup of sugar and 1 teaspoon of cinnamon. If using fresh peaches, let this sit for about 10 minutes. The sugar helps draw out the peach juices. 3. Prepare batter ingredients: In another bowl, whisk together 1 cup of flour, 1/2 cup of sugar, 1 tablespoon of baking powder, and 1/2 teaspoon of salt. Then, stir in 1 cup of milk and 1/2 cup of melted butter. Mix until just combined. It’s fine if the batter is lumpy! 1. Pour the batter into the baking dish: Grease a 9x13 inch baking dish. Pour the batter into the dish evenly. This will be the base for your cobbler. 2. Spoon the peach mixture over the batter: Carefully spoon the peach mixture over the batter. Make sure to include all the juices. Do not stir it; the batter will rise around the peaches as it bakes. 3. Bake and check for doneness: Place the baking dish in the oven. Bake for 45-50 minutes. The cobbler is done when the top is golden. Insert a toothpick in the center. If it comes out clean, your cobbler is ready to enjoy! Using canned peaches can save you time. They are already sweet and soft. Just drain the juice before you add them. This lets you skip slicing fresh peaches. You can start baking in no time. Pre-measuring your ingredients helps a lot. Before you cook, set out all the items you need. This makes everything faster and smoother. You won’t have to hunt for sugar or butter while mixing. Keep everything close at hand to save time. To get the best texture, don’t overmix the batter. A few lumps are okay. This keeps the cobbler light and fluffy. The key is to mix until the dry and wet combine. For serving, this dish is best warm. I love it with a scoop of vanilla ice cream on top. The cold ice cream contrasts nicely with the warm cobbler. You can also add a sprinkle of cinnamon for extra flavor. Enjoying it fresh out of the oven makes it even better. For the full recipe, click [here](#). {{image_2}} You can easily switch fruits in this peach cobbler. Use blueberries or cherries instead of peaches. These fruits add a fun twist and new flavors. If you want a mix, combine different fruits for a colorful cobbler. Dairy-free options are great too. Substitute regular milk with almond or oat milk. For butter, try coconut oil or vegan butter. These swaps work well and keep the recipe tasty. Serving peach cobbler a la mode is a must! Try different ice creams like vanilla, caramel, or even cinnamon. The cold ice cream melts into the warm cobbler, creating a delightful treat. You can also enjoy this cobbler for breakfast. Use it as a topping for pancakes or waffles. Add some whipped cream or yogurt for a perfect morning meal. Feel free to explore these variations to make your own version of this ridiculously easy peach cobbler. For the complete recipe, check the Full Recipe. To keep your peach cobbler fresh, use an airtight container. Glass or plastic containers work great. You can store it in the fridge for up to three days. If you want to keep it longer, freeze it. Wrap the cobbler tightly in plastic wrap or foil before putting it in a freezer-safe bag. It can last up to three months in the freezer. When you’re ready to eat it, just thaw it in the fridge overnight. The best way to reheat peach cobbler is in the oven. Preheat your oven to 350°F (175°C). Place your cobbler in a baking dish. Cover it with foil to help keep it moist. Heat for about 15 to 20 minutes. If you prefer the microwave, use it, but be careful. Heat in short bursts of 30 seconds. This helps keep the texture nice. Always check to make sure it’s warm throughout before serving. Can I use frozen peaches instead of fresh? Yes, you can use frozen peaches! Just let them thaw first. Drain any extra juice. This helps keep the cobbler from becoming too watery. Frozen peaches work well and save time. How can I make this recipe gluten-free? To make this peach cobbler gluten-free, swap the all-purpose flour for a gluten-free blend. Look for one that works for baking. Use the same amount as in the recipe. You can also try almond flour or oat flour for a different texture. What if my cobbler spills over in the oven? If your cobbler spills, don't panic! Place a baking sheet on the lower rack. This catches any drips. It also keeps your oven clean. If your cobbler overflows often, try using a larger dish next time. How do I know when the cobbler is done baking? Check the cobbler after about 45 minutes. The top should be golden brown. Insert a toothpick in the center. If it comes out clean, your cobbler is ready! The edges should also start to pull away from the dish. This blog post shared a simple peach cobbler recipe with clear steps and helpful tips. You learned about the ingredients needed and how to create this delightful dessert. We also discussed ways to customize the recipe and store any leftovers. Baking should bring joy, and this cobbler does just that. Enjoy making it and share it with friends or family. Happy baking!
Ridiculously Easy Peach Cobbler Simple and Tasty Recipe
If you crave the sweet taste of summer, this Ridiculously Easy Peach Cobbler is for you. In just a few simple steps, you can whip
For a delicious peach crisp, gather these simple ingredients: - 5 cups ripe peaches, peeled and sliced - 1 tablespoon lemon juice - 1/4 cup brown sugar - 1 teaspoon cinnamon - 1 teaspoon vanilla extract - 1 cup rolled oats - 1/2 cup all-purpose flour - 1/2 cup chopped pecans - 1/2 cup granulated sugar - 1/2 cup cold unsalted butter, cubed - 1/4 teaspoon salt You can easily swap some ingredients if needed. Here are some ideas: - Use honey or maple syrup instead of brown sugar. - Substitute coconut sugar for a different flavor. - If you have no pecans, try walnuts or almonds. - Gluten-free flour can replace all-purpose flour. Want to make your peach crisp even better? Try these add-ins: - Add 1/2 cup of blueberries or raspberries for a fruity twist. - Mix in 1/4 teaspoon of nutmeg for a warm spice note. - A handful of shredded coconut can add great texture. - For a crunchier topping, include some sunflower seeds. For the full recipe, check out Peachy Paradise Crisp! Start by washing and peeling 5 cups of ripe peaches. Slice them into thin pieces. Place the sliced peaches in a large bowl. Add 1 tablespoon of lemon juice. Then, sprinkle in 1/4 cup of brown sugar, 1 teaspoon of cinnamon, and 1 teaspoon of vanilla extract. Mix gently until the peaches are coated evenly. This step adds sweetness and flavor to the fruit. Next, spread the peach mixture into a greased 9x13 inch baking dish. Now, let’s prepare the topping. In another bowl, combine 1 cup of rolled oats, 1/2 cup of all-purpose flour, 1/2 cup of chopped pecans, 1/2 cup of granulated sugar, and 1/4 teaspoon of salt. Mix these dry ingredients well. Then, add 1/2 cup of cold unsalted butter, cut into cubes. Use a pastry cutter or your fingers to blend until the mixture looks like coarse crumbs. Sprinkle this topping over the peaches in the baking dish. Preheat your oven to 350°F (175°C). Bake for 30-35 minutes. Look for a golden brown topping and bubbly peaches. To check if your peach crisp is done, look for a golden brown crust. The peaches should bubble around the edges. If you see this, it’s ready to come out. Let it cool for about 10 minutes before serving. This cooling time helps the juices set. Serve it warm, and don’t forget the vanilla ice cream on top! For the full recipe, refer to the earlier section. To make a great peach crisp, start with ripe peaches. Look for peaches that are slightly soft to the touch. Their skin should be smooth and have a warm color. Avoid any peaches that have bruises or dark spots. If they don’t smell sweet, they might not be ready. You can also buy them a bit firm and let them ripen at home. One common mistake is using hard peaches. They won't soften well when baked. Make sure to peel the peaches before slicing. The skin can make the crisp tough. Don’t skip the lemon juice! It adds flavor and helps keep the peaches fresh. Lastly, avoid overmixing the topping. You want it crumbly, not pasty. For the topping, use cold butter. This helps create a nice, crisp texture. Mix until the mixture looks like coarse crumbs. Don’t worry about being perfect; uneven pieces add texture. Try adding a pinch of nutmeg for extra warmth. If you like nuts, sprinkle some extra chopped pecans on top before baking. For the best results, bake until golden brown and bubbly. Check the crisp at 25 minutes to see how it’s doing. For the full recipe, you can refer to the section above! {{image_2}} If you want a gluten-free peach crisp, it’s easy to make. Swap regular flour with gluten-free flour. You can use almond flour or oat flour too. For oats, make sure they are labeled gluten-free. This way, you can enjoy the crisp without worry. You can get creative with fruits! Try using berries, apples, or pears. Each fruit brings its own flavor. Adding nuts like walnuts or almonds can give it a nice crunch. Just be sure to chop them well for even spreading. Toppings can change the game for your peach crisp. You can add spices like nutmeg or ginger for warmth. If you want it sweeter, try using maple syrup or honey instead of sugar. You can even mix in coconut flakes for a tropical twist. These small changes can make your dessert unique and exciting. For the complete recipe, check the Full Recipe section! To keep your peach crisp fresh, store it in an airtight container. This helps keep moisture out. If you leave it uncovered, the topping will lose its crunch. You can keep it in the fridge for up to three days. To reheat your peach crisp, place it in a preheated oven at 350°F (175°C). Bake for about 15 minutes until it’s warm. This method keeps the topping nice and crisp. You can also microwave it for 30 seconds to 1 minute. However, this may make the topping soft. You can freeze peach crisp to enjoy later. Allow it to cool completely first. Then, wrap it tightly in plastic wrap and foil. This helps prevent freezer burn. You can freeze it for up to three months. To bake from frozen, preheat your oven to 350°F (175°C) and bake for about 45-50 minutes. You can check for doneness with a fork. The best peaches for peach crisp are ripe, juicy, and sweet. Look for yellow peaches. They have a great balance of sweetness and tartness. Freestone peaches are best because they come off the pit easily. If you can, pick peaches that smell sweet. This shows they are ripe. Yes, you can use canned or frozen peaches. Just make sure to drain canned peaches well. Frozen peaches should be thawed and drained too. Both options may change the texture a bit. But they will still taste great. If you use these, reduce the sugar slightly. Canned and frozen peaches are often sweeter. To make a smaller batch, cut the recipe in half. Use about 2.5 cups of peaches, and adjust other ingredients too. You can bake it in an 8x8 inch dish. This works well for small gatherings. Keep an eye on the bake time; it may be shorter. Peach crisp and peach cobbler are both fruity desserts. The main difference is in the topping. A crisp has a crunchy topping made from oats, flour, and butter. A cobbler has a biscuit-like topping that is fluffy. Both are delicious but offer different textures. You can’t go wrong with either one! Peach crisp is simple and fun to make. We discussed the ingredients, steps, and tips that lead to a tasty dish. You learned how to choose ripe peaches and avoid common mistakes. There are fun ways to change the recipe with different fruits and toppings. Store leftovers correctly for future enjoyment. Remember, the goal is to create a warm, delicious dessert that everyone loves. Enjoy your peach crisp journey!
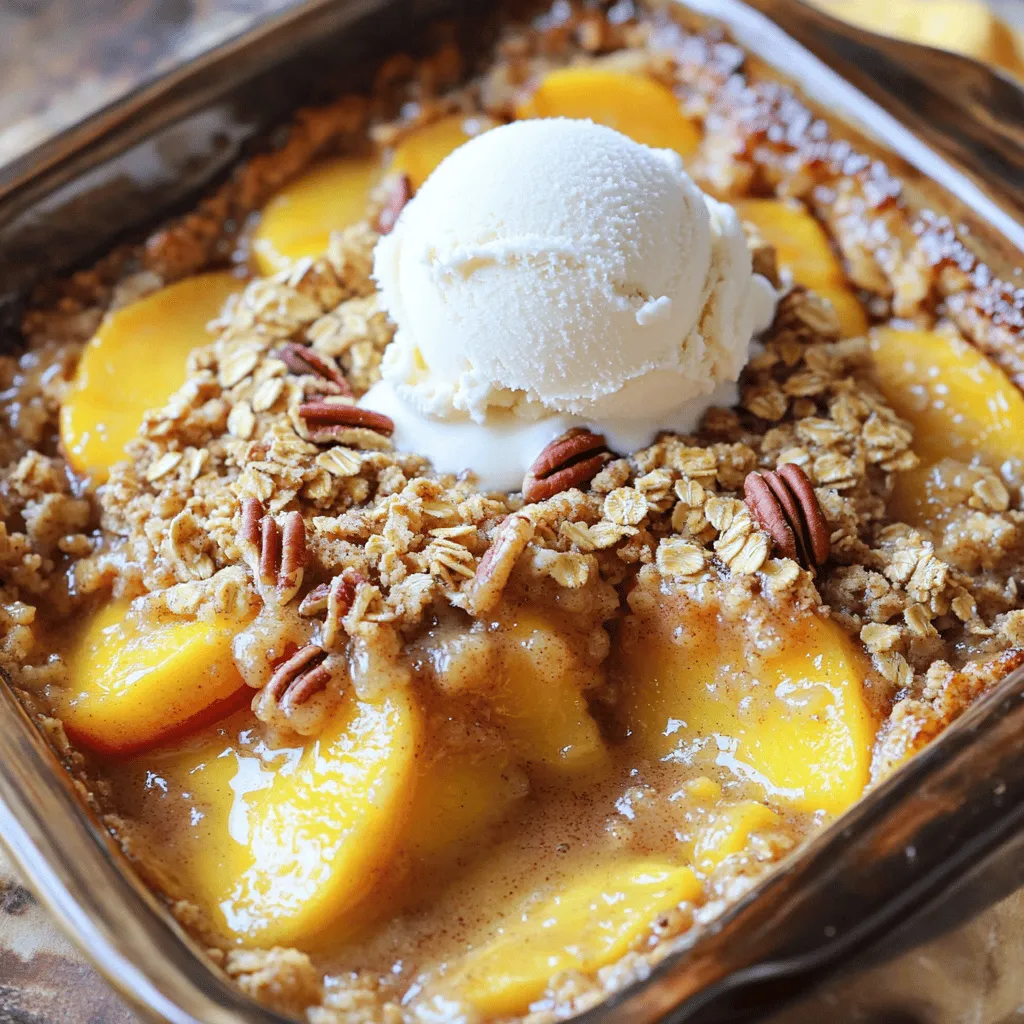
Peach Crisp Delight Simple and Tasty Dessert Recipe
Did you know that a warm Peach Crisp can brighten any day? I’ll show you how to make this easy and delicious dessert step by
To make a tasty cake mix peach cobbler, gather these simple ingredients: - 1 box of yellow cake mix - 4 cups fresh or canned peaches (sliced, if fresh) - 1/2 cup unsalted butter (melted) - 1 cup granulated sugar (adjust based on sweetness of peaches) - 1 teaspoon vanilla extract - 1 teaspoon cinnamon - 1/4 teaspoon nutmeg - 1/2 cup milk - Ice cream for serving (optional) When measuring, use the right tools. For dry ingredients, like sugar and cake mix, use a dry measuring cup. Fill it, then level it off with a knife. For liquids, use a liquid measuring cup. Pour until you reach the right line. This helps keep your cobbler perfect. It ensures the right balance of flavors and textures. If you don’t have some ingredients, try these swaps: - Instead of yellow cake mix, use vanilla or butter cake mix for a different taste. - Fresh peaches can be replaced with canned ones. Just check for added sugar. - Use coconut oil or margarine instead of butter for a dairy-free option. - Swap out the milk for almond milk or oat milk for a lighter touch. With these tips, you can customize your cake mix peach cobbler to fit your taste or what you have on hand. For the full recipe, check out the earlier steps. Enjoy your sweet creation! Start by preheating your oven to 350°F (175°C). This step is key for baking. Next, grab a 9x13 inch baking dish. Grease it well. Use butter or non-stick spray. This will stop the cobbler from sticking. It helps keep the edges nice and clean. Now, let’s get to the peaches. If you use fresh peaches, peel and slice them first. If you have canned peaches, just drain them. In a big bowl, mix the sliced peaches with 1/2 cup of sugar. Add the cinnamon, nutmeg, and vanilla extract. Stir it well until the peaches are coated. Spread this peach mixture evenly in the bottom of your greased dish. In another bowl, prepare the cake mix. Follow the package instructions, but use milk instead of water for half the amount. This makes the cake richer. Stir in the melted butter until smooth. Pour the cake batter over the peach layer. Make sure to cover all the peaches. Do not mix them together. The batter will rise while baking, creating a nice top layer. For the full recipe, check the Cooking section. Bake your cake mix peach cobbler at 350°F (175°C). This temperature helps the cake rise perfectly. The baking time is key. Aim for 40 to 45 minutes. The top should turn golden brown. To check if it's done, insert a toothpick in the center. If it comes out clean, your cobbler is ready! Let your cobbler cool for a few minutes before serving. This helps the layers settle. Cut it into squares for easy serving. You can serve it warm, or at room temperature. For a special touch, add a scoop of vanilla ice cream on top. Ice cream melts into the warm cobbler, making each bite sweet and creamy. Present your cobbler in a way that wows your guests. Use the peach syrup from the bottom of the dish. Drizzle it over the top for extra flavor. A sprinkle of cinnamon adds a warm touch. For a pop of color, garnish with fresh peach slices. This makes your dish look inviting and delicious! {{image_2}} To boost flavor, use ripe peaches. Fresh peaches give the best taste. If you use canned peaches, drain them well. This keeps your cobbler from being too soggy. Add a pinch of salt to the cake mix. It balances sweetness and enhances flavor. You can also mix in nuts for crunch. Walnuts or pecans work great. If you want a twist, try adding almond extract instead of vanilla. This gives a nice nutty flavor. Sometimes, the top might not brown well. If this happens, increase the oven temperature by 25°F for the last 5-10 minutes. Another issue could be a soggy bottom. This can happen if the peaches release too much juice. To fix this, sprinkle a little cornstarch over the peaches before adding the batter. This helps to thicken any extra juice. If your cobbler is too dry, try adding more milk to the batter next time. You can prepare the peach mixture a day in advance. Just store it in the fridge. When you’re ready to bake, make the cake batter and pour it over the peaches. Bake as directed. If you want to serve it later, cool it completely before covering it. Store it in the fridge. Reheat in the oven at 350°F until warm. Always serve it with ice cream for a delightful treat! You can find the full recipe above. You can switch up the fruit in your cobbler. Try using apples, pears, or berries. Each fruit brings its own taste. For apples, add some lemon juice for zing. For berries, mix in a bit of sugar to balance the tartness. You can even blend fruits together for a unique twist. Don’t be afraid to experiment! If you want a lighter cobbler, consider using whole wheat cake mix. This adds fiber and nutrients. You can also reduce the sugar. Try using honey or maple syrup instead of granulated sugar. These natural sweeteners can give a nice taste and cut calories. Consider using less butter too. Applesauce works well as a substitute! To make this recipe vegan, replace the butter with coconut oil or a plant-based spread. Use a non-dairy milk like almond or oat milk. For a gluten-free version, choose a gluten-free cake mix. Check labels to avoid any hidden gluten. These options keep the cobbler tasty and suitable for many diets. Yes, you can use frozen peaches. They work well in this recipe. Just thaw them first. Drain any excess liquid to avoid a soggy cobbler. The flavor will still shine through, and your dessert will taste great! To store leftovers, let the cobbler cool completely. Cover it with plastic wrap or foil. You can keep it in the fridge for up to three days. Reheat slices in the oven or microwave before serving. This way, the cobbler stays warm and tasty. Yes, you can prepare the peach mixture a day in advance. Keep it in the fridge until you are ready to bake. Just mix the cake batter right before baking. This helps the cobbler taste fresh and delicious. Peach cobbler is great on its own, but adding ice cream makes it even better! Vanilla pairs nicely with the warm, sweet cobbler. You can also sprinkle some nuts or fresh mint on top for extra flavor. Enjoy this sweet delight with friends and family! We explored all the key parts of making a peach cobbler. You learned about the ingredients, measurements, and alternatives to fit your needs. I shared step-by-step instructions for making the perfect treat, along with baking tips and how to serve it well. You also discovered ways to enhance flavors and troubleshoot common issues. Finally, we covered variations for different diets and tastes. With this guide, you can create a delicious peach cobbler that everyone will love. Enjoy making your own sweet version at home!
Cake Mix Peach Cobbler Simple and Sweet Delight
If you crave a sweet treat but want it easy, you’re in the right place! This Cake Mix Peach Cobbler is a simple recipe that
- 2 cups fresh peaches, peeled and diced - 1 ½ cups all-purpose flour - 1 cup granulated sugar Fresh peaches are the star of this cake. Their sweet and juicy flavor shines through each bite. Make sure to choose ripe peaches for the best taste. All-purpose flour gives the cake structure. Granulated sugar adds sweetness and helps create a tender crumb. - Powdered sugar for dusting - Spices: cinnamon and nutmeg You can add powdered sugar on top for a lovely finish. Cinnamon and nutmeg enhance the cake's flavor. They bring warmth and depth, making each slice even more delightful. - Choosing ripe peaches - Recognizing the best varieties When selecting peaches, look for ones that are slightly soft but not mushy. The skin should have a rich color, often yellow or reddish. I love using Freestone peaches because they easily come off the pit. They are sweet and juicy, perfect for baking. Always smell the peaches; they should have a sweet aroma that signals ripeness. Start by preheating your oven to 350°F (175°C). Grease and flour a 9-inch round cake pan. This helps your cake come out easily. Now, in a large mixing bowl, cream together the softened butter and granulated sugar. Mix until it looks light and fluffy. This step is key to a soft cake. Next, add the eggs one at a time. Mix well after each addition. Pour in the vanilla extract for extra flavor. In another bowl, combine the flour, baking powder, baking soda, salt, cinnamon, and nutmeg. These spices add warmth to your cake. Gradually add this dry mix to the creamed butter and sugar. Alternate with the buttermilk. Start and end with the flour mix. Mix until just combined; don’t overdo it. Now, gently fold in the diced peaches. Be careful not to mix too much. Pour the batter into your prepared cake pan. Smooth the top with a spatula to make it even. Bake in your preheated oven for 35-40 minutes. Check if it's done by inserting a toothpick in the center. If it comes out clean, your cake is ready! Let it cool in the pan for 10 minutes. After that, move it to a wire rack to cool completely. You can dust it with powdered sugar if you like. Enjoy your Fresh Peach Cake Delightfully Sweet Summer Treat! For complete instructions, check the Full Recipe. Buttermilk is key to a moist cake. It adds richness and tang. The acid in buttermilk breaks down the gluten, giving a tender crumb. To enhance flavor, use ripe, sweet peaches. Fresh fruit makes a big difference. Always taste your peaches before baking. The sweeter they are, the better your cake will be. Avoid overmixing the batter. Mix just until the flour blends in. Overmixing leads to a dense cake. When baking, keep an eye on your cake. Check it at the 35-minute mark. A toothpick should come out clean but moist. After baking, cool the cake in the pan for 10 minutes. This helps it set and keeps it from breaking. This cake pairs well with ice cream or whipped cream. A scoop of vanilla ice cream makes every bite special. For a pretty presentation, dust the top with powdered sugar. You can also add fresh peach slices for color. Serve it on a nice plate, and your guests will be impressed. For the full recipe, refer to the earlier section. {{image_2}} You can switch up your peach cake in fun ways. One great style is the upside-down fresh peach cake. This cake has juicy peaches on the bottom. When you flip it, the peaches sit on top, making it look pretty. The caramelized peaches add a sweet touch that everyone loves. Another option is a peach cake with almond extract. This adds a nutty flavor that pairs well with peaches. Just swap some vanilla extract for almond extract in your batter. You’ll get a new taste that surprises your friends! Don't feel stuck with just peaches! You can use other fruits, too. Seasonal fruits like plums or cherries work well. They add different flavors and colors to your cake. Mixing berries with peaches is also a fun idea. Try blueberries or raspberries for a fruity burst. Just make sure to adjust the amount of sugar since berries can be tart. This mix will give you a vibrant and delicious cake. If you need gluten-free options, you’re in luck! You can use almond flour or a gluten-free blend. Make sure to adjust the baking time, as these flours can change how the cake bakes. Want a healthier cake? You can reduce the sugar in the recipe. Start by cutting the sugar by a third. This way, you can enjoy your cake without feeling guilty. You still get the sweet taste from the fresh peaches. Store your fresh peach cake at room temperature for up to three days. Wrap it in plastic wrap to keep it moist. If you want to keep it longer, place it in the fridge. However, be aware that storing in the fridge can dry it out. To keep your cake fresh longer, use an airtight container. This will help to maintain its texture and flavor. To freeze your cake, first let it cool completely. Wrap it tightly in plastic wrap. Place the wrapped cake in a freezer-safe bag or container. This helps prevent freezer burn and keeps the cake fresh. When you’re ready to enjoy it, move the cake to the fridge overnight. Thawing it slowly keeps it moist. You can also reheat slices in the microwave for a warm treat. Your fresh peach cake lasts about three days at room temperature. In the fridge, it can last up to a week. If frozen, it stays good for about three months. Watch for signs of spoilage, like a dry texture or mold. If it smells off or looks strange, it's best to toss it. Enjoy your cake while it's fresh for the best taste! To keep your fresh peach cake from sinking, follow a few simple steps. First, make sure to coat the diced peaches in a bit of flour before adding them to the batter. This helps them stay afloat during baking. Second, avoid overmixing the batter after you fold in the peaches. Gently combine the ingredients to keep air in the batter. This air helps the cake rise and stay fluffy. Lastly, don't add too many peaches. Stick to the amount listed in the Full Recipe to maintain balance. Yes, you can make this peach cake ahead of time with ease. I recommend baking it a day in advance. Once cooled, wrap the cake tightly in plastic wrap. This keeps it fresh. You can store it at room temperature for up to two days. If you want to keep it longer, consider freezing it. Wrap the cake well and place it in the freezer. When ready to serve, just thaw it overnight in the fridge. To ripen peaches quickly, place them in a paper bag. The bag traps ethylene gas, which speeds up ripening. Add a ripe banana to the bag for faster results. Keep the bag at room temperature for one to two days. Check the peaches daily. When they feel soft, they are ready to use in your cake. In this post, I covered key ingredients, step-by-step instructions, and helpful tips for making fresh peach cake. I shared variations to suit different tastes and dietary needs, plus storage info to keep your cake fresh. Remember, using ripe peaches and proper mixing techniques makes a big difference. Whether you enjoy it on its own or with ice cream, this cake is sure to please. Now you can create your own delicious peach cake and impress your friends and family.
Fresh Peach Cake Delightfully Sweet Summer Treat
Summer is here, and it’s time to enjoy sweet and juicy peaches! This Fresh Peach Cake is the perfect way to celebrate the season. It