Desserts
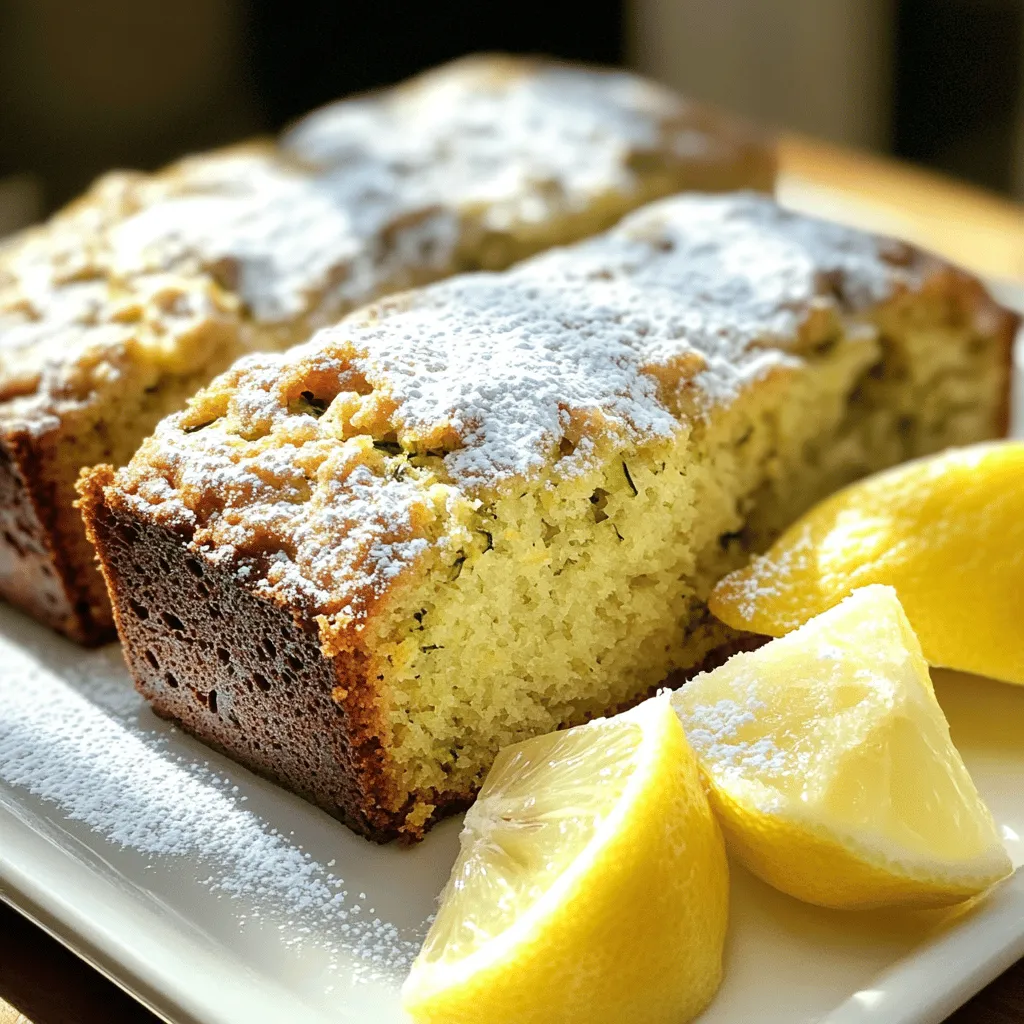
Moist Lemon Zucchini Bread Easy and Delicious Recipe
If you’re craving a treat that’s both zesty and soft, you’ve come to the right place! In this article, I’ll show you how to make
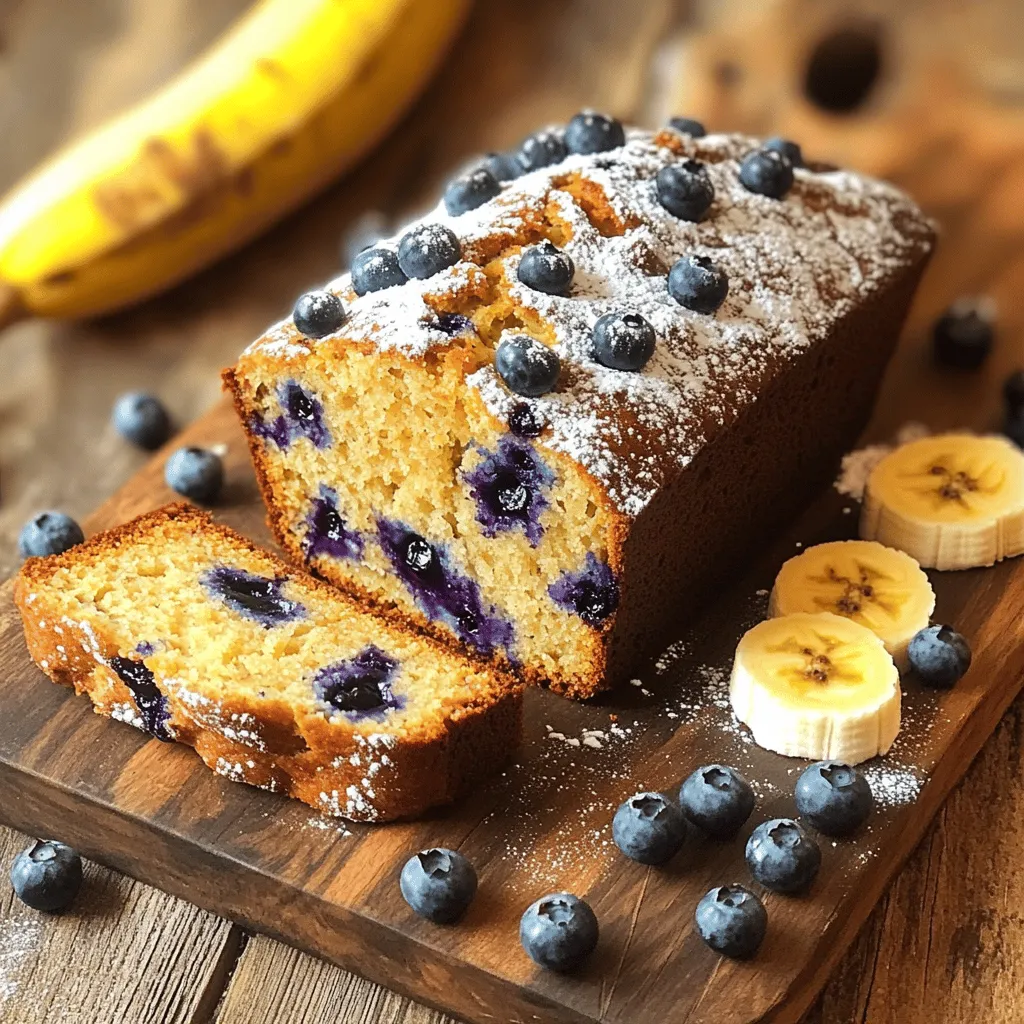
Blueberry Banana Bread Delightful and Easy Recipe
Are you ready to bake a treat that’s both tasty and simple? This Blueberry Banana Bread recipe combines the sweet, familiar taste of ripe bananas
![To make fresh blueberry brownies, you need simple and fresh items. Here’s the list of ingredients: - 1 cup fresh blueberries - 1/2 cup unsalted butter, melted - 1 cup granulated sugar - 2 large eggs - 1 teaspoon vanilla extract - 1/3 cup unsweetened cocoa powder - 1/2 teaspoon baking powder - 1/4 teaspoon salt - 1 cup all-purpose flour - 1/2 cup chocolate chips (optional) These ingredients come together to create a rich and fruity treat. The blueberries add a burst of flavor and moisture to the brownies. Using fresh blueberries makes a big difference in taste. If you want a chocolatey boost, add chocolate chips. You can find the full recipe in the previous section. Enjoy baking these delightful brownies! First, preheat your oven to 350°F (175°C). Grease a 9x9-inch baking pan or line it with parchment paper. This helps with easy removal later. In a mixing bowl, combine 1/2 cup of melted unsalted butter and 1 cup of granulated sugar. Stir these two until they blend well. Then, add 2 large eggs, one at a time. Mix well after each one. Finally, stir in 1 teaspoon of vanilla extract. In a separate bowl, whisk together the dry ingredients. This includes 1/3 cup of unsweetened cocoa powder, 1/2 teaspoon of baking powder, 1/4 teaspoon of salt, and 1 cup of all-purpose flour. Gradually add this dry mix to the wet ingredients. Stir until just combined. Be careful not to over-mix; this keeps your brownies soft. Next, gently fold in 1 cup of fresh blueberries and 1/2 cup of optional chocolate chips. Be careful not to mash the blueberries. They add great flavor and color! Now, pour the batter into the prepared baking pan. Spread it evenly. Bake for 25-30 minutes. Check if they are done by inserting a toothpick. It should come out with a few moist crumbs. Let the brownies cool in the pan for about 10 minutes. Then, move them to a wire rack to cool completely before cutting them into squares. Enjoy your fresh blueberry brownies! For the full recipe, refer to the earlier section. - Measuring ingredients accurately: Use measuring cups and spoons. Level off dry ingredients with a knife. This keeps your brownies moist and chewy. - Not over-mixing the batter: Mix just until you combine the wet and dry ingredients. Over-mixing can make your brownies tough. Fold gently when adding blueberries for the best texture. - Using fresh blueberries properly: Rinse the blueberries gently and pat them dry. This helps keep the batter from becoming too wet. Fold them in carefully to avoid smashing. - Presentation tips for a beautiful dessert: Cut brownies into even squares. Dust with powdered sugar for a lovely look. Add a few fresh blueberries on top for color. - Pairing with ice cream or whipped cream: Serve warm brownies with a scoop of vanilla ice cream. The cold ice cream melts slightly on the warm brownie, creating a tasty treat. Whipped cream also adds a nice touch! For the complete recipe, check out the [Full Recipe]. {{image_2}} You can make these blueberry brownies even more fun! Here are a couple of ideas: - Adding nuts for crunch: Adding chopped nuts, like walnuts or pecans, brings a nice crunch. Mix in about half a cup with the blueberries. This adds texture and a nutty flavor. - Swapping chocolate chips for white chocolate: If you love white chocolate, use it instead of regular chocolate chips. It pairs well with the blueberries. Just replace the chocolate chips with the same amount of white chocolate chips. You can also change the recipe to fit different diets. Here are some options: - Gluten-free options: To make these brownies gluten-free, swap all-purpose flour for a gluten-free blend. Many blends work well in baking. Just ensure you pick one for desserts. - Vegan substitutions: For a vegan version, replace the eggs. Use 1/4 cup of applesauce for each egg. You can also use a plant-based butter instead of regular butter. These variations let you customize the brownies to your taste or dietary needs. You can enjoy them your way! Check out the Full Recipe for all the steps. To keep your fresh blueberry brownies tasty, store them at room temperature. Place brownies in an airtight container. This helps them stay soft and moist. If you plan to eat them within a few days, this is perfect. For longer freshness, refrigerate your brownies. Wrap them well in plastic wrap or foil. This will keep out air and moisture. You can enjoy them for up to a week. If you have leftovers, freezing is a great option. Start by cooling the brownies completely. Once cool, cut them into squares. Wrap each square in plastic wrap tightly. Place the wrapped brownies in a freezer-safe bag or container. When you want a brownie, thaw it out. To do this, take it out of the freezer. Leave it in the fridge overnight. For a quick thaw, you can leave it at room temperature for a few hours. This keeps the flavor and texture just right. You can find the full recipe to make these delightful treats again anytime. - Can I use frozen blueberries? Yes, you can use frozen blueberries. They may add more moisture, so adjust baking time. If you do use them, do not thaw them first. This helps keep them whole in the batter. - How do I know when the brownies are done? Check the brownies after 25 minutes. Insert a toothpick into the center. If it comes out with a few moist crumbs, they are done. If it has wet batter, bake for a few more minutes. - Can I double the recipe for a larger batch? Yes, you can double the recipe. Use a larger pan, like a 9x13-inch, for even baking. Keep an eye on the baking time, as it may change with the bigger batch. - What's the best way to cut brownies? Use a sharp knife to cut brownies. Lightly grease the knife to prevent sticking. For neat cuts, wipe the knife after each slice. This keeps the edges clean and tidy. For the full recipe, check the link above. You learned how to make delicious blueberry brownies, from ingredients to baking tips. Fresh blueberries mix well with cocoa powder for a new treat. Don’t forget to measure carefully and avoid over-mixing! You can also create fun variations to suit your taste. Store brownies properly to keep them fresh, and don't hesitate to freeze extras. Now, it’s time to enjoy your homemade dessert!](https://toastedrecipes.com/wp-content/uploads/2025/07/3fe7a6a5-eca6-4fac-b147-36e5cb3e3100.webp)
Fresh Blueberry Brownies Delightful and Simple Recipe
Are you ready to elevate your dessert game? These Fresh Blueberry Brownies are easy and delicious! Bursting with juicy blueberries and rich chocolate, this simple
![To make Moist Pineapple Zucchini Bread, gather these key ingredients: - 1 cup grated zucchini (about 1 medium zucchini) - 1 cup crushed pineapple, drained - 1/2 cup granulated sugar - 1/2 cup brown sugar, packed - 1/2 cup vegetable oil - 2 large eggs - 1 teaspoon vanilla extract - 1 1/2 cups all-purpose flour - 1 teaspoon baking soda - 1/2 teaspoon baking powder - 1/2 teaspoon salt - 1 teaspoon ground cinnamon - 1/2 teaspoon ground nutmeg - 1/2 cup chopped walnuts or pecans (optional) - 1/2 cup shredded coconut (optional, for extra moisture and flavor) Each ingredient plays a role in making the bread moist and tasty. The zucchini adds moisture and nutrition, while the pineapple brings a sweet, tangy flavor. The sugars help the bread rise and keep it soft. Oils and eggs bind everything together, giving it a rich texture. If you want to enhance your bread, consider using the optional mix-ins. Chopped nuts add crunch, while shredded coconut boosts moisture and flavor. You can also tweak the spices to match your taste. Try adding a pinch of cardamom or ginger for a different twist. Ready to bake? Follow the [Full Recipe] for steps to create this delicious loaf. 1. Preheating the oven First, set your oven to 350°F (175°C). This helps the bread cook evenly. 2. Combining wet ingredients In a large bowl, mix the grated zucchini, crushed pineapple, granulated sugar, brown sugar, vegetable oil, eggs, and vanilla extract. Stir until everything is smooth. 3. Mixing dry ingredients In a separate bowl, whisk together the all-purpose flour, baking soda, baking powder, salt, cinnamon, and nutmeg. This step ensures the leavening agents are evenly spread. 1. Pouring batter into the pan Slowly pour the mixed batter into your greased or lined loaf pan. Use a spatula to smooth the top. 2. Baking and testing for doneness Place the pan in your preheated oven. Bake for 50-60 minutes. To check if it’s done, insert a toothpick in the center. If it comes out clean, your bread is ready. For the complete recipe, look for the Full Recipe section. Enjoy the process and the delicious results! To keep your bread moist, it's key to drain the pineapple well. If you skip this step, the excess juice can make your bread soggy. Use a fine mesh strainer or cheesecloth to remove that extra liquid. Zucchini plays a big role too. Grated zucchini adds moisture naturally. It helps bind the ingredients and keeps the bread soft. Don't forget the oil! Using vegetable oil adds richness and keeps the bread tender. One big mistake is overmixing the batter. Mixing too much can lead to tough bread. Stir just until the dry ingredients blend in. Little lumps are okay, just don't see dry flour. Another mistake is not having the right oven temperature. An oven too hot can burn the outside while leaving the inside raw. Always preheat your oven to 350°F (175°C) as stated in the Full Recipe. Use an oven thermometer to check for accuracy. A good temperature makes all the difference! {{image_2}} You can make your moist pineapple zucchini bread even better with some simple changes. - Adding spices and extracts: Consider adding a pinch of allspice or ginger. These spices can give your bread a warm, cozy flavor. You can also include a dash of almond or coconut extract for a unique twist. - Incorporating different nuts: If you want a crunchy texture, try different nuts. Pecans, hazelnuts, or even macadamia nuts can add depth. Simply chop them up and mix them in. You can make this recipe a bit healthier with some easy swaps. - Using whole wheat flour: Replace half or all of the all-purpose flour with whole wheat flour. This change can add fiber and nutrients. It may make the bread a bit denser, but the flavor will still shine. - Reducing sugars: You can cut down on sugar without losing flavor. Try using only one type of sugar or cutting the total amount by a third. The pineapple adds natural sweetness, so you can use less sugar and still enjoy a delicious loaf. For the full recipe, check the detailed instructions above! To keep your moist pineapple zucchini bread fresh, store it properly. - Room temperature storage: Wrap the bread in plastic wrap or foil. This keeps it moist. Place it in a cool, dry spot. It stays good for about 3 to 4 days. - Refrigeration tips: If you live in a humid area, store it in the fridge. Wrap it well to avoid drying out. It can last up to a week in the fridge, but the texture may change slightly. Freezing your bread is a smart way to enjoy it later. - How to freeze and thaw properly: Allow the bread to cool completely. Then, slice it into pieces. Wrap each slice in plastic wrap, then place them in a freezer bag. Squeeze out the air to avoid freezer burn. It freezes well for up to 3 months. When you're ready to enjoy it, take out a slice. Let it thaw at room temperature or pop it in the microwave for a quick warm-up. Enjoy the moistness and flavor as if it was just baked! For the full recipe, check out the guide provided. How can I make the bread gluten-free? To make this bread gluten-free, you can swap regular flour for a gluten-free blend. Look for a blend that works in baking. Many of these blends include xanthan gum, which helps with texture. Always check the package for the right measurement. Can I substitute the sugar? Yes, you can use honey, maple syrup, or coconut sugar. If you choose a liquid sweetener, reduce the oil by a couple of tablespoons. This keeps the moisture right. Adjust to your taste for sweetness, as some substitutes are sweeter than granulated sugar. What can I use instead of eggs? You can use flax eggs or applesauce. For a flax egg, mix one tablespoon of ground flaxseed with three tablespoons of water. Let it sit for a few minutes until it thickens. For applesauce, use 1/4 cup to replace one egg. This keeps the bread moist and tasty. For more details, check the Full Recipe. In this post, we covered all you need for moist pineapple zucchini bread. You learned about key ingredients, step-by-step mixing, and baking tips. We discussed how to keep it moist and avoid common mistakes. You also found flavor variations and storage methods. Baking should be fun and rewarding. Enjoy experimenting with your own versions. With practice, you’ll create a delicious bread that everyone loves. Happy baking!](https://toastedrecipes.com/wp-content/uploads/2025/07/0d72f8ec-b2ac-4049-be04-fa249f130b47.webp)
Moist Pineapple Zucchini Bread Simple and Tasty Recipe
Want to bake the perfect Moist Pineapple Zucchini Bread? You’re in the right place! This simple and tasty recipe combines fresh zucchini and sweet pineapple
![- 2 cups all-purpose flour - 1 cup granulated sugar - 1 tablespoon baking powder - 1 teaspoon baking soda - 1 teaspoon ground cinnamon - ½ teaspoon salt - 1 large egg - ¾ cup milk - ½ cup vegetable oil - 2 cups apples, peeled and diced - ½ cup chopped walnuts (optional) - 1 tablespoon brown sugar (for topping) - 1 teaspoon ground cinnamon (for topping) For this recipe, I focus on fresh apples. Granny Smith or Honeycrisp work best. Their tartness balances the sweet muffins. You’ll also need basic baking items, which you may already have at home. - Each muffin has about 200 calories. - They contain 8 grams of fat, 3 grams of protein, and 30 grams of carbohydrates. - These muffins are vegetarian-friendly. For nut-free options, skip the walnuts. Knowing the nutrition helps you enjoy these treats without worry. Now that you gathered your ingredients, let’s move on to making these tasty muffins! Check the Full Recipe for detailed steps. 1. Preheat your oven to 375°F (190°C). 2. Line a muffin tin with paper liners or grease it lightly. 3. In a large bowl, mix the dry ingredients. 4. Combine 2 cups of flour, 1 cup of sugar, 1 tablespoon of baking powder, 1 teaspoon of baking soda, 1 teaspoon of ground cinnamon, and ½ teaspoon of salt. 1. In another bowl, whisk together 1 large egg, ¾ cup of milk, and ½ cup of vegetable oil. 2. Mix until smooth and fully combined. 1. Pour the wet mixture into the dry mixture. 2. Stir gently until just combined. Do not overmix! 3. Fold in 2 cups of peeled and diced apples and ½ cup of walnuts if you like. 4. Use a scoop or spoon to fill each muffin cup about ¾ full with batter. 1. Bake in your preheated oven for 18-20 minutes. 2. Check for doneness by inserting a toothpick into the center. It should come out clean. - How to avoid overmixing the batter: Mix the wet and dry ingredients gently. Stir until you see no dry flour. A few lumps are okay. This keeps the muffins light and fluffy. Overmixing makes them tough. - Ensuring even apple distribution: Cut the apples into small, even pieces. Fold them in gently with the batter. This way, each bite has a taste of apple goodness. If apples are too big, they sink to the bottom. - Best practices for storing muffins: Once cooled, place muffins in an airtight container. Keep them at room temperature for up to three days. For longer storage, use the fridge or freezer. - Reheating recommendations: To reheat, use the microwave for about 10-15 seconds. You can also warm them in the oven at 350°F (175°C) for five minutes. This brings back their fresh-baked taste. - Serving suggestions with garnishes: Serve the warm muffins on a rustic wooden board. Add a few apple slices on the side. A sprinkle of cinnamon on top gives them a cozy look. - Pairing with beverages: Enjoy these muffins with a cup of coffee or tea. They also pair well with hot cider. This makes for a perfect autumn snack. {{image_2}} You can make your apple cinnamon muffins even more tasty. Try adding a pinch of nutmeg for warmth. A splash of vanilla will bring out the sweetness. Both spices work wonders with apples. You can also switch up the apples. Granny Smith gives a tart taste, while Honeycrisp adds sweetness. Mix and match to find your favorite. If you need gluten-free muffins, use a gluten-free flour blend. Make sure it has xanthan gum for the right texture. For a dairy-free option, almond milk or oat milk work great. These swaps keep the muffins soft and delicious. Consider replacing granulated sugar with honey or maple syrup. These natural sweeteners add flavor and moisture. You can also add oats or seeds to the batter. These ingredients boost nutrition and add nice texture. Explore these variations to make the recipe your own! For the complete recipe, check out the Full Recipe section. This recipe takes about 15 minutes to prep and 20 minutes to bake. You will get 12 warm and fluffy muffins. For a great look, serve them on a wooden board. Add some apple slices and a sprinkle of cinnamon on top. This gives a cozy touch and invites everyone to enjoy. Perfect for sharing with friends or family! To whip up these delightful treats, check out the complete recipe for cozy apple cinnamon muffins [Full Recipe]. How do I keep my muffins from sticking to the pan? To prevent sticking, use paper liners or grease the pan well. You can use cooking spray or a small amount of vegetable oil. This creates a barrier between the muffins and the pan. Can I make the batter ahead of time? Yes, you can prepare the batter ahead of time. Just store it in the fridge for up to 2 hours. When ready to bake, bring it back to room temperature. Mix gently before filling the muffin cups. How do I know when muffins are done baking? Muffins are done when a toothpick inserted in the center comes out clean. They should also be golden brown on top. If they are still wet, bake a few minutes longer. What type of apples are best for baking? Granny Smith and Honeycrisp are great for baking. They hold their shape well and add a nice tart flavor. You can also try Fuji or Braeburn for a sweeter taste. Can I use frozen apples instead of fresh? Yes, you can use frozen apples. Just make sure to thaw and drain them first. This helps keep the batter from getting too watery. How long do these muffins stay fresh? Apple cinnamon muffins stay fresh for about 2 to 3 days at room temperature. Store them in an airtight container to keep them soft. Can I freeze apple cinnamon muffins? Yes, you can freeze these muffins. Wrap each one in plastic wrap and place them in a freezer bag. They can last up to 3 months in the freezer. Just thaw them at room temperature when you’re ready to enjoy! This blog post covered a simple and tasty apple cinnamon muffin recipe. You learned about key ingredients, step-by-step instructions, and useful tips. Variations and substitutions offer fun ways to tailor your muffins. In my view, these muffins are a great choice for any occasion. They bring warmth and comfort. I hope you enjoy baking them as much as I do!](https://toastedrecipes.com/wp-content/uploads/2025/07/a599759c-6943-4758-893d-84cf82895988.webp)
Apple Cinnamon Muffins Tasty and Easy Recipe
Craving a warm, comforting treat? Look no further! These Apple Cinnamon Muffins are not only delicious but also super easy to make. Whether it’s breakfast,
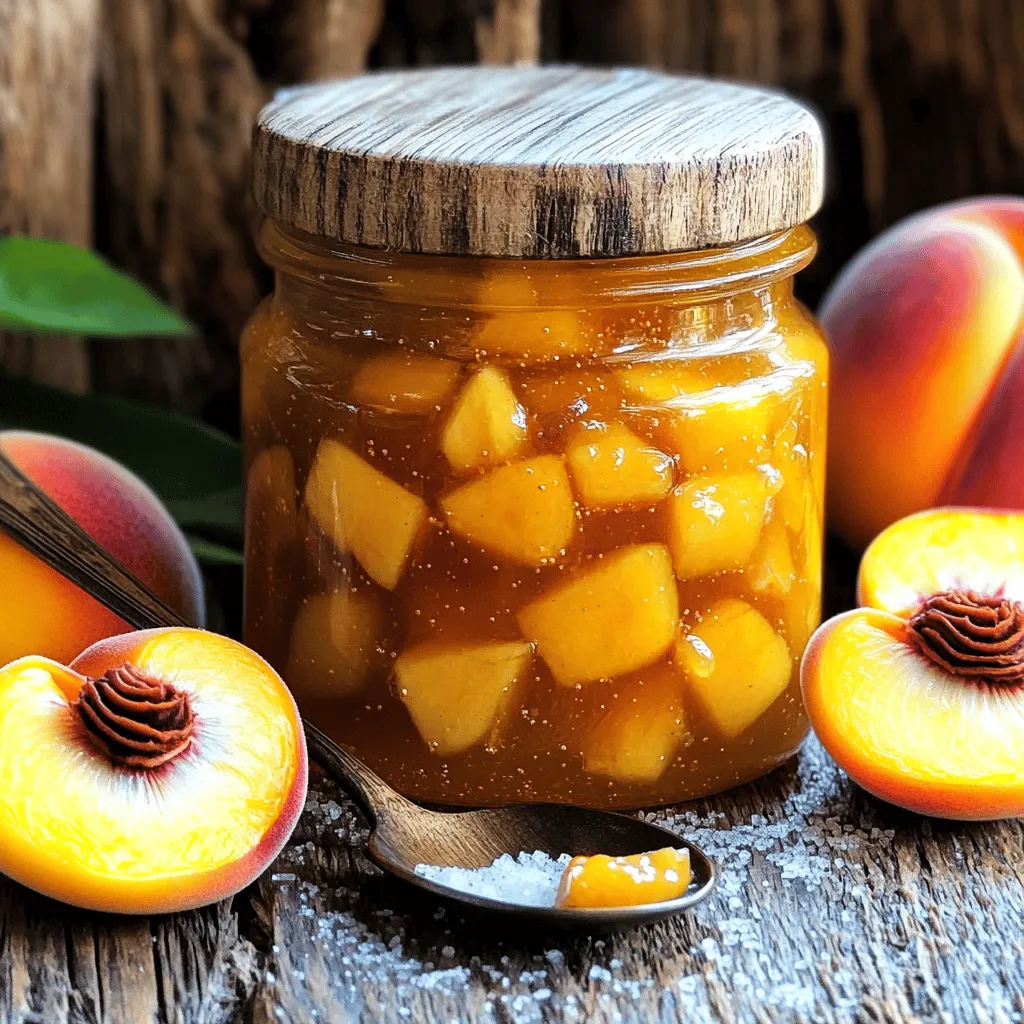
Small Batch Vanilla Peach Jam Simple and Sweet Treat
Are you ready to make a delicious treat this season? My Small Batch Vanilla Peach Jam is the perfect way to capture the sweet essence
![- 2 cups rolled oats - 1 cup unsalted almond butter - 1/2 cup honey or maple syrup - 1 teaspoon pure vanilla extract - 1 cup dried blueberries - 1/2 cup chopped almonds or walnuts - 1/4 teaspoon sea salt - 1/4 teaspoon cinnamon - Optional: 1/4 cup mini dark chocolate chips Each serving of these blueberry vanilla granola bars contains about 200 calories. You get around 9 grams of fat, 25 grams of carbs, and 5 grams of protein. This makes it a filling snack that keeps you going. These ingredients offer great health benefits. - Oats: They are high in fiber. This helps with digestion and keeps you full. - Blueberries: They have antioxidants. These can help fight free radicals and support heart health. - Nuts: Almonds and walnuts provide healthy fats and protein. They are good for your brain and heart health. Using these ingredients makes the granola bars not just tasty but also a smart snack choice. Try this Full Recipe to enjoy a healthy treat! 1. Preheat the oven and prepare the baking pan: Start by preheating your oven to 350°F (175°C). While it heats, grab an 8x8 inch baking pan. Line it with parchment paper. Leave some paper hanging over the edges. This will help you lift the granola bars out later. 2. Mixing the dry and wet ingredients separately: In a large bowl, combine the rolled oats, dried blueberries, and chopped nuts. Add the sea salt and cinnamon. Stir this mix well. In another bowl, whisk together the almond butter, honey (or maple syrup), and vanilla extract. Make sure it is smooth and creamy. 3. Transferring the mixture to the baking pan: Pour the wet mix over your dry ingredients. Stir until everything is well coated. The oats and nuts should look glossy. Now, transfer the mixture to your prepared pan. Press it down firmly with a spatula. This helps the bars hold together. 4. Baking time and tips for checking readiness: Place the pan in the oven. Bake for 20 to 25 minutes. Keep an eye on it. You want the edges to turn golden brown. This shows they are ready. 5. Cooling process post-baking: After baking, take the pan out of the oven. Let it cool in the pan for about 10 minutes. This step helps the bars firm up. Then, use the parchment paper overhang to lift the bars out. Place them on a wire rack to cool completely. 6. How to cut the bars into desired shapes: Once the bars are cool, it’s time to cut them. Use a sharp knife to slice them into squares or rectangles. Choose your favorite size. This makes them easy to grab as a snack. For the complete recipe, refer to the [Full Recipe]. Enjoy your delicious, homemade blueberry vanilla granola bars! To make the best granola bars, packing the mix tightly is key. When you press down the mixture, use a spatula. This ensures your bars hold together well. If you skip this step, your bars may crumble easily. To avoid crumbly bars, make sure you use enough sticky ingredients. Almond butter and honey help bind the oats and nuts together. Storing your granola bars correctly keeps them fresh. I find the best way is to use an airtight container. This helps prevent them from drying out. You can also wrap them in parchment paper for easy grab-and-go snacks. Refrigeration can extend their life, but it may change the texture. Room temperature keeps the bars soft and chewy. Want to boost the flavor? Try adding spices like nutmeg or ginger. You can also mix in different nuts or seeds for crunch. Dried fruit like cranberries or apricots adds a new twist. If you love chocolate, mini dark chocolate chips are a great option. For a savory touch, add a pinch of sea salt on top before baking. Remember, have fun with it! {{image_2}} You can change the taste of these granola bars easily. Try using dried cranberries or apricots instead of blueberries. Each fruit adds its own flavor. You can also explore nut butter alternatives. If you have a nut allergy, use sunflower seed butter. This choice keeps the bars tasty and safe to eat. Want to make it vegan? Swap honey for maple syrup. This keeps the sweetness and makes it plant-based. If you need gluten-free options, choose certified gluten-free oats. This way, everyone can enjoy the bars without worry. These bars work well with yogurt or fresh fruit. Try them as breakfast or a snack. They are easy to pack for lunch or a hike. You can also crumble them over ice cream for a sweet treat. Enjoy exploring these ideas! Homemade granola bars stay fresh for about one week when stored in an airtight container. Keep them in a cool, dry place. For longer storage, wrap the bars tightly in plastic wrap. This method helps prevent them from drying out. If you like, you can also refrigerate them, which can extend the life by a few days. Yes, you can freeze these granola bars! Wrap each one tightly in plastic wrap. Then, place the wrapped bars in a freezer-safe bag. They can last up to three months in the freezer. To enjoy, just take one out and let it thaw at room temperature for about 30 minutes. If you have nut allergies or don't like almond butter, try peanut butter or sunflower seed butter. Both options work well and add a nice flavor. You can also use soy nut butter for a nut-free choice. Each substitute will change the taste slightly, but the bars will still be delicious. This recipe features simple, healthy ingredients. You will need: - 2 cups rolled oats - 1 cup unsalted almond butter - 1/2 cup honey or maple syrup - 1 teaspoon pure vanilla extract - 1 cup dried blueberries - 1/2 cup chopped almonds or walnuts - 1/4 teaspoon sea salt - 1/4 teaspoon cinnamon - Optional: 1/4 cup mini dark chocolate chips First, preheat your oven to 350°F (175°C). Line an 8x8 inch baking pan with parchment paper. In a bowl, mix the oats, nuts, blueberries, salt, and cinnamon. In another bowl, whisk the almond butter, honey or syrup, and vanilla. Combine both mixtures and press them into the pan. Bake for about 20-25 minutes. Let it cool before cutting. This process makes it easy and fun! These granola bars are great on their own. You can also enjoy them with yogurt or fruit. Try serving with a drizzle of honey or maple syrup for extra sweetness. They make a perfect snack for kids or an energy boost before a workout. You can pack them in lunchboxes for a healthy treat. Feel free to get creative! You can swap dried blueberries for cranberries or apricots. If you love chocolate, add mini dark chocolate chips. For a nut-free version, use sunflower seed butter instead of almond butter. Customize these bars to suit your taste! For the complete recipe, check out the full recipe section above. These blueberry granola bars are a simple and healthy treat to make. We covered the key ingredients, preparation steps, and tips to ensure your bars turn out great. Remember, you can easily customize them to fit your taste. Whether you’re enjoying them as a snack or breakfast, these bars offer nutrition and flavor. Make them your own by adding different fruits or nut butters. Enjoy the fun of baking and sharing these delicious bars. Your homemade snacks will impress everyone!](https://toastedrecipes.com/wp-content/uploads/2025/07/877462d6-0009-4285-ab5a-868683ed5176.webp)
Blueberry Vanilla Granola Bars Healthy Snack Option
Looking for a delicious and healthy snack? You’ll love these Blueberry Vanilla Granola Bars! With oats, nut butter, and sweet blueberries, they pack a tasty
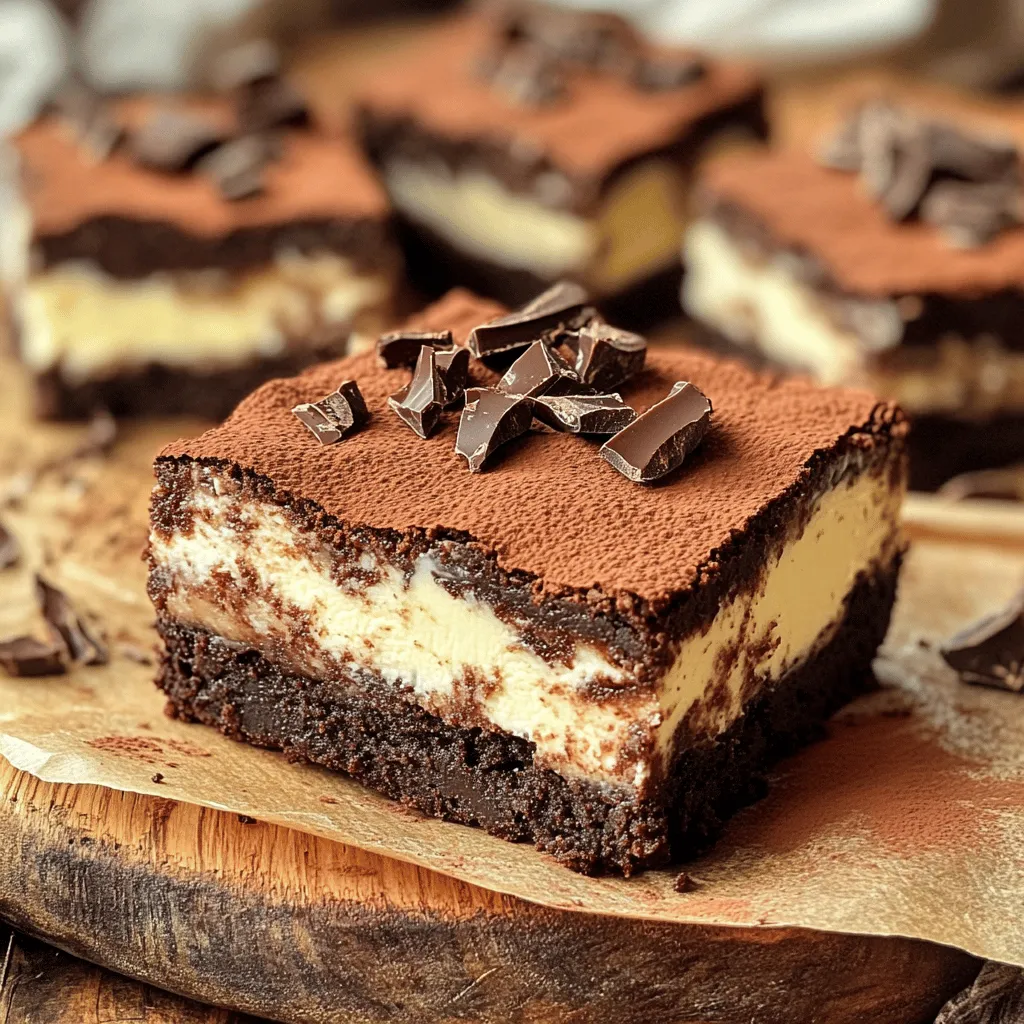
Tiramisu Brownies Delightful Coffee Chocolate Treat
Tiramisu brownies combine deep chocolate goodness with rich coffee flavors for a dream treat! If you love classic brownies and the indulgent taste of tiramisu,
![- 2 cups all-purpose flour - 1 cup granulated sugar - 1/2 cup unsalted butter - 1 cup sour cream - 3 large eggs - 1 teaspoon vanilla extract - 1 teaspoon baking powder - 1/2 teaspoon baking soda - 1/2 teaspoon salt - 2 cups fresh blueberries - 1 teaspoon cinnamon - 1 tablespoon lemon zest Gathering the right ingredients is key for a tasty Blueberry Sour Cream Coffee Cake. Each item plays a special role in making your cake moist and flavorful. How do the ingredients work together? - Flour gives the cake structure. - Sugar adds sweetness and moisture. - Butter brings richness and creaminess. - Sour cream keeps the cake moist and adds tang. - Eggs bind everything and help it rise. - Vanilla extract enhances the overall flavor. - Baking powder and baking soda are the leavening agents. - Salt balances the sweetness and enhances flavors. - Blueberries provide bursts of juicy flavor. - Cinnamon and lemon zest add a warm and bright note. - Calories per serving: About 250 calories. - Macronutrient breakdown: - Carbohydrates: 40g - Fats: 10g - Proteins: 4g - Dietary considerations: For a gluten-free option, use a gluten-free flour blend. Understanding the nutrition helps you enjoy the cake guilt-free. You can savor each slice, knowing you chose great ingredients. For the full recipe, check out the complete guide on making this delightful coffee cake. To start, preheat your oven to 350°F (175°C). This step is key for even baking. While the oven warms up, take a 9-inch round cake pan or a 9x13-inch baking dish and grease it well. Use butter or non-stick spray to coat the pan. This will help the cake slide out easily later. In a mixing bowl, cream together 1/2 cup of softened butter and 1 cup of granulated sugar. Mix until it turns light and fluffy, which takes about 3-4 minutes. Next, add 3 large eggs one at a time. Be sure to mix well after each egg. Then, stir in 1 teaspoon of vanilla extract and 1 tablespoon of lemon zest for a fresh taste. In another bowl, whisk together 2 cups of all-purpose flour, 1 teaspoon of baking powder, 1/2 teaspoon of baking soda, and 1/2 teaspoon of salt. Gradually add this dry mix to your wet ingredients. Alternate adding it with 1 cup of sour cream. Start and end with the flour mix. Mix just until combined to keep the cake light. Now comes the fun part: adding blueberries! Take 2 cups of fresh blueberries and gently fold them into the batter. Be careful not to smash them. Use a spatula and lift the batter over the berries. This will keep them whole and pretty in the cake. Before baking, mix 1 teaspoon of cinnamon with a sprinkle of sugar in a small bowl. Pour half of your batter into the prepared pan. Sprinkle half of the cinnamon-sugar mix on top. Add the rest of the batter, then finish with the remaining cinnamon-sugar. Bake the cake for 35-40 minutes. To check if it’s done, insert a toothpick into the center. If it comes out clean, the cake is ready. Follow these steps for a delightful Blueberry Sour Cream Coffee Cake. For more details, check the Full Recipe. To ensure even baking, always preheat your oven to the correct temperature. Use an oven thermometer to check. Place the cake pan in the center of the oven. This helps heat circulate around it. If you use a different pan size, adjust the baking time. A larger pan will cook faster. Start checking for doneness a few minutes early. Presentation is key! Dust the cooled cake with powdered sugar before serving. Add a few fresh blueberries on top for color. This makes the cake look inviting. For drinks, serve with a warm cup of coffee or tea. The flavors of the cake pair perfectly with these beverages. If your cake turns out too dry, try adding a bit more sour cream. This adds moisture and richness. You can also check your oven temperature. If it’s too hot, it may dry out faster. For a dense or heavy cake, make sure you mix the batter gently. Overmixing can create a tough texture. {{image_2}} You can swap sour cream for Greek yogurt. This change gives a nice tang. It also adds more protein. You might not notice a big taste change. For a healthier option, try alternative sweeteners. Maple syrup or honey can work well. Just adjust the amount to keep the right texture. Want to add some crunch? Toss in nuts like walnuts or almonds. They pair well with blueberries. You can also mix in different fruits. Raspberries or strawberries can add a fun twist. Just make sure to keep the fruit fresh or use frozen if needed. Change things up with spices for fall. A dash of nutmeg or allspice can warm the flavors. For the holidays, add festive items. Chopped cranberries or pumpkin puree can make this cake extra special. Each season offers a chance to reinvent this classic treat. Try it out and enjoy! Let your coffee cake cool completely before storing it. This step is key. If you store it while warm, it can create steam and make the cake soggy. I recommend using an airtight container. A glass or plastic container works well. You can also wrap the cake tightly in plastic wrap. This method keeps it fresh for longer. Freezing your blueberry sour cream coffee cake is easy. First, cut it into slices. Wrap each slice in plastic wrap. Then place the wrapped slices in a freezer bag. Make sure to remove as much air as possible. For best texture, use your cake within three months. When you're ready to eat, take a slice out of the freezer. Let it thaw in the fridge overnight. You can also warm it in the microwave for about 20-30 seconds. Your coffee cake will taste best if eaten within 3-5 days. Store it at room temperature for the best flavor. If you see mold or if the cake smells off, it is time to toss it. Keep an eye out for these signs of spoilage. Enjoy your delicious cake while it is fresh! For the complete Blueberry Bliss Sour Cream Coffee Cake recipe, check the [Full Recipe]. Sour cream coffee cake stands out due to its moist texture and rich flavor. The sour cream adds a tangy taste and helps keep the cake soft. This cake is dense but not heavy, making it perfect for breakfast or a snack. You also get a delightful crumb from the blueberries, which burst with flavor as you bite into them. Yes, you can make this coffee cake ahead of time! Bake it a day before your event. Once cooled, wrap it well in plastic wrap. Store it in the fridge for up to three days. When ready to serve, warm it in the oven at 350°F for about 10 minutes. This will refresh the cake and bring back its lovely texture. To help your cake rise well, make sure your ingredients are at room temperature. Cold eggs and sour cream can affect the rise. Also, measure your flour correctly. Too much flour can lead to a dense cake. Use the spoon and level method to ensure you get just the right amount. Yes, you can make a gluten-free version! Substitute all-purpose flour with a gluten-free blend. Look for blends that contain xanthan gum for better texture. You may need to adjust the baking time slightly. Always check for doneness with a toothpick to ensure it cooks through. This blog post covered how to make a delicious sour cream coffee cake. You learned about the key ingredients, steps to prepare the batter, and tips for perfect baking. I shared ideas for variations and how to store your cake. Baking can be fun and rewarding, especially when you make this treat. Remember, with practice and care, you can create a cake everyone will love. So gather your ingredients and start baking today! Enjoy a slice with friends or a warm cup of coffee.](https://toastedrecipes.com/wp-content/uploads/2025/07/59542509-e562-483b-b95d-e8d2d6031896.webp)
Blueberry Sour Cream Coffee Cake Delightful Recipe
Looking for a warm, tasty treat to brighten your mornings? This Blueberry Sour Cream Coffee Cake is your answer! With its soft, moist texture and
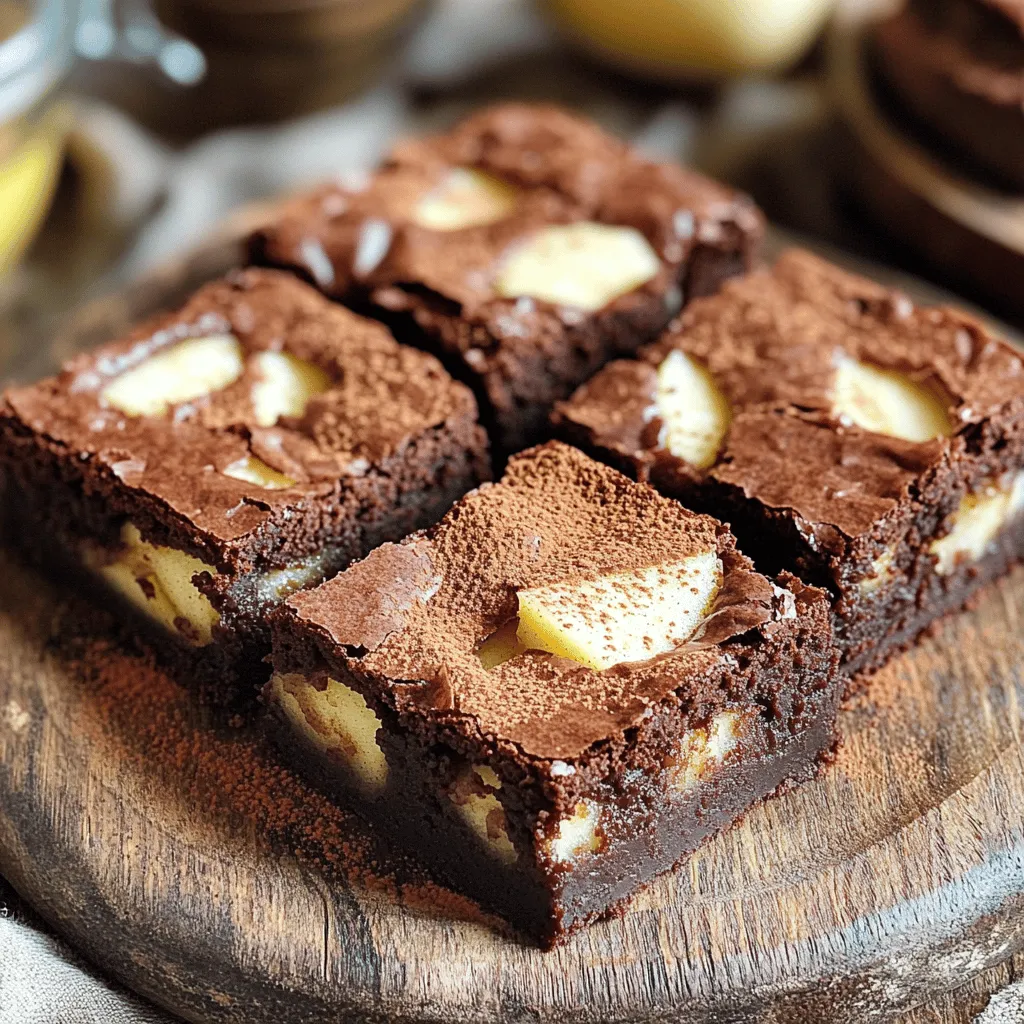
Sugar Free Apple Brownies Delightful and Healthy Treat
Are you craving a sweet treat but want to keep it healthy? Sugar-free apple brownies might be just what you need! These delightful and guilt-free