Desserts

To make a delicious Carrot Apple Zucchini Bread, you need fresh ingredients. Here’s what you will use: - 1 cup grated carrots - 1 cup grated zucchini - 1 cup grated apple (preferably Granny Smith) - 1 ½ cups all-purpose flour - 1 teaspoon baking powder - 1 teaspoon baking soda - 1 teaspoon ground cinnamon - ½ teaspoon ground nutmeg - ½ teaspoon salt - ½ cup granulated sugar - ½ cup brown sugar, packed - 2 large eggs - ½ cup vegetable oil or melted coconut oil - 1 teaspoon vanilla extract These ingredients come together to create a sweet and moist bread that everyone will love. The carrots, zucchini, and apple add moisture and flavor. For extra crunch and taste, you can add these optional ingredients: - ½ cup chopped walnuts or pecans - ½ cup raisins or dried cranberries These add-ins can enhance the texture. They also bring more nutrients to your bread. If you need to make some changes, here are some easy swaps: - Use whole wheat flour for more fiber. - Replace sugar with honey or maple syrup for a natural sweetener. - For a vegan option, substitute eggs with flax eggs (1 tablespoon flaxseed meal mixed with 2.5 tablespoons water). These changes can help meet different dietary needs. Always check the texture and taste when you make substitutions. For the full recipe, look above. To make Carrot Apple Zucchini Bread, start with a few easy steps. First, gather your ingredients. You will need grated carrots, zucchini, and apple. Make sure to use a Granny Smith apple for a nice tart flavor. 1. Preheat your oven to 350°F (175°C). 2. Grease a 9x5 inch loaf pan. You can also line it with parchment paper. 3. In a medium bowl, mix these dry ingredients: - 1 ½ cups all-purpose flour - 1 teaspoon baking powder - 1 teaspoon baking soda - 1 teaspoon ground cinnamon - ½ teaspoon ground nutmeg - ½ teaspoon salt Stir them well until they are combined. Now, let’s move on to the wet ingredients. 1. In a large bowl, combine: - ½ cup granulated sugar - ½ cup brown sugar, packed - 2 large eggs Whisk these together until the mixture is smooth. 2. Slowly add in: - ½ cup vegetable oil or melted coconut oil Continue to whisk as you pour. Then, add: - 1 teaspoon vanilla extract Mix until everything is combined. 3. Gently fold in the grated carrots, zucchini, and apple. 4. Gradually add the dry ingredients into the wet mixture. Stir just until combined. Do not overmix, as this can make the bread tough. 5. If you like, fold in: - ½ cup chopped walnuts or pecans (optional) - ½ cup raisins or dried cranberries (optional) 6. Pour the batter into the prepared loaf pan. Smooth the top with a spatula. 7. Bake for 50-60 minutes. Check if it’s done by inserting a toothpick into the center. If it comes out clean, it’s ready! Once the bread is baked, remove it from the oven. Let it cool in the pan for about 10 minutes. Then, transfer the bread to a wire rack. Allow it to cool completely before slicing. For serving, enjoy the bread warm. You can spread some cream cheese or butter on each slice. A sprinkle of cinnamon or a drizzle of honey on top adds a lovely touch. This makes the bread not just tasty but also beautiful! If you want the full recipe, check the section above. Pick firm apples with a crisp texture. Granny Smith apples work best for their tart flavor. They balance the sweetness of the sugars in the bread. When choosing zucchini, look for small to medium-sized ones. They should be smooth and firm. Avoid large zucchinis as they can be watery and less flavorful. To enhance moisture, use freshly grated zucchini and apple. This helps keep the bread tender. You can also add a bit more oil if you like a richer texture. Mixing in sour cream or yogurt can boost flavor and moisture too. For extra taste, try adding a splash of orange juice or some lemon zest. Do not overmix your batter. This can make the bread tough. Mix just until the dry and wet ingredients come together. Also, check your oven temperature. An oven that is too hot may burn the bread’s outside before the inside is done. Use a toothpick to check for doneness. If it comes out clean, your bread is ready. For more tips, check out the Full Recipe. {{image_2}} You can make this bread gluten-free. Use a gluten-free flour mix instead of all-purpose flour. Look for one that has xanthan gum in it. This will help the bread hold its shape. Keep in mind that the texture may change. It may be a bit denser but still tasty. Want to boost the flavor? Add spices like ginger or clove for warmth. A splash of almond extract can add a nice twist. You can also try mixing in some orange zest for a fresh taste. Experiment with these flavors to find your favorite mix. Each option can change the bread in amazing ways. If you want a nut-free version, skip the nuts. You can replace eggs with flax eggs. Mix one tablespoon of flaxseed meal with three tablespoons of water. Let it sit until it thickens. This works great in recipes like this one. For a vegan version, use coconut oil instead of vegetable oil. These swaps allow everyone to enjoy this yummy bread! For the complete recipe, check out the Full Recipe. To keep your carrot apple zucchini bread fresh, store it in an airtight container. You can place it in the fridge for up to a week. If you want to keep it longer, consider freezing it. Just make sure to wrap it tightly in plastic wrap first. This helps keep it moist and tasty. You can freeze the bread for up to three months. Slice the bread before freezing for easy servings later. Wrap each slice in plastic wrap, then place them in a freezer bag. When you're ready to enjoy it, simply take out a slice and let it thaw in the fridge overnight or on the counter for a few hours. Reheat slices in a toaster or oven. For a toaster, set it to medium heat. For the oven, preheat it to 350°F (175°C) and heat for about 10 minutes. You can also warm it in the microwave for about 15-20 seconds. Enjoy it warm, with cream cheese or butter, for the best taste! Carrot Apple Zucchini Bread lasts about 5 days when stored properly. Keep it in an airtight container at room temperature. If you want it to last longer, you can refrigerate it. In the fridge, it can last up to 10 days. Just make sure to wrap it well to avoid drying out. Yes, you can definitely make muffins with this recipe. Just pour the batter into a muffin tin instead of a loaf pan. Bake them for about 20-25 minutes at the same temperature. Check for doneness with a toothpick. If it comes out clean, your muffins are ready! If you need an egg substitute, try using applesauce or mashed bananas. Use 1/4 cup of applesauce or 1/4 cup of mashed banana for each egg. These options will keep your bread moist and add a touch of sweetness. You can also try flaxseed meal. Mix 1 tablespoon of flaxseed meal with 2.5 tablespoons of water. Let it sit for a few minutes until it thickens. This blog post covered how to make tasty Carrot Apple Zucchini Bread. We talked about key ingredients, optional add-ins, and substitutions. I shared step-by-step instructions for preparation and baking. You learned tips for choosing the best produce and avoiding common mistakes. We also explored variations like gluten-free and vegan options. With proper storage, this bread stays fresh and delicious for days. Enjoy your baking adventure, and remember to get creative with your flavors!
Carrot Apple Zucchini Bread Healthy and Tasty Recipe
Are you ready to bake something delicious? My Carrot Apple Zucchini Bread is healthy and tasty! This quick bread packs in veggies and fruit, making
- 2 cups rolled oats - 1 cup mashed ripe bananas - 1/2 cup unsweetened applesauce - 1/2 cup almond butter - 1/3 cup honey or maple syrup - 1 teaspoon vanilla extract - 1 teaspoon cinnamon - 1/2 teaspoon baking powder - 1/4 teaspoon salt - 1 cup fresh or frozen blueberries - You can use peanut butter, sunflower seed butter, or cashew butter instead of almond butter. - Try agave syrup or coconut sugar as sweetener swaps. - Add nuts, seeds, or shredded coconut on top for extra crunch and flavor. These ingredients come together to make healthy blueberry oatmeal bars. Each part plays a role in taste and texture. The rolled oats provide a hearty base, while bananas and applesauce keep the bars moist. Almond butter adds creaminess, and honey or maple syrup gives a sweet touch. Blueberries burst with flavor and nutrients, making them a perfect addition. For those wanting to customize, the optional ingredients offer alternatives to fit your taste. You can mix and match to create your favorite version. With the full recipe, you can easily whip these bars up in no time. Enjoy experimenting with flavors and textures! 1. Preheat your oven to 350°F (175°C). 2. Line an 8x8 inch baking pan with parchment paper. Leave some overhang for easy removal. 3. In a large bowl, combine the rolled oats, mashed bananas, applesauce, almond butter, honey, vanilla extract, cinnamon, baking powder, and salt. Mix until everything blends well. 4. Next, gently fold in the blueberries. Be careful not to smash them. This keeps the berries whole and tasty. 5. Pour the mixture into your prepared baking pan. Spread it evenly. Use a spatula to smooth the top. You can add extra blueberries on top for a nice touch. 6. Bake in the preheated oven for 25-30 minutes. Look for golden edges and use a toothpick to check. It should come out clean. 7. Let the bars cool in the pan for about 10 minutes. Use the parchment paper to lift them out. Transfer to a wire rack and let them cool completely. 8. Once cool, cut into squares or bars. Enjoy! Store leftovers in an airtight container for up to 5 days. For longer freshness, refrigerate them. For the full recipe, refer to the ingredients section above. To make the best Healthy Blueberry Oatmeal Bars, mix your ingredients well. Avoid over-mixing, which can lead to mushy bars. Gently fold in the blueberries. This keeps them whole and bright. Use a spatula, and be kind when mixing. Cooling is key for great texture. After baking, let the bars cool in the pan for ten minutes. Then, move them to a wire rack. This helps them firm up and stay together. These bars taste great fresh out of the oven. Serve them warm with a drizzle of honey. You can also top them with yogurt or fresh fruit. They pair well with a cup of tea or coffee, making them perfect for breakfast. Try serving them with almond milk or a smoothie for a balanced meal. You can pack these bars for a quick snack on the go. They are easy to take along and delicious at any time. Want to boost the fiber in your bars? Add some chia seeds or flaxseeds to the mix. Both are great sources of fiber and omega-3s. You can also use rolled oats for a heartier texture. For extra protein, try adding a scoop of protein powder to the mixture. This will help keep you full longer. If you want to add superfoods, consider mixing in some hemp seeds or spirulina. These add nutrients without changing the taste much. Check out the Full Recipe for all the details on making these tasty bars! {{image_2}} You can boost flavor by adding spices. Nutmeg or ginger works well in these bars. They add warmth and a nice twist. You can also mix in different fruits. Raspberries or peaches can change the taste nicely. They add color and fresh flavor. You can try these swaps to keep things fun! For a gluten-free option, use gluten-free oats. This keeps the bars safe for gluten-sensitive folks. You can also make these bars vegan. Swap the honey for maple syrup. This simple change makes the bars plant-based. You can enjoy them without any animal products! To change the texture, adjust the liquid. Add more for a softer bar, or less for a firmer one. If you want a crunchier topping, sprinkle nuts or seeds on top. This adds a nice bite and extra flavor. You can get creative with your choices. Each tweak can make the bars feel fresh and new! To keep your Healthy Blueberry Oatmeal Bars fresh at room temperature, store them in an airtight container. This method helps maintain moisture and prevents them from drying out. I recommend using a glass or plastic container with a tight lid. If you plan to eat them within five days, this is the best choice. To store the bars in the fridge, place them in a sealed container. This method extends their shelf life to about one week. Make sure to cool the bars completely before refrigerating to avoid condensation. If you want to keep them fresh, add a layer of parchment paper between layers to prevent sticking. Freezing your bars is simple and effective. First, cut the bars into squares. Then, wrap each square in plastic wrap. Place the wrapped bars in a freezer-safe bag or container. They can last for up to three months in the freezer. When you're ready to eat one, remove it from the freezer and let it thaw at room temperature. You can also reheat it in the microwave for about 15-20 seconds for a warm snack. Enjoy! To make these bars vegan, you can replace the eggs and dairy. Use mashed bananas instead of eggs. They help bind the mixture. For the almond butter, you can keep it or use another nut or seed butter. The honey can switch to maple syrup for a vegan option. This keeps the bars sweet and tasty. Yes, you can swap out blueberries for other fruits. Raspberries, strawberries, or chopped apples work well. You can even try peaches or cherries. Just make sure to keep the total fruit amount the same. This way, the bars hold together nicely. To keep your bars from falling apart, focus on binding. Use ripe bananas and almond butter as key ingredients. They add moisture and stickiness. Mixing the oats well with wet ingredients helps too. Make sure to press the mixture firmly into the pan before baking. This will help the bars stay together when you cut them. For the full recipe, refer back to the instructions above. This blog post shared a simple recipe for healthy blueberry oatmeal bars. We covered key ingredients and step-by-step instructions to make them delicious. I also provided tips for storage and variations to fit your taste. Remember, you can change the fruits or sweeteners to make the recipe your own. Exploring these options keeps this treat fun and exciting. Enjoy making your bars, and feel free to experiment with flavors. You’ll love the results, and they’ll be a great snack every time!
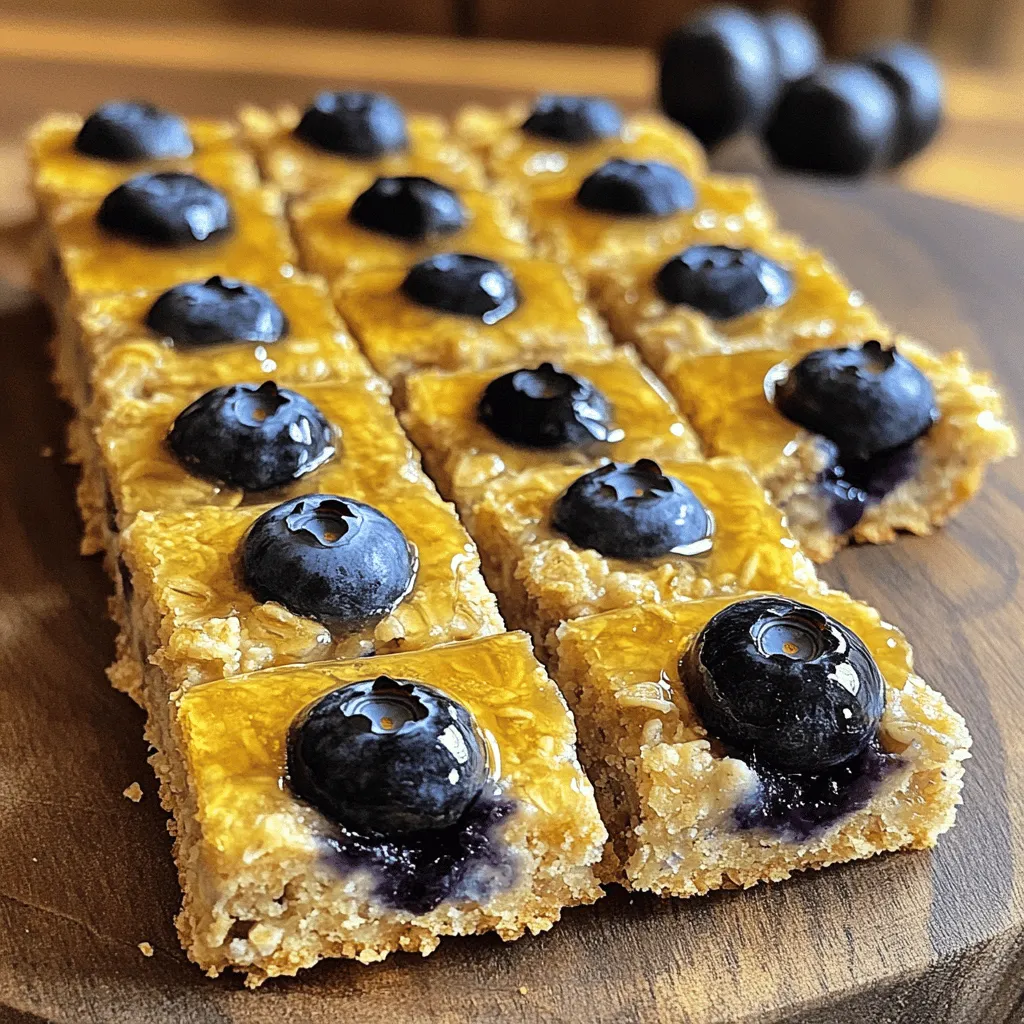
Healthy Blueberry Oatmeal Bars Delicious and Nutritious
Looking for a wholesome treat that packs a punch? You’re in the right place! These Healthy Blueberry Oatmeal Bars are simple to make and loaded
To make this delicious Double Chocolate Chip Zucchini Bread, you need: - 1 ½ cups grated zucchini (packed, about 1 medium zucchini) - 1 cup all-purpose flour - 1 cup whole wheat flour - ½ cup unsweetened cocoa powder - 1 teaspoon baking soda - ½ teaspoon baking powder - ½ teaspoon salt - 1 teaspoon cinnamon - ⅓ cup vegetable oil (or melted coconut oil) - ¾ cup brown sugar, packed - ½ cup granulated sugar - 2 large eggs - 1 teaspoon vanilla extract - 1 cup semi-sweet chocolate chips (plus extra for topping) You can swap ingredients based on your needs: - Use almond flour instead of all-purpose flour for a gluten-free option. - Replace brown sugar with coconut sugar for a lower glycemic index. - If you want a dairy-free option, use a plant-based milk instead of regular eggs. - For a richer flavor, try dark chocolate chips in place of semi-sweet chocolate chips. When picking zucchini, look for these signs: - Choose small to medium-sized zucchinis. They are sweeter and more tender. - Look for smooth skin without blemishes or soft spots. This shows quality. - The color should be vibrant green. Avoid dull or yellow zucchinis. - If possible, choose organic zucchini to reduce pesticide exposure. These tips ensure your bread tastes great and stays moist. Use fresh zucchini for the best results in your Double Chocolate Chip Zucchini Bread. You can find the full recipe above to guide you through the baking process. Start by preheating your oven to 350°F (175°C). Grab a 9x5-inch loaf pan. Grease it with cooking spray or line it with parchment paper. Next, take your grated zucchini and sprinkle a pinch of salt on it. Let it sit for about 10 minutes. This step helps remove extra moisture from the zucchini. After 10 minutes, place the zucchini in a clean kitchen towel and squeeze out more moisture. This is key for a great texture. In a large bowl, whisk together the following dry ingredients: - 1 cup all-purpose flour - 1 cup whole wheat flour - ½ cup unsweetened cocoa powder - 1 teaspoon baking soda - ½ teaspoon baking powder - ½ teaspoon salt - 1 teaspoon cinnamon In another bowl, mix these wet ingredients until well combined: - ⅓ cup vegetable oil (or melted coconut oil) - ¾ cup brown sugar, packed - ½ cup granulated sugar - 2 large eggs - 1 teaspoon vanilla extract Once mixed, stir the wet ingredients into the dry ingredients. Be careful not to overmix. This will keep your bread light and fluffy. Gently fold in the grated zucchini and chocolate chips, making sure they are evenly spread throughout the batter. Pour the batter into your prepared loaf pan. Smooth out the top with a spatula. For an extra treat, sprinkle some more chocolate chips on top. Bake your bread in the preheated oven for 50-60 minutes. To check if it’s done, insert a toothpick into the center. It should come out clean, with just a few moist crumbs. Once baked, let the bread cool in the pan for about 10 minutes. Then, transfer it to a wire rack to cool completely. Enjoy this rich treat from the Full Recipe! To get the best texture in your double chocolate chip zucchini bread, moisture is key. Start by grating fresh zucchini. Squeeze out excess water using a clean towel. Overmixing the batter can make it dense. Mix the wet and dry ingredients until just combined. This will keep your bread light and fluffy. Many home bakers face common mistakes. One is not measuring ingredients correctly. Use dry measuring cups for flour and cocoa. Another mistake is skipping the salt. Salt enhances flavors and balances sweetness. Lastly, don't skip the cooling time. Letting the bread cool helps it set properly. For serving, slice your bread warm. A pat of butter adds richness. You can also dust it with powdered sugar for a touch of sweetness. For a fun twist, serve it with fresh strawberries or a scoop of vanilla ice cream. This elevates the experience and makes it more special. You can find the full recipe to guide you through each step. {{image_2}} You can make this bread gluten-free easily. Swap out the all-purpose and whole wheat flour for a gluten-free flour blend. Look for blends made with rice flour, almond flour, or coconut flour. Make sure the blend contains xanthan gum to help with texture. This will give you tasty results without gluten. You can add fun flavors to your bread. Try mixing in nuts like walnuts or pecans for crunch. You can also add spices like nutmeg or ginger. These will give your bread a warm, cozy taste. For a fruity twist, fold in some berries or dried fruit. Each of these add-ins makes your bread unique. If you want a lower-sugar version, cut down the brown sugar and granulated sugar. You can use ½ cup of honey or maple syrup instead. Just reduce the oil by a bit to keep the bread moist. Also, try using unsweetened applesauce to replace some sugar. This change keeps the bread sweet while being healthier. For the full recipe, check out the complete guide. After enjoying your Double Chocolate Chip Zucchini Bread, store any leftover slices in an airtight container. Keep the container at room temperature for up to three days. If you want to keep the bread fresh for longer, refrigerate it. Just remember, refrigeration may change the texture slightly. To freeze your zucchini bread, slice it first. Wrap each slice tightly in plastic wrap. Then place the wrapped slices in a freezer-safe bag. Squeeze out the air before sealing. This method helps prevent freezer burn. You can freeze the bread for up to three months. When you want to enjoy a slice, just pull it out and let it thaw at room temperature. To reheat your zucchini bread, preheat your oven to 350°F (175°C). Place slices on a baking sheet and warm them for about 10 minutes. This will revive the soft texture and enhance the chocolate flavor. Alternatively, pop a slice in the microwave for 15-20 seconds. This method is quick and easy, perfect for a late-night snack. Enjoy every bite of this delicious treat! Yes, you can use frozen zucchini. Just thaw it first. Squeeze out any extra water. This helps keep the bread from becoming too soggy. Frozen zucchini works well, and it saves time. To boost the chocolate flavor, add more cocoa powder. You can add an extra ¼ cup of cocoa powder to the batter. Another option is to use dark chocolate chips instead of semi-sweet. You can even mix in chocolate chunks for a fun twist. This bread tastes great with many sides. I love it warm with butter. You can also serve it with a sprinkle of powdered sugar. Fresh strawberries add a nice touch. For dessert, a scoop of vanilla ice cream pairs perfectly. Check out the Full Recipe for more ideas! This blog post covered key ingredients for baking Double Chocolate Chip Zucchini Bread. You learned about ingredient substitutions, selecting fresh zucchini, and step-by-step baking instructions. We discussed tips for the best texture and common mistakes to avoid. Variations let you explore gluten-free and low-sugar options. Finally, I shared storage and reheating tips to keep your bread fresh. Now, you can create delicious zucchini bread at home. Enjoy your baking journey!
Decadent Double Chocolate Chip Zucchini Bread Recipe
Are you ready to indulge in a treat that’s both rich and healthy? This Decadent Double Chocolate Chip Zucchini Bread recipe will make you rethink
- 2 medium zucchinis, grated (about 1 ½ cups) - 1 cup all-purpose flour - 1 cup whole wheat flour - 1 teaspoon baking soda - 1 teaspoon baking powder - ½ teaspoon salt - 1 teaspoon ground cinnamon - ½ teaspoon nutmeg - 1 cup brown sugar, packed - ½ cup granulated sugar - 2 large eggs - ½ cup vegetable oil - 1 teaspoon vanilla extract - 1 cup chocolate chips (semi-sweet or dark) For this recipe, zucchini adds moisture and nutrition. It sneaks in extra veggies while keeping the bread soft. The mix of flours helps create a nice texture. Baking soda and powder help it rise, while spices add warmth. - ½ cup chopped walnuts or pecans (optional) You can toss in nuts for crunch. They add a nice bite and flavor. If you want to play with taste, consider adding a splash of almond extract or some raisins. Each choice brings its character to the bread. - Gluten-free alternatives: Use a gluten-free flour blend instead of all-purpose and whole wheat flour. - Sugar substitutes: If you want to cut sugar, try using coconut sugar or a sugar substitute like erythritol. Each swap can change the taste or texture, but they keep the bread yummy. Just remember to check the measurements on your substitutes to keep the results tasty. For the full recipe, check the provided link to ensure you have everything you need to create this delicious treat! To start, you need to prep the zucchini. Grate two medium zucchinis. This gives you about 1 ½ cups of grated zucchini. Place the grated zucchini in a bowl and sprinkle a pinch of salt over it. Let it sit for 10 minutes. This step helps draw out excess moisture. After waiting, take a clean kitchen towel and squeeze the zucchini. Remove as much liquid as you can. Next, mix the wet and dry ingredients. In a new bowl, whisk together the all-purpose flour, whole wheat flour, baking soda, baking powder, salt, cinnamon, and nutmeg. Make sure these ingredients are well combined. Set this bowl aside for later use. In a large mixing bowl, combine the brown sugar, granulated sugar, and eggs. Mix until the mixture is smooth. Then, add the vegetable oil and vanilla extract. Stir until everything is blended well. Gradually mix the dry ingredient bowl into the wet ingredients. Stop mixing as soon as you see no dry spots. Now, fold in the grated zucchini, chocolate chips, and nuts if you choose to use them. It should be evenly spread throughout the batter. Pour the batter into your prepared loaf pan. Use a spatula to smooth the top. Make sure it looks nice and even. Bake this in your preheated oven at 350°F (175°C). You want to bake for 50 to 60 minutes. To check if it’s done, insert a toothpick into the center. It should come out clean, but a few moist crumbs are okay. Once baked, remove the bread from the oven. Let it cool in the pan for about 10 minutes. Then, transfer the bread to a wire rack. Let it cool completely. For serving, slice the bread and enjoy it warm or at room temperature. You can dust the top with powdered sugar or drizzle it with melted chocolate for a special touch. Serving it on a rustic wooden board adds to its charm. To find the full recipe, check the section above. To make the best chocolate chip zucchini bread, avoid common mistakes. First, always squeeze excess water from the zucchini. This step keeps the bread moist. If you skip it, your bread might turn out soggy. Second, do not overmix the batter. Mixing too much can make the bread tough. Ensuring moisture balance is key. Use a mix of brown and white sugar for sweetness. Brown sugar adds moisture and a rich flavor. Also, check for the right amount of oil. Too little can make the bread dry. Aim for half a cup, as in the full recipe. To test doneness, insert a toothpick into the center. If it comes out clean or with a few crumbs, your bread is ready. Keep an eye on the baking time too. If it browns too fast, cover it with foil. This prevents burning while ensuring it cooks through. Enhancing flavor while baking is easy. Add spices like cinnamon or nutmeg to the dry mix. These spices give warmth and depth. For more chocolate flavor, you can add extra chocolate chips. Just fold them in before pouring the batter into the pan. For best practices in storing, wrap the cooled bread tightly in plastic wrap. This keeps the bread fresh and moist. You can also place it in an airtight container. If you want to keep it longer, freeze slices. Just wrap each slice well and store them in a freezer bag. When reheating, use the oven for the best results. Preheat it to 350°F (175°C) and heat the bread for about 10 minutes. This method revives the bread’s texture. You can also microwave a slice for about 15 seconds. Just be careful not to overheat it. {{image_2}} You can add seasonal spices to your bread. Think pumpkin spice in fall or vanilla in summer. These spices boost flavor and make the bread feel fresh. You can also change the type of chocolate. Try dark chocolate for a rich taste or white chocolate for sweetness. Each type of chocolate gives your bread a new twist. If you're looking to cut sugar, use less brown and granulated sugar. You can also swap in applesauce for some of the oil. It keeps the bread moist, and it adds a fruity touch. Adding more zucchini or even carrots can boost the veggie count. This gives you added nutrients without changing the taste. For a vegan version, replace the eggs with flaxseed meal or applesauce. This keeps the texture while making it plant-based. If you need a nut-free option, simply leave out the nuts. You can also use sunflower seeds for crunch without the allergens. These tweaks help everyone enjoy this tasty treat. Check out the Full Recipe for more details! Zucchini is a low-calorie vegetable packed with nutrients. It offers vitamins A and C, which help keep your skin healthy. Zucchini also contains potassium, which is good for heart health. Plus, it’s high in fiber, aiding digestion. One cup of grated zucchini has about 19 calories. This means you can enjoy it without guilt! When you slice your zucchini bread, think about portion sizes. A slice should be about 1 inch thick. This way, you can savor the flavors without overdoing it. Pair your bread with some fruit or yogurt to balance your meal. This adds nutrients and makes it more filling. How does zucchini bread stack up against regular bread? Zucchini bread often has fewer calories and more fiber than white bread. It also comes with added vitamins from the zucchini. On the other hand, traditional bread usually has more sugar and fewer nutrients. Making zucchini bread is a smart choice for those seeking healthier options. Store your zucchini bread in an airtight container. This keeps it fresh for about 3 days at room temperature. You can also store it in the fridge for up to a week. If you want to keep it longer, freeze it. Wrap the bread tightly in plastic wrap, then place it in a freezer bag. It can last up to 3 months in the freezer. Yes, you can use frozen zucchini! Thaw it first, then drain any excess water. This keeps your batter from being too wet. You might need to squeeze out more moisture to match the fresh zucchini texture. To make this bread lower in carbs, try using almond flour instead of all-purpose flour. You can also replace the sugars with a low-carb sweetener like erythritol. Adjust the baking time, as low-carb flours may cook differently. Keep an eye on it while baking. Leftover zucchini is great for many dishes! You can make zucchini fritters, add it to salads, or stir it into pasta. You can also blend it into smoothies for extra nutrients. Grate it into sauces or soups for added flavor and texture. You've learned about the essential ingredients for delicious chocolate chip zucchini bread. We covered required and optional items, ingredient swaps, and step-by-step preparation. We explored tips for perfect baking, along with ways to store and reheat. Lastly, we discussed tasty variations and the nutrition benefits of this bread. I hope this guide inspires you to try new flavors and make this treat your own. Enjoy your baking adventure!
Chocolate Chip Zucchini Bread Moist and Tasty Treat
If you love dessert and want a healthy twist, then Chocolate Chip Zucchini Bread is for you! This recipe blends rich chocolate with moist zucchini,
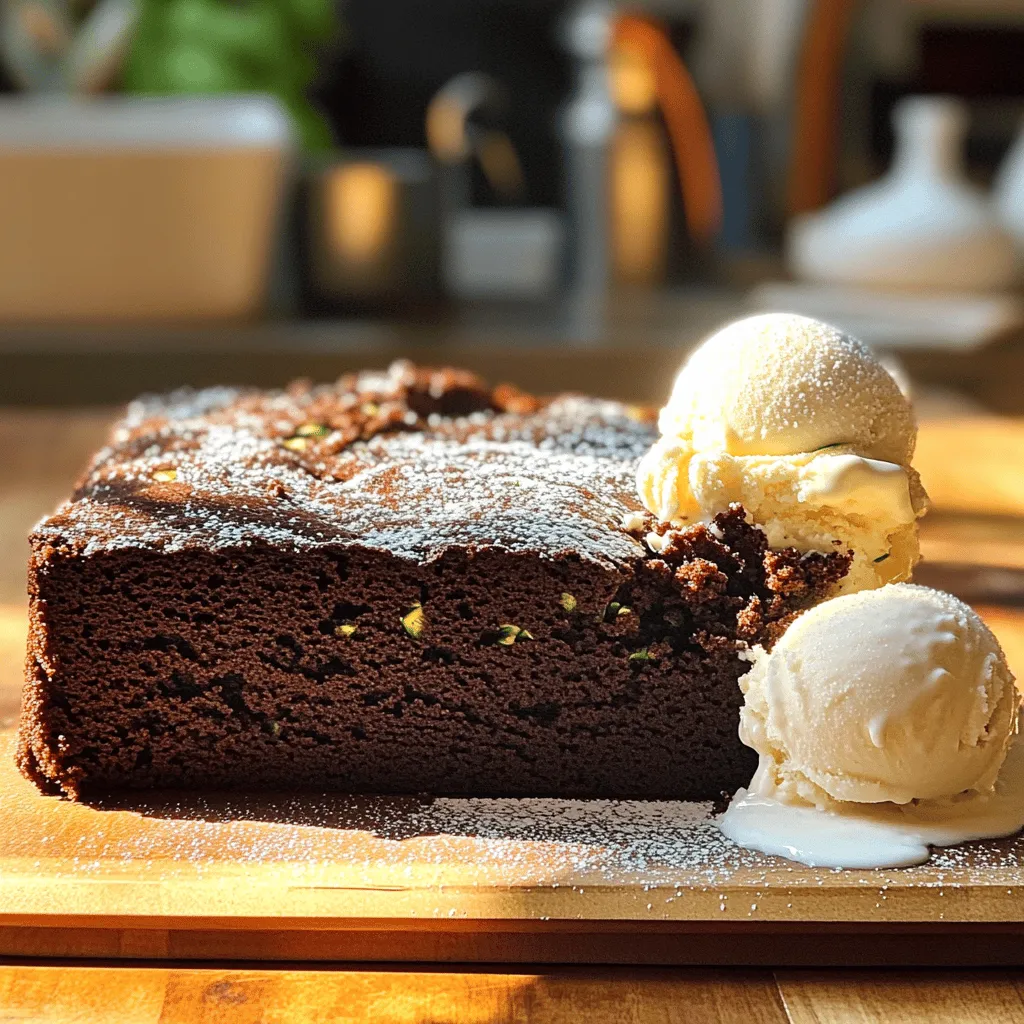
To make these fudgy Greek yogurt brownies, you need a few simple ingredients. Each one plays a key role in creating that rich, gooey texture. Here’s the list of what you’ll need: - 1 cup Greek yogurt (plain, full-fat or low-fat) - 1/2 cup coconut sugar (or brown sugar) - 1/4 cup honey or maple syrup - 1/2 cup unsweetened cocoa powder - 1/2 cup whole wheat flour (or gluten-free flour) - 1/2 teaspoon baking powder - 1/4 teaspoon salt - 1 teaspoon vanilla extract - 1/2 cup dark chocolate chips (optional) - 1/4 cup chopped nuts (walnuts or pecans, optional) Greek yogurt is the star here. It gives the brownies moisture and a protein boost. You can use full-fat or low-fat yogurt based on your preference. Coconut sugar adds a nice caramel flavor, while honey or maple syrup brings sweetness. Unsweetened cocoa powder is essential for that chocolatey taste. When it comes to flour, you can choose whole wheat for a hearty bite or gluten-free flour if needed. Baking powder helps the brownies rise, and a touch of salt enhances all the flavors. For extra fun, toss in some chocolate chips or nuts. They add texture and flavor. These ingredients make the brownies simple yet delicious. You can find the full recipe and instructions to guide you through the process. To start, preheat your oven to 350°F (175°C). This helps the brownies bake evenly. While the oven heats, grease an 8x8-inch baking pan with butter or oil. You can also line it with parchment paper. Lining makes it easier to lift out the brownies later. Next, we’ll mix the wet ingredients. In a large bowl, combine 1 cup of Greek yogurt, 1/2 cup of coconut sugar, 1/4 cup of honey or maple syrup, and 1 teaspoon of vanilla extract. Whisk these together until smooth. Now, sift in 1/2 cup of cocoa powder, 1/2 cup of whole wheat flour, 1/2 teaspoon of baking powder, and 1/4 teaspoon of salt. Stir gently until just combined. Be careful not to overmix; this is key for fudgy texture. Now it’s time to pour and spread the batter. Fold in 1/2 cup of dark chocolate chips and any chopped nuts if you like. Pour the batter into the prepared pan and spread it evenly. Bake in the preheated oven for 20 to 25 minutes. To check if they are done, insert a toothpick in the center. It should come out with a few moist crumbs. Let the brownies cool in the pan for at least 15 minutes. If you used parchment paper, lift them out to cut into squares. Enjoy your delicious fudgy Greek yogurt brownies! For the full recipe, refer to [Full Recipe]. To get that perfect fudgy texture, you must avoid overmixing. When you combine the wet and dry ingredients, mix just until you see no dry flour. Overmixing can make the brownies tough. Also, pay attention to the baking time. Bake for 20 to 25 minutes. A toothpick should come out with a few moist crumbs but not wet batter. This ensures the center remains fudgy. For a great look, dust the brownies with powdered sugar or cocoa powder. You can also add fresh berries for a colorful touch. For a tasty treat, serve them with a scoop of ice cream or a dollop of Greek yogurt. The creamy texture pairs well with the rich brownies. It adds a nice balance to the dish. Greek yogurt has many nutritional perks. It is high in protein and low in fat. This helps to lower the overall fat content in your brownies, making them a bit healthier. Using Greek yogurt instead of butter or oil keeps your brownies moist while adding extra nutrients. It’s a simple swap that makes a big difference. For the full recipe, check out the details above. {{image_2}} If you need a gluten-free version, use almond flour or oat flour. Both work well in this recipe. Almond flour gives a nutty taste, while oat flour is mild. You can swap the whole wheat flour for these alternatives without losing flavor. Just remember, gluten-free flours may change the texture a bit. You can spice things up by adding cinnamon or peppermint extract. A teaspoon of cinnamon gives warmth and depth. Peppermint extract brings a fresh twist, perfect for holiday treats. Also, try swapping dark chocolate chips for white chocolate or peanut butter chips. This swap creates a fun flavor mix that kids love! Get creative with mix-ins! Add chopped nuts like almonds or pistachios for crunch. You can also toss in seeds, like chia or sunflower seeds, for extra nutrition. Another fun idea is to add fruits, such as chopped apples or bananas. These additions not only taste great but also add moisture to your brownies. Enjoy your baking journey with these tasty variations! After baking your fudgy Greek yogurt brownies, let them cool for about 15 minutes in the pan. This helps set their texture. If you used parchment paper, you can lift them out easily. Place the brownies on a wire rack to cool completely. This keeps them soft and fudgy. For storage, an airtight container works best. This keeps them fresh and prevents them from drying out. You can also wrap them in plastic wrap or foil if you don't have a container. If you live in a warm area, store them in the fridge. This helps them stay fresh longer. At room temperature, these brownies last for 3 to 4 days. Keep them in a cool, dry place. If you want them to last longer, freezing is a great option. To freeze, cut the brownies into squares. Wrap each square in plastic wrap. Then, place them in a freezer-safe bag. They can last for up to 3 months this way. When you're ready to enjoy them, let them thaw in the fridge or at room temperature. Enjoy your fudgy Greek yogurt brownies whenever you want! For the full recipe, check out the recipe section. Yes, you can use non-fat Greek yogurt. However, it will change the texture. Fudginess may decrease, making the brownies less rich. Full-fat yogurt gives a creamier taste and a denser texture. You can use brown sugar as a substitute for coconut sugar. Other options include agave syrup or maple syrup. Each sweetener brings a different taste. Brown sugar adds a caramel flavor, while syrup makes the batter a bit wetter. Yes, you can make these brownies vegan! Replace eggs with ground flaxseed or applesauce. Use maple syrup instead of honey. Ensure to check your yogurt for vegan options. You can easily adjust the recipe for a tasty vegan treat. To check if brownies are done, insert a toothpick in the center. If it comes out with a few moist crumbs, they are ready. If it has wet batter, they need more time. Keep an eye on them to get that perfect fudgy texture. In this blog post, you learned how to make delicious and fudgy brownies using Greek yogurt. We covered key ingredients like Greek yogurt, coconut sugar, and cocoa powder. You also discovered step-by-step instructions and helpful tips for perfecting your brownies. Remember, not overmixing is crucial for that rich texture. Whether you stick to the original recipe or try fun variations, you can enjoy a tasty treat. Keep your brownies fresh by storing them properly, and don't hesitate to experiment with flavors. Enjoy baking and sharing these delightful brownies!
Fudgy Greek Yogurt Brownies Simple and Delicious Treat
Are you ready for a delicious twist on dessert? These fudgy Greek yogurt brownies are simple to make and pack a rich, chocolatey punch. With
To make a rich and moist chocolate zucchini cake, you need these key ingredients: - 1 ½ cups all-purpose flour - ½ cup unsweetened cocoa powder - 1 teaspoon baking soda - ½ teaspoon baking powder - ¼ teaspoon salt - 1 teaspoon cinnamon - ½ cup vegetable oil - 1 cup granulated sugar - 2 large eggs - 1 teaspoon vanilla extract - 1 ½ cups finely grated zucchini (about 1 medium zucchini) - ½ cup Greek yogurt - ½ cup semi-sweet chocolate chips (optional) Each ingredient plays a vital role. Flour gives structure, while cocoa adds deep chocolate flavor. Baking soda and baking powder help the cake rise. Zucchini keeps it moist and adds fiber without altering the taste. While the base recipe is fantastic, you can enhance it with these options: - Chopped nuts, like walnuts or pecans, for crunch - A pinch of nutmeg for warmth - A tablespoon of espresso powder to intensify the chocolate flavor - Different types of chocolate chips, like dark or white chocolate Feel free to mix and match these extras. They can personalize your cake to fit your taste. Here’s a simple breakdown of the main nutritional elements per serving: - Calories: About 250 - Total Fat: 12g - Saturated Fat: 2g - Carbohydrates: 35g - Sugars: 18g - Protein: 4g This cake offers a nice balance of flavors and textures. With the zucchini, you gain some nutrients too. You can enjoy this cake without feeling too guilty. For the full recipe, check out the directions above! Start by preheating your oven to 350°F (175°C). This step helps the cake rise well. Next, prepare a 9x9-inch baking pan. You can grease it with butter or non-stick spray. Alternatively, line it with parchment paper for easy removal later. Gather all your ingredients on the counter. This will make the mixing process smoother. In a medium bowl, whisk together the dry ingredients. Combine 1 ½ cups of all-purpose flour, ½ cup of unsweetened cocoa powder, 1 teaspoon of baking soda, ½ teaspoon of baking powder, ¼ teaspoon of salt, and 1 teaspoon of cinnamon. Make sure these are mixed well. In a large mixing bowl, combine ½ cup of vegetable oil, 1 cup of granulated sugar, 2 large eggs, and 1 teaspoon of vanilla extract. Beat these together until smooth. Now, slowly add the dry mixture to the wet mixture. Mix until just combined. This keeps the cake light and fluffy. Next, gently fold in 1 ½ cups of finely grated zucchini and ½ cup of Greek yogurt. If you want, you can add ½ cup of semi-sweet chocolate chips for extra flavor. Stir until everything is evenly mixed. Pour the batter into the prepared baking pan. Spread it out evenly with a spatula. Place the pan in your preheated oven. Bake for 30-35 minutes. To check if the cake is done, insert a toothpick into the center. If it comes out clean, your cake is ready. Once baked, take it out and let it cool in the pan for about 10 minutes. After that, transfer it to a wire rack to cool completely. Enjoy the wonderful smell as it cools! For the full recipe, check the previous section. When making Chocolate Zucchini Cake, watch out for these common errors: - Too Much Zucchini: Adding too much zucchini can make the cake soggy. Stick to the amount in the Full Recipe. - Not Grating Finely: If the zucchini pieces are too large, the cake can have an odd texture. Grate it finely for the best result. - Overmixing Batter: Mix the batter just until combined. Overmixing can lead to a tough cake. - Wrong Oven Temperature: Always preheat your oven to the correct temperature. This helps the cake rise properly. You can make your Chocolate Zucchini Cake even better! Here are some tips: - Substitute Oils: Use melted coconut oil instead of vegetable oil for a richer flavor. - Use Different Sugars: Try brown sugar or coconut sugar for a deeper taste. - Adjust Baking Time: If you use a larger pan, check the cake earlier. A thinner batter cooks faster. - Add Spices: A pinch of nutmeg or espresso powder can elevate the flavor. Serving your Chocolate Zucchini Cake can be fun! Here are some ideas: - Garnish with Fruit: Fresh berries or banana slices add a nice touch. - Serve with Ice Cream: A scoop of vanilla ice cream pairs well with warm cake. - Drizzle with Sauce: Try a chocolate or caramel sauce for extra sweetness. - Dust with Powdered Sugar: A light dusting makes the cake look fancy and appealing. {{image_2}} To make this cake gluten-free, swap regular flour with gluten-free flour. Here are some great substitutes: - 1 ½ cups gluten-free all-purpose flour - 1 ½ teaspoons xanthan gum (if your flour blend doesn’t include it) - Cornstarch or almond flour can also work well. These ingredients keep the cake moist and delicious without gluten. You can easily make this cake vegan by omitting eggs and dairy. Here’s how: - Replace each egg with ¼ cup unsweetened applesauce. - Use ½ cup of non-dairy milk instead of Greek yogurt. - For oil, you can use coconut oil or any plant-based oil. This keeps the cake moist while making it vegan-friendly. You can get creative with flavors in your chocolate zucchini cake. Here are some ideas: - Add a teaspoon of nutmeg for a warm spice. - Try using dark chocolate chips instead of semi-sweet for a richer taste. - Add chopped nuts like walnuts or pecans for texture. These changes can make your cake unique and exciting! For the full recipe, check out the earlier section. After you bake your chocolate zucchini cake, let it cool. Then, wrap it tightly in plastic wrap or foil. This keeps it fresh and moist. You can also store it in an airtight container. Place the cake at room temperature for short-term storage. If you want it to last longer, put it in the fridge. The cool air helps keep the cake fresh. Just remember, the cake can dry out in the fridge, so cover it well. To freeze your chocolate zucchini cake, start by letting it cool completely. Then, cut it into slices or keep it whole. Wrap each piece in plastic wrap. For extra protection, place the wrapped cake in a freezer bag. This helps prevent freezer burn. You can freeze the cake for up to three months. When you’re ready to enjoy it, move it to the fridge to thaw overnight. For a quicker thaw, leave it at room temperature for about an hour. When stored properly, your chocolate zucchini cake can last for about three days at room temperature. In the fridge, it can stay fresh for about a week. If frozen, it keeps well for up to three months. Just remember to check for any signs of spoilage before eating. Proper storage keeps your cake moist and flavorful, so you can enjoy every bite! For the complete recipe, refer to the Full Recipe section. Yes, you can make this cake ahead of time. It stays fresh for several days. To store it, wrap it tightly in plastic wrap. You can also place it in an airtight container. This will keep it moist. If you want to freeze it, wrap it well, and it can last for up to three months. Just thaw it in the fridge overnight when you're ready to eat it. No, the zucchini taste is not strong. It blends well into the chocolate. Zucchini adds moisture and makes the cake soft. You won’t even know it’s there! It also gives the cake a nice texture. The cocoa and sugar dominate the flavor, making it a rich treat. If you need a substitute for Greek yogurt, use sour cream. It has a similar texture and flavor. You can also use plain yogurt, but it may make the cake a bit less rich. For a dairy-free option, try unsweetened applesauce or almond milk yogurt. Each of these options will keep the cake moist and tasty. For the full recipe, check out the detailed steps provided earlier. This blog post covered making a chocolate zucchini cake from start to finish. You learned about essential and optional ingredients, preparation steps, baking tips, and more. Avoid common mistakes for a better cake, and try the variations for gluten-free or vegan options. Remember to store leftovers properly for freshness. With these details, you can enjoy a moist, delicious cake that impresses everyone. Dive into your baking adventure, and savor the joy of homemade treats!
Chocolate Zucchini Cake Moist and Flavorful Delight
Are you ready to bake a cake that surprises everyone? This Chocolate Zucchini Cake is both moist and full of flavor. Zucchini may seem odd
- 3 medium zucchinis, grated - 1 cup brown sugar, divided - 1 teaspoon cinnamon - 1/2 teaspoon nutmeg - 1 tablespoon lemon juice - 1 cup rolled oats - 1 cup all-purpose flour - 1/2 cup unsalted butter, softened - 1/2 teaspoon salt - 1/4 cup chopped walnuts (optional) - Vanilla ice cream or whipped cream for serving - Best ways to pair with the dessert Zucchini crisp is a fun twist on the classic apple crisp. You can make it with fresh zucchinis, and it tastes so good! The main ingredients are simple. Grating the zucchini helps it mix well with the spices. You want to use medium zucchinis. They hold moisture and flavor better than larger ones. Brown sugar adds sweetness and helps with the crisp topping. Cinnamon and nutmeg give warmth, while lemon juice brightens the taste. For the topping, rolled oats add texture. They should mix with flour and butter to create a crumbly layer. Using unsalted butter lets you control the salt level. If you like nuts, adding walnuts gives a nice crunch. When serving, warm zucchini crisp pairs perfectly with vanilla ice cream or whipped cream. The cold cream makes the warm dessert even better. This dish is great for family dinners or cozy get-togethers. Check out the Full Recipe for step-by-step instructions! In a large bowl, combine the grated zucchini, 1/2 cup of brown sugar, cinnamon, nutmeg, and lemon juice. This mix will create a sweet base. Stir everything together until well blended. Then, let it sit for about 15 minutes. This process allows the zucchini to release moisture. This step is key for a tender crisp. In another bowl, mix rolled oats, flour, the remaining 1/2 cup of brown sugar, softened butter, and salt. Use your fingers to blend it until it looks like coarse crumbs. This texture is perfect for the topping. If you like a nutty flavor, fold in the chopped walnuts. They add a nice crunch. Next, spread the zucchini mixture evenly in a greased 8x8-inch baking dish. Make sure it covers the bottom well. Then, evenly distribute the oat mixture over the top. Press it down gently to create a crust. Bake in your preheated oven at 350°F (175°C) for 30-35 minutes. The topping should turn golden brown, and the zucchini must be tender. To check for doneness, insert a fork. If it goes in easily, your crisp is ready to enjoy! To get the best texture, moisture control is key. Zucchini holds a lot of water. After grating, let it sit with sugar. This helps the zucchini release extra moisture. You want it to be moist, but not soggy. Adjust the baking time and temperature to suit your oven. I find that 30 to 35 minutes at 350°F works best. Keep an eye on it as it bakes. You want the top to be golden brown and the zucchini tender. Add a twist to your zucchini crisp with spices. Try adding some ginger or allspice for a warm flavor. You can also use vanilla extract for a sweet aroma. If you have dietary needs, you can swap ingredients. Use coconut sugar instead of brown sugar for a lower glycemic option. For gluten-free diets, substitute the flour with almond flour. Always adjust the amounts to fit your taste. When serving, warm zucchini crisp pairs well with a scoop of vanilla ice cream. The cold ice cream melts into the warm crisp, creating a delicious blend. For garnishing, sprinkle some chopped nuts or a dash of cinnamon on top. Serve it in a nice dish to make it look inviting. Enjoy it best while it’s still warm, so the flavors shine through. {{image_2}} You can switch out brown sugar for honey or maple syrup. These sweeteners add a unique flavor. They also make the dish a bit healthier. Honey and maple syrup are natural options. You can use them in the same amount as brown sugar. This small change can make a big difference in taste. Mixing in other fruits can enhance the crisp. Apples add crunch and sweetness. Blueberries bring a burst of flavor. You can toss in a cup or so of these fruits with the zucchini. For the topping, you can swap walnuts for almonds or pecans. Each nut gives a different taste and texture to the crisp. Want to make a vegan zucchini crisp? It’s easy! Use coconut oil or vegan butter instead of regular butter. Both work well for the topping. For the sweetener, use maple syrup or a vegan sugar. This way, you keep the flavor without using animal products. Your vegan friends will love this treat! For the full recipe, check out the details above. To keep your zucchini crisp fresh, first let it cool. Then, cover it with plastic wrap or place it in an airtight container. This helps prevent it from drying out. Store it in the fridge for the best results. If you want to freeze it, cut the crisp into portions. Wrap each piece tightly in plastic wrap and then in foil. This will help keep it fresh in the freezer. When reheating, I recommend using the oven. Preheat the oven to 350°F (175°C). Place the zucchini crisp in an oven-safe dish. Cover with foil to keep it moist. Heat for about 15-20 minutes, or until it’s warm throughout. This method keeps the topping nice and crisp. In the refrigerator, you can keep zucchini crisp for about 3-4 days. After that, it may lose some flavor and texture. In the freezer, it can last for up to 3 months. Make sure to label your containers with the date. This way, you can enjoy your crisp at a later time without worry. Yes, you can use frozen zucchini. Just thaw it first and drain excess water. This helps avoid a soggy crisp. Frozen zucchini may be softer but still works well. Look for a golden brown topping. The zucchini should be tender when pierced with a fork. If the crisp bubbles around the edges, it's ready. Yes, you can prep the zucchini and topping a day early. Store them separately in the fridge. When ready, assemble and bake. This makes it easy for gatherings. You can also bake it and heat it later. Enjoy it warm with ice cream! For the complete steps, check the Full Recipe. In this post, I shared how to make a delicious zucchini crisp. We discussed key ingredients like zucchinis, sugar, and oats. I also provided step-by-step instructions for the perfect texture and flavor. You learned about variations and how to store leftovers to keep your dessert fresh. Zucchini crisp is versatile and fun to make. Try different toppings or sweeteners to suit your taste. Enjoy each bite of your warm, crisp dessert.
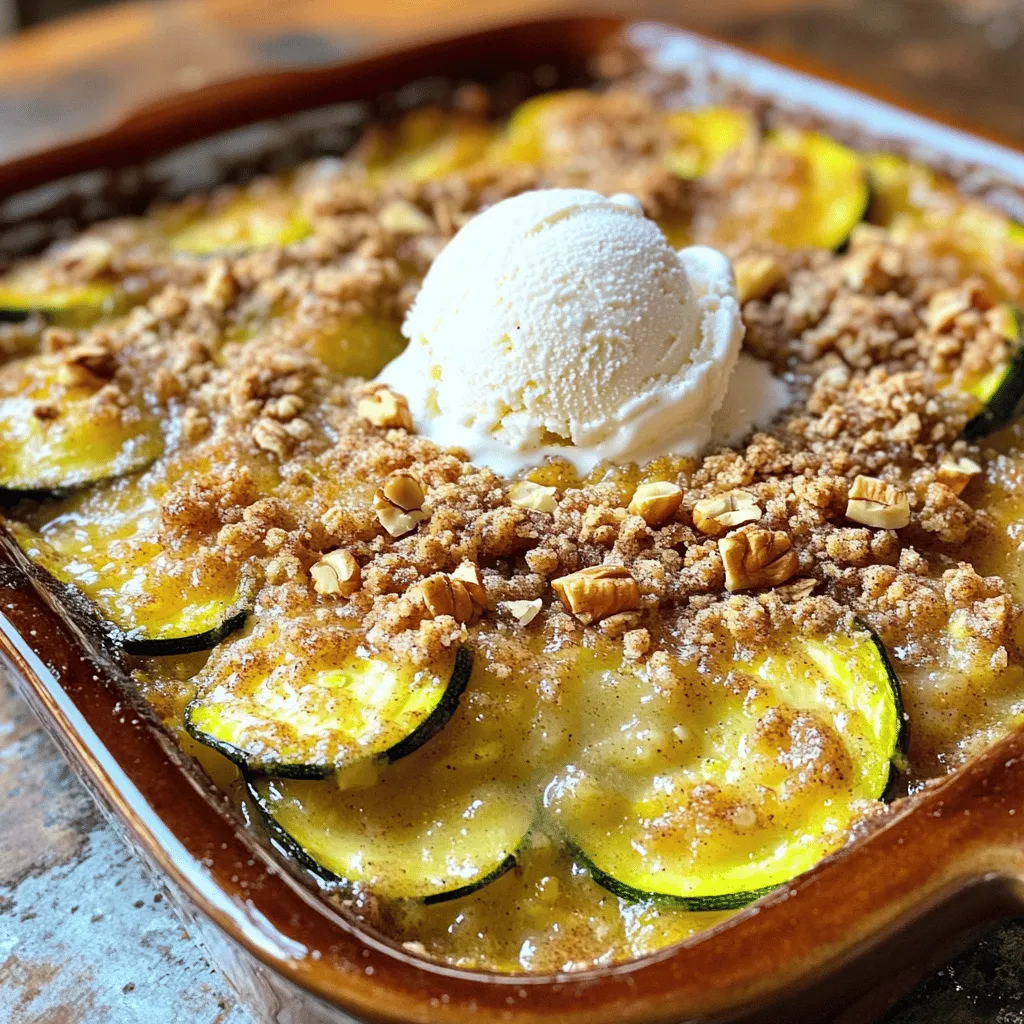
Zucchini Crisp Like Apple Crisp Delightful and Easy Treat
Craving a delicious dessert that’s a twist on the classic? Try my Zucchini Crisp like Apple Crisp! This delightful treat offers a surprising way to
- 2 cups grated zucchini - 1 cup finely grated apples - 2 cups all-purpose flour - 1 cup granulated sugar - 1/2 cup brown sugar, packed - 1/2 cup vegetable oil - 3 large eggs - 1/2 cup chopped walnuts or pecans - 1/2 cup raisins or dried cranberries - 1 tablespoon ground cinnamon - 1/2 teaspoon baking powder - 1 teaspoon baking soda - 1/2 teaspoon salt In this recipe, using grated zucchini and apples gives the bread its moist texture. The zucchini adds a subtle flavor, while the apples bring sweetness. You can use any kind of apple you like, but a tart one works best. I often go for Granny Smith apples. The all-purpose flour is the main base. It helps the bread hold its shape. Both granulated and brown sugar add sweetness and depth. The brown sugar gives a nice caramel flavor. For moisture, vegetable oil is key. It keeps the bread rich and tender. The eggs act as a binder, helping everything come together. If you want to add a crunch, consider nuts. Walnuts or pecans work well. Dried fruits like raisins or cranberries add a lovely chewiness. Spices play a big role too. Ground cinnamon is a must for that classic flavor. Baking powder and baking soda help the bread rise. Salt enhances all these flavors, making each bite delicious. For the full recipe, check out the complete details above. - Preheat the oven to 350°F (175°C). - Grease a 9x5 inch loaf pan or line it with parchment paper. - In a large bowl, combine 2 cups of all-purpose flour, 1 tablespoon of ground cinnamon, 1/2 teaspoon of baking powder, 1 teaspoon of baking soda, and 1/2 teaspoon of salt. - Mix these well to ensure even distribution. This step is key for good rise. - In a separate bowl, combine 1 cup of granulated sugar, 1/2 cup of brown sugar, and 1/2 cup of vegetable oil. - Stir until smooth. - Beat in 3 large eggs, one at a time. Then, add 1 teaspoon of vanilla extract. - Gradually add the dry mixture to the wet ingredients. Stir gently until just combined; a few lumps are okay. - Fold in 2 cups of grated zucchini and 1 cup of finely grated apple. - If you want, add 1/2 cup of chopped walnuts or pecans and 1/2 cup of raisins or dried cranberries for extra texture. - Pour the batter into the prepared loaf pan, smoothing the top with a spatula. - Bake for 55-65 minutes. To check doneness, insert a toothpick into the center. It should come out clean. - Once baked, let the bread cool in the pan for 10-15 minutes before moving it to a wire rack. You can find the Full Recipe for all the details. Enjoy your baking! Grated zucchini and apple make this bread moist. Aim for a good balance. Use 2 cups of grated zucchini and 1 cup of grated apple. This mix gives a perfect texture. Overmixing can ruin it. Mix just until combined; lumps are okay. Your oven needs to be right for good baking. Check the temperature with an oven thermometer. Adjust the heat if needed. For a perfect rise, use fresh baking powder and soda. They help the bread rise well. Slice the bread when it's cool for the best results. A sharp knife works best. Serve it warm, or at room temperature. You can add toppings like powdered sugar or butter. Cream cheese is also a nice option. Enjoy it plain or with your favorite spread. {{image_2}} You can enhance the taste of your bread by adding spices. Nutmeg and cloves can bring warmth to the flavor. A pinch of nutmeg adds depth. Cloves give a nice hint of earthiness. You can also swap granulated sugar for honey. Honey adds a unique floral sweetness. Just remember to reduce the liquid in your mix. This keeps the bread moist and tasty. For gluten-free options, you can use a gluten-free flour blend. It works well and keeps the bread soft. Make sure the blend has a good binding agent. If you want to go vegan, replace eggs with applesauce or flaxseed meal. Use one tablespoon of flaxseed meal mixed with three tablespoons of water per egg. This keeps the bread moist and fluffy, just like the original. Get creative with your bread by adding different fruits or nuts. Try diced peaches or blueberries for a fruity twist. Chopped walnuts or pecans add a nice crunch. If you love chocolate, mix in chocolate chips. Dark chocolate pairs well with the sweetness of the apples. Each add-in brings a new flavor to try, making every loaf unique. For the full recipe, check out the World’s Best Apple Cinnamon Zucchini Bread. To keep your apple cinnamon zucchini bread fresh, store it properly. For short-term storage, wrap the bread tightly in plastic wrap. Place it in an airtight container or a resealable bag. This method keeps the bread moist and tasty for about 3 to 5 days at room temperature. If you want to store it for longer, freezing is an excellent option. Wrap the cooled bread in plastic wrap, then in aluminum foil. Label it with the date. It will last for up to 3 months in the freezer. When it’s time to enjoy your bread again, you want it warm and soft. To reheat without drying it out, preheat your oven to 350°F (175°C). Place the bread in the oven for about 10 minutes. If you prefer using a microwave, slice the bread and heat it for 10 to 15 seconds. This method warms the bread without losing its moisture. At room temperature, your apple cinnamon zucchini bread can last up to 5 days. Keep an eye out for signs of spoilage. If you see mold, or if the bread has a sour smell, it’s time to toss it. When stored properly in the freezer, it can last up to 3 months. Enjoy your delicious creation at its best! Yes, you can make this recipe without sugar. Here are some options for sugar substitutes: - Honey: Use about 3/4 cup for each cup of sugar. - Maple syrup: Use 3/4 cup but reduce liquid slightly. - Stevia: A little goes a long way. Check the package for amounts. - Applesauce: Replace sugar with an equal amount of unsweetened applesauce. These substitutes may change the taste and texture slightly. Always taste as you go! To keep the bread from sinking, follow these tips: - Don’t overmix: Mix just until combined. - Check leavening agents: Make sure baking powder and soda are fresh. - Avoid too much moisture: Drain excess water from zucchini. - Use room temperature eggs: They mix better and help with rising. These steps help maintain the bread's structure during baking. Yes, you can make mini loaves! Here’s how: - Use mini loaf pans: Adjust the baking time to about 30-40 minutes. - Check for doneness: Use a toothpick to test the center. - Reduce the batter amount: Fill each mini pan about halfway. These changes ensure your mini loaves bake evenly and taste great! For the complete recipe, refer to the Full Recipe section. This blog post covered how to make delicious zucchini apple bread. We went through all the main ingredients you need, like grated zucchini and finely grated apples. I shared step-by-step instructions, including mixing wet and dry ingredients. Remember the tips for a moist texture and perfect rise. You can also explore variations and storage tips. Now, you can confidently bake this bread and experiment with flavors. Your kitchen will smell amazing, and your taste buds will thank you. Enjoy your baking adventure!
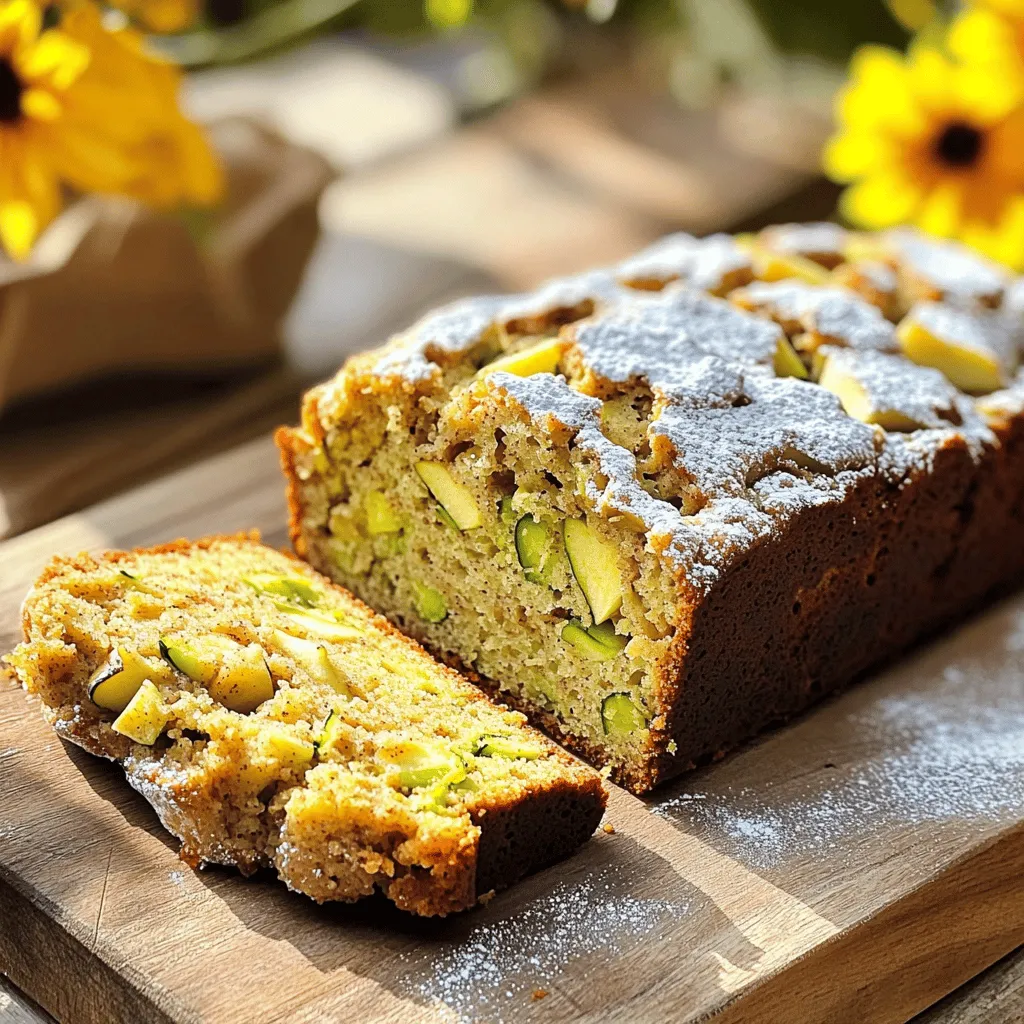
World’s Best Apple Cinnamon Zucchini Bread Recipe
Are you ready to bake the world’s best apple cinnamon zucchini bread? This recipe combines moist zucchini, sweet apples, and warm spices for a treat
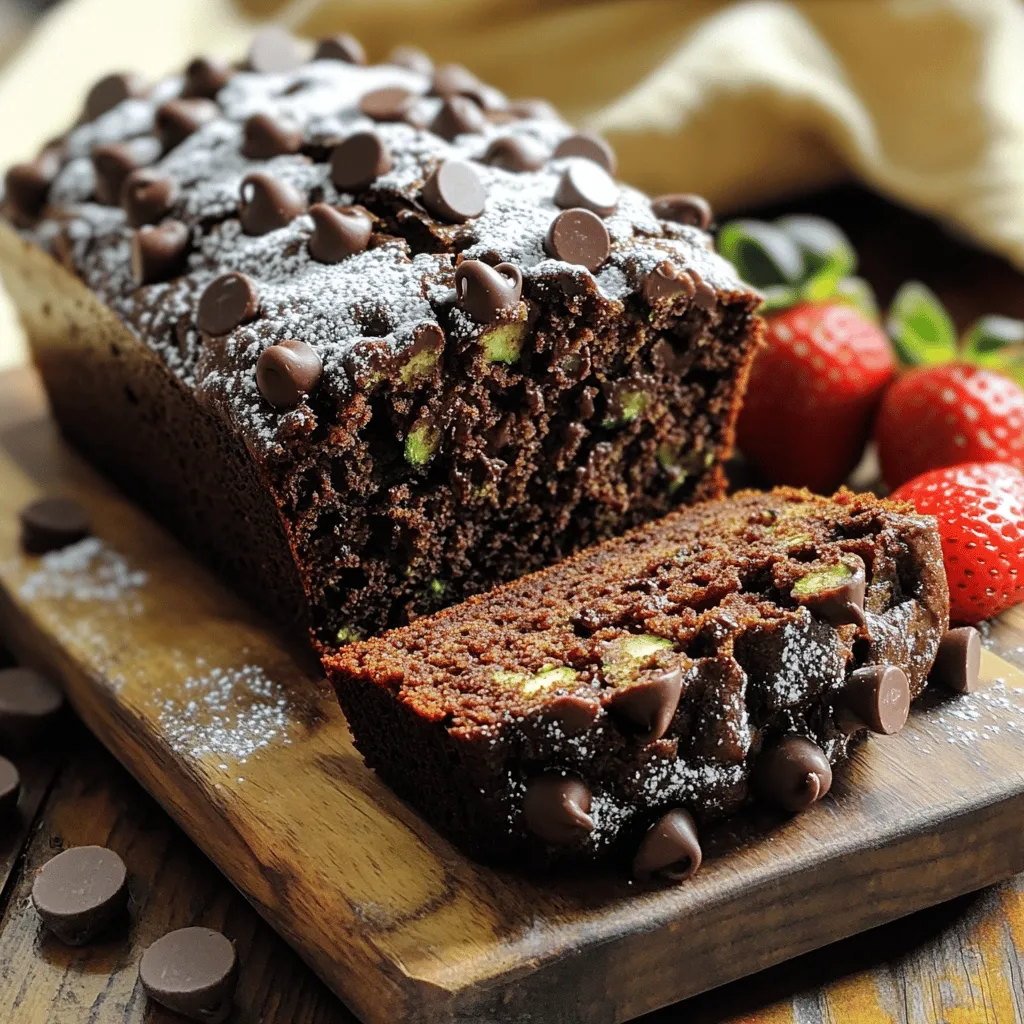
- Grated zucchini preparation: Start with fresh zucchini. Wash it well and grate it using a box grater. Make sure to squeeze out the excess water. This helps keep your cookies from being too wet. The zucchini adds moisture and a soft texture. - Types of cocoa powder: Use unsweetened cocoa powder for rich flavor. You can pick between Dutch-process or regular cocoa. Dutch-process cocoa gives a darker color and milder taste. Regular cocoa provides a stronger chocolate flavor. - Sugar variations (granulated vs. brown sugar): I use both granulated and brown sugar in this recipe. Granulated sugar helps the cookies spread. Brown sugar adds moisture and a chewy texture. The blend gives the best of both worlds. - Chocolate chip varieties: You can mix in different types of chocolate chips. Dark chocolate adds a rich flavor. Milk chocolate offers a sweeter taste. Semi-sweet chocolate is a classic choice. Pick what you love! - Walnuts or other mix-ins: Chopped walnuts add a nice crunch. You can also use pecans or dried fruits like raisins. These add flavor and texture. Feel free to get creative with your mix-ins! - Baking sheets and parchment paper: Use a baking sheet to hold your cookies. Lining it with parchment paper helps prevent sticking and makes cleanup easy. - Mixing bowls and measuring cups: You need some bowls for mixing your ingredients. Measuring cups ensure you get the right amounts for each ingredient. This is key for great cookies! - Oven thermometer for baking accuracy: An oven thermometer checks that your oven is at the right temperature. Ovens can often be off. This tool helps you bake cookies to perfection. First, preheat your oven to 350°F (175°C). This heat helps the cookies bake evenly. While the oven warms, line a baking sheet with parchment paper. This paper keeps cookies from sticking. It makes cleanup easy too. In a medium bowl, whisk together the flour, cocoa powder, baking soda, baking powder, and salt. Use a whisk to mix well. Air helps make cookies soft. For measuring, use the spoon and sweep method. Spoon flour into a cup, then level it off with a knife. In a large bowl, mix the grated zucchini, granulated sugar, brown sugar, vegetable oil, vanilla extract, and egg. Stir until everything blends well. The egg helps bind the ingredients. Oil keeps the cookies moist and soft. Use a cookie scoop or two spoons to drop mounds of dough onto the baking sheet. Space them about 2 inches apart. This helps them bake evenly. Bake for 10-12 minutes. The edges should be set, and the centers a bit soft. Let them cool on the sheet for 5 minutes before moving them to a wire rack. For the full recipe, check the section at the end. To make great chocolate zucchini cookies, you must manage moisture. Zucchini contains a lot of water. If you do not squeeze it out, your cookies can turn into a mushy mess. Grate your zucchini first. Then, use a clean kitchen towel to press it. This step helps to remove the excess water. For chewy cookies, mix the batter just enough. Overmixing can lead to tough cookies. Also, keep an eye on the baking time. Remove the cookies while they still look soft in the center. They will firm up as they cool. Want to boost flavor? Start with spices! A pinch of cinnamon or nutmeg can add warmth. You can also try adding a splash of almond extract for a nutty touch. Balance the sweetness by using half granulated and half brown sugar. Brown sugar adds moisture and depth, while granulated sugar keeps it light. Sometimes cookies spread too much. If this happens, chill the dough for 30 minutes before baking. Chilling helps the cookies hold their shape. If your cookies turn out dry or crumbly, you might need more moisture. Check if you added enough zucchini and oil. You can also add a splash of milk to the dough. This can help bring back some softness. For the full recipe, be sure to check out the [Full Recipe]. {{image_2}} You can make small changes to this cookie recipe for a healthier treat. Start by swapping out regular sugar for coconut sugar or maple syrup. These options add a nice flavor and sweetness without being overly sugary. You can also use avocado oil or applesauce instead of vegetable oil. These swaps keep your cookies moist and tasty. For flour, consider using whole wheat flour. This adds fiber and nutrients while still giving you a soft cookie. You can mix whole wheat flour with all-purpose flour to keep the texture light. If you want to change up the flavor, try adding spices or extracts. A touch of peppermint extract can give your cookies a fun minty twist. Or, use orange zest for a bright, citrusy note. Both options work well with chocolate. You can also include different nuts or seeds. Chopped pecans or almonds add crunch. Sunflower seeds or pumpkin seeds boost nutrition and add texture, too. Mix and match to find your favorite combination. If you need gluten-free cookies, there are great options available. Look for a gluten-free flour blend at the store. These blends often contain rice flour, tapioca flour, and other ingredients to mimic regular flour. When using gluten-free flour, you might need to adjust the liquid in your dough. Start with a little less zucchini or add a splash of milk to keep your cookies soft. This makes sure your cookies stay chewy and delicious. For a complete guide, check out the Full Recipe to see how these variations fit in! To keep your cookies fresh, use an airtight container. Line the bottom with wax paper to help absorb moisture. Store them at room temperature for up to one week. If you want them to last longer, place them in the fridge for up to two weeks. For best results, avoid stacking the cookies directly on top of each other to prevent squishing. You can freeze cookie dough before baking. Scoop the dough onto a baking sheet lined with parchment paper. Freeze the mounds for about an hour, then transfer them to a freezer-safe bag. They can last up to three months in the freezer. To bake frozen cookies, remove the dough from the freezer and place it on a baking sheet. Preheat the oven and bake for about two extra minutes. Keep an eye on them to check for doneness. Check your cookies for any changes in smell or appearance. If they smell off or have mold, it's time to toss them. A soft or stale texture means they are losing freshness. To maintain their best quality, consume them within the suggested storage times. For more details, check the Full Recipe for Chocolate Zucchini Delight Cookies. Yes, you can use frozen zucchini. Make sure to thaw it first. Squeeze out excess water after thawing. This helps your cookies stay soft and not too wet. You can test if the zucchini is ready by pressing it in a clean towel. If it feels mushy, it is good to go. Frozen zucchini works well, and you won’t lose flavor. These cookies have some healthy points. They contain zucchini, which adds fiber and nutrients. Each cookie has about 100 calories. They have sugar, but you can cut back on it if you like. The cocoa powder also has antioxidants. If you want to make them even healthier, consider using whole wheat flour or natural sweeteners. To make these cookies vegan, replace the egg with flaxseed or applesauce. Use 1 tablespoon of ground flaxseed mixed with 2.5 tablespoons of water. Let it sit until it thickens. For dairy, use plant-based chocolate chips. You can also choose a vegetable oil that fits your diet, like coconut oil. These swaps keep your cookies delicious and vegan-friendly. These cookies are great on their own, but you can jazz them up. Try serving them warm with vanilla ice cream. The mix of warm and cold is a delight. You can also pair them with a glass of cold milk or a hot cup of coffee. For a fun twist, serve them with a drizzle of chocolate sauce on top. In this post, we explored how to make delicious chocolate zucchini cookies. We covered key ingredients like grated zucchini, different cocoa powders, and sugar types. You learned essential tools for baking and step-by-step instructions for perfect results. I shared tips to enhance flavor and texture, plus variations for health-conscious bakers. Lastly, we discussed how to store and freeze cookies. With this knowledge, you can create tasty treats that impress friends and family. Enjoy baking and experimenting with your own twists!
Chocolate Zucchini Cookies Delightfully Soft Treat
Are you ready to indulge in a sweet treat that surprises with every bite? Chocolate Zucchini Cookies are an irresistible mix of chocolatey goodness and
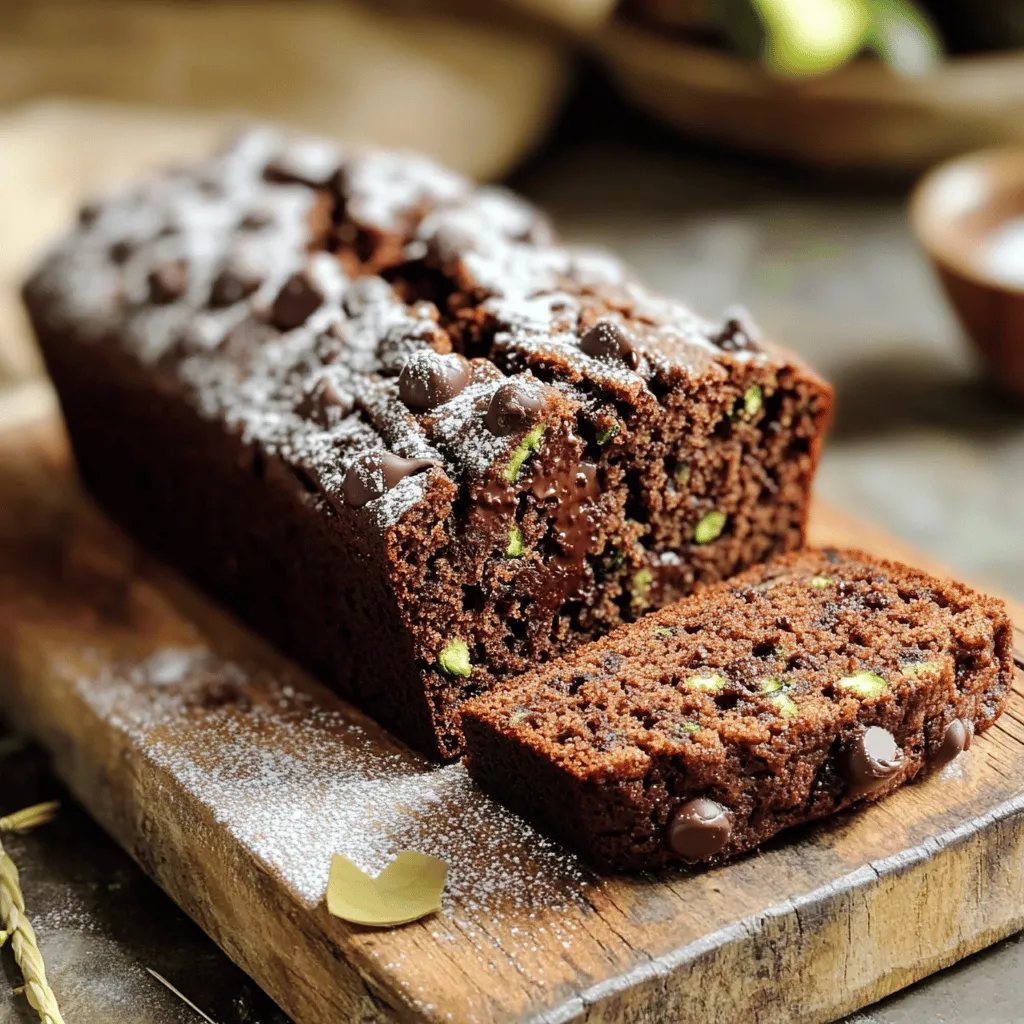
- 2 cups shredded zucchini (about 1 medium zucchini) - 1 cup almond flour - 1/2 cup cocoa powder (unsweetened) The key to this bread is the shredded zucchini. It adds moisture and keeps the bread soft. I love using almond flour as it gives a nutty flavor and is gluten-free. Unsweetened cocoa powder brings rich chocolate notes without added sugar. - 1/2 cup honey or maple syrup - 1/4 cup coconut oil, melted For sweetness, I choose either honey or maple syrup. Each option gives a unique taste. The coconut oil adds healthy fat and a slight tropical hint to the bread. - 3 large eggs - 1 teaspoon vanilla extract - 1/2 teaspoon baking soda - 1/2 teaspoon baking powder - 1/4 teaspoon sea salt - 1/2 cup dairy-free chocolate chips (optional) Eggs bind the ingredients and provide protein. Vanilla extract enhances the flavor. Baking soda and powder help the bread rise, while sea salt balances the sweetness. If you love chocolate, add dairy-free chocolate chips for extra richness. For the complete list and more details, check the Full Recipe. - Preheat the oven to 350°F (175°C). - Grease the loaf pan with coconut oil or line it with parchment paper. Setting the right temperature is key to baking perfect bread. Greasing the pan helps the bread slide out easily. - Combine almond flour, cocoa powder, baking soda, baking powder, and sea salt. In a large bowl, mix these dry ingredients well. Almond flour gives the bread a nice texture. Cocoa powder adds a rich chocolate flavor. Baking soda and baking powder help it rise. - Combine shredded zucchini, sweetener, coconut oil, eggs, and vanilla. In another bowl, mix the wet ingredients. The zucchini keeps the bread moist. You can use honey or maple syrup for sweetness. Melted coconut oil adds a lovely flavor. - Mix wet and dry ingredients until just combined. - Fold in optional chocolate chips. Now, pour the wet mix into the dry mix. Stir gently until they are just combined. Be careful not to overmix. If you like, fold in some chocolate chips for extra delight. - Pour batter into prepared pan. - Bake for 45-50 minutes. Once your batter is ready, pour it into the pan. Smooth the top with a spatula. Place it in the oven and bake for 45 to 50 minutes. The bread is done when a toothpick comes out clean. - Cool in the pan for 10 minutes before transferring. Once baked, let the bread cool in the pan for about 10 minutes. Then, carefully transfer it to a wire rack to cool completely. Enjoy your homemade Paleo chocolate zucchini bread! To make the best Paleo chocolate zucchini bread, avoid overmixing the batter. Overmixing can make the bread dense and heavy. Mix just until you see no dry spots. This keeps your loaf light and fluffy. When it comes to shredding zucchini, use a box grater or a food processor. Make sure to squeeze out excess moisture from the shredded zucchini. This step prevents your bread from becoming soggy. You want a nice, even texture. For serving, slice the bread while it’s warm or at room temperature. A sharp knife helps create clean slices. You can dust the top lightly with cocoa powder for a nice touch. Serve with a dollop of almond butter or dairy-free yogurt for added flavor. This makes your dish look appealing and adds a creamy texture. Almond flour shines in this recipe. It’s rich in healthy fats and low in carbs. This nut flour provides protein and vitamin E. Zucchini brings in moisture and fiber, making your bread moist. It also adds vitamins A and C, which are great for your health. Natural sweeteners like honey and maple syrup fit perfectly in Paleo recipes. They give a sweet taste without processed sugars. These sweeteners can offer antioxidants, making your bread not just tasty but also nutritious. For the full recipe, check out the details above. Happy baking! {{image_2}} You can make your Paleo chocolate zucchini bread even better with a few tweaks. Try using different sweeteners like agave or coconut sugar. These can change the taste and sweetness level. If you want some crunch, add nuts or seeds. Walnuts or pumpkin seeds work great in this recipe. They add texture and flavor that pairs well with the chocolate. For those following a vegan diet, you can use flax eggs instead of regular eggs. To make a flax egg, mix one tablespoon of ground flaxseed with three tablespoons of water. Let it sit for about five minutes until it thickens. This substitute still binds the bread well. If you need a gluten-free option, you can stick with the almond flour in the recipe. It naturally fits into gluten-free diets, making this bread safe for many. You can also play with seasonal flavors. Try adding spices like cinnamon or nutmeg for warmth. These spices give the bread a cozy feel, perfect for fall. Another fun idea is to include seasonal fruits or veggies. Grated carrots or sweet potatoes can add sweetness and nutrients. These add-ins make the bread unique and cater to what you have on hand. You can find the full recipe for this delightful treat [here]. After you bake your bread, let it cool completely on a wire rack. Once cool, slice the bread. Place the slices in an airtight container. I recommend using a glass container with a tight lid. This keeps the bread fresh longer. You can store it at room temperature for up to three days. If you live in a humid area, refrigeration is better. Just be aware that it may dry out a bit. To freeze slices, wrap them well in plastic wrap. Then, put the wrapped slices in a freezer bag. This helps to prevent freezer burn. You can keep them in the freezer for up to three months. When you want to enjoy some, take a slice out and let it thaw in the fridge overnight. For a quick option, you can microwave it for about 20 seconds. This warms it up and brings back the soft texture. When stored properly, your Paleo chocolate zucchini bread lasts about three days at room temperature. In the fridge, it can last up to a week. If you freeze it, aim to eat it within three months for the best flavor. Always check for signs of spoilage. If you see mold or if it smells off, it's best to toss it. Keeping an eye on your bread helps you enjoy it at its best. Yes, you can make this recipe without eggs. Common substitutes include flaxseed meal or chia seeds. To use flaxseed, mix 1 tablespoon of ground flaxseed with 3 tablespoons of water. Let it sit for about 5 minutes. This will create a gel-like mixture that works well in baking. Chia seeds can be used in the same way. Just remember, the texture may change slightly. To make this bread sweeter, you can adjust the sweeteners. Try adding more honey or maple syrup. You could also use coconut sugar or agave nectar. Each sweetener has a unique flavor, so feel free to experiment. Just make sure to keep your liquid ratios in mind. Too much liquid can change the bread's texture. Each slice of Paleo Chocolate Zucchini Bread has about 150 calories. You can expect around 8 grams of fat, 3 grams of protein, and 18 grams of carbs. This bread is packed with healthy fats from almond flour and coconut oil. It also provides fiber from the zucchini. These nutrients make it a great option for a snack or breakfast. You can find pre-made Paleo chocolate zucchini bread at health food stores. Brands like Simple Mills and Paleo Baking Company often carry it. You can also check local farmers' markets. Some bakeries focus on gluten-free and Paleo options. It's a good idea to read the labels to ensure they meet your dietary needs. Using regular flour instead of almond flour will change the bread's texture and taste. Almond flour is gluten-free, while regular flour contains gluten. This means the bread may not rise as well and could be denser. If you want to experiment, consider using a gluten-free blend that includes almond flour. This will help maintain the intended texture and flavor. This blog covered how to make Paleo Chocolate Zucchini Bread. We talked about the main ingredients like zucchini, almond flour, and natural sweeteners. I shared step-by-step instructions, tips for better texture, and healthy ingredient benefits. You also learned about variations and storage options. Remember, making this bread is easy and fun. You can customize it to fit your taste. Enjoy baking and tasting your delicious creation!
Paleo Chocolate Zucchini Bread Delightful and Healthy
Looking for a tasty, guilt-free treat? My Paleo Chocolate Zucchini Bread combines rich chocolate flavor with the health benefits of zucchini. It’s easy to make