Breakfast

Cooking is all about the right ingredients. For a tasty Tater Tot Breakfast Casserole, gather these items: - 32 ounces frozen tater tots - 8 large eggs - 1 cup milk - 1 cup shredded cheddar cheese - 1 cup cooked breakfast sausage, crumbled - 1 cup diced bell peppers (mixed colors) - 1 small red onion, diced - 1 teaspoon garlic powder - 1 teaspoon paprika - Salt and pepper to taste - Fresh chives or parsley for garnish These ingredients blend well to create a delightful dish. The frozen tater tots serve as a crispy base, while the eggs and milk make the casserole creamy. The cheese adds a rich flavor, and the sausage gives it a hearty touch. Fresh vegetables like bell peppers and onions add color and nutrition. This mix makes the casserole great for breakfast or brunch. You can find the full recipe to see how these ingredients come together. - Preheat the oven: Start by setting your oven to 350°F (175°C). This step is key for even cooking. - Combine egg mixture: In a large bowl, whisk together 8 large eggs, 1 cup milk, 1 teaspoon garlic powder, 1 teaspoon paprika, and salt and pepper to taste. Make sure it is mixed well to get a smooth texture. - Layer ingredients in the baking dish: Take a greased 9x13 inch baking dish. Spread 32 ounces of frozen tater tots evenly across the bottom. Next, sprinkle 1 cup of crumbled cooked breakfast sausage over the tater tots. Then, add 1 cup of diced bell peppers and 1 small diced red onion on top. Finally, pour your egg mixture over all the layers. Top it off with 1 cup of shredded cheddar cheese to cover the casserole fully. - Bake the casserole: Place the dish in your preheated oven. Bake for 45-50 minutes. You want the eggs to set and the top to get golden brown. - Cooling and serving tips: After baking, let the casserole cool for about 5 minutes. This cooling time helps it hold its shape when you slice it. - Ideas for garnishing: For a fresh touch, add some chopped chives or parsley on top before serving. This adds color and flavor. - Options for side dishes: Serve this casserole with fresh fruit or a simple green salad. This balance of flavors will brighten your meal. For the full recipe, check out the details above. Enjoy your cooking! To get that golden top, bake the casserole until the cheese bubbles. Keep an eye on it. If it browns too fast, cover it with foil. This will help even out cooking. For even cooking, spread the tater tots evenly. Layer the sausage, peppers, and onion well. Pour the egg mixture slowly to cover everything. This helps all the flavors mix nicely. If you want to swap ingredients, there are many options. For a dairy-free version, use plant-based milk and cheese. You can replace sausage with mushrooms or beans for a veggie twist. Adding extra flavors can really make a difference. Try mixing in fresh herbs like thyme or oregano. A pinch of cayenne or black pepper can add a nice kick. You can find more ideas in the Full Recipe. {{image_2}} You can easily swap ingredients in this dish. Different cheeses add unique flavors. Try pepper jack for a spicy kick or mozzarella for a creamy texture. You can also go for a mix of cheeses for added depth. If you want to switch out the sausage, bacon is a great choice. It brings a smoky taste and crispy texture. For a healthier option, add veggies instead. Spinach, mushrooms, or zucchini work well and boost nutrients. Want to try a different way to cook this casserole? A slow cooker is perfect for busy mornings. Just layer the ingredients in the slow cooker and set it on low. Cook for about 6-8 hours. An Instant Pot is also a great option. Use the sauté function first to cook your veggies and meat. Then, layer in the tater tots and egg mixture. Cook on high pressure for about 25 minutes. This method saves time and keeps the flavors locked in. For the full recipe, check out the complete guide to Tater Tot Breakfast Casserole! To store your Tater Tot Breakfast Casserole, use airtight containers. Glass or plastic containers work great. Ensure the casserole is cool before sealing to prevent moisture buildup. Label the containers with the date. This way, you know how long they have been in the fridge. Store leftovers in the refrigerator for up to three days. When you’re ready to enjoy leftovers, the best method is to use the oven. Preheat your oven to 350°F (175°C). Place the casserole in a baking dish and cover it with foil. Bake for about 20-25 minutes. This keeps the dish moist and warm. You can also use the microwave for quick reheating. Place a slice on a microwave-safe plate. Heat it for about one minute. Check if it’s warm enough; if not, heat in short bursts. To maintain texture, avoid overheating. Overcooked casserole can turn soggy. Aim for just warm enough to enjoy. Can I make this casserole ahead of time? Yes, you can! Just prepare it a day in advance. Store it in the fridge before baking. When ready, bake it straight from the fridge. You may need to add a few extra minutes to the cooking time. What can I serve with Tater Tot Breakfast Casserole? This dish pairs well with fresh fruit or a light salad. You can also serve it with toast or muffins for a full breakfast. A side of yogurt adds a nice touch too. Can I use fresh potatoes instead of frozen tater tots? Yes, you can use fresh potatoes. Just cut them into small cubes and par-cook them first. This ensures they cook evenly with the rest of the dish. Is there a vegetarian version of this recipe? Absolutely! You can skip the sausage and use more veggies instead. Try adding mushrooms, kale, or spinach for extra flavor. How many calories per serving? Each serving has about 300-350 calories. This can change based on your ingredient choices. Is this dish gluten-free? Yes, as long as you ensure your tater tots are gluten-free. Always check the package to be sure. Enjoy your meal without worry! For the Full Recipe, check back to ensure you have all the steps clear! This blog post covered a tasty tater tot breakfast casserole recipe. You learned about the key ingredients and step-by-step instructions. I shared tips for perfecting the dish and ideas for customization. You also saw how to store leftovers and reheat them right. In the end, this dish is fun to make and can fit many tastes. Try your own twists to make it special. Enjoy cooking and sharing this meal with friends and family!
Tater Tot Breakfast Casserole Delightful Morning Dish
Start your day right with a Tater Tot Breakfast Casserole! This dish is packed with tasty ingredients like eggs, cheese, and sausage, all layered with
To make Churro French Toast, you need a few key items. Here’s what you will need: - 4 slices of thick-cut bread (brioche or challah recommended) - 2 large eggs - 1 cup milk - 1 tablespoon vanilla extract - 1 teaspoon ground cinnamon - 1 tablespoon sugar - 1 cup granulated sugar (for coating) - 1 teaspoon ground cinnamon (for coating) - 2 tablespoons unsalted butter (for frying) These ingredients work together to create that sweet, churro flavor you love. Choosing the right bread is key. Thick-cut bread holds up well and soaks up the mixture. I recommend using brioche or challah. They are soft and sweet, making them perfect for this dish. You can also try Texas toast or any bread that is fluffy and thick. Toppings can take your Churro French Toast to the next level. Here are some fun ideas: - Whipped cream - Chocolate sauce - Fresh fruit like strawberries or bananas - A drizzle of caramel sauce Feel free to mix and match! Each topping can add a new twist to your brunch. For the full recipe, refer to the earlier section. Enjoy your tasty creation! To start, grab a mixing bowl. You will need to whisk together the following: - 2 large eggs - 1 cup milk - 1 tablespoon vanilla extract - 1 teaspoon ground cinnamon - 1 tablespoon sugar Make sure everything mixes well. This step gives your French toast flavor and richness. It should look smooth and creamy. Next, heat a skillet or griddle over medium heat. Add 1 tablespoon of unsalted butter and let it melt. Dip each slice of thick-cut bread into the egg mixture. Ensure each slice is soaked well on both sides. Let any extra mixture drip off. Now, place the soaked bread onto the skillet. Cook for 2-3 minutes on each side. You want it to be golden brown. Keep an eye on it to avoid burning. While the French toast cooks, mix the cinnamon sugar coating in a shallow dish. Combine: - 1 cup granulated sugar - 1 teaspoon ground cinnamon Once the French toast is cooked, take it off the skillet. While it’s still warm, coat it in the cinnamon sugar mixture. Press down gently to make sure it sticks. Repeat this process with the remaining bread slices. If needed, add more butter to the skillet for frying. Enjoy your Churro French Toast warm! You can find the full recipe for more details. Choosing the right bread is key. I love using thick-cut brioche or challah. These types soak up the egg mixture well. They also create a soft inside with a crisp outside. You can also try sourdough for a tangy flavor. Keep the bread fresh for the best taste. Stale bread works too; it absorbs the egg mixture well. To get that perfect crispiness, cook on medium heat. Make sure your skillet is hot before adding the bread. Use enough butter to cover the pan. Flip the bread gently so it stays intact. Cook each slice for 2-3 minutes per side. Look for a golden-brown color. If you rush it, the toast may end up soggy. Serve your Churro French Toast with whipped cream and chocolate sauce. Fresh fruits like strawberries or bananas add color and flavor. A sprinkle of extra cinnamon sugar gives a lovely touch. Maple syrup can work too, but keep it light. Enjoy with a side of coffee or hot chocolate for a cozy brunch. Check out the Full Recipe for more tips! {{image_2}} To make Chocolate Chip Churro French Toast, you’ll need chocolate chips. After dipping the bread in the egg mixture, sprinkle some chocolate chips on one side before cooking. This step adds a rich, gooey center to each slice. The sweet chocolate balances well with the cinnamon sugar. Your family will love the surprise in every bite! For Nutella-Stuffed Churro French Toast, spread a thick layer of Nutella between two slices of bread. Dip the stuffed bread in the egg mixture as usual. Cook it until golden brown and crispy. The warm Nutella will ooze out when you cut into it. This treat is perfect for a special brunch. You can enjoy Churro French Toast even if you follow a vegan diet. Replace the eggs with a mix of almond milk and ground flaxseed. Use your favorite plant-based milk for the recipe. Choose a vegan butter substitute for frying. This way, you can savor the flavor without any animal products. Everyone can share in this delicious meal! For a full recipe, check out the details above. You can store leftover Churro French Toast in the fridge. Place the slices in an airtight container. Make sure to cool them first. They will stay fresh for up to three days. If you want to reheat them later, it’s easy! You can also freeze Churro French Toast. Wrap each slice in plastic wrap and then foil. This keeps them safe from freezer burn. They can last up to two months in the freezer. To reheat, simply pop them in the toaster or oven. Bake at 350°F for about 10-15 minutes. Leftovers will taste best when eaten within three days. After that, the texture may change. If frozen, consume within two months for the best flavor. Always check for any signs of spoilage before eating. Enjoy your delicious Churro French Toast later without worries! I recommend using thick-cut bread for the best texture. Brioche and challah are perfect choices. They soak up the egg mixture well and stay soft. This helps create a fluffy inside. The outer layer gets crispy when fried. You can also use Texas toast if you can’t find brioche or challah. Its thickness works nicely in this recipe. Yes, you can prepare Churro French Toast ahead of time. Make the egg mixture and soak the bread slices. Then, place them in the fridge. Cover them tightly to keep them fresh. When you're ready to cook, just heat your skillet. Cook them as you normally would. This saves time on busy mornings. To make Churro French Toast gluten-free, use gluten-free bread. Many brands offer tasty options. Just make sure to check the label. The rest of the recipe stays the same. You can soak and fry the gluten-free bread as usual. The cinnamon sugar coating adds the same delicious flavor. Enjoy this tasty treat without worry! For the complete recipe, check out the Full Recipe section. Churro French Toast combines sweet and crispy with a tasty twist. We explored essential ingredients, including types of bread and toppings. Then, the step-by-step guide helped you create this dish easily. Don’t forget the tips for crispiness and texture. Plus, we shared exciting variations like Nutella-stuffed options. Finally, we looked at how to store leftovers. Enjoy this delightful treat anytime, and impress your friends with your skill.
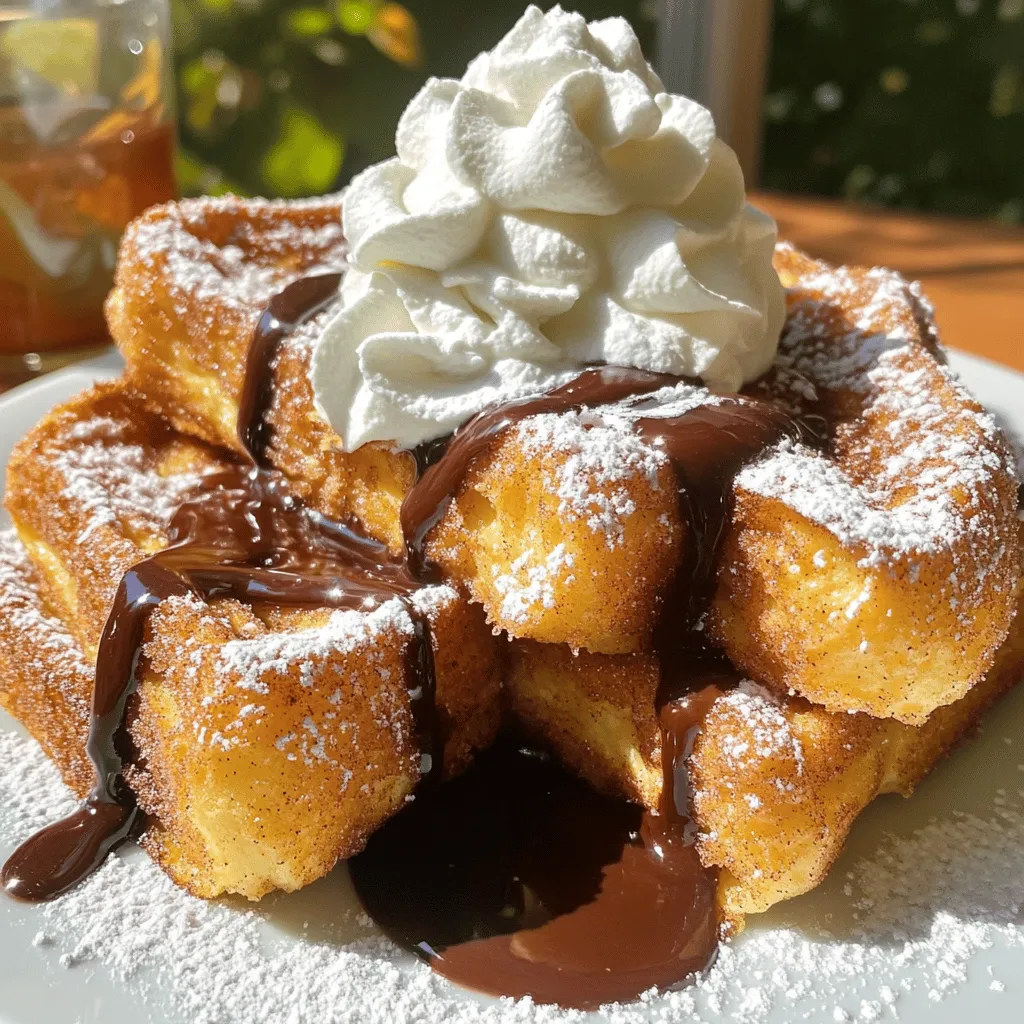
Churro French Toast Delight for Weekend Brunch
If you are ready to turn your weekend brunch into a fiesta, you need to try Churro French Toast! This sweet twist on a classic
- 8 Hawaiian rolls, sliced in half - 4 large eggs - 1 cup coconut milk - 1 teaspoon vanilla extract - 1 teaspoon ground cinnamon These main ingredients create a sweet and soft base for the dish. The Hawaiian rolls add a touch of sweetness. The eggs and coconut milk keep the texture rich. Vanilla and cinnamon bring warmth and depth to flavor. - Powdered sugar for dusting - Fresh pineapple chunks - Toasted coconut These garnishes enhance both the look and the taste. Powdered sugar gives a sweet touch. Fresh pineapple adds a bright, fruity flavor. Toasted coconut brings a nice crunch and extra tropical flair. - Skillet or griddle - Whisk - Mixing bowl A skillet or griddle is key for cooking the French toast evenly. A whisk helps blend the egg mixture smoothly. A mixing bowl holds everything together as you prepare. For the full recipe, check out the Hawaiian Roll French Toast Paradise. This dish blends simplicity and flavor, making it perfect for any breakfast or brunch! - First, whisk together 4 large eggs in a medium bowl. - Add 1 cup of coconut milk, 1 teaspoon vanilla extract, 1 teaspoon ground cinnamon, 1 tablespoon brown sugar, and 1/4 teaspoon nutmeg. Mix until smooth. - Next, heat a large skillet over medium heat. Add a tablespoon of butter to coat the surface. - Take each half of the 8 Hawaiian rolls and dip it in the egg mixture. Make sure it soaks well, but don’t let it get too soggy. - Place the soaked rolls cut side down in the hot skillet. Cook until golden brown, about 2-3 minutes. - Flip the rolls and cook the other side until golden brown as well. - Remove the French toast from the skillet and repeat the process, adding more butter as needed. - Once all the rolls are cooked, serve them warm on a plate. - Dust with powdered sugar and top with fresh pineapple chunks and toasted coconut for a fun finish. For the full recipe, check the details above! To avoid soggy bread, soak each Hawaiian roll half quickly. Dip it gently in the egg mix. You want it moist, not drenched. This will keep the bread fluffy. The best cooking temperature is medium heat. Too hot will burn the outside before the inside cooks. A gentle heat ensures nice, even cooking for the perfect golden brown color. You can add spices like nutmeg or ground ginger for depth. A pinch of salt helps balance the sweetness. You can also use extracts like almond for a twist. For milk options, coconut milk gives a tropical taste. Almond milk works well if you want a lighter flavor. You can try oat milk for a creamy texture too. Serve Hawaiian Roll French Toast with maple syrup for sweetness. Fresh fruits, like berries or banana slices, add freshness. You can also layer it with yogurt for a healthy twist. This dish is great for brunch. It looks beautiful on the table and tastes amazing. Garnish with powdered sugar, pineapple chunks, and toasted coconut for a festive look. For the full recipe, check out the main section. {{image_2}} You can make Hawaiian Roll French Toast even more fun! - Adding fruit like bananas or berries: Slice ripe bananas or toss in fresh berries. They add flavor and color. - Incorporating chocolate chips: Mix in mini chocolate chips for a sweet surprise. They melt and make each bite a treat. You can adjust this recipe to fit your needs. - Vegan version using plant-based substitutes: Use plant-based milk and egg replacer. It tastes great and is still fluffy. - Gluten-free alternatives: Try gluten-free rolls to make it safe for everyone. You won’t lose any taste! You can turn this dish into a fun dessert. - Turning it into a dessert option: Add whipped cream and chocolate sauce. It becomes a sweet delight for any time! - Sweet toppings ideas: Use caramel sauce or fresh fruit. You can also sprinkle nuts for a crunchy bite. Try these variations to make your Hawaiian Roll French Toast unique! For detailed instructions, check out the Full Recipe. To keep your Hawaiian Roll French Toast fresh, store it in the fridge. Place it in an airtight container. This helps keep the moisture in and the flavors intact. You can also wrap each piece in plastic wrap. For reheating, use a skillet or microwave. If using a skillet, heat it over low heat. Add a little butter for flavor. If using a microwave, place a damp paper towel over the French toast. Heat for about 30 seconds. This keeps it soft and warm. You can freeze cooked Hawaiian Roll French Toast. Let it cool completely first. Then, wrap each piece in plastic wrap. After that, place them in a freezer bag. Be sure to remove as much air as possible. When you want to eat it, take a piece out and thaw it in the fridge overnight. To reheat, use the skillet or microwave method mentioned above. Hawaiian Roll French Toast lasts about 3 to 4 days in the fridge. Check for signs of spoilage before eating. If it smells strange or has a slimy texture, throw it away. Enjoy your delicious breakfast treat while it’s fresh! And for the full recipe, check out the earlier sections. Yes, you can use regular bread. However, Hawaiian rolls add a sweet flavor. If you choose white or whole grain bread, the taste will change. You may want to add a bit more sugar to the egg mix to keep that sweetness. To make it dairy-free, simply swap coconut milk for a plant-based milk. Almond milk or oat milk works well. Just make sure to pick a milk that you enjoy. You can still achieve a tasty French toast with these options. The best way to reheat leftover French toast is in a toaster oven. Set it to 350°F (175°C). Place the French toast inside for about 5-7 minutes. This keeps it crisp on the outside and warm inside. You can also use a microwave, but it may make it a bit soggy. Store leftovers in an airtight container in the fridge. They last about 3 days. If freezing, wrap them tightly in plastic wrap. They can last up to 2 months in the freezer. Just remember to reheat thoroughly before enjoying. Yes! You can add other flavors like orange zest or almond extract. These will give your French toast a fun twist. You can also mix in spices like cardamom for a unique taste. Absolutely! You can prepare the egg mixture ahead of time. Store it in the fridge for up to 2 days. Just soak and cook the rolls when you're ready to eat. This makes breakfast quick and easy during busy mornings. Of course! Feel free to use any toppings you like. Maple syrup, whipped cream, and berries are great choices. You can also try a nut butter drizzle for a tasty twist. This blog post shared how to make Hawaiian roll French toast. We covered the main ingredients, step-by-step instructions, and useful tips. You learned about variations, storage tips, and answered common questions. This recipe is simple and fun to make. It’s perfect for any breakfast or brunch. Enjoy experimenting with flavors and toppings. Whether you keep it classic or add your twist, this dish will impress everyone. Get cooking and make a tasty treat today!
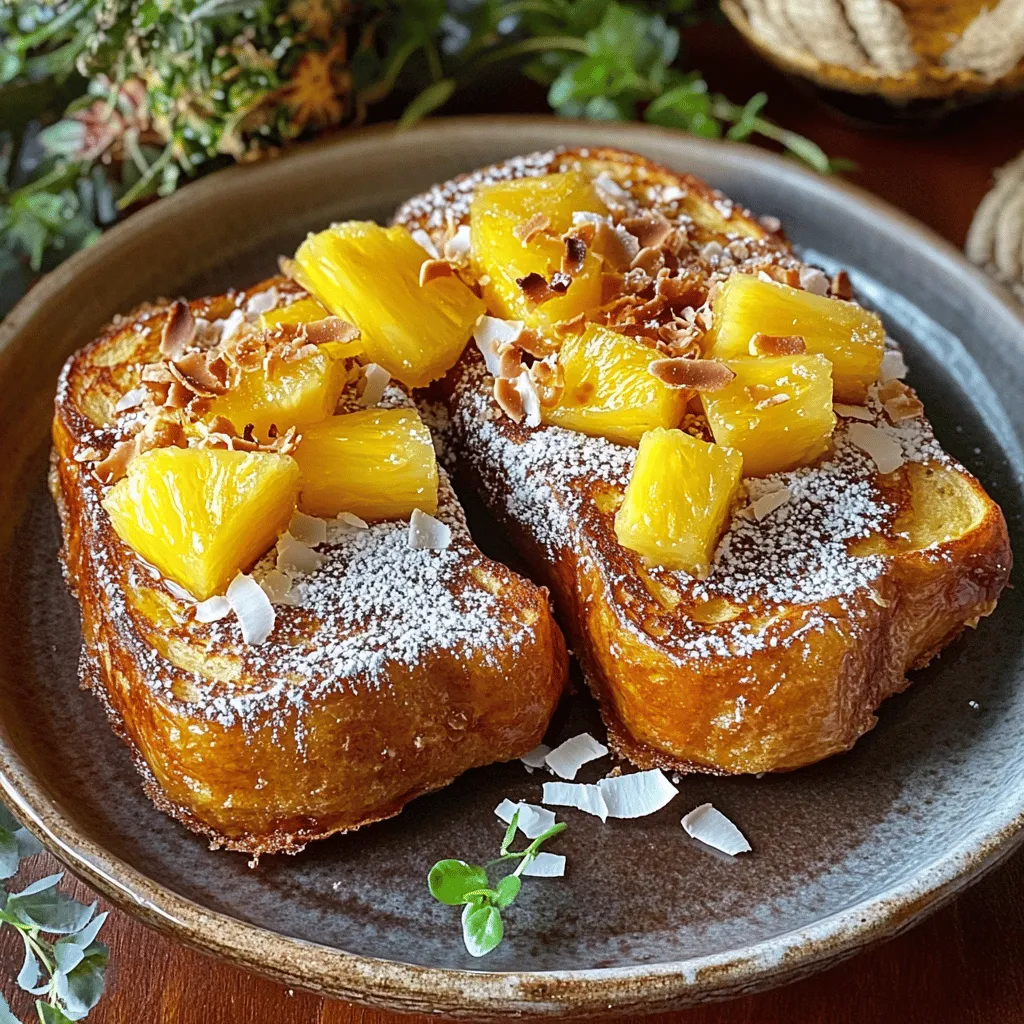
Hawaiian Roll French Toast Quick and Tasty Recipe
Looking for a fun twist on breakfast? Try my Hawaiian Roll French Toast! This quick recipe is simple and uses soft, sweet Hawaiian rolls for
- 2 cups all-purpose flour - 2 tablespoons sugar - 1 tablespoon baking powder - 1/2 teaspoon baking soda - 1/2 teaspoon salt The base of this casserole starts with all-purpose flour. It gives the dish the right texture. Sugar adds a hint of sweetness, while baking powder and baking soda help it rise. Salt balances the flavors, making each bite tasty. - 2 cups buttermilk - 2 large eggs - 1/4 cup unsalted butter, melted - 1 teaspoon vanilla extract Buttermilk makes the pancakes fluffy and moist. Eggs provide structure, while melted butter adds richness. Vanilla extract gives a warm flavor that enhances the blueberries. - 2 cups fresh or frozen blueberries - Maple syrup for serving - Powdered sugar for dusting (optional) Blueberries are the star of the show! They burst with flavor and add color. Maple syrup is perfect for drizzling on top, while powdered sugar can make it look fancy. You can find the full recipe above to get started on this easy breakfast treat. - Preheat oven to 350°F (175°C). - Grease a 9x13 inch baking dish. - Whisk together flour, sugar, baking powder, baking soda, and salt. - Whisk buttermilk, eggs, melted butter, and vanilla extract until smooth. - Combine wet and dry ingredients, stirring gently. - Fold in blueberries and pour into baking dish. - Bake for 25-30 minutes. - Check doneness with a toothpick. - Cool for a few minutes before slicing. - Serve with maple syrup and powdered sugar if desired. For the complete recipe, check out the Full Recipe. To get a fluffy pancake casserole, avoid over-mixing the batter. Mix just until you see no dry flour. A few lumps are okay. Let the batter sit for a few minutes before baking. This short rest helps the flavors blend and the batter rise well. For the best flavor, use fresh blueberries. They burst with juice and add great taste. If fresh blueberries are not available, frozen ones work too. There is no need to thaw them before adding to the batter. They will bake perfectly inside. This casserole is best served warm, topped with maple syrup. The syrup adds sweetness and richness. You can also consider pairing it with whipped cream or yogurt. Both options add creaminess and balance the flavors of the dish. Enjoy this easy breakfast treat with family and friends! {{image_2}} You can switch up the blueberries in this recipe. Use ripe bananas or sweet strawberries instead. They will add a fun twist to your pancake casserole. Another tasty option is to mix berries for a more complex flavor. The combination of flavors makes each bite exciting. Want to change the taste a bit? Adding lemon zest can give your dish a bright and fresh flavor. It adds a nice citrus touch that balances the sweetness. You can also mix in some ground cinnamon. This spice adds warmth and depth, making your breakfast feel cozy and inviting. If you need a gluten-free option, use gluten-free flour. This change keeps the texture nice while making it safe for those with gluten sensitivities. For those who avoid dairy, simply swap buttermilk with a non-dairy milk like almond or oat milk. This way, everyone can enjoy this delicious breakfast treat. After you enjoy your Blueberry Buttermilk Pancake Casserole, let any leftovers cool completely. This step is key to keeping it fresh. Once cool, place it in an airtight container. Store it in the refrigerator for up to three days. This keeps the casserole tasty and safe to eat later. For a quick breakfast, reheat your casserole in the microwave. Just pop a portion on a plate and heat for about 30 seconds to 1 minute. If you want a crispier texture, use the oven. Preheat it to 350°F and place the casserole in for about 10-15 minutes. This will warm it up and give it a nice texture. If you want to save some for later, freeze portions for easy meal prep. Cut the casserole into squares, wrap each piece tightly in plastic wrap, and place them in a freezer bag. When you're ready to eat, thaw in the fridge overnight and reheat as needed. This way, you can enjoy your delicious breakfast treat anytime! You can find the full recipe [here](#)
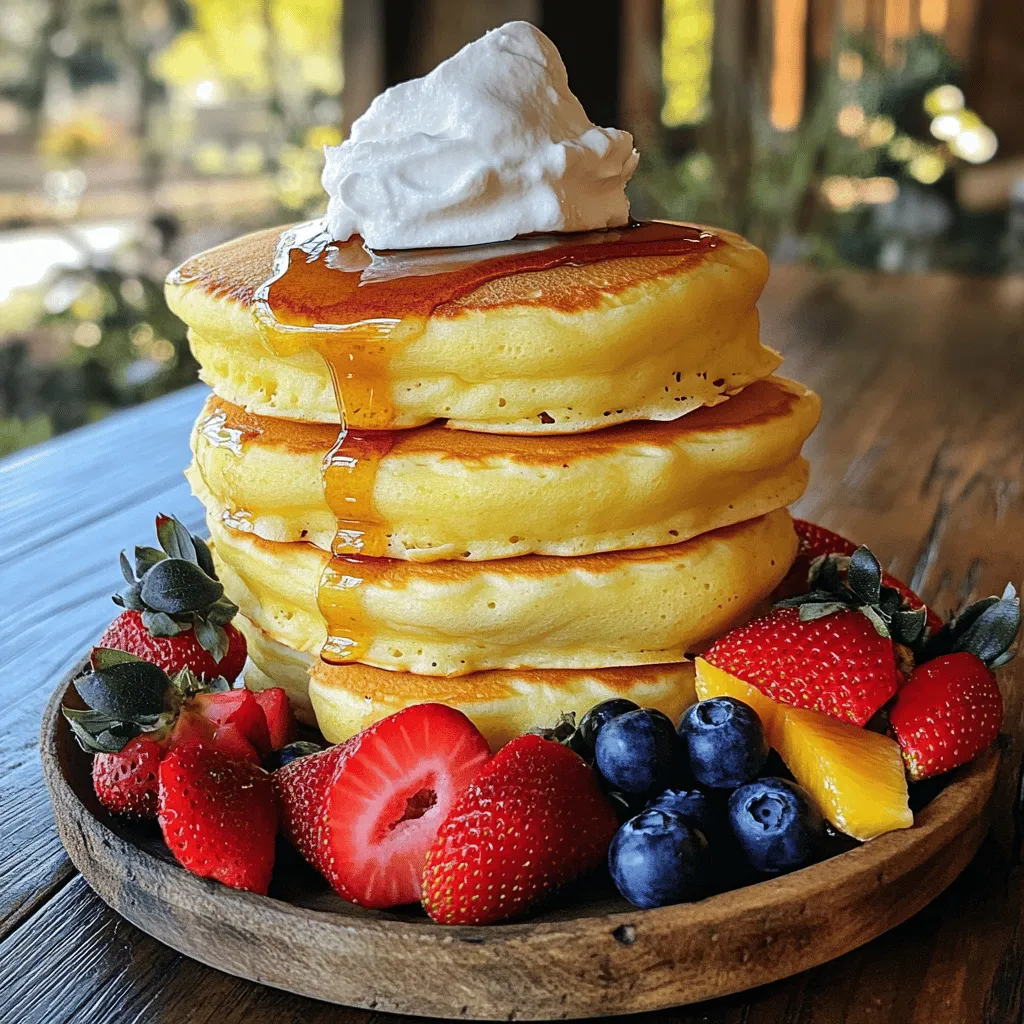
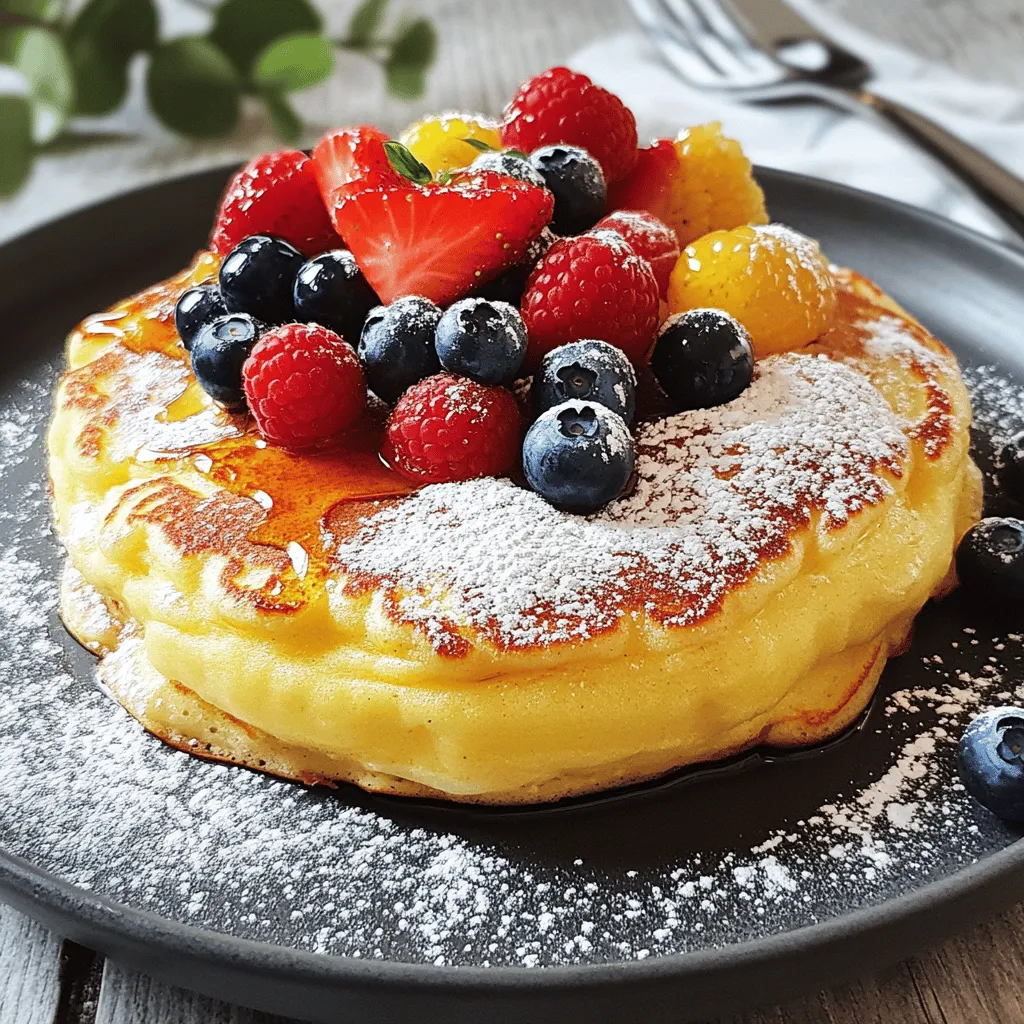
. Yes, but consider adding vinegar or lemon juice to mimic buttermilk acidity. This helps create the same tangy flavor. Just add one tablespoon of either to your regular milk and let it sit for about five minutes before using. Bake at 350°F for 25-30 minutes until golden brown. You can check if it’s done by inserting a toothpick into the center. If it comes out clean, your casserole is ready! Yes, prepare the batter the night before and bake in the morning. This makes breakfast so easy! Just store the batter in the fridge and pour it into the baking dish when you’re ready to bake. Absolutely! Feel free to add nuts, spices, or different fruits as desired. You can mix in chopped pecans or walnuts for a crunchy bite. Try adding a pinch of cinnamon for warmth or even switch the blueberries for strawberries or bananas. Yes, simply reduce the ingredients by half and use a smaller baking dish. This way, you can enjoy a smaller batch without wasting any food. It’s perfect for a cozy breakfast for two! For the full recipe, check out the details above. Blueberry buttermilk pancake casserole is a tasty and fun recipe. You mix dry and wet ingredients, then fold in fresh or frozen blueberries. Bake it, and enjoy a warm breakfast with maple syrup. Remember, you can easily make this dish your own by swapping fruits or adding flavors. Store any leftovers in the fridge for later. With these tips and tricks, your casserole success is guaranteed. Try this recipe for a yummy breakfast experience!
Blueberry Buttermilk Pancake Casserole Easy Breakfast Treat
Imagine waking up to the smell of warm, sweet pancakes without all the fuss. This Blueberry Buttermilk Pancake Casserole is an easy breakfast treat that
To make a tasty breakfast burrito, you need a few key items. Here’s what you will need: - 4 large flour tortillas - 4 large eggs - 1/2 cup black beans, rinsed and drained - 1/2 cup bell peppers, diced (mix of red and green) - 1/4 cup red onion, finely chopped - 1/2 cup shredded cheese (cheddar or a Mexican blend) - 1 avocado, sliced - 1 tablespoon olive oil - 1 teaspoon cumin - 1/2 teaspoon paprika - Salt and pepper to taste - Fresh cilantro, chopped (for garnish) - Salsa or hot sauce (for serving) These ingredients create a solid base for a delicious meal. The tortillas hold everything together, while the eggs provide protein. Beans add fiber and heartiness, and the veggies add color and flavor. You can take your breakfast burritos to the next level with some optional ingredients. Consider adding: - Chopped spinach or kale - Diced tomatoes - Cooked sausage or bacon bits - Jalapeños for heat - Sour cream or Greek yogurt These optional items let you create a burrito that matches your tastes. Feel free to mix and match! Each ingredient adds unique benefits to your breakfast burrito. Here’s a quick look: - Eggs: Great source of protein and healthy fats. - Black beans: High in fiber and protein, keeping you full. - Bell peppers: Packed with vitamins A and C. - Avocado: Full of healthy fats and adds creaminess. - Cheese: Adds flavor and calcium. This dish provides a balanced meal, giving you energy to start your day. For the full recipe, check out the details provided earlier. To make breakfast burritos, start by gathering your ingredients. You need flour tortillas, eggs, black beans, bell peppers, red onion, shredded cheese, avocado, olive oil, cumin, paprika, salt, and pepper. 1. Heat the Oil: In a large skillet, pour the olive oil. Heat it over medium heat. 2. Cook the Veggies: Add finely chopped red onion and diced bell peppers. Stir them for about 3-4 minutes until they soften. 3. Whisk the Eggs: In a bowl, crack the eggs. Add cumin, paprika, salt, and pepper. Mix well with a whisk. 4. Scramble the Eggs: Pour the eggs into the skillet with the veggies. Stir and scramble them for about 5-6 minutes. Cook until the eggs are fully set. 5. Add Black Beans and Cheese: Mix in the black beans and half of the shredded cheese. Stir until the cheese melts slightly. Turn off the heat. Now, it's time to build your burritos. 1. Warm the Tortillas: Heat the tortillas in a dry skillet or microwave. This step makes them soft and easy to handle. 2. Add the Filling: For each tortilla, place a generous scoop of the egg mixture in the center. 3. Top with Avocado and Cheese: Add slices of avocado and the rest of the shredded cheese on top. 4. Fold the Tortilla: Fold the sides of the tortilla inward. Then, roll it from the bottom up. This keeps the filling secure. 5. Toast if Desired: If you like crispy burritos, toast them in the skillet for 2-3 minutes on each side. Cooking eggs and veggies just right is key for great burritos. - Don’t Overcook the Eggs: Remove them from heat when they are just set. They will continue to cook a bit after you take them off the heat. - Use Fresh Veggies: Fresh bell peppers and onion add great flavor and texture. - Season Well: Season your eggs and veggies with salt and pepper. It enhances the taste. - Cook Veggies First: Always cook the veggies before adding the eggs. This step adds depth and flavor to the dish. For the full recipe, check out the detailed instructions above. Enjoy your delicious breakfast burritos! To keep your burritos from falling apart, use warm tortillas. If they are cold, they may crack. Warm them in a skillet or microwave for a few seconds. Next, do not overfill them. A generous scoop of filling works best but avoid too much. Fold the sides of the tortilla before rolling it up. This helps keep everything inside. Add flavor with spices. Cumin and paprika give a nice touch, but you can try others too. Fresh herbs like cilantro bring brightness to your burritos. Also, consider adding some diced jalapeños for heat. If you like it creamy, mix in some sour cream or Greek yogurt. Cheese melts nicely, adding richness. You can use cheddar or a Mexican blend for a great kick. For serving, slice your burritos in half for easy eating. Pair them with salsa or hot sauce for a spicy kick. A fresh salad or fruit on the side brightens the meal. You can also serve them with hash browns or breakfast potatoes for added crunch. For drinks, a smoothie or fresh juice complements your delicious breakfast burritos. Try these ideas and make your meal even better! For the complete recipe, check out the full recipe section. {{image_2}} You can make a tasty vegetarian breakfast burrito with simple swaps. Start with your base of eggs and black beans. Add more veggies like spinach, mushrooms, or zucchini. You can also use fresh herbs like cilantro or parsley for added flavor. For a creamy touch, try adding cream cheese or a dollop of sour cream. If you want a kick, sprinkle in some diced jalapeños. The choices are endless! If you're a meat lover, you can easily amp up your burrito. Start with the egg and bean mix. Then, add cooked sausage, bacon, or chorizo for rich flavors. You can also use leftover steak or ham. Just make sure to chop it up well. For extra protein, consider mixing in some cooked quinoa or shredded chicken. Don’t forget to layer on the cheese for that melty goodness! Want to switch up the wrap? Try using corn tortillas if you prefer a gluten-free option. They add a nice flavor and texture. You could also try whole wheat tortillas for a healthier choice. Another fun option is to use lettuce leaves for a low-carb burrito. This keeps it fresh and light. You can even use crepes for a unique twist! Fill them with your favorite ingredients for a fun breakfast treat. For the full recipe, check out the complete guide to breakfast burritos. To keep your leftover breakfast burritos fresh, wrap each one tightly in plastic wrap. Place the wrapped burritos in an airtight container or a resealable bag. This helps prevent air from drying them out. Store the burritos in the fridge for up to three days. If you want to keep them longer, freezing is a great option. When you're ready to enjoy your burrito again, remove it from the fridge or freezer. If it's frozen, let it thaw in the fridge overnight. To reheat, use the microwave for about 1-2 minutes. Check if it’s hot all the way through. You can also use a skillet over medium heat. Heat each side for about 2-3 minutes. This method keeps the tortilla crispy. Freezing breakfast burritos is simple and smart. After wrapping each burrito, place it in the freezer. Make sure to use freezer-safe bags or containers. Label them with the date. They can last up to three months in the freezer. When you want one, just follow the reheating instructions mentioned above. Enjoy a quick meal anytime! You can make breakfast burritos ahead of time in a few easy steps. First, prepare the filling as described in the recipe. Let it cool before wrapping it in tortillas. Wrap each burrito tightly in foil or plastic wrap. Store them in the fridge for up to three days. For longer storage, you can freeze them. Just note that freezing may change the texture slightly. When ready to eat, reheat them in the oven or microwave. Customizing breakfast burritos is fun and simple. You can change the ingredients to match your taste. Here are some ideas: - Add proteins: Cooked sausage, bacon, or tofu work great. - Use different veggies: Spinach, mushrooms, or zucchini can add flavor. - Change the cheese: Try pepper jack for a spicy kick or feta for a tangy twist. - Spice it up: Add jalapeños or hot sauce for extra heat. Mix and match your favorites for a unique breakfast every time! You can find the full recipe for breakfast burritos in this article. It includes all the ingredients and step-by-step instructions. This will help you create delicious burritos right at home. Just follow the recipe, and you'll have a tasty meal in no time! Breakfast burritos are tasty and easy to make. We covered essential and optional ingredients, plus how to cook and assemble them. You learned tips to enhance flavor and ways to keep your burritos intact. We also explored variations for every taste, from vegetarian to meat lover's options. Lastly, I shared storage and reheating tips to enjoy your leftovers perfectly. Now, with this knowledge, you can create your own delicious breakfast burritos anytime. Enjoy experimenting and making them your way!
Breakfast Burritos Tasty and Easy to Make at Home
Are you ready to master the art of making breakfast burritos at home? These tasty and easy wraps can become your new morning favorite! I’ll
To make Easy French Toast Bake, gather these simple ingredients: - 8 slices of stale bread (preferably French or brioche) - 4 large eggs - 2 cups milk - 1/2 cup heavy cream - 1/3 cup granulated sugar - 1 tablespoon vanilla extract - 1 teaspoon ground cinnamon - 1/2 teaspoon nutmeg - 1/4 cup maple syrup (plus more for serving) - 1/2 cup walnuts, chopped (optional) - Powdered sugar for dusting Choosing the right bread is key to great French toast. I like using stale French or brioche bread. Stale bread soaks up the custard better. You can also try challah for a rich flavor. Avoid fresh bread, as it can get soggy. Feel free to get creative! Add nuts for crunch or fresh fruit for sweetness. Here are some options: - Berries like strawberries or blueberries - Bananas for a fruity twist - Chocolate chips for a sweet treat - Spices like cardamom or ginger for a different flavor For the full recipe, follow the instructions carefully to ensure a perfect bake! First, gather your ingredients. You need: - 8 slices of stale bread (preferably French or brioche) - 4 large eggs - 2 cups milk - 1/2 cup heavy cream - 1/3 cup granulated sugar - 1 tablespoon vanilla extract - 1 teaspoon ground cinnamon - 1/2 teaspoon nutmeg - 1/4 cup maple syrup (plus more for serving) - 1/2 cup walnuts, chopped (optional) - Powdered sugar for dusting Start by preheating your oven to 350°F (175°C). Grease a 9x13 inch baking dish with butter or cooking spray. Next, cut the stale bread into cubes. Spread the bread evenly in the dish. If you like nuts, sprinkle half of the walnuts over the bread. In a mixing bowl, whisk the eggs, milk, heavy cream, sugar, vanilla, cinnamon, nutmeg, and maple syrup. Mix until smooth. Pour this mixture over the bread cubes. Press the bread down gently. This helps every piece soak up the custard. If using, sprinkle the remaining walnuts on top. Cover the dish with foil and bake for 25 minutes. After that, remove the foil. Bake for an extra 15-20 minutes. You want the top to turn golden brown and the center to set. Let the French toast bake cool for a few minutes. Dust the top with powdered sugar. Slice it into portions and serve warm. Drizzle more maple syrup on each serving if you like. For extra flair, add fresh berries or whipped cream. You can find the full recipe for this sweet cinnamon delight in the [Full Recipe]. To get the best texture, use stale bread. Stale bread soaks up the custard well. If your bread is fresh, let it sit out for a few hours. Cut it into cubes for even soaking. Soak the bread in the egg mixture for at least 30 minutes. This time helps the custard seep in. For a softer center, cover the dish while baking. Remove the cover for the last 15 minutes to get a nice golden top. You can swap ingredients easily. Use almond milk or oat milk instead of regular milk. If you want a lighter dish, pick low-fat milk. You can also replace heavy cream with more milk. For eggs, try flaxseed meal mixed with water for a vegan option. If you don’t like nuts, leave them out or use seeds instead. Changing the spices can create new flavors, too. Try cardamom or ginger for a fun twist. Serve your French toast bake warm right from the dish. It feels cozy and inviting. For a touch of elegance, transfer it to a wooden board. Dust with powdered sugar for a sweet look. Add fresh berries or sliced bananas on top. A dollop of whipped cream makes it special. Drizzle more maple syrup for extra sweetness. You can also serve it with yogurt for a creamy side. Check out the Full Recipe for more ideas! {{image_2}} You can make this Easy French Toast Bake your own with some fun flavors. Here are some ideas: - Berry Bliss: Add 1 cup of fresh berries like strawberries or blueberries into the bread. - Chocolate Delight: Stir in 1/2 cup of chocolate chips for a sweet touch. - Nutty Banana: Slice 1 banana and mix it in with the bread for a fruity twist. - Coconut Dream: Use coconut milk instead of regular milk and sprinkle shredded coconut on top. You can customize your French toast bake for different diets. For a gluten-free version, use gluten-free bread. For a vegan option, replace eggs with 1/4 cup of ground flaxseed mixed with 1/2 cup of water. Use plant-based milk and cream. This keeps the dish tasty and friendly for everyone. Seasonal ingredients can take your French toast bake to new heights. In the fall, try adding diced apples and a sprinkle of pumpkin spice. For winter, mix in some candied citrus peel or dried cranberries. In spring, fresh mint or lemon zest can brighten the dish. In summer, use peach slices or other ripe fruits. Each season brings its own tasty surprises! These variations make the Easy French Toast Bake a fun dish to explore. Don't hesitate to mix and match your favorites to create something new! After enjoying your Easy French Toast Bake, store any leftovers in an airtight container. Keep it in the fridge for up to three days. Make sure it cools down before sealing. This helps keep the texture nice and fresh. If you want to keep it longer, consider freezing it. To reheat, preheat your oven to 350°F (175°C). Place the slices in a baking dish. Cover it with foil to prevent drying out. Heat for about 15-20 minutes until warm. You can also use a microwave. Heat individual slices for about one minute. Check to see if it's warm throughout. You can freeze the Easy French Toast Bake for later. After baking, let it cool completely. Cut it into slices and wrap each slice in plastic wrap. Place the wrapped slices in a freezer bag. They can last for up to three months in the freezer. To enjoy, thaw overnight in the fridge and reheat as mentioned above. It takes about 15 minutes to prep and 40 minutes to bake. In total, you need about 1 hour. This includes the time to let it cool a bit before serving. You can enjoy it warm, fresh from the oven! Yes, you can prepare it the night before. Just follow the steps and cover it tightly. Place it in the fridge overnight. In the morning, bake it straight from the fridge. This saves time and makes breakfast easy! You can serve it with many delicious sides. Here are some ideas: - Fresh berries (strawberries, blueberries, raspberries) - Maple syrup for extra sweetness - A dollop of whipped cream - Yogurt for creaminess - Bacon or sausage for a savory touch Yes, you can make it dairy-free! Just swap the milk and cream for plant-based alternatives. Almond milk or oat milk works well. Use dairy-free butter for greasing the dish. You can still enjoy the great taste without dairy! Find the full recipe [here](#). This blog post covered how to make an Easy French Toast Bake. We explored ingredients, like the best bread types and fun add-ons. I shared simple steps for prepping, baking, and serving. You learned tips for texture and ingredient swaps, plus cool variations for everyone. I also shared how to store leftovers and answered some common questions. Making this dish offers a warm, tasty meal for any time. Enjoy trying new flavors and sharing with friends!
Easy French Toast Bake Simple and Delicious Recipe
Looking for a breakfast that’s simple, tasty, and perfect for any gathering? You’ve found it! My Easy French Toast Bake offers a warm, comforting twist
To make a loaded breakfast hash, you need fresh and tasty ingredients. Here’s what you will need: - 2 large russet potatoes, diced - 1 red bell pepper, diced - 1 green bell pepper, diced - 1 small onion, finely chopped - 2 cloves garlic, minced - 4 large eggs - ½ cup shredded cheddar cheese - ½ cup cooked and crumbled breakfast sausage (or plant-based alternative) - 1 tablespoon olive oil - 1 teaspoon smoked paprika - Salt and pepper to taste - Fresh parsley, chopped (for garnish) These ingredients mix well to create a flavorful meal. The russet potatoes give a nice base. The bell peppers add color and crunch. Onions and garlic make everything smell great. Eggs add protein and richness. You can also change some ingredients. For a plant-based dish, use a meat alternative. You can switch cheeses too. Try pepper jack for a spicy kick. You will find this recipe easy to follow and fun to make. Check out the Full Recipe for step-by-step guidance! Start by dicing your russet potatoes. Cut them into small, even pieces. This helps them cook evenly. Heat olive oil in a large skillet over medium heat. Add the diced potatoes to the skillet. Sprinkle salt, pepper, and smoked paprika on top. Cook for about 10 minutes. Stir them occasionally. You want them to start browning and softening. Once your potatoes are ready, add the chopped onion and minced garlic. Stir this mixture and let it cook for 3 to 4 minutes. You should see the onions turn translucent. Next, toss in the diced red and green bell peppers. Cook for another 5 minutes until they are slightly softened. Finally, stir in the cooked breakfast sausage. Heat this through for about one minute. Now, your hash is colorful and full of flavor! Make four small wells in the hash mixture. Crack an egg into each well. This makes a beautiful presentation. Sprinkle the shredded cheddar cheese over everything. If your skillet is oven-safe, move it to the preheated oven at 400°F (200°C). Bake for 8 to 10 minutes. The eggs should be set to your liking. If your skillet isn't safe for the oven, transfer the hash to a baking dish to bake. Once done, take it out and let it cool for a minute. Garnish with fresh parsley before serving. Enjoy this hearty meal! For the complete recipe, check out the Full Recipe. To get the best texture for your hash, start with the right potatoes. I love using russet potatoes because they get crispy on the outside and fluffy inside. Dice them evenly to ensure they cook at the same speed. When cooking, let them sit in the pan without stirring too much. This helps form a nice crust. If you like a softer hash, cook them with a lid for a few minutes. You can easily swap out some ingredients based on what you have. If you don’t have russet potatoes, sweet potatoes work well, too. For the sausage, try turkey sausage or a plant-based option for a lighter dish. Don’t have cheddar cheese? Use feta or pepper jack for a nice twist. Feel free to add other veggies like spinach or zucchini to boost flavor and nutrition. For runny yolks, bake the eggs for about 8 minutes. If you like firmer yolks, leave them in for about 10 minutes. You can also fry the eggs separately and place them on top of the hash. This way, you control their doneness perfectly. Consider adding a splash of hot sauce over the eggs for extra flavor. Visit the Full Recipe for all the details you need to make this dish! {{image_2}} You can easily make a vegetarian or vegan loaded breakfast hash. Start by swapping the breakfast sausage for a plant-based option. Use tofu or tempeh for a protein boost. You can also add more veggies like spinach, mushrooms, or zucchini. This not only adds flavor but makes the dish vibrant and colorful. For a creamy touch, consider using avocado slices on top. If you like heat, add some spice! Toss in jalapeños or diced serrano peppers for a kick. Use spicy sausage or chorizo instead of regular sausage. You can also sprinkle red pepper flakes on top before serving. A drizzle of hot sauce adds even more flavor. This will give your loaded breakfast hash a nice, fiery touch that wakes up your taste buds. Experiment with different meats for your loaded breakfast hash. Try diced ham, bacon, or chorizo for unique tastes. Each meat brings its own flavor profile. For a smoky flavor, use smoked sausage. You can also mix meats for added depth. Just remember to adjust cooking time based on the meat you choose. These variations ensure you never get bored of this dish. For all the details on how to make this dish, check out the Full Recipe. To keep your loaded breakfast hash fresh, let it cool down first. Place leftovers in an airtight container. You can store it in the fridge for up to three days. Make sure to separate the eggs if possible to keep their texture better. When you're ready to eat, reheat your hash on the stove. Use medium heat and add a splash of water to keep it moist. Stir occasionally until it’s hot. You can also use the microwave. Heat it in short bursts, about one minute at a time, stirring in between. If you want to freeze your hash, do this right after it cools. Pack it in a freezer-safe container. You can freeze it for up to three months. To reheat, let it thaw overnight in the fridge. Then, warm it up on the stove. This keeps the flavors fresh and tasty. For the best results, refer to the full recipe. Yes, you can make Loaded Breakfast Hash in advance. Cook it up to the point before adding eggs. Let it cool, then store it in the fridge. When ready, just add the eggs and bake. This saves time on busy mornings. You can serve Loaded Breakfast Hash with many tasty sides. Here are some ideas: - Fresh fruit like berries or bananas - Toast or warm tortillas - A side salad for a crisp bite - Hot sauce or salsa for extra flavor These options add variety and make your meal even more filling. Loaded Breakfast Hash lasts about 3 to 4 days in the fridge. Make sure to store it in an airtight container. When you're ready to eat, just reheat it in the oven or microwave. Enjoy every bite! This article covered a tasty loaded breakfast hash. You learned about the simple ingredients, step-by-step cooking instructions, and helpful tips. You can make many variations, whether you prefer meat or plant-based options. Don't forget about storing leftovers for later meals. In the end, this dish is easy, fun, and great for sharing. Try making it your own and enjoy every bite!
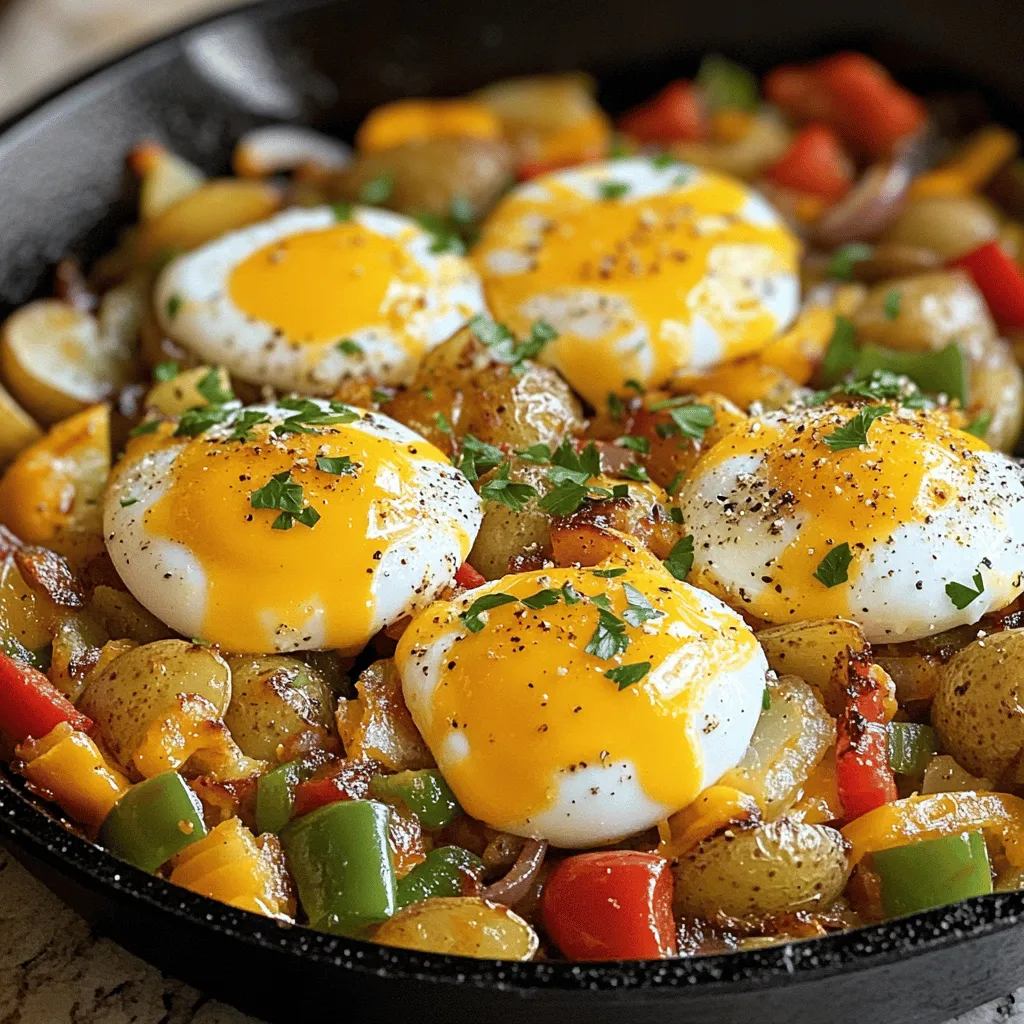
Loaded Breakfast Hash Flavorful and Satisfying Meal
Imagine waking up to a warm, hearty meal that bursts with flavor. Loaded breakfast hash is just that! This dish combines crispy potatoes, colorful veggies,
To make fluffy Japanese souffle pancakes, you need simple ingredients. Here’s what you’ll need: - 2 large eggs, separated - 2 tablespoons granulated sugar - 1 tablespoon milk - 1 teaspoon vanilla extract - 1/4 cup all-purpose flour - 1/4 teaspoon baking powder - A pinch of salt - Butter for cooking - Maple syrup, whipped cream, and fresh fruits for serving These ingredients work together to create light, airy pancakes. The key is in the eggs. Separating the yolks and whites helps to create volume. The sugar adds sweetness and helps with the structure. Milk and vanilla give flavor, while flour and baking powder help with the pancake's rise. Using butter in the pan adds flavor and keeps the pancakes from sticking. Finally, serving your pancakes with syrup, whipped cream, and fresh fruits makes the dish even more delightful. For the complete cooking instructions, check out the Full Recipe. Start with two large eggs. Carefully separate the yolks from the whites. In a clean bowl, whisk the egg whites. Whisk until soft peaks form. This means the whites should hold some shape but still be soft. Gradually add one tablespoon of granulated sugar. Keep whisking until you see stiff peaks. The mixture should look glossy and hold its shape well. Set this bowl aside for now. In another bowl, take the egg yolks. Add the remaining tablespoon of sugar. Whisk these together until they turn creamy and light in color. Then, pour in one tablespoon of milk and one teaspoon of vanilla extract. Mix well until everything is blended and smooth. Now, it’s time to add the dry ingredients. Sift one-fourth cup of all-purpose flour and one-fourth teaspoon of baking powder into the egg yolk mixture. Gently fold the flour in with a spatula. Be careful not to overmix; we want to keep it light and airy. Heat a non-stick skillet over low heat. Add a little butter to the pan. Place a round mold in the skillet. Pour about half of the pancake batter into the mold. Cover the skillet with a lid. Cook for about four to five minutes on low heat. Then, remove the lid and gently flip the pancake. Cook for another four to five minutes until it’s golden brown. Repeat this with the rest of the batter. Stack the pancakes on a plate. Serve them warm with maple syrup, whipped cream, and fresh fruits. For the full recipe and more tips, check the recipe section above! For fluffy Japanese souffle pancakes, the secret lies in the egg whites. Whip them until soft peaks form. This step adds volume. Next, gently fold them into the yolk mixture. Be careful not to deflate the air you created. This air gives the pancakes their light and airy texture. Always use a gentle hand when mixing. Cook these pancakes on low heat. A non-stick skillet works best. Use a round mold to hold the batter. Cover the skillet with a lid to trap steam. This steam helps the pancakes rise. Cook for 4-5 minutes on one side, then flip and cook for another 4-5 minutes. This method ensures even cooking without browning too fast. Avoid overmixing the batter. Overmixing deflates the egg whites and ruins the fluffiness. Use fresh eggs for the best results. Old eggs may not whip as well. Also, resist the urge to increase the heat. Cooking too fast leads to burnt pancakes outside and raw inside. Stick to low heat for that perfect rise. For the full recipe, check the section above. Enjoy making your delightful breakfast treat! {{image_2}} You can easily change the flavor of your fluffy Japanese souffle pancakes. Adding matcha gives a green tea twist. Just mix one teaspoon of matcha powder into the dry ingredients. If you love chocolate, try using cocoa powder instead. Mix in two tablespoons of cocoa powder for a rich taste. You can even add a splash of orange zest for a fresh kick. Each flavor makes breakfast feel special and fun! The toppings make these pancakes even better! Maple syrup is a classic choice. It adds sweetness and pairs well with the pancakes' fluffy texture. For a creamy touch, add whipped cream on top. Fresh fruits like strawberries, blueberries, or bananas add color and flavor. You can also sprinkle powdered sugar for a sweet finish. If you love nuts, try adding crushed almonds or walnuts for crunch. Get creative and try different combinations! You can make these pancakes gluten-free with a few simple swaps. Use a gluten-free flour blend instead of all-purpose flour. Look for blends that work well in baking. You can also try almond flour or coconut flour as alternatives. Just keep in mind that these flours may change the texture slightly. Make sure to check that your baking powder is gluten-free too. Enjoy these pancakes without worry! For the full recipe, check out the complete cooking instructions. To keep your fluffy pancakes fresh, store them in an airtight container. Make sure they cool down before sealing them. You can layer them with parchment paper to avoid sticking. They stay good in the fridge for up to three days. If you want to keep them longer, consider freezing. When you are ready to enjoy your pancakes again, reheat them gently. You can use a microwave for about 20-30 seconds. If you prefer, use a skillet on low heat. This method helps keep them soft. Flip them over halfway to heat evenly. For longer storage, freezing is a great option. Wrap each pancake in plastic wrap, then place them in a freezer bag. They will stay fresh for about one month. When you want to eat them, take out what you need. Let them thaw in the fridge overnight before reheating. This will keep them fluffy and delicious. Try out the Full Recipe for more tips on how to enjoy these delightful pancakes! Fluffy Japanese Souffle Pancakes come from Japan. They gained fame in Tokyo cafés. These pancakes are light and airy, unlike regular pancakes. Their unique cooking method makes them rise high and stay soft. Many people enjoy them for breakfast or dessert. You can cook the pancakes ahead of time. However, they taste best fresh. If you need to prepare them early, store them in an airtight container. Keep them in the fridge for up to two days. To enjoy, reheat them gently in a skillet. To make these pancakes dairy-free, substitute milk with a plant-based milk. Almond, soy, or oat milk work well. Make sure to check for any added sugars or flavors. The pancakes will still turn out fluffy and delicious! Maple syrup is a classic choice for these pancakes. Its sweetness complements their light texture. You can also try flavored syrups, like berry or caramel. Fresh fruit toppings add extra flavor and color. Enjoy experimenting with different syrup options! 1. Start by separating the egg whites from the yolks. 2. In a bowl, whisk the egg whites until they form soft peaks. Gradually add 1 tablespoon of sugar. Keep whisking until stiff peaks form. Set this aside. 3. In another bowl, whisk the egg yolks with the remaining sugar until creamy. Add in the milk and vanilla extract. Mix well. 4. Sift the flour and baking powder into the egg yolk mix. Fold gently to combine. Do not overmix. 5. Take a third of the whipped egg whites and fold it into the yolk mix. This lightens the batter. Then, fold in the rest of the egg whites carefully. 6. Heat a non-stick skillet on low heat. Add a little butter. Place a round mold in the skillet. 7. Pour half of the batter into the mold. Cover the skillet with a lid. Cook for 4-5 minutes. Remove the lid, then gently flip the pancake. Cook for another 4-5 minutes until golden. 8. Repeat this for the remaining batter. 9. Stack pancakes on a plate. Serve warm, drizzled with maple syrup, topped with whipped cream, and fresh fruits. - 2 large eggs, separated - 2 tablespoons granulated sugar - 1 tablespoon milk - 1 teaspoon vanilla extract - 1/4 cup all-purpose flour - 1/4 teaspoon baking powder - A pinch of salt - Butter for cooking - Maple syrup, whipped cream, and fresh fruits for serving I love serving these pancakes warm. They shine with maple syrup and fresh fruits. You can top them with whipped cream for extra delight. Try adding sliced strawberries, blueberries, or bananas for a burst of flavor. Enjoy them with a hot cup of tea or coffee. They make a perfect treat for breakfast or brunch. You can even stack them high for a stunning presentation. For the full recipe, follow the steps above. In this blog post, we explored how to make fluffy Japanese souffle pancakes. We covered the key ingredients, step-by-step instructions, and tips for perfect texture. You learned about variations to try and how to store leftovers. Fluffy pancakes are fun and easy to make. With practice, you can enjoy them anytime. Keep experimenting with flavors and toppings to find your favorite. Now, go ahead and make a batch; you won't be disappointed!
Fluffy Japanese Souffle Pancake Delightful Breakfast Treat
If you crave a breakfast that feels like a warm hug, you’ll love fluffy Japanese souffle pancakes. These airy delights melt in your mouth and
This Baked German Pancake is simple and fun to make. You need just a few ingredients to create a fluffy treat. The blend of eggs, milk, and flour makes it rise beautifully. You can serve it warm with sweet toppings. For this tasty pancake, gather these items: - 4 large eggs - 1 cup milk - 1 cup all-purpose flour - 1/4 cup granulated sugar - 1 teaspoon vanilla extract - 1/4 teaspoon salt - 4 tablespoons unsalted butter You can add fun toppings to make it special. Here are some ideas: - Powdered sugar for dusting - Fresh berries like strawberries, blueberries, or raspberries - Maple syrup for drizzling This combination of ingredients creates a dish you and your family will love. The Full Recipe provides guidance on preparing this delightful dish. Start by preheating your oven to 425°F (220°C). This step is crucial as it helps the pancake puff up beautifully. In a large mixing bowl, whisk together the following: - 4 large eggs - 1 cup milk - 1/4 cup granulated sugar - 1 teaspoon vanilla extract - 1/4 teaspoon salt Mix until everything is well blended. Next, gradually add in 1 cup of all-purpose flour. Whisk until the batter is smooth and lump-free. Remember, the batter will be thin, which is perfectly fine. Now, it's time to prepare the baking dish. Place 4 tablespoons of unsalted butter in a 9x13 inch baking dish. Put it in the preheated oven for about 5 minutes, or until the butter melts. Watch it closely so it doesn’t brown. Once melted, carefully pour the batter into the hot butter. Tilt the dish slightly to spread it evenly. Bake for 20-25 minutes. The pancake should puff up and turn golden brown around the edges. When it's done, take it out of the oven and let it cool for a few minutes. It might deflate a little, but that’s normal. To serve, dust the top with powdered sugar. You can slice it into squares or wedges. This pancake pairs wonderfully with fresh berries like strawberries, blueberries, or raspberries. Drizzle with maple syrup for extra sweetness. Enjoy your delicious creation with family or friends! To get that lovely rise, start with room temperature eggs. Cold eggs don't mix well, which can lead to a flat pancake. Beat the eggs well until they are frothy. This helps trap air, allowing the pancake to puff up. Use a hot baking dish, so the batter sizzles as it hits the melted butter. This gives it a nice lift. One mistake is not whisking the batter enough. You want it smooth and lump-free. Another issue is opening the oven door too soon. This can make the pancake fall flat. Also, avoid overbaking. Keep an eye on the time to prevent dryness. Lastly, using cold butter can lead to uneven cooking, so make sure it's melted before adding the batter. For this recipe, you need a mixing bowl, whisk, and a measuring cup. A 9x13 inch baking dish works best for even cooking. Use an oven mitt when handling the hot dish. A pastry brush can help to spread the melted butter evenly. Finally, a fine mesh sieve is great for dusting powdered sugar on top. Want to try making this delicious dish? Check out the Full Recipe for all the details! {{image_2}} You can change up the flavor of your baked German pancake easily. Add lemon zest for a bright taste. For a rich twist, mix in cocoa powder to create a chocolate version. Want something sweeter? Try adding cinnamon or nutmeg. You can also blend in pureed fruits. Apples or bananas work wonders in the batter. You can adapt this recipe to fit dietary needs. If you want it gluten-free, use a gluten-free flour blend. For a dairy-free option, swap milk with almond or oat milk. You can replace eggs with flaxseed meal mixed with water. Just mix 1 tablespoon of flaxseed meal with 2.5 tablespoons of water for each egg. These swaps keep the pancake tasty! Serving style can change your pancake experience. Serve it warm with a dusting of powdered sugar. You can layer fresh berries on top for color and flavor. Drizzle maple syrup for a sweet finish. For a brunch twist, add whipped cream and a sprinkle of nuts. You can also serve it with yogurt on the side for a creamy touch. This pancake is flexible and fun! To keep your baked German pancake fresh, store it in an airtight container. Let it cool completely first. Place parchment paper between layers if you stack slices. This way, they won't stick together. Store the container in the fridge. It will stay good for up to 3 days. When you're ready to enjoy leftovers, reheating is easy. Preheat your oven to 350°F (175°C). Place the pancake on a baking sheet. Heat for about 10-15 minutes until warm. You can also use a microwave. Heat it for 20-30 seconds. Check to see if it’s warm enough. If you want to save some for later, freezing works well. Cut the pancake into slices. Wrap each slice in plastic wrap. Place the wrapped slices in a freezer bag. Squeeze out the air before sealing. It can last for up to 2 months in the freezer. To eat, thaw overnight in the fridge and reheat. Enjoy your fluffy baked German pancake anytime! A baked German pancake is a large, fluffy pancake. You bake it in the oven instead of frying it. This pancake rises high while baking, creating a soft and airy texture. It usually has a light, slightly sweet flavor. You can serve it with fruit, syrup, or powdered sugar. Regular pancakes are cooked on a griddle or pan. They are smaller and thicker. In contrast, a baked German pancake is one big pancake. It puffs up in the oven and has a different texture. The baked version is more like a custard than a traditional pancake. You can prepare the batter ahead of time. Just store it in the fridge for up to 24 hours. When you're ready, pour it into the hot butter and bake. However, it’s best to eat it fresh after baking. This keeps it fluffy and delicious. For the full recipe, check out the details above. We’ve covered the key parts of making a Baked German Pancake. First, we explored essential ingredients and tasty toppings. Next, I shared easy steps for prep and baking. You learned tips to get the best rise and avoid common mistakes. We also discussed fun variations and smart storage methods. Now you’re ready to create a yummy dish. Enjoy your cooking!
Baked German Pancake Simple and Delicious Recipe
If you’re looking for a simple and tasty breakfast, a Baked German Pancake is perfect. This fluffy delight puffs up beautifully in the oven, making
- 1 sheet of puff pastry, thawed - 8 oz cream cheese, softened - 1/2 cup sugar - 1/4 cup sour cream - 1 teaspoon vanilla extract - 1 teaspoon lemon zest - 1 egg (for egg wash) - Pinch of salt - 1/4 cup powdered sugar (for drizzling) - 1 tablespoon milk (for icing) To make the best breakfast cheese Danish, you need very simple ingredients. The puff pastry is key. It gives the Danish its flaky texture. You can find this in any grocery store. Just make sure it is thawed before you start. Next, the cream cheese adds a rich, creamy filling. Mixing it with sugar, sour cream, vanilla extract, lemon zest, and a pinch of salt makes the filling shine. These flavors blend well and make each bite special. For that lovely golden color, you will need an egg for the egg wash. This step is small, but it really makes a difference in how the Danish looks. Finally, the icing adds a sweet finish. It combines powdered sugar and milk. Drizzling this on top makes your Danish look fancy and taste even better. Gather these items, and you're ready to create a delicious breakfast treat! For the full recipe, check out the details above. - Prepping the Oven and Baking Sheet Start by preheating your oven to 375°F (190°C). This ensures even baking. Line a baking sheet with parchment paper. This will help prevent sticking. - Rolling Out the Puff Pastry On a lightly floured surface, roll out the puff pastry sheet. This makes it smooth and easy to work with. Aim for a rectangular shape. Cut the pastry into 4 equal squares. Each square will hold the creamy filling. - Making the Cream Cheese Filling In a mixing bowl, combine 8 ounces of softened cream cheese, 1/2 cup of sugar, and 1/4 cup of sour cream. Add 1 teaspoon of vanilla extract, 1 teaspoon of lemon zest, and a pinch of salt. Mix until it turns smooth and creamy. This filling is the star of your Danish. - Filling and Folding the Pastry Spoon a generous amount of filling onto the center of each pastry square. Leave some space around the edges. Fold the corners of the pastry squares towards the center. Pinch them together tightly. This creates a pocket that holds all the delicious filling inside. - Egg Wash Application In a separate bowl, beat 1 egg. Brush this egg wash over the top of each Danish. This gives them a nice golden color when baked. - Ideal Baking Time & Temperature Place the Danishes in the preheated oven. Bake for 20-25 minutes. Look for them to be puffed and golden brown. That’s when you know they are ready! - Preparing the Icing While the Danishes bake, mix 1/4 cup of powdered sugar with 1 tablespoon of milk in a small bowl. Stir until it’s smooth. This icing will add a sweet touch. - Final Touch for Presentation Once the Danishes cool slightly, drizzle the icing over the top. This final touch makes them look and taste great. Serve them warm for the best experience. Enjoy your delicious breakfast cheese Danish! Handling puff pastry can be tricky. Here are some tips: - Keep It Cold: Always work with cold dough. Heat can make it sticky. - Flour Lightly: Use just enough flour when rolling to avoid sticking. - Don’t Overwork: Roll gently and stop as soon as it’s smooth. To ensure flakiness, follow these steps: - Fold and Roll: Fold the dough over itself several times. This creates layers. - Resting Time: Let the dough chill after rolling. This helps the layers form. - Bake Hot: A hot oven makes the layers puff quickly. You can customize your filling in many ways. Here are some ideas: - Add Flavor: Mix in lemon or orange zest for a bright taste. - Spice It Up: Try a pinch of cinnamon or nutmeg for warmth. For sweeteners, consider these options: - Natural Sweeteners: Use honey or maple syrup instead of sugar. - Low-Cal Choices: Try stevia or erythritol for a lighter option. How you serve your cheese Danish matters. Here are some suggestions: - Serve Warm: They taste best fresh from the oven. - Use a Platter: Arrange on a nice dish for a lovely display. For garnishing, consider: - Powdered Sugar: Dust a little on top for a sweet look. - Fresh Berries: Add berries for color and freshness. These tips will help you make beautiful and tasty cheese Danishes. If you want to try this recipe, check out the Full Recipe. {{image_2}} You can change the flavor of your cheese Danish easily. Try adding fruit fillings like berries or apples. These fruits bring a fresh taste that pairs well with the cream cheese. You can also mix in nuts or chocolate. Chopped pecans or dark chocolate chips add a rich, tasty twist. If you need a gluten-free option, look for gluten-free puff pastry. Many brands offer this, and it works well in the recipe. For vegans, you can replace cream cheese with a plant-based version. Use almond milk or coconut cream for the filling. This way, everyone can enjoy a delicious breakfast cheese Danish! You can also create seasonal flavors. For holidays, add spices like cinnamon or nutmeg. These spices bring warmth and comfort. In summer, mix in fresh fruits like peaches or strawberries. This keeps your breakfast light and bright. Whatever the season, you can always find a way to make your Danish special. For the full recipe, check the details above! - Refrigeration Methods: Place leftover cheese Danishes in an airtight container. Keep them in the fridge for up to three days. This helps keep them fresh and tasty. - Best Practices for Freezing: Wrap each Danish in plastic wrap, then place them in a freezer bag. They can last for up to three months. Thaw them in the fridge when you're ready to enjoy. - Oven vs Microwave Solutions: For best results, reheat in the oven at 350°F (175°C) for 10 minutes. This makes them nice and crispy. If you're short on time, use the microwave for about 30 seconds. But this may make them a bit soft. - Maintaining Texture: Always cover them with a damp paper towel in the microwave. This helps keep them moist without becoming too chewy. - How Long Do They Last?: Fresh cheese Danishes last in the fridge for about three days. If frozen, they can last for three months. - Signs of Spoilage: Check for mold or an off smell. If they feel dry or hard, it’s best to toss them. Always trust your senses when it comes to food safety. The best way to make cheese danish is to use fresh ingredients. Start with quality puff pastry. Roll it out to a nice size. For the filling, mix cream cheese, sugar, sour cream, vanilla, lemon zest, and salt. This mix should be smooth. Spoon it onto the pastry, fold, and seal. Bake until golden brown. You will love the fresh taste! Yes, you can use store-bought puff pastry! It saves time and effort. Look for a brand that is high quality. Thaw it as instructed. Roll it out gently, then fill it as usual. Store-bought pastry makes this recipe easy. It still tastes great! Your cheese danishes are done when they are golden brown. They should puff up nicely. The edges will look crisp, and the filling will be warm. If you see a nice color, they are ready. It usually takes about 20 to 25 minutes to bake. Cheese danish pairs well with many breakfast items. Consider serving it with fresh fruit, like berries or slices of banana. You can also add yogurt or a side of coffee. Some people enjoy it with a sprinkle of powdered sugar on top. This makes a lovely breakfast spread! You can find high-quality cheese danishes at bakeries or cafes. Look for local shops with good reviews. Many grocery stores also sell them in the bakery section. If you're up for it, try making them at home. It’s fun and rewarding! For a full recipe, check out the Delicious Breakfast Cheese Danish section. In this post, we covered how to make a delicious cheese danish. You learned about the key ingredients like puff pastry and cream cheese filling. I shared easy steps for preparation and baking, plus tips for perfect texture. You can explore fun variations, dietary options, and smart storage methods. Now you can enjoy your tasty treats, whether at breakfast or brunch. Get creative with flavors and impress your friends and family. Making cheese danish is simple and rewarding!
Delicious Breakfast Cheese Danish Easy and Quick Recipe
If you crave a sweet start to your day, this Easy and Quick Breakfast Cheese Danish recipe is for you! With just a few simple