Breakfast

Lemon Cream Cheese Muffins Delightfully Simple Treat
If you’re craving a sweet treat that bursts with flavor, look no further! In this post, I’ll show you how to make Lemon Cream Cheese
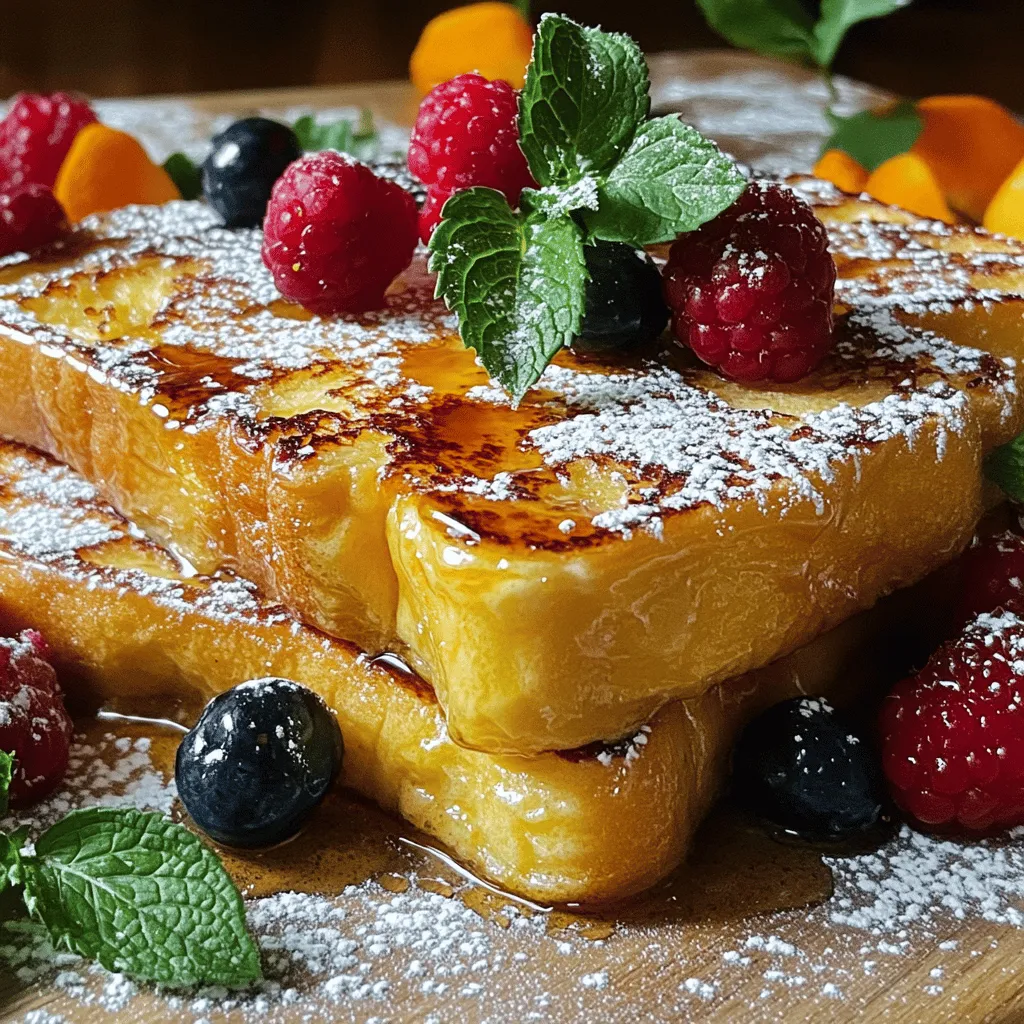
Overnight Crème Brûlée French Toast Delicious Recipe
Looking to impress at your next brunch? Overnight Crème Brûlée French Toast is the answer! This dish combines creamy custard and crispy caramel topping for

Berry Smoothie Bowl Energizing and Delicious Recipe
Are you ready to fuel your day with a tasty treat? A berry smoothie bowl is the perfect blend of energy and flavor. It’s quick
![For the perfect Blueberry Oatmeal Bars, gather these key ingredients: - 2 cups rolled oats - 1 cup whole wheat flour - 1/2 cup brown sugar, packed - 1/4 cup honey (or maple syrup) - 1/2 cup unsweetened applesauce - 1/2 teaspoon baking soda - 1/2 teaspoon cinnamon - 1/4 teaspoon salt - 1 1/2 cups fresh blueberries (or frozen, thawed) - 1/2 cup chopped nuts (walnuts or almonds) - 1/4 cup shredded coconut (optional) These ingredients blend to create a hearty and sweet snack. The oats provide fiber, while the blueberries add antioxidants. The honey gives a nice touch of natural sweetness. You can customize your bars to suit your taste. Here are a few ideas: - Add 1/4 cup of chia seeds for extra nutrition. - Swap blueberries for raspberries or chopped apples. - Use almond butter instead of applesauce for richness. - Mix in a dash of vanilla extract for a lovely aroma. These options let you play with flavors and textures, making the bars your own. Each bar provides a good balance of nutrients. Here’s a rough estimate per bar: - Calories: 150 - Protein: 3g - Fat: 5g - Carbohydrates: 25g - Fiber: 3g These bars are not only tasty but also nourishing. They make a great snack for kids and adults alike. For the full recipe, check out the details above. Start by preheating your oven to 350°F (175°C). This step is key for even baking. While the oven warms up, grab a 9x9 inch baking pan. Line it with parchment paper, leaving some paper hanging over the sides. This will help you lift the bars out later. In a large mixing bowl, combine the rolled oats, whole wheat flour, brown sugar, baking soda, cinnamon, and salt. Use a whisk or spoon to stir them together. Make sure everything is well mixed. This helps the flavors blend well in the bars. In another bowl, mix the honey (or maple syrup) with the applesauce. Stir until it is smooth and well combined. This mixture will add sweetness and moisture to your bars. Once it’s ready, pour it into the bowl with the dry ingredients. Mix everything until just combined. Be careful not to over-mix. Gently fold in the fresh blueberries and chopped nuts. If you want, you can also add shredded coconut. Spread the mixture evenly in the prepared pan and press it down with a spatula. Bake for 25-30 minutes. The edges should turn golden brown. To check if they are done, insert a toothpick in the center. If it comes out clean, your bars are ready! Allow them to cool for 10-15 minutes in the pan before lifting them out. Cut into squares or bars once completely cool. Enjoy your delicious Blueberry Oatmeal Delight Bars! For the complete recipe, check out the [Full Recipe]. To get chewy and soft bars, use rolled oats. They absorb moisture well. Mix your dry and wet ingredients gently. Over-mixing can make them tough. Press the mixture evenly in the pan. This helps the bars bake uniformly. Bake until the edges turn golden brown. This step adds a nice crunch. One common mistake is not measuring the ingredients. Accurate measurements ensure the right balance. Another mistake is using too much liquid. This can make the bars soggy. Don't skip the parchment paper. It helps with easy removal and prevents sticking. Lastly, let the bars cool before cutting. This helps them set properly. These blueberry oatmeal bars are great on their own. You can serve them with yogurt or a dollop of whipped cream. They pair well with a cup of tea or coffee. For a fun twist, add a scoop of ice cream on top. You can also pack them for a snack on the go. Enjoy them as a quick breakfast or a satisfying treat! For the full recipe, check out the details mentioned earlier. {{image_2}} You can make this recipe fit your diet. For gluten-free bars, use certified gluten-free oats and gluten-free flour. If you need a nut-free option, skip the nuts or replace them with seeds like sunflower seeds. You can also use mashed bananas instead of applesauce for a fruity twist. Want to jazz up the flavor? Try adding spices like nutmeg or ginger. You can also mix in different fruits, like diced apples or raspberries. If you like a crunch, add some chocolate chips or dried fruits. These changes keep the bars exciting and new. If you want less sugar, swap brown sugar for coconut sugar or a sugar substitute. Maple syrup is a great choice if you want a unique flavor. You can also use agave nectar for a milder sweetness. Just remember to adjust the wet ingredients slightly to keep the texture right. For the full recipe, check out the Blueberry Oatmeal Delight Bars section. To keep your blueberry oatmeal bars fresh, store them in an airtight container. This keeps them moist and tasty. You can place parchment paper between layers to prevent sticking. It helps maintain their texture. If you keep them at room temperature, they last about four days. For longer storage, the fridge is your best friend. Just remember to seal them tight. You can freeze these bars for up to three months. To do this, cut them into squares first. Then, wrap each piece in plastic wrap. Place the wrapped bars in a freezer bag. Label the bag with the date. This way, you’ll know when to enjoy them again. When you’re ready to eat, just thaw them in the fridge overnight. For a warm treat, reheat the bars in the microwave. Heat them for about 15 to 20 seconds. This brings back their soft texture. You can also warm them in the oven. Preheat the oven to 350°F (175°C) and heat for about 5 to 10 minutes. Serve them warm for a cozy snack. Enjoy these blueberry oatmeal bars at their best! Yes, you can use frozen blueberries. Just thaw them first. This keeps the bars moist and sweet. The flavor stays great, too! If you use frozen ones, they may make the mix a bit wet. Just remember to drain any extra juice. These bars can last up to one week. Store them in an airtight container at room temperature. If you want to keep them longer, freeze them. They can last up to three months in the freezer. Just make sure to wrap them well. Yes, these bars are a healthy snack choice. They have whole grains and fruits. The oats provide fiber, while blueberries add vitamins. Using honey or maple syrup gives a natural sweetness. You can also add nuts for protein. It’s a balanced snack for everyone! Absolutely! You can use gluten-free oats. They work just as well in this recipe. If you need them to be entirely gluten-free, check the labels. You can also try almond flour or coconut flour for a different texture. In this post, I shared how to make delicious blueberry oatmeal bars. We covered the key ingredients, step-by-step instructions, and helpful tips. You learned how to customize the recipe with variations and ensure proper storage. These bars are a tasty option for breakfast or snacks. Enjoy making them your own with flavors and toppings. Follow these tips to create a treat your family will love. Happy baking!](https://toastedrecipes.com/wp-content/uploads/2025/05/c5b58d6a-f8a4-4988-935a-b7b07346a85e.webp)
Blueberry Oatmeal Bars Savory and Satisfying Snack
Looking for a quick, tasty snack? Blueberry oatmeal bars are your answer! These bars pack a sweet and savory punch while being easy to make.
![To make Mediterranean Baked Feta Eggs, gather these fresh ingredients: - 200g feta cheese, crumbled - 4 large eggs - 1 medium zucchini, diced - 1 cup cherry tomatoes, halved - 1 bell pepper, diced - 2 cloves garlic, minced - 1 teaspoon dried oregano - 1 teaspoon smoked paprika - 2 tablespoons olive oil - Salt and pepper to taste - Fresh basil or parsley for garnish Each ingredient plays a vital role in this dish's flavor. The feta cheese adds creaminess, while the eggs bring richness. The zucchini, cherry tomatoes, and bell pepper add color and nutrition. Garlic provides depth, and herbs and spices elevate the taste. Using fresh ingredients ensures the best flavor. I find that high-quality feta and ripe tomatoes make a noticeable difference. Feel free to adjust the salt and pepper to fit your taste. These ingredients combine to create a dish that is both simple and satisfying. If you want the full recipe, check out the section on preparation. 1. Preheat the oven and prepare the baking dish. Start by preheating your oven to 375°F (190°C). This temperature helps cook the eggs just right. Grab a medium-sized baking dish. A glass dish works great for this recipe. 2. Add vegetables and seasonings to the baking dish. In your baking dish, add the diced zucchini, halved cherry tomatoes, and diced bell pepper. Drizzle 2 tablespoons of olive oil over the veggies. Sprinkle salt, pepper, and 1 teaspoon of dried oregano. Toss everything well, so the vegetables are coated in oil and spices. 3. Create wells for feta and eggs. Use a spoon to make small wells in the vegetable mix. Crumble 200g of feta cheese into these wells. Next, carefully crack 4 large eggs over the feta and vegetables, making sure the yolks stay whole. 1. Bake time and temperature. Place the dish in the oven. Bake for 20-25 minutes. You want the egg whites to be set, but the yolks should still be a bit runny. If you like firmer yolks, add a few extra minutes. 2. Tips for achieving perfect eggs. Keep an eye on the eggs during baking. Oven times can vary. If you want a creamier yolk, check them at 20 minutes. For firmer yolks, wait for the full 25 minutes. 1. How to serve Mediterranean Baked Feta Eggs. Once baked, let the dish cool for a couple of minutes. Garnish with fresh basil or parsley. This adds a pop of color and fresh flavor. Serve directly in the baking dish for a casual meal. 2. Pairing suggestions for sides or bread. Pair these eggs with crusty bread or pita. A simple green salad also works well. This dish is great for brunch or any meal of the day. You can find the full recipe to try this dish at home! To get the eggs just right, try baking them a bit longer. You can cook them for 30 minutes for firmer yolks. If you like runny yolks, stick to 20 minutes. Adjust to your taste. For crispy vegetables, cut them small. This helps them cook faster and caramelize nicely. Toss them in olive oil and seasoning before baking for extra flavor. If you want to switch up the cheese, try goat cheese or ricotta. They give a different but tasty flavor. For veggies, use what’s in season. Spinach, mushrooms, or asparagus all work well. Feel free to mix and match based on what you have at home. For baking, a medium-sized ceramic or glass dish works best. These materials help cook the eggs evenly. A sharp knife and cutting board make prep easy. Also, a spatula helps to serve the dish neatly. These tools will make your cooking experience smoother. For the full recipe, check out the main section. {{image_2}} You can make Mediterranean Baked Feta Eggs even more exciting. Try adding spices like cumin or chili flakes. These can bring warmth and depth to the dish. Fresh herbs such as dill or thyme also work great. They add a burst of freshness that enhances the flavors. You can switch up the cheese too. While feta is classic, goat cheese offers a tangy twist. Mozzarella brings creaminess, while sharp cheddar can add a nice bite. Each cheese gives a unique flavor profile, so feel free to experiment. If you follow a vegan diet, you can adapt this dish to suit your needs. Replace the eggs with silken tofu. Crumble the tofu and season it well to mimic the egg texture. Use nutritional yeast for a cheesy flavor without dairy. For gluten-free options, this recipe is already a winner. All the ingredients are gluten-free. Just make sure to double-check your cheese and other products to confirm they meet your dietary needs. Mediterranean Baked Feta Eggs can shine at any meal. For breakfast, serve it hot with crusty bread. It’s perfect for dipping and soaking up the egg yolks. For brunch, pair it with a light salad. The fresh greens balance the richness of the dish. If you meal prep, this recipe is great for that too. You can bake it in advance and store it in the fridge. Just reheat it quickly when you’re ready to enjoy. For the full recipe, check out the details provided earlier. To store leftovers of Mediterranean Baked Feta Eggs, let them cool first. Place them in an airtight container. This keeps the dish fresh and prevents odors from mixing. You can store it in the fridge for up to three days. If you want to enjoy this dish later, make sure to check for any signs of spoilage before eating. When reheating, you want to maintain the quality of the dish. The best way is to use an oven. Preheat the oven to 350°F (175°C). Place the eggs in a baking dish and cover with foil. Heat for about 10-15 minutes, or until warmed through. You can also use a microwave, but the eggs may become rubbery. To freeze Mediterranean Baked Feta Eggs, start by letting the dish cool completely. Cut it into portions and wrap each piece tightly in plastic wrap. Then, place them in a freezer bag. Make sure to label the bags with the date. These eggs can last up to three months in the freezer. When you're ready to eat, thaw the portions in the fridge overnight. Reheat them in the oven or microwave as mentioned earlier. This way, you can enjoy a quick and tasty meal anytime! For the full recipe, check the section above. You can tell when the eggs are done by looking at the whites. They should be set and not runny. The yolks can stay soft and slightly jiggly. If you want firmer yolks, bake a bit longer. The ideal cooking time is 20-25 minutes at 375°F (190°C). Yes! You can swap veggies easily. Try spinach, kale, or mushrooms. You can also add artichokes or olives for a twist. Mix and match based on what you have at home. Seasonal veggies add freshness and color to your dish. I love serving these eggs with crusty bread or pita. A side salad with greens and lemon dressing pairs well too. You can add roasted potatoes for a heartier meal. Don’t forget some fresh fruit for a sweet touch! Try this recipe for a delightful experience: [Full Recipe]. You can enjoy Mediterranean Baked Feta Eggs by following the steps outlined above. I shared how to prepare the ingredients, bake them, and serve delicious meals. With tips for perfecting texture and ingredient swaps, you can tailor this dish to your taste. You can even explore different flavor and dietary variations. Remember, storage and reheating techniques help keep leftovers fresh. Dive into this tasty recipe, and make it your own! Enjoy every bite and impress your friends and family.](https://toastedrecipes.com/wp-content/uploads/2025/05/3fba2d67-48a3-4dab-81d6-9a24f35c2242.webp)
Mediterranean Baked Feta Eggs Flavorful and Simple Dish
Are you ready to try a dish that’s both simple and bursting with flavor? Mediterranean Baked Feta Eggs combine creamy feta, fresh veggies, and perfectly
![- 1 cup all-purpose flour - 2 tablespoons sugar - 1 tablespoon baking powder - 1/2 teaspoon salt - 1 ripe banana, mashed - 1 cup milk (dairy or non-dairy) - 1 large egg - 2 tablespoons melted butter or coconut oil - 1/2 teaspoon vanilla extract - 1/2 cup chocolate chips - Additional butter or oil for cooking Banana chocolate chip pancakes need simple ingredients. Each one plays a key role in the taste and texture. - All-purpose flour gives the pancakes structure. It makes them fluffy. - Sugar adds sweetness, balancing the rich chocolate. - Baking powder helps the pancakes rise. This makes them light and airy. - Salt enhances all the flavors in the batter. - Ripe banana is the star of the dish. It brings natural sweetness and moisture. - Milk binds the batter. You can use dairy or non-dairy milk. - Egg adds richness and helps with binding. - Melted butter or coconut oil adds flavor and moisture to the pancakes. - Vanilla extract gives a warm, sweet note. - Chocolate chips provide bursts of chocolate in every bite. - Additional butter or oil is for cooking. It prevents sticking and adds a nice crisp. With these ingredients ready, you can make the best banana chocolate chip pancakes. Check out the Full Recipe for details on how to combine these tasty items! Mixing Dry Ingredients Start by gathering your dry ingredients. In a large bowl, whisk together: - 1 cup all-purpose flour - 2 tablespoons sugar - 1 tablespoon baking powder - 1/2 teaspoon salt Mix them well until everything looks even. This step adds air to your pancakes. Combining Wet Ingredients In another bowl, mash one ripe banana with a fork. Then, add: - 1 cup milk (dairy or non-dairy) - 1 large egg - 2 tablespoons melted butter or coconut oil - 1/2 teaspoon vanilla extract Stir these until smooth. The banana adds moisture and flavor. Merging Dry and Wet Mixtures Pour the wet mixture into the bowl with the dry mixture. Gently stir until just combined. It's okay if the batter has lumps. Overmixing can make pancakes tough. Cooking the Pancakes Heat a non-stick skillet over medium heat. Add a little butter or oil to coat the pan. Pour about 1/4 cup of batter for each pancake. Cook until bubbles form on top, about 2-3 minutes. Sprinkle a few chocolate chips on top before flipping. Flip the pancake carefully. Cook for another 2-3 minutes until both sides are golden brown. Serving Suggestions Serve these warm pancakes on a plate. Top with maple syrup, sliced bananas, or whipped cream. You can also sprinkle more chocolate chips on top for extra sweetness. Enjoy your delicious banana chocolate chip pancakes! For the complete recipe, check out the [Full Recipe]. Avoiding Overmixing Mix the batter gently. Overmixing can make the pancakes tough. Stir until you see no dry flour. A few lumps are fine. This keeps them light and fluffy. Cooking Temperature Recommendations Heat your skillet to medium. If it's too hot, pancakes can burn. If too cool, they won’t cook evenly. A drop of water should sizzle on the skillet. Adjust the heat as you cook. Ensuring Even Cooking When you pour the batter, use a measuring cup. This helps keep the pancakes the same size. Cook until bubbles form on top. This shows they are ready to flip. Popular Toppings for Banana Chocolate Chip Pancakes Maple syrup is a classic choice. You can also try honey or agave. Fresh banana slices add great flavor. Whipped cream makes it feel special. Sprinkle some extra chocolate chips on top for fun! Alternative Serving Suggestions Serve with yogurt for a protein boost. A side of bacon or sausage pairs nicely. For a twist, add nuts or berries. These add crunch and flavor. You can even make a pancake stack with layers of toppings! You can find the Full Recipe linked above to guide you through the process. {{image_2}} Using Whole Wheat Flour You can swap all-purpose flour for whole wheat flour. Whole wheat adds fiber and nutrients. The pancakes will have a nuttier taste. They will still be soft and delicious. Just use the same amount as the white flour. Low Sugar Options If you want to cut sugar, reduce or skip the 2 tablespoons of sugar. The ripe banana adds natural sweetness. You can also use honey or maple syrup instead. This way, you keep the flavor while lowering the sugar. Adding Nuts or Berries You can make your pancakes even tastier by adding nuts or berries. Walnuts or pecans add a nice crunch. Blueberries or strawberries give a fresh burst of flavor. Just mix in about 1/4 cup of your choice right before cooking. Swapping Chocolate Types Feel free to change the type of chocolate chips you use. Dark chocolate chips offer a rich taste. Milk chocolate chips are sweeter and creamier. You can even try white chocolate for a fun twist. Mixing different types adds depth to the flavors. For more ideas, check the Full Recipe! After making your banana chocolate chip pancakes, you might have leftovers. Storing them right helps keep them fresh. - Refrigerating Leftover Pancakes: Place your pancakes in an airtight container. Store them in the fridge for up to three days. This keeps them soft and tasty. If you want to enjoy them warm later, make sure they cool down before sealing. - Freezing Pancakes for Later Enjoyment: To save pancakes for a while, freeze them. Stack the pancakes with a piece of parchment paper between each one. This prevents them from sticking together. Use a freezer bag or an airtight container. They can last up to two months in the freezer. When you're ready to eat your pancakes, reheating them is easy. - How to Reheat Pancakes Effectively: For a quick fix, use the microwave. Place a pancake on a microwave-safe plate. Cover it with a damp paper towel to keep it moist. Heat for 20-30 seconds. For a crispy outside, use a skillet. Heat a little butter on medium heat. Add the pancake and cook for about one minute on each side. Enjoy your warm pancakes just like they were fresh! Can I make Banana Chocolate Chip Pancakes gluten-free? Yes, you can. Use a gluten-free flour blend instead of regular flour. Many brands work well. Just check the label to confirm it is a 1:1 substitute. This way, everyone can enjoy these tasty pancakes. How ripe should the banana be for the best flavor? Look for bananas that are very ripe. They should have brown spots and feel soft. Ripe bananas bring out the best sweet taste. They also mash easily, which helps mix well into the batter. Can this recipe be doubled or halved? Yes, you can double or halve the recipe. If you double it, use two ripe bananas. For halving, use half the amount of each ingredient. This makes it easy to adjust for your needs. What are some common mistakes to avoid? Avoid overmixing the batter. A few lumps are okay. Also, make sure your skillet is hot enough before pouring the batter. Cooking at the right temperature helps the pancakes cook evenly. Lastly, don’t skip the chocolate chips; they are the star of this recipe! For the full recipe, check out the detailed steps above. You learned how to make delicious banana chocolate chip pancakes. We covered the ingredients, easy steps, and helpful tips. You also found ideas for healthy swaps and storage advice. Remember, don’t overmix your batter for light pancakes. Enjoy them fresh with your favorite toppings. I hope this recipe makes breakfast special. Now, it’s time to grab those ingredients and start cooking!](https://toastedrecipes.com/wp-content/uploads/2025/05/a564b558-0a85-46c8-b2f7-ab0bf43221ee.webp)
Irresistible Banana Chocolate Chip Pancakes Recipe
If you love pancakes, get ready for a treat! These Banana Chocolate Chip Pancakes are soft, sweet, and full of flavor. With just a few

Crispy Air Fryer Breakfast Potatoes Easy and Tasty Recipe
Welcome to your new favorite breakfast recipe: Crispy Air Fryer Breakfast Potatoes! I’m excited to share a simple and tasty method for making perfectly crisp

Sausage Gravy Breakfast Pizza Scrumptious Morning Meal
Start your day with a twist on tradition: Sausage Gravy Breakfast Pizza. This mouthwatering meal combines hearty sausage gravy with the classic taste of pizza.
![To make a delicious Loaded Breakfast Hash, gather the following ingredients: - Diced potatoes - Chopped bell peppers - Finely chopped onion - Minced garlic - Eggs - Ground turkey or chicken sausage (optional) - Shredded cheddar cheese - Olive oil - Salt and pepper - Smoked paprika - Chili powder - Fresh parsley Each ingredient plays a key role. The diced potatoes form the base, giving a hearty texture. Bell peppers and onions add sweetness and crunch. Garlic enhances flavor with its warm notes. Eggs bring richness and protein, while optional sausage adds depth. Cheese melts beautifully, creating a creamy finish. Olive oil helps everything cook evenly, while spices like smoked paprika and chili powder bring warmth and a hint of spice. Finally, fresh parsley brightens the dish and adds a pop of color. For the full recipe to get started, check out Loaded Breakfast Hash. Start by peeling the potatoes. Use a sharp peeler for quick work. Next, dice the potatoes into small cubes. Aim for uniform sizes. This helps them cook evenly. If they are too big, they will take longer to cook. If they are too small, they may burn. Heat a skillet over medium heat. Add one tablespoon of olive oil. Once the oil is hot, add the diced potatoes. Season them with salt, pepper, smoked paprika, and chili powder. Stir well to coat each piece. Cook for about 10-12 minutes. Stir occasionally to avoid sticking. You want them golden brown and tender. Now it’s time to add flavor. Add the chopped onion and bell peppers to the skillet. Cook for an additional 5 minutes. This softens the veggies and adds flavor. If you want to add sausage, do it now. Mix it in well for even cooking. Make four small wells in the hash. Use a spoon to create space for the eggs. Crack an egg into each well. Cover the skillet with a lid. Let the eggs cook for 5-7 minutes. Check the eggs for your desired doneness. You want the whites set but the yolks still runny or firm. Once the eggs are cooked, it’s cheese time! Sprinkle shredded cheddar cheese over the hash. Cover the skillet again for one more minute. This helps the cheese melt nicely. You want it gooey and delicious. Remove the skillet from heat. Garnish with fresh chopped parsley. This adds a nice pop of color. You can also add more salt and pepper if you like. Enjoy your hearty meal! For more details, check the Full Recipe. For a tasty breakfast hash, I prefer using Yukon Gold or red potatoes. These types are creamy and hold their shape well. They cook evenly and create a nice texture. Avoid starchy potatoes like Russets; they can turn mushy. To get crispy potatoes, you need a few simple steps. Start by cutting the potatoes into small, uniform cubes. This helps them cook at the same rate. Use medium heat and make sure your skillet is hot before adding the potatoes. Don’t overcrowd the pan; this will trap steam and prevent crisping. Stir occasionally but not too often. Let them brown for a few minutes before flipping. When it comes to eggs, you can cook them to your taste. For runny yolks, let them cook for about 5 minutes. If you like firmer yolks, give them a few more minutes. You can also crack the eggs into small wells in the hash for even cooking. Cover the skillet to help the eggs set faster. This method keeps everything warm and gooey. Try this approach to make your Loaded Breakfast Hash perfect every time. Follow the [Full Recipe] for details on how to put it all together! {{image_2}} You can easily make a vegetarian version of loaded breakfast hash. Just swap the sausage for more veggies. Try using mushrooms, zucchini, or spinach. These veggies add great flavor and texture. You can also toss in some black beans for protein. This way, you keep it hearty and filling without meat. If you like heat, make a spicy loaded breakfast hash. Add jalapeños or diced chili peppers. You can also sprinkle in some red pepper flakes. This extra spice turns up the flavor and makes it fun. Remember to adjust the heat to suit your taste. Cheese lovers will enjoy a cheesy loaded breakfast hash. You can use different types of cheese to mix it up. Cheddar, pepper jack, or even feta can work well. Just sprinkle the cheese on top right before serving. It melts perfectly and adds a creamy touch to the dish. Feel free to explore these variations. Each one brings a unique twist to the classic loaded breakfast hash. For the full recipe, check out the section above. To store your loaded breakfast hash, let it cool first. Once cool, place it in an airtight container. This keeps the flavors fresh and prevents spills. You can store it in the fridge for up to four days. When you're ready to enjoy your leftovers, reheat them gently. The best way is to use a skillet over medium heat. Add a splash of water to create steam. This method helps maintain texture and keeps everything moist. Stir occasionally until heated through. You can freeze portions of your loaded breakfast hash as well. Divide it into single servings and place them in freezer-safe bags. Make sure to remove as much air as possible before sealing. This helps prevent freezer burn. It can last up to three months in the freezer. When ready to eat, thaw in the fridge overnight before reheating. For best results, eat within one month for optimal taste. Yes, you can prepare Loaded Breakfast Hash ahead of time. Cook the potatoes and veggies as stated in the recipe. Let it cool completely before storing. Place it in an airtight container in the fridge. You can keep it for up to three days. When ready to eat, reheat it in a skillet. Add your eggs fresh to get the best taste. There are many tasty side dishes that pair well with Loaded Breakfast Hash. Here are a few ideas: - Fresh fruit salad - Toast or bagels - Avocado slices - Mixed green salad - Yogurt with honey These sides add freshness and balance to your meal. Customizing your Loaded Breakfast Hash is easy and fun! Here are some ways to make it your own: - Swap out the ground turkey for bacon or ham. - Use sweet potatoes instead of regular potatoes. - Add spinach or kale for extra greens. - Include different spices like cumin or oregano. - Experiment with cheese types like feta or pepper jack. Feel free to mix and match until you find your favorite combination. For the complete recipe, check the Full Recipe. In this post, we explored how to create a tasty loaded breakfast hash. We covered the ingredients, like potatoes, bell peppers, and eggs, and the cooking steps to bring it all together. We also discussed various tips to enhance your dish and shared fun variations to try. Finally, look out for storage info and reheating tips. With these strategies, your breakfast hash will be a hit! Enjoy cooking and feel free to get creative.](https://toastedrecipes.com/wp-content/uploads/2025/05/128862fe-e240-4874-8bb6-ad350c181cec.webp)
Loaded Breakfast Hash Flavorful and Hearty Meal
Are you ready to elevate your breakfast game? This Loaded Breakfast Hash is perfect for kickstarting your day. With crispy potatoes, colorful veggies, and protein-packed
![To make Lemon Blueberry Muffins, gather these simple ingredients: - 1 ½ cups all-purpose flour - ½ cup granulated sugar - 2 teaspoons baking powder - ¼ teaspoon baking soda - ¼ teaspoon salt - 1 large egg - ¾ cup buttermilk (or substitute with milk and a splash of lemon juice) - ⅓ cup vegetable oil - Zest of 1 lemon - 1 tablespoon lemon juice - 1 cup fresh blueberries (or frozen, if out of season) - Optional: 1 tablespoon coarse sugar for topping You can add a few extras to enhance your muffins: - 1 teaspoon vanilla extract for a sweet note - ½ teaspoon cinnamon for warmth - A handful of chopped nuts for crunch Each muffin has about: - Calories: 180 - Protein: 3g - Carbohydrates: 28g - Fat: 7g - Fiber: 1g - Sugar: 8g These muffins are a tasty treat, but enjoy them in moderation! For the full recipe, visit the detailed guide on how to bake these delightful muffins. Start by preheating your oven to 375°F (190°C). This step is key to getting golden muffins. While the oven heats, line a muffin tin with paper liners. If you prefer, you can spray the tin with non-stick spray. This keeps the muffins from sticking and makes cleanup easy. In a large bowl, whisk together the dry ingredients. You need 1 ½ cups of all-purpose flour, ½ cup of granulated sugar, 2 teaspoons of baking powder, ¼ teaspoon of baking soda, and ¼ teaspoon of salt. Mix until everything blends well. In another bowl, crack 1 large egg. Add ¾ cup of buttermilk, ⅓ cup of vegetable oil, the zest of 1 lemon, and 1 tablespoon of lemon juice. Beat these ingredients together until they mix smoothly. Now, pour the wet mix into the dry mix. Gently fold them together. Be careful not to overmix. It’s okay if a few lumps remain. Next, fold in 1 cup of fresh blueberries. Make sure they spread evenly in the batter. Spoon the batter into the muffin tin, filling each cup about ¾ full. If you like, sprinkle 1 tablespoon of coarse sugar on top for a crunchy finish. Bake the muffins in your preheated oven for 18-22 minutes. They should be golden brown, and a toothpick should come out clean when inserted in the center. After baking, let the muffins cool in the tin for 5 minutes. Then, transfer them to a wire rack to cool completely. These steps ensure your muffins are fresh and delicious. For the full recipe, refer to the earlier section. To get the best texture, avoid overmixing the batter. Gently fold the wet and dry ingredients together. A few lumps are fine. This keeps the muffins light and fluffy. You want them to rise nicely in the oven. If you want even softer muffins, try adding a bit more buttermilk. This adds moisture and keeps them tender. The zing of lemon and the sweetness of blueberries should shine. Use fresh lemon juice and zest for a bright taste. These elements balance well with the sugar. If you like a stronger lemon flavor, add more lemon juice or zest. This will enhance the overall taste. Remember, the blueberries add natural sweetness, so adjust sugar as needed. Serve these muffins warm for the best flavor. They pair well with tea or coffee. For a fun twist, drizzle a lemon glaze on top. This adds a sweet, tangy finish. You can also dust them with powdered sugar for a nice touch. Arrange them on a colorful plate for a lovely display. Check the [Full Recipe] for more ideas on how to enjoy these delightful treats! {{image_2}} You can swap all-purpose flour for whole wheat flour. This change adds fiber and nutrients. The muffins will taste slightly nuttier. You may also use almond flour for a gluten-free option. Just remember to adjust the liquid since almond flour absorbs more moisture. Feel free to mix in other fruits. Raspberries or blackberries work great with lemon. You can also use diced peaches or apples for a twist. Each fruit gives the muffins a unique flavor. Just keep the total fruit amount about one cup. For a gluten-free treat, use a gluten-free flour blend. Look for one that contains xanthan gum. This helps mimic the texture of regular flour. You can also try oat flour or coconut flour. Adjust the liquid to ensure the batter remains moist and fluffy. To keep your lemon blueberry muffins fresh, store them in an airtight container. Place them at room temperature for up to three days. If you want them to last longer, refrigerate them for up to a week. Just remember to wrap them tightly to avoid drying out. Freezing is a great way to save muffins for later. First, let the muffins cool completely. Then, wrap each muffin in plastic wrap or foil. Place them in a freezer-safe bag or container. You can freeze them for up to three months. When you're ready to eat one, just take it out and let it thaw at room temperature. Reheating muffins is easy and quick. For best results, use the oven. Preheat it to 350°F. Place the muffin on a baking sheet for about 5-10 minutes. If you're in a hurry, a microwave works too. Heat the muffin for about 15-20 seconds. Enjoy your warm lemon blueberry muffins just like when they were fresh! For the full recipe, check out the Lemon Blueberry Bliss Muffins. Yes, you can use frozen blueberries. They work well in this recipe. Frozen blueberries may add more moisture. To prevent the batter from turning blue, fold them in gently. You can check if the muffins are done by inserting a toothpick. If it comes out clean, they are ready. The tops should be golden brown. The muffins should feel springy when lightly touched. Yes, you can make these muffins ahead of time. They taste great fresh but store well. Keep them in an airtight container at room temperature. You can also freeze them for later. Just warm them in the oven or microwave before serving. For the full recipe, check earlier in the article. This blog post covered how to make delicious muffins. We reviewed key ingredients, step-by-step instructions, and helpful tips. You learned about variations and storage methods too. Perfecting your muffins means paying attention to texture and flavor. Try adding fruits or switching flours for new tastes. Follow these tips to create a treat everyone will love. With this guide, you can enjoy baking fun and tasty muffins at home. Happy baking!](https://toastedrecipes.com/wp-content/uploads/2025/05/c645bd0c-3d61-4c89-8e2f-41f0c71f05db.webp)
Lemon Blueberry Muffins Fresh and Flavorful Delight
Are you ready to bake some delicious Lemon Blueberry Muffins? This fresh and flavorful treat brightens any morning. With a simple list of ingredients and