Breakfast
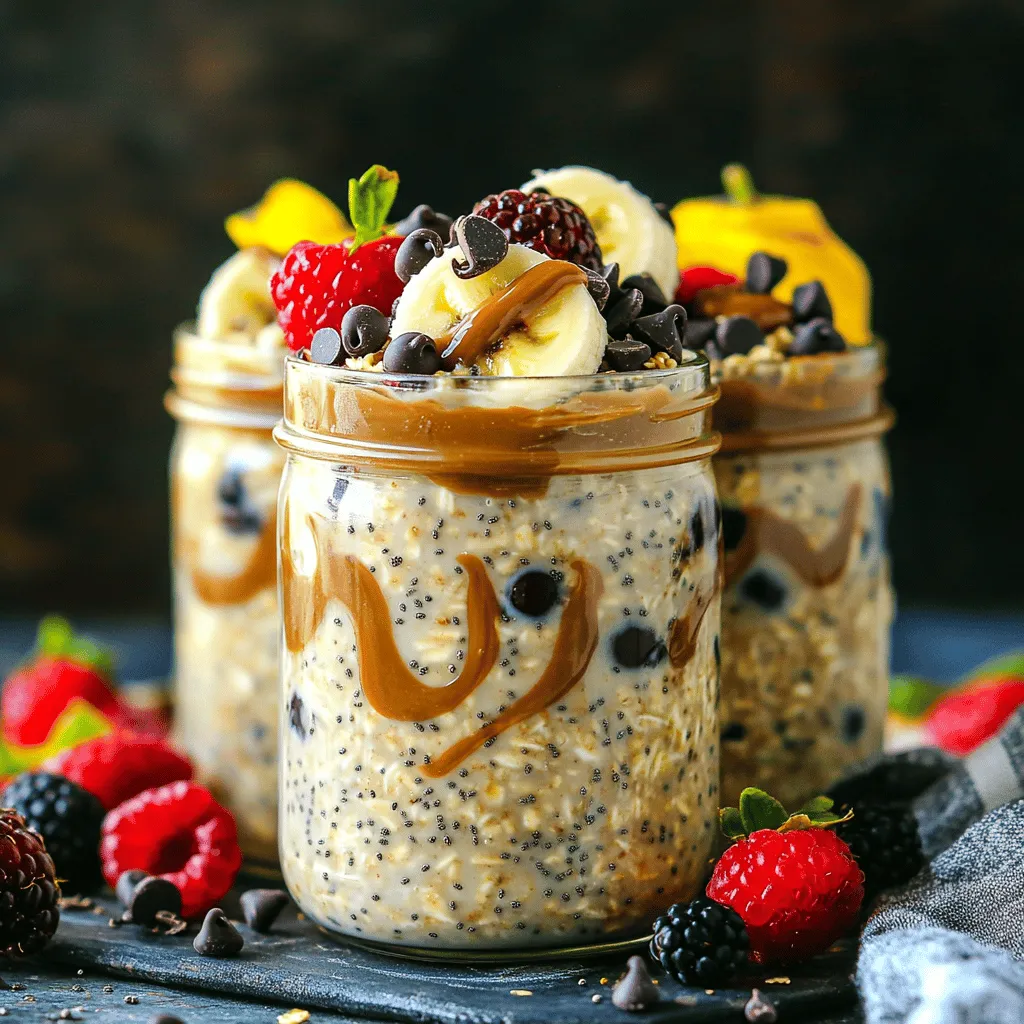
High-Protein Overnight Oats for a Healthy Start
Start your day strong with high-protein overnight oats! This quick and easy breakfast is perfect for busy mornings. Packed with essential nutrients, these oats can
![- Brioche Bread - Eggs - Whole Milk - Heavy Cream - Granulated Sugar - Vanilla Extract - Ground Cinnamon - Salt - Brown Sugar (for topping) - Fresh Berries (for garnish) - Whipped Cream (optional) You can swap brioche with other breads like challah or sourdough. These options work well too. For a dairy-free version, use almond or oat milk instead of whole milk. You can also use coconut cream in place of heavy cream. If you want to cut sugar, try natural sweeteners, like honey or maple syrup. Just adjust the amounts to taste. Start by whisking the egg mixture. In a bowl, combine 4 large eggs, 2 cups of whole milk, 1 cup of heavy cream, ¾ cup of granulated sugar, 1 tablespoon of vanilla extract, ½ teaspoon of ground cinnamon, and a pinch of salt. Mix until it looks smooth and creamy. This step is key for a rich flavor. Next, arrange the brioche slices in a greased 9x13 inch baking dish. You want them to overlap slightly for even soaking. Pour the egg mixture evenly over the slices. Make sure every piece is well-coated. Gently press down so the bread absorbs the mixture. Cover the dish tightly with plastic wrap. This keeps the moisture in while it chills. Place it in the fridge overnight or for at least 4 hours. This soaking time allows the bread to soak up all the delicious flavors. In the morning, preheat your oven to 350°F (175°C). This ensures the dish bakes evenly. After preheating, remove the plastic wrap. Sprinkle ¼ cup of brown sugar evenly over the top of the soaked bread. This topping creates a nice caramelized layer. Bake in the preheated oven for 30-35 minutes. Keep an eye on it until the custard sets and the top is golden brown. It’s okay to have a little jiggle in the center, as it will firm up while cooling. When it’s done, let the dish cool slightly. For a true crème brûlée effect, use a kitchen torch to caramelize the sugar on top. This gives it that crunchy layer we all love. For garnishes, fresh berries add a nice touch. You can also serve it with whipped cream if you like. When plating, cut into squares and arrange on plates. Best of all, enjoy it warm for the best flavor. For the full recipe, check out the detailed instructions above! To make the best custard, soaking the bread is key. Use thick slices of brioche. When you place the slices in the dish, overlap them slightly. This helps the custard soak in evenly. Pour your egg mixture over the bread slowly. Press down gently so every slice absorbs the liquid. Mixing well is just as important. Whisk the eggs and cream until combined. You want a smooth texture with no lumps. If the sugar does not mix in well, it can lead to grainy custard. Timing is everything. Bake your French toast for 30 to 35 minutes. Set a timer to help you keep track. Check for doneness by gently shaking the dish. If the center jiggles, it needs more time. The top should be golden and firm. A good baking dish makes a difference. I recommend a 9x13 inch glass or ceramic dish. These materials help cook the custard evenly. For serving, a spatula works well to lift pieces. If you want a fancy touch, use a torch to caramelize the sugar on top. This gives it that classic crème brûlée finish. For the full recipe, check the section above. Happy cooking! {{image_2}} You can easily change the flavor of your Overnight Crème Brûlée French Toast. Adding fruit can make it taste fresh and fun. Think about using apples or bananas. Both fruits will add sweetness and a nice texture. You can slice them thin and layer them on top of the brioche before pouring the egg mixture. Another great option is to add nuts. Pecans or walnuts can bring a crunchy bite. Chop them up and sprinkle them over the bread before soaking it. This will give your dish a nutty flavor that is simply delightful. If you want a vegan version, you can swap out a few ingredients. Use plant-based milk like almond or oat milk. Instead of eggs, try using flaxseed or chia seeds mixed with water. This will help create that creamy texture without using animal products. For those needing gluten-free options, use gluten-free bread. There are many tasty types available now. Make sure all your other ingredients are gluten-free too. This way, everyone can enjoy this yummy dish! You can create themed versions of this dish for holidays. For example, pumpkin spice adds a warm flavor for fall. Just mix in some pumpkin puree and pumpkin spice into your egg mixture. You’ll love the cozy taste. Seasonal toppings can also keep things exciting. In the summer, add fresh strawberries or blueberries on top. In winter, consider using spiced pears or warm apples. Each season brings new flavors to try! For the full recipe, check out the [Full Recipe]. To keep your Overnight Crème Brûlée French Toast fresh, store it in the fridge. Place the leftovers in an airtight container. This method helps maintain the moisture and flavor. You can refrigerate the dish for up to three days. When reheating, preheat your oven to 350°F (175°C). Place the French toast in an oven-safe dish. Cover it with foil to avoid drying out. Heat for about 15 minutes or until warm. You can also use the microwave, but it may not keep the texture as nice. If you want to freeze the dish, let it cool first. Slice the French toast into individual pieces. Wrap each slice tightly in plastic wrap and then place them in a freezer bag. This keeps them fresh for up to two months. When you’re ready to enjoy it, thaw the slices in the fridge overnight. After thawing, reheat them as mentioned above. This way, you can savor the creamy goodness anytime! In the fridge, the Overnight Crème Brûlée French Toast lasts about three days. If it stays longer, check for signs of spoilage. Look for changes in smell or appearance. If it smells off or has a slimy texture, it’s best to discard it. Always trust your senses! Yes, you can. If you are short on time, make the egg mixture in the morning. Whisk together the eggs, milk, cream, sugar, and spices. Then, soak the brioche slices for at least 30 minutes. This gives the bread some time to soak up the flavor. Make sure to preheat the oven while the bread soaks. Bake it just like the recipe says. You can pair this dish with many tasty sides. Fresh fruit, like berries or bananas, adds color and flavor. You can also serve it with a light syrup or maple syrup. If you want something warm, try hot chocolate or coffee. These drinks balance the sweet flavors of the French toast. Yes, you can use different breads. Challah or sourdough works well, too. These breads have a nice texture. They soak up the mixture well and are still soft. Just make sure the bread is thick enough to hold the custard without falling apart. This way, your French toast will be delicious! For the full recipe, check out the details above. This article covered delicious recipes for Overnight Crème Brûlée French Toast. We talked about key ingredients, helpful tips, and variations to try. You learned about preparing ahead, cooking methods, and storing leftovers. Customizing the dish to suit your taste is easy. With these ideas, your breakfast can be quick, fun, and tasty. Enjoy your cooking adventure with this tasty dish!](https://toastedrecipes.com/wp-content/uploads/2025/06/e0a56e8f-671d-4bd1-8efc-a47ff431f5a1.webp)
Overnight Crème Brûlée French Toast Delightful Recipe
Get ready to elevate your breakfast game with my Overnight Crème Brûlée French Toast! This delicious dish combines soft brioche bread soaked in a rich

Easy Peanut Butter & Jelly French Toast Delight
Are you ready to take your breakfast to a new level? With my Easy Peanut Butter & Jelly French Toast Delight, you can turn a

Fireman’s Overnight Breakfast Casserole Energizing Delight
Kick-start your day with the Fireman’s Overnight Breakfast Casserole! This hearty dish is packed with eggs, cheese, and savory sausage, making it perfect for a
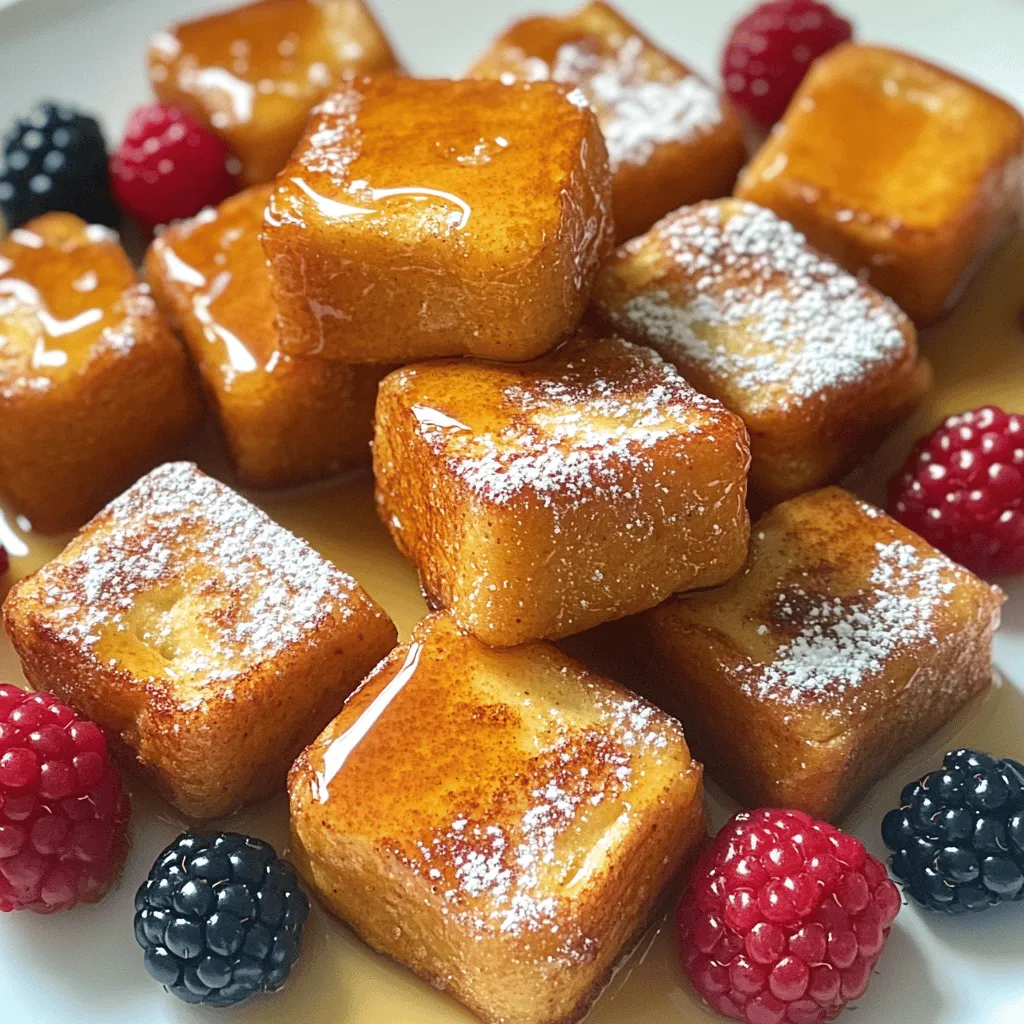
Cinnamon Roll French Toast Bites Delightful and Decadent
Are you ready to treat yourself to a sweet breakfast? Today, I’m excited to share my recipe for Cinnamon Roll French Toast Bites. These delicious
![For this delicious recipe, gather the following ingredients: - 6 large cinnamon rolls (store-bought or homemade) - 4 large eggs - 1 cup milk (whole or almond milk) - 1 teaspoon vanilla extract - 1 teaspoon ground cinnamon - 2 tablespoons maple syrup - 2 tablespoons butter (for cooking) - Powdered sugar (for dusting) - Fresh berries (strawberries or blueberries for garnish) If you want to make some swaps, here are a few ideas: - Use egg substitutes like flaxseed or chia seeds for a vegan option. - Almond milk or oat milk works well for dairy-free diets. - Try gluten-free cinnamon rolls if you need to avoid gluten. You can choose between store-bought cinnamon rolls for convenience or make your own from scratch for a personal touch. Both options can lead to tasty treats! If you’re short on time, the store-bought version saves you some effort without losing flavor. How to prep the cinnamon rolls Start with 6 large cinnamon rolls. If you use store-bought rolls, unroll each one carefully. This gives you a long strip of dough. If you make them from scratch, roll out the dough into flat rectangles. Mixing the filling ingredients In a small bowl, mix 2 tablespoons of maple syrup with a sprinkle of ground cinnamon. This simple mix will add extra flavor. Spread it evenly on each unrolled cinnamon roll. Rolling the cinnamon rolls back up Once the filling is on, roll each cinnamon roll back up tightly. Make sure the filling stays sealed inside. This step is key for the best taste. Detailed instructions for egg mixture preparation In a medium bowl, whisk together 4 large eggs, 1 cup of milk, 1 teaspoon of vanilla extract, and 1 teaspoon of ground cinnamon. Add another tablespoon of maple syrup. Mix well until everything is combined. Coating and cooking the cinnamon roll slices Dip each rolled cinnamon roll into the egg mixture. Coat them evenly, but do not soak them too long. Place the coated rolls in a large skillet. Melt 2 tablespoons of butter over medium heat. Cook each roll for about 3-4 minutes on each side until they turn golden brown. Tips for achieving golden-brown perfection Keep an eye on the rolls as they cook. Turn them carefully to avoid breaking. If they cook too fast, lower the heat a bit. This ensures they cook through without burning. - Best practices for flipping the rolls: Use a wide spatula to flip each roll. Gently slide the spatula under the roll. Lift it carefully to avoid breaking. Wait until the edges are golden before flipping. This ensures they stay intact and fluffy. - Avoiding sogginess in the rolls: Do not soak the rolls in the egg mixture for too long. A quick dip is all they need. This keeps the texture light and fluffy. Also, make sure your skillet is hot enough before adding the rolls. This helps seal in the flavors without making them soggy. - Achieving the right balance of flavors: Use just the right amount of cinnamon in the filling and the egg mix. Too much can overpower the sweet taste of the rolls. A teaspoon of vanilla adds depth without being too strong. This balance makes each bite delightful. - Garnishing ideas with fresh berries: Top your cinnamon roll French toast rolls with fresh berries. Strawberries and blueberries work great. They add a pop of color and freshness to the dish. The tartness of the berries balances the sweetness of the rolls. - Pairing with syrups or whipped cream: Drizzle with maple syrup for added sweetness. If you like, add a dollop of whipped cream on top. This adds a creamy texture that makes every bite richer. You can also try flavored syrups for a twist. - Creative serving ideas for special occasions: Serve these rolls on a large platter for brunch. Dust them with powdered sugar for a beautiful look. You can also stack them high for an eye-catching display. Add a few sprigs of mint for a fresh touch. These ideas make your presentation stand out at any gathering. For the full recipe, check the details mentioned earlier. {{image_2}} You can make these Cinnamon Roll French Toast Rolls even more fun. Here are some ways to change up the flavors: - Adding chocolate chips or nuts: Toss in some chocolate chips or chopped nuts. They add great texture and a sweet crunch. Mix these into the filling or sprinkle them on top while cooking. - Exploring different types of bread: Try using brioche, challah, or even gluten-free bread. Each type will give a unique taste and texture. A richer bread makes the rolls even fluffier. - Spicing it up with extracts or zests: A splash of almond extract or a bit of orange zest can brighten the flavor. Just a little goes a long way in making each bite special. These rolls can fit many diets. Here are some simple swaps: - Vegan or dairy-free adaptations: Use flax eggs instead of regular eggs and almond milk in place of dairy milk. This keeps the taste delicious while staying plant-based. - Gluten-free options: Opt for gluten-free cinnamon rolls. Many brands offer tasty gluten-free dough that works well in this recipe. - Reducing sugar for health-conscious choices: Cut back on the maple syrup or use a sugar substitute. You can still enjoy sweet flavors without all the sugar. Feel free to mix and match these ideas to make your perfect Cinnamon Roll French Toast Rolls! For the complete recipe, check the [Full Recipe]. To store leftover Cinnamon Roll French Toast Rolls, place them in an airtight container. This keeps them fresh and prevents them from drying out. You can also wrap them tightly in plastic wrap. They stay fresh in the fridge for about 3 to 4 days. If you want to enjoy them later, it’s best to refrigerate them as soon as they cool. Avoid leaving them out for too long. This helps keep their fluffy texture and sweet flavor. If you want to save some for later, freezing is a great option. First, let the cooked rolls cool completely. Then, wrap each roll tightly in plastic wrap. Place the wrapped rolls in a freezer-safe bag or container. They can last in the freezer for about 2 to 3 months. When you're ready to eat, take them out and let them thaw in the fridge overnight. To reheat, place the rolls in the oven at 350°F (175°C) for about 10-15 minutes. This will help restore their fluffy texture. You can also microwave them for about 30 seconds if you’re in a hurry. Just be careful not to overheat, as this can make them tough. Enjoy your delicious treat anytime! For the complete recipe, check out the Full Recipe. Can I make Cinnamon Roll French Toast Rolls ahead of time? Yes, you can prep the rolls ahead of time. Make the rolls and coat them in the egg mixture. Place them in the fridge, covered. Cook them when you're ready. This saves time in the morning. How do I know when they are fully cooked? You can tell they are done when they turn golden brown. Check both sides to ensure even cooking. If you cut one open, the center should not be doughy. What can I serve with Cinnamon Roll French Toast Rolls? These rolls pair well with fresh berries, whipped cream, or maple syrup. You can also add a sprinkle of nuts for crunch. They make a fun brunch dish! Can I use different flavors of cinnamon rolls? Absolutely! You can use chocolate rolls or even caramel rolls. The base recipe works well with many flavors. Try your favorite to mix things up. How to adapt for a larger group or gatherings? To serve more people, simply double the recipe. Prepare more rolls and increase the egg mixture as needed. You can cook them in batches to keep everything warm. In this post, I shared how to make delicious cinnamon roll French toast rolls. You learned about the key ingredients, preparation steps, and cooking methods. I included tips for storage and serving to enhance your meal. Feel free to explore variations to suit your taste and dietary needs. Cinnamon roll French toast is a fun twist on a classic. With this guide, you can impress your family and friends. Enjoy making this treat and share it with others!](https://toastedrecipes.com/wp-content/uploads/2025/05/411a8026-5769-4567-bbd0-98219481663b.webp)
Cinnamon Roll French Toast Rolls Perfectly Fluffy Treat
If you love breakfast treats, you’re in for a treat! These Cinnamon Roll French Toast Rolls are fluffy, sweet, and fun to make. Imagine warm,

Blueberry Buttermilk Pancake Casserole Delight
Craving a cozy breakfast that feels like a treat? Let me introduce you to my Blueberry Buttermilk Pancake Casserole Delight! This dish combines fluffy pancakes
![To make a tasty grits breakfast bowl, you need a few key ingredients. Here’s what you will need: - 1 cup stone-ground grits - 4 cups water or vegetable broth - 1/2 teaspoon salt - 1 tablespoon unsalted butter - 1/2 cup shredded sharp cheddar cheese - 2 large eggs - 1 cup fresh spinach, chopped - 1/4 cup cherry tomatoes, halved - 1 tablespoon olive oil - 1/4 teaspoon red pepper flakes - Salt and black pepper to taste - Fresh herbs (like chives or parsley) for garnish You can customize your bowl with various toppings. Here are some great options to try: - Avocado slices for creaminess - Crispy bacon or sausage for a hearty bite - Hot sauce for some heat - Sautéed mushrooms for an earthy flavor - Feta cheese for a tangy twist Feel free to mix and match to find your favorite! Each ingredient offers its own benefits. Here’s a quick look at the core ingredients: - Grits: These are high in carbohydrates, providing energy. They also have some protein. - Eggs: Packed with protein, vitamins, and healthy fats. - Spinach: Rich in vitamins A, C, and K, plus iron and calcium. - Cheddar Cheese: Adds calcium and protein, but watch for fat content. This bowl is not just delicious; it’s also a nutritious start to your day. For the full recipe, check out the complete guide above. To cook the grits, start by adding water or vegetable broth and salt to a medium saucepan. Bring it to a boil. Slowly whisk in the stone-ground grits. This helps prevent lumps. Reduce the heat to low and stir often. Let the mixture simmer for 20 to 25 minutes. You want the grits to become thick and creamy. Once they are done, add the butter. Stir until it melts. Then, mix in the cheddar cheese until the grits are smooth and cheesy. Next, heat olive oil in a skillet over medium heat. Add the chopped spinach and cook it for about 2 to 3 minutes. You want the spinach to wilt down. Then, add the halved cherry tomatoes and red pepper flakes. Cook for one more minute. Season with salt and black pepper to taste. Once cooked, remove the skillet from the heat and set it aside. In a separate pan, cook the eggs how you like. You can scramble them or fry them. If you fry the eggs, cook until the whites are firm. Keep the yolk runny for a creamier texture. This adds a nice touch to your bowl. Now it’s time to put it all together. Take serving bowls and spoon a generous amount of the cheesy grits at the bottom. Next, top the grits with the sautéed spinach and tomatoes. Finally, carefully place the cooked eggs on top. This creates a beautiful and hearty breakfast bowl. For the complete recipe, check out the [Full Recipe]. To make your grits creamy, use stone-ground grits. They cook slower but yield a better texture. Start by boiling water or vegetable broth. Whisk in the grits slowly to avoid lumps. Reduce the heat and stir often. This helps the grits cook evenly. Cook them for about 20 to 25 minutes. When they thicken, add butter and cheddar cheese. Stir until they melt and blend in. This is the secret to creamy grits. Seasoning is key to a tasty breakfast bowl. Start with salt in the boiling water or broth. This adds flavor from the start. After cooking the grits, you can add more flavors. A pinch of black pepper can enhance the dish. Red pepper flakes add a nice kick. Fresh herbs like chives or parsley will brighten the bowl. Don’t forget to taste as you go, and adjust seasoning to your liking. Eggs can be a game changer in your breakfast bowl. You can fry or scramble them based on your preference. If you fry, cook the eggs until the whites are set. The yolks should remain runny for creaminess. Scrambling also works well. Whisk the eggs before cooking and season them. You can mix in cheese or herbs for extra flavor. Eggs not only add protein but also make your bowl feel complete. For the best taste, cook eggs just before serving. This keeps them fresh and warm. You can find the full recipe for the Grits Breakfast Bowl to try these tips and tricks effectively! {{image_2}} To make a vegan version, swap the butter and cheese for plant-based options. Use coconut oil for cooking and nutritional yeast for a cheesy flavor. Replace the eggs with tofu scramble or chickpea flour scramble. You can add any veggies you like, such as bell peppers or mushrooms. This way, you keep the bowl hearty and tasty without any animal products. Grits are usually gluten-free, but check the package to be sure. If you want a different base, try polenta. It has a similar texture and works great in bowls. Just prepare it like the grits in the recipe. Top with your favorite veggies and proteins to create a filling meal. You can easily change the flavor of your grits breakfast bowl. For a spicy kick, add more red pepper flakes or some hot sauce. You can also mix in herbs like thyme or rosemary when you cook the grits. These herbs give a fresh taste that brightens each bite. Try adding roasted garlic for a deeper flavor, or even a squeeze of lemon for some zest. For more ideas, check out the Full Recipe for inspiration! To store your Grits Breakfast Bowl leftovers, let them cool first. Place them in an airtight container. This helps keep the flavors fresh. Store the bowl in the fridge for up to three days. If you want to keep it longer, freezing is a great option. When you reheat your grits, add a splash of water or broth. This will help them regain their creamy texture. Use a microwave or a stovetop. Heat gently to avoid drying them out. Stir occasionally for even heating. You can freeze each part of the bowl separately. For the grits, let them cool and spoon them into freezer bags. Press out the air and seal tightly. The sautéed spinach and tomatoes can also be frozen. Place them in a container or bag. Cooked eggs do not freeze well, so enjoy them fresh! I recommend using stone-ground grits for the best texture and flavor. They are less processed and have a rich, nutty taste. Instant or quick-cooking grits can work in a pinch but won't give you the same creamy result. Always choose high-quality grits for the best Grits Breakfast Bowl. Yes, you can prepare many parts of this recipe ahead of time. Cook the grits and store them in the fridge for up to three days. Reheat them with a splash of water or broth to bring back their creaminess. You can also sauté the spinach and tomatoes ahead. Just warm them before serving. To find the best Grits Breakfast Bowls, check local diners or Southern-style restaurants. Many places serve their own twist on this dish. You can also search online reviews or foodie blogs for recommendations. Don't forget to ask friends for their favorites! You can customize your Grits Breakfast Bowl in many ways. Try different toppings like crispy bacon, sautéed mushrooms, or avocado slices. For a spicy kick, add hot sauce or jalapeños. You can also change the cheese or use plant-based options for a vegan twist. The possibilities are endless! For the full recipe, check the earlier section. Savory Grits Breakfast Bowl is a warm and filling start to your day. Here’s how to make it: - 1 cup stone-ground grits - 4 cups water or vegetable broth - 1/2 teaspoon salt - 1 tablespoon unsalted butter - 1/2 cup shredded sharp cheddar cheese - 2 large eggs - 1 cup fresh spinach, chopped - 1/4 cup cherry tomatoes, halved - 1 tablespoon olive oil - 1/4 teaspoon red pepper flakes - Salt and black pepper to taste - Fresh herbs (like chives or parsley) for garnish 1. Cook the Grits: Start by boiling the water or broth with salt. Gradually whisk in the grits. Lower the heat and stir often. Let it cook for 20-25 minutes until creamy. Add butter and cheese, stirring until smooth. 2. Sauté the Spinach and Tomatoes: Heat olive oil in a skillet. Add spinach and cook for 2-3 minutes until it wilts. Mix in cherry tomatoes and red pepper flakes. Cook for one more minute. Season with salt and black pepper, then set aside. 3. Cook the Eggs: In another pan, you can scramble or fry the eggs. If frying, cook until the whites are set and the yolk stays runny. 4. Assemble the Bowl: In bowls, add a big scoop of cheesy grits. Top with the spinach and tomatoes. Place the cooked eggs on top. 5. Garnish: Sprinkle fresh herbs over the bowl for extra flavor and a pop of color. Now you have a tasty Grits Breakfast Bowl. It’s a great way to fuel your morning! For the full recipe, you can check out the detailed steps above. Enjoy! This blog post covered how to make a tasty grits breakfast bowl. We talked about the main and optional ingredients, plus their nutritional value. I shared simple steps to cook grits, eggs, and veggies. You'll find tips to make your dish creamy and flavorful. We also explored different variations for dietary needs and ways to store leftovers. Grits are a versatile base. You can add your favorite toppings or spices. Enjoy creating your own perfect bowl!](https://toastedrecipes.com/wp-content/uploads/2025/05/e4c50a0a-cefa-4f9f-81a0-9c1e16a23c8e.webp)
Grits Breakfast Bowl Tasty and Hearty Morning Meal
Start your morning right with a Grits Breakfast Bowl! This tasty and hearty meal is simple to make and packed with flavor. Whether you prefer
![- 12 Hawaiian sweet rolls - 6 large eggs - 1 cup milk - 1/2 cup heavy cream - 1/2 cup brown sugar - 1 tablespoon vanilla extract - 1 teaspoon ground cinnamon - 1/4 teaspoon nutmeg - 1/4 cup crushed pineapple (drained) - 1/2 cup shredded coconut (toasted optional) - 1/4 cup chopped pecans or walnuts To make Hawaiian sweet roll French toast bake, gather all your ingredients first. The main ingredients are the Hawaiian sweet rolls, eggs, milk, and heavy cream. These give the dish its creamy and soft texture. Next, we have flavor enhancers like brown sugar, vanilla, cinnamon, and nutmeg. These spices add warmth and sweetness to the dish. For extra fun, you can add optional ingredients. Crushed pineapple brings a bright, tropical flavor. Shredded coconut adds a nice crunch, while nuts like pecans or walnuts give a lovely texture. You can mix and match these add-ins to make your dish unique. For the full recipe, check out the detailed instructions later. Enjoy your cooking! - Preheat your oven to 350°F (175°C). Grease a 9x13 inch baking dish. - In a large bowl, whisk together the eggs, milk, heavy cream, brown sugar, vanilla extract, cinnamon, and nutmeg. Mix until smooth and well combined. - Take the quartered Hawaiian rolls and gently mix them into the egg mixture. Make sure all pieces soak well. - Next, fold in the crushed pineapple. If you want, add the toasted coconut and chopped nuts for extra flavor. Stir carefully to keep the rolls intact. - Cover the dish with foil. Let it sit for about 30 minutes at room temperature, or refrigerate overnight for more flavor. - Bake covered for 25 minutes. Then, remove the foil and bake for an additional 15-20 minutes. Look for a golden top and a set custard. This full recipe creates a tasty breakfast treat. You can serve it warm, drizzled with maple syrup for a delightful touch! - Soaking time for optimal flavor: Let the rolls soak for at least 30 minutes. This helps them absorb the egg mixture. For deeper flavor, chill overnight. The longer they soak, the tastier they become. - Temperature considerations for baking: Preheat your oven to 350°F (175°C). An even temperature ensures a golden top and a soft center. - How to garnish for visual appeal: Top your bake with toasted coconut and fresh pineapple chunks. A dusting of powdered sugar adds a nice touch too. This makes every plate look inviting. - Ideal side dishes to complement the bake: Serve with fresh fruit, like berries or sliced bananas. A light yogurt on the side balances the sweetness. - Tips for keeping leftovers tasty: Store any leftovers in an airtight container. Place them in the fridge for up to three days. This keeps them moist and flavorful. - Reheating techniques for best results: Reheat in the oven at 300°F (150°C) for about 10 minutes. This helps regain that fresh-baked texture. You can also use a microwave, but it may not be as crispy. {{image_2}} You can change this bake to fit your taste! Add tropical fruit like mango or banana for a fresh twist. These fruits will give your dish a bright, sweet flavor. If you prefer a nutty crunch, swap in nuts like almonds or hazelnuts. They add a nice texture and taste. Feel free to mix and match until you find your favorite combination! If you need gluten-free options, use gluten-free sweet rolls. They will work just as well in this bake. For those avoiding dairy, try almond or oat milk instead of regular milk. You can also use coconut cream instead of heavy cream. These swaps will keep the dish creamy and delicious! You can make this dish in individual ramekins for a fun touch. Each person gets their own serving, which looks nice on the table. If you have a brunch gathering, consider making mini versions. Small portions are perfect for guests to sample different flavors. Get creative with your presentation! After you bake your Hawaiian Sweet Roll French Toast Bake, let it cool completely. Then, cover it tightly with plastic wrap or foil. This will help keep it fresh. You can store it in the fridge for up to three days. If you want the best taste, try to eat it within two days. If you want to save it for later, freezing is a great option. Cut the bake into portions. Wrap each piece in plastic wrap, then place them in a freezer bag. This helps avoid freezer burn. You can freeze it for up to three months. When you are ready to eat, take it out and let it thaw in the fridge overnight. To reheat your French toast bake, you can use an oven or microwave. For the oven, preheat it to 350°F (175°C). Place the bake in a baking dish and cover it with foil. Heat for about 15-20 minutes until warm. If you use the microwave, warm it in short bursts, about 30 seconds each time. This keeps it moist. Avoid heating too long, or it might dry out. Yes, you can make this dish ahead of time. To do this, prepare the bake and cover it tightly. You can chill it in the fridge overnight. This step helps the flavors mix well. When you are ready to bake, just remove it from the fridge. Let it sit at room temperature for about 30 minutes before baking. This way, it cooks evenly. If you want to try something different, use other types of sweet bread. You might like brioche or challah rolls. These options add their own flavor. You can also use regular dinner rolls for a simpler taste. Feel free to experiment with different flavors to find your favorite. To make the dish more kid-friendly, swap some ingredients. You can use whole milk instead of heavy cream. You might also try a little less sugar for less sweetness. If your kids dislike coconut, leave it out. You can also add chocolate chips for a fun twist. They will love the extra sweetness! Yes, you can make this bake vegan. Use plant-based milk, like almond or oat milk. Instead of eggs, use flaxseed meal mixed with water. This mix will help bind the dish. For heavy cream, try coconut cream or a non-dairy substitute. The taste will still be delicious, and everyone can enjoy it! For the full recipe, check out the [Full Recipe]. This blog post shared a delicious recipe for a Hawaiian sweet roll bake. We discussed the main ingredients needed for this dish and the flavor enhancers that take it to the next level. I provided step-by-step instructions for preparation, assembly, and baking. You also learned tips for serving, storing, and adjusting the recipe to fit your diet. Now, get cooking and enjoy a tasty treat at your next gathering!](https://toastedrecipes.com/wp-content/uploads/2025/05/5714a37f-d837-4071-988d-87c861b8d8c4.webp)
Hawaiian Sweet Roll French Toast Bake Delightful Treat
If you’re looking for a sweet breakfast treat that’s easy and delicious, you’ve found it! My Hawaiian Sweet Roll French Toast Bake is perfect for

Savory Breakfast Poptarts Tasty and Easy Recipe
Are you tired of boring breakfast choices? Let’s shake things up with savory breakfast poptarts! These tasty treats are quick to make and packed with