Breakfast

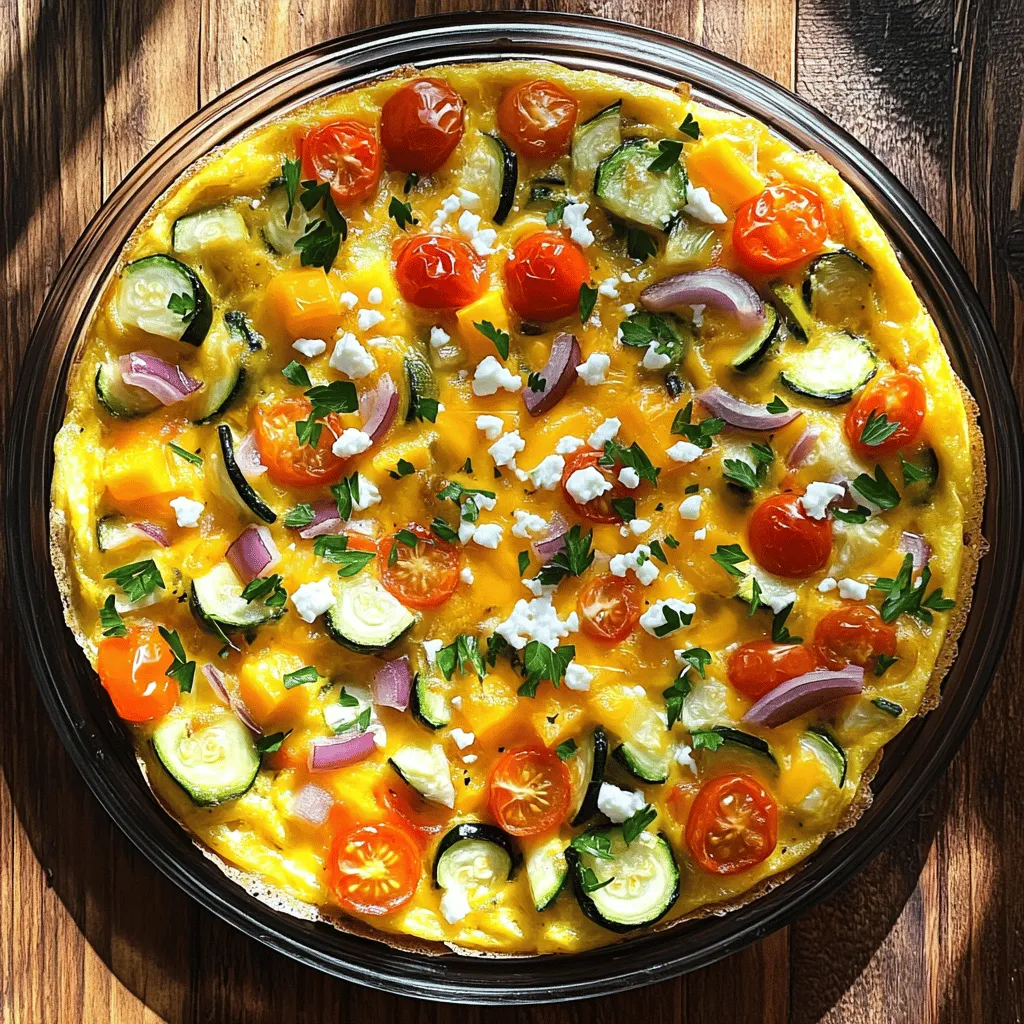
For this frittata, choose fresh veggies for the best taste. I like to use: - 1 cup mixed bell peppers, diced - 1 medium zucchini, diced - 1 small red onion, diced - 1 cup cherry tomatoes, halved These vegetables add color and flavor. Roasting them brings out their natural sweetness. Eggs are the heart of a frittata. You’ll need: - 6 large eggs - 1/2 cup shredded cheddar cheese - 1/2 cup crumbled feta cheese The eggs create a fluffy base. The cheese adds creaminess and a rich taste. Seasonings add depth to your dish. Here’s what you need: - 2 tablespoons olive oil - 1 teaspoon garlic powder - Salt and pepper to taste - Fresh herbs (like parsley or basil) for garnish Olive oil helps the veggies roast evenly. Garlic powder gives that extra kick. Use salt and pepper to enhance all the flavors. For a lovely finish, sprinkle fresh herbs on top. For the full recipe, check out the Easy Cheesy Roasted Vegetable Frittata. First, preheat your oven to 400°F (200°C). This step is key for roasting. While the oven heats, chop your vegetables. You will need bell peppers, zucchini, red onion, and cherry tomatoes. Toss them in a bowl with olive oil, garlic powder, salt, and pepper. Make sure each piece is coated well. Spread the veggies on a baking sheet in a single layer. Roast them for about 20 minutes. They should turn tender and get a bit brown. While the vegetables roast, grab a large mixing bowl. Crack six large eggs into the bowl. Add a pinch of salt and pepper. Whisk the eggs until they are fully combined. This makes a smooth mixture. After the veggies cool slightly, fold them into the egg mix gently. Then, add the shredded cheddar and crumbled feta cheese. Mix everything until well combined. Now, pour the egg and vegetable mixture into a greased oven-safe skillet or pie dish. Spread it out evenly. Place it in the oven and bake for 20-25 minutes. The frittata is done when it is set and the top is golden brown. Let it cool for a few minutes before slicing. Serve warm or at room temperature. You can find the full recipe for this easy cheesy roasted vegetable frittata to explore more details and tips. To achieve fluffy eggs, crack your eggs into a bowl. Use a fork or whisk to beat them well. Aim for a uniform yellow color. Add a pinch of salt and pepper while whisking. This enhances flavor and helps the eggs rise. Roasting vegetables brings out their best flavors. For this frittata, I roast mixed bell peppers, zucchini, red onion, and cherry tomatoes. Roast them at 400°F (200°C) for about 20 minutes. Check for tenderness and slight caramelization. If they look golden and soft, they are ready to mix into the eggs. This frittata is great on its own, but you can enhance it. Serve it with a side of mixed greens. A light salad adds freshness and crunch. You can also top it with fresh herbs like parsley or basil for extra flavor. Pair it with a slice of crusty bread or a light soup for a full meal. Enjoy your Easy Cheesy Roasted Vegetable Frittata with these tasty sides! For the complete cooking process, refer to the Full Recipe. {{image_2}} You can swap the veggies for your favorites. Try spinach, kale, or broccoli. Carrots add a nice crunch, while mushrooms bring a savory taste. Roasted sweet potatoes can add sweetness. Get creative! Use what you have in your fridge. Each vegetable gives a unique flavor and texture to your frittata. To make this dish dairy-free, skip the cheese or use a dairy-free alternative. Nutritional yeast gives a cheesy flavor without dairy. For a vegan version, replace eggs with a mixture of silken tofu and chickpea flour. Blend them until smooth for a great texture. You can also use flaxseed meal mixed with water as an egg substitute. Add spices for extra flavor! Paprika or cumin can give warmth. Fresh herbs like thyme or oregano also enhance taste. For heat, try red pepper flakes. A splash of hot sauce can kick it up a notch. Experiment and find your favorite mix. Each addition makes your frittata more exciting and delicious. For the full recipe, check out Easy Cheesy Roasted Vegetable Frittata. Enjoy crafting your dish! After enjoying your Easy Cheesy Roasted Vegetable Frittata, store leftovers in an airtight container. Let the frittata cool to room temperature first. Keep it in the fridge for up to three days. This way, you can enjoy it again without losing its great taste. You can also freeze the frittata for later use. Slice it into wedges and wrap each piece in plastic wrap. Place the wrapped pieces in a freezer-safe bag. This keeps it fresh for up to two months. When you crave it, just take a slice out to thaw. To reheat, place the frittata in a microwave-safe dish. Heat it on medium power for about one to two minutes. You can also use an oven. Preheat to 350°F (175°C) and bake for about 10-15 minutes. Both methods will bring back its cheesy goodness. For the best taste, enjoy it warm! For the full recipe, check the section above. Yes, you can use eggs from a carton. They work well in this recipe. Just measure out the same amount. For six eggs, use about three-quarters of a cup of liquid eggs. They taste great and save time. However, fresh eggs often give a richer flavor and texture. This frittata is naturally gluten-free. The main ingredients, like eggs and vegetables, are free from gluten. Just ensure any cheese you use is also gluten-free. Always check labels for safety if you have strict dietary needs. You can serve the frittata with a fresh salad for balance. Mixed greens with a light vinaigrette add a nice touch. You could also pair it with crusty bread or whole grain toast. For a fun twist, enjoy it with fresh fruit on the side. For more details, check the Full Recipe. You learned how to make a tasty Easy Cheesy Roasted Vegetable Frittata. We covered fresh veggies, eggs, and dairy. You also discovered how to prep and bake this dish. With tips on whisking, roasting times, and serving ideas, success is easy. You can mix in your favorite veggies or try dairy-free options. Store leftovers well, freeze portions, and reheat easily. Now you are ready to enjoy your frittata. Happy cooking!
Easy Cheesy Roasted Vegetable Frittata Delightful Dish
Are you ready to whip up a dish that’s both simple and tasty? The Easy Cheesy Roasted Vegetable Frittata is perfect for any meal. With
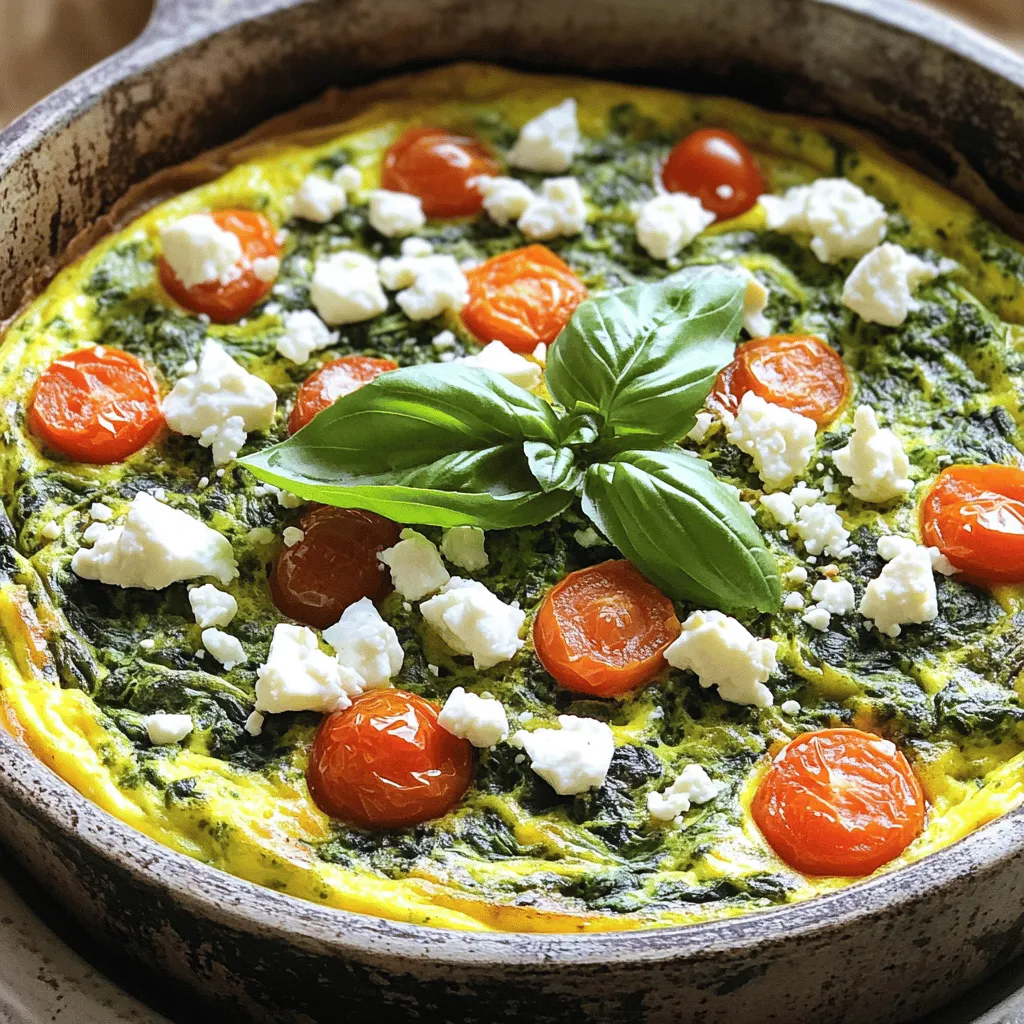
- 6 large eggs - 1 cup fresh spinach, chopped - 1/2 cup cherry tomatoes, halved - 1/2 cup feta cheese, crumbled - Fresh basil leaves for garnish - Additional spices for flavor enhancement - Oven-safe skillet - Mixing bowl - Whisk To make a tasty spinach frittata, you need a few simple items. Start with six large eggs. They form the base of the dish. Next, grab one cup of fresh spinach and chop it well. This gives the frittata its vibrant color and nutrition. You will also need half a cup of cherry tomatoes, halved for a sweet burst of flavor. Lastly, half a cup of crumbled feta cheese adds a creamy touch that makes this dish special. For optional ingredients, consider fresh basil leaves. They add a lovely smell and taste when you serve the frittata. You can also use extra spices to boost the flavor, like garlic powder or black pepper. You will need a few kitchen tools to prepare this dish. An oven-safe skillet is key for cooking your frittata. A mixing bowl will help you whisk the eggs. Finally, a whisk makes it easy to combine the eggs and seasonings. For the full recipe, check the details provided earlier. First, preheat your oven to 375°F (190°C). This step warms up the oven and gets it ready for your frittata. While the oven heats, grab a large bowl and whisk together 6 large eggs. Make sure they are mixed well. Next, season the eggs with salt and pepper to taste. This will add flavor to your base mixture. Set the bowl aside for now. Now, heat 2 tablespoons of olive oil in an oven-safe skillet over medium heat. Once the oil is hot, add 1/4 cup of finely chopped onion. Sauté the onions for about 2-3 minutes until they turn translucent. This means they should look soft but not brown. Next, add 2 cloves of minced garlic and cook for another minute. You want to smell that lovely garlic aroma! Then, stir in 1 cup of chopped fresh spinach. Cook it for about 2 minutes until it wilts down. This will help the spinach blend with the other flavors. Now it’s time to add some color! Toss in 1/2 cup of halved cherry tomatoes and mix well with the other veggies. Pour your egg mixture over the vegetables, ensuring everything is spread evenly. Finally, sprinkle 1/2 cup of crumbled feta cheese on top of the egg mixture. Cook the frittata on the stovetop for about 4-5 minutes without stirring. You want the edges to start setting. Once they do, transfer the skillet to the preheated oven. Bake the frittata for 12-15 minutes. It’s ready when the center is set and the top is lightly browned. Let it cool for a few minutes, then slice and serve. For a nice touch, you can garnish with fresh basil leaves if you like. Check out the Full Recipe to make your own delicious spinach frittata! To get the best frittata, start with the eggs. Whisk them well until they are light and frothy. This adds air and makes your frittata fluffy. Mix in salt and pepper to season. Always choose fresh ingredients. Fresh spinach, ripe tomatoes, and good cheese make a big difference in flavor. When your veggies are fresh, your dish will shine. For side dishes, think simple. Toasted bread pairs well with a frittata. A fresh salad can also add crunch and color. Try a mix of greens with a light dressing. This balances the rich frittata. You can also serve it with fruit for a sweet touch. Make your frittata look great on the plate. After slicing, arrange the pieces neatly. Add a sprinkle of fresh basil on top for color. You can also drizzle a little olive oil for shine. Using a nice plate can elevate the meal. Remember, we eat with our eyes first! For the full recipe, check out Spinach Frittata Delight . {{image_2}} You can swap out feta cheese for other tasty options. Try goat cheese for a tangy kick. Cheddar adds a rich flavor, while mozzarella gives a nice stretch. Feel free to mix in different veggies too. Bell peppers, zucchini, or mushrooms work great. Each adds unique taste and nutrition to your frittata. Herbs and spices can change the game. Fresh basil, parsley, or thyme brighten the dish. If you like heat, add a pinch of red pepper flakes. Want more protein? Throw in cooked bacon or diced ham. These meats add a savory depth and make the frittata even more filling. You can cook your frittata on the stovetop or in the oven. Stovetop means quicker cooking, but the oven gives a nice, even finish. Using a non-stick skillet is smart. It helps the frittata slide right out when you serve it. No more messy plates! For the full recipe, check out Spinach Frittata Delight. To keep your frittata fresh, store it in the fridge. Place it in an airtight container. It stays good for about 3 to 4 days. When you are ready to eat, reheat it in the oven or microwave. For the oven, set it to 350°F (175°C) and heat for about 10 minutes. If using a microwave, warm it in 30-second bursts until hot. This helps keep the texture nice. You can freeze the frittata for longer storage. Cut it into slices. Wrap each slice in plastic wrap. Then, place them in a freezer bag. This method helps keep the frittata from getting freezer burn. To thaw, move it to the fridge overnight. Reheat in the oven or microwave as mentioned above. Always check your frittata for spoilage. If it smells off or has a slimy texture, throw it away. Keep your fridge at 40°F (4°C) or lower to ensure safety. This temperature helps prevent bacteria growth. To make a frittata fluffy, you want to aerate the eggs. Here’s how: - Whisk well: Beat the eggs until they are light and frothy. This adds air. - Add liquid: You can add a splash of milk or cream. This helps with fluffiness. - Don’t overcook: Keep an eye on the cooking time. Overcooked eggs can become dense. These steps help create a light, airy texture. A fluffy frittata feels soft and moist, making it more enjoyable to eat. Yes, you can make a spinach frittata ahead of time. Here’s how to prepare and store it: - Cook and cool: Follow the recipe and let the frittata cool completely before storing. - Cover tightly: Wrap it in plastic wrap or foil. This keeps it fresh. - Store in the fridge: It stays good for up to 3 days. When you're ready to eat, simply reheat it in the oven or microwave. This makes meal prep easy and saves time. To make the best frittata, avoid these common mistakes: - Overcooking: This makes the eggs rubbery. Cook just until set. - Under-seasoning: Season well with salt and pepper. Let the flavors shine. - Neglecting the vegetables: Make sure to cook them enough. This enhances the taste. By avoiding these errors, you'll enjoy a much better frittata. For the complete guide, check the Full Recipe. A spinach frittata is easy and fun to make. We discussed key ingredients like eggs, spinach, and feta. I shared steps for preparation, cooking, and serving. You can explore variations, storage tips, and common mistakes to avoid. In the end, a frittata is versatile and can suit any taste. Enjoy it fresh or save for later meals. With practice, you’ll master this tasty dish.
Spinach Frittata Deliciously Easy Meal to Make
Looking for a quick and healthy meal? You’ve come to the right place! A spinach frittata is not only easy to make, but it’s also
To make a tasty vegetable sheet pan frittata, you need a mix of colorful veggies. Here are the main ones I recommend: - 1 bell pepper (any color), diced - 1 zucchini, diced - 1 small red onion, finely chopped - 1 cup cherry tomatoes, halved - 1 cup baby spinach, chopped These vegetables add flavor and nutrition. You can switch them out for others like mushrooms or kale based on your taste. The egg and dairy base gives the frittata its creamy texture. For this recipe, you will need: - 8 large eggs - 1 cup milk (dairy or non-dairy) Whisk these together for a smooth blend. This mix binds the veggies and adds a rich taste. Seasonings make your frittata pop with flavor. Here’s what you should use: - 1 teaspoon garlic powder - 1 teaspoon onion powder - Salt and pepper to taste You can also add optional ingredients like fresh herbs. Try basil or parsley for a fresh touch. The choice of cheese is also important; pick from: - 1 cup shredded cheese (cheddar, feta, or a mix) This adds a delightful, melty finish. Be creative! Adjust the seasonings to match your preferences. For the Full Recipe, check the main instructions. First, preheat your oven to 400°F (200°C). This heat helps the frittata cook evenly. Next, grab a large sheet pan. Line it with parchment paper for easy cleanup. Lightly grease the paper with olive oil. This step prevents the frittata from sticking. A clean pan makes serving easier! In a big bowl, combine 8 large eggs and 1 cup of milk. You can use dairy or non-dairy milk, depending on your taste. Add 1 teaspoon each of garlic powder and onion powder. Season with salt and pepper. Whisk everything until the mixture looks smooth and creamy. This step adds flavor and helps the frittata rise. Spread the diced bell pepper, zucchini, red onion, and halved cherry tomatoes across the sheet pan. Make sure the veggies are evenly spaced. Drizzle a little olive oil on top and toss them gently. Then, pour the egg mixture over the vegetables. Ensure all veggies are submerged. Finally, sprinkle the chopped spinach and shredded cheese on top. This layer adds color and taste. Now, it’s time to bake! Place the sheet pan in the preheated oven. Bake for 20 to 25 minutes. You want the frittata to be set and golden on top. Check it by inserting a toothpick. If it comes out clean, your frittata is ready. Once baked, remove it from the oven and let it cool a bit. Then, slice it up and enjoy! For the full recipe, visit the link. Eggs are a key part of many meals. To make your frittata perfect, use fresh eggs. They taste better and give a lovely color. Always whisk your eggs until they are smooth. This helps them mix well with the other ingredients. You can add a splash of milk for creaminess. Don’t skip seasoning! Salt and pepper boost the flavor. To cook your frittata evenly, cut all veggies into similar sizes. This ensures they cook at the same rate. Spread the veggies evenly across the pan. When pouring the egg mixture, make sure all veggies are covered. If you bake it too long, the frittata can dry out. Keep an eye on it in the oven. A toothpick test helps check if it’s done. Presentation makes your dish shine! Once baked, let the frittata cool a bit. Cut it into squares or slices for serving. A colorful platter adds charm. Garnish with fresh herbs like parsley or basil to enhance the look. This adds freshness and a pop of color. Your Vegetable Sheet Pan Frittata will look and taste amazing! For the full recipe, check out the details above. {{image_2}} You can change the veggies in a sheet pan frittata to match your taste. Try using broccoli, mushrooms, or asparagus for a fresh twist. You can also mix in some kale or carrots for extra color. Just chop them small so they cook well. The key is to keep the total amount of veggies similar to the original recipe. This helps the frittata set nicely. Cheese can change the flavor of your frittata. If you prefer a milder taste, use mozzarella or Swiss cheese. For a tangy kick, try feta or goat cheese. You can even mix different cheeses for a unique taste. Just remember to use about one cup total. This will keep the frittata creamy and delicious. Boost the protein in your frittata easily. You can add cooked bacon, ham, or sausage for a hearty meal. If you want a meatless option, consider using black beans or chickpeas. These add flavor and make it filling. Just make sure to drain any canned beans before adding them. This keeps the frittata from getting too wet. For the full recipe, check out the Colorful Vegetable Sheet Pan Frittata. After you make your colorful vegetable sheet pan frittata, let it cool. Slice the frittata into pieces. Store the pieces in an airtight container. It will last in the fridge for about 3 to 4 days. When you want to eat it again, just grab a slice! If you want to save some for later, freezing works great. Wrap each slice in plastic wrap. Then, put the wrapped slices in a freezer bag. This keeps them fresh. Your frittata can stay frozen for up to 2 months. When you are ready to eat, just thaw it in the fridge overnight. To reheat, you can use the oven or microwave. For the oven, preheat it to 350°F (175°C). Place the slices on a baking sheet. Heat for about 10-15 minutes until warm. If you use the microwave, heat each slice for 30 seconds to 1 minute. Check if it's hot enough before eating. Enjoy your tasty frittata any time! For the Full Recipe, check back to ensure you have all the steps covered! The frittata lasts up to four days in the fridge. To store it, let it cool first. Then place it in an airtight container. This keeps it fresh and tasty. When you want to eat it, just reheat in the oven or microwave. Yes, you can use egg whites. Using egg whites will make the frittata lighter. You can use three egg whites for every whole egg. This gives you a healthier option. Just remember, the texture might change a little. Serve the frittata warm. Cut it into squares or slices. A colorful platter makes it look nice. You can add fresh herbs on top for extra flavor. Pair it with a side salad or fruit for a complete meal. For the full recipe, check out the details above. You now have all the tools to make a great frittata. We covered the key ingredients, from veggies to seasonings. You learned the steps for the perfect bake and some tips for even cooking. I shared various combinations to spark your creativity. Plus, you can store leftovers easily for future meals. With this knowledge, you can create delicious frittatas that suit your taste. Enjoy cooking and sharing this simple yet satisfying dish!
Vegetable Sheet Pan Frittata Tasty and Easy Recipe
Looking for a tasty and simple dish that boosts your veggie intake? I’ve got the perfect recipe for you: a Vegetable Sheet Pan Frittata! This
To make a tasty vegetable frittata, you need these main ingredients: - 6 large eggs - 1/4 cup milk (or a dairy-free alternative) - 1 cup cherry tomatoes, halved - 1 bell pepper (any color), diced - 1 small zucchini, diced - 1 small red onion, finely chopped - 1 cup fresh spinach, roughly chopped - 1/2 cup feta cheese, crumbled - 2 tablespoons olive oil - Salt and pepper to taste These ingredients come together to create a fluffy frittata filled with flavor and nutrients. The eggs serve as a great base, while the veggies add color and taste. You can customize your frittata with these optional ingredients: - Mushrooms, sliced - Broccoli florets - Asparagus, chopped - Fresh herbs like parsley or dill - Different cheeses such as cheddar or goat cheese - Avocado, diced Feel free to mix and match these extras. They let you create a dish that suits your taste and the season. To cook your frittata, you'll need: - A large mixing bowl - A whisk or fork - An oven-safe skillet - A spatula - An oven preheated to 375°F (190°C) Having the right tools makes cooking easier and more fun. An oven-safe skillet is key for baking the frittata evenly. Remember, this recipe is all about making it your own. You can find the full recipe for a garden delight vegetable frittata in the section above. Enjoy your cooking! Start by gathering all the ingredients. You will need: - 6 large eggs - 1/4 cup milk (or a dairy-free alternative) - 1 cup cherry tomatoes, halved - 1 bell pepper (any color), diced - 1 small zucchini, diced - 1 small red onion, finely chopped - 1 cup fresh spinach, roughly chopped - 1/2 cup feta cheese, crumbled - 2 tablespoons olive oil - Salt and pepper to taste - Fresh basil leaves, for garnish Next, wash all the vegetables. Chop them into small pieces. This helps them cook evenly. Set your chopped veggies aside. In a large bowl, whisk the eggs and milk. Add salt and pepper to taste. This mixture will become the base of your frittata. Heat the olive oil in a large, oven-safe skillet over medium heat. I like to use a cast-iron skillet for even cooking. Add the chopped red onion and bell pepper. Sauté them for about 3-4 minutes until they soften. The colors should brighten and the aroma will fill your kitchen. Now, add the diced zucchini. Cook for another 2-3 minutes. After that, toss in the halved cherry tomatoes and spinach. Stir until the spinach wilts. This keeps the veggies fresh and vibrant in your dish. Once everything is cooked, pour the egg mixture over the sautéed veggies. Gently stir to combine. This ensures every bite has a mix of flavors. Now, sprinkle the crumbled feta cheese on top for added creaminess. Allow the frittata to cook on the stovetop for about 3-4 minutes. You want the edges to start setting. After that, carefully transfer the skillet to your preheated oven at 375°F (190°C). Bake for 15-20 minutes. You’ll know it’s done when it’s fully set and slightly golden on top. Once baked, let it cool for a few minutes before slicing. This will help it hold its shape. Serve it warm, garnished with fresh basil leaves. You can cut it into wedges for a lovely presentation. Enjoy it with a fresh green salad for a complete meal. For the full recipe, check the details above. To get a perfect frittata, focus on cooking times. Start on the stovetop. This helps set the edges. When you transfer it to the oven, watch for golden color. A toothpick should come out clean from the center. If it’s still wet, bake a bit longer. This gives you that fluffy texture everyone loves. Seasoning makes a big difference. I love adding fresh herbs like basil or parsley. You can also try a pinch of smoked paprika for extra warmth. For a kick, add a dash of red pepper flakes. Taste as you go to find your perfect blend. Don't forget to use salt and pepper to balance the flavors. One common mistake is overcooking the frittata. Keep an eye on your oven. Another mistake is not whisking the eggs well. You want a light and airy mix. Lastly, avoid overcrowding the skillet with too many veggies. This can lead to a soggy frittata. Stick to the amounts in the Full Recipe for best results. {{image_2}} You can easily make a low-carb frittata. Skip the milk and use just eggs. Opt for veggies like spinach, mushrooms, and bell peppers. These choices keep it low in carbs. You might add cheese like cheddar or mozzarella for flavor. Avoid starchy vegetables like potatoes to stay keto-friendly. To make a dairy-free frittata, replace milk with almond or oat milk. For a vegan option, swap eggs for tofu or chickpea flour. Blend the chickpea flour with water and spices to get a smooth mix. Add your favorite veggies, and bake as usual. This way, you can enjoy the same great taste without dairy or eggs. Feel free to mix up your veggies. Try broccoli, asparagus, or kale for a new twist. Each vegetable brings its own taste and texture. You can also change the cheese. Use goat cheese for a tangy flavor or mozzarella for a milder taste. This flexibility lets you create a unique frittata each time you cook. You can find the full recipe here [Full Recipe]. To store leftover frittata, let it cool first. Then, place it in an airtight container. Keep it in the fridge for up to four days. If you want to keep it longer, consider freezing it. To reheat your frittata, use the oven or microwave. For the oven, preheat it to 350°F (175°C). Place the frittata on a baking sheet. Heat for about 10-15 minutes until warm. For the microwave, slice the frittata and heat for 30-60 seconds. Make sure it is hot throughout. Freezing is a great way to save your frittata. Slice it first for easy serving. Wrap each piece tightly in plastic wrap. Then, place the slices in a freezer bag. Make sure to remove excess air. Your frittata will last in the freezer for up to three months. When ready to eat, thaw it overnight in the fridge before reheating. This keeps the taste fresh and delicious. You can find the Full Recipe for more tasty ideas. Yes, you can make a Vegetable Frittata in advance. It stores well in the fridge. After cooking, let it cool completely. Then, wrap it tightly in plastic wrap or store it in an airtight container. It will last for up to four days. You can easily reheat it in the oven or microwave. This makes it a great option for busy mornings. Many cheeses work well in a frittata. Feta adds a nice tangy flavor. Cheddar gives a rich, creamy taste. Goat cheese adds a unique, soft texture. You can also use mozzarella for a milder flavor. Feel free to mix different cheeses for more depth. Just remember to crumble or shred the cheese for even melting. Adding protein to your frittata is simple. You can include cooked meats like ham, bacon, or sausage. Tofu is a good choice for a vegan option. You can also mix in beans like black beans or chickpeas for added nutrition. Just make sure to cook any raw meat before adding it to the frittata. This keeps your dish safe and tasty. If you want, you can check the Full Recipe for more ideas. A vegetable frittata is easy to make with simple ingredients and tools. You can customize it with your favorite flavors and vegetables. Remember to avoid common mistakes for the best texture. Store leftovers properly to enjoy them later. With the tips and variations provided, you can create many delicious frittatas. Explore this dish and make it your own. Enjoy each bite of your tasty creation!
Vegetable Frittata Simple and Tasty Recipe Guide
Looking for a quick, healthy meal? A vegetable frittata is perfect for breakfast, lunch, or dinner. With simple ingredients and easy steps, you can whip
To make a delicious garden frittata with goat cheese and potatoes, you need simple, fresh ingredients. Here’s what you’ll need: - 4 large eggs - 1 cup spinach, chopped - 1 medium potato, peeled and diced - 1 small zucchini, diced - 1/2 red bell pepper, diced - 1/2 cup goat cheese, crumbled - 1/4 cup milk - 1 small onion, diced - 2 tablespoons olive oil - Salt and pepper to taste - Fresh herbs (like parsley or chives) for garnish These ingredients blend together to create a colorful dish. The eggs form a fluffy base, while the vegetables add flavor and nutrition. The goat cheese gives it a creamy touch. Together, they make a meal that is both tasty and satisfying. When picking your vegetables, look for fresh options. Organic produce often tastes better and is good for the earth. The goat cheese should be soft and crumbly, adding a rich flavor to your frittata. You can find this recipe in the [Full Recipe] section for complete details. Set your oven to 400°F (200°C). This step is key for a fluffy frittata. In a skillet, heat 1 tablespoon of olive oil over medium heat. Add the diced potato and cook for 5-7 minutes. Stir it often. You want the potato to be golden and tender. Next, add the diced onion and bell pepper. Sauté them for 3-4 minutes until they soften. Then, stir in the zucchini and chopped spinach. Cook until the spinach wilts, about 2 minutes. Season with salt and pepper to taste. In a mixing bowl, whisk together 4 large eggs and 1/4 cup of milk until blended. Gently fold in half of the goat cheese. This adds a creamy flavor to the frittata. Pour the egg mixture over the sautéed vegetables in the skillet. Cook on the stovetop for 2-3 minutes until the edges set. Sprinkle the rest of the goat cheese on top. Transfer the skillet to the oven and bake for 10-12 minutes. Look for the frittata to puff up and the center to set. Remove it from the oven, let it cool for a few minutes, and slice into wedges. Garnish with fresh herbs. For the full recipe, check out the earlier section. When making a garden frittata, fresh vegetables make a big difference. Look for vibrant colors. Choose firm and unblemished produce. Spinach should be bright green, and zucchini should be smooth. The potato must feel heavy for its size. Fresh herbs like parsley or chives add flavor and beauty. Always wash your veggies well before use. This ensures they are clean and ready to shine in your dish. Your frittata will taste better with quality ingredients. The egg mixture is key to a fluffy frittata. Use large eggs for the best texture. Whisk them well with milk until frothy. This adds air, making the frittata light. For added flavor, fold in half of the goat cheese into the egg mix. This creates pockets of creamy goodness in every bite. Don’t forget to season the mixture with salt and pepper. Taste it before cooking to ensure it’s just right. The right blend makes a big difference in your dish's final taste. Baking times can vary based on your oven. I recommend checking the frittata around the 10-minute mark. Look for puffiness and a set center. If it’s jiggly in the middle, give it more time. Keep an eye on it to avoid overcooking. The edges should be golden brown. If you use a larger skillet, you may need to adjust the bake time. Remember, every oven is different, and a little patience goes a long way. Enjoy the process, and your frittata will turn out great! {{image_2}} You can make your garden frittata even better by adding more greens. Kale and Swiss chard work great. They boost the flavor and add nutrition. Just chop them up and toss them in with the other veggies. Using different cheeses can also change the taste. Feta gives a tangy kick, while cheddar adds a sharp flavor. Both melt well and blend nicely with the eggs. Mix and match to find your favorite combo. This frittata pairs well with crusty bread or a fresh salad. The bread soaks up any extra flavors. A light salad adds a crisp touch. Both options make for a delightful meal. You can serve this dish at brunch, lunch, or dinner. It’s perfect for family gatherings or casual get-togethers. Everyone loves a slice of frittata, and it looks great on the table. For the full recipe, check out the instructions above to create your own delicious garden frittata with goat cheese and potatoes! To keep your garden frittata fresh, let it cool first. Then, slice it into wedges. Place the slices in an airtight container. Store them in the fridge. They will last for about 3-4 days. For the best taste, eat your leftovers within the first two days. When you're ready to enjoy your frittata again, I recommend reheating it in the oven. Preheat your oven to 350°F (175°C). Place the slices on a baking sheet. Heat for about 10-15 minutes. This method keeps the frittata soft and tasty. You can also use the microwave for quick reheating. Just cover it with a damp paper towel and heat for 30-60 seconds. If you want to save your frittata for later, freezing works well. Wrap each slice in plastic wrap. Then, place them in a freezer bag. Make sure to remove as much air as you can. Your frittata can stay frozen for up to 2 months. When you want to eat it, thaw it overnight in the fridge before reheating. Enjoy your delicious garden frittata anytime! For the full recipe, check out the earlier sections. Yes, you can make this frittata ahead of time. Cook it fully, then let it cool. Store it in the fridge for up to three days. When you're ready to eat, you can warm it in the oven or microwave. It tastes great even after a day or two! If you want to swap goat cheese, try feta cheese for a tangy flavor. Cream cheese works well too, giving a creamy texture. For a milder taste, use ricotta. Each cheese will change the frittata's flavor but will still be delicious! To cut the frittata neatly, let it rest for a few minutes before slicing. Use a sharp knife or a pizza cutter for clean edges. Wipe the knife between cuts to avoid sticking. This way, you get nice, even slices. You can tell the frittata is done when it puffs up and the center is set. A toothpick inserted should come out clean. If it jiggles too much, give it a few more minutes in the oven. It should be firm yet moist. For the full recipe, check out the Garden Frittata with Goat Cheese & Potatoes. This frittata recipe uses fresh vegetables, cheese, and eggs for a tasty meal. You learned how to cook it step-by-step and discovered tips for making it better. You can easily switch up the ingredients to fit your taste or occasion. Lastly, I showed you how to store and reheat leftovers. Enjoy this simple dish that is full of flavor and good for any time!
Garden Frittata with Goat Cheese & Potatoes Delight
Ready to elevate your breakfast game? This Garden Frittata with Goat Cheese & Potatoes is not just easy to make, but it’s packed with flavor
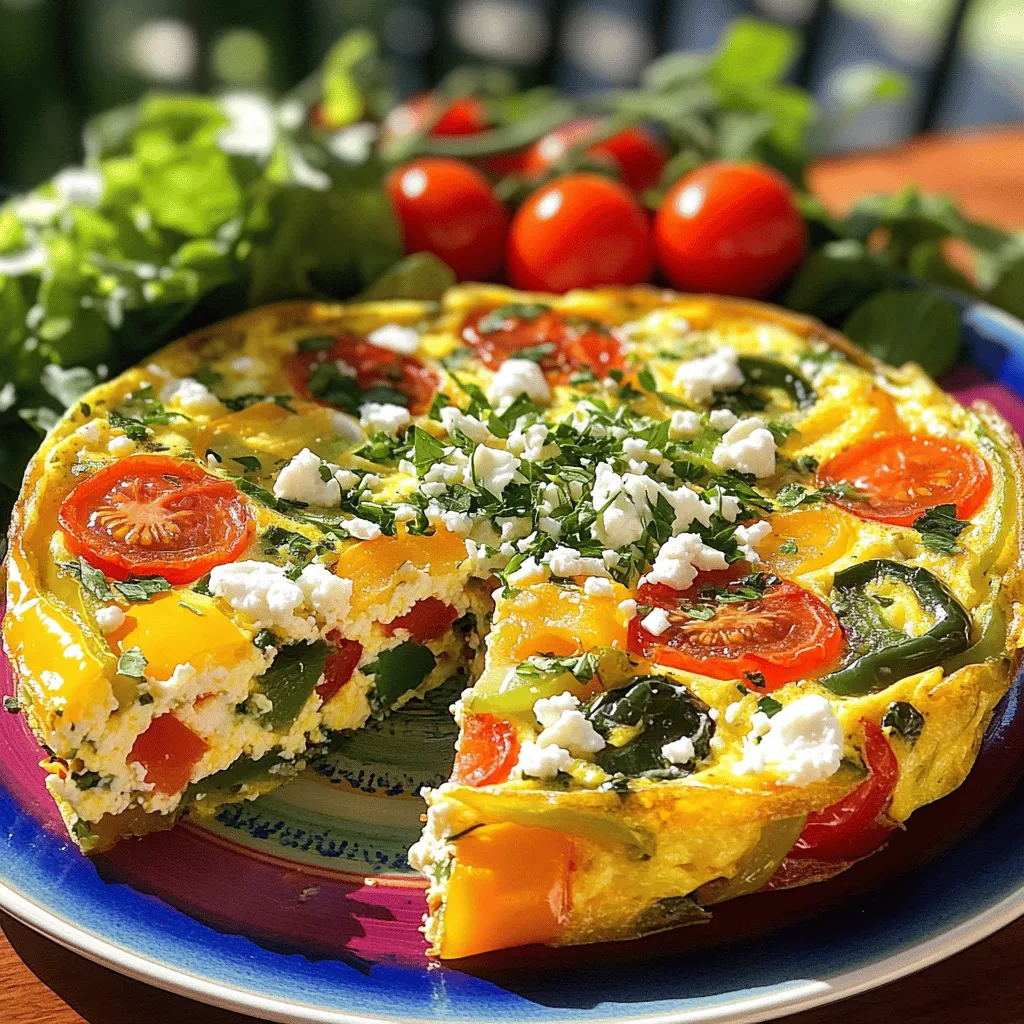
To make a Healthy Garden Veggie Frittata, you’ll need the following ingredients: - 6 large eggs - 1/4 cup milk (or almond milk for a dairy-free option) - 1 cup spinach, chopped - 1/2 cup bell peppers (mixed colors), diced - 1/2 cup cherry tomatoes, halved - 1/2 cup zucchini, grated - 1 small red onion, finely chopped - 1/2 cup feta cheese, crumbled - 2 tablespoons olive oil - Salt and pepper to taste - Fresh herbs (basil or parsley) for garnish Using fresh, garden-fresh vegetables is key for this recipe. They add vibrant colors and rich flavors. Fresh veggies also have more nutrients. You can get them from local farmers' markets or your garden. If you don’t have all the veggies, you can swap them out for what you have. For example, use kale instead of spinach or add mushrooms instead of zucchini. You can also replace the feta cheese with goat cheese or skip it for a lighter version. Feel free to get creative and make it your own! For the full recipe, check the details above. 1. Whisking eggs and milk Start by cracking six large eggs into a bowl. Add 1/4 cup of milk, or use almond milk for a dairy-free twist. Whisk them together until smooth. This step adds air to the eggs, making your frittata fluffy. Don’t forget to sprinkle in some salt and pepper for flavor. 2. Sautéing vegetables Heat 2 tablespoons of olive oil in a large, oven-safe skillet over medium heat. Add 1 small, finely chopped red onion. Cook for about 3 minutes until it softens. Next, toss in 1/2 cup of diced bell peppers and 1/2 cup of grated zucchini. Sauté these for another 3-4 minutes. Finally, add 1 cup of chopped spinach and stir until it wilts. This mix brings vibrant colors and great taste to your frittata. 3. Baking and finishing touches Once your veggies look great, pour the egg mixture evenly over them. Stir lightly to combine. Sprinkle 1/2 cup of crumbled feta cheese on top. Transfer the skillet to a preheated oven at 350°F (175°C). Bake for 20-25 minutes. The frittata is done when it sets and the top has a light golden hue. 4. Visual tips for each step As you whisk the eggs, look for a smooth and creamy texture. When sautéing, aim for bright colors in your veggies. The spinach should turn a deep green. For baking, keep an eye on the frittata. It should puff up and turn golden, signaling it’s ready. These steps help you create a beautiful and tasty Healthy Garden Veggie Frittata. You can find the full recipe in the article. Enjoy your cooking adventure! To make your frittata light and fluffy, start with the eggs. Beat the eggs well until they are frothy. This adds air, which helps them rise during cooking. Use a whisk for the best results. For even cooking, make sure your skillet is hot but not smoking. If it’s too hot, the bottom will burn before the top sets. Keep the heat at medium. To achieve that perfect golden top, bake the frittata in the oven. Bake it until the edges pull away from the skillet. You want a lightly golden top. If you have a broiler, you can use it briefly at the end for extra color. When serving your frittata, slice it into wedges. Place each slice on a colorful plate. This makes each serving pop visually. For garnish, add fresh herbs like basil or parsley. This not only adds color but also fresh flavor. You can also serve the frittata with a side of mixed greens. This adds crunch and a nice contrast to the soft frittata. For a fun twist, consider adding a few cherry tomatoes on the side. They add a burst of color and flavor. For the full recipe, check out the details above. {{image_2}} You can switch up the veggies in your frittata. I love using seasonal vegetables. Fresh asparagus, kale, or mushrooms work great. You can also try sweet corn or broccoli. Each adds a unique taste. Want some protein? You can add meat like ham or bacon. Tofu makes a nice, plant-based option too. Just chop it small and mix it in. It gives you more flavor and a fuller meal. If you need a dairy-free version, simply swap the milk for almond milk. You can skip the feta cheese, or use a dairy-free cheese. This keeps the frittata creamy without the dairy. For gluten-free needs, this recipe is already safe. All the ingredients are gluten-free. Just double-check any store-bought items you use. They may contain gluten, so always read labels. For more ideas, check out the Full Recipe for tips and tricks. Store leftover frittata in an airtight container. This keeps it fresh and tasty. You can refrigerate it for up to three days. When reheating, use a microwave or an oven. If using a microwave, heat on medium power for one to two minutes. For the oven, preheat to 350°F and bake for about 10 minutes. This helps maintain its texture and flavor. To freeze frittata, let it cool completely first. Cut it into portions and wrap each piece tightly in plastic wrap. Then, place the wrapped portions in a freezer-safe bag. This makes it easy to grab just what you need later. When you’re ready to enjoy, thaw it overnight in the fridge. Reheat in the oven at 350°F for about 15 minutes, or until hot. This method keeps your frittata delicious and fresh-tasting. How to know when the frittata is done? You can tell the frittata is done when it is set in the center. A knife inserted should come out clean. The top will look golden and firm. Can I make it ahead of time? Yes, you can make the frittata ahead of time. Just let it cool, then store it in the fridge for up to three days. Reheat slices in the microwave or oven. What’s the best way to serve a frittata? I love serving frittata warm or at room temperature. Cut it into wedges and place it on a colorful plate. Add a side of mixed greens for a fresh touch. Can I add more cheese or different types of cheese? Absolutely! You can add more cheese or swap it out. Try goat cheese, cheddar, or mozzarella for different flavors. Just remember to balance the amount so it doesn't overpower the veggies. What other herbs can I use for flavor? Feel free to use herbs like chives, dill, or oregano. Fresh herbs add a nice touch. You can mix and match them based on your taste or what you have on hand. This blog post shared how to create a Healthy Garden Veggie Frittata. We covered essential ingredients and the importance of fresh veggies. I explained simple steps for preparation and tips for a fluffy texture. You learned how to present and serve it nicely. We also explored variations and dietary adjustments. Finally, I shared smart storage tips for leftovers. Now, you have all the tools to make this tasty dish yourself. Enjoy your healthy frittata journey!
Healthy Garden Veggie Frittata Flavorful and Easy Recipe
Looking for a quick, tasty meal that’s packed with nutrients? A Healthy Garden Veggie Frittata is just what you need! This easy recipe takes fresh
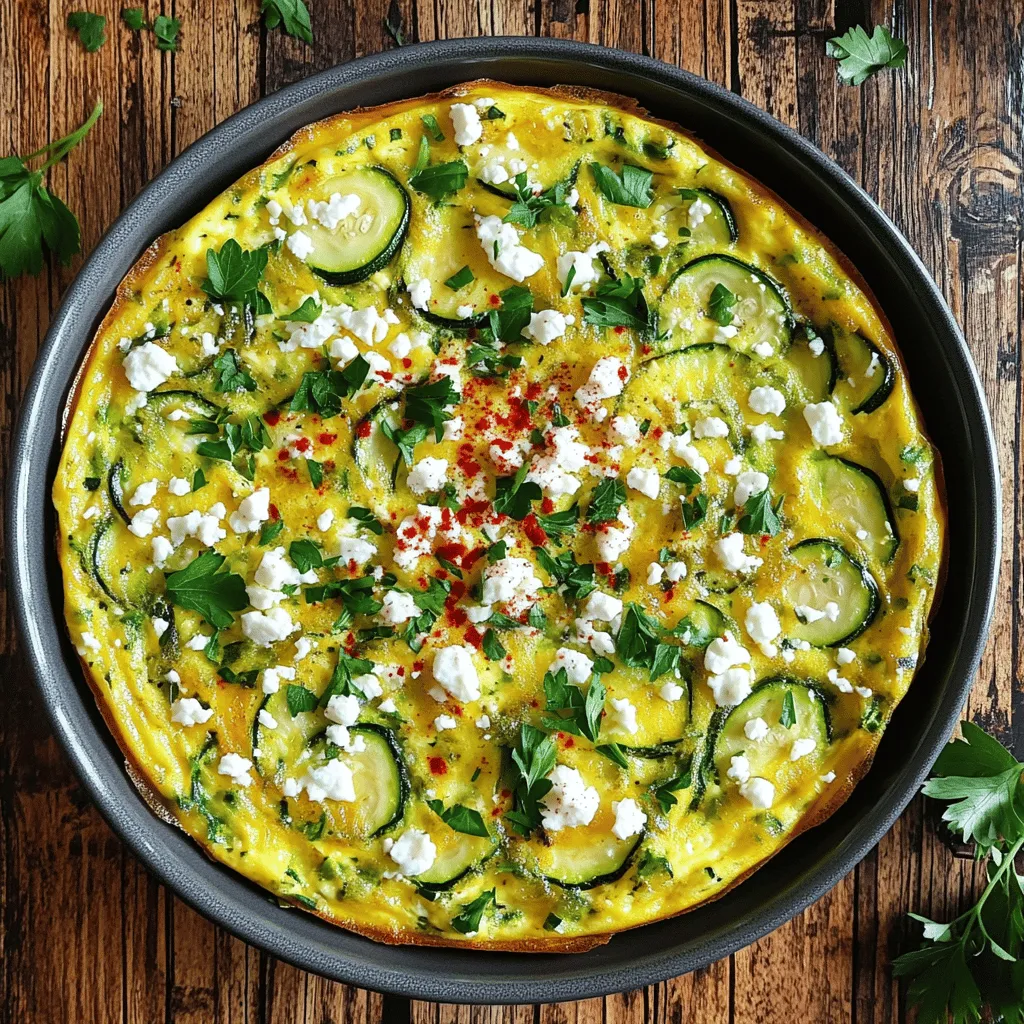
To make a zesty zucchini frittata, gather these simple ingredients: - 4 large eggs - 1 medium zucchini, grated - 1 small red bell pepper, finely chopped - 1/2 cup onion, diced - 1/2 cup feta cheese, crumbled - 1/4 cup fresh parsley, chopped - 1/4 teaspoon red chili flakes (optional) - 2 tablespoons olive oil - Salt and pepper to taste You can easily swap some ingredients if needed. Here are a few ideas: - Eggs: Use egg whites for a lighter option or a vegan egg substitute. - Zucchini: Try yellow squash or spinach if you want a different flavor. - Feta cheese: Replace it with goat cheese or mozzarella for a milder taste. - Red bell pepper: Any color pepper works, or you can use diced tomatoes for a twist. - Fresh parsley: Basil or chives can add a nice fragrance. Choosing fresh vegetables makes a big difference in taste. Here are some tips: - Look for zucchini that is firm and has shiny skin. Avoid any with soft spots. - Choose vegetables that are in season for the best flavor. For example, summer zucchini is often sweeter. - When picking bell peppers, look for ones with vibrant color and smooth skin. - Check onions for a heavy feel and avoid any that show signs of sprouting. When you pick the right ingredients, your frittata will shine! For the full recipe, check out the detailed instructions. 1. Preheat your oven to 375°F (190°C). This temperature ensures even cooking. 2. In a large bowl, crack 4 eggs. Whisk them until they are well combined. 3. Add salt and pepper to taste. Stir in 1/4 cup chopped parsley and, if you like, 1/4 teaspoon red chili flakes. 4. Heat 2 tablespoons olive oil in a large oven-safe skillet over medium heat. 5. Add 1/2 cup diced onion and sauté for about 3 minutes. Wait until it turns translucent. 6. Grate 1 medium zucchini and finely chop 1 small red bell pepper. Add both to the skillet. 7. Cook for 5 minutes, stirring often. This helps to soften the veggies and remove extra moisture. 8. Pour the egg mixture over the veggies. Gently stir to mix everything well. 9. Sprinkle 1/2 cup crumbled feta cheese on top. It adds great flavor. 10. Reduce the heat to low. Cook for about 5 minutes, so the edges start to set. 11. Carefully transfer the skillet to the oven. Bake for about 15 minutes until the center is set and the top is golden. 12. Remove from the oven and let it cool for a few minutes. Slice and enjoy your zucchini frittata! To save time while cooking, prepare your ingredients first. Start by grating the zucchini and chopping the onion and red bell pepper. This way, you have everything ready to go when you need it. It makes cooking smoother and more fun. To create a fluffy frittata, focus on two main points. First, whisk the eggs well. This adds air into the mixture. Second, cook on low heat. This lets the eggs set slowly, preventing a tough texture. Follow these tips, and you’ll have a delicious and fluffy frittata every time! For the complete recipe, check out the Full Recipe section. When making a frittata, avoid using too many eggs. This can make it dense. Stick to four large eggs for a nice balance. Another mistake is not cooking the veggies enough. They should soften before adding eggs. Also, don’t skip seasoning. Salt and pepper enhance the flavors. Lastly, avoid using high heat. Cooking on low helps the frittata cook evenly. To get a set center, cook the frittata on low heat first. Let the edges firm up before moving it to the oven. This method helps avoid a runny center. When you bake it, check for doneness at around 15 minutes. The frittata should be golden on top and firm in the center. If it jiggles too much, give it a few more minutes. Serving your frittata can be fun! Slice it into wedges and place it on a plate. Garnish with fresh parsley for color. You can also add a side of mixed greens for a light meal. For extra flavor, drizzle some balsamic glaze over the slices. If you like heat, serve with a dollop of spicy salsa. These simple touches make a big difference! For the full recipe, check the section above. {{image_2}} You can mix in other veggies to change the taste. Try adding spinach for a fresh bite. Mushrooms add a rich flavor and nice texture. Bell peppers bring sweetness. You can use broccoli or asparagus for extra crunch. Just remember to cook them well before adding to the eggs. This way, they will blend in nicely. Cheese makes a big difference in your frittata. Feta gives a tangy kick, while cheddar adds sharpness. Goat cheese adds creaminess and a unique flavor. You could also use mozzarella for a mild, stretchy texture. Experiment with these to find your favorite taste. The right cheese can really elevate your dish. Adding protein makes your frittata heartier. Ham or bacon provides a savory note. If you prefer chicken, shredded pieces work great too. For a meat-free option, try adding black beans or chickpeas. These add fiber and keep it filling. You can mix and match proteins to create a dish that suits your taste. After making your zucchini frittata, let it cool down first. Once cool, store it in an airtight container. This keeps the frittata fresh for longer. I recommend placing a paper towel in the container. This absorbs any extra moisture. You can store it in the fridge for up to three days. To reheat your frittata, use the oven for the best results. Preheat your oven to 350°F (175°C). Place the frittata on a baking sheet. Cover it with foil to keep it moist. Heat for about 10 to 15 minutes. This way, you keep the fluffy texture. You can also use the microwave. Just heat it for 30 seconds at a time, checking often. If you want to keep your frittata longer, freezing works well. Cut the frittata into slices. Wrap each slice tightly in plastic wrap. Then, place them in a freezer-safe bag. Remove as much air as possible before sealing. You can freeze the frittata for up to three months. When you’re ready to eat, thaw it in the fridge overnight before reheating. For the full recipe, check out the Zesty Zucchini Frittata section. A zucchini frittata lasts about three to four days in the fridge. Store it in an airtight container. This keeps it fresh and tasty. If you notice any strange smell or mold, it's best to throw it out. Yes, you can make a zucchini frittata ahead of time. Cook it, let it cool, and then store it in the fridge. This makes a quick meal for busy days. Just reheat it in the oven or microwave when you're ready to eat. You can serve a frittata with a simple salad or some crusty bread. Fresh fruit also makes a great side. For a heartier meal, add a side of roasted potatoes. This adds flavor and texture, making the meal more filling. For more ideas, check out the Full Recipe. You’ve learned about making a delicious frittata with fresh zucchini and more. We covered the best ingredients, key cooking tips, and variations to try. Remember to avoid common mistakes for a fluffy center. You can store leftovers safely and reheat them well. Experimenting with different veggies and cheeses can keep your meals exciting. With these steps and tips, you can make a frittata that impresses every time. Enjoy the process and happy cooking!
Zucchini Frittata Delicious and Simple Recipe Guide
Are you ready to create a delicious and simple zucchini frittata? This easy dish makes the most of fresh veggies and is perfect for any
To make easy keto egg cups, gather these key ingredients: - 6 large eggs - 1/2 cup heavy cream - 1 cup fresh spinach, chopped - 1/2 cup cherry tomatoes, halved - 1/2 cup cheddar cheese, shredded - 1/4 cup diced bell pepper (any color) - 1/2 teaspoon garlic powder - 1/2 teaspoon onion powder - Salt and pepper to taste Want to mix things up? Here are some tasty options you can add: - Cooked bacon or sausage for extra protein - Feta or goat cheese for a tangy flavor - Avocado for creaminess and healthy fats - Zucchini or mushrooms for extra veggies You will need some basic tools to whip up these egg cups: - Muffin tin for baking - Mixing bowl for combining ingredients - Whisk for beating eggs - Measuring cups and spoons for precise amounts - Oven to bake the cups at 350°F (175°C) These simple ingredients and tools make it easy to prepare delicious keto egg cups. For a detailed recipe, check out the Full Recipe. First, gather your ingredients. You need: - 6 large eggs - 1/2 cup heavy cream - 1 cup fresh spinach, chopped - 1/2 cup cherry tomatoes, halved - 1/2 cup cheddar cheese, shredded - 1/4 cup diced bell pepper - 1/2 teaspoon garlic powder - 1/2 teaspoon onion powder - Salt and pepper - Fresh herbs for garnish Next, preheat your oven to 350°F (175°C). This step makes sure the egg cups bake evenly. While the oven heats, grease a muffin tin lightly. This helps the egg cups come out easily. In a large bowl, whisk the eggs and heavy cream together. Mix until they look smooth and fluffy. Then, add the garlic powder, onion powder, salt, and pepper. Taste and adjust the seasoning as needed. Now, fold in the chopped spinach, halved cherry tomatoes, diced bell pepper, and shredded cheese. Make sure everything is mixed well. This step adds great flavor and color to your egg cups. Pour the egg mixture into the prepared muffin tin. Fill each cup about three-quarters full. This allows room for the egg to rise. Bake in the preheated oven for 20-25 minutes. You know they’re done when they are set and golden on top. Keep an eye on them to avoid overcooking. Once baked, carefully remove the muffin tin from the oven. Let the egg cups cool for a few minutes. Then, use a fork to gently lift them out. To make perfect egg cups, here are some tips: - Use fresh ingredients for the best taste. - Don’t skip greasing the muffin tin; it’s key for easy removal. - Feel free to adjust the cooking time based on your oven. - For a creamier texture, add more heavy cream. - Garnish with fresh herbs for a pop of color and taste. These simple steps will lead you to delicious keto egg cups. Enjoy the full recipe for more details! One mistake is overfilling the muffin tin. This can cause the egg cups to spill over. Aim to fill each cup about three-quarters full. Another common error is undercooking. Make sure they bake until set and golden. Check them at the 20-minute mark. If they are still jiggly, give them a few more minutes. You can switch up the veggies based on what you like. Try adding mushrooms, zucchini, or onions. You can also change the cheese. Feta or goat cheese can add a nice twist. For a spicy kick, add jalapeños or red pepper flakes. Feel free to mix in leftover meats like bacon or sausage for extra flavor. These egg cups work well with a side salad. A fresh mixed greens salad adds a nice crunch. You can also pair them with avocado slices for healthy fats. Serve with a low-carb smoothie for a complete breakfast. If you want something heartier, try them with a side of sautéed greens. For the full recipe, check out the Keto Delight Egg Cups section. {{image_2}} You can change the flavors of your egg cups easily. Try adding cooked bacon or sausage for a savory twist. You could also use feta cheese and olives for a Mediterranean vibe. If you like spice, add jalapeños or hot sauce. Fresh herbs like basil or cilantro can brighten the taste. Each time you make them, you can create a new dish! If you want a dairy-free version, swap out the heavy cream. Use coconut cream or almond milk instead. You can also try using nutritional yeast. It adds a cheesy flavor without dairy. Make sure to check labels for any hidden dairy. This way, you can enjoy these egg cups on a dairy-free diet. To make mini egg cups, use a mini muffin tin. Fill each cup halfway with the egg mixture. Bake for about 15-20 minutes. For large egg cups, use a regular muffin tin. Fill each cup three-quarters full. Bake as usual. This gives you options for different serving sizes. Enjoy experimenting with shapes and sizes! Store leftover egg cups in an airtight container. This keeps them fresh longer. Place a paper towel inside to absorb excess moisture. This helps prevent sogginess. You can keep them in the fridge for up to four days. If you plan to eat them later, make sure they cool down first. Reheat your egg cups in the microwave for 30 to 60 seconds. Check them often to avoid overcooking. You can also use an oven for reheating. Set it to 350°F (175°C) and warm for about 10 minutes. This method keeps the texture nice and fluffy. For extra flavor, sprinkle a bit of cheese on top before reheating. To freeze, let the egg cups cool completely. Wrap each one in plastic wrap and place them in a freezer bag. Remove as much air as possible to prevent freezer burn. They can last for up to three months in the freezer. When ready to eat, thaw them in the fridge overnight. Reheat as mentioned above for a tasty meal. For the full recipe, check out the details above. Yes, Easy Keto Egg Cups are great for meal prep. They store well and reheat easily. You can make a batch and keep them in the fridge for quick meals. They fit perfectly in a busy schedule. Just grab one when you need a fast breakfast or snack. These egg cups last about 4 to 5 days in the fridge. Store them in an airtight container. This keeps them fresh and tasty. If you see any moisture, it’s best to eat them sooner. Always check for signs of spoilage before eating. Absolutely! You can prepare them ahead of time. Just bake your egg cups and let them cool. Then, store them in the fridge. They are perfect for busy mornings. Just reheat them in the microwave for about 30 seconds. Keto Egg Cups are packed with protein and healthy fats. They help you feel full longer. The eggs provide essential nutrients, like vitamin D and B vitamins. Spinach adds fiber and vitamins A and C. This dish supports your keto diet by keeping carbs low while giving you energy. You can enjoy a tasty meal with great nutrition! For the full recipe, check out Keto Delight Egg Cups. In this post, we covered how to make Easy Keto Egg Cups. We discussed the key ingredients, cooking steps, and tips to avoid mistakes. You can customize your egg cups or try different flavors. We also shared how to store leftovers and reheat them. In summary, making these egg cups is simple and fun. They fit well in any meal plan. Enjoy experimenting with your own flavors and pairings!
Easy Keto Egg Cups Quick and Delicious Recipe
Looking for a simple and tasty meal that fits your keto lifestyle? These Easy Keto Egg Cups are your go-to solution! Packed with flavor and
- 4 small bagels, sliced in half - 4 large eggs - 4 slices of cheddar cheese - 4 slices of turkey sausage - 1 ripe avocado, sliced - 2 tablespoons butter - Salt and pepper to taste - Fresh chives, chopped for garnish Each ingredient plays a vital role in making these bagel breakfast sliders tasty. The bagels provide a chewy base. Eggs add protein and creaminess. Cheddar cheese gives a rich flavor. Turkey sausage enhances the savory taste. Avocado brings freshness and healthy fats. Butter helps to toast the sliders perfectly. Seasoning with salt and pepper adds essential flavors. Fresh chives not only brighten the dish but also add a pop of color. You can use the Full Recipe to get started. Each step brings you closer to a delicious breakfast treat. Enjoy the balance of flavors and textures in every bite! To start, prepare your skillet. Melt 1 tablespoon of butter over medium heat. This creates a nice flavor base. Next, add the turkey sausage slices. Cook them for 3-4 minutes on each side. You want them golden brown. Once done, take them out and set them aside. Now, let's cook the eggs. You can choose to make them sunny-side up or scrambled. I prefer sunny-side up for the runny yolk. Crack the eggs into the skillet and season with salt and pepper. Cook for about 3-4 minutes. When the whites are set, place a slice of cheddar cheese on top. Let it melt for that rich, creamy flavor. While the eggs cook, it’s time to toast the bagels. You can use a toaster or a pan. Toast them until they are golden brown. This step is key. A crispy bagel adds great texture to your sliders. Now for the fun part: assembling the sliders. Start with the bottom half of the bagel. Place a slice of turkey sausage on it. Next, add the cheesy egg. Then, top it with a few slices of avocado. Finally, place the top half of the bagel over everything. For a crispy finish, melt the remaining tablespoon of butter in the skillet. Gently place the assembled sliders in the pan. Toast for about 2 minutes on each side. This gives them a nice crunch. Serve them warm, and don’t forget to garnish with fresh chives. Enjoy your delicious bagel breakfast sliders! For the complete recipe, check out the Full Recipe section. To make great Bagel Breakfast Sliders, you need to focus on two key areas: the eggs and the sausage. - Avoiding overcooked eggs: Cook the eggs for just enough time. For sunny-side up, watch the whites carefully. They should be firm but the yolks should stay runny. If you scramble, mix them gently and remove from heat when they are soft and fluffy. Overcooked eggs can become rubbery, so take them off the heat when they look slightly underdone. - Achieving the right sausage texture: Cook the turkey sausage until it is golden brown. This means cooking for about 3-4 minutes on each side. You want it crispy on the outside but juicy inside. Don't rush this step. If it's not browned, it won't have the great flavor we want. Pair your sliders with tasty sides. Here are some ideas: - Pairing with sides: Fresh fruit or a light salad works well. You can also serve them with crispy hash browns for a heartier meal. - Drizzle ideas: Try adding a drizzle of hot sauce or a creamy ranch dressing. These add a nice kick and enhance the flavor of the sliders. Garnishing can elevate your dish. - Other options besides chives: If you want to mix it up, try using parsley or diced tomatoes. These add color and freshness. - How garnishing enhances presentation: A nice garnish makes your sliders look more appealing. It shows care and attention to detail. A pop of green can make your dish stand out on the table. For the full recipe, you can check the detailed steps above. Enjoy making these delicious Bagel Breakfast Sliders! {{image_2}} You can switch up the bagels you use. Try onion, everything, or plain bagels. Each type adds a new taste. You can also change the meat. Instead of turkey sausage, use crispy bacon or savory ham. Both options bring a different flavor. Want to make your sliders pop? Add fresh veggies like spinach or juicy tomatoes. They add crunch and color. You can spice things up too. A dash of hot sauce or your favorite herbs can give your sliders a kick. If you want a vegetarian option, skip the meat and add more veggies. You can use black beans or mushrooms for protein. For gluten-free sliders, choose gluten-free bagels. They work just as well and taste fantastic. These variations let you make the Bagel Breakfast Sliders your own. Explore different flavors and enjoy! For more ideas, check the Full Recipe. To keep your sliders fresh, wrap them tightly in plastic wrap or foil. You can also use a sealed container. Store them in the fridge for up to three days. This way, you can enjoy your tasty bagel breakfast sliders later. When reheating, the oven works best. Preheat it to 350°F (175°C). Place the sliders on a baking sheet and cover them with foil. Heat them for about 10-15 minutes. This keeps the bagels crisp and the cheese melty. If you use a microwave, heat them in short bursts. A few seconds will warm them, but they may get soggy. You can freeze your sliders for later. Wrap each slider in plastic wrap, then put them in a freezer bag. Make sure to remove as much air as possible. They can stay frozen for up to three months. To enjoy them, take them out and thaw overnight in the fridge. Reheat as mentioned above for best results. Yes, you can make Bagel Breakfast Sliders ahead of time. To prep in advance, cook the turkey sausage and eggs. Store them in the fridge. You can also slice the bagels. When you are ready to eat, just toast the bagels and assemble the sliders. This saves time and makes breakfast quick and easy! You can mix and match fillings to make them your own. Try using bacon or ham instead of turkey sausage. Add spinach, tomatoes, or even jalapeños for a kick. Want more flavor? Use different cheeses like pepper jack or cream cheese. The options are endless, so have fun with it! For the best flavor, use fresh bagels. I recommend everything bagels for a bold taste. Plain bagels work well too, letting the fillings shine. If you like a sweeter option, try cinnamon raisin bagels. Choose what you love! Yes, you can easily make these sliders vegetarian. Substitute turkey sausage with veggie sausage or mushrooms. You can also add more veggies like bell peppers or zucchini. Use cheese or avocado for creaminess. These swaps keep your sliders tasty and satisfying! Bagel Breakfast Sliders can last up to three days in the fridge. Be sure to store them in an airtight container. When you want to eat them, reheat in the microwave or toaster oven. This keeps them warm and delicious! In this blog post, we covered how to make delicious Bagel Breakfast Sliders. We explored main and additional ingredients, detailed step-by-step cooking instructions, and offered tips for perfecting your cooking process. We also shared variations and storage information. As you try these sliders, remember to be creative with flavors and adjustments. Enjoy customizing your sliders for perfect mornings ahead!
Bagel Breakfast Sliders Savory and Simple Delight
Start your day right with Bagel Breakfast Sliders! These savory and simple delights will impress your taste buds. Picture warm bagels stuffed with fluffy eggs,
- 2 ripe bananas - 1 cup natural peanut butter - 2 large eggs - 1/4 cup honey or maple syrup - 1 teaspoon vanilla extract - 1 teaspoon baking soda - 1/2 teaspoon cinnamon - 1/4 teaspoon salt - 1/2 cup chocolate chips (optional) These ingredients make the base of the muffins. Ripe bananas add natural sweetness. They also help bind the mix. Peanut butter gives a creamy texture and rich flavor. Use natural peanut butter for a healthier choice. Eggs help the muffins rise and provide protein. Honey or maple syrup sweetens the mix and keeps it moist. For extra flavor, we add vanilla extract. Baking soda helps the muffins rise. Cinnamon adds warmth and depth. A pinch of salt boosts the taste. If you like chocolate, toss in some chocolate chips. They make these muffins even more fun! For the full recipe, check out the instructions above. These ingredients blend to create a delightful treat that's both tasty and nutritious. You can enjoy them for breakfast or as a snack. - Preheat the oven to 350°F (175°C). - Prepare the muffin tin with liners or cooking spray. - In a large bowl, combine the mashed bananas and peanut butter. - Add the eggs, honey (or maple syrup), and vanilla. Mix until smooth. - Stir in the baking soda, cinnamon, and salt. Mix until well combined. - Scoop the batter into the muffin tin, filling each cup about 3/4 full. - Bake for 15-20 minutes. Check for doneness with a toothpick. These steps create a simple yet tasty treat. For the full recipe, you can refer to the earlier section. Enjoy your baking! To get the best muffins, start with ripe bananas. They add natural sweetness and moisture. Overripe bananas work best. Next, mix the batter gently. Overmixing can make your muffins tough. Stir until just combined for a light and fluffy texture. Keep an eye on your muffins as they bake. Check them around the 15-minute mark. Every oven is different, so this step is key. A toothpick is your best friend here. Stick it in the center; if it comes out clean, your muffins are done. Want to boost the taste? Try adding spices like nutmeg or cardamom. They can give your muffins a warm, cozy flavor. You can also add nuts for extra crunch and texture. Chopped walnuts or pecans work great and add healthy fats too. For the full recipe, check out the complete guide to Flourless Peanut Butter Banana Muffins. Enjoy baking! {{image_2}} If you need gluten-free muffins, use gluten-free baking powder. This keeps the muffins light without gluten. For a vegan option, replace eggs with flax eggs. Mix 1 tablespoon of ground flaxseed with 2.5 tablespoons of water. Let this mix sit for a few minutes until it gels. This works well in the recipe. You can add different flavors to these muffins. Toss in some fresh berries or dried fruits. This adds sweetness and texture. If you want to switch up the nut butter, try almond or cashew butter. Each nut butter gives a unique taste to the muffins and keeps them fun. For a fun twist, make mini muffins. They are perfect for snacks or lunchboxes. If you have a party, try muffin "cakes." Just pour the batter into a cake pan instead of a muffin tin. This makes a great centerpiece for any event. Check the baking time, as it may change for larger sizes. For the complete recipe, you can refer to the Full Recipe section. To keep your flourless peanut butter banana muffins fresh, store them in an airtight container. This helps lock in moisture and flavor. Aim for a cool, dry place away from direct sunlight. Room temperature is just fine for short-term storage. If you want to save some muffins for later, freezing is a great option. Place the muffins in a freezer-safe bag or container. Make sure to remove as much air as possible. For thawing, take a muffin out and let it sit at room temperature for about 30 minutes. You can also warm it in the microwave for 10-15 seconds. These muffins stay fresh for about 3 to 5 days at room temperature. If frozen, they can last for up to 3 months. Always check for signs of spoilage before eating. Look for mold, an off smell, or a dry texture. Fresh muffins should be soft and moist. For the full recipe, check the previous section. You can ripen bananas fast using a few easy tricks. - Place them in a brown paper bag. - Add an apple or a tomato to speed up the process. - Set them near a warm spot in your kitchen. These methods help the bananas ripen in about one day. The ethylene gas they emit helps them turn sweet and soft. Yes, you can use other spreads if you need nut-free options. - Sunflower seed butter is a great choice. - Soy nut butter works well too. - You can even try tahini for a different taste. These swaps keep the muffins tasty and safe for those with nut allergies. To boost protein in these muffins, you can add some tasty options. - Mix in a scoop of protein powder with the dry ingredients. - Add Greek yogurt for extra creaminess and protein. - Chia seeds or hemp seeds can also give a protein boost. These additions help you enjoy a more filling snack without losing flavor. You learned how to make delicious peanut butter banana muffins. We covered the key ingredients, step-by-step instructions, and helpful tips. Remember, ripe bananas make a big difference in flavor. You can try different nut butters or mix in fruits for variety. Storing muffins properly helps to keep them fresh. These muffins are easy, tasty, and great for snacks or breakfast. Now, it’s time to bake and enjoy your own healthy treats!
Flourless Peanut Butter Banana Muffins Healthy Treat
Craving a tasty snack that’s also healthy? Try these Flourless Peanut Butter Banana Muffins! Made with just a few simple ingredients, they are a delightful