Appetizers
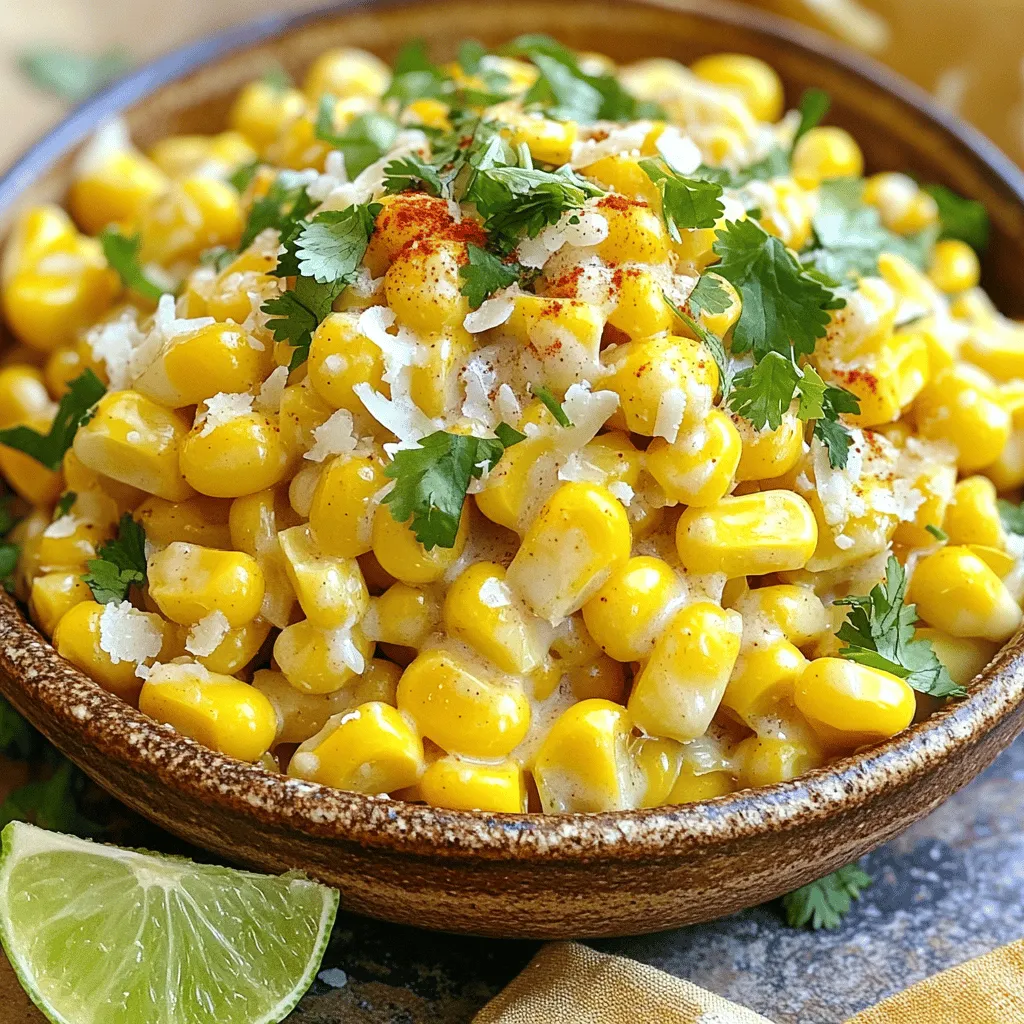
Irresistible Garlic Butter Corn with Cheese Delight
If you’re craving a tasty side dish, look no further! My Irresistible Garlic Butter Corn with Cheese Delight is the answer. This dish bursts with
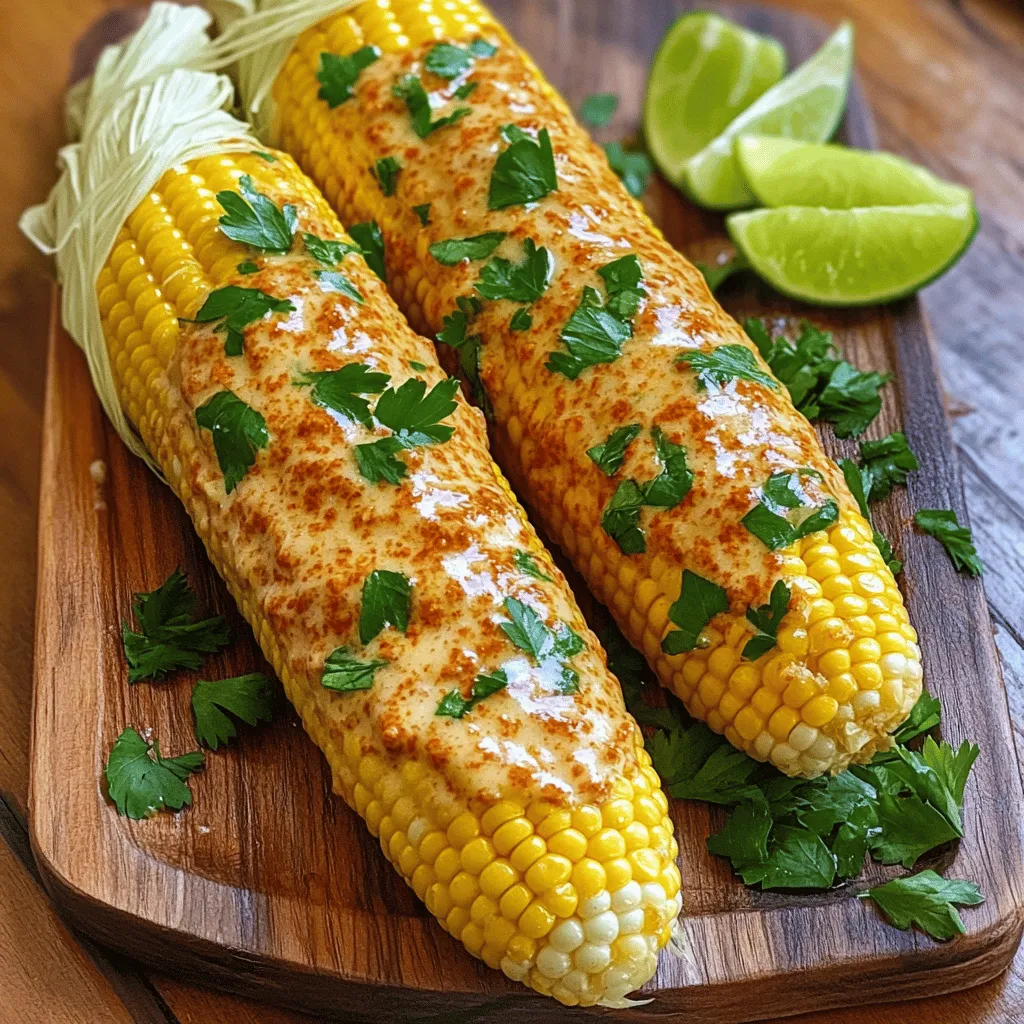
Smoked Paprika Garlic Butter Corn Delightfully Simple
If you’re looking to elevate your corn game, you’ve landed in the right spot! In this post, I’ll show you how to make Smoked Paprika
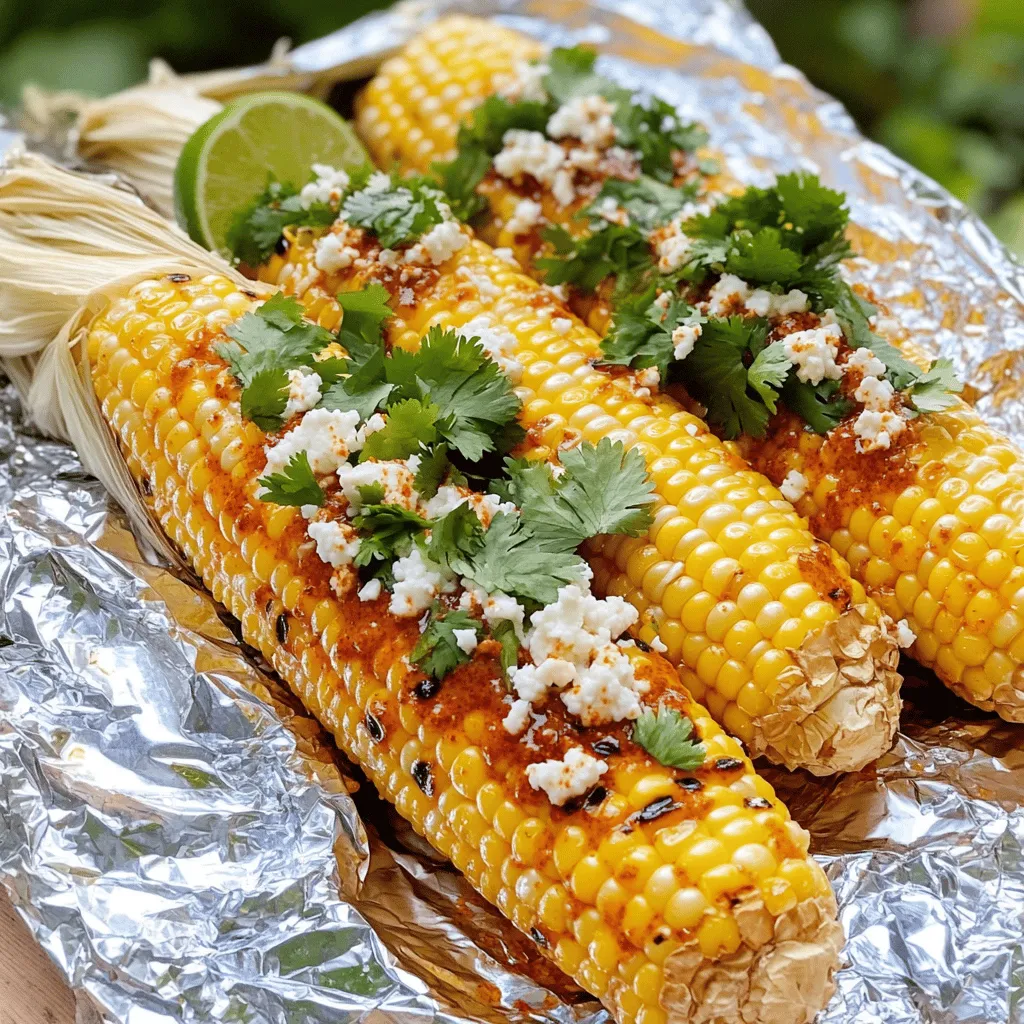
Grilled Corn in Foil Delicious and Easy Recipe
Grilled corn in foil is a tasty and easy way to enjoy summer flavors. With just a few simple steps, you can have sweet, smoky
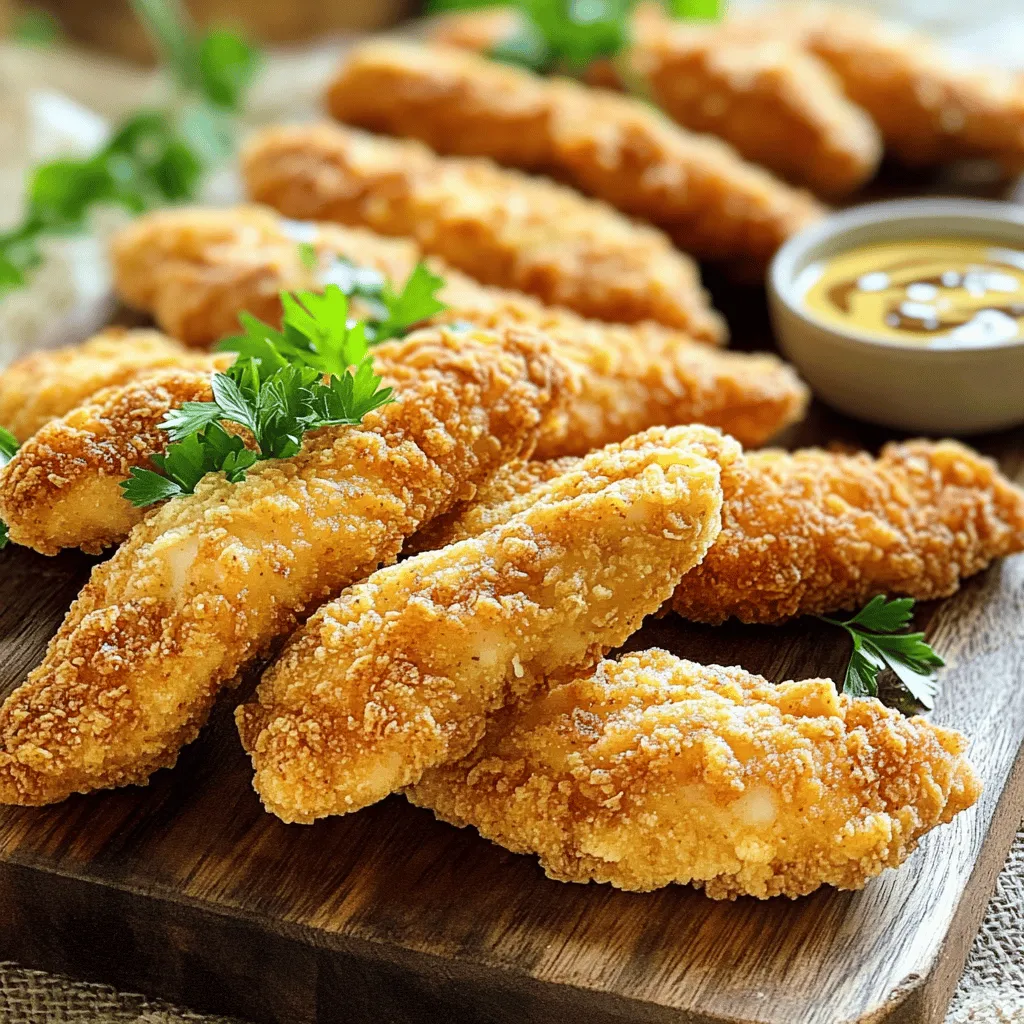
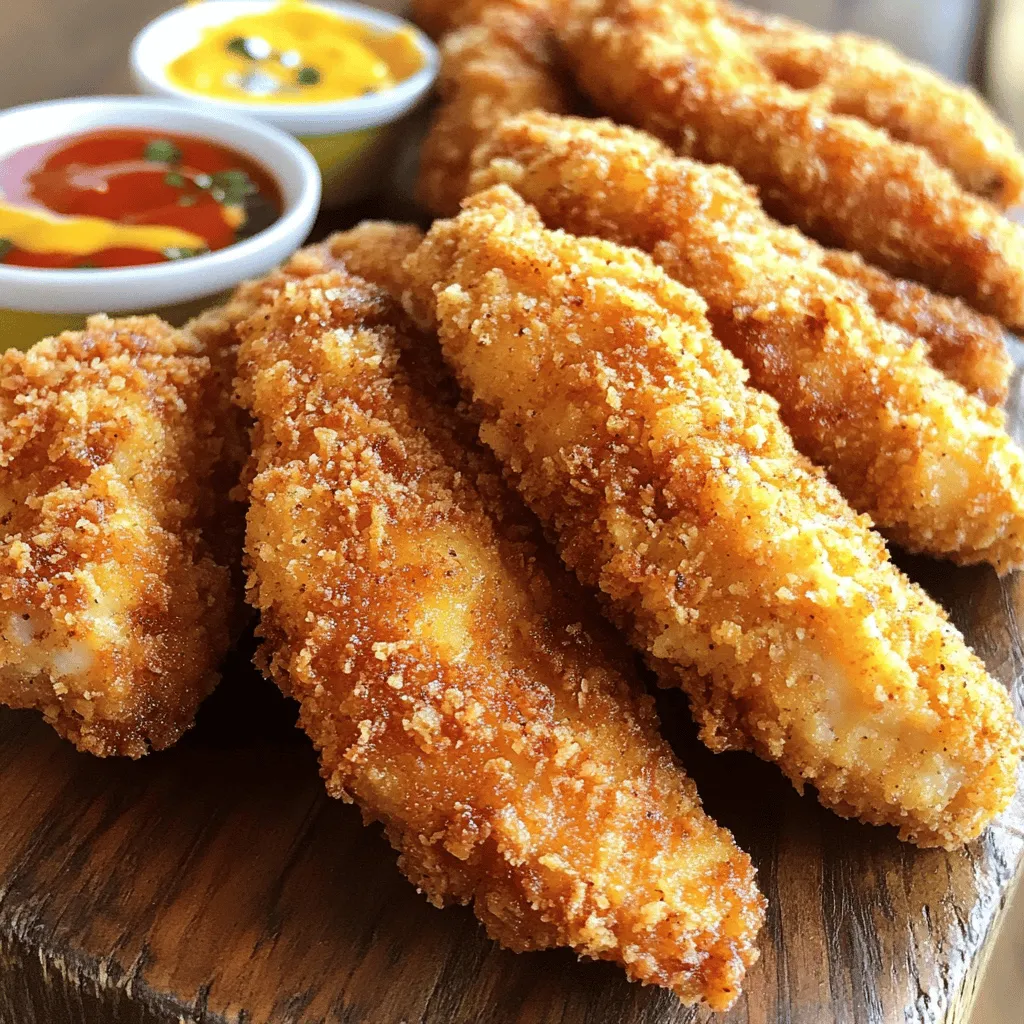
Crispy Homemade Chicken Tenders Easy and Flavorful Meal
Looking for a tasty meal that’s easy to make? You’ve come to the right place! These crispy homemade chicken tenders are packed with flavor and
![For this tasty dish, you need: - 4 ears of fresh corn, husked - 1/2 cup unsalted butter, softened - 4 cloves garlic, minced - 2 tablespoons fresh parsley, chopped - 1 teaspoon smoked paprika - 1 teaspoon salt - 1/2 teaspoon black pepper - Aluminum foil These ingredients create a rich flavor that makes the corn shine. The garlic butter adds a lovely touch to the sweet corn. You can customize your corn by adding extra ingredients. Here are some ideas: - Crushed red pepper flakes for heat - Cheese, like Parmesan or feta, for creaminess - Lemon juice for a bright twist Feel free to mix and match based on your taste. These add-ins can bring new life to the recipe. To make this dish, you will need: - A baking sheet or oven rack - A small mixing bowl - A sharp knife for husking the corn - A spoon or spatula for mixing Having the right tools makes the cooking process smoother. With these ingredients and equipment, you are ready to enjoy oven-roasted corn in foil with garlic butter. For the full recipe, check the main article. Start by husking the corn. Remove all the green leaves and silk strands. This step is key for a great taste. Make sure you have clean ears of corn. Rinse them under cool water to wash away any dirt. Pat them dry with a towel. Set your corn aside while you prepare the garlic butter. In a small bowl, combine the softened butter and minced garlic. Use a fork to mix them well. Add in the chopped parsley for a fresh taste. Next, sprinkle in the smoked paprika, salt, and black pepper. Stir the mixture until it’s smooth and creamy. This garlic butter is the magic that makes the corn so tasty! Take a large piece of aluminum foil for each ear of corn. Lay the corn in the center of the foil. Use a spoon to spread a generous amount of the garlic butter over the corn. Make sure every side is coated. After that, fold the foil tightly around the corn. This keeps the steam in while it cooks. Place the wrapped corn on an oven rack or a baking sheet. Roast it in the oven at 400°F for 25-30 minutes. The corn should be tender and smell amazing. When it’s ready, unwrap the foil carefully. Watch out for the hot steam! Serve the corn warm, drizzling any leftover garlic butter over the top. Enjoy this delicious treat! For the complete recipe, check out the [Full Recipe]. To make the best garlic butter, start with soft butter. Use a small bowl to mix it. Add minced garlic, chopped parsley, smoked paprika, salt, and black pepper. Stir until smooth. This step is key. You want a great balance of flavors. Feel free to get creative with your seasonings. Try adding a squeeze of lemon juice for brightness. You can also use chili powder for a spicy kick. Don’t forget about cheese. A sprinkle of Parmesan or feta works wonders. These tweaks can make your corn even better. Roasting corn in foil traps steam. This keeps it tender and juicy. Make sure to fold the foil tightly. This prevents the steam from escaping. Roast the corn for 25 to 30 minutes. Check for tenderness by piercing it with a fork. If it feels soft, it’s ready! Enjoy this easy and tasty dish from the Full Recipe. {{image_2}} You can change the taste of oven-roasted corn in foil easily. Try adding lime juice for a zesty kick. A sprinkle of chili powder adds heat and excitement. You can swap garlic butter for herb butter, too. Mixing in basil or cilantro gives a fresh twist. For a cheesy touch, sprinkle grated Parmesan before wrapping. Your corn can become a new dish with these ideas. This oven-roasted corn recipe is naturally gluten-free. All ingredients are safe for those avoiding gluten. Just ensure your butter is pure and free from additives. If you want extra flavor, use gluten-free seasoning mixes. You can add fresh herbs like thyme or dill for even more taste. Enjoy your corn worry-free! The recipe is vegetarian, making it perfect for all diets. You can keep it simple with the classic garlic butter. For a vegan twist, use vegan butter instead. Try adding nutritional yeast for a cheesy flavor without dairy. You can also mix in different veggies, like bell peppers or zucchini, for a colorful side. This way, you can enjoy a hearty dish full of flavor and nutrients. After enjoying your oven-roasted corn, store any leftovers in the fridge. Place the corn in an airtight container. This keeps the corn fresh and tasty. You can also wrap it tightly in plastic wrap. Store it in the fridge for up to three days. To reheat your corn, use the oven for the best results. Preheat your oven to 350°F (175°C). Wrap the corn in foil to keep it moist. Heat for about 10-15 minutes. You can also use the microwave. Place the corn on a plate and cover it with a damp paper towel. Heat in short bursts of 30 seconds, checking until warm. If you want to save corn for later, freezing is a great option. First, cook the corn as per the recipe. Let it cool completely before freezing. Wrap each ear in plastic wrap and place them in a freezer bag. This way, they stay fresh for up to six months. When you’re ready to use, thaw them in the fridge overnight before reheating. For a quick fix, you can also toss them in hot water for a few minutes. Enjoy your corn later with ease! Roast corn in foil for 25 to 30 minutes. This time gives the corn a tender bite. Make sure your oven is preheated to 400°F (200°C) for best results. Check the corn after 25 minutes. If it is not tender, roast for another 5 minutes. Using frozen corn is not ideal for this recipe. Fresh corn gives the best taste and texture. Frozen corn may not cook evenly in the oven. If you must use frozen corn, thaw it first. Then, follow the same steps to wrap and roast. You can use many herbs in garlic butter. Basil, cilantro, or dill work great. Each herb adds a unique flavor twist. For a spicy kick, try adding some red pepper flakes. Mix and match herbs to find your favorite blend. Enjoy experimenting with flavors! In this blog post, we covered key ingredients and equipment for roasting corn. I shared step-by-step instructions for prepping, making garlic butter, and roasting the corn. Tips on perfecting flavor and best practices were included, along with fun variations and storage info. Roasting corn is easy and fun. Explore flavors and ways to enjoy this dish, even with leftovers. Try your favorite seasonings to make it your own. Enjoy great corn today!](https://toastedrecipes.com/wp-content/uploads/2025/06/05325e7e-394d-4b6a-a362-ac8a5703618f.webp)
Oven-Roasted Corn in Foil with Garlic Butter Delight
Looking for a tasty side dish that’s simple and packed with flavor? Oven-Roasted Corn in Foil with Garlic Butter Delight is your answer! This easy
Buttermilk Chicken Tenders Crispy and Flavorful Meal
Looking for a crispy and flavorful meal that will impress your family? Try my buttermilk chicken tenders! These tender strips are marinated for deep taste,
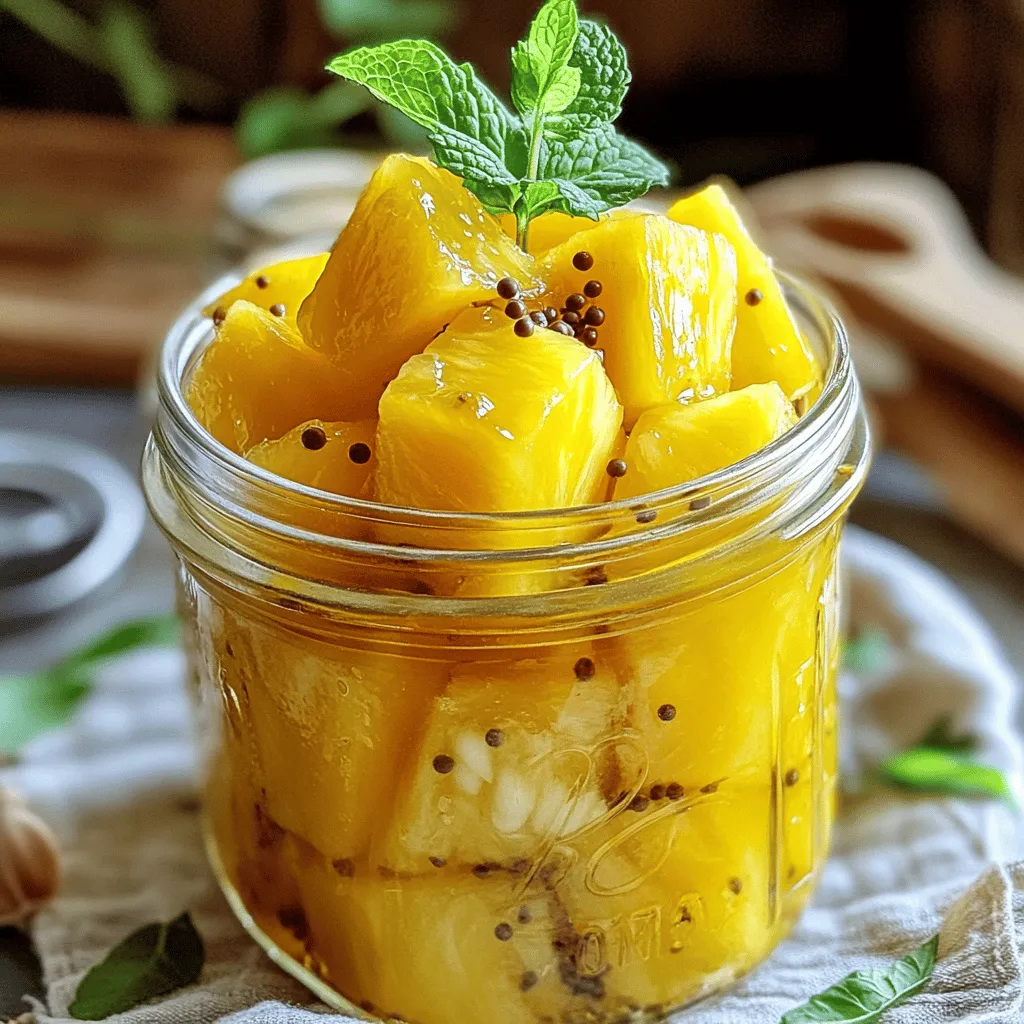
Easy Pickled Pineapple Simple and Tasty Recipe
Pickled pineapple is a quick and tasty way to spice up your meals. This simple recipe lets you transform fresh pineapple into a sweet and
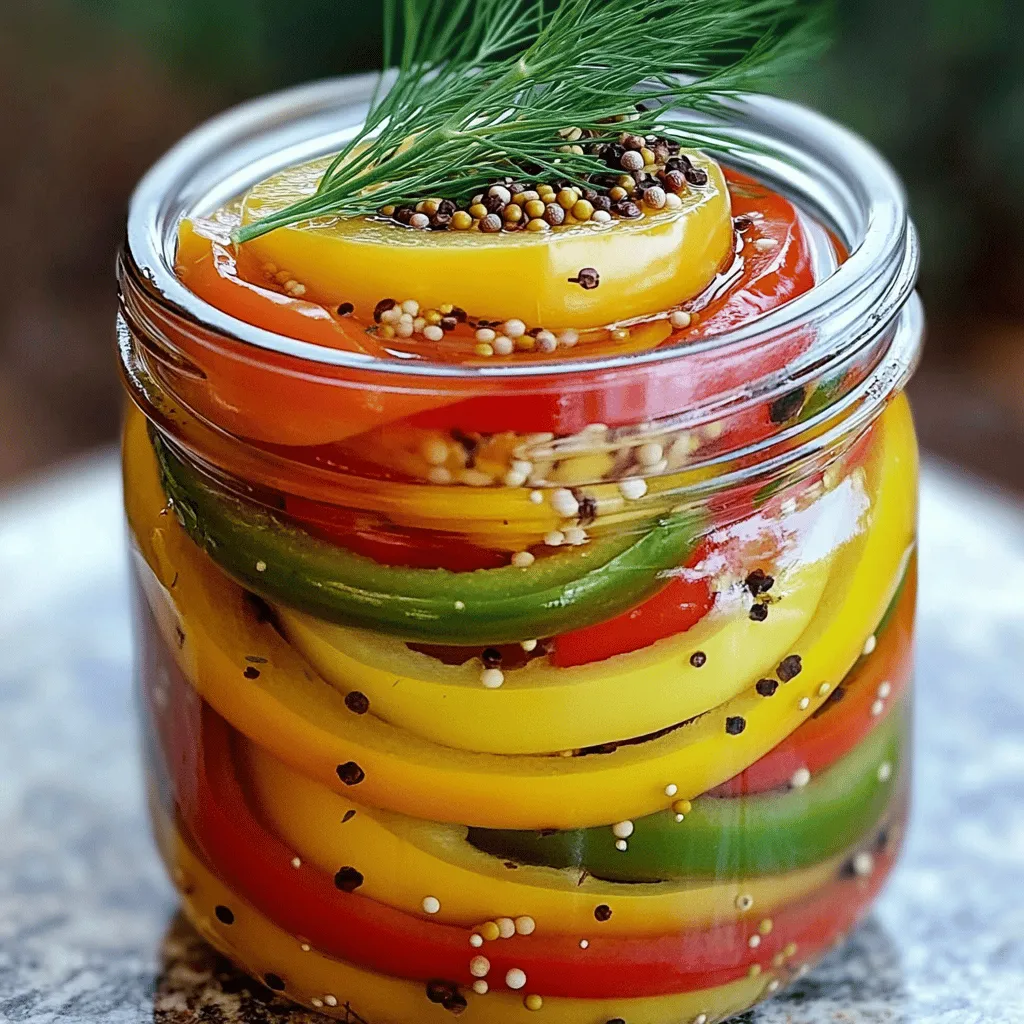
Easy Pickled Peppers Quick and Flavorful Recipe
Are you ready to add a zing to your meals? My “Easy Pickled Peppers” recipe is your ticket to quick and flavorful goodness! With just
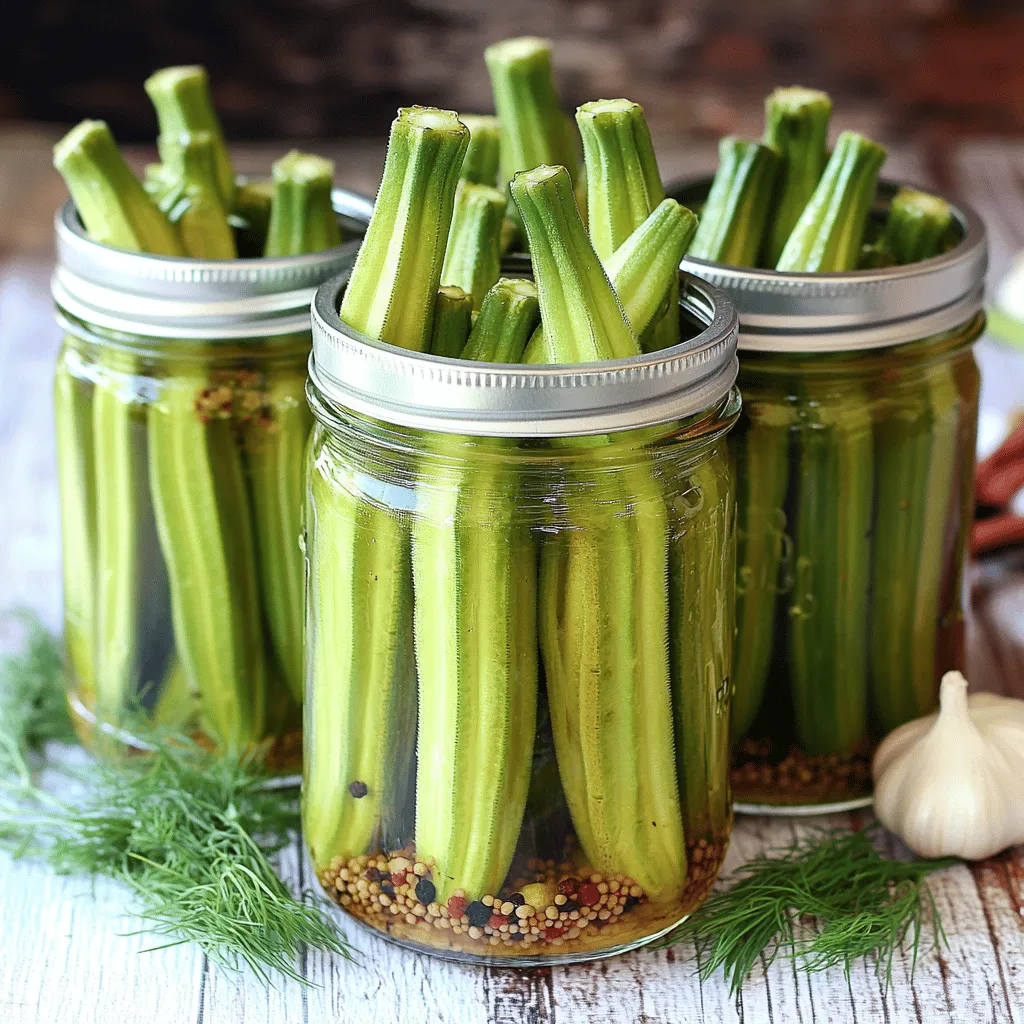
Crisp Pickled Okra Tangy and Flavorful Delight
Crisp pickled okra is a tasty treat you can make at home. With a tangy kick and crunchy texture, this dish adds flavor to any

Chili Cheese Fries Irresistible Comfort Food Delight
Craving a warm and cheesy treat? Chili cheese fries may just be the ultimate comfort food! This dish combines crispy fries, hearty chili, and gooey