Appetizers

- Cherry tomatoes - Fresh basil leaves - Fresh mozzarella balls - Balsamic glaze - Extra virgin olive oil - Garlic powder - Salt and pepper - Tortilla chips - Toasted baguette slices To make the best Caprese dip, you need fresh and vibrant ingredients. First, grab some cherry tomatoes. These small, sweet gems are the base of our dish. They add juiciness and color. Next, we’ll need fresh basil leaves. Their bright flavor adds a fragrant twist. For the creamy part, choose fresh mozzarella balls. They give our dip a rich texture. You can find these at most grocery stores. The smoothness of the cheese pairs well with the tomatoes. Now let’s talk about flavor enhancers. Balsamic glaze is a must. It brings a sweet tang that elevates the dish. Extra virgin olive oil adds a fruity note and richness. Just a tablespoon will do. A sprinkle of garlic powder adds depth without overpowering the other flavors. Lastly, add salt and pepper to taste. These simple spices balance the dip perfectly. When it comes to serving, think about what you like. Tortilla chips add a nice crunch. They are perfect for dipping. Alternatively, toasted baguette slices work wonderfully for scooping. For the full recipe, check out the Caprese Dip Delight. You’ll love how easy this is to make! - Halve cherry tomatoes and mozzarella balls. - Chop fresh basil leaves. Start by taking your cherry tomatoes. Cut them in half. This step helps release their juicy flavor. Next, take your mozzarella balls. Halve them just like the tomatoes. This creates a nice balance of flavors. Finally, chop your fresh basil leaves. The basil adds a fragrant touch to your dip. - Mixing bowl assembly. Now, grab a mixing bowl. Add the halved cherry tomatoes, halved mozzarella, and chopped basil leaves. This is where the magic happens. The colors alone make this dish pop! - Drizzle with oil and glaze. - Toss gently and serve. Next, drizzle the extra virgin olive oil over your mix. Follow this with balsamic glaze. These will enhance the taste of your dip. Add garlic powder, salt, and pepper to season. Now, gently toss the ingredients together. Be careful not to squish the tomatoes or mozzarella. Once mixed, transfer the dip to a serving dish. For a lovely finish, drizzle some extra balsamic glaze on top. Serve right away with tortilla chips or toasted baguette slices. Enjoy this fresh and flavorful appetizer delight! Choosing ripe tomatoes is key for taste. Look for tomatoes that feel firm but slightly soft. They should have rich color and a strong aroma. Quality mozzarella makes a big difference too. Opt for fresh mozzarella balls packed in water. This keeps them soft and moist, enhancing the dip. Arrange your Caprese dip to impress. Use a shallow bowl to show off the colors. Start with a layer of tomatoes, then add mozzarella and basil. Drizzle balsamic glaze on top for a shiny finish. You can add a sprig of basil for a pop of green. Serve with tortilla chips or toasted baguette slices for a fun twist. Overmixing is a common mistake. Mix just enough to combine the flavors without breaking the cheese. Also, don’t skip marination time. Allowing the dip to sit for a few minutes helps the flavors meld. This makes each bite taste even better. For the full recipe, check out the Caprese Dip Delight. {{image_2}} You can make Caprese dip your own by adding fun ingredients. Try mixing in pesto for a herby kick. Olives add a salty punch that brings new life to the dip. You can also change the cheese. Feta adds a tangy flavor, while goat cheese offers creaminess. Both are great options for a twist. You can easily adjust this dip for different diets. For a gluten-free option, serve it with fresh veggies or gluten-free chips. If you want a vegan dip, swap the mozzarella with vegan cheese. You can also use cashew cream for a rich texture without dairy. Using seasonal ingredients can bring fresh flavors to your Caprese dip. In summer, add diced cucumbers or bell peppers for crunch. In fall, roasted squash can add warmth. You can also change the herbs based on what’s fresh. Try using mint or dill for unique tastes. For the full recipe, check out the Caprese Dip Delight section. To store leftover Caprese dip, place it in an airtight container. This keeps it fresh. Make sure to cover the top well. The dip lasts up to three days in the fridge. If you see any moisture, drain it before serving again. You can freeze Caprese dip, but keep in mind that it may change texture. To freeze it, use a freezer-safe container. Leave some space at the top for expansion. When ready to use, thaw it in the fridge overnight. Reheating Caprese dip is not the best option. It tastes best fresh. If you must reheat, do so gently. Use a microwave or a stovetop. Heat it slowly to keep the flavors bright and fresh. Caprese dip is a fresh and tasty mix of tomatoes, cheese, and basil. This dish has bright flavors that remind you of summer. You use sweet cherry tomatoes and creamy mozzarella. The dish gets a punch from fresh basil and a drizzle of balsamic glaze. It is light, refreshing, and perfect for gatherings or snacks. Yes, you can prep Caprese dip ahead of time. Chop the tomatoes, mozzarella, and basil earlier in the day. Mix them in a bowl and add olive oil and glaze just before serving. This keeps the flavors fresh. If you make it too early, the dip may get watery. So, save the mixing for closer to when you want to serve it. Caprese dip pairs well with crunchy tortilla chips or toasted baguette slices. Both options let you scoop the dip easily. You can also serve it with fresh veggies like cucumber or bell peppers. This adds a nice crunch and extra nutrition. Enjoy it at parties, picnics, or just a night in! For the full recipe, check out the Caprese Dip Delight section above. This blog covers how to make a delicious Caprese dip. You learned about the fresh ingredients, from cherry tomatoes to mozzarella. We shared easy step-by-step instructions for mixing and serving. I included tips to make your dip perfect, plus fun variations and storage info. Enjoy creating your Caprese dip! It’s a tasty treat everyone will love. Remember to use quality ingredients for the best flavor. Happy dipping!
Caprese Dip Fresh and Flavorful Appetizer Delight
If you’re craving a light, fresh, and easy appetizer, look no further! Caprese dip combines juicy cherry tomatoes, creamy mozzarella, and fragrant basil for a
To make loaded tater tots, you need a few key ingredients: - 1 pound frozen tater tots - 1 cup shredded cheddar cheese - 1/2 cup sour cream - 1/2 cup cooked bacon bits (optional) - 1/4 cup green onions, chopped - 1/4 cup diced tomatoes - 1/4 cup jalapeños, sliced - 1/2 teaspoon garlic powder - 1/2 teaspoon paprika - Salt and pepper to taste This list gives you a great base for your dish. You can mix and match based on your taste. If you want to switch things up, here are some fun alternatives: - Tater Tots: Use sweet potato tots for a different flavor. - Cheese: Try pepper jack or mozzarella for a spicy twist. - Sour Cream: Greek yogurt works well for a healthier choice. - Bacon: Use turkey bacon or skip it for a vegetarian option. - Toppings: Feel free to add avocado, chili, or even cheese sauce. These swaps can make your loaded tater tots unique and delicious. Choosing the right tater tots can boost your dish. Here are my top tips: - Look for Quality: Choose brands that offer crispy and golden tots. - Check Ingredients: Fewer ingredients often mean better quality. - Frozen vs. Fresh: Frozen tots are convenient and stay crispy. Fresh can be harder to find. - Size Matters: Smaller tots can get crispier and hold toppings better. These tips will help you pick the best tater tots for your recipe. For the full recipe, check out the instructions above. To make loaded tater tots, start with the frozen tater tots. Preheat your oven to 425°F (220°C). Spread the tater tots out on a baking sheet. Ensure they are in a single layer for even cooking. Bake them for about 20 to 25 minutes. You want them golden and crispy. Once they are done, take them out and sprinkle shredded cheddar cheese on top. Put the tray back in the oven for 5 more minutes. This allows the cheese to melt perfectly. While the cheese melts, mix sour cream, garlic powder, paprika, salt, and pepper in a bowl. Stir until it is smooth. Set this aside for later. When the cheese is melted, take the tray out of the oven again. Drizzle the garlic sour cream mix over the tater tots. Add your toppings—bacon bits, green onions, tomatoes, and jalapeños. Finally, return the loaded tater tots to the oven for 2 to 3 more minutes. This warms the toppings just right. Then, let them cool slightly before serving. For the best crispy tater tots, use a preheated oven. Baking at the right temperature helps them crisp up nicely. Make sure to space them out well. If they touch, they will steam instead of crisp. You can also flip them halfway through baking for even crispiness. If you want an extra crispy finish, broil them for the last minute. Just watch them closely to avoid burning. The key to perfect loaded tater tots is timing. Bake them at 425°F (220°C) for the best results. It usually takes about 20 to 25 minutes at this temperature. When adding cheese, keep it in the oven for just 5 minutes. This ensures it melts without getting too brown. For the final warm-up with toppings, 2 to 3 minutes does the trick. Following these steps will give you crispy, flavorful loaded tater tots every time! For the full recipe, check out the detailed instructions above. To get your tater tots super crispy, follow these steps: - Use a baking sheet lined with parchment paper. This helps the tots crisp up nicely. - Spread the frozen tater tots in a single layer. Avoid stacking them to ensure even cooking. - Bake at 425°F (220°C) for about 20-25 minutes. Keep an eye on them, so they don’t burn. - Flip the tots halfway through baking. This helps both sides get golden and crunchy. - For extra crunch, give them a quick broil for 1-2 minutes at the end. Watch closely! Here are some pitfalls to steer clear of: - Don’t overcrowd the baking sheet. Too many tots will steam, not crisp. - Avoid using fresh tater tots. Frozen ones work best for a crunchy texture. - Don’t skip the cheese-melting step. It adds flavor and helps hold toppings in place. - Don’t rush the cooling process. Let them sit for a minute to firm up. To elevate your loaded tater tots, try these flavor tips: - Add spices like chili powder or cumin for a spicy kick. - Mix in a splash of hot sauce into your sour cream for added zest. - Use different cheeses, like pepper jack or mozzarella, for unique flavors. - Garnish with fresh herbs like cilantro or parsley for a fresh touch. For the full recipe, check out the [Full Recipe]. {{image_2}} You can make loaded tater tots even better with great toppings. Here are some popular picks: - Cheddar Cheese: This classic cheese melts well and adds a rich flavor. - Bacon Bits: Crispy bacon adds a nice crunch and a savory taste. - Sour Cream: A dollop of sour cream brings a cool creaminess. - Green Onions: Chopped green onions add a fresh bite and color. - Tomatoes: Diced tomatoes give a juicy texture and bright flavor. - Jalapeños: For some heat, sliced jalapeños bring a spicy kick. Mix and match these toppings to find your favorite combo. Loaded tater tots can easily fit different diets. For a vegetarian option, skip the bacon. You can add more veggies like bell peppers or olives. For a vegan twist, use vegan cheese and dairy-free sour cream. This way, everyone can enjoy a tasty treat! Tater tots can change based on where you are. In some areas, people love spicy toppings, like buffalo sauce and blue cheese. In other places, you might find tater tots topped with chili and cheese for a hearty meal. Each region adds its unique flair, giving you many tasty choices. You can explore these variations and make your loaded tater tots special! For a full recipe, check out the Loaded Tater Tots recipe above. To store leftover loaded tater tots, let them cool first. Place them in an airtight container. Make sure to separate layers with parchment paper. This keeps them from sticking. Store the container in the fridge. They will stay fresh for about 3 to 4 days. For the best taste, reheat your tater tots in the oven. Preheat your oven to 400°F (200°C). Spread the tater tots on a baking sheet. Heat them for about 10 to 15 minutes. This will help them regain their crispiness. You can also use an air fryer for faster results. Set it to 350°F (175°C) for about 5 to 7 minutes. You can freeze loaded tater tots for later use. First, let them cool completely. Then, place them in a single layer on a baking sheet. Freeze them for about 1 to 2 hours until firm. After that, transfer them to a freezer bag. They can last up to 2 months in the freezer. When you want to eat them, bake from frozen. Just add a few extra minutes to the cooking time. For the full recipe, check out the details above! Loaded tater tots are crispy potato bites topped with tasty ingredients. They often feature cheese, bacon, sour cream, and various veggies. The mix of flavors and textures makes them a crowd favorite. You can serve them as a snack or side dish. They are fun to make and even more fun to eat! Yes, you can use homemade tater tots. Just make sure they are crispy and well-cooked. Homemade tater tots can add a fresh taste. Plus, you can control the ingredients. If you decide to make your own, use my [Full Recipe] as a guide for toppings and cooking time. Many sauces pair well with loaded tater tots. Here are a few favorites: - Ranch dressing - Spicy ketchup - BBQ sauce - Chipotle mayo - Cheese sauce Each sauce adds a unique flavor to your tater tots. Feel free to mix and match! You now know how to make loaded tater tots. We covered the best ingredients, the steps for perfect cooking, and tips for extra crunch. You’ve learned how to store leftovers and even how to customize them with tasty toppings. Remember, the key is to experiment and find what you love. Whether you serve them as a snack or party dish, loaded tater tots can impress anyone. Enjoy your cooking and share these tips with friends!
Loaded Tater Tots Crispy and Flavorful Delight
If you’re craving a snack that’s not just tasty but also fun to make, you’ve hit the jackpot with Loaded Tater Tots! They’re crispy, flavorful,
- 1 large French baguette - 8 ounces ribeye steak, thinly sliced - 1 cup bell peppers, thinly sliced (mixed colors) - 1 cup onion, thinly sliced - 1 cup provolone cheese, shredded - 1 cup mozzarella cheese, shredded - 2 tablespoons olive oil - 1 teaspoon garlic powder - Salt and pepper to taste - Fresh parsley, chopped (for garnish) When making Philly Cheesesteak Cheesy Bread, the right ingredients make all the difference. I love using a large French baguette as the base. It holds up well and gives a nice crunch. For the meat, I recommend ribeye steak. It’s tender and flavorful. Thin slices cook quickly and blend well with the veggies. Bell peppers and onions add color and sweetness. I prefer a mix of bell pepper colors for a vibrant dish. The cheese is key. Provolone brings a sharp flavor while mozzarella melts beautifully. Together, they create a gooey and delicious topping. Olive oil adds richness to the sautéed veggies. Garlic powder enhances the flavor without adding too much fuss. Salt and pepper are essential for balancing taste. Finally, fresh parsley gives a pop of color and freshness when you serve the dish. Be sure to check the Full Recipe for complete cooking steps. - Preheat oven to 375°F (190°C). - In a large skillet, heat olive oil over medium-high heat. - Add sliced onions and bell peppers, sauté for about 5-7 minutes until soft. - Remove the veggies from the skillet and set them aside. - In the same skillet, add thinly sliced ribeye steak. - Season steak with garlic powder, salt, and pepper. - Cook for 3-4 minutes until the steak is browned but still tender. - Slice the baguette in half lengthwise and place it cut side up on a baking sheet. - Evenly layer the cooked steak over each half of the baguette. - Add the sautéed onions and peppers on top of the steak. - Sprinkle provolone cheese first, then mozzarella cheese, covering the filling well. - Place the baking sheet in the preheated oven. - Bake for 10-12 minutes or until the cheese is melted and bubbly. - Remove from oven and let it cool slightly. - Garnish with chopped fresh parsley before slicing into pieces. Follow these steps to make your Philly Cheesesteak Cheesy Bread a hit! For the complete recipe, check out the Full Recipe. - Choosing the right steak: I prefer ribeye steak for its tender texture and rich flavor. Thinly slice it against the grain for the best bite. You can also use sirloin or flank steak if you want a leaner option. - Timing for sautéing vegetables: Sauté the onions and bell peppers for about 5-7 minutes. This time lets them soften and caramelize nicely. Keep an eye on them to avoid burning. You want them golden but not mushy. - Cheese melting tips: Use a mix of provolone and mozzarella cheese for a creamy and gooey topping. Layer the provolone first, then add the mozzarella. This method helps the cheese melt evenly and creates that delicious stretch we love. - Pairing with dips or sides: Serve your cheesy bread with ranch or marinara sauce for dipping. A simple side salad or some crispy fries can also complement the dish well. - Presentation ideas: Slice the cheesy bread into pieces and arrange it on a platter. Sprinkle chopped parsley on top for a fresh touch. A colorful plate makes it even more inviting and fun! For the full recipe, check out the detailed steps above. Enjoy your cooking! {{image_2}} You can make this dish your own in many ways. If you want a vegetarian version, swap the ribeye for mushrooms. Portobello or cremini mushrooms work well. They give a nice, meaty flavor. You can also try different cheese combinations. Cheddar or gouda can add a fun twist. To spice things up, add some red pepper flakes or a dash of hot sauce. This will give your cheesy bread a nice kick. You can even mix in herbs like oregano or thyme for extra flavor. While a French baguette is classic, feel free to use other types of bread. Substituting with ciabatta gives a nice chewy texture. You can also use whole grain or sourdough for a new taste. For those needing gluten-free options, look for gluten-free baguettes or rolls. These work just as well, and you won’t miss the gluten. You can still enjoy the great flavors of Philly Cheesesteak Cheesy Bread with these tasty swaps. For the full recipe, check the earlier section. To keep your Philly cheesesteak cheesy bread fresh, store it in the fridge. First, let it cool completely. Then, wrap it tightly in plastic wrap or place it in an airtight container. This way, it won’t dry out. You can keep it in the fridge for up to three days. When you want to reheat it, preheat your oven to 350°F (175°C). Place the bread on a baking sheet. Cover it with foil to keep it from getting hard. Heat for about 10-15 minutes, or until it’s warm. This helps the cheese melt nicely again. You can freeze this cheesy bread either before or after baking. If you freeze it before baking, follow these steps: prepare the filling and put it on the baguette. Wrap it well in plastic wrap and then foil. This keeps air out. It can stay in the freezer for up to three months. To bake from frozen, preheat your oven to 375°F (190°C). Bake it for about 20-25 minutes. Check if the cheese is melted and bubbly before serving. If you choose to freeze it after baking, let it cool first. Wrap it tightly in plastic wrap, then foil. To thaw, move it to the fridge overnight. When ready, reheat it in the oven as mentioned before. Enjoy your cheesy bread anytime! If you can't find ribeye, you can use other steaks. Sirloin or flank steak works well. You could also try ground beef or chicken. For a vegetarian option, use mushrooms or tempeh. Just slice them thinly to match the cooking time. Yes, you can prep the filling in advance. Cook the steak, peppers, and onions, then store them in the fridge. When you're ready, just assemble and bake. This saves time and makes it easy for a busy night. To avoid soggy bread, do not overload it with filling. Use less oil when cooking veggies. Also, bake it just until the cheese melts. This keeps the bread crusty and delicious. Absolutely! Preheat your air fryer to 350°F (175°C). Assemble the cheesy bread as usual, then place it in the air fryer. Cook for about 8-10 minutes. Check until the cheese is melted and bubbly. This method cuts down on baking time and adds great texture. This blog post covered the key ingredients and steps for making a delicious Philly cheesesteak cheesy bread. We shared tips on perfecting your flavors and suggested fun variations to fit your taste. Remember, you can swap the steak for veggies or try different cheeses. Storing leftovers and reheating them properly ensures you enjoy every bite later. Explore these ideas, and have fun in the kitchen. Now, you’re ready to impress with a tasty meal that everyone will love!
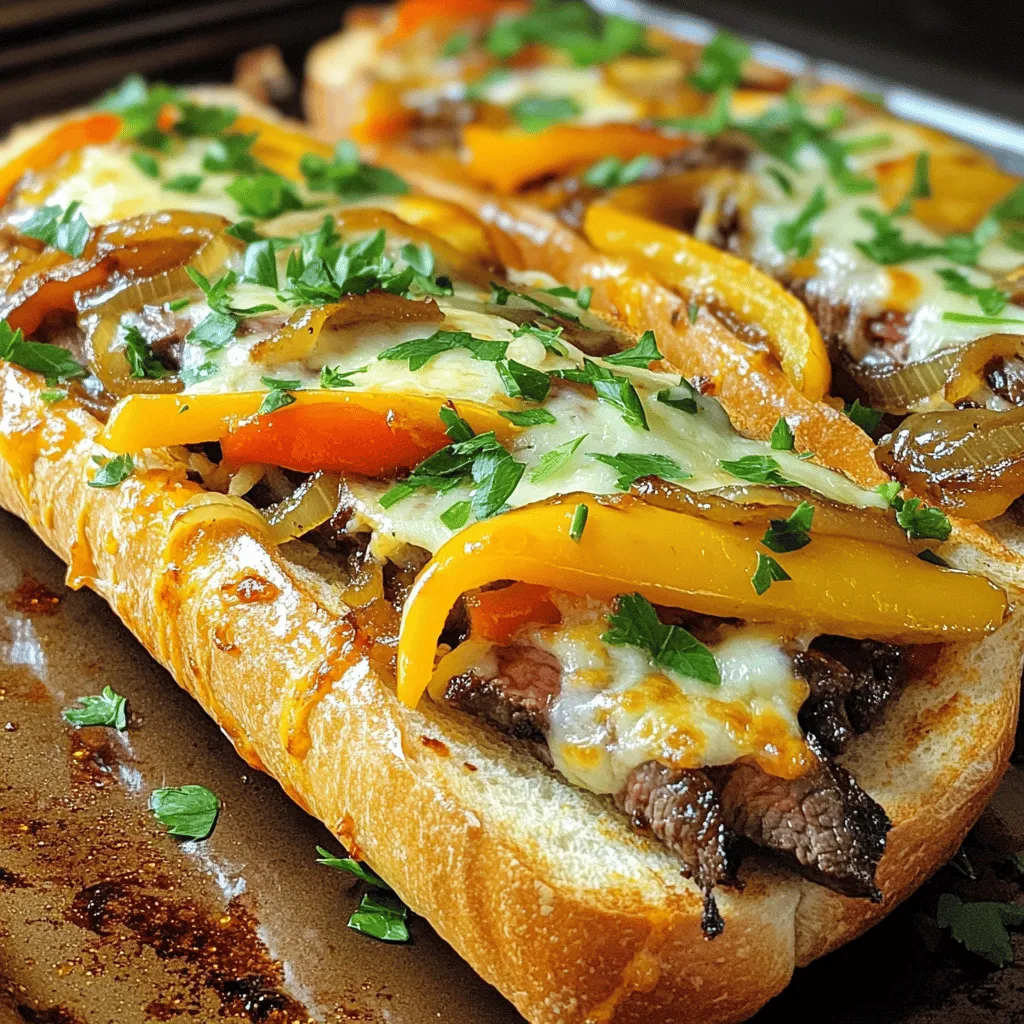
Philly Cheesesteak Cheesy Bread Tasty and Easy Recipe
Are you ready to elevate your snack game with a tasty twist on a classic? This Philly Cheesesteak Cheesy Bread recipe is both simple and
To make Cheesy Supreme Pizza Rolls, you need the following: - 1 can of pizza dough (store-bought or homemade) - 1 cup shredded mozzarella cheese - 1/2 cup pepperoni slices - 1/2 cup bell peppers, diced (red and green) - 1/4 cup black olives, sliced - 1/2 teaspoon Italian seasoning - 1/4 teaspoon garlic powder - 1/4 teaspoon onion powder - 1 egg, beaten (for egg wash) - Marinara sauce, for dipping When you use different measuring tools, here are some basic conversions: - 1 cup = 16 tablespoons - 1/2 cup = 8 tablespoons - 1/4 cup = 4 tablespoons - 1 teaspoon = 5 milliliters - 1/2 teaspoon = 2.5 milliliters These conversions help you get the right amounts for your rolls. Choosing great ingredients makes a big difference. Here are my tips: - Pizza dough: Fresh dough from a local bakery tastes best. - Cheese: Use whole milk mozzarella for a rich, creamy flavor. - Pepperoni: Look for high-quality pepperoni that is not greasy. - Vegetables: Fresh bell peppers add crunch. Choose ripe, colorful ones. - Seasonings: Fresh herbs can boost flavor even more. Use fresh garlic and onions if you can. Using quality ingredients makes your Cheesy Supreme Pizza Rolls even tastier. For the complete recipe, check the Full Recipe section. To start, preheat your oven to 400°F (200°C). This step is key for even cooking. Next, take your pizza dough. You can use store-bought dough or make your own. Roll the dough out on a lightly floured surface. Aim for a rectangle shape, about 1/4 inch thick. Make sure it’s even. Now, let’s build the filling. First, sprinkle shredded mozzarella cheese evenly across the rolled-out dough. Leave a small border around the edges to avoid spills. Next, layer on pepperoni slices. Add diced bell peppers, both red and green, for a fresh crunch. Don’t forget to toss in some sliced black olives for a briny touch. For added flavor, sprinkle Italian seasoning, garlic powder, and onion powder over the toppings. This mix will make your rolls burst with flavor. It’s time to roll it up! Start at one end of the dough and carefully roll it toward the other end. Keep the filling inside as you go. Pinch the seams to seal them well. Once rolled, slice the dough into 1 to 2-inch pieces. Place these pieces seam-side down on a baking sheet lined with parchment paper. Next, brush the tops with beaten egg. This will give your rolls a nice golden color. Finally, bake them in the preheated oven for 15-20 minutes. Watch for a puffed-up and golden brown finish. Once done, let them cool for a few minutes. You can serve them warm with marinara sauce for dipping. Enjoy your cheesy supreme pizza rolls! For the complete recipe, check out the Full Recipe section. To make the best pizza rolls, start with fresh ingredients. Use a good pizza dough for better flavor. Roll the dough evenly to avoid uneven baking. Keep the filling balanced to prevent spills. If the rolls are too full, they may burst. Make sure to seal the edges well. This helps keep the cheese and toppings inside. Using the right tools can make your cooking easier. A rolling pin helps to flatten the dough evenly. A sharp knife or pizza cutter works great for slicing the rolls. Use a baking sheet lined with parchment paper for easy cleanup. An egg wash brush helps to coat the rolls evenly. A good oven thermometer ensures your oven is at the right temperature. Add more flavor with herbs and spices. Fresh basil or oregano can elevate your pizza rolls. You can also sprinkle extra cheese on top before baking. For a fun touch, serve with marinara sauce in a small bowl. This adds color and makes your rolls look inviting. Another option is to garnish with chopped parsley after baking. It adds freshness and a nice pop of color. For the full recipe, refer to the main section. {{image_2}} You can easily make vegetarian pizza rolls. Just skip the pepperoni. Use more veggies instead. Great choices include mushrooms, zucchini, or spinach. They add color and flavor. You can use different cheese too. Feta or cheddar work well. Just remember to keep the taste balanced. Cheese is the heart of pizza rolls. You can mix and match your favorites. Try provolone for a sharp taste. Or use gouda for a smoky flavor. A blend of mozzarella and ricotta adds creaminess. The cheese melts perfectly, making each bite delicious. Don't be afraid to experiment with cheese! Want some heat? Add jalapeños or crushed red pepper flakes. You can also include spicy sausage for a meatier option. Hot sauce drizzled on top before baking gives a nice zing. Always taste as you go to find the right level of spice. Keep it fun and flavorful! To keep your leftover pizza rolls fresh, let them cool first. Place them in an airtight container. You can also wrap them tightly in plastic wrap. Store them in the fridge for up to three days. This way, they stay tasty and ready for your next snack. When you are ready to enjoy your pizza rolls again, reheating is key. Preheat your oven to 350°F (175°C). Place the rolls on a baking sheet. Heat them for about 10-15 minutes. This makes them crispy again, just like when they were fresh. You can also use a microwave, but they may not be as crispy. Heat them in 30-second bursts. Keep an eye on them to avoid sogginess. If you want to save some for later, freezing is a great option. First, let the pizza rolls cool completely. Then, place them in a single layer on a baking sheet. Freeze them for about an hour. Once frozen, move them to a freezer bag. Remove as much air as possible before sealing. They will stay good for up to three months. When you want to eat them, bake them from frozen. Add a few extra minutes to the baking time for the best results. For the full recipe, check out the earlier sections. To keep pizza rolls crispy, avoid overfilling them. Use just enough cheese and toppings. Make sure to roll the dough tightly. This keeps moisture inside. Bake them until golden brown and puffy. Let them cool on a wire rack. This helps air circulate. Yes, you can use gluten-free dough. Many stores sell it now. Just follow the same steps in the recipe. Check the dough package for bake times, as they may differ. Gluten-free dough can taste great too! These pizza rolls can last up to three days in the fridge. Store them in an airtight container. When you are ready to eat, reheat them in the oven. This keeps them crispy. Enjoy the flavors again! For the full recipe, check out the earlier sections. In this post, we explored how to make Cheesy Supreme Pizza Rolls. We covered ingredients, step-by-step instructions, and tips for success. You learned to make tasty variations and how to store leftovers properly. Use quality ingredients for the best flavor. Follow my tips for perfect rolls. Now, enjoy your cooking, and impress everyone with your delicious pizza rolls. Happy baking!
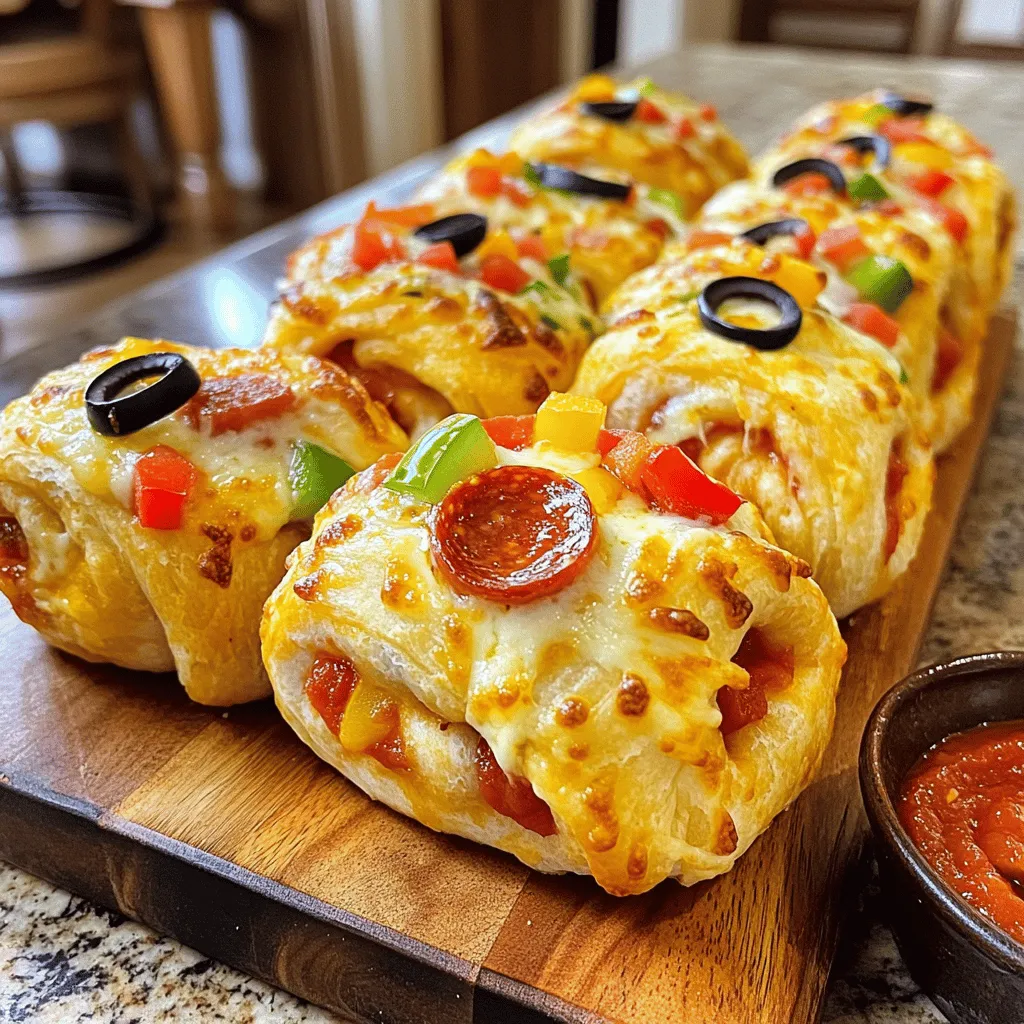
Cheesy Supreme Pizza Rolls Tasty Party Snack Delight
Are you ready to impress your friends at your next gathering? I’m excited to share my recipe for Cheesy Supreme Pizza Rolls, a tasty party
To make the best homemade egg rolls, gather these fresh and tasty ingredients: - 1 pound ground chicken or turkey - 2 cups coleslaw mix (cabbage and carrots) - 2 green onions, chopped - 2 cloves garlic, minced - 1 teaspoon fresh ginger, grated - 2 tablespoons soy sauce - 1 tablespoon sesame oil - 1 teaspoon salt - 1/2 teaspoon black pepper - 20 egg roll wrappers - Oil for frying These ingredients create a flavor-packed filling that makes your egg rolls so crispy and delicious. The ground protein gives a hearty base, while the coleslaw mix adds crunch. Fresh garlic and ginger bring warmth, and soy sauce adds depth. Don't skip the sesame oil; it enhances the taste. With the right ingredients, you can easily impress your family and friends. Just remember, quality matters. Fresh veggies and good protein make all the difference in your egg rolls. For the full recipe, check out the detailed instructions on how to bring these delightful treats to life! To make the filling, I start by sautéing the aromatics. I heat sesame oil in a large skillet over medium heat. Then, I add minced garlic and grated ginger. I cook them for about one minute until they smell great. Next, I add the ground chicken or turkey to the skillet. I cook it for 5 to 7 minutes until it turns brown. I break it apart with a wooden spoon. This helps it cook evenly. After the meat is cooked, I add the coleslaw mix and chopped green onions. I also stir in soy sauce, salt, and black pepper. I cook this mix for 2 to 3 minutes. The veggies should be soft but still crisp. I then remove the skillet from the heat and let the filling cool slightly. Now it’s time to assemble the egg rolls. I lay an egg roll wrapper on a clean surface with one corner facing me. I scoop about 2 tablespoons of the filling into the center of the wrapper. Next, I fold the bottom corner over the filling. I then fold the sides inward to keep the filling secure. Finally, I roll the egg roll tightly away from me. I seal the top corner with a bit of water. I repeat this with the remaining wrappers and filling. Frying the egg rolls is the best part! I heat oil in a deep pan or fryer to 350°F (175°C). Once hot, I carefully add a few egg rolls at a time. I fry them for about 3 to 4 minutes on each side. I want them golden brown and crispy. After frying, I remove the egg rolls and drain them on paper towels. This helps to get rid of excess oil. Now, they are ready to serve warm with my favorite dipping sauce. You can find the full recipe above to follow along! To make egg rolls crispy, start with the right oil. Use a good frying oil, like vegetable or peanut oil. Heat the oil to 350°F (175°C). This temperature helps the egg rolls cook quickly and get that golden crunch. If the oil is too cool, the rolls will soak up oil and become greasy. To avoid a soggy filling, make sure your vegetables are dry. You can pat them with a paper towel after washing. Also, do not overfill the egg rolls. About two tablespoons of filling is just right. If you pack them too tight, moisture builds up inside, making them soggy. To boost flavor, consider adding some extra seasonings. You can mix in a teaspoon of five-spice powder for a unique taste. A splash of rice vinegar gives a nice tang. If you like heat, add a few drops of sriracha or chili oil. Customizing the filling is easy. Try swapping ground chicken for shrimp or tofu. You can mix in different veggies like bell peppers or mushrooms for added crunch and flavor. Adding fresh herbs like cilantro or basil can also bring a fresh twist to your egg rolls. For the full recipe, check out the section above! {{image_2}} You can easily make egg rolls vegetarian or vegan. Start by substituting the protein. Use tofu or tempeh instead of chicken or turkey. Both options offer great texture and flavor. Next, think about the vegetables. You can use a mix of bell peppers, mushrooms, and bean sprouts. These add crunch and taste to your rolls. Try adding spinach or zucchini for extra nutrition. For an Asian-inspired flavor, add soy sauce, sesame oil, and hoisin sauce to your filling. These ingredients bring a rich taste that pairs well with the vegetables. You can also toss in some crushed red pepper for heat. If you like spicy and tangy versions, use sriracha in your filling or as a dip. Mix lime juice with your dipping sauce for a zesty kick. Consider adding pickled vegetables to your filling for extra tang. Explore these variations to make your egg rolls unique and exciting! Check out the Full Recipe for more ideas. To keep your uncooked egg rolls fresh, follow these steps. First, lay them flat on a baking sheet. Make sure they do not touch each other. Cover the sheet with plastic wrap. Place it in the freezer for a few hours until they freeze solid. Once frozen, transfer the egg rolls to a freezer bag. Squeeze out the air before sealing. You can keep them in the freezer for up to three months. If you want to refrigerate them, do this for one to two days. Just keep them wrapped tightly in plastic wrap. After cooking, let the egg rolls cool on a wire rack. This helps prevent sogginess. To store them, place them in an airtight container. You can keep cooked egg rolls in the fridge for up to three days. When reheating, use an oven or air fryer. Set the oven to 350°F (175°C) and heat for about 10-15 minutes. This keeps them crispy. If you use a microwave, they may turn soft. Always aim for crispy edges for the best taste. For more details, check the Full Recipe. Yes, you can make egg rolls ahead of time. Prepare the filling and wrap the egg rolls. Store them in the fridge for a day or freeze them for longer. If you freeze them, just remember to separate them with parchment paper. This way, they won’t stick together. When you're ready to fry them, cook them straight from the freezer. This keeps them fresh and tasty! The best dipping sauce for egg rolls is sweet and sour sauce. It adds a nice balance to the crispy roll. Soy sauce is also a popular choice. You can even mix them for a unique taste. If you like spice, try adding chili sauce or sriracha to your soy sauce. Experimenting with these sauces can make your egg rolls even more enjoyable! To reheat leftover egg rolls, use the oven. Preheat it to 350°F (175°C). Place the egg rolls on a baking sheet. Bake them for about 10 minutes until crispy. This method keeps the outside crunchy. You can also use an air fryer if you have one. Just heat them at 350°F for about 5 minutes. Both methods work great! - Can I bake instead of fry egg rolls? Yes, you can bake egg rolls instead of frying. Preheat your oven to 400°F (200°C). Brush the egg rolls with a little oil before baking. Place them on a baking sheet and bake for 20-25 minutes. Turn them halfway through for even crispiness. Baking is a healthier option, but they may not be as crispy as frying. - What are the best fillings for egg rolls? The best fillings for egg rolls include ground meat like chicken or turkey. You can also use shrimp or tofu for variety. Adding vegetables like cabbage, carrots, and green onions gives color and crunch. For a twist, try adding mushrooms, bean sprouts, or even cheese. Get creative with flavors to find your favorite mix! Check out the Full Recipe for more ideas. You now have all the tools to make delicious egg rolls. We covered the key ingredients, from proteins to veggies, to create a tasty filling. Following step-by-step instructions, you can assemble and fry these snacks to perfection. Don't forget to explore variations and learn storage tips to keep them fresh. Enjoy making these egg rolls your own by mixing flavors. With a little practice, you’ll impress everyone. Get started and have fun cooking!
The Best Homemade Egg Rolls Crispy and Flavorful Treat
Are you ready to elevate your snack game? In this post, I’ll share my favorite recipe for homemade egg rolls that are crispy and full
- 1 pound large shrimp, peeled and deveined - 2 cups green cabbage, finely shredded - 1 cup carrots, grated - 3 green onions, finely chopped - 2 cloves garlic, minced - 1 tablespoon fresh ginger, minced - 1 teaspoon soy sauce - 1 teaspoon sesame oil - 1 package of egg roll wrappers - Vegetable oil for frying - Salt and pepper to taste Gathering the right ingredients is key. You need large shrimp, cabbage, carrots, and green onions. Each ingredient adds flavor and texture. Garlic and ginger bring a nice kick, while soy sauce and sesame oil add depth. Egg roll wrappers hold everything together. Don't forget the vegetable oil for frying! It helps achieve that perfect crisp. Salt and pepper are your trusty friends for taste. For the full recipe, refer to the section above. Enjoy cooking! First, gather your ingredients. In a large bowl, combine the shrimp and vegetables. Use 1 pound of large shrimp and mix it with 2 cups of finely shredded cabbage, 1 cup of grated carrots, and 3 chopped green onions. Then, add in 2 cloves of minced garlic and 1 tablespoon of minced fresh ginger. Next, season this mixture. Pour in 1 teaspoon of soy sauce, 1 teaspoon of sesame oil, and sprinkle with salt and pepper to taste. Mix it all well until everything is combined. The filling should smell fresh and vibrant. Now it’s time to wrap! Lay out an egg roll wrapper on a clean surface. Make sure one corner points toward you. Place about 2 tablespoons of your shrimp and vegetable mixture near that corner. Fold the corner over the filling, then tuck in the side corners. Roll it tightly to seal the egg roll. You might need to moisten the edge with a bit of water to help it stick. Repeat this with the rest of the wrappers and filling. It’s a fun process and your egg rolls will look great! To fry, heat vegetable oil in a deep pan or pot over medium heat. The oil should be hot but not smoking. Carefully add a few egg rolls at a time, making sure not to overcrowd the pan. Fry them for 3-4 minutes until they turn golden brown and crispy. Use a slotted spoon to remove them from the oil. Let them drain on paper towels to absorb extra oil. This step is key for that delightful crispiness you want. Enjoy your crispy shrimp and cabbage egg rolls with a nice dipping sauce! For the full recipe, check out the details above. To get crispy shrimp and cabbage egg rolls, pay close attention to oil temperature. Aim for about 350°F (175°C) when frying. This heat gives a golden brown, crunchy texture. If the oil is too cool, the egg rolls soak in oil and become soggy. If it's too hot, they burn quickly. Fry in small batches. This keeps the oil temperature steady. Overcrowding the pan lowers the heat and leads to less crispy rolls. Fry three or four at a time. This way, you will get a more even cook. How do you store uncooked egg rolls? Wrap them tightly in plastic wrap. Place them in an airtight container. Store them in the fridge for up to 24 hours. For longer storage, freeze them. Reheating fried egg rolls for the best texture is easy. Place them in an oven set to 375°F (190°C). Heat for about 10-15 minutes. This keeps them crispy instead of soggy. Avoid the microwave, as it makes them soft. What are good accompaniments for optimal flavor? Sweet chili sauce pairs perfectly with these egg rolls. You can also use soy sauce or a spicy dipping sauce. For presentation ideas, arrange the egg rolls on a large platter. Garnish with chopped cilantro or sesame seeds. This adds color and makes your dish look appetizing. Serve them hot for the best taste. For the full recipe, check out the detailed steps provided earlier. {{image_2}} You can switch up the fillings in your crispy shrimp and cabbage egg rolls. Using different proteins can add variety. Try crab meat, chicken, or tofu for a personal touch. Each protein brings its own flavor. If you prefer vegetarian options, load up on vegetables. You can use mushrooms, bell peppers, or zucchini. Adding beans or lentils offers protein without meat. This way, everyone can enjoy these tasty rolls. Adding spices or sauces can elevate your egg rolls. A pinch of cayenne pepper gives a nice kick. You can also try a dash of five-spice powder for a rich taste. Incorporating fresh herbs makes a big difference. Cilantro or basil brightens the flavor. You can sprinkle them in the filling or use them as a garnish. For a unique twist, try adding lime or lemon zest. This brings a fresh, zesty flavor to your rolls. For the full recipe, check out the detailed instructions. You can freeze uncooked egg rolls. Lay them flat in a single layer on a baking sheet. Make sure they do not touch each other. Once frozen, transfer them to a zip-top bag. Remove as much air as possible before sealing. This way, they stay fresh for up to three months. Cooking from frozen is easy. You can fry them directly from the freezer. Just add a few minutes to the cooking time. Fry until they are golden brown and crispy. To store cooked egg rolls, place them in an airtight container. Make sure they cool down first. This keeps them fresh for about three days in the fridge. After this time, they may lose their crispness. For the best quality, eat them within two days. If you want to reheat them, use an oven or an air fryer. This helps restore some of their crunch. Check out the Full Recipe for more details and tips on making these tasty snacks! To keep your egg rolls crispy, follow these tips: - Fry at the right temperature. Heat the oil to 350°F (175°C). - Don’t overcrowd the pan. Fry only a few at a time. - Drain well. After frying, place them on paper towels to soak up excess oil. - Serve right away. Enjoy them fresh for the best crunch. Yes, you can bake these egg rolls! Here’s how: - Preheat your oven to 425°F (220°C). - Place the egg rolls on a baking sheet lined with parchment paper. - Brush them lightly with vegetable oil for a golden finish. - Bake for 15 to 20 minutes, flipping halfway through for even crisping. Baking may not be as crispy as frying, but they will still taste great! A few sauces that enhance flavor include: - Sweet chili sauce for a nice kick. - Soy sauce for a classic taste. - Peanut sauce for a creamy texture. - Hot sauce if you like heat. These sauces add fun and flavor to your crispy shrimp and cabbage egg rolls. For the full recipe, check out the details above! We covered how to make crispy shrimp egg rolls from start to finish. You learned the key ingredients and each simple step to prepare and fry them. We also discussed tips for storage and suggested fun variations. Making these egg rolls can be easy and satisfying. Try different fillings and enjoy them with your favorite dips. With practice, you'll perfect your technique and impress your friends and family. Enjoy your cooking adventure!
Crispy Shrimp and Cabbage Egg Rolls Delightful Snack
Ready to tantalize your taste buds? My Crispy Shrimp and Cabbage Egg Rolls are more than just a snack; they’re a delightful fusion of texture
- 1 lb large shrimp, peeled and deveined - 6 tablespoons unsalted butter, melted - 5 cloves garlic, minced - 1 tablespoon lemon juice - 1 teaspoon paprika - 1 teaspoon dried parsley - Salt and pepper to taste - 1/4 teaspoon red pepper flakes (optional) These ingredients make the perfect mix for baked shrimp. The shrimp give us a great base. The garlic and butter enhance the flavor. Lemon juice adds a nice tang. Paprika and parsley bring color and depth. Salt and pepper are key to taste, and red pepper flakes can add a kick if you like heat. - Lemon wedges for serving - Additional fresh parsley for garnish Garnishes are the final touch. Lemon wedges brighten the dish. Fresh parsley adds a pop of color. These simple additions make your meal look great and taste even better. For the full recipe, check out [Full Recipe]. - Preheat the oven to 400°F (200°C). - In a mixing bowl, combine melted butter, minced garlic, lemon juice, paprika, dried parsley, salt, pepper, and red pepper flakes if you want some heat. Mixing these ingredients creates a rich garlic butter sauce. This sauce is the key to flavor. Use fresh garlic for the best taste. Don't skip the lemon juice; it brightens the dish. - Pour the garlic butter mixture over the shrimp and mix well. - Arrange the shrimp in a single layer on the baking dish and bake. Make sure the shrimp are well coated in the sauce. This helps to get that flavor into every bite. Place them in a single layer for even cooking. Bake for 8-10 minutes. The shrimp will turn pink and opaque. To serve the baked shrimp, take them hot from the oven. Garnish with lemon wedges and fresh parsley. This adds color and freshness to the dish. Pair the shrimp with crusty bread. It’s perfect for soaking up any leftover garlic butter sauce. You can also serve it with a fresh salad or steamed veggies. These sides balance the rich flavor of the shrimp. Enjoy this dish with family and friends! For the full recipe, check out the detailed instructions above. For baked shrimp, I recommend a cooking time of 8 to 10 minutes. Shrimp cook fast, so watch them closely. They should turn pink and opaque when done. Overcooking can make shrimp rubbery. To avoid this, check them a minute or two early. If they curl tightly, they are likely overcooked. Adjusting the seasoning can really boost the flavor. If you like more heat, add extra red pepper flakes or a dash of hot sauce. You can also try adding fresh herbs like thyme or cilantro. For a zesty kick, squeeze more lemon juice before serving. This will brighten up the garlic butter sauce. To make your baked shrimp look great, serve them hot from the dish. Garnish with lemon wedges and fresh parsley for a pop of color. You can also sprinkle a little paprika on top for flair. Pair the shrimp with crusty bread. This helps soak up the tasty garlic butter sauce. Each bite will be a delight for your guests. {{image_2}} You can easily swap ingredients to fit your taste. If you don't have shrimp, try using scallops or even firm fish like cod. For butter, use olive oil for a lighter option. Coconut oil also works if you want a hint of sweetness. If you need a garlic substitute, shallots can add a mild flavor. Baking shrimp gives it a soft texture and rich flavor. The garlic butter seeps into the shrimp as it cooks. Grilling can add a smoky taste. It also gives shrimp a nice char. Both methods are great, but baking keeps the shrimp juicy. Grill if you want a fun outdoor meal. Spice up your dish with herbs from around the world. Add fresh basil or oregano for an Italian flair. Use cilantro and lime for a Mexican twist. You can even try a dash of curry powder for an Indian vibe. These changes can make your baked shrimp a new adventure each time! To store leftover baked shrimp, let them cool first. Then, place them in an airtight container. You can keep the shrimp in the fridge for up to three days. Make sure to cover them well to prevent drying out. If you plan to eat them later, it is best to add some extra garlic butter to keep them moist. Yes, you can freeze baked shrimp! To do this, let them cool completely. Then, wrap each shrimp in plastic wrap or foil. Place them in a freezer-safe bag or container. They can stay frozen for up to three months. When you are ready to eat, thaw them in the fridge overnight. To reheat, bake them at 350°F (175°C) for about 10 minutes. This keeps them juicy and tasty. Cooked shrimp can be safely stored in the fridge for three days. If frozen, they can last for up to three months. After that, the quality may drop. Always check for any off smells or changes in color before eating leftovers. Enjoy your baked shrimp knowing they are safe and delicious! Yes, you can use frozen shrimp. Just remember to thaw them first. Place the shrimp in a bowl of cold water for about 15-20 minutes. This will help them thaw quickly. Frozen shrimp can work well, but fresh shrimp often taste better. Fresh shrimp usually have a firmer texture and richer flavor. If you use frozen shrimp, ensure they are peeled and deveined to save time. Shrimp cook quickly, so watch them closely. They turn pink and opaque when cooked. If you see them curl into a "C" shape, they are done. Overcooking shrimp makes them tough and rubbery. I recommend setting a timer for 8 minutes. Check them, and if they need more time, add one more minute. Your shrimp should be juicy and tender for the best flavor. Yes, you can make this recipe dairy-free. Use olive oil or coconut oil instead of butter. Both options add nice flavors. For a creamy taste, try adding a dairy-free butter substitute. Adjust the amount of lemon juice to balance the flavors. This way, you can still enjoy delicious garlic shrimp without dairy. Baked shrimp in garlic butter sauce is easy and tasty. We reviewed key ingredients and steps, plus cooking tips for great flavor. Remember to not overbake to keep shrimp tender. For extra zest, try different spices or herbs from other cuisines. You can store leftovers or even freeze shrimp for later. This dish will impress friends and family. Enjoy your delicious creation, and happy cooking!
Savory Baked Shrimp in Garlic Butter Sauce Recipe
Looking for a quick and tasty dish? My Savory Baked Shrimp in Garlic Butter Sauce is perfect for you! This easy recipe combines fresh shrimp
- 2 cups cooked chicken, shredded - ½ cup buffalo sauce - 1 cup cream cheese, softened - 1 cup shredded cheddar cheese - ½ cup green onions, finely chopped - 4 large tortillas (flour or whole wheat) - 1 cup lettuce, shredded - Ranch or blue cheese dressing for dipping (optional) - Alternative chicken options (e.g., rotisserie chicken, canned chicken) - Different cheese varieties (e.g., pepper jack, gouda) - Additional vegetables (e.g., bell peppers, cucumbers) The main ingredients are simple yet flavorful. I love using cooked chicken to bring a hearty touch. Shredding it ensures the flavors blend well. The buffalo sauce adds a nice kick. You can adjust the amount to suit your taste. Cream cheese makes the roll-ups creamy. It pairs perfectly with the cheddar cheese. I often mix in green onions for added crunch and a fresh taste. The tortillas hold everything together. You can choose flour or whole wheat based on your preference. If you want to customize, consider using rotisserie chicken. It saves time and adds depth. Experimenting with different cheeses can change the flavor. Pepper jack gives a great zing. You can add colorful veggies for extra crunch and nutrition. This recipe is flexible. Use what you have at home. The Full Recipe is a guide, but your creativity makes it special! - Combine shredded chicken with buffalo sauce. - Mix cream cheese with cheddar cheese and green onions. First, take your cooked chicken and shred it into small bits. In a large bowl, mix the chicken with the buffalo sauce. Make sure the chicken is well coated. This step gives the roll-ups their spicy and tangy flavor. Next, in another bowl, blend the softened cream cheese. Add half of the shredded cheddar cheese and the green onions. Mix until it is smooth and creamy. This creamy mixture helps balance the heat from the buffalo sauce. - Spread cream cheese mixture on tortillas. - Add buffalo chicken mixture and toppings. Now, lay one tortilla flat on your work surface. With a spatula or knife, spread a generous layer of the cream cheese mixture over the entire tortilla. This layer adds a rich taste. Then, take a quarter of the buffalo chicken mixture and evenly distribute it over the cream cheese layer. Add a handful of the shredded lettuce and sprinkle the remaining cheddar cheese on top. The lettuce adds crunch and freshness. - Roll tortillas tightly and chill. - Slice into bite-sized pieces for serving. Starting from one edge, roll the tortilla tightly. Keep the filling inside as you roll. After rolling all the tortillas, place them seam-side down on a cutting board. Chill the roll-ups in the fridge for 30 minutes. This step helps them hold their shape. Once chilled, slice each roll-up into bite-sized rounds. Arrange them on a serving platter. These bite-sized pieces are perfect for grabbing at parties. Serve with ranch or blue cheese dressing on the side for dipping. Enjoy your flavorful party snack! For the full recipe, check out the detailed instructions above. To roll tortillas without tearing, choose soft, fresh tortillas. Warm them slightly in the microwave for 10-15 seconds. This helps make them flexible. Spread the filling evenly, leaving a small border. This prevents spilling when you roll. For even filling distribution, start at one edge. Place the filling in a line. Make sure to spread it close to the edge. As you roll, tuck in the sides. This keeps the filling secure and neat. The best dips to serve with Buffalo Chicken Tortilla Roll Ups are ranch dressing and blue cheese. They cool the spicy flavor and add creaminess. You can also try salsa for a fresh twist. These roll-ups work well for many occasions. Serve them at parties, game days, or family gatherings. They are also great for casual get-togethers with friends. For creative ways to display roll-ups, use a large platter. Arrange the roll-ups in a circle or line for an appealing look. You can cut them into bite-sized pieces for easy grabbing. Garnish the platter with parsley or green onions. These add a pop of color and freshness. You can also sprinkle some extra cheese on top for a fun touch. For the full recipe, check out the earlier section. {{image_2}} You can spice up your Buffalo chicken tortilla roll-ups in fun ways. Jalapeños add heat and crunch. Just chop them finely and add them to your filling. If you love heat, drizzle in some extra hot sauce before rolling. For a different taste, swap buffalo sauce for BBQ sauce or teriyaki sauce. These sauces bring a sweet twist to the spicy flavor. This keeps the dish interesting for every party! If you need gluten-free options, try using corn tortillas. They work well and are just as tasty. For those watching carbs, low-carb tortillas are a great choice too. If you want a vegan version, replace chicken with shredded jackfruit or tofu. Use vegan cream cheese and a plant-based dressing for dipping. This way, everyone can enjoy these roll-ups! Making these roll-ups ahead saves time. You can prepare them a day in advance. Simply roll them up, wrap in plastic, and store in the fridge. For longer storage, freeze them after rolling but before slicing. When ready to eat, let them thaw in the fridge overnight. Then slice and serve. This makes hosting easy, and your guests will love these tasty snacks! Check out the Full Recipe for all the details. To keep your leftover roll-ups fresh, wrap them tightly in plastic wrap or foil. This helps prevent air from getting in. Place them in an airtight container for extra protection. They can stay fresh in the fridge for about 3 days. After that, the ingredients might not taste as good. To freeze your roll-ups, slice them first for easy use later. Place the slices in a single layer on a baking sheet. Freeze them until solid, then transfer them to a freezer bag. This keeps them from sticking together. They can last in the freezer for up to 2 months. To defrost, move the roll-ups to the fridge a few hours before use. For reheating, pop them in the microwave for 30 seconds or until warm. Enjoy them just like fresh! For the full recipe, check back to the main article. Serve these roll-ups cold or at room temperature. Garnish with parsley for color. You can place small bowls of ranch or blue cheese dressing on the side for dipping. Pair them with crunchy veggies like carrots and celery. This adds a fresh touch and balances the flavors. Yes, you can prepare these roll-ups a day ahead. After rolling, wrap them in plastic wrap. Store them in the fridge. They will stay fresh and tasty for up to two days. This makes them perfect for events or gatherings. To lower the spice, use less buffalo sauce. You can also mix in some cream cheese to tone it down. For more heat, add extra buffalo sauce or toss in some chopped jalapeños. Adjust to fit your taste and the crowd you serve. Absolutely! These roll-ups are easy to hold and eat. They pack bold flavors, making them a hit at parties. Their bite-sized shape allows guests to enjoy them without fuss. They also look great on a platter, adding to the fun of any gathering. For the full recipe, check out the details provided above. Buffalo Chicken Tortilla Roll-Ups are simple and fun to make. You combine shredded chicken, buffalo sauce, cream cheese, and your choice of cheese in a tortilla. Feel free to add veggies or different sauces for a twist. Remember to roll tightly for the best results. These roll-ups are perfect for parties or quick meals. Customize them to your taste and enjoy their delicious flavors. You can even prepare them ahead of time for convenience. Get ready to impress with this tasty treat!
Buffalo Chicken Tortilla Roll Ups Flavorful Party Snack
Get ready to impress your guests with Buffalo Chicken Tortilla Roll Ups! These tasty bites combine tender chicken, creamy cheese, and zesty buffalo flavor. Perfect
- 1 pound boneless, skinless chicken breasts - 1 cup barbecue sauce - 1 cup panko breadcrumbs - 1/2 cup shredded cheddar cheese - 1 teaspoon garlic powder - 1 teaspoon smoked paprika - 1/2 teaspoon black pepper - 1/4 teaspoon salt - 1 tablespoon olive oil - Fresh parsley, chopped (for garnish) When making BBQ chicken bites, I focus on fresh and easy-to-find ingredients. Start with boneless, skinless chicken breasts. Cutting them into small pieces helps them cook fast and stay juicy. For the sauce, choose your favorite barbecue sauce. Sweet, tangy, or smoky flavors all work well. Panko breadcrumbs are a must for that extra crunch. They give the bites a nice texture. Shredded cheddar cheese adds richness. Don’t skip the spices! Garlic powder and smoked paprika will boost the flavor. A little black pepper and salt enhance everything. Lastly, have some fresh parsley ready for garnish. It makes the dish look beautiful and adds a pop of color. For the full recipe, check out the details above. - Gather all necessary ingredients: - 1 pound boneless, skinless chicken breasts, cut into bite-sized pieces - 1 cup barbecue sauce (your favorite brand) - 1 cup panko breadcrumbs - 1/2 cup shredded cheddar cheese - 1 teaspoon garlic powder - 1 teaspoon smoked paprika - 1/2 teaspoon black pepper - 1/4 teaspoon salt - 1 tablespoon olive oil - Fresh parsley, chopped (for garnish) - Preheat the oven to 400°F (200°C). Now it's time to mix the chicken with the sauce. In a large bowl, add the chicken pieces. Pour in 3/4 cup of barbecue sauce. Toss the chicken well until every piece gets a nice coat of sauce. This helps lock in flavor and moisture. Next, we prepare the breadcrumb mixture. In another bowl, mix the panko breadcrumbs, cheddar cheese, garlic powder, smoked paprika, black pepper, and salt. This blend adds great texture and flavor. Take each chicken piece, dip it in the breadcrumb mix, and press gently. This helps the crumbs stick well. Place the coated chicken bites on the prepared baking sheet. Drizzle olive oil over the chicken bites. This helps them become crispy in the oven. Bake in the preheated oven for 15-20 minutes. Look for a golden brown color and ensure the chicken is fully cooked. After baking, brush the chicken bites with any remaining barbecue sauce. This adds an extra layer of flavor. Finally, garnish with fresh parsley before serving. Enjoy your BBQ chicken bites! For a full recipe, check out the details above. To get crispy chicken bites, drizzle olive oil on top. This helps the chicken become golden and crunchy. Olive oil also adds a nice flavor. Use panko breadcrumbs instead of regular bread crumbs. Panko gives a light and crispy texture. It allows the bites to have that perfect crunch we all love. For the best taste, try different barbecue sauces. Each sauce brings its own unique flavor. You can go sweet, spicy, or smoky depending on your mood. Add spices to kick the flavor up a notch. A pinch of cayenne pepper can add heat. Paprika gives a nice depth. Experiment to find your favorite mix! When serving, use a colorful platter. It makes the bites look more inviting. Serve with extra barbecue sauce for dipping. Pair your chicken bites with fresh veggies or chips. They complement the bites very well. You can also add a creamy dip for a fun twist. For more details, check out the Full Recipe. {{image_2}} You can switch up the protein in BBQ chicken bites. Turkey works well if you want a leaner meat. Just use the same amount of turkey breast as chicken. Cut it into bite-sized pieces like you would with chicken. Tofu is a great choice for a vegetarian option. Firm tofu holds up well. Just press it to remove extra moisture and cut it into cubes. The flavors from the marinade will soak in nicely. Try different seasonings to make BBQ chicken bites unique. You can add a kick by mixing in cayenne pepper or chili powder. For a sweeter twist, use honey or maple syrup in the barbecue sauce. You can also experiment with garlic and onion powder for depth. Marinating the chicken in the sauce overnight can enhance the flavors even more. Each new spice or sauce adds its own twist to the bites. If you follow a gluten-free diet, you can easily adapt this recipe. Use gluten-free breadcrumbs instead of panko. Most brands offer a great texture that works well. For a low-calorie option, you can skip the breadcrumbs altogether. Coat the chicken pieces directly in the sauce. You can also grill the chicken instead of baking it for a lighter experience. These small changes keep the taste while meeting your dietary needs. To keep your BBQ chicken bites fresh, store them in an airtight container. Place a paper towel at the bottom to absorb moisture. This helps maintain their crispiness. Refrigerate the bites for up to four days. When it’s time to enjoy them again, reheat your oven to 350°F (175°C). Place the bites on a baking sheet and heat for about 10 minutes. This method keeps them crispy and tasty. If you want to save some bites for later, freezing is a great option. First, let the chicken bites cool completely. Then, arrange them in a single layer on a baking sheet. Freeze them for about an hour. Once frozen, transfer the bites to a freezer-safe bag or container. They can last up to three months in the freezer. To thaw, place them in the fridge overnight. Reheat them in the oven as mentioned above for the best results. BBQ chicken bites can stay fresh in the fridge for four days. If you freeze them, they will last for up to three months. Always check for any signs of spoilage, like bad odor or discoloration, before enjoying them. Proper storage ensures that your tasty snacks remain delightful every time you crave them. For the full recipe, refer back to the main article. Yes, you can use pre-cooked chicken. Leftover chicken or rotisserie chicken works great. Just shred or cut it into small pieces. Then, mix it with barbecue sauce. This saves time and still gives you tasty bites. Choose a barbecue sauce that you love. Some popular brands include Sweet Baby Ray's, Stubb's, and KC Masterpiece. Each brand offers a unique flavor, so pick one that fits your taste. You can even try different sauces for fun. Absolutely! To air fry, preheat your air fryer to 400°F (200°C). Coat the chicken pieces like you do for the oven. Place them in the air fryer basket in a single layer. Cook for about 10-12 minutes, flipping halfway through. They will be crispy and delicious! Serve these bites with a variety of sides. Try coleslaw, potato salad, or corn on the cob. For dips, ranch dressing or extra barbecue sauce works well. These pairings make your snack more fun and delicious. You can find pre-made BBQ chicken bites at many grocery stores. Check the frozen section or the deli area. Stores like Costco or Sam's Club often have them. You can also look at local restaurants or food trucks for fresh options. You learned how to make BBQ chicken bites, from ingredients to storage tips. Remember to use panko breadcrumbs for crunch and try different sauces for flavor. You can swap proteins or adjust spices for your taste. Leftovers can be stored well and reheat nicely. Whether for a party or a simple meal, these bites are a hit. Easy steps mean anyone can do this. Enjoy creating your tasty BBQ chicken bites!
BBQ Chicken Bites Flavorful and Easy Snack Recipe
Do you want a quick and tasty snack? BBQ Chicken Bites are the answer! You can whip up this flavorful treat in no time, and
- 2 large Russet potatoes - 1 cup sharp cheddar cheese, shredded - 1/4 cup green onions, finely chopped - 1/4 cup fresh parsley, finely chopped - 1 teaspoon garlic powder - 1 teaspoon onion powder - 1 teaspoon salt - 1/2 teaspoon black pepper - 1/2 cup all-purpose flour - 1 large egg, beaten - Vegetable oil for frying When making homemade tater tots, the ingredients play a big role in flavor. Start with two large Russet potatoes. They give the tots a nice, fluffy texture. Next, add a cup of sharp cheddar cheese. The cheese melts and adds a cheesy goodness. I like using one-fourth cup of finely chopped green onions for a fresh bite. A sprinkle of fresh parsley adds a pop of color and flavor. For seasonings, I recommend one teaspoon of garlic powder and one teaspoon of onion powder. They both boost the taste and aroma. Don’t forget one teaspoon of salt and half a teaspoon of black pepper. These simple seasonings make a big difference. You will also need half a cup of all-purpose flour to help bind everything together. One large beaten egg gives the mixture richness. Finally, vegetable oil is key for frying. It helps achieve that perfect crunch. For the full recipe, check out the instructions and tips later in the article. To start, you need to peel the Russet potatoes. Use a vegetable peeler for this task. After peeling, cut the potatoes into quarters. This helps them cook evenly. Place the quartered potatoes in a large pot. Fill it with water until the potatoes are covered. Add a big pinch of salt to the water. Bring the pot to a boil. Cook the potatoes for about 15 to 20 minutes. You want them to be fork-tender. This means a fork goes in easily. Once the potatoes are cooked, drain them and let them cool a bit. You can either grate the potatoes or use a potato ricer. Both methods will give you a smooth and slightly chunky texture. Now, grab a large mixing bowl. Combine the grated potatoes, sharp cheddar cheese, chopped green onions, and parsley. Don't forget the garlic powder, onion powder, salt, pepper, flour, and the beaten egg. Mix everything well until it all comes together. You want a nice, thick mixture that holds its shape. Next, it’s time to shape the tater tots. Take small portions of the potato mixture. Roll them into balls about the size of golf balls. Slightly flatten them for even cooking. Heat vegetable oil in a deep skillet or fryer. Aim for a temperature of about 350°F (175°C). Carefully drop the formed tots into the hot oil. Fry them in batches to avoid overcrowding. Cook for about 3 to 4 minutes until they turn golden brown and crispy. Once done, transfer the tater tots to a paper towel-lined plate. This helps drain any extra oil. Sprinkle some salt on top while they’re still hot. Repeat until all your tots are cooked. Enjoy your homemade tater tots as a tasty snack or side dish! For complete detailed steps, check the Full Recipe. To make your tater tots crispy, you need to fry them at the right temperature. Aim for 350°F (175°C). This heat gets the outside golden and crunchy while keeping the inside soft. Do not overcrowd the oil. Fry in small batches. If too many tots are in the pan, they will steam instead of fry. This can make them soggy. Space them out to ensure even cooking. You can change the cheese in this recipe. Try using mozzarella or pepper jack for a different taste. Each type adds a unique flavor to your tater tots. Feel free to add herbs and spices. Try fresh chives, dill, or even a pinch of cayenne for heat. These changes can help you create a tater tot that fits your taste. Dips can make your tater tots even better. Serve them with ranch, spicy ketchup, or garlic aioli. These dips add flavor and fun. For presentation, use a rustic wooden platter. Line it with parchment paper for a nice touch. You can also place the tots in a metal basket. Garnish with herbs for a beautiful look. Enjoy your homemade tater tots as a tasty snack or side dish. For the full recipe, check the earlier section. {{image_2}} You can change up the taste of your tater tots easily. Here are two fun ideas: - Cheesy bacon tater tots: Add crispy bacon bits and extra cheese to the mix. The bacon adds a salty crunch that really enhances the flavor. - Spicy jalapeño tater tots: Mix in chopped jalapeños for a kick. This adds heat and makes your tater tots exciting. You don’t have to fry your tater tots. Here are two great ways to cook them: - Baked tater tots recipe: Preheat your oven to 425°F (220°C). Shape the tots and place them on a baking sheet. Bake for about 25-30 minutes, flipping halfway through. This method gives you crispy tots with less oil. - Air fryer tater tots instructions: Preheat the air fryer to 400°F (200°C). Arrange the shaped tots in a single layer. Cook for 15-20 minutes, shaking the basket halfway. This method is quick and gives a great crunch. Tater tots can be served in creative ways. Consider these fun serving ideas: - Tater tot casserole ideas: Layer cooked tater tots with ground beef, cheese, and veggies in a baking dish. Bake until bubbly for a filling meal. - Tater tot nachos concept: Use tater tots as a base for nachos. Top with cheese, salsa, and guacamole for a fun twist. These variations keep your homemade tater tots fresh and fun. For the complete recipe, check out the [Full Recipe]. To keep your leftover tater tots fresh, let them cool down first. Place them in a single layer on a cooling rack. This helps avoid sogginess. Once cool, store the tater tots in an airtight container. You can also use a zip-top bag. Make sure to press out the air to keep them crisp. Store them in the fridge for up to three days. When it's time to eat your leftover tater tots, the goal is to keep them crispy. The best method is to reheat them in the oven. Preheat your oven to 400°F (200°C). Spread the tater tots on a baking sheet in a single layer. Bake for about 15-20 minutes, flipping halfway through. This method gives them a nice crunch again. Avoid using the microwave, as it makes them soggy. If you want to freeze uncooked tater tots, shape them and place them on a parchment-lined baking sheet. Make sure the tots don't touch each other. Freeze them for about an hour until firm. Then, transfer them to a freezer-safe bag. You can freeze them for up to three months. To reheat cooked tater tots from frozen, preheat your oven to 400°F (200°C). Spread the frozen tots on a baking sheet. Bake for 20-25 minutes, flipping once, until they are hot and crispy. With these simple steps, you can enjoy tater tots any time! For the complete process, check the Full Recipe. Your tater tots are done when they turn golden brown. You should also hear a crispy sound when you bite into them. They should feel firm to the touch, not soft. If they look dark, they may be overcooked. Yes, you can prep the mixture in advance! Just follow these tips: - Make the potato mix and shape the tots. - Place them on a baking sheet lined with parchment. - Cover with plastic wrap and chill in the fridge for up to 24 hours. - Fry them just before serving for the best crunch! Serve your tater tots in fun ways. Here are some ideas: - Place them on a wooden platter for a rustic look. - Use a metal basket lined with parchment paper for a diner vibe. - Top with your favorite sauces like ranch, spicy ketchup, or cheese sauce. - Garnish with extra herbs for a pop of color. Homemade tater tots can be healthier than store-bought. You control the ingredients! Here are some tips: - Use less oil for frying or try baking them. - Swap some potatoes for sweet potatoes for added nutrients. - Add veggies or herbs for more flavor and health. Remember, moderation is key for any treat! In this post, we covered everything you need to make tasty tater tots. You learned about key ingredients, step-by-step instructions, and tips for getting them crispy. You also saw fun variations and how to store leftovers. Making tater tots at home is easy and fun. With simple swaps and cooking methods, you can create your own unique versions. Enjoy sharing them with family or friends for a delicious snack!
Homemade Tater Tots Simple and Crunchy Recipe
Are you ready to elevate your snack game? With my simple and crunchy homemade tater tots, you can create the perfect bite-sized treat that everyone