Appetizers

Tarte Au Soleil Delightful and Simple Recipe Guide
Get ready to impress your taste buds with Tarte Au Soleil! This delightful and simple recipe guide will show you how to create this stunning
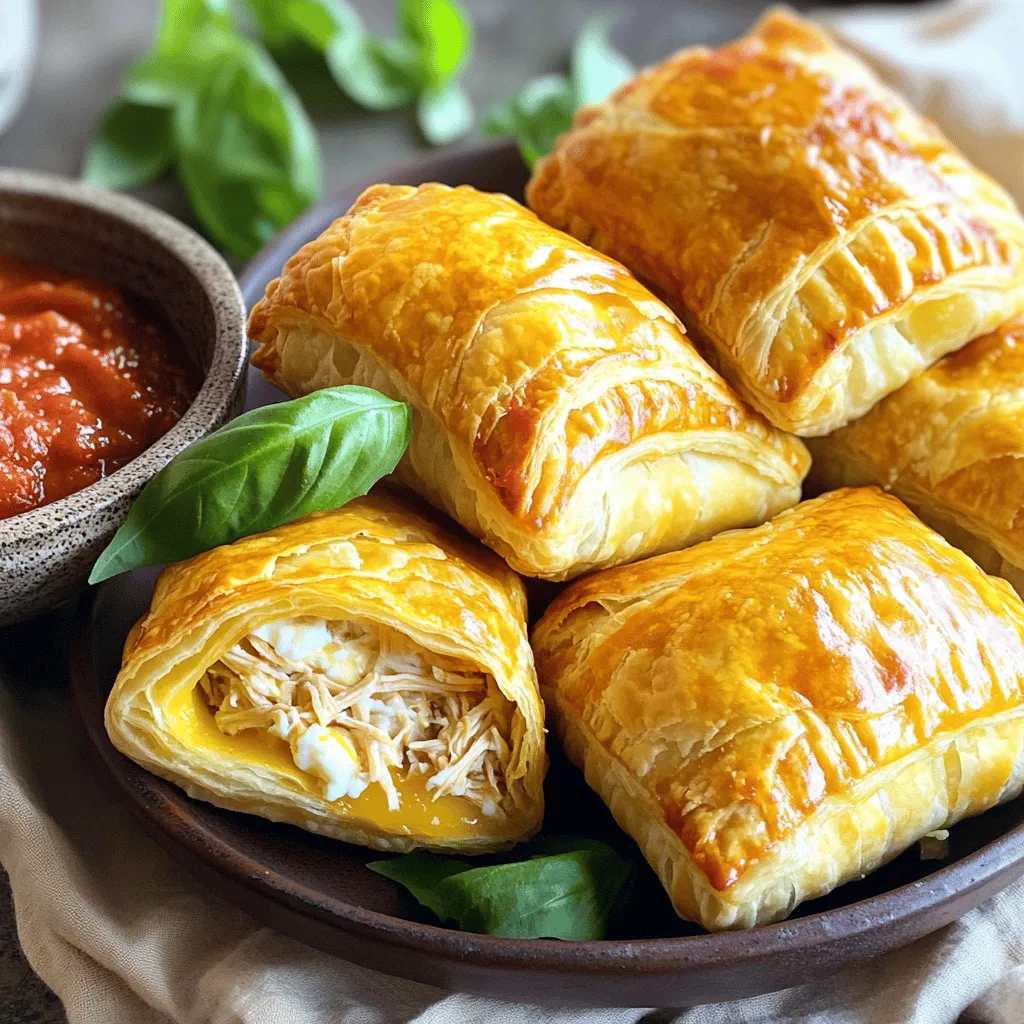
Savory Chicken Parmesan Pillows Deliciously Stuffed Treat
Craving a tasty treat that combines ease and flavor? Let me introduce you to Chicken Parmesan Pillows! These delightful bites are packed with shredded chicken,
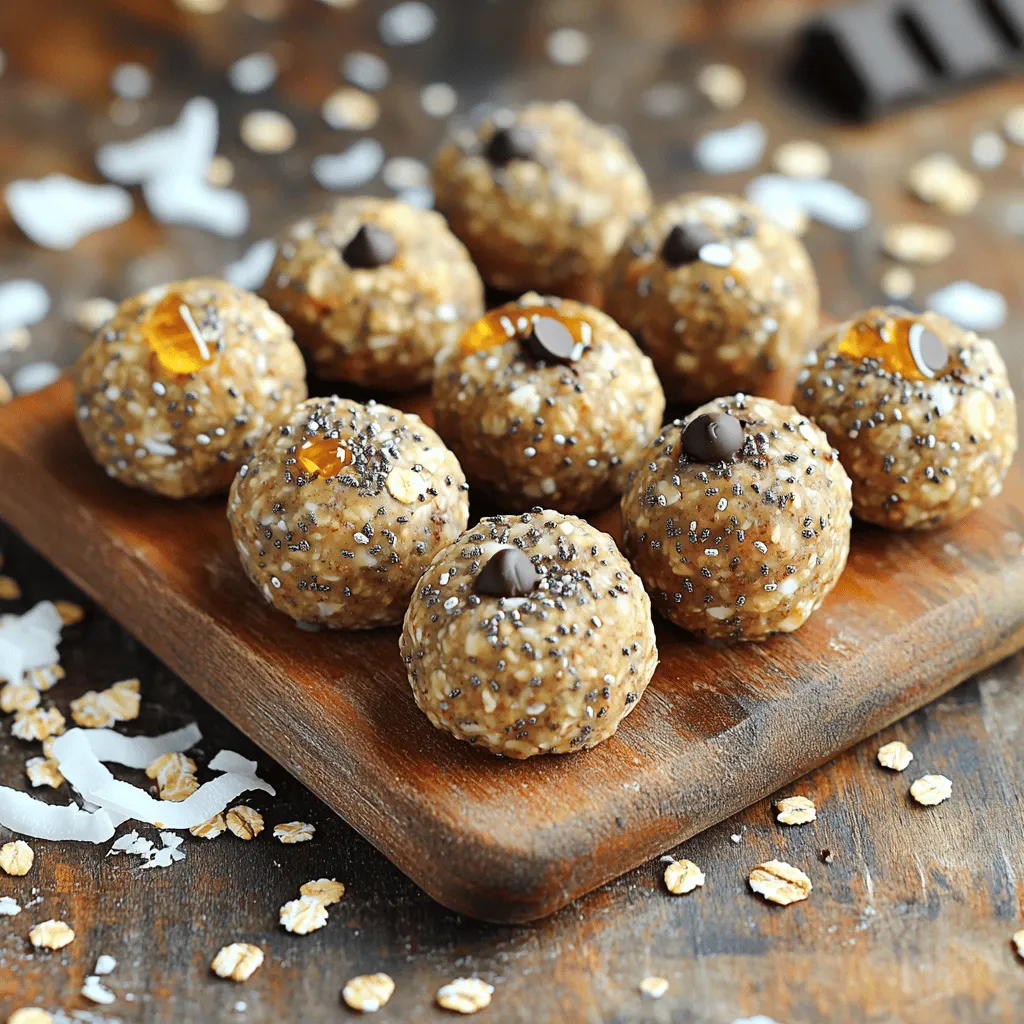
Healthy Energy Balls Quick and Tasty Recipe Guide
Are you looking for a quick, tasty snack that boosts your energy? You’ve come to the right place! In this guide, I’ll share my favorite
![To make crispy loaded chicken taquitos, you need the following ingredients: - 2 cups cooked shredded chicken - 1 cup shredded cheese (choose cheddar or Mexican blend) - 1/2 cup black beans, rinsed and drained - 1/4 cup fresh cilantro, chopped - 1 teaspoon cumin - 1/2 teaspoon garlic powder - Salt and pepper, to taste - 12 small corn tortillas - Vegetable oil, for frying - Optional toppings: sour cream, guacamole, salsa Using quality ingredients makes a big difference. For chicken, use rotisserie or freshly cooked chicken. It shreds easily and adds great flavor. I love using a blend of cheddar and Mexican cheese for a rich taste. Black beans bring extra protein and fiber. Fresh cilantro adds a pop of color and a fresh taste. Corn tortillas are the best choice. They're soft and perfect for rolling. Heat them before filling to keep them pliable. For frying, use vegetable oil for a nice crisp. For added fun, top your taquitos with sour cream, guacamole, or salsa. These toppings enhance flavor and make every bite even better. Check the [Full Recipe] for a step-by-step guide to making these tasty treats! 1. Mixing the filling Start by taking a large mixing bowl. Add 2 cups of cooked shredded chicken. Then, toss in 1 cup of shredded cheese. I like using a cheddar or Mexican blend for extra flavor. Next, add 1/2 cup of black beans that you rinsed and drained. For a fresh taste, add 1/4 cup of chopped cilantro. Sprinkle in 1 teaspoon of cumin and 1/2 teaspoon of garlic powder. Don’t forget to season with salt and pepper to taste. Mix everything well until it is combined. 2. Heating the tortillas Grab a dry skillet and place it over medium heat. Warm each small corn tortilla for about 30 seconds on each side. This step is key to making them soft and easy to roll. Don’t rush; it helps prevent tearing. 3. Rolling the taquitos Lay one tortilla flat on a clean surface. Take about 2 tablespoons of the filling and place it on one end of the tortilla. Roll it tightly around the filling. If you need help, use a toothpick to keep it secure. Repeat this for all your tortillas. 4. Heating the oil In a large skillet, pour in about an inch of vegetable oil. Heat the oil over medium-high heat. You want it to get hot, but not smoking. This step is important for crispy taquitos. 5. Frying the taquitos Once the oil is hot, carefully add the rolled taquitos to the skillet, seam-side down. Fry them for about 3-4 minutes on each side. You want them golden brown and crispy. Fry in batches to avoid crowding the pan. 6. Draining excess oil After frying, use a slotted spoon to transfer the taquitos to a plate lined with paper towels. This helps drain any excess oil. Serve them hot with your favorite toppings. You can use sour cream, guacamole, or salsa. Enjoy your delicious taquitos! For the full recipe, check out the complete instructions. To keep your tortillas soft, heat them in a dry skillet. Warm each side for about 30 seconds. This step makes them easy to roll. If you skip this, they may crack. You can also wrap them in a damp cloth while you prepare the filling. For that perfect golden-brown color, don’t overcrowd the pan. Fry only a few at a time. This way, the heat stays high, and they cook evenly. Flip them carefully to avoid breaking. Keep an eye on them, as they can burn quickly. Toppings can elevate your taquitos. Try sour cream, guacamole, or salsa for a fresh twist. You can also add shredded lettuce or diced tomatoes. If you like a kick, top with jalapeños or hot sauce. Pair your taquitos with sides like Mexican rice or refried beans. For drinks, consider a refreshing margarita or a cold soda. These will complement your meal and make it even more enjoyable. {{image_2}} You can fill taquitos with many tasty options. For a beef filling, use seasoned ground beef. Add onions and spices for more flavor. Vegetarian taquitos are great too. Use roasted veggies or a mix of beans. Cheese-only taquitos are simple and delicious. Just pick your favorite cheese for a cheesy treat. You can get creative with ingredients. Try using pulled pork or turkey instead of chicken. Add some spinach or kale for a health boost. You can even mix in different cheeses, like pepper jack for a spicy kick. The possibilities are endless! Baked taquitos are a healthier option. Preheat your oven to 400°F (200°C). Place the rolled taquitos on a baking sheet. Brush them lightly with oil. Bake for about 20 minutes until crispy. This method cuts down on oil and mess. Air-fried taquitos are quick and easy. Set your air fryer to 375°F (190°C). Arrange the taquitos in a single layer. Cook for 10-12 minutes. They come out crispy and golden. This method uses less oil and gives great results. Try these methods to find your favorite way to enjoy taquitos! For a complete guide, check the Full Recipe. To store leftover taquitos, let them cool first. Place them in a plastic bag or an airtight container. Make sure to remove as much air as possible. You can keep them in the fridge for up to three days. To reheat, I recommend using the oven. Preheat it to 350°F (175°C). Place the taquitos on a baking sheet and heat for about 10 to 15 minutes. This method keeps them crispy and tasty. Freezing taquitos is easy. For uncooked taquitos, lay them on a baking sheet. Freeze them for about an hour until they are firm. Once firm, transfer them to a freezer bag. You can keep them for up to three months. For cooked taquitos, let them cool. Then, wrap each one in plastic wrap and place them in a freezer bag. To thaw, move them to the fridge overnight. For reheating, use the oven at 350°F (175°C) for 15 to 20 minutes. This way, they stay crispy and delicious. For more details on making taquitos, check the Full Recipe. Can I make taquitos ahead of time? Yes, you can make taquitos ahead of time. Prepare the filling and roll the taquitos. Store them in the fridge for up to 24 hours. You can fry them just before serving. This saves time and keeps them fresh. What are the best sauces for taquitos? Taquitos pair well with many sauces. Some great options include: - Sour cream - Guacamole - Salsa - Chipotle sauce These sauces add flavor and make your taquitos even better. How do I make taquitos crispy without frying? To make taquitos crispy without frying, try baking them. Preheat your oven to 425°F (220°C). Arrange rolled taquitos on a baking sheet. Brush them lightly with oil. Bake for about 15-20 minutes, turning them halfway through. This method gives you a healthier option. What is the historical significance of taquitos? Taquitos have roots in Mexican cuisine. They are often linked to street food. They offer a quick and tasty meal. Many families have their own recipes passed down through generations. This makes taquitos a beloved dish. Where can I buy authentic taquitos near me? To find authentic taquitos, check local Mexican restaurants or food trucks. Yelp and Google Maps can help you locate places nearby. Ask friends for their favorites, as personal recommendations are often the best. How do I serve taquitos for a party? For a party, arrange taquitos on a large platter. Include small bowls of sauces for dipping. You can also serve sides like rice or beans. This way, your guests can enjoy a complete meal. Taquitos are a fun and tasty dish you can make at home. This guide covered the best ingredients, step-by-step instructions, and tips to perfect your taquitos. We explored different variations and storage options, along with answers to common questions. With the right recipes and techniques, you can create delicious taquitos for any occasion. Whether you fry, bake, or air-fry, your homemade taquitos will impress everyone. Enjoy the process and make it your own!](https://toastedrecipes.com/wp-content/uploads/2025/05/cbfd469d-8f8e-4f10-a42e-6e951cb45e56.webp)
Taquitos Delight Easy and Flavorful Recipes
Ready to make taquitos that burst with flavor? In this post, I’ll share easy, delicious recipes that will impress everyone at your table. From the

Cheesy Taco Sticks Savory Snack for Any Occasion
Looking for a snack that’s both fun and tasty? You’ve come to the right place! Cheesy Taco Sticks are the perfect bite-sized treats for any
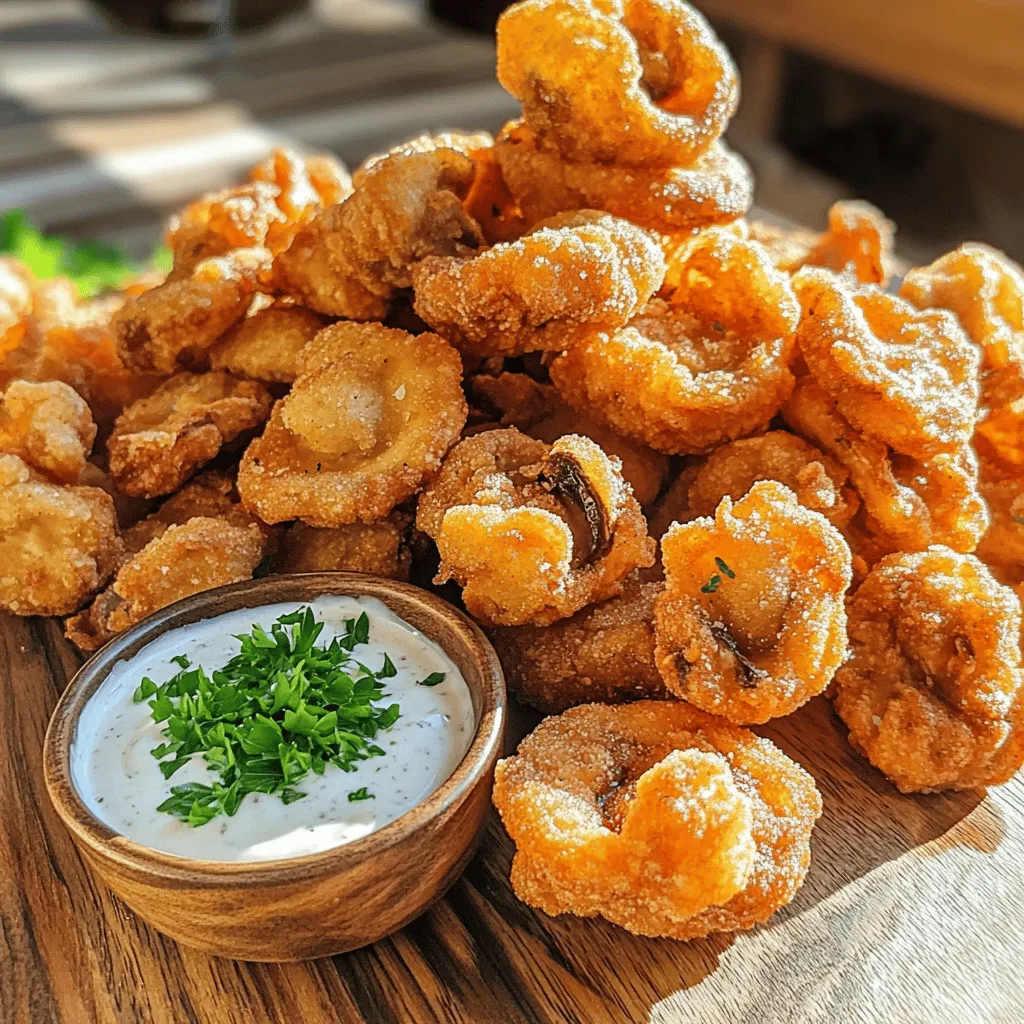
Fried Sliced Mushrooms with Ranch Flavorful Snack
Looking for a tasty snack that’s easy to make? Fried sliced mushrooms with ranch could be just what you need! This crispy treat combines flavorful

Mozzarella Pepperoni Croissant Rolls Easy and Delicious
Craving a tasty snack or meal? Let me introduce you to Mozzarella Pepperoni Croissant Rolls! They are super easy to make and packed with flavor.
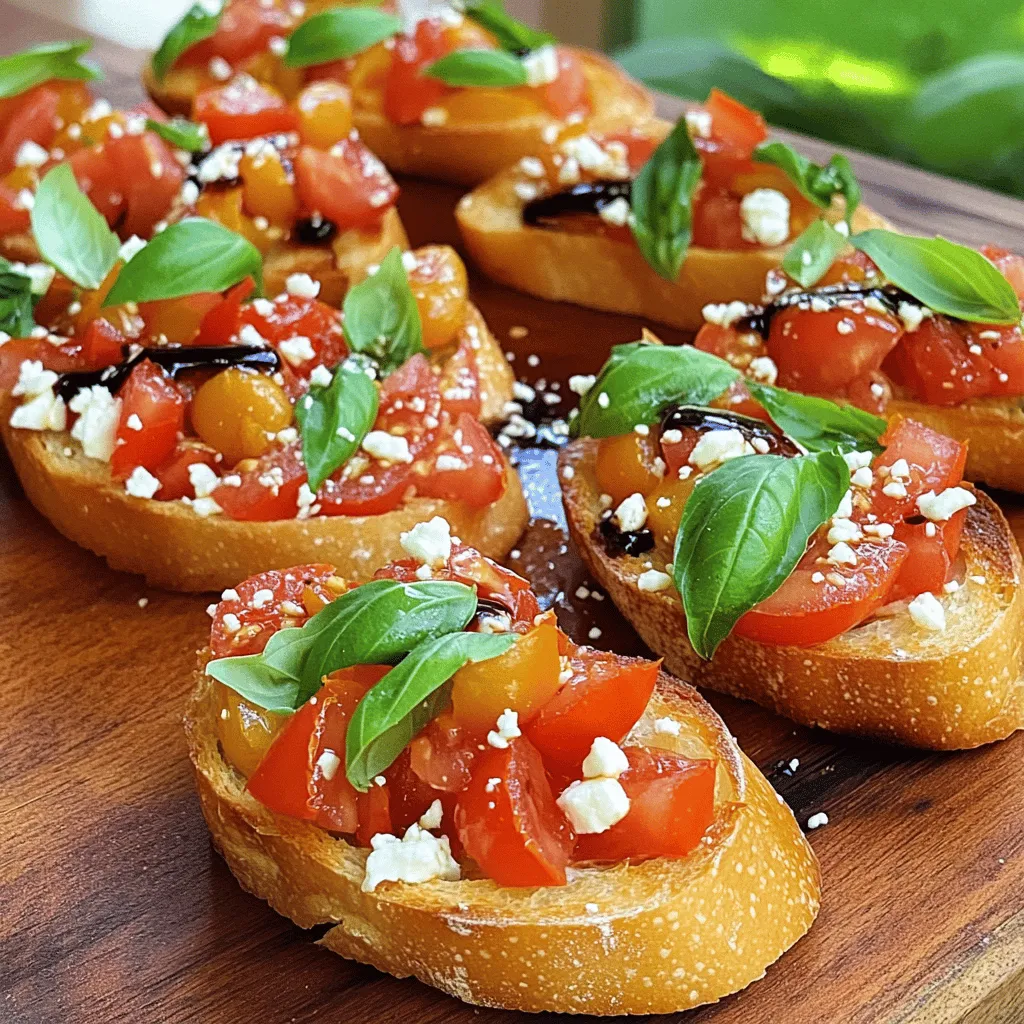
Bruschetta Delight Simple and Flavorful Appetizer
Bruschetta is the perfect appetizer that’s easy to make and packed with flavor. In this post, I’ll share my simple and delicious Bruschetta recipe, featuring

Buffalo Chicken Wings Crispy and Flavorful Recipe
Get ready to tantalize your taste buds with my crispy and flavorful Buffalo Chicken Wings recipe! These wings are perfect for game day or any
![To make these cheesy bites, gather these key ingredients: - 1 cup shredded mozzarella cheese - 1/2 cup grated Parmesan cheese - 1/2 cup all-purpose flour - 1 large egg - 1/2 teaspoon garlic powder - 1/2 teaspoon dried Italian herbs (oregano, basil, thyme) - Salt and pepper to taste - 1/4 cup breadcrumbs (preferably panko for extra crunch) - Cooking oil for frying - Fresh parsley, chopped (for garnish) These ingredients create a perfect blend of flavor and texture. The mozzarella ensures that gooey, melty center, while the Parmesan adds a rich, savory taste. When choosing cheese, look for freshness. Check the sell-by date on the package. Fresh mozzarella should feel soft and moist. Parmesan should have a hard, dry texture. If possible, buy from a local cheese shop. You can often find better quality cheeses there. Ask for samples to taste before buying. This way, you can choose the best cheese for your bites. If you have dietary needs, there are substitutes. For a gluten-free option, use almond flour instead of all-purpose flour. Vegan cheese can replace mozzarella and Parmesan if you avoid dairy. Make sure to choose a brand that melts well. For egg-free bites, use flaxseed meal mixed with water as a binder. This way, you can still enjoy these cheesy bites without worry. These tips help you create Irresistible Cheesy Parmesan Mozzarella Bites that suit your needs. Use the [Full Recipe] for detailed steps to make them. First, grab a bowl. Add 1 cup of shredded mozzarella cheese and 1/2 cup of grated Parmesan cheese. Mix them well. This blend gives the bites their cheesy goodness. Make sure the cheeses are evenly combined. It helps when you shape the bites later. Now, take another bowl. Whisk together 1/2 cup of all-purpose flour, 1/2 teaspoon of garlic powder, and 1/2 teaspoon of dried Italian herbs. Add salt and pepper to taste. Set this bowl aside. In a small bowl, beat one large egg. This egg will help the coating stick. Take about a tablespoon of the cheese mixture and shape it into a ball. Repeat until you have 12-15 balls. Roll each cheese ball in the flour mixture. Then dip it into the beaten egg. Finally, coat it with 1/4 cup of breadcrumbs. Make sure every bite is covered well. In a deep skillet, heat about 1 inch of cooking oil over medium heat. The oil should be hot but not smoking. Carefully add a few mozzarella bites at a time. Fry them for about 2-3 minutes on each side. You want them golden brown. Use a slotted spoon to remove the bites. Place them on a paper towel-lined plate. This helps soak up any extra oil. Let them cool slightly before serving. Garnish with chopped fresh parsley for a fresh touch. For the full recipe, check the earlier section. Enjoy your cheesy bites! To get the best texture, focus on the cheese blend. Use fresh mozzarella for a gooey center. Grated Parmesan adds a rich, salty flavor. The mixture should feel sticky but not too wet. If it’s too wet, add a little flour. This helps the bites hold their shape when frying. Letting the bites chill for 15 minutes helps firm them up. One big mistake is overcrowding the pan. Fry only a few bites at a time. This keeps the oil hot and gives a crispy outer layer. Another mistake is not coating the bites well. Make sure each bite is fully covered in flour, egg, and breadcrumbs. This seals in the cheesy goodness. Lastly, don’t rush the frying time. Cook until golden brown for the best flavor. Use a deep skillet to fry these bites. A slotted spoon makes it easy to remove them. A thermometer helps check oil temperature. Aim for 350°F for even frying. Having paper towels ready helps soak up extra oil. A cookie sheet can hold the bites while they cool. These tools make the cooking process smooth and fun. For the complete recipe, check the Full Recipe section. {{image_2}} To add a kick to your cheesy bites, try adding jalapeños. Simply dice about one or two fresh jalapeños. Mix the diced jalapeños into your cheese mixture. This gives each bite a spicy surprise. Just be careful with the amount. You can always add more, but you can’t take it out! If you prefer a healthier option, you can bake these bites. Preheat your oven to 400°F (200°C). After coating the cheese balls, place them on a baking sheet lined with parchment paper. Spray or brush them lightly with olive oil. Bake for about 15-20 minutes, or until they are golden brown. This method cuts down on oil and keeps the bites crispy. You can elevate the flavor with fun add-ons. Crumbled bacon is a great choice. Just mix in a few tablespoons of cooked bacon into your cheese blend. Fresh herbs like chives or parsley also work well. These add a burst of fresh taste. Experiment with different flavors for a unique twist! For the full recipe, check the details above. Enjoy making these cheesy bites your way! To keep your cheesy Parmesan mozzarella bites fresh, store them in an airtight container. Place a paper towel at the bottom to absorb moisture. This helps maintain their crispy texture. You can keep them in the fridge for up to three days. If you want to enjoy them later, freezing is a great option. To reheat the bites, avoid the microwave. It makes them soggy. Instead, place them in a preheated oven at 350°F (175°C) for about 10 minutes. This helps them regain their crunch. You can also use an air fryer for about five minutes. This keeps them crispy and delicious. To freeze your mozzarella bites, first let them cool completely. Arrange them in a single layer on a baking sheet. Freeze for about an hour until they are firm. Then, transfer them to a freezer-safe bag. They can last up to three months in the freezer. When you’re ready to eat them, reheat straight from frozen. Adjust your cooking time as needed for best results. Don't forget to check out the Full Recipe for more details! Yes, you can use different cheeses! Cheddar or Gouda work well. Each cheese adds its unique flavor. You can mix cheeses for a fun twist. Just keep the texture in mind. Ensure they melt nicely, like mozzarella. Look for a golden brown color on the bites. They should take about 2-3 minutes on each side. The oil should be hot, but not smoking. A small test bite can help, too. If it’s gooey and soft, you’re good to go! These bites pair great with marinara sauce for dipping. You can also serve them with a fresh salad for balance. Try a side of garlic bread for a full meal. Enjoy them as a snack or appetizer! For the full recipe, check out the link. In this blog post, we explored how to make cheesy Parmesan mozzarella bites. We covered essential ingredients, tips for good cheese, and alternatives for dietary needs. I shared step-by-step instructions and valuable tips for a perfect texture. We also looked at fun variations and how to store leftovers. These bites are easy and fun to make. With some practice, you’ll master them in no time! Enjoy experimenting with flavors and impressing friends with your tasty creations.](https://toastedrecipes.com/wp-content/uploads/2025/05/dc1d6d50-cf2c-4741-9d5c-2474b0ce5987.webp)
Irresistible Cheesy Parmesan Mozzarella Bites Recipe
Get ready to indulge in an appetizer that will steal the show! My Irresistible Cheesy Parmesan Mozzarella Bites are the ultimate snack for any gathering.