Appetizers

Mozzarella Pepperoni Croissant Rolls Easy Snack Idea
Looking for a quick and tasty snack? Try these Mozzarella Pepperoni Croissant Rolls. With just a few simple ingredients, you can whip up a treat
![- 1 package pizza dough (store-bought or homemade) - 1 cup ribeye steak, thinly sliced - 1 small onion, thinly sliced - 1 small green bell pepper, thinly sliced - 2 tablespoons olive oil - 1 teaspoon garlic powder - Salt and pepper to taste - 1 cup provolone cheese, shredded - 1 cup mozzarella cheese, shredded - 1 egg, beaten (for egg wash) - 1 tablespoon fresh parsley, chopped (for garnish) Choosing the right ribeye steak makes a big difference. Look for bright red meat with good marbling. This fat adds flavor and helps keep the meat juicy. For cheese, I suggest using provolone and mozzarella. Provolone adds a nice sharp taste, while mozzarella gives that gooey melt. You can mix in some cheddar for extra flavor too. If you want to make your own pizza dough, that’s great! But store-bought works well too. Just make sure to let it rest before rolling it out. This keeps it from shrinking back while you shape it. - Preheat your oven to 425°F (220°C). - In a skillet, heat 2 tablespoons of olive oil over medium heat. Add the sliced onion and green bell pepper. Sauté until soft, about 5-7 minutes. Remove and set aside. - In the same skillet, add 1 cup of thinly sliced ribeye steak. Season with 1 teaspoon of garlic powder, salt, and pepper. Cook for about 4-5 minutes until the steak is just cooked through. - Add the sautéed onions and bell peppers back to the skillet. Mix everything well. - On a lightly floured surface, roll out the pizza dough into a large rectangle, about ¼ inch thick. - Sprinkle half of the provolone and mozzarella cheese evenly over one half of the dough. - Add the steak and vegetable mixture over the cheese layer. Top with the remaining cheese. - Fold the dough over the filling to create a stuffed breadstick shape. Pinch the edges to seal completely. - Cut the stuffed dough into equal-sized strips. Place them on a baking sheet lined with parchment paper. - Brush the tops with the beaten egg for a golden finish. - Bake in the preheated oven for 12-15 minutes or until the breadsticks are golden brown and the cheese is melted. - Once baked, let them cool slightly. Sprinkle with chopped parsley before serving. You can find the full recipe above to guide you through this delicious process! Serve your Philly cheesesteak stuffed cheesy breadsticks warm. I love pairing them with marinara sauce. The rich tomato flavor goes well with the cheesy breadsticks. For a nice touch, add fresh parsley on the side. Arrange the breadsticks on a colorful platter. This makes them look even more tempting. Avoid overstuffing your breadsticks. If you add too much filling, they may burst open. Make sure to seal the dough properly. Pinching the edges well keeps all the goodness inside. A good seal helps your breadsticks stay intact while baking. You can add spices or herbs to the steak for more flavor. Try using Italian seasoning or a pinch of red pepper flakes. These add a nice kick. Mix different cheese blends for a fun twist. Using cheddar or gouda with provolone enhances the taste. Experiment with cheese and spices to find your favorite combination. {{image_2}} You can change the meat in your breadsticks. Try chicken or turkey instead of ribeye. These swaps give a new taste while keeping it easy. For a vegetarian option, use mushrooms or eggplant. They bring great flavor and texture. You can also mix in your favorite veggies, like spinach or zucchini. Want some heat? Add jalapeños to the mix. They make the dish spicy and fun. You can also try different cheeses for new flavors. Pepper jack adds a kick, while gouda gives a smoky taste. Mixing cheeses can make every bite unique. If you need gluten-free breadsticks, look for gluten-free pizza dough. Many stores sell it now. You can also make your own using almond flour or cauliflower. For the filling, use gluten-free meats and veggies. Just check labels to be sure they are gluten-free. To keep your Philly cheesesteak stuffed cheesy breadsticks fresh, store them in an airtight container. Place a paper towel inside to absorb moisture. They will last for about 3 to 4 days in the fridge. Always cool them down before sealing the container. This prevents sogginess. You can freeze these breadsticks before or after baking. If freezing before baking, wrap each one tightly in plastic wrap. Place them in a freezer bag to prevent freezer burn. They can last up to 3 months this way. To freeze after baking, wait until they cool completely, then store in an airtight container. For thawing, move them to the fridge overnight. This helps maintain their texture. You can also thaw them at room temperature for about 1-2 hours if you're in a hurry. To reheat without losing quality, use an oven. Preheat it to 350°F (175°C) and place the breadsticks on a baking sheet. Heat for about 10-12 minutes. This ensures they get warm and crispy. Avoid using a microwave, as it can make them chewy. Keep an eye on them to prevent burning. Enjoy them warm for the best taste! To make these stuffed breadsticks, start by preheating your oven to 425°F (220°C). Sauté thinly sliced onions and green peppers in olive oil until soft. Cook thinly sliced ribeye steak with garlic powder, salt, and pepper until done. Roll out pizza dough into a rectangle. Sprinkle half the provolone and mozzarella cheese on one half of the dough. Layer the steak mixture on top and add the remaining cheese. Fold the dough over, seal the edges, and cut into strips. Bake for 12-15 minutes until golden brown. [Full Recipe] Yes, you can make these breadsticks ahead of time. Prepare the filling and dough separately. Store the filling in the fridge for up to two days. You can also assemble the breadsticks and keep them in the fridge. Bake them just before serving for the best taste. I love serving these breadsticks with marinara sauce. It adds a nice, tangy flavor. You can also try ranch dressing or a spicy aioli for a fun twist. These sauces enhance the breadsticks and make them even better. You can change the filling to suit your taste. Try using chicken or turkey instead of ribeye steak. For a vegetarian option, add mushrooms, spinach, or zucchini. Mixing in different spices or herbs can also add unique flavors to the filling. Provolone cheese is a classic choice for cheesesteaks. It melts well and has a mild flavor. You can also use mozzarella for extra creaminess. For something different, try adding pepper jack for a spicy kick, or gouda for a rich taste. You can create tasty Philly cheesesteak stuffed cheesy breadsticks with easy steps. Start with high-quality ingredients like ribeye and flavorful cheeses. Follow the preparation and baking instructions to avoid common mistakes. Remember, you can personalize these breadsticks with different meats or veggies. In the end, these breadsticks make a fun dish for any meal. Enjoy the flavor and impress your friends with your cooking skills!](https://toastedrecipes.com/wp-content/uploads/2025/05/16b9f63d-d5a7-4449-9acf-a7af0421a90c.webp)
Philly Cheesesteak Stuffed Cheesy Breadsticks Delight
Are you ready to take your snacking game to new heights? In this post, I’m sharing my recipe for Philly Cheesesteak Stuffed Cheesy Breadsticks Delight!

Easy Bang Bang Salmon Bites Tasty and Quick Snack
Looking for a fun, tasty snack that’s super easy to make? You’ve found it! These Easy Bang Bang Salmon Bites are quick to whip up
![To make these tasty snacks, you need a few key ingredients: - 1 lb ground beef - 1 cup shredded sharp cheddar cheese - 1 cup shredded mozzarella cheese - 1 tablespoon garlic powder - 1 teaspoon onion powder - 1 teaspoon salt - 1 teaspoon black pepper - 1 can (16 oz) refrigerated biscuit dough - 1/2 cup grated parmesan cheese - 2 tablespoons fresh parsley, chopped (for garnish) - 1 tablespoon olive oil These ingredients come together to create a rich and cheesy filling that everyone will love. The ground beef offers a hearty base, while the cheeses add creaminess and depth. Garlic and onion powders give a lovely flavor kick. Finally, the biscuit dough wraps it all up in a warm, golden hug. Want to make your Garlic Parmesan Cheeseburger Bombs even better? Try these optional ingredients: - Additional cheeses like pepper jack or gouda - Spices like paprika or cayenne for extra heat - Your favorite dipping sauces, like ranch or spicy ketchup Customizing your bombs can lead to new flavor experiences. You can mix and match cheeses or add spices to make them truly your own. Each serving of Garlic Parmesan Cheeseburger Bombs has around 400 calories. Here’s a quick look at the macronutrient breakdown: - Protein: 25g - Fat: 25g - Carbs: 30g This snack packs a punch with its protein and flavor. You’ll feel satisfied while enjoying a tasty treat. Mixing the beef and cheese filling Start by putting the ground beef in a large bowl. Add shredded sharp cheddar and mozzarella cheese. Then, sprinkle in the garlic powder, onion powder, salt, and pepper. Mix everything until it’s well blended and looks like one smooth mixture. Preparing the biscuit dough Next, open your can of refrigerated biscuit dough. Carefully pull apart the biscuits. You want to flatten each biscuit into a circle, about four inches wide. This makes it easy to hold the filling later. Shaping the biscuit and stuffing Now it's time to assemble! Place a generous tablespoon of your beef and cheese mix in the center of each biscuit. Be careful not to overfill; a tablespoon is just right. Sealing the edges correctly Fold the biscuit edges over the filling. Pinch them together tightly to seal the bombs. This step is crucial. If they aren’t sealed well, the filling might leak out while cooking. Searing and baking instructions Heat olive oil in a skillet over medium heat. Once hot, place the sealed biscuit balls in the skillet. Sear them for about two minutes on each side until they turn golden brown. This step adds flavor and texture. After searing, transfer them to a baking sheet lined with parchment paper. Ensuring doneness Sprinkle grated parmesan cheese on top of the bombs before baking. Pop them in the oven set at 375°F (190°C). Bake for 15 to 18 minutes. You want them golden brown and cooked all the way through. When done, let them cool slightly before serving. For the full recipe, you can refer to the earlier sections. Enjoy the tasty Garlic Parmesan Cheeseburger Bombs! To keep your filling juicy, use fresh ground beef. Lean beef can dry out. Mix well so the cheese melts into the meat. This adds great flavor. For even cooking, sear the bombs before baking. Browning them locks in moisture. Place them on a lined baking sheet for heat flow. This helps them cook evenly. Garnish your bombs with chopped parsley. This adds color and freshness. A drizzle of olive oil can enhance the look and taste. Serve them on a warm platter. Sprinkling extra parmesan on top makes them pop. Pair with your favorite dipping sauces for an extra touch of flavor. Be careful not to overfill the biscuits. Too much filling can cause them to burst. Stick to a generous tablespoon for the best results. Make sure to seal the edges tightly. If not sealed, the filling may leak during cooking. Pinching the edges well will keep all that cheesy goodness inside. For the full recipe and step-by-step guidance, check the [Full Recipe]. {{image_2}} You can change the protein in Garlic Parmesan Cheeseburger Bombs. Ground turkey or chicken works well. They add a lighter twist while still being tasty. You can also mix cheeses. Try using pepper jack for a spicy kick or gouda for a smoky flavor. The cheeseburger bombs will surprise your taste buds. If you need gluten-free options, look for gluten-free biscuit dough. Many brands offer this tasty choice. You can also make a vegetarian version. Use black beans or lentils instead of meat. Add mushrooms for a savory touch. These options let everyone enjoy this snack. Garlic Parmesan Cheeseburger Bombs are great as a snack or meal. Serve them with fries or a fresh salad for a full dinner. They also work well as appetizers at parties. You can present them on a platter with dips like ketchup or ranch. Each bite will be a hit with your guests. For the full recipe, check out the details above! To keep your Garlic Parmesan Cheeseburger Bombs fresh, store them in the fridge. Place them in an airtight container. This helps lock in moisture and flavor. They can stay fresh in the fridge for about 3-4 days. If you want to keep them longer, freezing is a great option. Wrap each bomb tightly in plastic wrap. Then, place them in a freezer-safe bag. They can last for up to 3 months in the freezer. To reheat, simply thaw them in the fridge overnight. Then, bake at 350°F (175°C) for about 10-12 minutes. This will help regain their crispy outer layer. Always check for signs of spoilage. If you see mold or notice an off smell, it’s time to toss them. It’s best to avoid eating leftovers that have been in the fridge for more than 4 days. Remember, safety first! Enjoy your Garlic Parmesan Cheeseburger Bombs while they’re fresh and tasty. Making Garlic Parmesan Cheeseburger Bombs takes about 40 minutes. You will spend around 20 minutes prepping the ingredients and about 20 minutes cooking them. The time includes mixing, shaping, and baking. Yes, you can use frozen biscuit dough. Thaw it before you start. You can follow the same steps for shaping and baking. Just ensure the dough is soft enough to flatten easily. These cheeseburger bombs go great with many sauces. Some tasty options include: - Ketchup - Mustard - Ranch dressing - BBQ sauce - Garlic aioli Each sauce adds a unique flavor, enhancing your snack experience. You can prepare the cheeseburger bombs in advance. Assemble them, then place them in the fridge. For best results, bake them on the same day. If you want to store them longer, freeze them before baking. Just thaw and bake when ready. For the full recipe, check the details above. Garlic Parmesan Cheeseburger Bombs are tasty and easy to make. This blog covered the key ingredients, step-by-step instructions, and tips for perfecting your dish. You now know how to customize flavors and store any leftovers. In the end, feel free to experiment with ingredients. Enjoy the process and share these fun bites with family and friends. With these tips, you’ll create a dish that impresses everyone. Happy cooking!](https://toastedrecipes.com/wp-content/uploads/2025/05/6c53df0a-a5d5-4d29-beb2-1747369b6d2d.webp)
Garlic Parmesan Cheeseburger Bombs Flavorful Snack Treat
Are you ready to indulge in a delicious snack? Garlic Parmesan Cheeseburger Bombs are a fun twist on classic flavors. Picture juicy beef, melted cheese,

Salmon Meatballs with Creamy Avocado Sauce Delight
Are you ready to elevate your meal game? This Salmon Meatballs with Creamy Avocado Sauce recipe combines rich flavors and fresh ingredients for a delicious
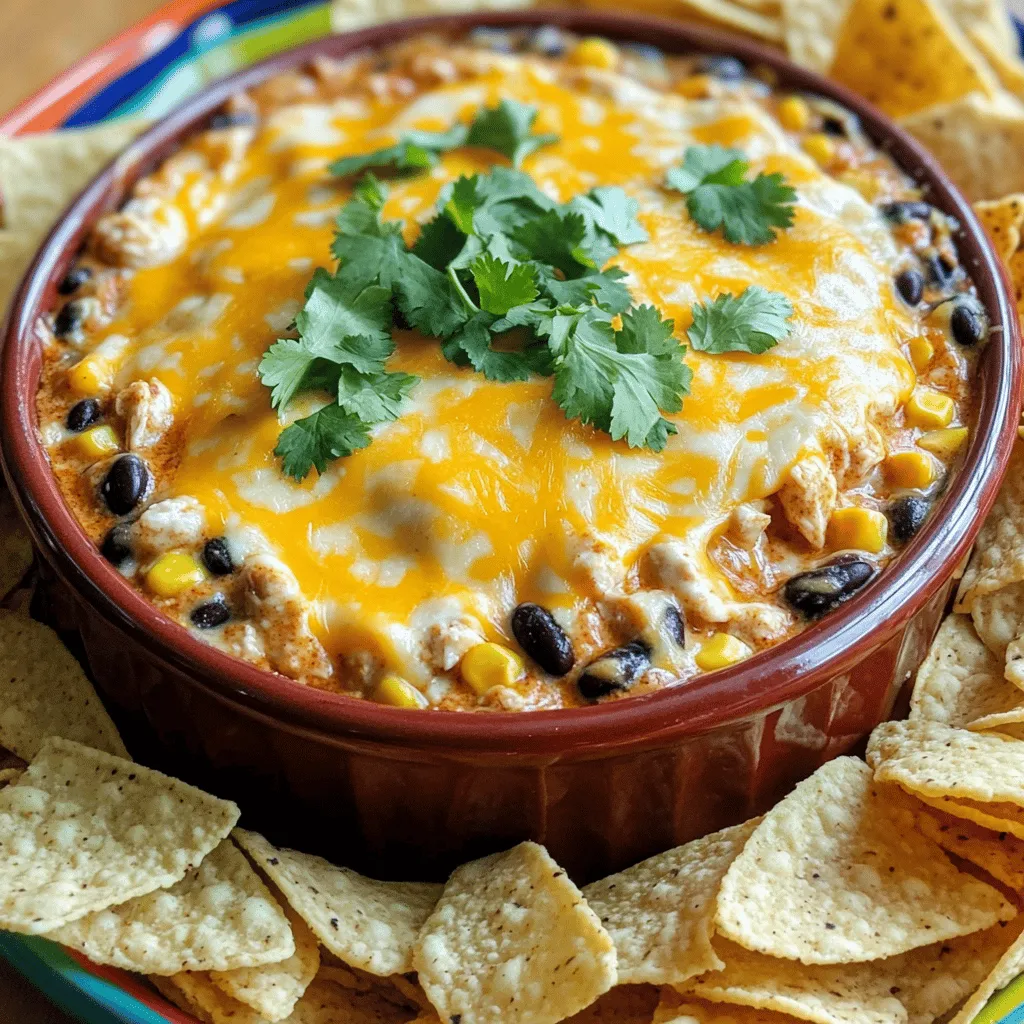
How to Make Chicken Taco Dip Simple and Tasty Dish
If you’re craving a fun and tasty snack, look no further! I’m excited to share my simple recipe for chicken taco dip. This crowd-pleaser is
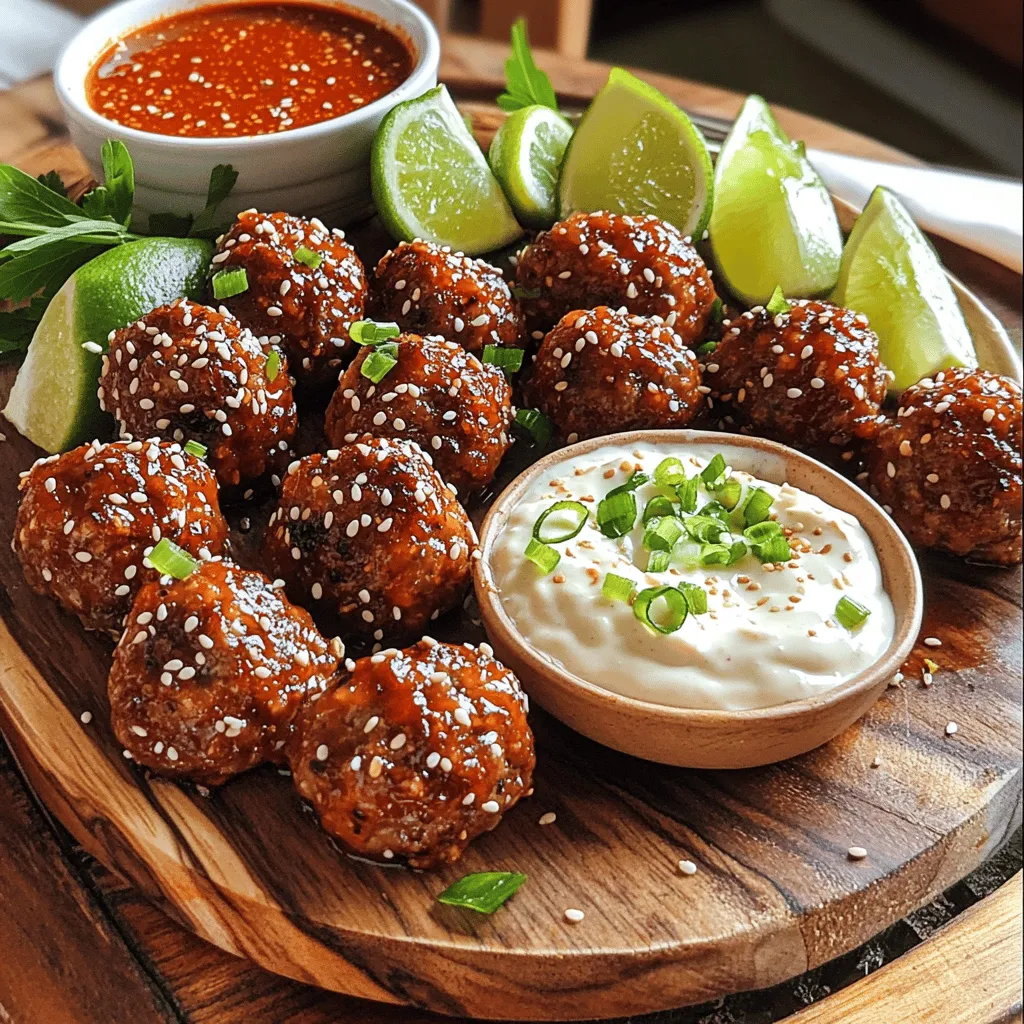
Korean BBQ Meatballs with Spicy Mayo Dip Delight
Are you ready to elevate your snack game? These Korean BBQ Meatballs with Spicy Mayo Dip are packed with bold flavors and are super easy
![- 2 cups cooked chicken, shredded or diced - 1 cup shredded mozzarella cheese - 1 cup cream cheese, softened - 3 cloves garlic, minced - 1 teaspoon Italian seasoning - 4 large flour tortillas - 1/2 cup fresh spinach, chopped - 1/4 cup sun-dried tomatoes, chopped (optional) - Salt and pepper to taste - Olive oil, for cooking Gather these tasty ingredients to make your Easy Cheesy Chicken Garlic Wraps. Start with cooked chicken. You can use leftover chicken or rotisserie chicken. Next, grab mozzarella cheese to add that nice melty goodness. Cream cheese adds creaminess, while garlic gives a wonderful flavor boost. Italian seasoning adds depth. You can adjust it to your taste. Fresh spinach adds color and nutrients. If you like, add sun-dried tomatoes for a sweet touch. Don’t forget salt and pepper for seasoning. Finally, olive oil helps crisp up the wraps when cooking. You’re all set with these simple ingredients. For the full recipe, check the recipe section above. In a large mixing bowl, you will mix the cooked chicken, cheeses, garlic, and seasonings. Start with 2 cups of cooked chicken. You can shred or dice it. Next, add 1 cup of shredded mozzarella cheese and 1 cup of softened cream cheese. Then, toss in 3 cloves of minced garlic and 1 teaspoon of Italian seasoning. Finally, season with salt and pepper to taste. Stir until everything combines well. Now it's time to assemble your wraps. Lay out 4 large flour tortillas on a clean surface. Take a generous spoonful of the chicken-cheese mixture and place it in the center of each tortilla. You can add 1/2 cup of chopped fresh spinach and, if you like, 1/4 cup of sun-dried tomatoes. These add great flavor! Next, fold the sides of the tortilla in and roll it up tightly from the bottom to enclose the filling. Repeat this for all tortillas. Heat a skillet over medium heat. Once hot, add a drizzle of olive oil. Place the wraps seam side down in the skillet. Cook for 3-4 minutes until they turn golden brown. Flip the wraps and cook the other side for another 3-4 minutes. You want both sides to be crispy and heated through. Remove them from the skillet and let them cool for a minute. Slice them in half to serve. Enjoy your Easy Cheesy Chicken Garlic Wraps! For the full recipe, check out the details above. To make your Easy Cheesy Chicken Garlic Wraps crispy, follow these tips: - Dry Ingredients: Use cooked chicken that is not too moist. This helps keep the wrap crisp. - Heat Level: Cook on medium heat. This ensures the wraps get golden brown without burning. - Use Olive Oil: A light drizzle of olive oil in the skillet adds flavor and helps achieve that crunchy outside. For even cooking, use these skillet methods: - Single Layer: Place wraps seam-side down. This keeps the filling inside and helps them cook well. - Monitor Cook Time: Flip the wraps gently after 3-4 minutes. This ensures both sides get that perfect crunch. You can swap out ingredients to fit your taste or needs: - Cheese Alternatives: Try cheddar or pepper jack cheese for a different flavor. - Protein Swaps: Use grilled shrimp or tofu for a tasty twist. To customize with vegetables, consider: - Add Peppers: Sliced bell peppers add color and crunch. - Zucchini or Mushrooms: These add moisture and flavor to your wraps. Serving your wraps well makes them even more appealing: - Slice Them Up: Cut each wrap in half to show the colorful filling. - Dipping Sauce: Serve with marinara or ranch dressing for extra flavor. - Garnish Smartly: Sprinkle fresh parsley or basil on top for a pop of color and freshness. For the full recipe, check out the [Full Recipe]. {{image_2}} You can easily change up the taste of your wraps. For a spicy version, try adding jalapeños or a drizzle of hot sauce. This adds a nice kick to every bite. If you prefer a Mediterranean twist, swap out the mozzarella for feta cheese. You can also add olives for a briny flavor that pairs well with chicken. Both options give a fresh twist to the classic wrap. If you need gluten-free options, look for gluten-free tortillas at your store. They work just as well for this recipe. For a vegetarian alternative, use plant-based protein instead of chicken. You can try crumbled tofu or chickpeas. This makes the wraps tasty and suitable for everyone at the table. To save time, you can make these wraps ahead and freeze them. Prepare the wraps as normal, then wrap them in foil or plastic wrap. Place them in a freezer bag and store them in the freezer. When you're ready to eat, just thaw them overnight in the fridge. Then, cook them in a skillet until heated through. This way, you have a quick meal ready to go whenever you need it. Check out the Full Recipe for more cooking tips. To keep your Easy Cheesy Chicken Garlic Wraps fresh, store leftovers in an airtight container. This helps keep moisture out and keeps the flavors intact. Ideally, eat them within three days. If you notice any odd smells or textures, it’s best to toss them. If you want to freeze your wraps, it’s easy! First, wrap each one in plastic wrap. Then, place them in a freezer bag or container. Be sure to squeeze out any air. This will help prevent freezer burn. You can freeze the wraps for up to three months. When you’re ready to eat, simply thaw them in the fridge overnight. To reheat your wraps, the skillet method works best. Heat a skillet over medium heat. Place the wraps seam side down and cook for about three to four minutes. This keeps them crispy. Flip and heat for another three to four minutes. You can also use an oven set at 350°F for about 10-15 minutes, but this may not be as crispy. Enjoy your Easy Cheesy Chicken Garlic Wraps warm! These wraps last about three days in the fridge. To keep them fresh, store them in an airtight container. If you want to avoid soggy wraps, place a paper towel inside the container. This towel absorbs extra moisture and helps keep the wraps crisp. No, you cannot use raw chicken in this recipe. You need to cook the chicken first. Cooked chicken gives the wraps better flavor and texture. You can use grilled, rotisserie, or leftover chicken. Just make sure it’s shredded or diced before mixing it with the other ingredients. You can pair these wraps with many tasty sides. Here are some ideas: - Fresh salad: A light green salad with a tangy dressing works well. - Dips: Marinara sauce or ranch dressing add extra flavor. - Vegetable sticks: Carrot and cucumber sticks are a crunchy addition. - Fries: Sweet potato fries or regular fries add a fun crunch. Feel free to mix and match these sides to suit your taste! For the complete recipe of Easy Cheesy Chicken Garlic Wraps, check out the [Full Recipe]. In this blog post, I shared how to make Easy Cheesy Chicken Garlic Wraps. We covered the main ingredients, preparation steps, tips for cooking, and meal variations. Cooking these wraps is simple and fun. You can customize them to fit your tastes. Remember to store leftovers properly for later enjoyment. Whether you enjoy spicy flavors or prefer a vegetarian option, these wraps are versatile. Try them out, and I hope they become a go-to meal for you. Happy cooking!](https://toastedrecipes.com/wp-content/uploads/2025/05/8921906f-1bb6-4828-8477-eba631c828bf.webp)
Easy Cheesy Chicken Garlic Wraps Quick and Tasty Meal
Looking for a quick meal that’s packed with flavor? You’re in the right place! My Easy Cheesy Chicken Garlic Wraps are a breeze to make

Delicious Crab & Cheese Crescents Perfect for Parties
Looking for a crowd-pleaser for your next party? Try my Delicious Crab & Cheese Crescents! These savory bites are quick to make and full of

Korean BBQ Meatballs with Spicy Mayo Dip Delight
Are you ready to transform your next meal? Our Korean BBQ Meatballs with Spicy Mayo Dip are sure to impress! These juicy meatballs pack a