Caramel Apple Dessert Cups Tasty and Fun Treat

WANT TO SAVE THIS RECIPE?

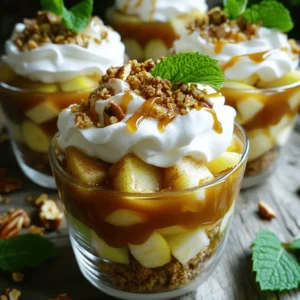
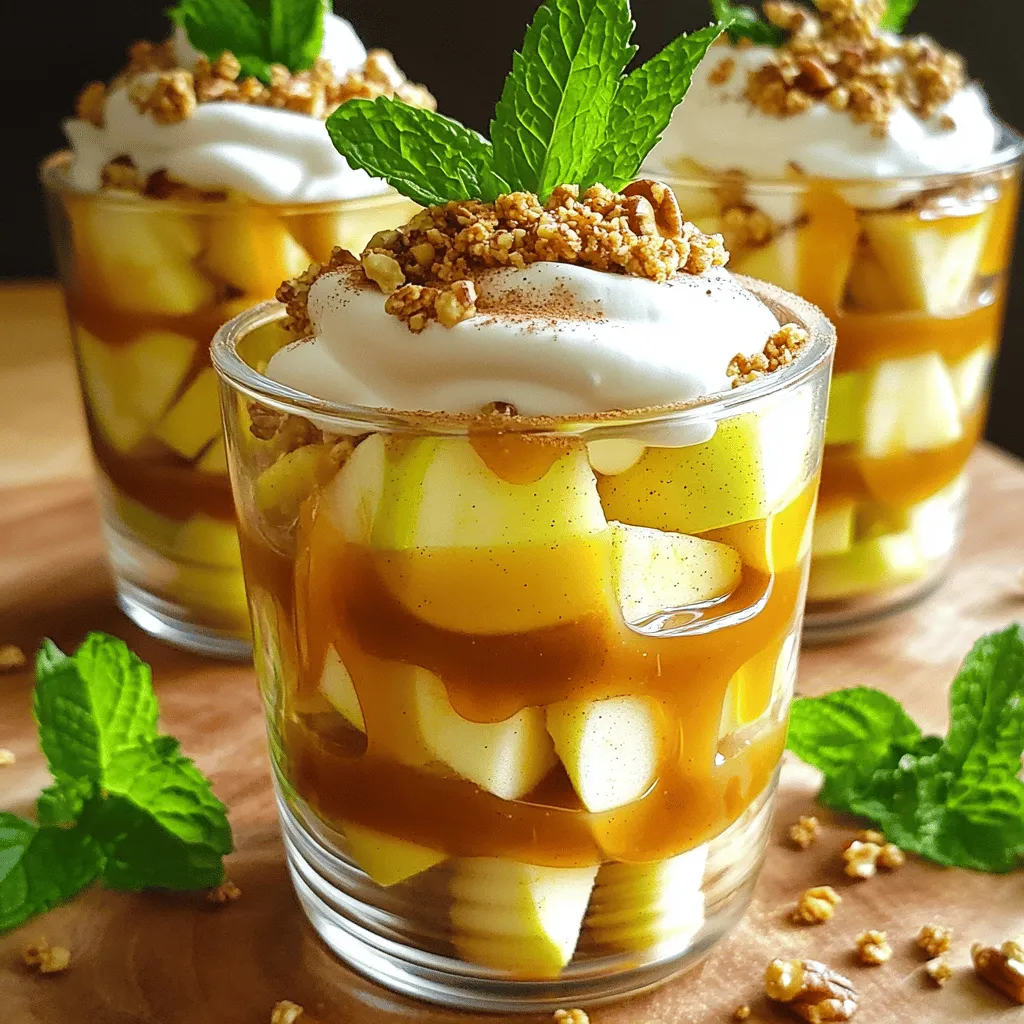
Looking for a fun and tasty treat? Caramel Apple Dessert Cups are the perfect solution! These cups combine sweet apples, rich caramel, and whipped cream for a delightful dessert. In this easy guide, I’ll share all you need—from choosing the best apple to stacking the layers just right. Get ready to impress your friends and family with this simple yet delicious recipe! Let’s dive in and make these yummy cups together.

Ingredients

List of Ingredients

To make delicious caramel apple dessert cups, you need some key ingredients. Here is what you will need:

– 2 large apples (Granny Smith or Honeycrisp), peeled, cored, and diced

– 1 cup caramel sauce (store-bought or homemade)

– 1/2 teaspoon cinnamon

– 1/4 teaspoon nutmeg

– 1 tablespoon lemon juice

– 1 cup whipped cream or whipped topping

– 1/2 cup granola (for crunch)

– 1/4 cup chopped pecans or walnuts (optional)

– Fresh mint leaves for garnish

For the apples, both Granny Smith and Honeycrisp work great. Granny Smith apples are tart and crisp, while Honeycrisp are sweet and juicy. Choose whichever you prefer!

For the caramel sauce, you can go for store-bought for ease. If you want to impress, try making your own. Homemade caramel can add a special touch. It’s simple, just sugar, butter, and cream!

You can add fun extras for flavor. Chopped nuts like pecans or walnuts give great crunch. They also add a nutty flavor that pairs well with apples. If you want something lighter, swap whipped cream for yogurt.

This list gives you a solid base for your dessert cups. Now you’re ready to create a tasty treat! For the full recipe, don’t forget to check the details shared above.

Step-by-Step Instructions

Preparation of Ingredients

To make the caramel apple dessert cups, you first need to prepare the apples. Start by peeling the apples. I like to use Granny Smith or Honeycrisp apples for their crispness. After peeling, use a corer to remove the core. Then, dice the apples into small pieces. Aim for uniform sizes to ensure even cooking.

Next, mix the spices with the apples. In a medium bowl, combine the diced apples with 1 tablespoon of lemon juice, 1/2 teaspoon of cinnamon, and 1/4 teaspoon of nutmeg. The lemon juice helps prevent browning and adds a fresh flavor. Toss everything together until the apples are well coated. This spiced apple mix is key to a tasty dessert.

Layering the Dessert Cups

Now comes the fun part: layering the dessert cups! Start by placing a generous layer of the spiced apples at the bottom of each cup. This layer should be thick enough to provide a flavorful base.

Next, drizzle about 2 tablespoons of caramel sauce over the apples. Make sure every cup gets its share of sweetness. After the caramel, add a layer of whipped cream on top. You can spoon it on or use a piping bag for a nice design.

Now, sprinkle a layer of granola over the whipped cream. This adds a crunchy texture that contrasts well with the soft apples. Be sure to distribute the granola evenly across all cups. Finally, drizzle a bit more caramel sauce on top of the granola.

Final Touches

For the final touches, garnish each dessert cup with fresh mint leaves. This adds a pop of color and a hint of freshness to the dessert. If you want, you can also sprinkle some chopped pecans or walnuts on top. This adds extra flavor and a lovely crunch.

To achieve a visually appealing presentation, make sure the layers are visible through the cup. This way, your guests will see the beautiful colors and textures. The caramel apple dessert cups are now ready to enjoy! For the full recipe, check out the instructions above.

Tips & Tricks

Serving Suggestions

Caramel apple dessert cups are perfect for many occasions. Serve them at birthday parties, family gatherings, or even cozy movie nights. They add a sweet touch to any event. Pair these cups with hot cider or a creamy vanilla milkshake. They work well with many drinks.

Customization Options

You can make these dessert cups your own. Try using different nuts like almonds or peanuts for a new flavor. If you prefer yogurt, use it instead of whipped cream for a lighter option. Adjust the sweetness by adding more or less caramel sauce. You can also add spices, like more cinnamon or a pinch of ginger, to change the taste to your liking. Enjoy making this dessert unique!

Variations

Flavor Variations

You can change up the fruit in your caramel apple dessert cups. Try pears, for a sweet twist. Berries add a burst of color and flavor too. Use peaches for a summer treat. Each fruit pairs well with caramel and spices.

You can also switch up the toppings. Try chocolate sauce for a rich flavor. A drizzle of peanut butter adds a nutty touch. You could use yogurt instead of whipped cream for a lighter option. Add sprinkles for a fun look.

Dietary Modifications

If you need gluten-free options, choose gluten-free granola. You can also skip the granola and use nuts. Sunflower seeds work well, too. They add crunch without gluten.

For vegan options, use coconut cream instead of whipped cream. Look for vegan caramel sauce to keep it dairy-free. These swaps keep your dessert tasty and friendly for all diets.

Storage Info

Storing Leftovers

To keep your caramel apple dessert cups fresh, store them in the fridge. Use an airtight container to prevent air from getting in. This helps maintain the flavors and textures. You can enjoy leftover dessert cups for up to three days. However, the granola may lose its crunch after a day. If you want it to stay crispy, store it separately.

Freezing Options

You can freeze the individual parts of this dessert. If you have leftover apples, caramel, or whipped cream, freeze them in small containers. This keeps them fresh for about three months. When you want to use them, thaw the apples and caramel in the fridge overnight. For the whipped cream, let it sit at room temperature for about 30 minutes. Avoid refreezing after thawing to keep the best texture.

FAQs

How do I make homemade caramel sauce?

To make homemade caramel sauce, you need just sugar, butter, and cream. Start by heating sugar in a pan until it melts. Stir it until it turns golden brown. Remove it from heat and add butter. Once melted, slowly mix in cream. Let it cool before using it in your dessert cups.

Can I use a different type of apple?

Yes, you can use other apples. I like Granny Smith for its tartness. Honeycrisp apples add a sweet crunch. Feel free to try Fuji or Gala apples, too. Each type gives a unique taste to your dessert cups.

Are caramel apple dessert cups suitable for kids?

Absolutely! Kids love the sweet and crunchy layers. They can help make these cups, too. Just watch out for the caramel sauce. It can get hot. Overall, these dessert cups are a fun treat for kids.

What’s the best way to prevent apples from browning?

To keep apples from browning, use lemon juice. It works wonders! Tossing the diced apples in lemon juice right after cutting slows down browning. This keeps your dessert looking fresh and tasty.

Can I prepare these dessert cups in advance?

You can prepare them ahead of time! Just assemble the layers without topping them with whipped cream and granola. Cover and store them in the fridge. Add the whipped cream and granola just before serving for the best texture.

You now have a clear guide to making delicious caramel apple dessert cups. You learned about essential ingredients, preparation steps, and elegant serving tips. I shared ways to customize and make these treats fit your taste. Proper storage tips and variations help keep your dessert exciting.

Enjoy exploring this sweet treat, and share it with others. You can impress friends and family at any event with these easy instructions. Get creative and have fun in the kitchen!

To make delicious caramel apple dessert cups, you need some key ingredients. Here is what you will need: - 2 large apples (Granny Smith or Honeycrisp), peeled, cored, and diced - 1 cup caramel sauce (store-bought or homemade) - 1/2 teaspoon cinnamon - 1/4 teaspoon nutmeg - 1 tablespoon lemon juice - 1 cup whipped cream or whipped topping - 1/2 cup granola (for crunch) - 1/4 cup chopped pecans or walnuts (optional) - Fresh mint leaves for garnish For the apples, both Granny Smith and Honeycrisp work great. Granny Smith apples are tart and crisp, while Honeycrisp are sweet and juicy. Choose whichever you prefer! For the caramel sauce, you can go for store-bought for ease. If you want to impress, try making your own. Homemade caramel can add a special touch. It’s simple, just sugar, butter, and cream! You can add fun extras for flavor. Chopped nuts like pecans or walnuts give great crunch. They also add a nutty flavor that pairs well with apples. If you want something lighter, swap whipped cream for yogurt. This list gives you a solid base for your dessert cups. Now you're ready to create a tasty treat! For the full recipe, don’t forget to check the details shared above. To make the caramel apple dessert cups, you first need to prepare the apples. Start by peeling the apples. I like to use Granny Smith or Honeycrisp apples for their crispness. After peeling, use a corer to remove the core. Then, dice the apples into small pieces. Aim for uniform sizes to ensure even cooking. Next, mix the spices with the apples. In a medium bowl, combine the diced apples with 1 tablespoon of lemon juice, 1/2 teaspoon of cinnamon, and 1/4 teaspoon of nutmeg. The lemon juice helps prevent browning and adds a fresh flavor. Toss everything together until the apples are well coated. This spiced apple mix is key to a tasty dessert. Now comes the fun part: layering the dessert cups! Start by placing a generous layer of the spiced apples at the bottom of each cup. This layer should be thick enough to provide a flavorful base. Next, drizzle about 2 tablespoons of caramel sauce over the apples. Make sure every cup gets its share of sweetness. After the caramel, add a layer of whipped cream on top. You can spoon it on or use a piping bag for a nice design. Now, sprinkle a layer of granola over the whipped cream. This adds a crunchy texture that contrasts well with the soft apples. Be sure to distribute the granola evenly across all cups. Finally, drizzle a bit more caramel sauce on top of the granola. For the final touches, garnish each dessert cup with fresh mint leaves. This adds a pop of color and a hint of freshness to the dessert. If you want, you can also sprinkle some chopped pecans or walnuts on top. This adds extra flavor and a lovely crunch. To achieve a visually appealing presentation, make sure the layers are visible through the cup. This way, your guests will see the beautiful colors and textures. The caramel apple dessert cups are now ready to enjoy! For the full recipe, check out the instructions above. Caramel apple dessert cups are perfect for many occasions. Serve them at birthday parties, family gatherings, or even cozy movie nights. They add a sweet touch to any event. Pair these cups with hot cider or a creamy vanilla milkshake. They work well with many drinks. You can make these dessert cups your own. Try using different nuts like almonds or peanuts for a new flavor. If you prefer yogurt, use it instead of whipped cream for a lighter option. Adjust the sweetness by adding more or less caramel sauce. You can also add spices, like more cinnamon or a pinch of ginger, to change the taste to your liking. Enjoy making this dessert unique! {{image_2}} You can change up the fruit in your caramel apple dessert cups. Try pears, for a sweet twist. Berries add a burst of color and flavor too. Use peaches for a summer treat. Each fruit pairs well with caramel and spices. You can also switch up the toppings. Try chocolate sauce for a rich flavor. A drizzle of peanut butter adds a nutty touch. You could use yogurt instead of whipped cream for a lighter option. Add sprinkles for a fun look. If you need gluten-free options, choose gluten-free granola. You can also skip the granola and use nuts. Sunflower seeds work well, too. They add crunch without gluten. For vegan options, use coconut cream instead of whipped cream. Look for vegan caramel sauce to keep it dairy-free. These swaps keep your dessert tasty and friendly for all diets. To keep your caramel apple dessert cups fresh, store them in the fridge. Use an airtight container to prevent air from getting in. This helps maintain the flavors and textures. You can enjoy leftover dessert cups for up to three days. However, the granola may lose its crunch after a day. If you want it to stay crispy, store it separately. You can freeze the individual parts of this dessert. If you have leftover apples, caramel, or whipped cream, freeze them in small containers. This keeps them fresh for about three months. When you want to use them, thaw the apples and caramel in the fridge overnight. For the whipped cream, let it sit at room temperature for about 30 minutes. Avoid refreezing after thawing to keep the best texture. To make homemade caramel sauce, you need just sugar, butter, and cream. Start by heating sugar in a pan until it melts. Stir it until it turns golden brown. Remove it from heat and add butter. Once melted, slowly mix in cream. Let it cool before using it in your dessert cups. Yes, you can use other apples. I like Granny Smith for its tartness. Honeycrisp apples add a sweet crunch. Feel free to try Fuji or Gala apples, too. Each type gives a unique taste to your dessert cups. Absolutely! Kids love the sweet and crunchy layers. They can help make these cups, too. Just watch out for the caramel sauce. It can get hot. Overall, these dessert cups are a fun treat for kids. To keep apples from browning, use lemon juice. It works wonders! Tossing the diced apples in lemon juice right after cutting slows down browning. This keeps your dessert looking fresh and tasty. You can prepare them ahead of time! Just assemble the layers without topping them with whipped cream and granola. Cover and store them in the fridge. Add the whipped cream and granola just before serving for the best texture. You now have a clear guide to making delicious caramel apple dessert cups. You learned about essential ingredients, preparation steps, and elegant serving tips. I shared ways to customize and make these treats fit your taste. Proper storage tips and variations help keep your dessert exciting. Enjoy exploring this sweet treat, and share it with others. You can impress friends and family at any event with these easy instructions. Get creative and have fun in the kitchen!

Caramel Apple Dessert Cups

Indulge in these delicious Caramel Apple Dessert Cups that are perfect for any occasion! With crisp apples, fluffy whipped cream, and a drizzle of rich caramel, each layer creates a delightful explosion of flavors. This easy recipe takes just 15 minutes to make, making it an ideal treat for gatherings or weeknight desserts. Click through to discover how to whip up these delightful cups and impress your family and friends!

Ingredients
  

2 large apples (Granny Smith or Honeycrisp), peeled, cored, and diced

1 cup caramel sauce (store-bought or homemade)

1/2 teaspoon cinnamon

1/4 teaspoon nutmeg

1 tablespoon lemon juice

1 cup whipped cream or whipped topping

1/2 cup granola (for crunch)

1/4 cup chopped pecans or walnuts (optional)

Fresh mint leaves for garnish

Instructions
 

In a medium bowl, combine the diced apples, lemon juice, cinnamon, and nutmeg. Toss until the apples are well coated.

    In serving cups or bowls, layer the spiced apples evenly at the bottom. Be generous with this layer to provide a flavorful base.

      Drizzle a few tablespoons of caramel sauce over the apples, ensuring every cup gets a delightful touch of sweetness.

        Add a layer of whipped cream on top of the caramel. You can use a piping bag for a decorative effect or simply spoon it on.

          Sprinkle granola over the whipped cream for a crunchy texture. This will add a nice contrast to the soft apples and creamy topping.

            Finish with another drizzle of caramel sauce over the granola. If using, scatter the chopped pecans or walnuts on top for added flavor.

              Garnish each dessert cup with a fresh mint leaf for an extra pop of color and freshness.

                Prep Time: 15 minutes | Total Time: 15 minutes | Servings: 4

                  WANT TO SAVE THIS RECIPE?