Are you ready to bake a treat that brings back childhood memories? Brown Sugar Pop Tart Cookies combine the joy of a classic pastry with the coziness of homemade cookies. In just a few simple steps, you can whip up these delicious goodies filled with fruity preserves and topped with icing. Let’s dive into this delightful dessert and explore how to make them your own!
Ingredients
Let’s dive into the tasty world of Brown Sugar Pop Tart Cookies! Here’s what you need to create these delightful treats:
– 2 cups all-purpose flour
– 1/2 cup brown sugar, packed
– 1/2 cup granulated sugar
– 1 teaspoon baking powder
– 1/4 teaspoon baking soda
– 1/4 teaspoon salt
– 1 cup unsalted butter, softened
– 1 large egg
– 1 teaspoon vanilla extract
– 1/2 cup fruit preserves (your choice: strawberry, raspberry, or apricot)
– 1 cup powdered sugar (for icing)
– 1-2 tablespoons milk (to thin the icing)
– Sprinkles (optional, for decoration)
Gather these ingredients before you start. Fresh ingredients really make a difference! The blend of brown sugar and butter gives the cookies a rich taste. The fruit preserves add a fun twist, while the icing brings everything together beautifully.
Make sure to check out the Full Recipe for more details on how to put these ingredients to good use!
Step-by-Step Instructions
Prepping the Dough
– Preheat your oven to 350°F (175°C) and line two baking sheets with parchment paper.
– In a large mixing bowl, combine the following dry ingredients:
– 2 cups all-purpose flour
– 1/2 cup brown sugar, packed
– 1/2 cup granulated sugar
– 1 teaspoon baking powder
– 1/4 teaspoon baking soda
– 1/4 teaspoon salt
– In a separate bowl, cream together:
– 1 cup unsalted butter, softened
– 1 large egg
– 1 teaspoon vanilla extract
Mix until light and fluffy.
Shaping and Filling the Cookies
– Chill the dough for about 30 minutes. This makes it easier to handle.
– Roll out one portion of the dough on a floured surface to about 1/8 inch thick. Cut rectangles, roughly 3×2 inches, for the cookie base.
– Place half of the rectangles on the baking sheets. Spoon about a teaspoon of fruit preserves onto the center of each rectangle. You can choose strawberry, raspberry, or apricot.
Baking the Cookies
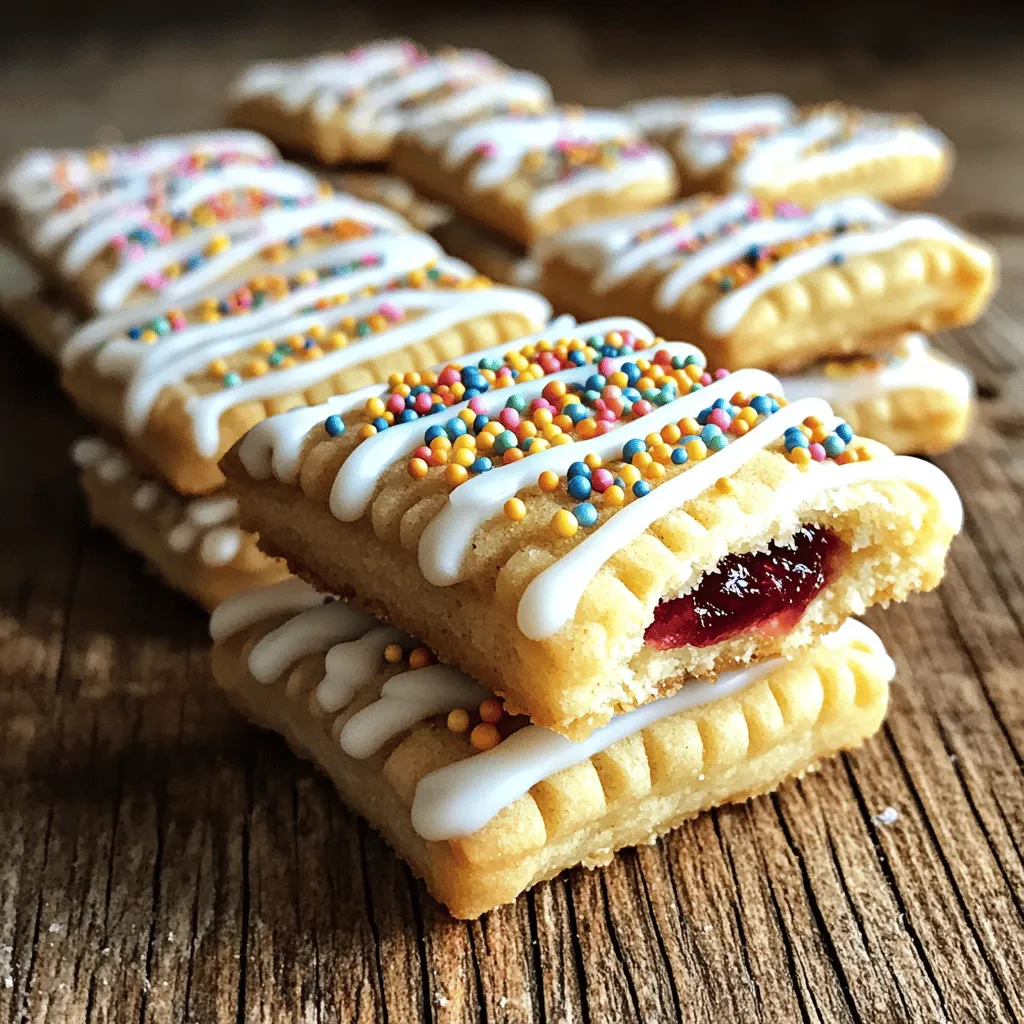
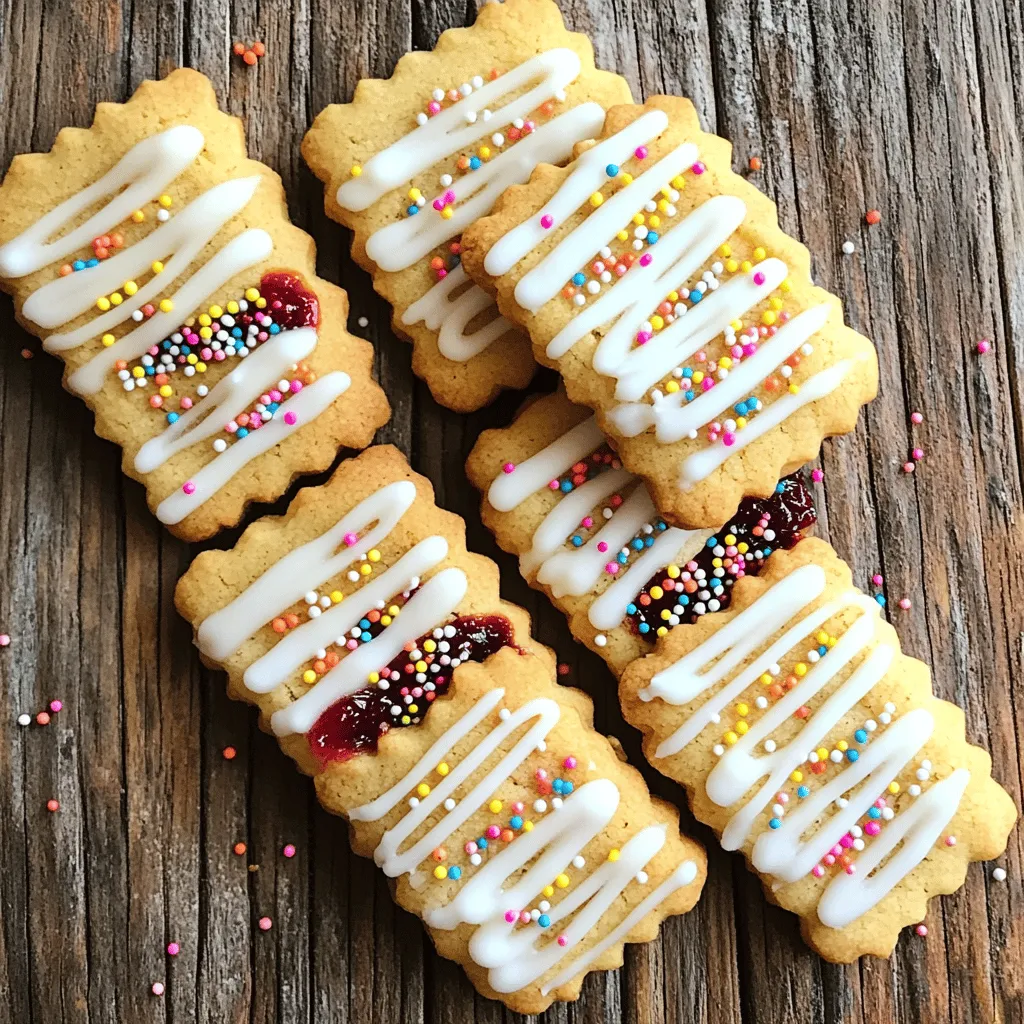
– Roll out the second portion of dough and cut out the same number of rectangles. Place each one over the preserves. Pinch the edges to seal them tight. Use a fork to make pretty patterns on the edges.
– Bake in the preheated oven for 12-15 minutes. Look for a golden brown color.
– Let the cookies cool on the baking sheet for a few minutes. Then transfer them to a wire rack to cool completely before icing.
For the icing, mix powdered sugar with milk until smooth. Drizzle the icing over your cookies and add sprinkles if you like. Enjoy your delightful treat! For the full recipe, see above.
Tips & Tricks
Achieving the Perfect Cookie Texture
To get that perfect cookie texture, chilling the dough is key. After mixing the dough, wrap it in plastic and chill for 30 minutes. This helps the butter firm up. It makes the dough easier to roll out and keeps the cookies from spreading too much.
When rolling out the dough, use a floured surface. This will stop it from sticking. If it still sticks, sprinkle more flour on top of the dough. Use a rolling pin to flatten it to about 1/8 inch thick. Keep a sharp knife or pizza cutter handy to cut out rectangles.
Icing and Decoration Tips
For the icing, mix powdered sugar and milk. You want it smooth but thick enough to hold its shape. If it’s too runny, add a bit more powdered sugar. If it’s too thick, add a tiny bit more milk.
When it comes to decoration, sprinkles can really make the cookies pop. After icing, sprinkle them on while the icing is still wet. This way, the sprinkles will stick better.
Common Mistakes to Avoid
One common mistake is overmixing the dough. Mix just until combined; this keeps the cookies tender. If you mix too much, they can become tough.
Another mistake is not sealing the cookies properly. Once you place the top rectangle, pinch the edges well. You can also use a fork to press down around the edges. This helps keep the filling inside while baking.
Variations
Flavor Variations
You can switch up the flavors in your Brown Sugar Pop Tart Cookies. Try using different fruit preserves for a fun twist. Some great options include:
– Strawberry
– Raspberry
– Apricot
You can also add spices to enhance the taste. A pinch of cinnamon or nutmeg can add warmth. Cardamom offers a unique flair, too. Don’t be afraid to experiment!
Dietary Modifications
If you need gluten-free cookies, there are flour options. Almond flour or a gluten-free blend works well. Just ensure you adjust the amounts correctly.
For vegan cookies, substitute the butter with coconut oil. You can replace the egg with a flaxseed meal or applesauce. These changes keep the cookies tasty and friendly for all diets.
Serving Suggestions
Pair these cookies with your favorite drinks. They go great with milk, tea, or coffee. You can also serve them with ice cream for a delightful dessert.
For a fun presentation, arrange the cookies on a colorful platter. Use seasonal fruits and flowers around them. This makes your cookie display look festive and inviting.
Storage Info
Best Practices for Storing Cookies
To keep your Brown Sugar Pop Tart Cookies fresh, store them in an airtight container. This helps maintain their soft texture and flavor. You can layer parchment paper between cookies to prevent sticking. Keep the container in a cool, dark place, like a pantry or cupboard. Avoid exposure to heat or moisture, which can make cookies go stale faster.
Freezing Options
You can freeze cookie dough for later use. After mixing the dough, divide it into smaller portions. Wrap each portion tightly in plastic wrap, then place them in a freezer bag. To bake, remove the dough from the freezer and let it thaw overnight in the fridge. When ready, roll out the dough and bake as directed. If you freeze baked cookies, store them in a freezer-safe container for best results. Thaw them at room temperature before serving.
Shelf Life
These cookies will stay fresh for about one week at room temperature. If you freeze them, they can last up to three months. Check for signs that cookies are no longer good, such as an off smell or a hard texture. If the cookies feel dry or crumbly, it’s best to discard them. Enjoy these delightful treats while they are at their best!
FAQs
Can I make these cookies ahead of time?
Yes, you can prepare the dough in advance. First, after mixing your ingredients, wrap the dough tightly in plastic wrap. This keeps it fresh. You can store it in the fridge for up to three days. If you want to keep it longer, freeze it for up to three months. Just remember to thaw it in the fridge overnight before baking.
How do I know when the cookies are done baking?
Look for a few visual cues to know your cookies are ready. The edges should be golden brown, while the center may look slightly soft. If you gently press the top, it should bounce back. This means the cookies are baked well but still soft inside.
Can I customize the size of the cookies?
Absolutely! You can make the cookies any size you like. For smaller cookies, cut the rectangles into 2×1 inches. For larger ones, go for 4×3 inches. Just keep an eye on the baking time. Smaller cookies will bake faster, while larger ones may need a few extra minutes.
We explored how to make delicious filled cookies. You learned the key ingredients, detailed steps, and tips for success. Don’t forget the fun of decorating with icing and sprinkles.
Mix up the flavors with different preserves or spices to find your favorite. With proper storage, these cookies can last a while. Enjoy baking and sharing your creations!
