Skip to content
toastedrecipes.com
  • Home
  • Appetizers
  • Desserts
  • Salads
  • Breakfast
  • Dinner
  • Privacy Policy
  • Contact
  • About

Chef Theo

One Bowl Apple Cake Simple and Delicious Treat

May 10, 2025April 28, 2025 by Chef Theo
To make this easy one bowl apple cake, you will need: - 2 large apples, peeled, cored, and diced - 1 cup granulated sugar - 1/2 cup brown sugar, packed - 1/2 cup vegetable oil - 3 large eggs - 1 teaspoon vanilla extract - 2 1/2 cups all-purpose flour - 1 teaspoon baking powder - 1 teaspoon baking soda - 1 teaspoon ground cinnamon - 1/2 teaspoon salt These ingredients work together to create a moist and flavorful cake. The apples add sweetness and a nice texture. The sugars give it a lovely caramelized crust. The oils and eggs keep it rich and tender. To customize your cake, you might want to add: - 1/2 cup chopped walnuts or pecans (optional) - 1/4 cup powdered sugar (for dusting, optional) Adding nuts gives a crunchy bite. Dusting with powdered sugar adds a nice touch for serving. These options let you play with flavors and textures. You can find the full recipe with instructions to guide you through the process. Enjoy baking! First, preheat your oven to 350°F (175°C). This ensures even baking. Next, grease a 9x13 inch baking dish with butter or cooking spray. This step keeps the cake from sticking. In a large mixing bowl, combine the granulated sugar, brown sugar, and vegetable oil. Mix until everything is well combined. This creates a sweet base for your cake. Now, add the eggs one at a time. Mix well after each egg. This makes the batter fluffy. Then, stir in the vanilla extract. The vanilla adds a nice flavor. Gently fold in the diced apples into the mixture. This gives the cake its fruity flavor. Make sure the apples are evenly distributed. In another bowl, whisk together the flour, baking powder, baking soda, ground cinnamon, and salt. This blends the dry ingredients. Gradually add the dry ingredients to the apple mixture. Stir until just combined. Be careful not to overmix; a few lumps are okay. If you want to add nuts, fold them into the batter now. Pour the batter into the greased baking dish. Spread it evenly across the dish. Bake in the preheated oven for 35-40 minutes. Check doneness with a toothpick. If it comes out clean, the cake is done. Once baked, let the cake cool in the pan on a wire rack. If you like, dust the cooled cake with powdered sugar before serving. Enjoy your delicious One Bowl Apple Cake! For the full recipe, refer to the earlier section. To get the best texture in your cake, you must avoid overmixing. Overmixing makes the cake tough. Mix just until you see no flour lumps. A few lumps are okay and will help keep it soft. Bake your cake for 35 to 40 minutes. Check it with a toothpick. If it comes out clean, the cake is done. If it has batter on it, give it a few more minutes. For a lovely presentation, cut the cake into squares. Use a decorative plate to make it shine. A sprinkle of cinnamon on top looks great. You can also add thin apple slices for fun color. Pair your cake with a scoop of vanilla ice cream. The cold ice cream goes well with the warm cake. You can even serve it with a drizzle of caramel sauce for extra sweetness. Want to spice things up? Add a teaspoon of nutmeg or ginger. These spices give your cake a warm flavor. You can also add different fruits. Try using pears or peaches instead of apples. They will add a new twist to your cake. Each fruit brings its unique taste. For the full recipe, check out the One Bowl Apple Cake section. {{image_2}} If you want a nut-free version, just replace the nuts with seeds. Sunflower seeds or pumpkin seeds work well. They add a nice crunch without any nuts. This way, everyone can enjoy the cake without worrying about allergies. You can mix them in just like you would with nuts. For a gluten-free option, use gluten-free flour alternatives. Almond flour or oat flour are great choices. You might need to adjust the liquid a bit. This change keeps the cake moist and tasty. Make sure to check that your baking powder is gluten-free too! To enhance the flavor, you can add citrus zest. Lemon or orange zest brightens the cake. It adds a fresh and zesty note that pairs well with apples. Another fun twist is adding chocolate chips. They melt into the cake and create delicious pockets of chocolate. You can mix in about a cup of chips for a sweet surprise. This One Bowl Apple Cake is fun to customize! You can try different seeds, flours, or flavors. The possibilities are endless, and it always tastes great. For the full recipe, check out the detailed instructions above. To keep your One Bowl Apple Cake fresh, you have a couple of options. - Storing in the refrigerator: If you want to keep the cake for a longer time, store it in the fridge. Wrap the cake tightly in plastic wrap or place it in an airtight container. This way, it stays moist and doesn’t absorb fridge odors. - Room temperature storage: If you plan to eat the cake within a few days, you can store it at room temperature. Just cover it with a clean kitchen towel or plastic wrap. This keeps the cake fresh and yummy. Freezing your One Bowl Apple Cake is easy and keeps it tasty. - How to freeze: First, let the cake cool completely. Once cool, wrap it tightly in plastic wrap. Then, place it in a freezer-safe bag or container. Be sure to label it with the date. - How to thaw the cake: When you’re ready to enjoy a slice, take it out and let it thaw in the fridge overnight. You can also leave it at room temp for a few hours. This keeps it nice and soft. Knowing how long your cake stays fresh helps you enjoy it at its best. - How long the cake stays fresh: If stored in the fridge, your Apple Cake can last about a week. At room temperature, it stays fresh for about three days. If frozen, it can last up to three months. Enjoy this simple and delicious treat when it’s at its best! Yes, you can use many apple types. Some apples work better for baking. I love using Granny Smith apples. They give a nice tartness. Honeycrisp apples are sweet and juicy. Fuji apples also add great flavor. For the best cake, pick apples that hold their shape when baked. You can use two tests to check. The toothpick test is the most common. Insert a toothpick in the center. If it comes out clean, the cake is done. The pancake test is another fun way. If the top bounces back when you touch it, it’s ready. Yes, you can make this cake ahead. It stores well for a few days. Keep it in an airtight container. You can also freeze it for longer storage. Just let it cool first, then wrap it tightly. When ready to serve, thaw it in the fridge overnight. This guide shared key ingredients and simple steps to make a delicious One Bowl Apple Cake. We covered the main and optional ingredients, essential tips for baking, and ways to customize your cake. You can also adapt it for allergies or personal tastes. Remember, the joy of baking lies in experimentation. So, go ahead and make this cake your own. Enjoy the wonderful smells and flavors that fill your kitchen as you create this treat!

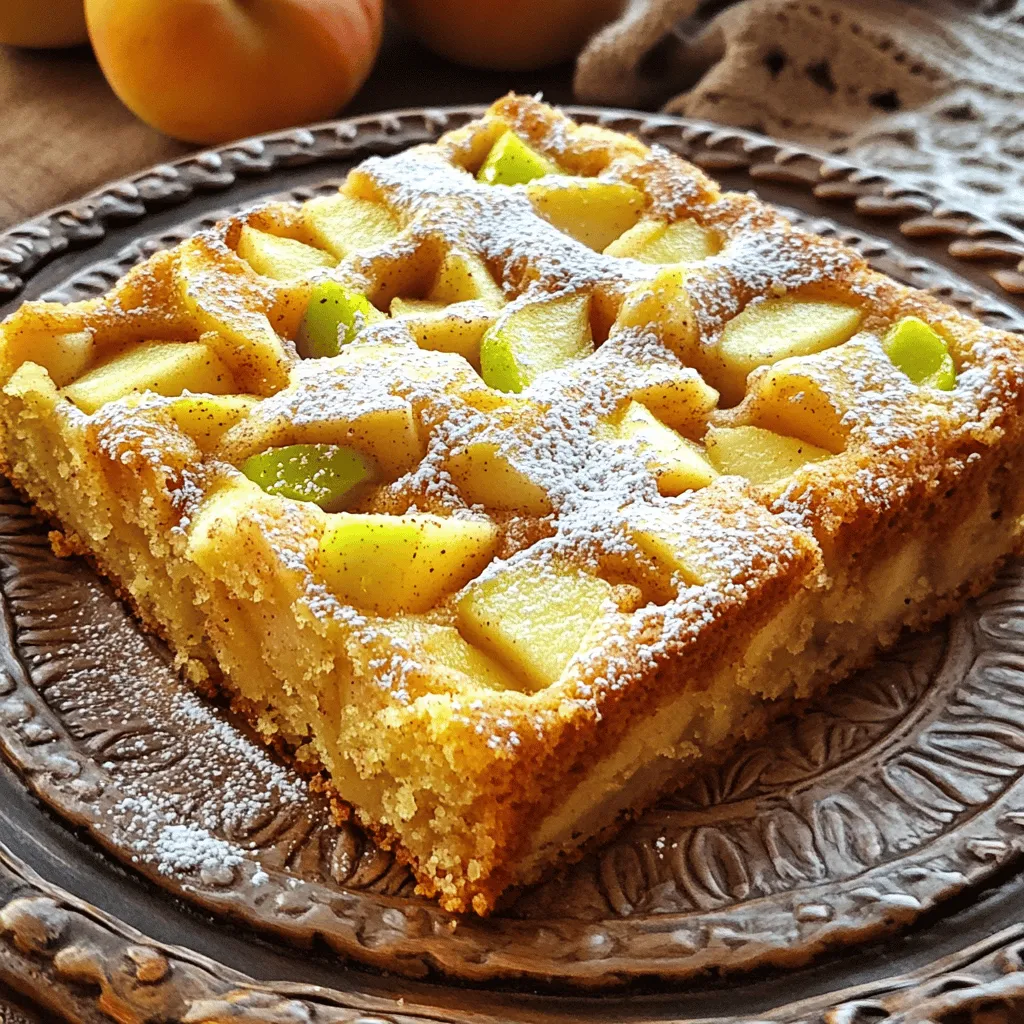
Looking for a simple and delicious dessert? You’ve found it! This One Bowl Apple Cake is easy to make and requires just a few key ingredients. You don’t need fancy …

Read more

Categories Desserts

Brown Butter Pecan Pie Bars Irresistible Dessert Treat

May 10, 2025April 28, 2025 by Chef Theo
- 1 cup unsalted butter - 1 cup all-purpose flour - 1/2 cup brown sugar - 1/4 teaspoon salt - 2 cups pecans, chopped - 1/2 cup granulated sugar - 3 large eggs - 1 teaspoon vanilla extract - 1/4 teaspoon nutmeg - 1/4 cup corn syrup - Whipped cream (for serving) The key to making these brown butter pecan pie bars is in the ingredients. Each one plays a vital role. First, the unsalted butter is what gives these bars their rich flavor. I always go for high-quality butter. It makes a big difference in taste. The flour acts as the base for the crust. It holds everything together and gives it a nice texture. Brown sugar adds depth to the sweetness. It has a hint of caramel that works well with pecans. Pecans are the star of this dessert. I love to chop them, so you get a mix of crunch and creaminess with each bite. Granulated sugar balances the flavor. It sweetens the filling just right. Eggs bring everything together. They help the filling set and create a smooth texture. Vanilla extract adds warmth and depth. Nutmeg gives it a truly festive touch. A little corn syrup adds that classic pecan pie feel. Finally, whipped cream is perfect when you serve these bars. It adds creaminess and makes each bite even better. - Chocolate chips - Sea salt for garnish - Additional spices If you want to take these bars to the next level, consider adding some chocolate chips. The mix of chocolate and pecan is heavenly. You can also sprinkle a bit of sea salt on top after baking. It enhances the sweet and nutty flavors beautifully. Feel free to explore with other spices too. Cinnamon or even a touch of cloves can add a unique twist. Don’t hesitate to make this recipe your own. To brown butter, start by melting one cup of unsalted butter in a saucepan over medium heat. Stir it often. Watch for it to bubble and foam. After about five to seven minutes, it will turn a nice golden brown. It should smell nutty. Remove it from the heat to stop cooking. This step is key for rich flavor. Temperature control is very important. If the heat is too high, the butter can burn. Keep a close eye on it. The right color and smell mean you did it right. This brown butter will add depth to your pie bars. For the crust, gather one cup of all-purpose flour, half a cup of brown sugar, and a quarter teaspoon of salt in a bowl. Once your butter has cooled a bit, pour it into the bowl. Mix it well until it forms a dough. Next, press the crust mixture evenly into a greased 9x13-inch baking dish. Make sure it covers the bottom well. This step is crucial for a nice, even base. Bake it in a preheated oven at 350°F (175°C) for about 15 minutes. It should look lightly golden when ready. Now, for the filling, mix together half a cup of granulated sugar, three large eggs, one teaspoon of vanilla extract, a quarter teaspoon of nutmeg, and a quarter cup of corn syrup in a large bowl. Whisk it all until smooth. When it’s well mixed, gently fold in two cups of chopped pecans. Be careful not to overmix. You want to keep the pecans whole for a nice texture. They will add a lovely crunch to your bars. Once the crust is baked and slightly cooled, pour the pecan filling over it. Spread the filling evenly across the crust. This ensures each bite has that sweet filling. Bake the whole dish for an additional 25 to 30 minutes. Look for the filling to be set and slightly bubbly around the edges. This shows it’s done. Let it cool in the pan for about 20 minutes before slicing. Cooling is important. Let the bars cool completely in the pan first. This helps them set up nicely. Once cool, slice into squares or bars. For serving, add a dollop of whipped cream on top. It makes each bite even better. You can enjoy them warm or at room temperature. These bars are a delicious way to end a meal. For the full recipe, check out the details above! To brown butter, heat it in a saucepan over medium heat. This process takes about 5 to 7 minutes. You will see it bubble and start to foam. Stir it often so it cooks evenly. Turn off the heat when the butter turns a golden brown color. The nutty smell is a key sign of perfectly browned butter. A sturdy crust helps keep your bars from getting soggy. Start by pressing the crust firmly into the baking dish. Bake it for 15 minutes until it’s lightly golden. This adds a nice crunch. For a firmer filling, bake it until it is set and slightly bubbly. You can add spices like cinnamon or ginger for extra flavor. A pinch of salt can also make the sweetness pop. Try mixing in different nuts too, like walnuts or almonds. They offer a unique taste and texture that pairs well with pecans. For a fun twist, add chocolate chips or sea salt on top before serving. For the full recipe, check out the Brown Butter Pecan Pie Bars. {{image_2}} You can switch up the nuts in your bars. Walnuts and almonds work well. They add their own unique taste. If you want a nut-free version, try using seeds. Sunflower seeds or pumpkin seeds can give a nice crunch. This way, everyone can enjoy the treat! Want to mix in some other flavors? You can add chocolate chips for a sweet twist. Drizzling caramel on top gives a rich flavor. Consider holiday-inspired variations too. Cinnamon or ginger can add warmth for fall or winter. These flavors can make your dessert feel special. If you need gluten-free bars, use a gluten-free flour blend. It works just as well! For vegan options, swap the eggs for flaxseed meal. Mix one tablespoon of flaxseed with three tablespoons of water. Let it sit until it thickens. You can still enjoy these bars while meeting your dietary needs. To keep your Brown Butter Pecan Pie Bars fresh, I recommend storing them in the fridge. Wrap them tightly in plastic wrap. This helps prevent drying out and keeps them tasty. You can also place them in an airtight container. This is a great option if you want to save space. - Use plastic wrap for individual bars or slices. - Choose an airtight container to stack layers safely. - Avoid storing them at room temperature to maintain freshness. You can freeze these bars for longer storage. First, let them cool completely. Then, cut them into squares. Wrap each piece in plastic wrap. You can also place them in a freezer bag. This helps keep them fresh. - To thaw, take them out of the freezer and let them sit in the fridge overnight. - For best flavor, use them within three months. If you need the full recipe, check out the Brown Butter Pecan Pie Bars 🥧 recipe section. Yes, you can make these bars ahead of time. To do this, bake the bars and let them cool completely. Then, wrap them tightly with plastic wrap or foil. Store them in the fridge for up to three days. You can also freeze them for up to three months. Just thaw them in the fridge before serving. This makes it easy for gatherings or busy days. Look for a few signs to know when these bars are done. The filling should be set and slightly bubbly. The edges will look firm, while the center may be a touch jiggly. A toothpick inserted in the center should come out clean or with a few moist crumbs. Keep an eye during the last few minutes of baking for the best results. These bars are delicious on their own, but you can pair them with some tasty sides. I recommend serving them with a dollop of whipped cream. A scoop of vanilla ice cream also works wonders. For a fun twist, drizzle warm caramel sauce over the top. These pairings add extra texture and flavor that will impress your guests. Pecan pie bars and traditional pecan pie differ mainly in their texture and cooking methods. Bars have a firmer base, thanks to the crust. They are cut into squares, making them easy to serve. Traditional pecan pie has a softer, gooey filling and is baked in a pie crust. Both are yummy, but bars are a great option for easy serving and sharing. For the full recipe, check out Brown Butter Pecan Pie Bars. This blog shared a simple way to make delicious Brown Butter Pecan Pie Bars. You learned about the key ingredients, like brown sugar and pecans, and how to prepare them. I explained how to brown butter and create a sturdy crust. I also gave tips to avoid soggy bars and ways to enhance flavors. Try these bars with whipped cream, or customize them to your taste. Enjoy baking these sweet treats!

If you love desserts that blend rich flavors and crunchy textures, you’re in for a treat! Brown butter pecan pie bars are a delicious twist on a classic favorite. With …

Read more

Categories Desserts

Savory Baked Shrimp in Garlic Butter Sauce Recipe

May 10, 2025April 28, 2025 by Chef Theo
- 1 lb large shrimp, peeled and deveined - 6 tablespoons unsalted butter, melted - 5 cloves garlic, minced - 1 tablespoon lemon juice - 1 teaspoon paprika - 1 teaspoon dried parsley - Salt and pepper to taste - 1/4 teaspoon red pepper flakes (optional) These ingredients make the perfect mix for baked shrimp. The shrimp give us a great base. The garlic and butter enhance the flavor. Lemon juice adds a nice tang. Paprika and parsley bring color and depth. Salt and pepper are key to taste, and red pepper flakes can add a kick if you like heat. - Lemon wedges for serving - Additional fresh parsley for garnish Garnishes are the final touch. Lemon wedges brighten the dish. Fresh parsley adds a pop of color. These simple additions make your meal look great and taste even better. For the full recipe, check out [Full Recipe]. - Preheat the oven to 400°F (200°C). - In a mixing bowl, combine melted butter, minced garlic, lemon juice, paprika, dried parsley, salt, pepper, and red pepper flakes if you want some heat. Mixing these ingredients creates a rich garlic butter sauce. This sauce is the key to flavor. Use fresh garlic for the best taste. Don't skip the lemon juice; it brightens the dish. - Pour the garlic butter mixture over the shrimp and mix well. - Arrange the shrimp in a single layer on the baking dish and bake. Make sure the shrimp are well coated in the sauce. This helps to get that flavor into every bite. Place them in a single layer for even cooking. Bake for 8-10 minutes. The shrimp will turn pink and opaque. To serve the baked shrimp, take them hot from the oven. Garnish with lemon wedges and fresh parsley. This adds color and freshness to the dish. Pair the shrimp with crusty bread. It’s perfect for soaking up any leftover garlic butter sauce. You can also serve it with a fresh salad or steamed veggies. These sides balance the rich flavor of the shrimp. Enjoy this dish with family and friends! For the full recipe, check out the detailed instructions above. For baked shrimp, I recommend a cooking time of 8 to 10 minutes. Shrimp cook fast, so watch them closely. They should turn pink and opaque when done. Overcooking can make shrimp rubbery. To avoid this, check them a minute or two early. If they curl tightly, they are likely overcooked. Adjusting the seasoning can really boost the flavor. If you like more heat, add extra red pepper flakes or a dash of hot sauce. You can also try adding fresh herbs like thyme or cilantro. For a zesty kick, squeeze more lemon juice before serving. This will brighten up the garlic butter sauce. To make your baked shrimp look great, serve them hot from the dish. Garnish with lemon wedges and fresh parsley for a pop of color. You can also sprinkle a little paprika on top for flair. Pair the shrimp with crusty bread. This helps soak up the tasty garlic butter sauce. Each bite will be a delight for your guests. {{image_2}} You can easily swap ingredients to fit your taste. If you don't have shrimp, try using scallops or even firm fish like cod. For butter, use olive oil for a lighter option. Coconut oil also works if you want a hint of sweetness. If you need a garlic substitute, shallots can add a mild flavor. Baking shrimp gives it a soft texture and rich flavor. The garlic butter seeps into the shrimp as it cooks. Grilling can add a smoky taste. It also gives shrimp a nice char. Both methods are great, but baking keeps the shrimp juicy. Grill if you want a fun outdoor meal. Spice up your dish with herbs from around the world. Add fresh basil or oregano for an Italian flair. Use cilantro and lime for a Mexican twist. You can even try a dash of curry powder for an Indian vibe. These changes can make your baked shrimp a new adventure each time! To store leftover baked shrimp, let them cool first. Then, place them in an airtight container. You can keep the shrimp in the fridge for up to three days. Make sure to cover them well to prevent drying out. If you plan to eat them later, it is best to add some extra garlic butter to keep them moist. Yes, you can freeze baked shrimp! To do this, let them cool completely. Then, wrap each shrimp in plastic wrap or foil. Place them in a freezer-safe bag or container. They can stay frozen for up to three months. When you are ready to eat, thaw them in the fridge overnight. To reheat, bake them at 350°F (175°C) for about 10 minutes. This keeps them juicy and tasty. Cooked shrimp can be safely stored in the fridge for three days. If frozen, they can last for up to three months. After that, the quality may drop. Always check for any off smells or changes in color before eating leftovers. Enjoy your baked shrimp knowing they are safe and delicious! Yes, you can use frozen shrimp. Just remember to thaw them first. Place the shrimp in a bowl of cold water for about 15-20 minutes. This will help them thaw quickly. Frozen shrimp can work well, but fresh shrimp often taste better. Fresh shrimp usually have a firmer texture and richer flavor. If you use frozen shrimp, ensure they are peeled and deveined to save time. Shrimp cook quickly, so watch them closely. They turn pink and opaque when cooked. If you see them curl into a "C" shape, they are done. Overcooking shrimp makes them tough and rubbery. I recommend setting a timer for 8 minutes. Check them, and if they need more time, add one more minute. Your shrimp should be juicy and tender for the best flavor. Yes, you can make this recipe dairy-free. Use olive oil or coconut oil instead of butter. Both options add nice flavors. For a creamy taste, try adding a dairy-free butter substitute. Adjust the amount of lemon juice to balance the flavors. This way, you can still enjoy delicious garlic shrimp without dairy. Baked shrimp in garlic butter sauce is easy and tasty. We reviewed key ingredients and steps, plus cooking tips for great flavor. Remember to not overbake to keep shrimp tender. For extra zest, try different spices or herbs from other cuisines. You can store leftovers or even freeze shrimp for later. This dish will impress friends and family. Enjoy your delicious creation, and happy cooking!

Looking for a quick and tasty dish? My Savory Baked Shrimp in Garlic Butter Sauce is perfect for you! This easy recipe combines fresh shrimp with creamy garlic butter, creating …

Read more

Categories Appetizers

Alfrido Pasta Delightful Creamy Recipe Unveiled

May 10, 2025April 27, 2025 by Chef Theo
To make Alfrido Pasta, you need a few key ingredients. Here’s what you will need: - Fettuccine pasta: Use 300g of fettuccine. If you can’t find fettuccine, you can use linguine or spaghetti. These shapes hold the sauce well. - Cream and cheese selection: Grab 1 cup of heavy cream and 1 cup of grated Parmesan cheese. This combo gives the sauce a rich, creamy texture. You can swap Parmesan with Pecorino Romano for a sharper taste. - Seasoning variations and optional add-ins: You’ll need 3 tablespoons of unsalted butter, 1 clove of minced garlic, and 1 teaspoon each of dried oregano and garlic powder. For a little heat, add 1/2 teaspoon of crushed red pepper flakes. Adjust salt and pepper to your taste. Don't forget fresh parsley for garnish and zest from 1 lemon for a fresh twist! This recipe is all about balance. The cream and cheese provide a smooth base, while the garlic and herbs add depth. You can get creative with your seasonings too! Cooking Alfrido Pasta is fun and easy. Let's break it down step by step. Start by boiling a big pot of salted water. This helps the pasta taste better. Add 300g of fettuccine and cook it until it’s al dente. This means it should still have a little bite. It usually takes about 8-10 minutes. Drain the pasta but save about 1 cup of the pasta water. This water is starchy and helpful later. In a large skillet, melt 3 tablespoons of unsalted butter over medium heat. Add 1 clove of minced garlic and cook for about 1 minute. This step makes your kitchen smell amazing! Next, pour in 1 cup of heavy cream. Let it simmer for 2-3 minutes while stirring. Then, slowly add 1 cup of grated Parmesan cheese. Stir constantly until it melts and becomes smooth. Mix in 1 teaspoon of dried oregano, 1 teaspoon of garlic powder, and 1/2 teaspoon of crushed red pepper flakes if you like a bit of heat. Season with salt and pepper to taste. Now it’s time to bring everything together! Add the drained fettuccine to the skillet. Toss it gently to coat the pasta with the creamy sauce. If the sauce seems too thick, add a splash of the reserved pasta water until it reaches your desired consistency. Finally, stir in the zest of 1 lemon for a bright, fresh flavor. Garnish with chopped parsley before serving. For the full recipe, check the details above! Enjoy your creamy Alfrido Pasta! To cook perfect al dente pasta, follow these tips: - Use a large pot of salted water. It should taste like the sea. - Add the fettuccine and stir often to avoid sticking. - Check the pasta a minute early. It should have a slight bite. For the sauce, maintain the right consistency: - Start with medium heat. This helps to melt the butter and garlic. - Add the heavy cream and let it simmer gently. Do not boil it. - Gradually mix in Parmesan while stirring. This ensures a smooth sauce. Adjust the seasoning to enhance the flavor: - Taste the sauce before serving. This is key. - Add salt, pepper, or red pepper flakes for a kick. - A touch of lemon zest brightens the dish. Don’t skip this step! These tips will help you create a delightful Alfrido Pasta. For the complete guide, check the Full Recipe. Enjoy your cooking! {{image_2}} You can make Alfrido Pasta your own with some easy changes. - Suggested protein additions: Add chicken or shrimp for a heartier meal. Grilled chicken works great. Shrimp adds a nice touch of sweetness. Both options boost protein and flavor. - Vegetarian and vegan modifications: For a vegetarian dish, skip the meat and add more veggies. You can use mushrooms, spinach, or bell peppers. If you're vegan, swap heavy cream with coconut cream and use nutritional yeast for cheese flavor. - Adding seasonal vegetables for extra nutrition: Seasonal veggies enhance taste and health. In spring, try asparagus or peas. In fall, add butternut squash or kale. It’s a tasty way to use fresh produce. These simple tweaks let you enjoy Alfrido Pasta in many ways. You can find the Full Recipe to get started! To keep leftover Alfrido pasta fresh, store it in an airtight container. This helps prevent moisture loss and keeps the pasta creamy. Make sure to let the pasta cool down before sealing the container. When it's time to reheat, use a low heat setting on your stove. Add a splash of cream or reserved pasta water to keep the sauce smooth. Stir gently to avoid burning. Microwaving is quick, but cover the dish to trap steam. This keeps the pasta moist. If you want to store it for a longer time, you can freeze Alfrido pasta. Place it in a freezer-safe bag or container, squeezing out air to prevent freezer burn. It can last for up to three months in the freezer. When ready to eat, thaw it in the fridge overnight before reheating. This method helps retain the pasta's creamy texture. Alfrido Pasta is a rich, creamy dish made with fettuccine. It features a smooth sauce of heavy cream and Parmesan cheese. This dish is perfect for those who love comfort food. To make Alfrido Pasta from scratch, gather your ingredients. You will need fettuccine, heavy cream, and Parmesan cheese. Cook the fettuccine, then make the creamy sauce in a skillet. Combine everything for a delightful meal. For the full recipe, check the earlier section. You can buy Alfrido Pasta ingredients at grocery stores. Look for fettuccine in the pasta aisle. Heavy cream and Parmesan cheese are usually in the dairy section. Specialty stores may offer unique pasta brands too. Great side dishes for Alfrido Pasta include garlic bread and a fresh salad. Roasted vegetables also pair well. You can add steamed broccoli or green beans for a healthy touch. Yes, you can make Alfrido Pasta gluten-free. Use gluten-free fettuccine as a substitute. Check labels to ensure the cream and cheese are gluten-free too. Enjoy this dish without worries! In this blog post, we explored how to make the perfect Alfrido pasta. We discussed key ingredients, cooking steps, and helpful tips to create a creamy dish. I shared ways to customize your recipe with proteins, veggies, or dietary needs. Plus, we covered how to store leftovers for freshness. With these insights, you can now make a delicious Alfrido pasta at home. Enjoy your cooking journey!

Are you ready to elevate your pasta game with a creamy explosion of flavor? In this post, I’ll reveal my delightful Alfrido Pasta recipe. You’ll learn how to create a …

Read more

Categories Dinner

Buffalo Chicken Tortilla Roll Ups Flavorful Party Snack

May 10, 2025April 27, 2025 by Chef Theo
- 2 cups cooked chicken, shredded - ½ cup buffalo sauce - 1 cup cream cheese, softened - 1 cup shredded cheddar cheese - ½ cup green onions, finely chopped - 4 large tortillas (flour or whole wheat) - 1 cup lettuce, shredded - Ranch or blue cheese dressing for dipping (optional) - Alternative chicken options (e.g., rotisserie chicken, canned chicken) - Different cheese varieties (e.g., pepper jack, gouda) - Additional vegetables (e.g., bell peppers, cucumbers) The main ingredients are simple yet flavorful. I love using cooked chicken to bring a hearty touch. Shredding it ensures the flavors blend well. The buffalo sauce adds a nice kick. You can adjust the amount to suit your taste. Cream cheese makes the roll-ups creamy. It pairs perfectly with the cheddar cheese. I often mix in green onions for added crunch and a fresh taste. The tortillas hold everything together. You can choose flour or whole wheat based on your preference. If you want to customize, consider using rotisserie chicken. It saves time and adds depth. Experimenting with different cheeses can change the flavor. Pepper jack gives a great zing. You can add colorful veggies for extra crunch and nutrition. This recipe is flexible. Use what you have at home. The Full Recipe is a guide, but your creativity makes it special! - Combine shredded chicken with buffalo sauce. - Mix cream cheese with cheddar cheese and green onions. First, take your cooked chicken and shred it into small bits. In a large bowl, mix the chicken with the buffalo sauce. Make sure the chicken is well coated. This step gives the roll-ups their spicy and tangy flavor. Next, in another bowl, blend the softened cream cheese. Add half of the shredded cheddar cheese and the green onions. Mix until it is smooth and creamy. This creamy mixture helps balance the heat from the buffalo sauce. - Spread cream cheese mixture on tortillas. - Add buffalo chicken mixture and toppings. Now, lay one tortilla flat on your work surface. With a spatula or knife, spread a generous layer of the cream cheese mixture over the entire tortilla. This layer adds a rich taste. Then, take a quarter of the buffalo chicken mixture and evenly distribute it over the cream cheese layer. Add a handful of the shredded lettuce and sprinkle the remaining cheddar cheese on top. The lettuce adds crunch and freshness. - Roll tortillas tightly and chill. - Slice into bite-sized pieces for serving. Starting from one edge, roll the tortilla tightly. Keep the filling inside as you roll. After rolling all the tortillas, place them seam-side down on a cutting board. Chill the roll-ups in the fridge for 30 minutes. This step helps them hold their shape. Once chilled, slice each roll-up into bite-sized rounds. Arrange them on a serving platter. These bite-sized pieces are perfect for grabbing at parties. Serve with ranch or blue cheese dressing on the side for dipping. Enjoy your flavorful party snack! For the full recipe, check out the detailed instructions above. To roll tortillas without tearing, choose soft, fresh tortillas. Warm them slightly in the microwave for 10-15 seconds. This helps make them flexible. Spread the filling evenly, leaving a small border. This prevents spilling when you roll. For even filling distribution, start at one edge. Place the filling in a line. Make sure to spread it close to the edge. As you roll, tuck in the sides. This keeps the filling secure and neat. The best dips to serve with Buffalo Chicken Tortilla Roll Ups are ranch dressing and blue cheese. They cool the spicy flavor and add creaminess. You can also try salsa for a fresh twist. These roll-ups work well for many occasions. Serve them at parties, game days, or family gatherings. They are also great for casual get-togethers with friends. For creative ways to display roll-ups, use a large platter. Arrange the roll-ups in a circle or line for an appealing look. You can cut them into bite-sized pieces for easy grabbing. Garnish the platter with parsley or green onions. These add a pop of color and freshness. You can also sprinkle some extra cheese on top for a fun touch. For the full recipe, check out the earlier section. {{image_2}} You can spice up your Buffalo chicken tortilla roll-ups in fun ways. Jalapeños add heat and crunch. Just chop them finely and add them to your filling. If you love heat, drizzle in some extra hot sauce before rolling. For a different taste, swap buffalo sauce for BBQ sauce or teriyaki sauce. These sauces bring a sweet twist to the spicy flavor. This keeps the dish interesting for every party! If you need gluten-free options, try using corn tortillas. They work well and are just as tasty. For those watching carbs, low-carb tortillas are a great choice too. If you want a vegan version, replace chicken with shredded jackfruit or tofu. Use vegan cream cheese and a plant-based dressing for dipping. This way, everyone can enjoy these roll-ups! Making these roll-ups ahead saves time. You can prepare them a day in advance. Simply roll them up, wrap in plastic, and store in the fridge. For longer storage, freeze them after rolling but before slicing. When ready to eat, let them thaw in the fridge overnight. Then slice and serve. This makes hosting easy, and your guests will love these tasty snacks! Check out the Full Recipe for all the details. To keep your leftover roll-ups fresh, wrap them tightly in plastic wrap or foil. This helps prevent air from getting in. Place them in an airtight container for extra protection. They can stay fresh in the fridge for about 3 days. After that, the ingredients might not taste as good. To freeze your roll-ups, slice them first for easy use later. Place the slices in a single layer on a baking sheet. Freeze them until solid, then transfer them to a freezer bag. This keeps them from sticking together. They can last in the freezer for up to 2 months. To defrost, move the roll-ups to the fridge a few hours before use. For reheating, pop them in the microwave for 30 seconds or until warm. Enjoy them just like fresh! For the full recipe, check back to the main article. Serve these roll-ups cold or at room temperature. Garnish with parsley for color. You can place small bowls of ranch or blue cheese dressing on the side for dipping. Pair them with crunchy veggies like carrots and celery. This adds a fresh touch and balances the flavors. Yes, you can prepare these roll-ups a day ahead. After rolling, wrap them in plastic wrap. Store them in the fridge. They will stay fresh and tasty for up to two days. This makes them perfect for events or gatherings. To lower the spice, use less buffalo sauce. You can also mix in some cream cheese to tone it down. For more heat, add extra buffalo sauce or toss in some chopped jalapeños. Adjust to fit your taste and the crowd you serve. Absolutely! These roll-ups are easy to hold and eat. They pack bold flavors, making them a hit at parties. Their bite-sized shape allows guests to enjoy them without fuss. They also look great on a platter, adding to the fun of any gathering. For the full recipe, check out the details provided above. Buffalo Chicken Tortilla Roll-Ups are simple and fun to make. You combine shredded chicken, buffalo sauce, cream cheese, and your choice of cheese in a tortilla. Feel free to add veggies or different sauces for a twist. Remember to roll tightly for the best results. These roll-ups are perfect for parties or quick meals. Customize them to your taste and enjoy their delicious flavors. You can even prepare them ahead of time for convenience. Get ready to impress with this tasty treat!

Get ready to impress your guests with Buffalo Chicken Tortilla Roll Ups! These tasty bites combine tender chicken, creamy cheese, and zesty buffalo flavor. Perfect for parties, game days, or …

Read more

Categories Appetizers

Caramel Apple Pies Irresistible and Flavorful Dessert

May 10, 2025April 27, 2025 by Chef Theo
- Fresh apples: Use Granny Smith or Honeycrisp. They balance sweet and tart well. Look for firm apples without bruises for the best taste. - Sweeteners and dairy: Granulated sugar helps to make a rich caramel. Heavy cream adds smoothness and richness to the sauce. - Pie crust options: You can use store-bought crusts for ease or make your own for freshness. Both options work great, but homemade adds a special touch. Using these ingredients will lead to a delicious Caramel Apple Pie. For the complete process, check out the Full Recipe. Start by peeling your apples. I like using Granny Smith or Honeycrisp for their tartness. After peeling, use a corer to remove the core. Slice the apples into thin pieces. A sharp knife works best for even slices. Once sliced, place them in a bowl. Drizzle lemon juice over the apples and sprinkle cinnamon. Toss gently to coat every slice. This keeps the apples fresh and adds flavor. To make the caramel, melt butter in a saucepan over medium heat. Add granulated sugar and stir constantly. Keep an eye on the color; you want it to look like light amber. This takes about five to seven minutes. Once you see the right color, whisk in heavy cream. Be careful, as it will bubble up. Mix until smooth, then stir in vanilla extract. Let the sauce cool a bit before pouring it over the apples. Roll out half of your pie crust. Place it in your pie dish. Make sure it fits snugly. Spoon the caramel apple mixture into the crust. Spread it out evenly. Roll out the second half of the crust to cover the top. You can cut slits for a lattice design or simply lay it flat. Crimp the edges with a fork to seal it well. This prevents the filling from leaking. Now, you’re ready to bake! Follow the Full Recipe for detailed baking instructions. Overcooking caramel: How to tell when it’s done When you cook caramel, watch it closely. The color should change to a light amber. If it turns dark, it may burn. Use a candy thermometer for precision. The target temperature is around 350°F (175°C). This helps you get the perfect texture. Preventing a soggy bottom crust A soggy crust ruins your pie. To avoid this, pre-bake the crust for about 10 minutes. This gives it a head start. You can also sprinkle some flour on the bottom before adding the filling. It acts as a barrier against moisture. Ideal accompaniments: Whipped cream and sea salt Whipped cream adds creaminess. A sprinkle of sea salt enhances the flavors. Together, they create a perfect balance. Try to serve the pie warm. The caramel will be gooey and delicious. Best temperature: Serving warm vs. cooling down Warm pie tastes best. The caramel is soft and drippy. If you cool it down, the caramel firms up. Some like it chilled, but I prefer it warm. Alternative toppings for a unique twist Try adding nuts, like walnuts or pecans, for crunch. Caramel drizzle is also a tasty option. You can even experiment with chocolate shavings. Each topping adds a new flavor layer. Pairing beverages: Best drinks to serve with caramel apple pie Serve with hot cider or coffee for a cozy feel. Cold vanilla ice cream is a delightful contrast. These drinks elevate the dessert experience. Enjoy experimenting with pairings! For the full recipe, check out the detailed steps above. {{image_2}} The type of apple you choose changes the flavor and texture of your pie. Tart apples like Granny Smith give a nice balance to the sweet caramel. Honeycrisp apples add a crisp bite and sweetness. Try using a mix of apples for more depth. A blend brings together different tastes and textures. This mix creates a pie that dances with flavor. You can easily enhance your caramel apple pie with a few extra ingredients. Adding nuts like walnuts or pecans adds crunch and richness. They also introduce a nutty flavor that pairs well with sweet apples. Spice can also elevate your pie. A pinch of nutmeg or ginger gives warmth and depth. These spices add layers of flavor that make each bite exciting. If you have diet needs, there are great options for you. You can make a gluten-free crust using almond flour or oat flour. These options can taste just as good as regular crusts. For a vegan twist, try using coconut cream for the caramel. You can also use maple syrup instead of sugar for a natural sweetness. Both options keep your pie delicious while fitting your diet. To keep your caramel apple pie fresh, refrigerate it. Wrap it in plastic wrap or foil. This helps keep the pie moist. You can also place it in an airtight container. If you want to freeze it, slice the pie first. Wrap each slice tightly in plastic wrap. Then, place them in a freezer bag. This method saves space and makes it easy to enjoy later. Your caramel apple pie can last up to 4 days in the fridge. If frozen, it stays good for about 2 to 3 months. Just remember to label the bag with the date. To reheat your caramel apple pie, use the oven. Preheat it to 350°F (175°C). Place the pie on a baking sheet. Cover the top with foil to keep it from browning too much. Heat for about 15 to 20 minutes. This helps maintain the pie's texture and taste. If you’re short on time, use a microwave. Heat a slice for about 30 seconds. Keep an eye on it to avoid overheating. You can add a small dollop of whipped cream on top. This gives a fresh-baked aroma and taste! For caramel apple pie, I love using Granny Smith or Honeycrisp apples. - Granny Smith: These are tart and firm. They hold their shape well when baked. - Honeycrisp: These are sweet and juicy. They add a nice balance to the tartness. Mixing both types gives a great flavor and texture. You get sweetness and tartness in each bite. Yes, you can swap out granulated sugar. Here are some good options: - Brown sugar: It adds a deeper flavor and moisture. - Maple syrup: This brings a unique taste and is a natural sweetener. - Honey: It also works well but may change the flavor a bit. Just remember that each sweetener has a different level of sweetness. Adjust to your taste! When using a convection oven, your pie cooks faster. - Convection oven: Lower the temperature by 25°F. Check for doneness at 20 minutes. - Traditional oven: Follow the standard temperature and time in the recipe. Always watch your pie closely. You want a golden crust and bubbling filling. You can find pre-made caramel apple pies at local bakeries and grocery stores. - Local bakeries: Many offer fresh pies made with seasonal apples. - Grocery stores: Check the frozen section for brands like Marie Callender's or Sara Lee. These brands often get good reviews for their flavor and crust. If you’re in a hurry, they can save you time! Making a caramel apple pie is a rewarding journey. We explored the best apples, how to make smooth caramel, and vital pie assembly tips. Avoiding common mistakes, like overcooking caramel, is key. Remember to serve warm for the best taste experience. Feel free to experiment with different apple types and toppings to customize your pie. With these tips and tricks, you can create a delicious dessert that everyone will love. Enjoy your baking adventure!

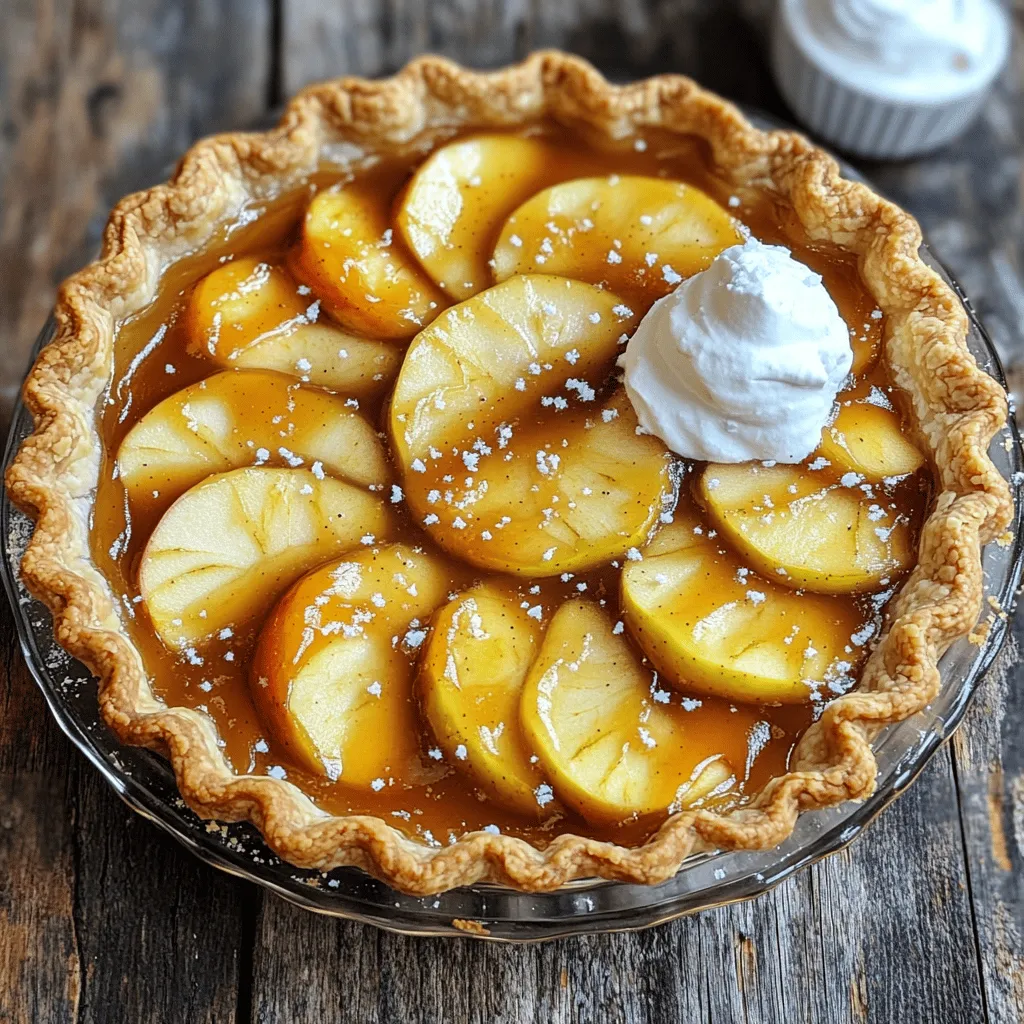
Looking for a sweet treat that’s both comforting and delicious? Caramel apple pie offers the perfect blend of flavors and textures. In this guide, I’ll share my favorite ingredients, easy …
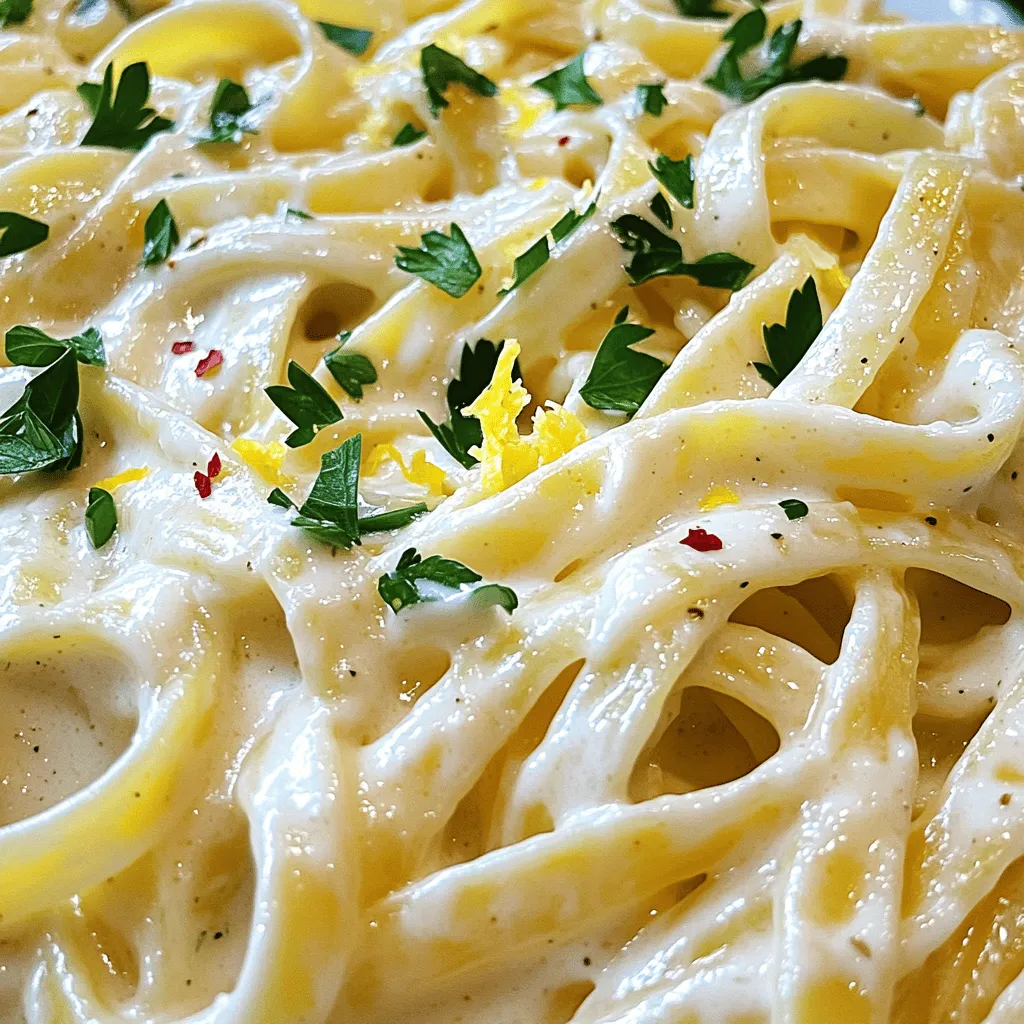
Read more

Categories Desserts

Creamy Mozzarella Shrimp Pasta Flavorful Dinner Recipe

May 10, 2025April 27, 2025 by Chef Theo
To make this creamy mozzarella shrimp pasta, you need: - 8 oz fettuccine or spaghetti - 1 lb large shrimp, peeled and deveined - 2 tablespoons olive oil - 3 cloves garlic, minced - 1 teaspoon red pepper flakes (adjust for spice preference) - 1 cup heavy cream - 1 cup shredded mozzarella cheese - 1/2 cup grated Parmesan cheese - Salt and pepper to taste - Fresh basil leaves for garnish - Zest of 1 lemon - Juice of 1 lemon The large shrimp are the star of this dish. They add a sweet, tender bite. Use fresh shrimp for the best flavor, but frozen works too. Just thaw it well first. The heavy cream creates that rich, creamy base. It blends perfectly with the mozzarella and Parmesan. Mozzarella gives a nice stretch and melts so well. The garlic adds depth, while the red pepper flakes bring heat. The lemon zest and juice brighten the dish. Fresh basil ties everything together with a refreshing touch. If you can’t find large shrimp, try medium ones. They work just as well. For a lighter sauce, swap heavy cream with half-and-half. You can use any pasta shape you like, but fettuccine or spaghetti are best. If you want a dairy-free option, use coconut cream and nutritional yeast. For a different flavor, add sun-dried tomatoes or spinach. This recipe is flexible, so feel free to get creative! You can find the full recipe at [Full Recipe]. To start, you need to cook the pasta. Use a large pot and fill it with water. Add a good amount of salt to the water for flavor. Bring it to a boil. Once boiling, add 8 oz of fettuccine or spaghetti. Stir often. Cook according to the package instructions until it is al dente. This usually takes about 8 to 10 minutes. When done, drain the pasta and save about 1 cup of the pasta water. Set the pasta aside for later. Next, we will sauté the shrimp. Grab a large skillet and heat 2 tablespoons of olive oil over medium heat. Once the oil is hot, add 3 cloves of minced garlic and 1 teaspoon of red pepper flakes. Sauté these for about 1 minute. You want the garlic to smell great but not burn. Now, add 1 pound of large shrimp that you have peeled and deveined. Season the shrimp with salt and pepper. Cook each side for about 2 to 3 minutes. The shrimp should turn pink and opaque. Remove the shrimp from the skillet and set them aside. Now, let’s make the cream sauce. In the same skillet, pour in 1 cup of heavy cream. Turn the heat to a gentle simmer. Stir the cream well. Then, add 1 cup of shredded mozzarella cheese and 1/2 cup of grated Parmesan cheese. Mix until both cheeses melt and the sauce is creamy. If your sauce looks too thick, add a bit of the reserved pasta water. This will help reach your desired consistency. It’s time to combine everything. Return the sautéed shrimp to the skillet. Now, add the cooked pasta, the zest of 1 lemon, and the juice of 1 lemon. Toss everything together. Make sure all the pasta and shrimp are coated in the creamy sauce. Heat it through for a couple of minutes. Taste and adjust the seasoning with salt and pepper if needed. For serving, grab some wide, shallow bowls. Plate the creamy pasta in each bowl. For a nice touch, garnish with fresh basil leaves. You can also sprinkle more Parmesan cheese on top if you wish. This dish looks beautiful and tastes even better. Enjoy your meal! For the complete recipe, check the [Full Recipe]. To get that perfect creamy texture, you want to heat your cream gently. If you boil it too fast, it can separate. When you stir in the mozzarella, make sure it melts completely. If the sauce is too thick, add a splash of reserved pasta water. This helps to loosen it up without losing flavor. Always remember to mix well to keep everything smooth and creamy. Adding lemon zest brightens the dish. It gives a fresh taste that balances the richness. You can also play with herbs. Fresh basil adds a nice touch. If you like a kick, try more red pepper flakes. Taste as you go to find the perfect mix of flavors. A little salt and pepper can make a big difference, too. Keep an eye on the shrimp while cooking. They only need a few minutes on each side. Overcooking makes them tough. The pasta should be al dente, so check it a minute early. If you want to save time, cook the pasta while you sauté the shrimp. This way, everything is ready at the same time. For the full recipe, refer to the earlier section. {{image_2}} You can easily make a vegetarian version of this creamy pasta. Replace the shrimp with fresh vegetables. Zucchini, bell peppers, and spinach work well. You can sauté the veggies just like you would the shrimp. This swaps meat for delicious greens while keeping the dish creamy and rich. While fettuccine and spaghetti are popular, you can use any pasta you like. Penne, farfalle, or even gluten-free pasta will work. Each type of pasta brings its own shape and texture. Choose what you enjoy most or what you have on hand. The cooking time may vary, so check the package for instructions. Want to add more flavor? Try infusing the cream sauce with herbs or spices. Fresh thyme, oregano, or rosemary can add depth. You can also use sun-dried tomatoes or artichokes for a tangy twist. For a zesty finish, a splash of white wine can elevate the sauce. Don't be afraid to experiment to find your favorite mix. For the full recipe, see the details above. Store your creamy mozzarella shrimp pasta in an airtight container. This keeps it fresh. You can refrigerate it for up to three days. When you’re ready to eat it, make sure to check for any off smells or changes in texture. To freeze the pasta, let it cool completely first. Then, place it in freezer-safe bags. Be sure to remove as much air as possible before sealing. You can freeze it for up to two months. Thaw it overnight in the fridge before reheating. To reheat, use a skillet over low heat. Add a splash of water or cream to help loosen the sauce. Stir often to avoid burning. You can also use the microwave. Heat in short bursts, stirring in between. This ensures even heating without drying it out. For best results, serve it fresh when possible. For the full recipe, check out the main article. To make Creamy Mozzarella Shrimp Pasta, follow these steps: 1. Cook 8 oz of fettuccine or spaghetti in salted boiling water until al dente. 2. In a skillet, heat 2 tablespoons of olive oil. Add 3 minced garlic cloves and 1 teaspoon of red pepper flakes, cooking for 1 minute. 3. Add 1 lb of peeled and deveined shrimp. Season with salt and pepper. Cook for 2-3 minutes on each side until shrimp are pink. 4. Remove shrimp and set aside. In the same skillet, pour in 1 cup of heavy cream. Bring it to a gentle simmer. 5. Stir in 1 cup of shredded mozzarella and 1/2 cup of grated Parmesan cheese until melted. 6. Return the shrimp to the skillet, then add the cooked pasta, lemon zest, and lemon juice. Toss everything together. 7. Serve in bowls with fresh basil for garnish. For the full recipe, click here. Yes, you can use frozen shrimp! Just make sure to thaw them first. Place them in cold water for about 15 minutes. Drain well before cooking. This way, you avoid extra water in your dish. If you need a substitute for heavy cream, try using whole milk mixed with butter. Combine 3/4 cup of milk with 1/4 cup of melted butter. This mix gives a similar richness to your pasta. To keep shrimp tender, do not overcook them. Cook for just 2-3 minutes per side until they turn pink. Also, remove them from heat as soon as they’re done. This prevents them from cooking more in the hot pan. Yes, you can make this dish ahead of time! Cook the pasta and shrimp, then mix them with the sauce. Store in the fridge for up to 2 days. When ready to eat, just reheat gently and enjoy! In this blog, I shared how to make creamy mozzarella shrimp pasta. You learned about the key ingredients, cooking steps, and helpful tips to perfect the dish. I also covered variations and storage info to suit your needs. Remember, using fresh ingredients and cooking the shrimp right improves taste and texture. Enjoy experimenting with different flavors and pasta types. This pasta dish is flexible and always a crowd-pleaser. Happy cooking!

If you’re looking for a quick and tasty dinner, you’ve found it! My Creamy Mozzarella Shrimp Pasta is simple to make and packed with flavor. You’ll learn how to perfectly …

Read more

Categories Dinner

Tuscan White Bean Soup Delicious and Nutritious Meal

May 10, 2025April 27, 2025 by Chef Theo
To make this tasty soup, you need some key ingredients. Here’s the list: - 2 cups canned cannellini beans, rinsed and drained - 1 medium onion, chopped - 2 cloves garlic, minced - 2 medium carrots, diced - 2 celery stalks, diced - 4 cups vegetable broth - 2 cups diced tomatoes (canned or fresh) - 1 teaspoon dried thyme - 1 teaspoon dried rosemary - 2 cups kale or spinach, chopped - 2 tablespoons olive oil - Salt and pepper to taste - Fresh basil for garnish These items give the soup a nice balance of flavors and textures. The beans add creaminess. The veggies bring crunch and color. The herbs offer depth and aroma. You can add some optional ingredients to make the soup even better. Here are a few ideas: - 1-2 bay leaves for extra flavor - A splash of lemon juice for brightness - A pinch of red pepper flakes for heat - Parmesan cheese for a rich taste These additions can spice up the soup. They let you customize your bowl to fit your taste. Fresh herbs can really brighten up your soup. Here are some great options: - Fresh parsley for a pop of color - Fresh thyme leaves for a stronger herb flavor - A drizzle of olive oil for richness - Croutons for added crunch These garnishes add flair and freshness to your dish. They make your soup look and taste amazing. For the full recipe, be sure to check the complete guide. First, gather all your ingredients. You need two cups of canned cannellini beans, one medium onion, two cloves of garlic, two medium carrots, and two celery stalks. Measure out four cups of vegetable broth and two cups of diced tomatoes. Don't forget your dried thyme, dried rosemary, and two cups of kale or spinach. Lastly, grab olive oil, salt, and pepper. Next, chop the onion, carrots, and celery. Mince the garlic. Rinse and drain the beans. This prep makes cooking easier. In a large pot, heat the olive oil over medium heat. Add the chopped onion and sauté for about five minutes. You want the onion to be soft and clear. Next, stir in the garlic, carrots, and celery. Cook for another five to seven minutes. Stir often to keep them from burning. Now, add the diced tomatoes, vegetable broth, thyme, and rosemary to the pot. Bring it to a boil. Then, reduce the heat and let it simmer for about 15 minutes. This helps the flavors blend well. After 15 minutes, stir in the rinsed cannellini beans and chopped kale or spinach. Let the soup simmer for another ten minutes. This step adds nutrition and color. Finally, season with salt and pepper to taste. To serve, ladle the soup into bowls. Add fresh basil leaves on top for garnish. This adds a pop of color and fresh flavor. Serve the soup hot. Pair it with crusty bread or a simple salad for a complete meal. Enjoy each comforting spoonful of your homemade Tuscan White Bean Soup. You can find the Full Recipe to guide you through each step. When making Tuscan white bean soup, avoid overcooking the vegetables. They should stay tender, not mushy. Another mistake is skipping the seasoning. Salt and pepper can make a big difference. Don't forget to taste as you go. This helps you adjust flavors. To boost flavor, add a splash of lemon juice. It brightens the soup and adds freshness. You can also try adding a pinch of red pepper flakes for warmth. Fresh herbs like basil or parsley can enhance the taste too. Stir them in right before serving for the best effect. Use a large pot or Dutch oven for even cooking. A good cutting board and sharp knife will help you chop quickly. A wooden spoon is great for stirring. If you have an immersion blender, it can smooth out the soup if you want a creamier texture. For the full recipe, check out the details above. {{image_2}} You can easily make this soup meat-free. Use vegetable broth and skip any meat. The cannellini beans give you protein. You can add more veggies for texture and flavor. Try adding zucchini or bell peppers. These options keep the soup hearty and healthy. This soup is naturally gluten-free. Make sure your vegetable broth is gluten-free. Always check the labels. You can enjoy this dish without worrying about gluten. Enjoy it as is for a safe and tasty meal. Feel free to swap ingredients based on what you have. If you don’t have kale, use spinach or Swiss chard. You can use any white bean if you can’t find cannellini beans. Add herbs like oregano or parsley for a new twist. You can also use fresh tomatoes if canned ones are not available. For a spicier kick, add red pepper flakes. These small changes can give your soup a whole new flavor. For the full recipe, check out the section above. I love making extra Tuscan white bean soup. To store it, let the soup cool. Use an airtight container for best results. Place the soup in the fridge. It will stay fresh for up to 5 days. Make sure you label the container with the date. When you are ready to enjoy your soup again, take it out of the fridge. Pour the soup into a pot. Heat over medium heat until it is warm. Stir it often to keep it from sticking. You can also use a microwave. Just heat it in a microwave-safe bowl. Stir every minute until it is hot. If you want to keep the soup longer, freezing is a great option. First, let the soup cool completely. Then, pour it into freezer-safe containers. Leave some space at the top as the soup will expand. Seal the containers well and label them. You can freeze the soup for up to 3 months. When you are ready to eat it, thaw it in the fridge overnight. Reheat it as mentioned above. This way, you can enjoy this tasty dish anytime! For the complete recipe, check out the Full Recipe. Tuscan White Bean Soup is a warm, hearty dish. It comes from the Tuscany region of Italy. This soup features cannellini beans, veggies, and herbs. The broth is rich and full of flavor. You can enjoy it as a main dish or a side. Yes, you can switch beans if you like. White beans are best for this recipe. Navy or great northern beans work well too. You can even try black beans for a twist. Just make sure to rinse and drain them before use. You can keep Tuscan White Bean Soup in the fridge for about five days. Store it in an airtight container. Make sure it cools down first. This way, the soup will stay fresh and tasty. You can serve this soup with crusty bread. A simple green salad pairs well too. You might even enjoy it with a sprinkle of grated cheese on top. Fresh basil makes a great garnish, adding color and flavor. For the full recipe, check out the section above. Tuscan White Bean Soup is simple yet tasty. We covered its main and optional ingredients, key cooking steps, and how to serve. Remember to avoid common mistakes to get the best flavor. You can make variations to fit your needs, like vegan or gluten-free. Store leftovers properly and follow reheating tips to enjoy later. With this guide, you can make a delicious soup that warms your heart. Enjoy your cooking journey!

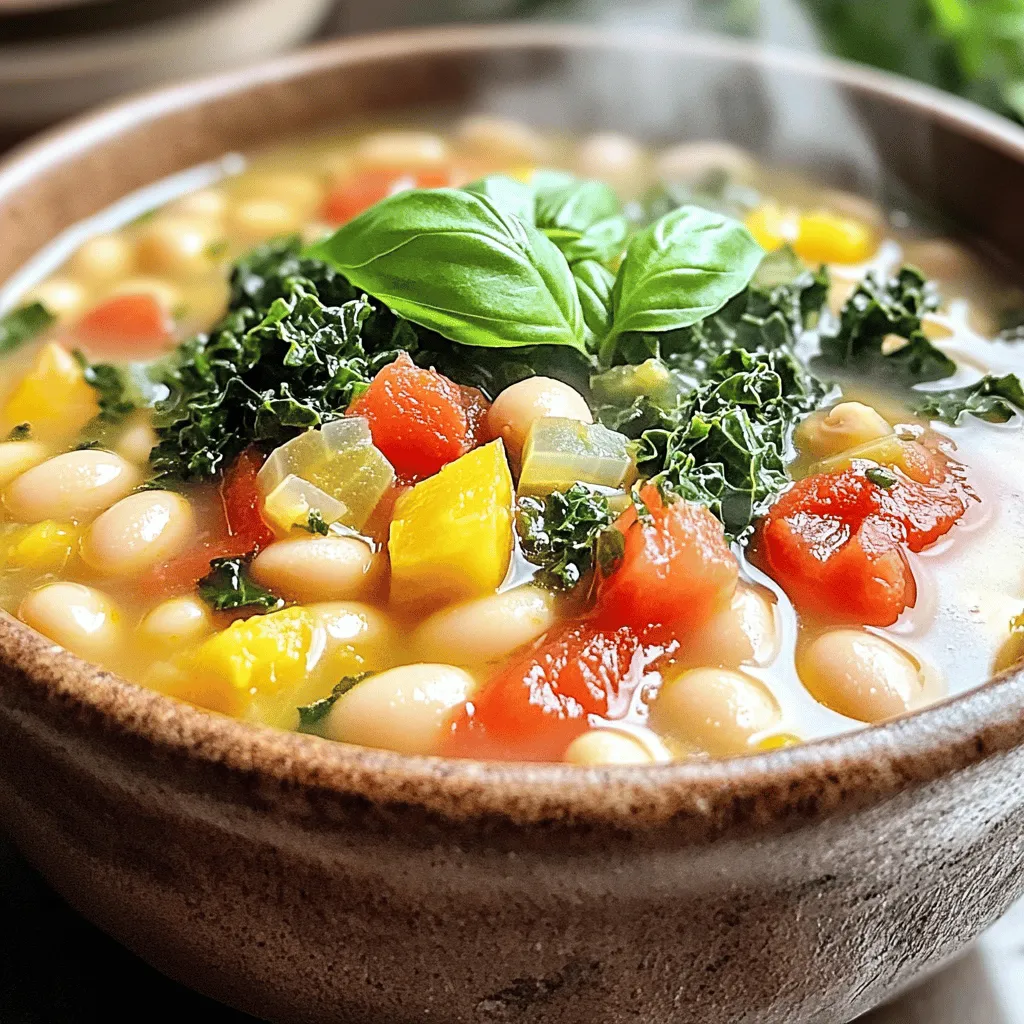
If you’re craving a warm and hearty meal, Tuscan White Bean Soup is a must-try. This soup is packed with flavor and goodness, making it both tasty and nutritious. In …

Read more

Categories Dinner

Strawberry Bundt Cake Simple and Delicious Recipe

May 10, 2025April 27, 2025 by Chef Theo
- 2 cups all-purpose flour - 1 ½ teaspoons baking powder - ½ teaspoon baking soda - ½ teaspoon salt - ½ cup unsalted butter, softened - 1 cup granulated sugar - 3 large eggs - 1 teaspoon vanilla extract - 1 cup buttermilk - 1 ½ cups fresh strawberries, hulled and sliced - 1 tablespoon cornstarch When you pick your ingredients, focus on freshness. Use ripe strawberries that smell sweet. Look for bright red, plump berries without soft spots. These taste best in your cake. For butter, choose unsalted. This allows you to control the salt in your recipe. Always check the expiration date on baking powder and baking soda. Freshness matters for a good rise. To make this cake, you will need a few key tools. A 10-inch Bundt pan is essential for the right shape. An electric mixer saves time and ensures a smooth batter. Use measuring cups and spoons for accuracy. A rubber spatula helps fold in the strawberries gently. Lastly, have a wire rack ready for cooling. This setup makes your baking easy and fun! Start by preheating your oven to 350°F (175°C). Take a 10-inch Bundt pan and grease it well. You can use unsalted butter or cooking spray. Once greased, dust the pan with flour. Turn the pan upside down and tap it lightly to remove the extra flour. This step helps the cake come out easily after baking. In a medium bowl, whisk together 2 cups of all-purpose flour, 1 ½ teaspoons of baking powder, ½ teaspoon of baking soda, and ½ teaspoon of salt. Set this bowl aside. In a large mixing bowl, cream together ½ cup of softened unsalted butter and 1 cup of granulated sugar using an electric mixer. Mix until it becomes light and fluffy, about 3 to 5 minutes. Next, add 3 large eggs, one at a time, mixing well after each. Stir in 1 teaspoon of vanilla extract. Now, alternate adding the flour mixture and 1 cup of buttermilk into the large bowl. Start and end with the flour mixture. Mix until everything is just combined. In a separate bowl, toss 1 ½ cups of hulled and sliced strawberries with 1 tablespoon of cornstarch. This helps thicken the juices and keeps the strawberries from sinking in the batter. Gently fold the strawberries into your batter. Pour two-thirds of the batter into the prepared Bundt pan. Spoon the remaining batter on top. Use a knife to create swirls through the batter. Bake in the preheated oven for 40 to 50 minutes. To check if it’s done, insert a toothpick into the center. If it comes out clean, the cake is ready. After baking, let the cake cool in the pan for 10 to 15 minutes. Carefully invert it onto a wire rack to cool completely. Once the cake has cooled, you can serve it in fun ways. Dust the top with powdered sugar for a simple look. For a fancier touch, drizzle a glaze made from powdered sugar and a splash of milk on top. You can also add fresh strawberries as a garnish. These small details make your strawberry Bundt cake look beautiful and inviting. Enjoy your delicious creation! Baking can be tricky. Here are some common mistakes to watch for: - Not measuring ingredients correctly: Use a kitchen scale or measuring cups to get it right. - Skipping the preheating step: Always preheat your oven. This helps the cake rise evenly. - Overmixing the batter: Mix just until combined. This keeps the cake light and fluffy. - Not greasing the pan well: Grease the Bundt pan thoroughly. This prevents sticking and helps with easy removal. To boost flavor in your Strawberry Bundt Cake, consider these tips: - Vanilla extract: This classic addition enhances the cake's sweetness. - Citrus zest: Add the zest of a lemon or lime for a fresh twist. Just a teaspoon can make a big difference. - Almond extract: A small amount gives a warm, nutty flavor that pairs well with strawberries. A moist cake is key to a great Bundt. Here’s how to achieve that: - Use room temperature ingredients: Eggs and butter blend better when they’re not cold. - Add buttermilk: This ingredient adds moisture and creates a tender crumb. - Don’t overbake: Check the cake a few minutes early. A toothpick should come out clean but not dry. Use these tips to make your Strawberry Bundt Cake a hit! For the full recipe, see the section above. {{image_2}} You can take your strawberry Bundt cake to the next level with cream cheese frosting. This frosting makes the cake richer and adds a tangy flavor. To make the frosting, mix 8 ounces of softened cream cheese with ½ cup of softened butter. Then add 2 cups of powdered sugar and 1 teaspoon of vanilla extract. Beat until smooth and creamy. Once the cake cools, spread the frosting on top. You can also add fresh strawberries on top for a lovely finish. If you need a gluten-free version, just swap the all-purpose flour for gluten-free flour. Look for a blend that has xanthan gum, which helps bind the cake. Follow the same steps in the full recipe. Your cake will be just as moist and tasty, and everyone can enjoy it. Don’t forget to check the labels on other ingredients to ensure they are gluten-free. You can change the flavor by using other fruits. Blueberries, raspberries, or peaches work well in this cake. Just follow the same steps in the full recipe. Use the same amount of fruit, and remember to toss them with cornstarch. This helps to keep the fruit from sinking. Each fruit adds a unique twist, making your Bundt cake fresh and exciting every time. To keep your strawberry Bundt cake fresh, store it properly. First, let the cake cool completely. Then, wrap it tightly in plastic wrap. This keeps moisture in and prevents it from drying out. You can also place it in an airtight container. Keep it in a cool, dry place. It should stay fresh for about 3-4 days. Freezing is a great way to save leftover cake. Start by slicing the cake if you like. Wrap each slice in plastic wrap, then place them in a freezer bag or container. Be sure to label it with the date. You can freeze the cake for up to three months. When you’re ready to eat it, just thaw it in the fridge overnight. If you want to enjoy your cake warm, reheating is easy. Preheat your oven to 350°F (175°C). Place the cake on a baking sheet. Cover it with foil to prevent it from drying out. Heat it for about 10-15 minutes. You can also microwave individual slices. Heat them for about 20-30 seconds until warm. Serve it with fresh strawberries or whipped cream for a treat. The best way to check if your Bundt cake is done is to use a toothpick. Insert the toothpick into the center of the cake. If it comes out clean, your cake is ready. If you see wet batter on the toothpick, bake it a bit longer. The cake should spring back when you touch it lightly. It's okay to check a few times, but don't open the oven too often. This will let out heat and can affect the baking time. Yes, you can use frozen strawberries in this cake. Just remember to thaw them first. Drain any excess liquid to avoid a soggy cake. I recommend tossing the thawed strawberries with cornstarch as you would with fresh ones. This helps keep their shape and prevents sinking in the batter. Using frozen strawberries can make it easy to enjoy this cake all year round. If you don't have buttermilk, don't worry! You can make a quick substitute. Mix 1 cup of milk with 1 tablespoon of white vinegar or lemon juice. Let it sit for about 5 minutes. This will give you a similar tangy flavor and acidity that buttermilk provides. You can also use plain yogurt thinned with a little milk. Both options work well in this cake. For the full recipe, including steps and tips, please refer to the earlier section. This will guide you through making your own delicious strawberry Bundt cake. In this blog post, we explored how to make a delicious strawberry Bundt cake. We covered quality ingredients, easy steps, and tips for perfect results. Remember to choose ripe strawberries for the best flavor. Avoid overmixing the batter to keep the cake moist. You can even try fun variations, like adding cream cheese frosting. Store leftover cake correctly so it stays fresh. Follow these tips, and your cake will impress! Enjoy your baking and share it with friends and family.

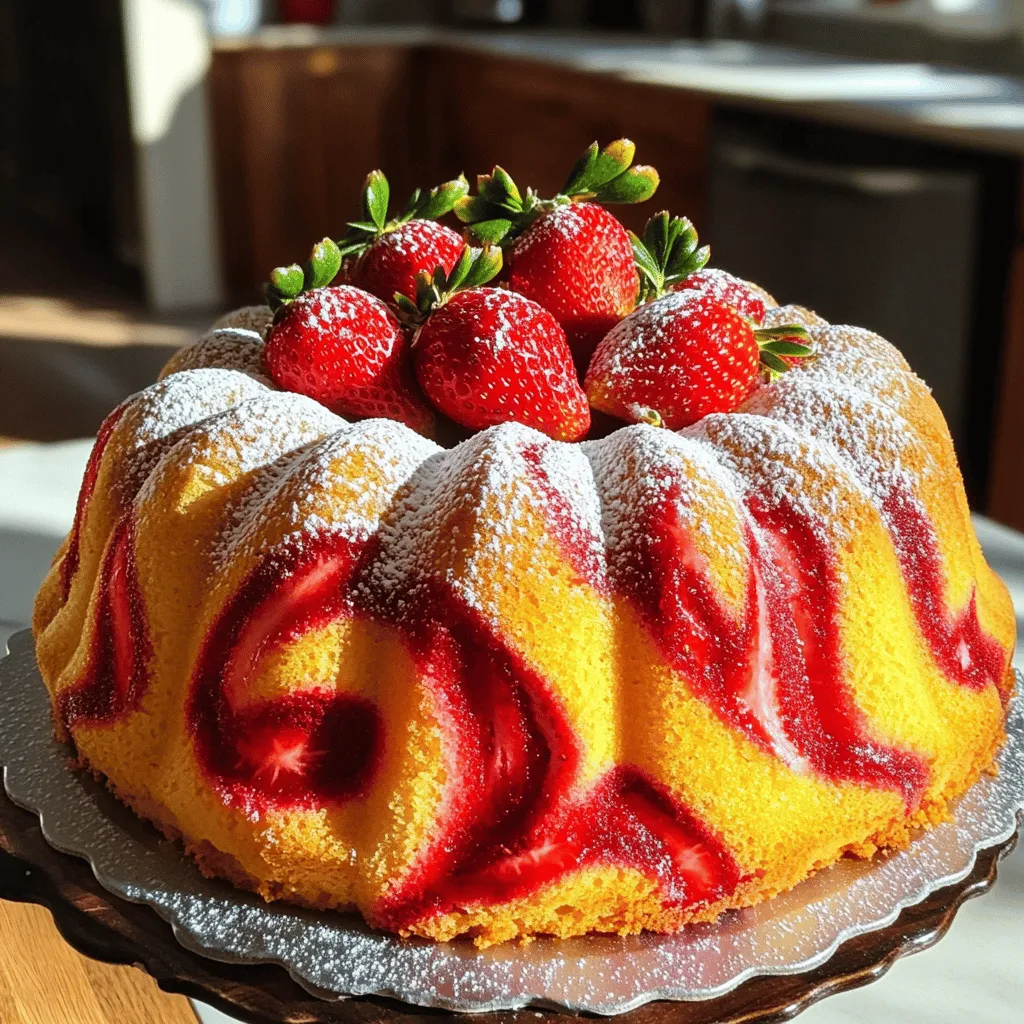
If you love fresh strawberries and want a cake that’s easy and yummy, you’re in the right place. This Strawberry Bundt Cake is both simple to make and delicious to …

Read more

Categories Desserts

Savory Shrimp Scampi Simple and Tasty Recipe

May 10, 2025April 27, 2025 by Chef Theo
- 1 pound large shrimp, peeled and deveined - 8 ounces linguine or spaghetti - 4 tablespoons unsalted butter - 4 tablespoons olive oil - 4 cloves garlic, minced - 1 teaspoon red pepper flakes (adjust to taste) - Zest and juice of 1 lemon - 1/4 cup chopped fresh parsley - Salt and pepper to taste - Optional: Lemon wedges for garnish When picking shrimp, fresh is best if you can find it. Fresh shrimp should look pink and shiny. It should smell like the ocean, not fishy. If you buy frozen shrimp, check the package. Look for shrimp that is firm and not icy. You can use either type for this dish, but fresh gives the best taste. You need a few key tools for this recipe. A large skillet works great for cooking shrimp. You’ll also need a pot for boiling pasta. Make sure to have measuring cups and spoons on hand. A strainer helps drain the pasta after cooking. With these tools, you’ll be all set to make shrimp scampi. For the full recipe, check the detailed instructions above! To cook the pasta, start by boiling water in a large pot. Add a good amount of salt to the water. This helps flavor the pasta. Once the water boils, add your linguine or spaghetti. Cook it for about 8-10 minutes until it is al dente. Al dente means the pasta is firm but not hard. Remember to reserve 1/2 cup of that pasta water before draining it. You will need it later! In a large skillet, heat the butter and olive oil over medium heat. Once the butter melts, add the minced garlic and red pepper flakes. Be careful! You do not want to burn the garlic. Cook it for about 1-2 minutes until it smells great. Next, add the shrimp to the skillet. Season it with salt and pepper. Cook the shrimp for about 2-3 minutes on each side. They are done when they turn pink and opaque. Now it's time to combine everything! Lower the heat and add the lemon zest and juice. Pour in that reserved pasta water you saved. Stir well to mix it all together. Toss in the cooked pasta and chopped parsley. This will coat the pasta and shrimp in a yummy lemony sauce. For serving, use a large bowl or plate. Garnish with extra lemon wedges and a sprinkle of parsley. This makes the dish look bright and inviting. Enjoy your savory shrimp scampi! For the full recipe, check the above section. Garlic gives shrimp scampi its bold taste. Timing is key when cooking garlic. You want to add it after the butter and oil melt but before you add the shrimp. This way, it cooks just right. Cooking garlic for 1-2 minutes makes it fragrant. You must watch closely to avoid burning it. If garlic burns, it can turn bitter. Keep the heat at medium and stir often. Lemon adds brightness to shrimp scampi. Balancing acidity is important. If you like it tangy, add more lemon juice. Start with half the juice and taste. You can always add more. Red pepper flakes can spice things up. Start with a teaspoon and adjust to your liking. If you want heat, add more. If not, hold back. The perfect shrimp texture is juicy and tender. To achieve this, cook shrimp until they turn pink and opaque. This usually takes about 2-3 minutes per side. Do not overcook the shrimp, or they will become rubbery. Keep a close eye on them while they cook. This helps you serve a dish that is pleasing to the eye and the palate. For the full recipe, check the section above! {{image_2}} You can serve shrimp scampi with different types of pasta. I recommend using: - Linguine - Spaghetti - Zucchini noodles Linguine and spaghetti are classic choices. They hold the sauce well. Zucchini noodles are great for a low-carb option. They add a fun twist to the dish. If you want to skip wine, you can still make a tasty sauce. Here are some substitutes: - Chicken broth - Vegetable stock Both options give depth to the sauce. Chicken broth adds a savory note. Vegetable stock keeps it light and fresh. Just replace the wine with an equal amount of either broth. You can boost your shrimp scampi by adding veggies. Some great choices are: - Spinach - Cherry tomatoes - Asparagus Adding spinach is easy. Toss it in just before you finish cooking the shrimp. Cherry tomatoes add sweetness. You can add them at the same time as the shrimp. Asparagus needs a bit more time. Add it a few minutes before the shrimp. This way, everything cooks perfectly. To keep shrimp scampi fresh, refrigerate it right away. Place it in an airtight container. This helps keep the flavors strong and the shrimp tender. I recommend using glass containers. They seal well and do not stain like plastic. Your leftovers can last up to three days in the fridge. When reheating shrimp scampi, do it slowly. Use a skillet over low heat. Add a splash of water or broth to keep it moist. Stir often for even heating. Avoid using a microwave; it can make the shrimp rubbery. This method keeps the dish flavorful and tasty. Freezing shrimp scampi is simple. First, let it cool completely. Then, place it in a freezer-safe bag. Remove as much air as possible before sealing. This helps prevent freezer burn. To thaw, move it to the fridge overnight. Reheat gently to enjoy the same great taste. Cooking shrimp is quick. For large shrimp, it takes about 2-3 minutes per side. They turn pink and opaque when done. Smaller shrimp need less time, around 1-2 minutes per side. Always check to avoid overcooking. Overcooked shrimp become rubbery and tough. You want tender, juicy shrimp for the best flavor. Yes, you can prep Shrimp Scampi in advance. Cook the pasta and shrimp separately. Store the shrimp and pasta in the fridge. When you’re ready to eat, heat them together with the sauce. This keeps your dish fresh and tasty. Avoid cooking shrimp too early, as they can lose their nice texture. Shrimp Scampi pairs well with many sides. Here are some popular choices: - Garlic bread for dipping in the sauce - A fresh green salad with lemon vinaigrette - Roasted or steamed vegetables for color and nutrition - Rice or risotto for a hearty meal These sides balance the flavors and make your meal complete. Shrimp Scampi has roots in Italy. The word "scampi" refers to small crustaceans. In the U.S., it often means shrimp cooked in garlic and butter. This dish shows Italian-American cooking’s creativity and flavor. It's a favorite for many due to its rich taste and simple preparation. Absolutely, frozen shrimp are great for this dish. They are often flash-frozen to keep freshness. Thaw them in the fridge overnight or run them under cold water. Avoid using hot water as it can cook the shrimp. Cook frozen shrimp directly from the bag, just add a minute to your cook time. This way, you still get that delicious shrimp flavor. Enjoy the full recipe for more details on making this dish! In this post, I shared how to make easy and delicious shrimp scampi. You learned about the essential ingredients, cooking steps, and tips for perfect flavor and texture. I also explored how to adjust the dish to suit your taste. Remember, using fresh shrimp and right cooking techniques makes a big difference. Enjoy your cooking adventure, and don’t hesitate to experiment with new flavors and ingredients. Happy cooking!

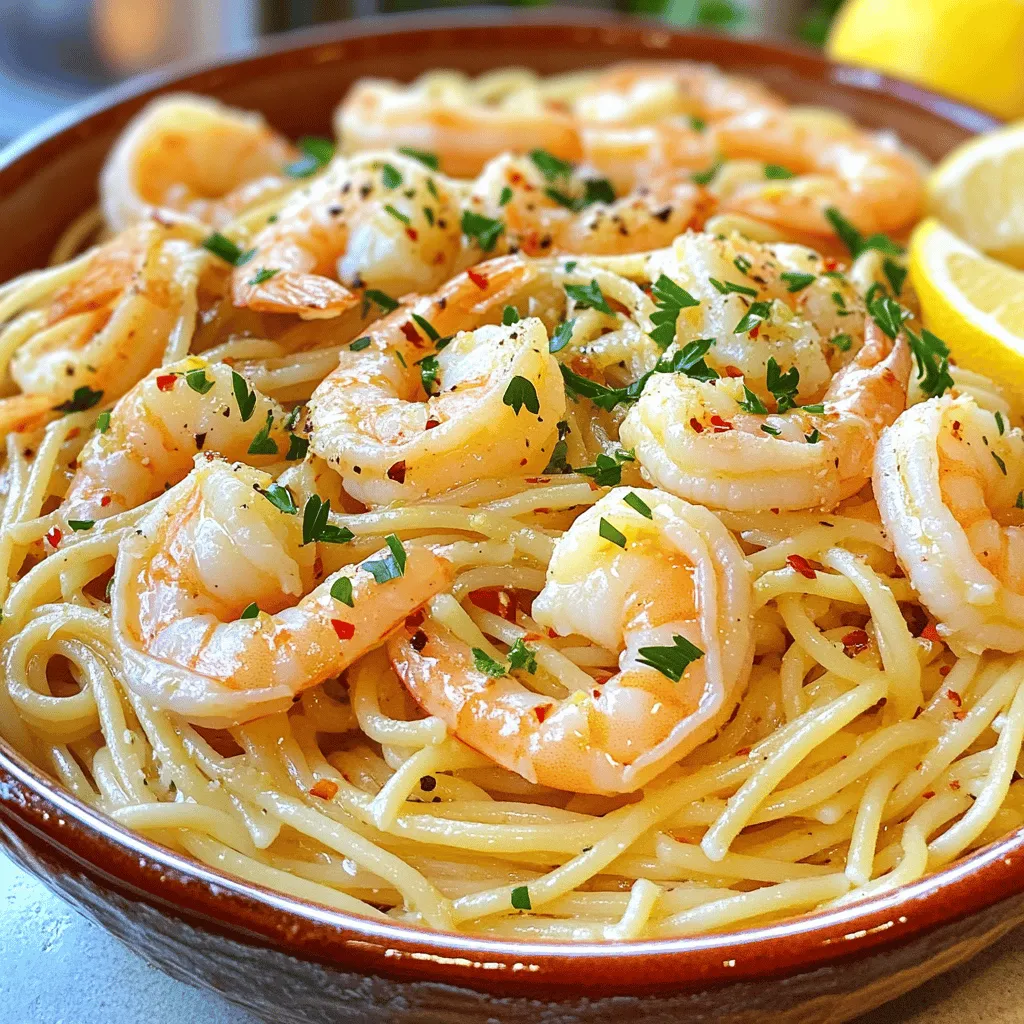
If you love seafood, you’ll enjoy this simple Shrimp Scampi recipe. This dish packs bold flavors in every bite. You’ll learn how to pick the best shrimp and pair it …

Read more

Categories Dinner
Older posts
Newer posts
← Previous Page1 … Page89 Page90 Page91 Next →

TOASTED RECIPES

Where ideas are warm, crisp, and ready to serve! 🍞

PAGES

Home About Contact Privacy Policy Terms & Conditions Cookie Policy GDPR Policy Copyright Policy Disclaimer

CATEGORIES

Appetizers Desserts Salads Breakfast Dinner

Contact

  • Pinterest
  • Mail
Copyright © 2025 Toasted Recipes. All rights reserved.