Savory Apple Cheesecake Tacos Delightful Dessert Treat
. Enjoy the process of making these apple cheesecake tacos! To start, gather your dry ingredients. You need: - 1 cup all-purpose flour - 1/4 cup sugar - 1/2 teaspoon baking powder - 1/4 teaspoon salt Mix them together in a bowl. Then, add 1/4 cup melted unsalted butter. Stir until the dough forms. Next, divide the dough into four equal pieces. Roll each piece into a flat circle, about 5 inches wide. Now, heat a non-stick skillet over medium heat. Place each dough circle in the skillet. Cook for 2-3 minutes per side. They should turn golden brown. Once cooked, you need to shape the taco shells. Take an overturned muffin tin and drape the warm shells over it. This helps them hold their taco shape while they cool. For the cheesecake filling, you will need: - 1/4 cup cream cheese, softened - 1/2 cup powdered sugar - 1 teaspoon vanilla extract In a bowl, blend the cream cheese with the powdered sugar and vanilla. Mix until smooth and creamy. Set it aside. Now, it’s time for the apple filling. You will need: - 1 large apple, peeled and diced - 2 tablespoons lemon juice - 1 teaspoon cinnamon In a separate bowl, toss your diced apple with lemon juice and cinnamon. Make sure all the pieces are well coated. Once your taco shells are cool, it's time to assemble. Spoon a layer of the cheesecake filling into each shell. Then, add the cinnamon apples on top. To finish, top each filled taco with whipped cream. Sprinkle crushed graham crackers on top for extra crunch. These small touches make a big difference! For the full recipe, refer to the earlier section. To make crispy yet soft taco shells, follow these tips: - Knead the dough well. This helps develop gluten, giving the shells structure. - Use a hot skillet. A medium heat ensures even cooking and a nice golden color. - Shape quickly. Once cooked, drape the shells over a muffin tin right away. This keeps their taco shape. Common mistakes include: - Under-kneading the dough. This makes them tough and chewy. - Cooking on low heat. This can lead to soggy shells. For flavor variations, try these ideas: - Add a splash of maple syrup for a warm, sweet touch. - Mix in some lemon zest for bright, fresh notes. - Fold in some vanilla bean for extra richness. Using room temperature cream cheese is key. It mixes smoothly and creates a creamy texture. Cold cream cheese can lead to lumps. Choosing the right apple is vital for this recipe. I recommend using a Granny Smith apple. It offers the perfect balance of tartness and sweetness. To prepare apples: - Peel and dice them into small, even pieces. This ensures they cook evenly. - Toss the diced apples with lemon juice and cinnamon. This adds flavor and keeps the apples from browning. These simple tips will make your Apple Cheesecake Tacos shine. For the complete recipe, check the Full Recipe section. {{image_2}} You can change up the fruit in your tacos. Try using pears or peaches for a twist. Each fruit brings its own taste. Pears add a juicy sweetness, while peaches give a bright flavor. You can also mix different fruits together. This way, you can create a blend of tastes that everyone will love. Toppings make your tacos even better. You can use different types of whipped cream. Try vanilla, chocolate, or even caramel-flavored cream. You can also add nuts or fresh fruit slices for extra crunch. A sprinkle of cinnamon or a drizzle of honey can enhance the flavor too. Experiment with toppings to find your favorite mix! If you need gluten-free options, use almond or coconut flour instead of regular flour. This keeps the taco shells tasty and safe for those with gluten issues. For a vegan version, swap cream cheese for a plant-based option. Use coconut cream or cashew cream as a filling. You can also use maple syrup instead of sugar to keep it sweet. These simple changes let everyone enjoy your delicious tacos! You can find the full recipe for these delightful treats and more tips to create your own variations! Store your taco shells and fillings separately. Place taco shells in an airtight container. Keep them at room temperature for up to two days. If you need to store them longer, wrap them in plastic wrap and freeze. For the cheesecake filling, put it in a sealed container in the fridge. It lasts about three days. The apple filling should also go in the fridge. Use it within two days for the best taste. To reheat taco shells, preheat your oven to 350°F (175°C). Place the shells on a baking sheet. Heat them for about five minutes until warm and crispy. Avoid the microwave, as it may make the shells soggy. You can freeze the taco shells for up to three months. Wrap them tightly in plastic wrap and place them in a freezer bag. For make-ahead options, freeze the cheesecake and apple fillings in separate containers. Thaw them in the fridge overnight before using. This way, you can enjoy fresh tacos anytime you want. For the full recipe, refer to the earlier section. Yes, you can make the taco shells ahead of time. Just store them in an airtight container. This helps keep them fresh. When ready to use, warm them in the oven for a few minutes. This will make them crispy again. Granny Smith apples work great for this recipe. They are tart and balance the sweetness. Other good choices include Honeycrisp and Fuji apples. These apples add nice flavor and texture. These tacos last about 2-3 days in the fridge. Store them in an airtight container. Keep the filling and shells separate if possible. This helps prevent the shells from getting soggy. Yes, you can change the sweetness to your taste. Use less sugar in the filling if you want. You can also skip the powdered sugar on top. Try adding a bit of honey or maple syrup for a different flavor. Absolutely! You can use gluten-free flour instead of all-purpose flour. Almond flour or a gluten-free blend works well. Just follow the same steps in the full recipe. This way, everyone can enjoy these tasty treats! You can make fun and tasty Apple Cheesecake Tacos with simple steps. Start with fresh ingredients like Granny Smith apples and cream cheese. Follow the detailed instructions to create crispy taco shells and a sweet filling. Remember, you can customize flavors and toppings to suit your taste. Store any extras properly for later enjoyment. Try different fruits and toppings to keep things exciting. Enjoy your delicious creation and impress your family and friends with these unique tacos!](https://toastedrecipes.com/wp-content/uploads/2025/04/8f4fa191-5298-46b4-8078-6eeac97e2633.webp)
Get ready to treat yourself with a unique twist on dessert: Savory Apple Cheesecake Tacos! Imagine crispy taco shells filled with creamy cheesecake and sweet apples, all topped with whipped …
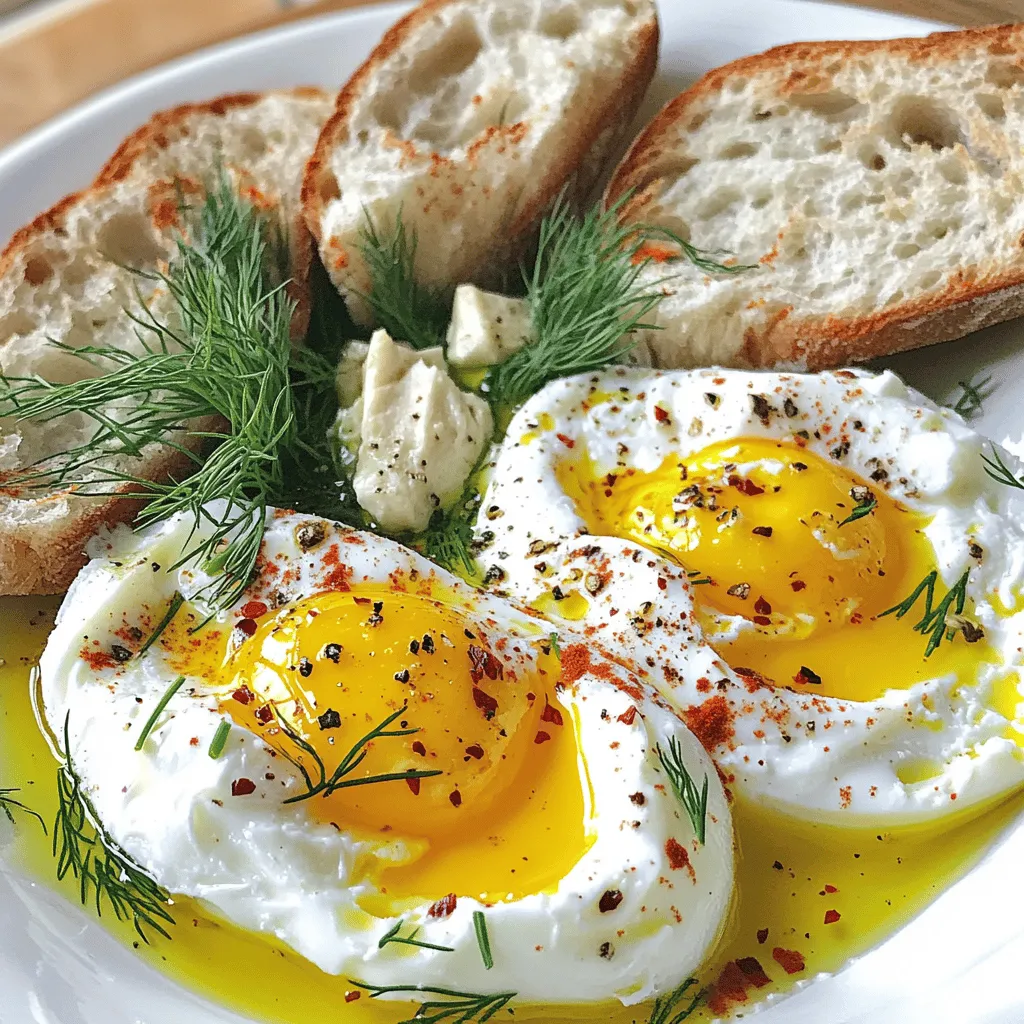
. - First, wash the cucumbers well under cold water. - Next, slice the cucumbers into thin rounds. - If you want a smoother texture, you can peel the cucumbers. - In a mixing bowl, combine 1 cup of Greek yogurt and 2 tablespoons of sour cream. - Then, add 1 tablespoon of fresh dill, 1 teaspoon of garlic powder, 1 tablespoon of lemon juice, salt, and pepper. - Mix all these ingredients until they blend well into a creamy dressing. - Toss the sliced cucumbers with the creamy dressing until they are well coated. - Fold in 1/4 cup of finely chopped red onion for added flavor and crunch. - If you enjoy a bit of heat, sprinkle in 1/4 teaspoon of chili flakes. Chilling the salad for about 30 minutes helps the flavors mix. This salad is a perfect side dish for any meal. You can find the full recipe above for more details! To make your creamy cucumber salad even better, you can adjust the seasoning to your taste. Start with salt and pepper, then add more as needed. Let the salad chill for at least 30 minutes. This time helps all the flavors blend together. The chill also makes every bite refreshing. When it comes to serving, you have options. You can serve the salad in a large bowl for sharing or in individual dishes for a nice touch. To make it look even better, garnish with fresh dill or a sprinkle of extra chili flakes. This adds color and a little kick. You don’t need much to make this salad. Here are the tools you will need: - Mixing bowl - Knife and cutting board - Measuring spoons {{image_2}} You can change up the salad by adding herbs and veggies. Fresh mint or parsley can brighten the dish. Just chop them finely and mix them in. You can also add color and crunch with sliced bell peppers or tomatoes. These additions make the salad even more refreshing and fun! If you want a dairy-free option, try using vegan yogurt instead of Greek yogurt. It keeps the creamy texture while being plant-based. For a low-calorie version, you can use yogurt alternatives that have fewer calories. This way, you can enjoy the salad while sticking to your diet goals. To give your salad a tangy kick, add a splash of vinegar. It balances the creaminess of the yogurt. If you enjoy a bit of saltiness, mix in some crumbled feta cheese. This twist adds a rich flavor and makes your salad even more delicious. For the full recipe, refer back to the Cool & Creamy Cucumber Delight section. To keep your creamy cucumber salad fresh, store it in the fridge. Place any leftovers in an airtight container. This helps keep moisture in and prevents odors from other foods. Glass or BPA-free plastic containers work best. These options do not interact with food and keep flavors intact. You can expect your salad to last about 3 to 5 days in the fridge. Check for signs of spoilage, like a sour smell or watery texture. If the cucumbers look mushy or the dressing separates, it’s time to toss it out. Keeping an eye on these signs ensures you enjoy your salad at its best. To make this salad vegan, you can swap Greek yogurt and sour cream for plant-based options. Use unsweetened coconut yogurt or almond yogurt for a creamy base. You can also mix in some tahini for extra creaminess. Adding nutritional yeast can enhance the flavor, giving a cheesy taste. Yes, you can prepare this salad ahead of time! To keep it fresh, mix the cucumbers and dressing separately. Combine them right before serving. This will prevent the cucumbers from getting too watery. If you want to save time, slice the cucumbers and store them in the fridge. Just remember to add the dressing later. Creamy cucumber salad pairs well with many dishes. Try serving it with grilled chicken, fish, or lamb. It also works great with quinoa or rice dishes. For a light meal, enjoy it with pita bread or falafel. This salad can be a refreshing side for any summer barbecue or picnic. This creamy cucumber salad is easy and fun to make. Use fresh ingredients for great taste. You can adjust this recipe with herbs, veggies, or dairy-free options. Letting it chill enhances flavor, so don’t skip that step. Store leftovers properly to keep them fresh. Enjoy this salad at your next meal or gathering. It adds a refreshing touch and pairs well with many dishes. Try out these tips, and make it your own!](https://toastedrecipes.com/wp-content/uploads/2025/04/28db7a0d-8682-46fc-8ae8-8eb0d712b296.webp)
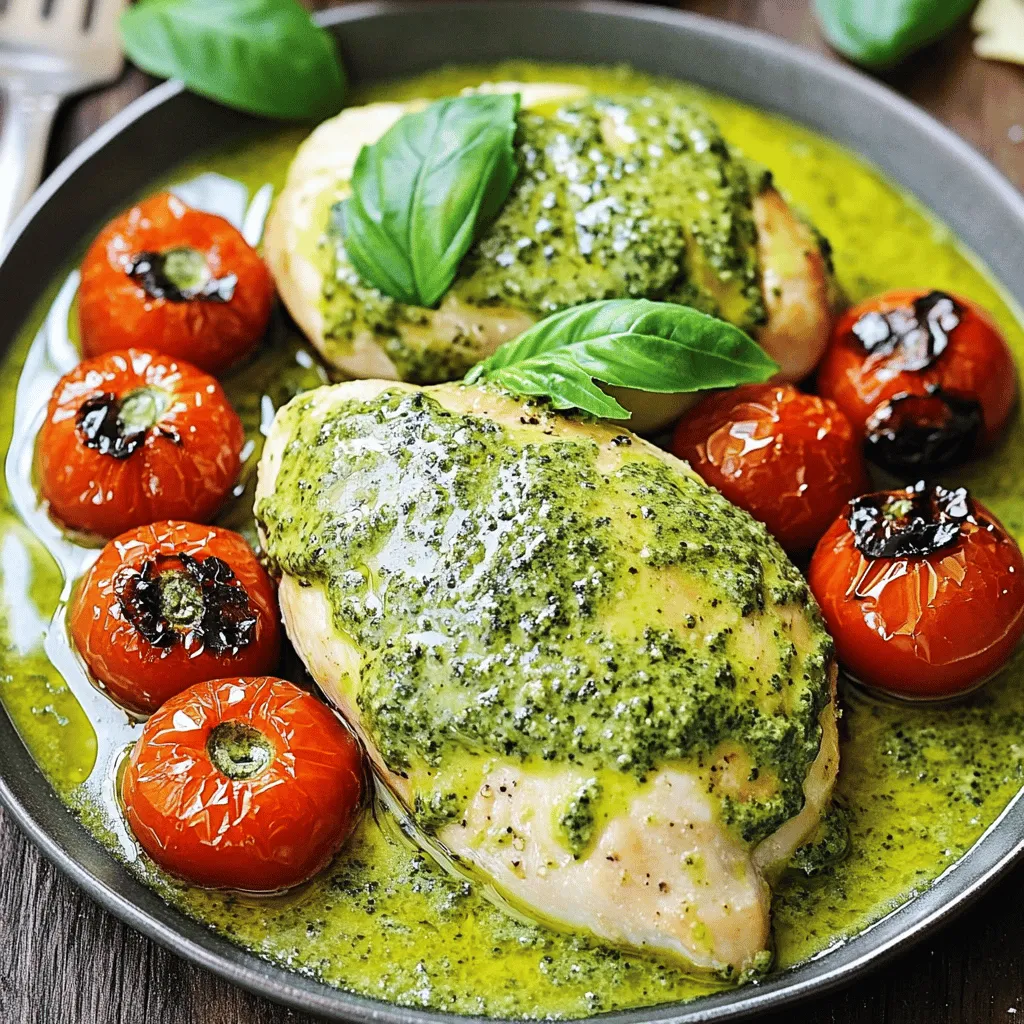
![- 4 chicken breast fillets - 1 cup shredded coconut - 1 cup buttermilk (or yogurt) The main ingredients make this dish shine. Chicken breast fillets form the base. They soak up the marinade well. Shredded coconut adds crunch and flavor. The buttermilk or yogurt helps tenderize the chicken. - 1 cup all-purpose flour - 1/2 teaspoon garlic powder - 1/2 teaspoon onion powder - Salt and pepper to taste For the dry ingredients, all-purpose flour creates a crispy coating. Garlic powder and onion powder add depth to the taste. A pinch of salt and pepper enhances all the flavors. - 1 cup apricot preserves - 1 tablespoon fresh ginger, grated - 1 tablespoon lime juice - 1 tablespoon soy sauce (or coconut aminos for a gluten-free option) For the apricot sauce, apricot preserves bring sweetness. Fresh ginger adds a zesty kick. Lime juice balances the flavor profile. Soy sauce rounds it out with umami. This sauce elevates the coconut chicken to new heights. You can find the Full Recipe to guide you through the steps. Enjoy the blend of flavors! To start, gather your buttermilk, garlic powder, onion powder, salt, and pepper. In a bowl, mix these ingredients well. Add the chicken breast fillets to the bowl. Make sure each piece is coated fully. Cover the bowl and place it in the fridge. For the best flavor, marinate the chicken for at least 30 minutes. If you have time, let it sit for up to 2 hours. This enhances the taste and keeps the chicken juicy. Next, we need to prepare the coating. Grab a shallow dish and combine the all-purpose flour and shredded coconut. Stir them together until they blend well. Season this mixture with a pinch of salt and pepper to add flavor. This coating will give your chicken a crunchy texture and a lovely coconut taste. Now it's time to cook the chicken. Remove each fillet from the marinade. Allow the extra buttermilk to drip off. Dredge the chicken in the coconut-flour mixture. Press gently so it sticks well. Heat vegetable oil in a large skillet over medium heat. Once the oil is hot, add the coated chicken fillets. Cook for 4-5 minutes on each side. You want them golden brown and cooked through. The internal temperature should reach 165°F (75°C). After cooking, place the chicken on a paper towel-lined plate. This helps soak up any extra oil. For the complete recipe, check the Full Recipe section. To get that crispy texture, make sure to coat the chicken well. Use a mix of shredded coconut and flour. This gives the chicken its crunch. You can also try adding spices like paprika or cumin to the coating. This adds extra flavor and warmth. For marinating, you can use yogurt instead of buttermilk. Yogurt gives a tangy taste. You can also add a splash of lime juice to the marinade for a fresh kick. Marinate for at least 30 minutes. The longer you marinate, the deeper the flavor. To get the best sauce, use quality apricot preserves. Heat them gently with the grated ginger, lime juice, and soy sauce. Stir often to avoid sticking. If the sauce is too thick, add a bit of water. This will help reach the right consistency. For garnishes, fresh cilantro adds a bright touch. Lime wedges also add a nice pop of color. You can sprinkle some sesame seeds for a crunchy finish. When frying, a deep skillet works best. It holds more oil and heat. Keep the oil at medium heat. This prevents the chicken from burning while cooking through. To avoid oil splatter, use a splatter guard. It keeps the mess down. You can also place the chicken in the pan gently to minimize splashes. For the full recipe, check out the details above. Enjoy your cooking! {{image_2}} You can easily make this dish gluten-free. Instead of all-purpose flour, use gluten-free flour. It works well for coating the chicken. For a lighter sauce, swap regular soy sauce with coconut aminos. This change cuts some calories while keeping great flavor. Want to kick up the taste? Add spices like paprika or cayenne to the coating. Fresh herbs like cilantro or basil can add a nice touch. You can also make a unique apricot sauce. Try mixing in orange juice or a dash of chili for a zesty twist. Pair your coconut chicken with rice or a fresh salad. These sides balance the rich flavors. For a fun presentation, slice the chicken and fan it out on the plate. Drizzle the apricot sauce on top and sprinkle with fresh herbs for a pop of color. For the full details on making this dish, check out the [Full Recipe]. To keep your coconut chicken fresh, use airtight containers. Glass containers work well, but plastic ones are fine too. Store leftovers in the fridge. They stay good for about 3 to 4 days. If you want to keep them longer, consider freezing. When reheating, use an oven or skillet. This helps maintain the crispy texture. Avoid the microwave, as it can make the chicken soggy. If frozen, let the chicken thaw overnight in the fridge. Reheat in a 350°F oven until warmed through, about 15 minutes. You can prep parts of this dish in advance. Marinate the chicken and store it in the fridge. Mix the flour and coconut ahead of time too. Always ensure food is cooled before storing. When meal prepping, keep everything clean to avoid contamination. You can marinate the chicken for at least 30 minutes. This time allows the flavors to sink in. For a deeper flavor, try marinating for up to 2 hours. This extra time helps the chicken stay juicy and tasty. Yes, you can! Cook the chicken and make the apricot sauce ahead. Store them in separate containers in the fridge. When you’re ready to eat, reheat the chicken in a pan. Warm the apricot sauce on the stove. This method keeps everything fresh and delicious. This dish pairs well with several sides. Try fluffy rice or a crisp salad for a light touch. You can also serve it with steamed veggies for a healthy option. For drinks, a fruity iced tea or a light white wine works great. Check the [Full Recipe] for more details on the main dish! This blog post covered a delightful recipe for Coconut Chicken with Apricot Sauce. We explored key ingredients like chicken, coconut, and a flavorful apricot sauce. I shared step-by-step instructions, tips for perfecting texture, and creative variations. You now have the tools to make this dish shine. Enjoy experimenting with flavors and serving ideas. Your culinary skills can impress anyone. Happy cooking!](https://toastedrecipes.com/wp-content/uploads/2025/04/ed4f0fe1-80a4-429b-b264-d0aabc4f4437.webp)

![- 2 large Russet potatoes - 1 cup sharp cheddar cheese, shredded - 1/4 cup green onions, finely chopped - 1/4 cup fresh parsley, finely chopped - 1 teaspoon garlic powder - 1 teaspoon onion powder - 1 teaspoon salt - 1/2 teaspoon black pepper - 1/2 cup all-purpose flour - 1 large egg, beaten - Vegetable oil for frying When making homemade tater tots, the ingredients play a big role in flavor. Start with two large Russet potatoes. They give the tots a nice, fluffy texture. Next, add a cup of sharp cheddar cheese. The cheese melts and adds a cheesy goodness. I like using one-fourth cup of finely chopped green onions for a fresh bite. A sprinkle of fresh parsley adds a pop of color and flavor. For seasonings, I recommend one teaspoon of garlic powder and one teaspoon of onion powder. They both boost the taste and aroma. Don’t forget one teaspoon of salt and half a teaspoon of black pepper. These simple seasonings make a big difference. You will also need half a cup of all-purpose flour to help bind everything together. One large beaten egg gives the mixture richness. Finally, vegetable oil is key for frying. It helps achieve that perfect crunch. For the full recipe, check out the instructions and tips later in the article. To start, you need to peel the Russet potatoes. Use a vegetable peeler for this task. After peeling, cut the potatoes into quarters. This helps them cook evenly. Place the quartered potatoes in a large pot. Fill it with water until the potatoes are covered. Add a big pinch of salt to the water. Bring the pot to a boil. Cook the potatoes for about 15 to 20 minutes. You want them to be fork-tender. This means a fork goes in easily. Once the potatoes are cooked, drain them and let them cool a bit. You can either grate the potatoes or use a potato ricer. Both methods will give you a smooth and slightly chunky texture. Now, grab a large mixing bowl. Combine the grated potatoes, sharp cheddar cheese, chopped green onions, and parsley. Don't forget the garlic powder, onion powder, salt, pepper, flour, and the beaten egg. Mix everything well until it all comes together. You want a nice, thick mixture that holds its shape. Next, it’s time to shape the tater tots. Take small portions of the potato mixture. Roll them into balls about the size of golf balls. Slightly flatten them for even cooking. Heat vegetable oil in a deep skillet or fryer. Aim for a temperature of about 350°F (175°C). Carefully drop the formed tots into the hot oil. Fry them in batches to avoid overcrowding. Cook for about 3 to 4 minutes until they turn golden brown and crispy. Once done, transfer the tater tots to a paper towel-lined plate. This helps drain any extra oil. Sprinkle some salt on top while they’re still hot. Repeat until all your tots are cooked. Enjoy your homemade tater tots as a tasty snack or side dish! For complete detailed steps, check the Full Recipe. To make your tater tots crispy, you need to fry them at the right temperature. Aim for 350°F (175°C). This heat gets the outside golden and crunchy while keeping the inside soft. Do not overcrowd the oil. Fry in small batches. If too many tots are in the pan, they will steam instead of fry. This can make them soggy. Space them out to ensure even cooking. You can change the cheese in this recipe. Try using mozzarella or pepper jack for a different taste. Each type adds a unique flavor to your tater tots. Feel free to add herbs and spices. Try fresh chives, dill, or even a pinch of cayenne for heat. These changes can help you create a tater tot that fits your taste. Dips can make your tater tots even better. Serve them with ranch, spicy ketchup, or garlic aioli. These dips add flavor and fun. For presentation, use a rustic wooden platter. Line it with parchment paper for a nice touch. You can also place the tots in a metal basket. Garnish with herbs for a beautiful look. Enjoy your homemade tater tots as a tasty snack or side dish. For the full recipe, check the earlier section. {{image_2}} You can change up the taste of your tater tots easily. Here are two fun ideas: - Cheesy bacon tater tots: Add crispy bacon bits and extra cheese to the mix. The bacon adds a salty crunch that really enhances the flavor. - Spicy jalapeño tater tots: Mix in chopped jalapeños for a kick. This adds heat and makes your tater tots exciting. You don’t have to fry your tater tots. Here are two great ways to cook them: - Baked tater tots recipe: Preheat your oven to 425°F (220°C). Shape the tots and place them on a baking sheet. Bake for about 25-30 minutes, flipping halfway through. This method gives you crispy tots with less oil. - Air fryer tater tots instructions: Preheat the air fryer to 400°F (200°C). Arrange the shaped tots in a single layer. Cook for 15-20 minutes, shaking the basket halfway. This method is quick and gives a great crunch. Tater tots can be served in creative ways. Consider these fun serving ideas: - Tater tot casserole ideas: Layer cooked tater tots with ground beef, cheese, and veggies in a baking dish. Bake until bubbly for a filling meal. - Tater tot nachos concept: Use tater tots as a base for nachos. Top with cheese, salsa, and guacamole for a fun twist. These variations keep your homemade tater tots fresh and fun. For the complete recipe, check out the [Full Recipe]. To keep your leftover tater tots fresh, let them cool down first. Place them in a single layer on a cooling rack. This helps avoid sogginess. Once cool, store the tater tots in an airtight container. You can also use a zip-top bag. Make sure to press out the air to keep them crisp. Store them in the fridge for up to three days. When it's time to eat your leftover tater tots, the goal is to keep them crispy. The best method is to reheat them in the oven. Preheat your oven to 400°F (200°C). Spread the tater tots on a baking sheet in a single layer. Bake for about 15-20 minutes, flipping halfway through. This method gives them a nice crunch again. Avoid using the microwave, as it makes them soggy. If you want to freeze uncooked tater tots, shape them and place them on a parchment-lined baking sheet. Make sure the tots don't touch each other. Freeze them for about an hour until firm. Then, transfer them to a freezer-safe bag. You can freeze them for up to three months. To reheat cooked tater tots from frozen, preheat your oven to 400°F (200°C). Spread the frozen tots on a baking sheet. Bake for 20-25 minutes, flipping once, until they are hot and crispy. With these simple steps, you can enjoy tater tots any time! For the complete process, check the Full Recipe. Your tater tots are done when they turn golden brown. You should also hear a crispy sound when you bite into them. They should feel firm to the touch, not soft. If they look dark, they may be overcooked. Yes, you can prep the mixture in advance! Just follow these tips: - Make the potato mix and shape the tots. - Place them on a baking sheet lined with parchment. - Cover with plastic wrap and chill in the fridge for up to 24 hours. - Fry them just before serving for the best crunch! Serve your tater tots in fun ways. Here are some ideas: - Place them on a wooden platter for a rustic look. - Use a metal basket lined with parchment paper for a diner vibe. - Top with your favorite sauces like ranch, spicy ketchup, or cheese sauce. - Garnish with extra herbs for a pop of color. Homemade tater tots can be healthier than store-bought. You control the ingredients! Here are some tips: - Use less oil for frying or try baking them. - Swap some potatoes for sweet potatoes for added nutrients. - Add veggies or herbs for more flavor and health. Remember, moderation is key for any treat! In this post, we covered everything you need to make tasty tater tots. You learned about key ingredients, step-by-step instructions, and tips for getting them crispy. You also saw fun variations and how to store leftovers. Making tater tots at home is easy and fun. With simple swaps and cooking methods, you can create your own unique versions. Enjoy sharing them with family or friends for a delicious snack!](https://toastedrecipes.com/wp-content/uploads/2025/04/93fb0b2f-bf6e-40f1-b773-95b7ae25635d-2.webp)
![To make the perfect pork egg rolls, gather these main ingredients: - 1 pound ground pork - 2 cups green cabbage, finely shredded - 1 cup carrots, grated - 1/2 cup green onions, chopped These ingredients bring together a mix of flavors and textures. The ground pork adds richness. The cabbage gives a nice crunch. Carrots add sweetness, while green onions bring fresh notes. Next, we need some key seasonings to enhance the flavor: - 3 cloves garlic, minced - 1 tablespoon fresh ginger, minced - 2 tablespoons soy sauce - 1 tablespoon sesame oil - 1 teaspoon chili garlic sauce (adjust to taste) Garlic and ginger add warmth and depth. Soy sauce brings umami, while sesame oil offers a nutty flavor. Chili garlic sauce gives a spicy kick, which you can adjust based on your taste. Finally, you will need these cooking essentials: - 10-12 egg roll wrappers - Vegetable oil for frying Egg roll wrappers are crucial for that crispy exterior. The vegetable oil is perfect for frying, ensuring the egg rolls turn golden brown. You can find these items at most grocery stores or Asian markets. For the complete recipe, check out the [Full Recipe]. First, let's start with the filling. This is where all the great flavors come together. - Sautéing garlic and ginger: Heat 1 tablespoon of sesame oil in a large skillet over medium heat. Add 3 minced cloves of garlic and 1 tablespoon of minced ginger. Stir for about 30 seconds until you smell that wonderful aroma. - Cooking the ground pork: Next, add 1 pound of ground pork to the skillet. Cook it for about 5-7 minutes. Use a spatula to break it into small pieces. Cook until the pork turns fully brown and is no longer pink. - Mixing in vegetables and seasoning: Once the pork is cooked, stir in 2 cups of finely shredded green cabbage, 1 cup of grated carrots, and 1/2 cup of chopped green onions. Pour in 2 tablespoons of soy sauce and 1 teaspoon of chili garlic sauce. Cook for another 3-5 minutes until the veggies are soft. Don’t forget to season with salt and pepper to taste. Remove the skillet from heat and let the filling cool for a bit. Now it’s time to roll those egg rolls! - Setting up the workspace: Clear a clean work surface or use a cutting board. Keep a small bowl of water nearby for sealing the rolls. - Proper folding technique: Lay an egg roll wrapper down with one corner pointing at you. Place a couple of tablespoons of your pork filling in the center. Fold the bottom corner over the filling. Then fold in the sides tightly. Roll it toward the top corner and seal the edge with a bit of water. Repeat this process with the rest of your wrappers and filling. Now comes the fun part: frying! - Heating the oil: In a deep skillet or fryer, heat vegetable oil over medium-high heat. You want enough oil to cover the egg rolls when frying. - Frying until golden brown: Carefully add a few egg rolls at a time. Do not overcrowd the pan. Fry them for about 2-3 minutes until they are golden brown and crispy on all sides. - Draining excess oil: Once they are golden, carefully remove the egg rolls and place them on paper towels. This helps drain any extra oil. Serve hot with your favorite dipping sauces like sweet and sour or soy sauce. Now you have a delicious batch of pork egg rolls ready to enjoy! For the complete recipe, check the Full Recipe section. To get crispy egg rolls, control the oil temperature. Heat the oil to about 350°F. If the oil is too cool, the egg rolls will soak up oil and become soggy. If it’s too hot, they may burn before cooking through. Avoid overcrowding the pan. Fry only a few egg rolls at a time. This helps keep the oil temperature steady and ensures even cooking. If you add too many, the temperature drops too low. Balancing meat and veggies is key. Use equal parts pork and vegetables for a healthy mix. This gives flavor and crunch. You can adjust the filling to suit your taste. Want it spicier? Add more chili garlic sauce. Prefer it milder? Cut back on the heat while still keeping rich flavors. Garnish your egg rolls for a nice touch. Sprinkle sesame seeds and sliced green onions on top. This adds color and texture. Serve your egg rolls with a dipping sauce. Sweet and sour sauce or soy sauce work great. Place a small bowl of sauce in the center of your platter. It makes a beautiful presentation that invites everyone to dig in! {{image_2}} You can switch up the meat in your egg rolls. Chicken or shrimp can work well. They both add unique flavors and textures. If you want to use veggies, try bell peppers or mushrooms. These add color and crunch, making your egg rolls even more exciting. You can mix different veggies together for more taste. For spice lovers, adding chili flakes or hot sauce can make your egg rolls fiery. You can also mix sweet and savory flavors. Try adding a bit of honey or sweet chili sauce to the filling. This gives a lovely balance of flavors. Experimenting with spices can lead to tasty surprises. You can bake or fry your egg rolls. Baking is healthier, but frying gives a crispy texture. If you choose to fry, make sure the oil is hot for golden egg rolls. Air frying is another option. It uses less oil and still gives a nice crunch. This method is great if you want to keep things lighter. For the full recipe, check out the details above. To keep your leftover egg rolls fresh, store them in the fridge. Place them in an airtight container. They will stay good for about 3-4 days. If you want to save them longer, freezing is a great option. Wrap each egg roll in plastic wrap. Then, place them in a freezer-safe bag. They can last in the freezer for up to 3 months. When it’s time to eat your stored egg rolls, you want them crispy again. The best way to reheat them is in the oven. Preheat your oven to 375°F (190°C). Place the egg rolls on a baking sheet. Heat them for about 10-15 minutes. Flip them halfway through for even crispiness. You can also use an air fryer. Set it to 350°F (175°C) and heat for about 5-7 minutes. In the fridge, pork egg rolls last for about 3-4 days. In the freezer, they can last for up to 3 months. Always check for any signs of spoilage before eating. If they smell off or look strange, it’s best to throw them away. Enjoy your delicious pork egg rolls while they are fresh! Pork egg rolls are made of several tasty ingredients. You need: - Ground pork - Green cabbage, finely shredded - Carrots, grated - Green onions, chopped - Garlic and ginger for flavor - Soy sauce and sesame oil for seasoning - Egg roll wrappers to hold everything together These ingredients create a savory filling that is both crunchy and flavorful. Yes, you can make pork egg rolls ahead of time. Prepare the filling and roll them up. Then, store them in the fridge for up to 24 hours. You can also freeze them for longer storage. When ready to fry, cook them straight from the freezer. This keeps them fresh and tasty. Egg rolls are done frying when they turn a golden brown color. This usually takes about 2-3 minutes per side. The skin should look crispy and feel firm to the touch. You can also check by pressing lightly; they should feel hot inside. Pork egg rolls taste great with several dipping sauces. Some popular choices include: - Sweet and sour sauce - Soy sauce - Duck sauce - Spicy mustard These sauces enhance the flavors and add extra zing. Yes, you can bake pork egg rolls if you prefer a healthier option. Preheat your oven to 400°F (200°C). Place the egg rolls on a baking sheet. Brush them lightly with oil. Bake for 20-25 minutes, turning halfway through. They won’t be as crispy, but they will still be delicious. You can find pre-made pork egg rolls in many grocery stores. Check the frozen foods section or the deli area. Asian markets often carry fresh ones as well. Look for brands that use quality ingredients for the best taste. Making pork egg rolls is fun and rewarding. You now know the key ingredients, from ground pork to green cabbage and seasoning. I shared step-by-step instructions for preparing the filling, rolling, and frying. You also learned tips for crispiness and variations for your tastes. Whether you choose to fry or bake, these egg rolls make a tasty treat. With the right guide, you can impress family and friends. Enjoy exploring this dish in your kitchen!](https://toastedrecipes.com/wp-content/uploads/2025/04/005f455e-7ab4-4444-a22e-4bd10f1b59ef-2.webp)