Skip to content
toastedrecipes.com
  • Home
  • Appetizers
  • Desserts
  • Salads
  • Breakfast
  • Dinner
  • Privacy Policy
  • Contact
  • About

Chef Theo

Oatmeal Cookies Deliciously Chewy and Simple Recipe

May 10, 2025April 28, 2025 by Chef Theo
Making oatmeal cookies is fun and easy. You only need a few simple items. This recipe delivers chewy cookies with rich flavors. You will enjoy the mix of oats and chocolate. Here is what you will need for the best oatmeal cookies: - 1 cup rolled oats - 1 cup all-purpose flour - 1/2 cup brown sugar, packed - 1/2 cup granulated sugar - 1/2 cup unsalted butter, softened - 1/4 cup honey - 1 large egg - 1 teaspoon vanilla extract - 1/2 teaspoon baking soda - 1/2 teaspoon salt - 1/2 teaspoon ground cinnamon - 1/2 cup dark chocolate chips These ingredients make your cookies chewy and sweet. The oats add texture, while the sugars create a nice balance. You can make your cookies even better by adding extras. Here are some great options: - 1/2 cup walnuts, chopped - 1/2 cup raisins - 1/2 cup coconut flakes - A pinch of nutmeg - A handful of dried fruit Feel free to mix and match! Each add-in brings its own flavor and crunch. Enjoy creating your own twist on this classic recipe. To make oatmeal cookies, start by gathering your ingredients. You will need rolled oats, flour, sugars, butter, honey, an egg, vanilla, baking soda, salt, cinnamon, and chocolate chips. 1. Preheat your oven to 350°F (175°C). Line a baking sheet with parchment paper. This helps cookies bake evenly and not stick. 2. In a bowl, cream the softened butter with brown and granulated sugar. Mix until the mixture is light and fluffy. This process adds air and makes your cookies soft. 3. Next, add honey, the egg, and vanilla to the butter mix. Stir until everything is smooth. This adds sweetness and flavor. 4. In another bowl, mix the rolled oats, flour, baking soda, salt, and cinnamon. Stir until well blended. This is your dry mix. 5. Gradually add the dry mix to the wet mix. Stir until just combined. Over-mixing can make cookies tough, so stop as soon as you see no dry flour. 6. Gently fold in the chocolate chips and nuts if you want. This is where you can add your favorite flavors. Getting the baking right is key. - Use a tablespoon to scoop the dough. This keeps cookie sizes even. - Place the dough balls about 2 inches apart. Cookies spread while baking, so give them space. - Flatten each ball slightly with a spoon. This helps them bake evenly and creates a nice shape. - Bake for 10-12 minutes. Watch for golden edges. This means they are ready to come out. After baking, cooling is important for the right texture. 1. Let the cookies sit on the baking sheet for 5 minutes. This helps them set. 2. Carefully transfer them to a wire rack. This allows air to circulate and cool them down completely. 3. Store cookies in an airtight container. They stay fresh longer this way. For the full recipe, check out the Oatmeal Cookie Delight section above. Enjoy your deliciously chewy cookies! When making oatmeal cookies, small errors can change the outcome. Here are some tips to help you avoid common mistakes: - Overmixing the dough: This can make cookies tough. Mix until just combined. - Incorrect oven temperature: Make sure your oven is preheated. An oven thermometer helps ensure accuracy. - Not measuring ingredients properly: Use dry measuring cups for flour and oats. This ensures you get the right amounts. - Skipping the cooling time: Let cookies cool before moving them. This helps them set correctly. You can control the texture of your oatmeal cookies easily. Here’s how: - For chewy cookies: Use more brown sugar, and add a bit of extra honey. Bake for a shorter time, about 10 minutes. - For crunchy cookies: Use more white sugar and less honey. Bake a bit longer, checking for a golden brown color. Sometimes you might not have all the ingredients for oatmeal cookies. Here are some great substitutions: - Butter: Use coconut oil or applesauce for a dairy-free option. - Sugar: You can use maple syrup or agave nectar instead of brown sugar. - Flour: Almond flour or whole wheat flour can work well, but adjust the amount to avoid a dry dough. These tips will help you make the most delicious cookies. Check the Full Recipe for specific ingredient amounts and instructions! {{image_2}} You can make oatmeal cookies healthier with simple swaps. Use applesauce instead of butter. This cuts fat and adds moisture. You can also try using whole wheat flour. It adds fiber and nutrients. Use less sugar by adding mashed bananas or dates for sweetness. These changes keep the cookies tasty and guilt-free. Get creative with flavors for fun cookies. You can mix in dried fruits like cranberries or raisins. Add nuts like pecans or almonds for crunch. Try spices like ginger or nutmeg for a warm taste. For a twist, include peanut butter or almond butter. You can even swap chocolate chips for butterscotch or white chocolate. Each mix makes a new cookie adventure. For gluten-free cookies, use almond flour or oat flour. These flours work great and still taste good. If you want vegan cookies, replace the egg with flaxseed meal or chia seeds. Just mix one tablespoon of flaxseed with three tablespoons of water. Let it sit for a few minutes to thicken. Use coconut oil instead of butter for a rich flavor. These options let everyone enjoy oatmeal cookies! For a complete guide, refer to the Full Recipe above. To keep your oatmeal cookies fresh, store them in an airtight container. This method helps maintain their chewy texture. Place parchment paper between layers to prevent sticking. If you have chocolate chips or nuts, they may add moisture. Hence, use this method to keep them at their best. You can freeze oatmeal cookies for later enjoyment. Let them cool completely first. Then, wrap each cookie in plastic wrap or place them in a freezer bag. This keeps them fresh for up to three months. When you want a cookie, take one out and let it sit at room temperature for about 30 minutes. You can also warm it in the oven for a few minutes. Oatmeal cookies last about a week at room temperature. If you keep them in the fridge, they can stay fresh for up to two weeks. To check for freshness, look for any signs of dryness or changes in smell. If they start to feel hard or stale, it’s time to toss them. Enjoy your cookies while they are at their best! For the full recipe of oatmeal cookies, check out the details above. To make your oatmeal cookies soft, use brown sugar. Brown sugar adds moisture. You can also bake them for a shorter time. Remove them when they are just golden. Let them cool on the baking sheet for a few minutes. This keeps them soft and chewy. Yes, you can use quick oats. They will change the texture a bit. Quick oats may make your cookies softer. If you want more chew, stick with rolled oats. Rolled oats give a heartier bite. You can use coconut oil or applesauce. Coconut oil works well for a rich taste. Applesauce adds moisture and reduces fat. You can also try margarine. Each option changes the taste slightly, so choose what you like best. For the full recipe, check the earlier section. Oatmeal cookies are tasty, simple, and fun to make. We covered essential and optional ingredients, step-by-step baking, and tips for chewy or crunchy cookies. You can even explore healthy and creative variations. Remember to store them right for the best taste. Try different ingredients and techniques to find your favorite recipe. Enjoy baking and sharing these delightful treats!

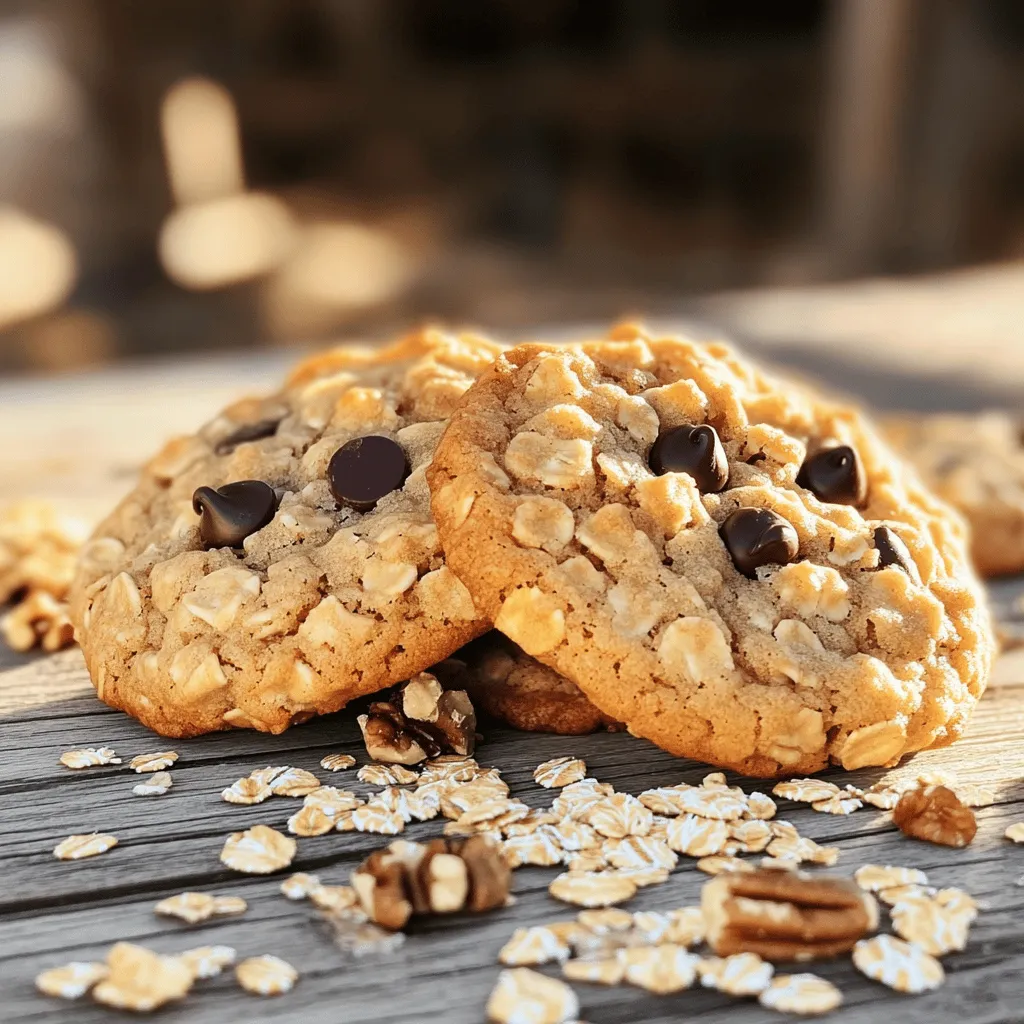
If you love cookies that are both chewy and simple to make, I have the perfect recipe for you. Oatmeal cookies are not just tasty—they’re also easy to customize. You …

Read more

Categories Desserts

Baked Caesar Chicken Flavorful and Easy Dinner Recipe

May 10, 2025April 28, 2025 by Chef Theo
For this tasty dish, you need simple items. Here’s what you should gather: - 4 boneless, skinless chicken breasts - 1 cup Caesar dressing (store-bought or homemade) - 1 cup breadcrumbs (preferably panko for extra crunch) - 1/2 cup freshly grated Parmesan cheese - 1 tablespoon Italian seasoning - Salt and pepper to taste - 2 cups romaine lettuce, chopped - Cherry tomatoes, halved (for garnish) - Lemon wedges (for serving) These ingredients combine to create a rich and creamy flavor. The chicken absorbs the Caesar dressing, making it juicy and delicious. The panko breadcrumbs give a nice crunch, and the Parmesan adds a savory touch. You can add personal touches to this recipe. Here are some ideas: - Fresh herbs like parsley or basil for extra flavor - Garlic powder or minced garlic for a stronger taste - Red pepper flakes if you enjoy a bit of heat - Avocado slices for a creamy addition - Bacon bits for a smoky flavor Feel free to mix and match these options to suit your taste. Each addition can make the dish more exciting. If you don’t have an ingredient, don’t worry. Here are some swaps you can use: - Use chicken thighs instead of breasts for richer flavor - Swap Caesar dressing with ranch dressing for a different taste - Use whole wheat breadcrumbs for a healthier option - Grated mozzarella can be a nice cheese swap if Parmesan is not available These substitutions help you make this dish even if you are missing some items. Just remember to adjust cooking times based on the ingredients you choose. For the full recipe, check the provided link. To start, gather all your ingredients. This makes cooking easier and faster. You will need four boneless, skinless chicken breasts, Caesar dressing, breadcrumbs, and Parmesan cheese. Don’t forget Italian seasoning, salt, and pepper too. 1. Preheat your oven to 400°F (200°C). 2. Place the chicken in a large bowl. Season it with salt, pepper, and Italian seasoning. 3. Pour the Caesar dressing over the chicken. Make sure all pieces get coated. Let it marinate for about 15 minutes. This step adds great flavor. Now, it’s time to bake the chicken. 1. In a bowl, mix the breadcrumbs and grated Parmesan cheese. 2. Take each marinated chicken breast and press it into the breadcrumb mix. Be sure to coat both sides well. 3. Place the coated chicken on a greased baking sheet. 4. Bake for 25 to 30 minutes. The chicken should be cooked through and the topping golden brown. Use a meat thermometer to check. The chicken needs to reach 165°F (75°C). Once your chicken is done, it's time to serve! 1. Let the chicken rest for five minutes before slicing. 2. Prepare a fresh romaine salad while the chicken cools. Toss chopped lettuce with Caesar dressing. 3. Serve each chicken breast on a plate. Add a portion of your romaine salad next to it. 4. Garnish with halved cherry tomatoes for color. A wedge of lemon is perfect for extra flavor. This recipe makes a tasty and easy dinner. For the full recipe, check out the details above! Choose fresh chicken breasts for the best taste. Look for meat that feels firm and looks pink. Always wash your hands before and after handling raw chicken. This helps keep your food safe. Cook chicken to the right temperature. The safe internal temperature is 165°F (75°C). Use a meat thermometer to check this. This ensures your chicken is safe to eat and juicy. To get that nice, crispy skin, use panko breadcrumbs. Panko is lighter and crunchier than regular breadcrumbs. Mix the panko with Parmesan cheese for extra flavor. Before baking, press the chicken into the breadcrumb mix firmly. This helps the coating stick better. Bake at 400°F (200°C) for the best results. Keep an eye on it to avoid burning. Marinate your chicken in Caesar dressing for at least 15 minutes. This adds a lot of flavor. You can marinate it longer for a stronger taste. Try adding a little lemon juice to the dressing. This gives a nice tang. You can also mix in some garlic for an extra kick. For a special touch, marinate overnight in the fridge. This makes the chicken even more tasty. Using these tips will help you make Baked Caesar Chicken that everyone will love. For the complete recipe, check the Full Recipe. {{image_2}} You can easily make Baked Caesar Chicken healthier. Use Greek yogurt instead of Caesar dressing. It gives great flavor while cutting calories and fat. You can also swap out breadcrumbs for crushed nuts. Almonds or walnuts add nice crunch and healthy fats. Adding veggies boosts nutrition. Try placing sliced bell peppers or zucchini on the baking sheet with chicken. They cook nicely and soak up the flavors. Roasted asparagus or broccoli also pairs well and makes the meal colorful and tasty. Pair your Baked Caesar Chicken with fresh salads for a balanced meal. A light arugula salad with lemon vinaigrette works great. You can also serve it with quinoa or brown rice for extra fiber. These sides complement the chicken and make your plate appealing. For the complete cooking experience, check out the Full Recipe. Storing Baked Caesar Chicken is simple. First, let the chicken cool down to room temperature. Then, place it in an airtight container. You can keep it in the fridge for up to three days. Make sure to separate the chicken from the salad. This will keep everything fresh. To reheat your Baked Caesar Chicken, preheat the oven to 350°F (175°C). Place the chicken on a baking sheet. Cover it with foil to keep it moist. Heat for about 15 to 20 minutes. You can also use a microwave. Just place a piece on a plate and heat it in short bursts. Check often to avoid overcooking. You can freeze Baked Caesar Chicken if you want to save it for later. First, let the chicken cool completely. Wrap each piece tightly in plastic wrap. Then, place them in a freezer bag. You can keep it in the freezer for up to three months. When you are ready to eat, thaw it in the fridge overnight before reheating. For the complete recipe, check the Full Recipe section. Baked Caesar Chicken is a delicious dish made with chicken breasts and Caesar dressing. It has a crispy topping of breadcrumbs and Parmesan cheese. The chicken cooks in the oven, making it easy and tasty. You can serve it with a fresh salad for a complete meal. For the full recipe, check out the details above. Yes, you can use chicken thighs instead of breasts. Chicken thighs are juicy and have more flavor. They will also cook well with the Caesar dressing and breadcrumbs. Just adjust the cooking time, as thighs may take a bit longer to cook through. To check if the chicken is fully cooked, use a meat thermometer. The internal temperature should reach 165°F (75°C). If you don’t have a thermometer, cut into the chicken. The meat should be white, and the juices should run clear. Cook it longer if it’s still pink or the juices are red. Baked Caesar Chicken offers a simple way to enjoy a tasty meal. You learned about key ingredients, preparation steps, and tips for great results. You can customize the dish with optional ingredients or healthy swaps. Storing and reheating the leftovers is easy too. Whether you're a new cook or a pro, these ideas help you make a delicious dinner. Enjoy your time in the kitchen and share this dish with your loved ones. Trust me, they will love it!

Looking for a quick and tasty meal? You’ll love this Baked Caesar Chicken recipe! It combines juicy chicken with rich Caesar flavors for a dinner that’s easy to prepare. In …

Read more

Categories Dinner

Blueberry Crumble Pie Delightful and Easy Recipe

May 10, 2025April 28, 2025 by Chef Theo
For a tasty Blueberry Crumble Pie, gather these ingredients: - 2 cups fresh blueberries - 1 cup granulated sugar - 2 tablespoons cornstarch - 1 tablespoon lemon juice - 1 teaspoon vanilla extract - 1 pre-made pie crust (or homemade if preferred) - 1 cup rolled oats - 1/2 cup all-purpose flour - 1/2 cup brown sugar - 1/2 teaspoon ground cinnamon - 1/4 cup cold unsalted butter, cubed - Pinch of salt These ingredients work together to create a sweet and tart filling, topped with a crunchy crumble. Fresh blueberries are always best for this pie. They burst with flavor and add vibrant color. However, frozen blueberries can work too, especially when fresh ones are out of season. If you use frozen, don’t thaw them first. This will keep them firm and juicy. You might need to add a little more cornstarch to thicken the filling, as frozen berries release more juice. You can swap some ingredients if needed. Here are a few ideas: - Use honey or maple syrup instead of granulated sugar for a natural sweetener. - If you need a gluten-free option, try almond flour instead of all-purpose flour. - You can replace unsalted butter with coconut oil or vegan butter for a dairy-free version. - If you don’t have oats, crushed nuts like almonds or pecans can make a delicious topping. For the full recipe, check out the Blueberry Bliss Crumble Pie. Explore how easy it is to make this delightful treat! To start, grab a medium bowl. Add 2 cups of fresh blueberries. Then, mix in 1 cup of granulated sugar. Sprinkle in 2 tablespoons of cornstarch. Add 1 tablespoon of lemon juice and 1 teaspoon of vanilla extract. Toss the blueberries gently to coat them well. Let this sit for about 10 minutes. This helps the filling thicken and the flavors blend. Now, take another bowl. In it, combine 1 cup of rolled oats, 1/2 cup of all-purpose flour, and 1/2 cup of brown sugar. Add 1/2 teaspoon of ground cinnamon and a pinch of salt. Next, cube 1/4 cup of cold unsalted butter. Add the butter to the oat mixture. Use your fingers or a pastry cutter to blend until it looks like coarse crumbs. Roll out your pre-made pie crust and place it in a 9-inch pie dish. Trim the edges if needed. Prick the bottom with a fork to avoid bubbles. Pour the blueberry filling into the crust and spread it evenly. Sprinkle the crumble topping over the blueberries. Make sure to cover the entire surface. Bake at 375°F (190°C) for 40-45 minutes. Look for a golden brown crumble and bubbling blueberries. After baking, let the pie cool for 15 minutes. This helps the filling set. Enjoy each slice of this blueberry crumble pie delight! For the complete recipe, check out the Full Recipe. To get a great crust, start with cold ingredients. Cold butter helps make it flaky. If you use a pre-made crust, check for cracks. If you see any, patch them with extra dough. Always roll the dough on a floured surface. This keeps it from sticking. Pricking the bottom with a fork is key. It helps steam escape and stops bubbles. For a crunchy topping, mix the dry ingredients well. Use oats, flour, and sugar. Cut in cold butter until it looks like coarse crumbs. This helps the topping crisp up. Spread the crumble evenly over the blueberries. Bake until golden brown. Keep an eye on it. If it browns too fast, cover it with foil. To avoid a soggy bottom, consider pre-baking the crust. This helps firm it up before adding the filling. You can also sprinkle a thin layer of flour in the crust. This layer acts like a barrier. Another trick is to bake the pie on a hot pan. It gives the bottom a nice crunch. Follow these tips for a perfect slice every time. For more details, check out the Full Recipe. {{image_2}} You can easily make a gluten-free blueberry crumble pie. Start by using a gluten-free pie crust. Look for one made from almond flour or a blend of rice and tapioca flours. For the crumble topping, swap regular flour for gluten-free flour. This way, you keep the same texture without gluten. If you want a vegan version, you can replace butter with coconut oil or a vegan butter. For the crumble, ensure your sugar is vegan-friendly. You can also substitute the pie crust with a store-bought vegan option. Instead of an egg wash, brush the crust with a bit of almond milk for shine. To elevate the taste, try adding some lemon zest to the blueberry filling. This brightens the flavor. Almond extract also adds a lovely nutty touch. You can mix a teaspoon of almond extract into the crumble for depth. Experiment with spices like nutmeg or ginger for extra warmth. These small tweaks make a big difference in your blueberry crumble pie. For the full recipe, check out the Blueberry Bliss Crumble Pie. To keep your blueberry crumble pie fresh, store it in the fridge. Place it in an airtight container. If you do not have one, cover the pie tightly with plastic wrap. This method helps prevent it from drying out. Enjoy your pie within 3-4 days for the best taste. When you want to enjoy your leftover pie, you can reheat it. Preheat your oven to 350°F (175°C). Place the pie on a baking sheet to catch any drips. Heat it for about 15-20 minutes. This will warm the pie and keep the crumble crispy. If you're in a hurry, you can microwave a slice for about 30 seconds but know that the texture may not be as good. If you want to save your pie for later, freezing is a great option. First, let the pie cool completely. Wrap it tightly in plastic wrap and then in aluminum foil. This double wrapping helps prevent freezer burn. You can freeze the pie for up to 2-3 months. When you’re ready to eat it, thaw it in the fridge overnight. Reheat it in the oven for the best results. For more details, check the Full Recipe. You can tell the pie is done when the crumble is golden brown. The blueberries should bubble around the edges. If the crust looks firm and not too soft, it is ready. I suggest using a timer for 40-45 minutes of baking. You can also check the filling by gently shaking the pie. If it moves like jelly, it needs more time. Yes, you can use many fruits! Raspberries, blackberries, or peaches work well. Mix and match to find your favorite. Just remember to adjust the sugar based on the fruit's sweetness. For example, sour cherries might need more sugar. Blueberry crumble pie tastes great with vanilla ice cream or whipped cream. You can also add a sprinkle of mint for color. Some people enjoy a cup of tea or coffee with their pie. It's a perfect dessert for family gatherings or special occasions. Blueberry crumble pie has a fun history. It dates back to the 19th century. People made it as a way to use fresh fruit. It became popular in the U.S. during the Great Depression. This pie was easy to make and used simple ingredients. Now, it remains a favorite for many! This blog post covered how to make a delicious blueberry crumble pie. We discussed key ingredients, including fresh versus frozen blueberries, and helpful substitutions. I provided step-by-step instructions for preparing the filling, the crumble topping, and assembling the pie. Understanding baking tips and variations can elevate your pie, whether it’s gluten-free or vegan. Finally, I shared storage tips to keep your leftovers fresh. Enjoy baking and sharing this treat with others!

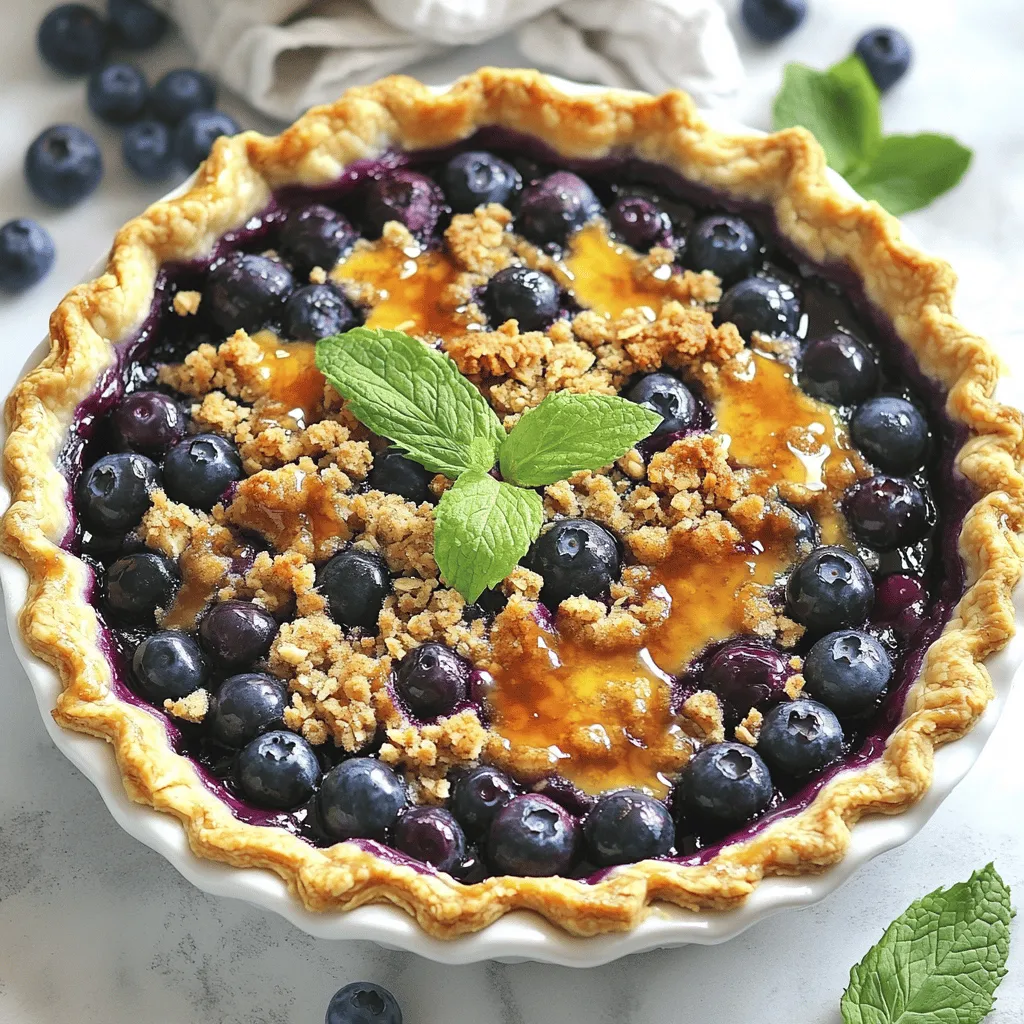
Are you ready to make a dessert that’s both simple and delicious? My Blueberry Crumble Pie recipe will impress your family and friends. You’ll learn how to mix fresh berries …

Read more

Categories Desserts

Caramel Apple Cream Cheese Crescent Ring Delight

May 10, 2025April 28, 2025 by Chef Theo
- 2 tubes of crescent roll dough - 1 (8 oz) package cream cheese, softened - 1 cup granulated sugar - 1 teaspoon vanilla extract - 1/2 teaspoon cinnamon - 2 medium apples (Granny Smith or Honeycrisp), peeled and diced - 1/2 cup caramel sauce (plus extra for drizzling) - 1 egg (for egg wash) - 1 tablespoon milk - 1/4 cup chopped pecans (optional) - Mixing bowls - Baking sheet - Parchment paper - Whisk or fork for egg wash - Prep Time: 15 minutes - Cook Time: 25-30 minutes - Total Time: 40 minutes - Servings: 8 servings The ingredients for the Caramel Apple Cream Cheese Crescent Ring are simple yet delightful. You start with crescent roll dough, which gives a soft and flaky base. The cream cheese adds a rich, creamy layer. Granulated sugar and vanilla extract bring in sweetness and warmth. A hint of cinnamon gives a cozy touch. When it comes to the apples, I recommend using Granny Smith or Honeycrisp. They add a great tartness that balances the sweetness. The caramel sauce ties everything together with its gooey goodness. If you want a bit of crunch, toss in some pecans. They add a nice texture, but you can skip them if you prefer. Make sure you have the right tools. Mixing bowls are key for blending the cream cheese mixture. A baking sheet lined with parchment paper helps prevent sticking. The egg and milk mixture gives your dough a lovely golden finish. In just 40 minutes, you can serve eight delicious portions. This recipe is perfect for gatherings or a sweet treat at home. You can find the full recipe in the article to get started on this tasty adventure! First, grab a mixing bowl. Add the cream cheese, granulated sugar, vanilla extract, and cinnamon. Use a spatula or whisk to blend until smooth. This creamy mixture will be the heart of your ring. Now, take your crescent roll dough. Unroll it on a baking sheet lined with parchment paper. Arrange the triangles in a circular shape, overlapping them slightly. Leave the center open for the filling. Spread the cream cheese mixture evenly in the middle of the ring. In another bowl, mix the diced apples with caramel sauce. Make sure the apples are coated well. Spoon this sweet apple mixture over the cream cheese layer. This will bring a tasty crunch to each bite. Next, fold the pointed ends of the crescent dough over the apple filling. Tuck them slightly under to form a secure ring. In a small bowl, beat the egg with milk. Brush this mixture over the dough to help it turn golden brown. Bake in a preheated oven at 375°F for 25-30 minutes. You want it golden and cooked through. Let it cool for a bit before drizzling more caramel sauce on top for an extra treat. Enjoy your Caramel Apple Cream Cheese Crescent Ring! You can find the full recipe above. For the perfect Caramel Apple Cream Cheese Crescent Ring, set your oven to 375°F (190°C). This temperature allows the dough to rise well. It also helps the filling cook through. Place the baking sheet in the center of the oven. This ensures even heat distribution. If you put it too close to the bottom, the bottom may burn. To get a golden crust, brush the dough with an egg wash. Mix one egg with a tablespoon of milk for this. Use a pastry brush for even coverage. This wash gives the dough a nice shine. It also helps create a crisp texture. Don’t skip this step if you want that perfect look! Feel free to add your own twist! You can swap cinnamon for nutmeg or allspice. This adds different notes to your ring. You might try adding lemon zest for brightness. For a richer taste, consider using brown sugar instead of granulated sugar. Each change can make the dish unique. Get creative and make it your own! For the complete recipe, check out the Full Recipe. {{image_2}} You can switch things up by using other fruits. Pears add a sweet twist. Fresh berries like blueberries or raspberries bring a tart flavor. You can use peaches or even figs for a fun mix. Each fruit changes the taste but still works well with cream cheese and caramel. If you need a nut-free version, skip the pecans. You can replace them with seeds, like sunflower seeds, for crunch. You could also use extra apple pieces for texture. This way, you keep it safe for anyone with nut allergies. To go gluten-free, look for gluten-free crescent roll dough. Many brands offer this option. You can also use gluten-free pastry dough. Just roll it out and follow the same steps. It will still taste great and be safe for gluten-sensitive eaters. For the full recipe, check out the Caramel Apple Cream Cheese Crescent Ring. To keep your Caramel Apple Cream Cheese Crescent Ring fresh, wrap it tightly. Use plastic wrap or aluminum foil. You can also place it in an airtight container. Store it in the fridge for up to three days. This helps maintain its creaminess and flavor. To reheat your crescent ring, preheat your oven to 350°F (175°C). Place the ring on a baking sheet. Cover it loosely with foil to avoid burning. Heat for about 10-15 minutes until warm. This method keeps the crust crispy and the filling soft. If you want to save some for later, freezing is a great option. Wrap the cooled crescent ring tightly in plastic wrap, then in foil. This protects it from freezer burn. You can freeze it for up to two months. To enjoy later, thaw it in the fridge overnight before reheating. To make the Caramel Apple Cream Cheese Crescent Ring healthier, you can try a few simple swaps: - Use low-fat cream cheese instead of regular cream cheese. - Reduce the amount of sugar in the cream cheese mixture. You can start with half a cup and adjust to your taste. - Substitute some of the granulated sugar with a natural sweetener like honey or agave syrup. - For a lighter option, choose a sugar-free caramel sauce. These changes can help cut calories while keeping the flavor fun and delicious. Yes, you can prepare the crescent ring ahead of time! Here’s how: - Make the cream cheese mixture and the apple filling in advance. Store them in separate containers in the fridge. - Assemble the crescent ring just before baking. This way, the dough stays fresh and flaky. - If you need to, you can also shape the ring and keep it in the fridge for a few hours. Just cover it well with plastic wrap. When you are ready to bake, simply brush with egg wash and pop it in the oven. This dessert pairs well with many tasty options: - A scoop of vanilla ice cream adds a creamy touch. - Whipped cream can enhance the sweet flavors. - Serve it with a drizzle of extra caramel sauce for added sweetness. - Fresh apple slices provide a nice crunch and balance the sweetness. - A sprinkle of sea salt can bring out the caramel flavor beautifully. These pairings will make your Caramel Apple Cream Cheese Crescent Ring even more delightful! This recipe gives you a fun and tasty treat. You create a delicious crescent ring filled with cream cheese and apples. The steps are easy and the result is a crowd-pleaser. You can customize it with different fruits or toppings. Always store leftovers well for fresh flavors later. I hope you enjoy making this sweet treat as much as I do!

Get ready to impress your family and friends with a sweet treat: the Caramel Apple Cream Cheese Crescent Ring! This delightful recipe combines soft cream cheese, sweet apples, and rich …

Read more

Categories Desserts

Harry Potter Butterbeer Cupcakes Magical Dessert Treat

May 10, 2025April 28, 2025 by Chef Theo
- 1 ½ cups all-purpose flour - ½ cup unsalted butter, softened - 1 cup brown sugar - 2 large eggs - ½ cup buttermilk - ¼ cup butterscotch syrup - ½ teaspoon butter extract (optional) - 1 teaspoon vanilla extract - ½ cup heavy cream - 1 cup powdered sugar - Extra butterscotch syrup for drizzling To make these magical cupcakes, you need a mix of main ingredients, flavor enhancers, and frosting components. Each part plays a key role. For the main ingredients, I use flour to create the base. The butter adds richness, while brown sugar gives sweetness. Eggs help bind everything together, and buttermilk keeps the cupcakes moist. Flavor enhancers bring out the butterscotch taste. I love adding butterscotch syrup for a sweet kick. The optional butter extract makes the flavor pop, and vanilla adds warmth. For the frosting, heavy cream is key. It whips up light and fluffy. Powdered sugar sweetens it, making it perfect for topping the cupcakes. Don’t forget the extra butterscotch syrup! It makes a delightful drizzle. These ingredients come together to create a dessert that feels like a treat from Hogwarts. For the full recipe, check out the [Full Recipe]. First, you need to preheat the oven to 350°F (175°C). This step makes sure your cupcakes bake evenly. While the oven heats, grab a medium bowl. In this bowl, whisk together these dry ingredients: - 1 ½ cups all-purpose flour - 1 teaspoon baking powder - ½ teaspoon baking soda - ¼ teaspoon salt Mix them well and set the bowl aside. This blend will give your cupcakes the right rise. Next, take a large mixing bowl and cream together the following: - ½ cup unsalted butter, softened - 1 cup brown sugar Beat them until they are light and fluffy. This should take about 3 to 5 minutes. Now, add: - 2 large eggs, one at a time - 1 teaspoon vanilla extract Mix well until everything is combined. Now it's time to bring the wet and dry ingredients together. Gradually add the dry mix to the butter mix. Alternate this with: - ½ cup buttermilk Start and end with the dry ingredients. Be careful not to overmix. You want a smooth batter, but a little lump is okay. Now, fold in: - ¼ cup butterscotch syrup - ½ teaspoon butter extract (optional) Make sure these flavors mix well into the batter. Now, it's time to fill the cupcake liners. Divide the batter evenly among them. Fill each liner about 2/3 full. This helps them rise without overflowing. Bake the cupcakes for about 18 to 20 minutes. To check if they’re done, insert a toothpick into the center. If it comes out clean, they are ready. After baking, let them cool in the pan for 5 minutes. Then, transfer them to a wire rack to cool completely. While the cupcakes cool, prepare the frosting. In a medium bowl, whip: - ½ cup heavy cream Keep whipping until soft peaks form. Then, gradually add: - 1 cup powdered sugar Continue to whip until stiff peaks form. This frosting will be light and fluffy. Once the cupcakes are completely cool, frost each one generously. Use a piping bag for neat designs or a knife for a simple spread. To finish, drizzle some extra butterscotch syrup on top. This adds a sweet touch and makes your cupcakes look magical! To make the best Harry Potter Butterbeer cupcakes, focus on your batter. First, avoid overmixing. If you mix too much, your cupcakes can turn out tough. Mix until just combined for a light texture. Next, ensure your ingredients are at room temperature. Room temp butter and eggs blend better. They create a smooth batter, which helps your cupcakes rise evenly. Frosting can make or break your cupcakes. I recommend using a piping bag for a neat look. Fill your bag with frosting and twist it to keep it from spilling. To create pretty patterns, practice your piping. Try swirling the frosting in circles or making a simple star shape. This adds a fun touch to your cupcakes. Decorating these cupcakes is part of the fun! Start by drizzling butterscotch syrup on top. This adds a sweet flavor and a beautiful look. You can also add themed sprinkles or toppings. Think about using gold and brown sprinkles for a Harry Potter vibe. These small touches can make your cupcakes even more magical! {{image_2}} To make these cupcakes gluten-free, swap all-purpose flour with a good gluten-free blend. Look for one that works well in baking. You can find these blends in most stores. Keep the rest of the recipe the same. Just watch the baking time, as gluten-free flour can change how they bake. For a vegan twist, you can use plant-based butter and milk. Replace the two large eggs with 1/2 cup of unsweetened applesauce or a flax egg. To make a flax egg, mix 1 tablespoon of ground flaxseed with 2.5 tablespoons of water. Let it sit for five minutes. This keeps the cupcakes moist and delicious. Try a butterscotch frosting for a rich flavor. To make this, mix softened butter with powdered sugar and butterscotch syrup. You can also add a touch of vanilla. For a cream cheese frosting, blend softened cream cheese with powdered sugar and a splash of vanilla extract. Both options add a fun twist to your cupcakes. You can keep your Butterbeer cupcakes at room temperature. Place them in an airtight container. This keeps them fresh for up to three days. Make sure to keep them away from direct sunlight and heat. The cupcakes will stay soft and tasty if stored this way. If you want to save them for longer, freezing is the way to go. Wrap each cupcake in plastic wrap. Then, place them in a freezer-safe bag. They can stay in the freezer for up to three months. To enjoy them again, just take them out and let them thaw. Leave them at room temperature for a few hours. You can also speed up thawing by placing them in the fridge overnight. Frosted cupcakes need special care. To keep the frosting nice, store them in a single layer. Use a container that is large enough to hold them without squishing. If you have to stack them, place a piece of wax paper between layers. This will help keep the frosting from sticking. For the best taste, eat them within two days. Yes, you can make these cupcakes ahead. Bake them a day in advance. Let them cool fully. Store them in an airtight container at room temperature. You can frost them just before serving. You can use milk with vinegar or lemon juice. Just mix one cup of milk with one tablespoon of vinegar or juice. Let it sit for five minutes to thicken. You can also use yogurt or sour cream mixed with water. To check if cupcakes are done, use a toothpick. Insert it into the center of a cupcake. If it comes out clean, the cupcakes are ready. If there’s batter on it, bake a few more minutes. Yes! You can try caramel or chocolate syrup. Each syrup adds a unique taste. Caramel gives a rich flavor, while chocolate adds a sweet twist. Be creative and mix flavors you love! Use whipped cream frosting for a fun look. You can pipe it high for a fancy touch. Drizzle extra butterscotch syrup on top. Add themed sprinkles or chocolate chips for extra flair. Make them as magical as you like! For detailed instructions and servings, check the [Full Recipe]. In this post, I detailed how to make delicious butterscotch cupcakes. You learned about the main ingredients, flavor enhancers, and how to prepare and frost them. I shared tips for perfecting your batter and frosting designs, along with storage advice. You can also explore gluten-free and vegan options for different diets. Baking is fun and rewarding, so don’t hesitate to try various flavors and decorations. Enjoy the sweet treat you create!

Are you ready to cast a sweet spell in the kitchen? These Harry Potter Butterbeer Cupcakes are a magical treat that will delight any fan! With their rich butterscotch flavor …

Read more

Categories Desserts

Lasagna Roll Ups Simple and Delicious Dinner Idea

May 10, 2025April 28, 2025 by Chef Theo
To make Lasagna Roll Ups, you need a few simple ingredients. Here is what you will need: - 9-12 lasagna noodles, cooked and drained - 2 cups ricotta cheese - 1 cup mozzarella cheese, shredded - 1/2 cup Parmesan cheese, grated - 1 large egg - 2 cups spinach, chopped (fresh or frozen) - 2 cups marinara sauce - 1 tablespoon garlic powder - 1 teaspoon Italian seasoning - Salt and pepper to taste - Fresh basil leaves for garnish These ingredients blend well to create a tasty dish. When choosing your ingredients, focus on freshness and quality. Here are some tips: - Noodles: Select a brand that uses no preservatives. Check for a good texture. - Cheese: Opt for whole milk ricotta for creaminess. Fresh mozzarella offers a nice melt. - Spinach: Fresh spinach adds color and taste. Frozen works too, just thaw and drain it well. - Sauce: Look for a marinara with simple ingredients. A homemade sauce can elevate your dish. If you have dietary needs, here are some substitutions: - Ricotta cheese: Use cottage cheese or tofu for a lighter option. - Mozzarella cheese: Try a dairy-free cheese for a vegan meal. - Spinach: Swap spinach for other greens like kale or Swiss chard. - Lasagna noodles: Use zucchini slices for a low-carb option. - Egg: Replace the egg with flaxseed meal mixed with water for a vegan version. These swaps allow everyone to enjoy this dish! For the full recipe, check out the detailed instructions on how to prepare these delicious Lasagna Roll Ups. First, gather all your ingredients. You need: - 9-12 lasagna noodles, cooked and drained - 2 cups ricotta cheese - 1 cup mozzarella cheese, shredded - 1/2 cup Parmesan cheese, grated - 1 large egg - 2 cups spinach, chopped (fresh or frozen) - 2 cups marinara sauce - 1 tablespoon garlic powder - 1 teaspoon Italian seasoning - Salt and pepper to taste - Fresh basil leaves for garnish Next, clear your workspace. Make sure you have a large bowl, a baking dish, and a flat surface to roll your noodles. Preheat your oven to 375°F (190°C) so it’s ready when you finish. In a large bowl, mix the ricotta cheese, mozzarella cheese, Parmesan cheese, egg, spinach, garlic powder, Italian seasoning, salt, and pepper. Stir well until everything is combined. This mix is your filling. Spread a thin layer of marinara sauce on the bottom of a 9x13-inch baking dish. This keeps the roll-ups from sticking. Now, take one cooked lasagna noodle and spread about 2-3 tablespoons of the cheese mixture evenly along the noodle. Roll it up tightly, starting from one end. Place the rolled noodle seam-side down in the baking dish. Repeat this until all noodles are filled and rolled. Once you place all the roll-ups in the dish, cover them with the rest of the marinara sauce. If you have leftover mozzarella and Parmesan cheese, sprinkle it on top. Cover the dish with aluminum foil to keep the top from burning. Bake for 25 minutes. Then, remove the foil and bake for another 10-15 minutes until the cheese is bubbly and golden. When rolling the noodles, make sure they are not too hot. This helps you avoid burns. If you find the noodles sticking, use a bit of water to help them slide apart. Don’t overfill the noodles. If you add too much filling, it can spill out while baking. A little filling goes a long way. If you want to add extra flavor, mix in some herbs or spices to the ricotta filling. Consider using fresh herbs for a burst of taste. Once baked, let your lasagna roll-ups cool for a few minutes. Garnish with fresh basil leaves before serving. Enjoy your delicious lasagna roll-ups! One common mistake is overcooking the noodles. If they are too soft, they may tear when rolling. Cook them until just al dente to keep them firm. Another mistake is too much filling. If you use too much, the roll-ups can burst. Stick to 2-3 tablespoons of filling per noodle. Also, make sure your oven is preheated. This helps the cheese melt evenly. Lastly, don’t forget to cover the dish with foil at first. This keeps the top from burning. To get that gooey, melty cheese, use a mix of cheeses. Combine mozzarella, ricotta, and Parmesan for the best flavor. Shred the mozzarella instead of using blocks. Shredded cheese melts better. Also, bake the roll-ups covered, then uncovered. This helps the cheese melt fully without drying out. Keep an eye on the oven towards the end. You want a bubbly, golden top. Serve your lasagna roll-ups with a side salad for a fresh touch. A simple green salad pairs well with the rich flavors. For garnish, add fresh basil leaves. They add color and a nice aroma. You can also drizzle a bit of olive oil on top for extra flavor. If you like a kick, sprinkle some red pepper flakes. This enhances the dish and makes it more exciting. Enjoy your meal! For the full recipe, check out the details above. {{image_2}} For a tasty vegetarian version, swap meat for veggies. Use mushrooms, zucchini, or bell peppers. You can also add more greens like kale or Swiss chard. They add color and nutrients. Just sauté the veggies first to keep them soft. Mix these veggies into your cheese filling. This keeps it creamy and delicious. If you need a gluten-free option, use gluten-free lasagna noodles. Many brands offer these at stores. You can also try zucchini slices instead of noodles. Just slice zucchini thinly and layer them like noodles. This makes a fresh, low-carb dish. Check your marinara sauce to ensure it's gluten-free, too. You can make your roll ups even more fun by adding proteins. Try cooked chicken, ground turkey, or sausage for a meatier meal. For a unique touch, add sun-dried tomatoes or feta cheese. These ingredients bring new flavors to the dish. Just keep the cheese mixture balanced. You want it creamy but not too heavy. For the full recipe, click here [Full Recipe]. After you enjoy your lasagna roll ups, store any leftovers in an airtight container. This keeps them fresh and tasty. Allow the dish to cool to room temperature before sealing it up. Place a piece of parchment paper between layers if stacking. This will help prevent sticking. Store your roll ups in the fridge for up to three days. To freeze lasagna roll ups, wrap each one in plastic wrap. Then, place them in a freezer-safe bag. This method helps keep the flavors in. You can freeze them for up to three months. When ready to eat, thaw them in the fridge overnight. To reheat, place them in a baking dish with some marinara sauce. Cover with foil to keep moisture in. Bake at 350°F (175°C) for about 20-25 minutes. Remove the foil for the last five minutes for a bubbly top. Lasagna roll ups can last in the fridge for three days. If they smell off or the cheese looks discolored, it's time to toss them. Check for a slimy texture on the noodles, too. If you see this, do not eat them. Always trust your senses. If in doubt, throw it out. Enjoy your delicious lasagna roll ups by following the storage tips above! For the full recipe, don't forget to check the recipe provided. You can prepare Lasagna Roll Ups a day in advance. First, assemble the roll-ups and place them in the baking dish. Cover the dish tightly with plastic wrap or aluminum foil. Store it in the fridge. When you're ready to bake, remove the cover and add extra sauce if needed. Bake as per the instructions, adding a few extra minutes to the time. Yes, you can use different cheeses. Try using ricotta or cottage cheese as a base. For a twist, add goat cheese or feta for tang. A blend of cheeses can create a richer taste. Just make sure to keep the texture in mind. You want it creamy, not too dry. To reheat, place the roll-ups in a baking dish with a bit of marinara sauce. Cover the dish with foil to keep them moist. Bake at 350°F (175°C) for about 15-20 minutes. You can also microwave them on medium heat for about 2-3 minutes. Just check the middle to ensure it’s hot. This keeps the flavors fresh and the cheese gooey. Lasagna Roll Ups are fun and tasty. We covered the best ingredients, cooking steps, and storage tips. I shared easy ways to change the recipe for dietary needs. Remember to avoid common mistakes for great results. Try out my tips for the perfect dish. Get creative with your Roll Ups. Enjoy your cooking and share your delicious meals with family and friends. Your kitchen is now ready for great flavors!

Looking for a simple and tasty dinner idea? Lasagna Roll Ups are the answer! This dish combines all your favorite lasagna flavors but in a fun, easy-to-eat format. With layered …

Read more

Categories Dinner

Runza Casserole Easy Comfort Food Delight

May 10, 2025April 28, 2025 by Chef Theo
- 1 lb ground beef - 1 small onion, diced - 2 cups green cabbage, shredded - 1 cup shredded cheddar cheese - 2 packages of crescent roll dough - 1 tablespoon garlic powder - 1 tablespoon Italian seasoning - Salt and pepper to taste - 1 tablespoon olive oil - Large skillet - 9x13 inch baking dish - Spoon or spatula - Knife and cutting board To make a tasty Runza casserole, you'll want to gather all the ingredients first. The ground beef is your protein base. Next, the onion adds great flavor. Green cabbage gives a nice crunch and a bit of color. Cheddar cheese melts beautifully, making everything creamy. You will also need crescent roll dough. It creates a flaky crust. Garlic powder and Italian seasoning are key for flavor. Salt and pepper help to enhance all the tastes. A bit of olive oil is perfect for cooking the beef and onion. For cooking, a large skillet works best. A 9x13 inch baking dish holds everything nicely. A spoon or spatula helps with mixing, and a knife and cutting board are needed for prepping the veggies. This list makes it easy to get started. Check each item off as you gather them. You will be ready to create your warm and cozy dish in no time. Don't forget to check the Full Recipe for exact steps! - Preheat your oven to 375°F (190°C). - In a large skillet, heat 1 tablespoon of olive oil over medium heat. - Dice 1 small onion finely. - Shred 2 cups of green cabbage. - Add the diced onion to the skillet and sauté until it turns clear. - Next, add 1 pound of ground beef. Cook until it is brown. - Drain any extra fat from the meat. - Stir in the shredded cabbage, 1 tablespoon of garlic powder, 1 tablespoon of Italian seasoning, and salt and pepper to taste. - Cook the mixture for 5-7 minutes until the cabbage is soft. - Get a 9x13 inch baking dish and grease it lightly. - Spread one package of crescent roll dough on the bottom, pressing the seams together. - Layer the beef and cabbage mixture evenly over the dough. - Sprinkle 1 cup of shredded cheddar cheese on top. - Unroll the second package of crescent roll dough and place it over the cheese. - Seal the seams as you did with the first layer of dough. - Place the casserole in the preheated oven. - Bake for 25-30 minutes until the top is a nice golden brown. - Check for doneness by looking for a crispy top and bubbling cheese. - Let it cool for a few minutes before slicing into squares. This Runza casserole is easy to make and perfect for any night. You can find the Full Recipe for more cooking details. Enjoy! To avoid soggy dough, always ensure the filling is not too wet. After cooking the beef and cabbage, drain any excess liquid. This keeps the crust crispy. Use a large baking dish so the filling spreads evenly. For even cheese melting, shred your cheese instead of using pre-packaged blocks. Freshly shredded cheese melts better and gives a nice texture. Sprinkle the cheese evenly over the filling. This helps it melt uniformly during baking. Pair your Runza casserole with fresh sides like a crisp salad or tangy pickles. The coolness of the salad complements the warm casserole. Pickles add a nice crunch and flavor contrast. For garnishing, sprinkle fresh parsley on top of the baked casserole. This adds color and freshness. You can also serve slices on individual plates with a side of hot mustard for dipping. It enhances the flavor and gives a fun twist. To boost the flavor, add spices like paprika or cumin to the beef mixture. These spices add warmth and depth. Fresh herbs like thyme or dill can also brighten the dish. Just add them right before baking to keep their flavor strong. For extra toppings before baking, consider adding sliced jalapeños or diced tomatoes. These add spice and freshness. You could even layer some extra cheese on top for a gooey finish. For the full recipe, check the details above! {{image_2}} You can change the meat in Runza casserole to suit your taste. For a lighter option, try ground turkey or chicken. Both meats work well and still taste great. If you want a vegetarian version, swap the meat for tofu or beans. These options give you similar texture and flavor. You can also mix in lentils for added protein. Cheese is key to making this dish creamy and rich. While cheddar is a classic choice, you can explore other cheese varieties. Try pepper jack for a spicy kick or mozzarella for a gooey texture. Mixing different cheeses adds layers of flavor. For a fun twist, use feta or gouda to create a unique taste. Adding other vegetables can make the casserole even better. Carrots or bell peppers can brighten up the dish. You can mix in some spinach for more nutrients, too. Want to make it spicy? Try adding hot sauce or jalapeños to the filling. These small changes can turn your Runza casserole into a new family favorite. Explore these variations with the full recipe for the best results! To keep your Runza casserole fresh, you should refrigerate it right away. Place it in an airtight container to lock in moisture. This helps maintain its delicious flavor and texture. You can also wrap it tightly in plastic wrap or foil. Leftovers stay good for about 3 to 4 days in the fridge. When it's time to enjoy your leftovers, reheating is key. For the best results, use the oven. Preheat it to 350°F (175°C). Place the casserole in an oven-safe dish and cover it with foil. This keeps the heat in and helps avoid dryness. Heat for about 20 minutes or until warm. If you prefer the microwave, place a slice on a plate. Heat it for 1 to 2 minutes, checking often to keep it moist. If you want to save some for later, freezing works great! First, let the casserole cool completely. Cut it into portions for easy use. Wrap each piece in plastic wrap, then place them in a freezer-safe bag. Be sure to remove as much air as possible. You can freeze it for up to 3 months. When you're ready to eat, let it thaw in the fridge overnight. Reheat it in the oven or microwave as I mentioned earlier. Enjoy your Runza casserole at any time! For the full recipe to make this delightful dish, check out the earlier sections. A Runza Casserole is a tasty dish inspired by the popular Nebraska sandwich. This dish combines ground beef, onions, and cabbage, all wrapped in dough. The flavors are rich and comfort-filled. Runza sandwiches date back to the 1940s. They started as a quick meal for farm families. The dish became popular due to its easy preparation and hearty taste. Typical ingredients for a Runza Casserole include: - Ground beef - Green cabbage - Onion - Cheddar cheese - Crescent roll dough The flavor profile is savory and satisfying. You get the meatiness from beef, crunch from cabbage, and creaminess from cheese. Yes, you can prepare this casserole ahead of time. To do so, follow these steps: 1. Cook the beef and cabbage mixture as directed in the recipe. 2. Assemble the casserole in the baking dish, but do not bake it yet. 3. Cover it tightly with plastic wrap or foil and place it in the fridge. You can store it for up to 24 hours before baking. When ready, just pop it in the oven. Baking time may need slight adjustment if it's cold. You can make a gluten-free Runza Casserole. Instead of using crescent roll dough, try gluten-free dough. Some good options are: - Gluten-free pizza dough - Gluten-free pie crust You can find these at most grocery stores. Make sure to check for any allergies. This way, everyone can enjoy the dish. To add some heat, you can try these simple tips: - Mix in chopped jalapeños or green chilies with the beef and cabbage. - Use spicy cheese like pepper jack instead of cheddar. - Add red pepper flakes to the seasoning mix. These changes can make your Runza Casserole a delightful spicy treat. This blog post covered an easy and tasty runza casserole recipe. We discussed ingredients, cooking tools, and step-by-step instructions. I shared tips for storing leftovers and reheating them. You can also explore variations to mix things up. In the end, this casserole is simple to make and full of flavor. It satisfies hunger and brings comfort. Enjoy the process of cooking and share this dish with others. Your family will love it!

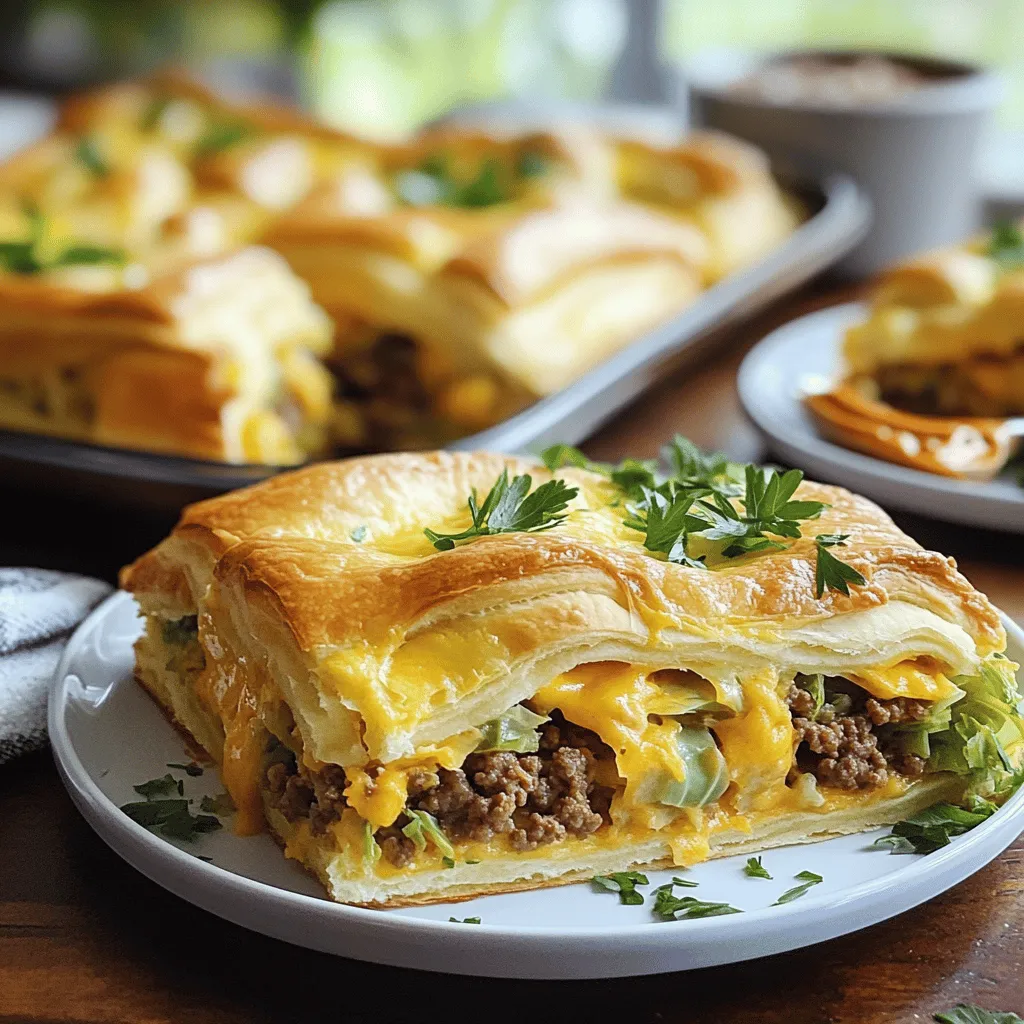
Looking for an easy meal that warms the heart? Look no further than my Runza Casserole! This dish combines ground beef, cabbage, and cheese, all wrapped in flaky crescent dough. …

Read more

Categories Dinner

Sweet Onion Pie Flavorful and Easy Recipe Guide

May 10, 2025April 28, 2025 by Chef Theo
- Sweet onions: These onions add a rich, sweet flavor to the pie. They caramelize well, giving depth to the dish. Use three large sweet onions for the best taste. - Fresh herbs: Fresh thyme is key for seasoning. It enhances the sweet onion flavor. You may use dried thyme if fresh is not available, but fresh is always better. - Cheese and pie crust: Gruyère cheese works well, but Swiss cheese is a great substitute. For the crust, you can use a pre-made pie crust to save time. Homemade crust is also delicious, if you prefer. With these ingredients, you set the stage for a delightful Sweet Onion Pie. Each component plays a vital role, creating a balance of flavors that makes this dish special. You can check the Full Recipe for detailed steps to make it perfectly! Prepping the sweet onions: Start by slicing your sweet onions thinly. Use a sharp knife to make this easier. You want the slices to be uniform for even cooking. Heat one tablespoon of olive oil in a skillet over medium heat. Add the onions, then sprinkle with one teaspoon of sugar and one teaspoon of salt. Cook them for about 15 to 20 minutes. Stir often until they turn a lovely golden brown. The smell will be amazing! Mixing the filling: In a mixing bowl, whisk together one cup of heavy cream and two large eggs. This mixture needs to be smooth. After the onions cool a bit, stir them into the cream mixture. Add half a cup of grated Gruyère cheese or Swiss cheese for a rich flavor. Season with freshly cracked black pepper to taste. This step helps create a creamy, flavorful filling. Assembling the pie: Pour the filling into a pre-made pie crust. Spread it evenly for even cooking. Make sure there are no air pockets. This will help the pie bake nicely and hold together when you cut it. Preheating the oven: Set your oven to 375°F (190°C). Preheating is key for even baking. If you skip this step, the pie may not cook right. Baking time and checking for doneness: Place the pie in the oven and bake for 35 to 40 minutes. The top should be golden brown, and the filling should be set. To check, insert a knife in the center. It should come out clean, showing the pie is ready. Cooling period before serving: Once baked, let the pie cool for 10 to 15 minutes. This cooling time helps the filling firm up. It makes it easier to slice and serve. Enjoy your delicious Sweet Onion Pie! - How to caramelize onions perfectly Start by heating olive oil in a skillet over medium heat. Add thinly sliced sweet onions. Sprinkle with sugar and salt. Cook, stirring often, for 15-20 minutes. The onions should turn golden brown and smell sweet. Patience is key; don’t rush this step. - Substitutions for ingredients based on availability If you can’t find Gruyère cheese, Swiss cheese works well too. You can also use dried thyme if fresh isn’t available. A store-bought pie crust saves time, but homemade adds a nice touch. - Common mistakes to avoid when making the pie Don’t skip the caramelization step. It adds flavor to the pie. Make sure to let the onion mix cool before adding eggs and cream. This prevents cooking the eggs too quickly. Lastly, don’t overfill the pie crust; it can spill over while baking. - Best sides to complement Sweet Onion Pie A simple green salad pairs nicely. The freshness balances the pie's richness. You can also serve roasted vegetables for extra color and taste. - Presentation tips for an appealing dish Slice the pie and serve warm. Garnish each slice with a sprig of fresh thyme. This adds a pop of color and a hint of freshness. - Pairing beverages with the pie A light white wine, like Sauvignon Blanc, matches well. If you prefer non-alcoholic options, try sparkling water with a lemon slice. Both enhance the dish without overpowering it. For the full recipe, check the section above. Enjoy your cooking! {{image_2}} You can change the flavor of your Sweet Onion Pie by using different types of onions. For a milder taste, try using Vidalia or Walla Walla onions. If you want a sharper flavor, yellow onions work well. Each type brings its own twist to the pie. Cheese can also change the taste. Gruyère offers a nutty flavor, but Swiss cheese is a great option too. You might even try goat cheese for a tangy kick. Mixing cheeses can create a unique flavor profile. Feel free to add proteins or vegetables to the filling. Cooked bacon or ham adds richness. Spinach or mushrooms can boost nutrition and flavor. Customize your pie to suit your taste! To make a vegetarian version of this dish, simply leave out any meat. You can add more veggies like bell peppers or zucchini for extra texture and taste. If you need a gluten-free pie crust, look for a store-bought option made from almond or rice flour. You can also make your own using gluten-free flour blends. Baking methods can vary too. You can bake the pie in a traditional oven or use an air fryer for a crispy crust. Both methods yield delicious results. Don't hesitate to experiment with these variations for your Sweet Onion Pie! To keep your Sweet Onion Pie fresh, store it in the fridge. First, let the pie cool completely. Then, cover it tightly with plastic wrap or place it in an airtight container. This helps prevent it from drying out or absorbing other smells. The pie lasts about 3 to 4 days in the fridge. Just remember to check for any signs of spoilage before you enjoy it again. Yes, you can freeze Sweet Onion Pie! Freezing is a great way to save leftovers for later. Wrap the pie tightly in plastic wrap, then cover it with aluminum foil. This double layer keeps it safe from freezer burn. The pie can stay frozen for up to 3 months. When you want to enjoy it, thaw the pie in the fridge overnight. To reheat, place it in a preheated oven at 350°F (175°C) for about 25-30 minutes. This method ensures your pie stays warm and tasty. You can also cover it with foil to prevent over-browning. Enjoy your gourmet dish even when it’s from the freezer! Is Sweet Onion Pie sweet or savory? Sweet Onion Pie is mainly savory. The sweet onions give it a mild taste, but it is not a dessert. The cream, cheese, and herbs balance the flavor well. Can I make this recipe ahead of time? Yes, you can prepare Sweet Onion Pie a day in advance. Just cover it with plastic wrap and store it in the fridge. Bake it the next day for a fresh and warm dish. What's the best way to reheat leftovers? To reheat leftovers, place them in a preheated oven at 350°F (175°C). Heat for about 15-20 minutes. This keeps the crust crispy and the filling warm. Why is my pie filling too watery? A watery filling may happen if the onions release too much moisture. To fix this, cook the onions longer to caramelize them fully. You can also drain excess liquid before mixing with the cream. What to do if my crust is too soggy? If the crust is soggy, it may not have been pre-baked long enough or had too much filling. Try blind baking the crust for 5-10 minutes before adding the filling next time. How to fix an overcooked onion filling? If your onion filling is overcooked, it will taste bitter. To balance this, add a small amount of sugar or a splash of cream to the mixture. This can help mellow out the flavor. To make the perfect Sweet Onion Pie, remember key ingredients like sweet onions and fresh herbs. Follow simple steps for preparation, baking, and cooling to ensure success. Apply the helpful tips shared to avoid common mistakes. You can customize your pie with variations to suit your taste. Finally, proper storage can keep leftovers fresh. With these insights, you'll create a dish worth sharing. Enjoy your cooking journey, and savor every bite of your delicious pie!

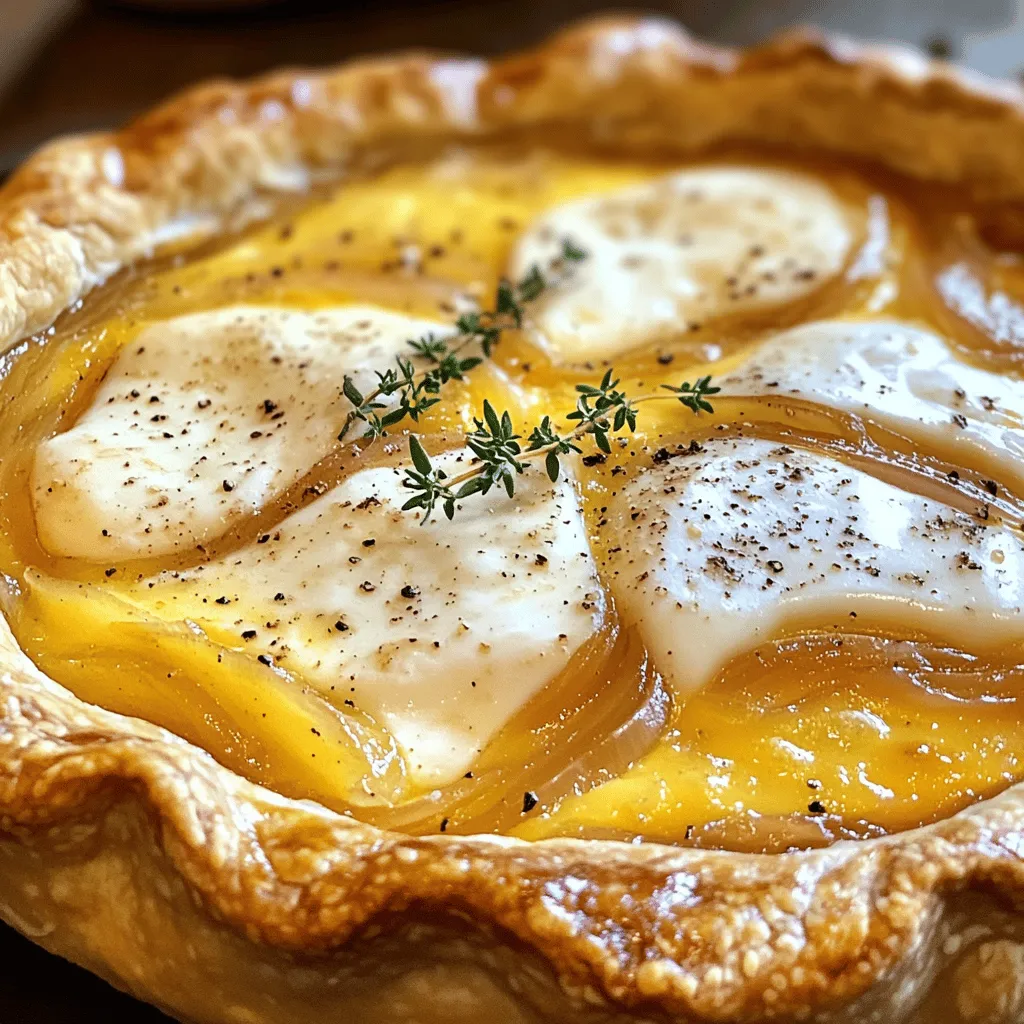
Are you ready to make a dish that delights your taste buds? Sweet Onion Pie is not just a treat; it’s a blend of rich flavors that anyone can whip …

Read more

Categories Dinner

Cabbage Beef Bake Flavorful Comfort Food Dish

May 10, 2025April 28, 2025 by Chef Theo
For this comforting dish, you need a few key items. They bring the flavors together. Here’s the list: - 1 medium head of green cabbage, chopped - 1 lb ground beef - 1 cup cooked rice - 1 large onion, diced - 2 cloves garlic, minced - 1 can (15 oz) diced tomatoes, drained - 1 cup beef broth - 1 tablespoon Worcestershire sauce - 1 teaspoon smoked paprika - 1 teaspoon dried oregano - Salt and pepper to taste - 1 cup shredded mozzarella cheese - Fresh parsley for garnish These ingredients form the heart of the dish. The cabbage serves as a great base, holding all the tasty layers. You can customize your Cabbage Beef Bake with fun add-ins. Try adding chopped bell peppers or mushrooms for extra veggies. You can also swap the ground beef for turkey or chicken. For a spicy kick, add red pepper flakes. If you want a creamier texture, mix in some cream cheese or sour cream. Seasonings make your dish pop. Besides salt and pepper, smoked paprika adds a nice depth. Dried oregano brings a fresh taste. If you like, try adding thyme or basil for extra flavor. Each spice enhances the beef and cabbage, making every bite more enjoyable. Discover more about this dish by checking the Full Recipe! Start by gathering your ingredients. You need a medium head of green cabbage, ground beef, cooked rice, a large onion, garlic, diced tomatoes, beef broth, Worcestershire sauce, smoked paprika, oregano, salt, pepper, mozzarella cheese, and fresh parsley. Chop the cabbage into bite-sized pieces. Dice the onion and mince the garlic. This prep helps create a nice mix of flavors. First, preheat your oven to 350°F (175°C). Take a large skillet and brown the ground beef over medium heat. Cook it until it is no longer pink. If there’s fat in the skillet, drain it. Next, add the diced onion and minced garlic, cooking for about 3-4 minutes. Wait until the onion turns soft and clear. Then, stir in the cooked rice, drained tomatoes, Worcestershire sauce, smoked paprika, oregano, salt, and pepper. Let this simmer for about 5 minutes. Now, grab a large baking dish. Layer half of the chopped cabbage on the bottom. Spread the beef mixture evenly on top of the cabbage. Then, add the rest of the cabbage over the beef. Pour the beef broth evenly across the layers. Cover the dish with aluminum foil and bake for 45 minutes. After that, take off the foil and sprinkle mozzarella cheese on top. Bake for another 15 minutes until the cheese is bubbly and golden. Once done, let it cool for a few minutes before slicing. Don’t forget to garnish with fresh parsley. To check if your Cabbage Beef Bake is done, look for bubbling broth and melted cheese. The cabbage should be tender but not mushy. Use a fork to poke through the layers. If it feels soft and easy to cut, it’s ready. Also, the cheese should have a nice golden color. For best results, let it set for a few minutes before serving. This lets the flavors mingle nicely. Enjoy your flavorful comfort food dish! When cooking ground beef, start with medium heat. This helps it brown evenly. Use a wooden spoon to break it apart as it cooks. This way, you avoid large clumps. Look for a nice brown color, which adds flavor. Make sure to drain any extra fat to keep your dish light. Layering is key in Cabbage Beef Bake. Begin with half of the chopped cabbage at the bottom of your dish. This acts as a base and helps with moisture. Then, spread the beef mixture evenly over the cabbage. Top it off with the rest of the cabbage. This keeps everything nice and juicy during baking. To boost the flavor, always season as you cook. Add salt and pepper to the beef while it browns. This helps the taste blend well. Use fresh herbs like parsley for garnish. They add a nice pop of color and taste. Don’t forget the Worcestershire sauce; it gives a savory kick. For a full guide, check out the Full Recipe. {{image_2}} You can easily make a vegetarian Cabbage Beef Bake. Instead of ground beef, use lentils or mushrooms for a meaty texture. Cooked quinoa or brown rice also works well. Replace beef broth with vegetable broth to keep it vegan. Use cashew or almond cheese for a creamy finish. This way, you keep all the flavor and comfort without meat. To make this dish gluten-free, choose gluten-free Worcestershire sauce. Ensure your beef broth is also gluten-free. If you use rice, stick with white, brown, or cauliflower rice. This keeps the dish safe for those with gluten allergies. The overall taste remains rich and hearty, just like the original recipe. If you want to change up the cheese, try using cheddar or Monterey Jack. These cheeses melt well and add a nice flavor. For a dairy-free option, you can use vegan cheese shreds. Nutritional yeast is another great choice for a cheesy taste without dairy. Experimenting with different cheeses can bring new flavors to your Cabbage Beef Bake. For the full recipe, check out the details above. To keep Cabbage Beef Bake fresh, let it cool first. Then, place leftovers in an airtight container. Store it in the fridge for up to three days. If you want to keep it longer, freezing is a great choice. When you’re ready to enjoy leftovers, preheat your oven to 350°F (175°C). Place your Cabbage Beef Bake in a baking dish. Cover it with foil to avoid drying out. Heat for about 25 to 30 minutes. You can also microwave it for quicker results. Just make sure to stir it halfway through. To freeze, cut the bake into portions. Wrap each piece tightly in plastic wrap. Then, place them in a freezer-safe bag. This will help avoid freezer burn. Cabbage Beef Bake can stay fresh in the freezer for up to three months. When you’re ready to eat, thaw it overnight in the fridge before reheating. Enjoy this comforting dish again! Yes, you can make Cabbage Beef Bake ahead. This dish tastes even better after resting. Prepare it up to a day before. Just follow the steps in the Full Recipe, then cover and chill it. When you are ready to eat, bake it straight from the fridge. You may need to add a few extra minutes to the bake time. There are many tasty options to replace ground beef. You can use ground turkey or chicken for a leaner choice. If you want a meatless dish, try lentils or mushrooms. Both add great texture and flavor. For a unique twist, use quinoa or tempeh. Each option gives a new taste to the dish. To keep cabbage from getting soggy, make sure to chop it finely. This helps it cook evenly. Also, avoid overcooking it before baking. Layer the cabbage carefully and do not press down too hard. The beef broth adds moisture, so use just the right amount. If you follow these steps, your cabbage will stay crisp and firm. In this article, we explored the key ingredients and steps for a delicious Cabbage Beef Bake. We covered important tips, variations for dietary needs, and storage methods. Discovering how to make this dish can enhance your mealtime. Remember to layer your ingredients well and check for doneness for the best taste. You can adjust the recipe to fit your needs. With these tips, your Cabbage Beef Bake will surely be a hit! Enjoy making this hearty dish.

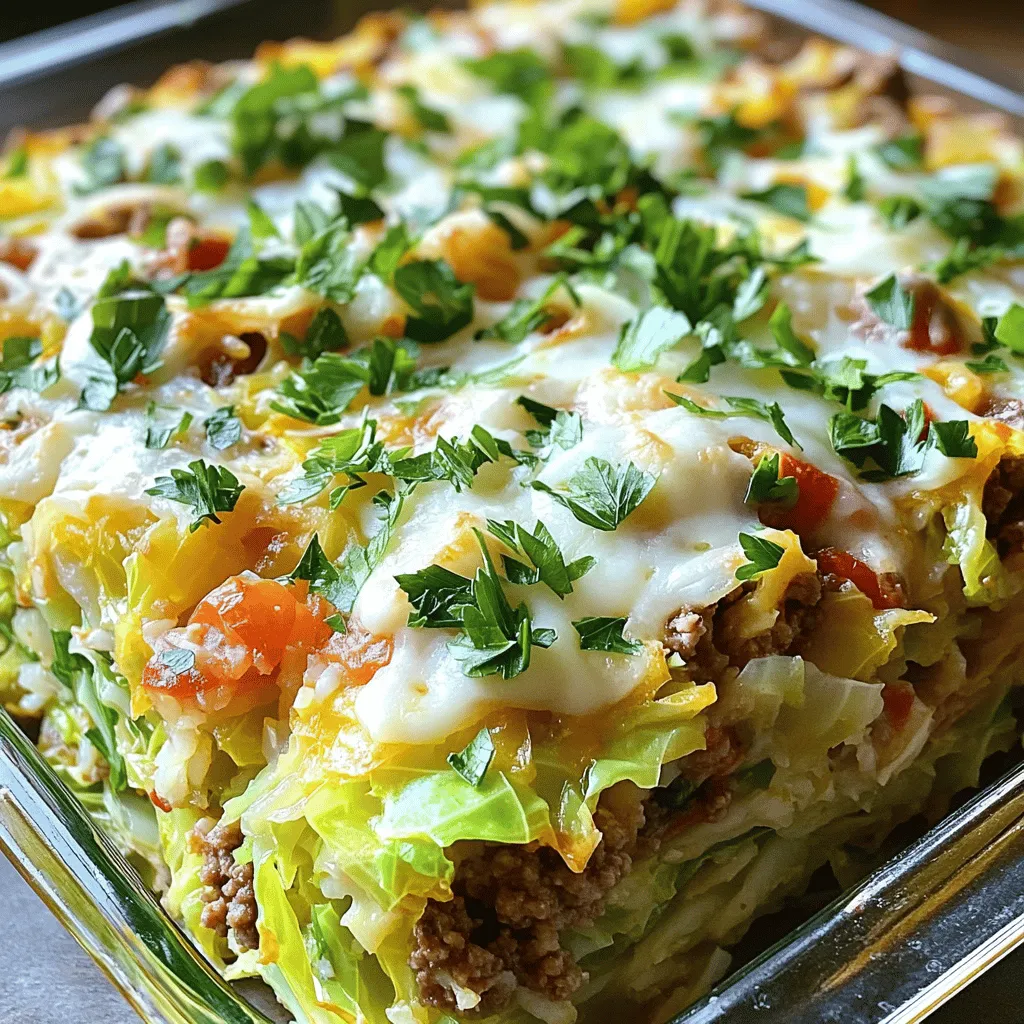
Are you ready to dive into the world of comfort food? My Cabbage Beef Bake is a dish that warms the heart and satisfies the tummy. With easy-to-find ingredients and …

Read more

Categories Dinner

One Bowl Apple Cake Simple and Delicious Treat

May 10, 2025April 28, 2025 by Chef Theo
To make this easy one bowl apple cake, you will need: - 2 large apples, peeled, cored, and diced - 1 cup granulated sugar - 1/2 cup brown sugar, packed - 1/2 cup vegetable oil - 3 large eggs - 1 teaspoon vanilla extract - 2 1/2 cups all-purpose flour - 1 teaspoon baking powder - 1 teaspoon baking soda - 1 teaspoon ground cinnamon - 1/2 teaspoon salt These ingredients work together to create a moist and flavorful cake. The apples add sweetness and a nice texture. The sugars give it a lovely caramelized crust. The oils and eggs keep it rich and tender. To customize your cake, you might want to add: - 1/2 cup chopped walnuts or pecans (optional) - 1/4 cup powdered sugar (for dusting, optional) Adding nuts gives a crunchy bite. Dusting with powdered sugar adds a nice touch for serving. These options let you play with flavors and textures. You can find the full recipe with instructions to guide you through the process. Enjoy baking! First, preheat your oven to 350°F (175°C). This ensures even baking. Next, grease a 9x13 inch baking dish with butter or cooking spray. This step keeps the cake from sticking. In a large mixing bowl, combine the granulated sugar, brown sugar, and vegetable oil. Mix until everything is well combined. This creates a sweet base for your cake. Now, add the eggs one at a time. Mix well after each egg. This makes the batter fluffy. Then, stir in the vanilla extract. The vanilla adds a nice flavor. Gently fold in the diced apples into the mixture. This gives the cake its fruity flavor. Make sure the apples are evenly distributed. In another bowl, whisk together the flour, baking powder, baking soda, ground cinnamon, and salt. This blends the dry ingredients. Gradually add the dry ingredients to the apple mixture. Stir until just combined. Be careful not to overmix; a few lumps are okay. If you want to add nuts, fold them into the batter now. Pour the batter into the greased baking dish. Spread it evenly across the dish. Bake in the preheated oven for 35-40 minutes. Check doneness with a toothpick. If it comes out clean, the cake is done. Once baked, let the cake cool in the pan on a wire rack. If you like, dust the cooled cake with powdered sugar before serving. Enjoy your delicious One Bowl Apple Cake! For the full recipe, refer to the earlier section. To get the best texture in your cake, you must avoid overmixing. Overmixing makes the cake tough. Mix just until you see no flour lumps. A few lumps are okay and will help keep it soft. Bake your cake for 35 to 40 minutes. Check it with a toothpick. If it comes out clean, the cake is done. If it has batter on it, give it a few more minutes. For a lovely presentation, cut the cake into squares. Use a decorative plate to make it shine. A sprinkle of cinnamon on top looks great. You can also add thin apple slices for fun color. Pair your cake with a scoop of vanilla ice cream. The cold ice cream goes well with the warm cake. You can even serve it with a drizzle of caramel sauce for extra sweetness. Want to spice things up? Add a teaspoon of nutmeg or ginger. These spices give your cake a warm flavor. You can also add different fruits. Try using pears or peaches instead of apples. They will add a new twist to your cake. Each fruit brings its unique taste. For the full recipe, check out the One Bowl Apple Cake section. {{image_2}} If you want a nut-free version, just replace the nuts with seeds. Sunflower seeds or pumpkin seeds work well. They add a nice crunch without any nuts. This way, everyone can enjoy the cake without worrying about allergies. You can mix them in just like you would with nuts. For a gluten-free option, use gluten-free flour alternatives. Almond flour or oat flour are great choices. You might need to adjust the liquid a bit. This change keeps the cake moist and tasty. Make sure to check that your baking powder is gluten-free too! To enhance the flavor, you can add citrus zest. Lemon or orange zest brightens the cake. It adds a fresh and zesty note that pairs well with apples. Another fun twist is adding chocolate chips. They melt into the cake and create delicious pockets of chocolate. You can mix in about a cup of chips for a sweet surprise. This One Bowl Apple Cake is fun to customize! You can try different seeds, flours, or flavors. The possibilities are endless, and it always tastes great. For the full recipe, check out the detailed instructions above. To keep your One Bowl Apple Cake fresh, you have a couple of options. - Storing in the refrigerator: If you want to keep the cake for a longer time, store it in the fridge. Wrap the cake tightly in plastic wrap or place it in an airtight container. This way, it stays moist and doesn’t absorb fridge odors. - Room temperature storage: If you plan to eat the cake within a few days, you can store it at room temperature. Just cover it with a clean kitchen towel or plastic wrap. This keeps the cake fresh and yummy. Freezing your One Bowl Apple Cake is easy and keeps it tasty. - How to freeze: First, let the cake cool completely. Once cool, wrap it tightly in plastic wrap. Then, place it in a freezer-safe bag or container. Be sure to label it with the date. - How to thaw the cake: When you’re ready to enjoy a slice, take it out and let it thaw in the fridge overnight. You can also leave it at room temp for a few hours. This keeps it nice and soft. Knowing how long your cake stays fresh helps you enjoy it at its best. - How long the cake stays fresh: If stored in the fridge, your Apple Cake can last about a week. At room temperature, it stays fresh for about three days. If frozen, it can last up to three months. Enjoy this simple and delicious treat when it’s at its best! Yes, you can use many apple types. Some apples work better for baking. I love using Granny Smith apples. They give a nice tartness. Honeycrisp apples are sweet and juicy. Fuji apples also add great flavor. For the best cake, pick apples that hold their shape when baked. You can use two tests to check. The toothpick test is the most common. Insert a toothpick in the center. If it comes out clean, the cake is done. The pancake test is another fun way. If the top bounces back when you touch it, it’s ready. Yes, you can make this cake ahead. It stores well for a few days. Keep it in an airtight container. You can also freeze it for longer storage. Just let it cool first, then wrap it tightly. When ready to serve, thaw it in the fridge overnight. This guide shared key ingredients and simple steps to make a delicious One Bowl Apple Cake. We covered the main and optional ingredients, essential tips for baking, and ways to customize your cake. You can also adapt it for allergies or personal tastes. Remember, the joy of baking lies in experimentation. So, go ahead and make this cake your own. Enjoy the wonderful smells and flavors that fill your kitchen as you create this treat!

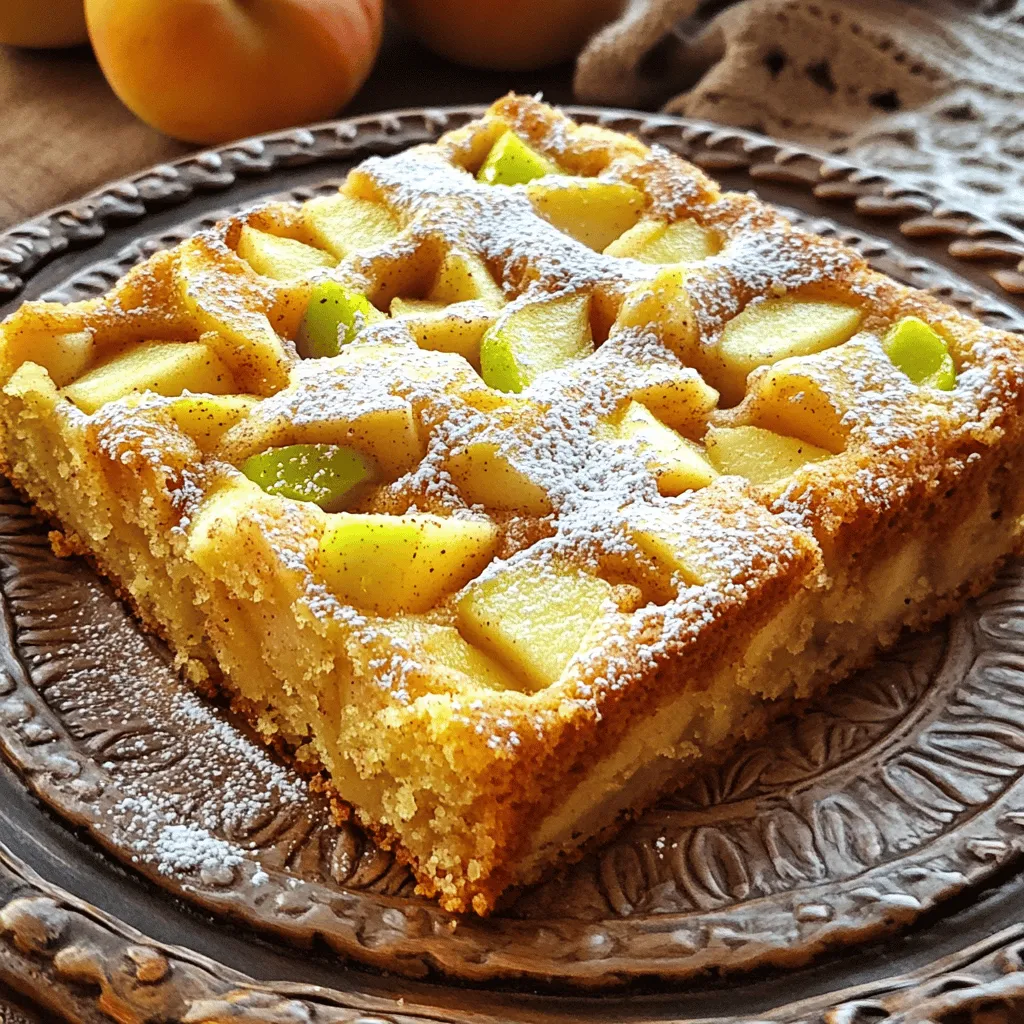
Looking for a simple and delicious dessert? You’ve found it! This One Bowl Apple Cake is easy to make and requires just a few key ingredients. You don’t need fancy …

Read more

Categories Desserts
Older posts
Newer posts
← Previous Page1 … Page87 Page88 Page89 Page90 Next →

TOASTED RECIPES

Where ideas are warm, crisp, and ready to serve! 🍞

PAGES

Home About Contact Privacy Policy Terms & Conditions Cookie Policy GDPR Policy Copyright Policy Disclaimer

CATEGORIES

Appetizers Desserts Salads Breakfast Dinner

Contact

  • Pinterest
  • Mail
Copyright © 2025 Toasted Recipes. All rights reserved.