Skip to content
toastedrecipes.com
  • Home
  • Appetizers
  • Desserts
  • Salads
  • Breakfast
  • Dinner
  • Privacy Policy
  • Contact
  • About

Chef Theo

Cheesy Asparagus Casserole Tasty and Simple Recipe

May 11, 2025 by Chef Theo
- 1 lb fresh asparagus, trimmed and cut into 2-inch pieces - 1 cup cooked quinoa - 1 cup shredded cheddar cheese - 1 cup cream of mushroom soup (or homemade equivalent) - 1/2 cup sour cream - 1/2 cup grated Parmesan cheese - 1/2 cup breadcrumbs - 2 tablespoons olive oil - 1 teaspoon garlic powder - 1 teaspoon onion powder - Salt and pepper to taste - Fresh parsley, chopped (for garnish) The main ingredient in this dish is fresh asparagus. It gives a bright, fresh taste. I love using quinoa, too, since it adds a nice texture and protein. The cream of mushroom soup helps to bind everything together. You can use store-bought soup or make your own for a more homemade touch. The cheeses add a rich flavor. I usually go for cheddar and Parmesan because they melt wonderfully. - Different cheese types - Vegetable additions You can switch up the cheese. Try mozzarella for a milder taste or gouda for a smoky flavor. Adding veggies like spinach or bell peppers can make the dish even better. They add color and extra nutrients. Mix and match to find your favorite combo! - Spices to use - Garnishing options For seasoning, I suggest garlic powder and onion powder. They add depth without being too strong. You can also sprinkle in some paprika for a hint of heat. For garnish, fresh parsley brightens the plate and adds a pop of color. You can also use chives or even toasted nuts for crunch. These small touches make a big difference! Check out the [Full Recipe](#) for precise measurements and more tips! Cooking quinoa perfectly is easy. First, rinse it under cold water. This removes the bitter coating. Next, add one cup of quinoa to two cups of water. Bring it to a boil, then cover and let it simmer for about 15 minutes. Once the quinoa is fluffy, remove it from heat and let it sit for five minutes. To trim asparagus, hold the stalk and bend it. The asparagus will snap at the right point. Cut the stalks into 2-inch pieces. This helps them cook evenly in the casserole. In a large bowl, combine the cooked quinoa, cream of mushroom soup, sour cream, garlic powder, onion powder, salt, and pepper. Mix well until all ingredients are smooth. This mixture will coat the asparagus nicely. Add the cut asparagus to the bowl. Stir gently to coat each piece with the creamy mixture. Make sure every piece of asparagus is covered. This step ensures great flavor in every bite. First, preheat your oven to 350°F (175°C). Grease a 9x13 inch casserole dish with olive oil. This prevents sticking and helps with browning. Pour the asparagus mixture into the prepared dish. Spread it evenly. Sprinkle shredded cheddar cheese on top for that cheesy goodness. In a small bowl, mix breadcrumbs with grated Parmesan cheese and a drizzle of olive oil. This creates a crunchy topping. Evenly distribute this mixture over the cheese layer. Bake in the preheated oven for 30-35 minutes. Look for a golden brown top with bubbling edges. When it’s done, let it cool for a few minutes. Garnish with fresh parsley before serving. For the complete recipe, check the Full Recipe section. To avoid overcooked asparagus, cook it just until tender. This usually takes about 3-4 minutes in boiling water. If you cook it too long, it will become mushy in the casserole. After boiling, quickly cool the asparagus in ice water. This method keeps the bright green color and crisp texture. For the right casserole consistency, mix your ingredients well. The cream of mushroom and sour cream should blend smoothly with the quinoa. If it feels too thick, add a splash of vegetable broth. This will help create a creamy, rich texture. I recommend using homemade cream of mushroom soup for a fresher taste. Store-bought options can be high in sodium. If you make your own, you can control the flavors and ingredients. You can also add garlic or onion to enhance the flavor further. Consider adding herbs like thyme or dill for extra flavor. A sprinkle of red pepper flakes can add a bit of heat. Experiment with these additions to find your favorite flavor combination. To complement the casserole, serve it with a light salad. A fresh green salad with lemon vinaigrette balances the richness of the dish. You could also pair it with roasted potatoes or crusty bread. To present the dish attractively, use a colorful plate. Garnish with chopped parsley for a fresh look. You can also sprinkle extra cheese on top before serving for added appeal. For the full recipe, click here. {{image_2}} You can make this casserole to fit different diets. For a gluten-free option, swap the breadcrumbs for gluten-free breadcrumbs. You can also use brown rice instead of quinoa. This keeps the dish hearty and safe for gluten-free eaters. For a vegan version, replace the dairy. Use plant-based cream of mushroom soup and non-dairy sour cream. Substitute the cheese with a vegan cheese blend or nutritional yeast for a cheesy flavor. These changes still make the dish creamy and tasty. Feel free to mix in other veggies. Broccoli, spinach, or bell peppers all work well. You can also add cooked lentils or chickpeas for extra protein. This makes the casserole more filling and colorful. For a low-fat alternative, use reduced-fat cheese and sour cream. You can also choose Greek yogurt instead of sour cream. This keeps the dish creamy while cutting down on fat. Incorporating seasonal veggies can add freshness. In spring, use fresh peas or green beans. In summer, try zucchini or cherry tomatoes. These additions can brighten the flavor and color of your casserole. For holiday-inspired versions, think of adding herbs like thyme or rosemary. You can also sprinkle crushed nuts on top for a crunchy finish. This not only enhances taste but also makes the dish festive. For the full recipe, check the earlier section detailing all the steps and ingredients. To keep your Cheesy Asparagus Casserole fresh, use a good container. Glass or plastic containers with tight lids work best. Make sure the casserole cools down before sealing it. This helps prevent moisture build-up. Store it in the fridge for up to four days. When it’s time to enjoy leftovers, you have two choices: the microwave or oven. If you use the microwave, heat in short bursts. This helps keep the texture nice. Stir it often to heat evenly. If you prefer the oven, set it to 350°F (175°C). Cover the casserole with foil to avoid drying out. Bake for about 20 minutes until hot. You can freeze the casserole too! If you want to freeze it before baking, assemble it in your dish but don’t bake it. Cover tightly with foil or plastic wrap. To freeze after baking, let it cool first, then wrap. For best results, thaw it in the fridge overnight before reheating. This helps keep the flavor and texture perfect. Cheesy Asparagus Casserole can last about 3 to 5 days in the fridge. Store it in an airtight container. This helps keep it fresh and tasty. Before eating, check for any signs of spoilage. Yes, you can make this casserole ahead of time. Prepare it up to the baking step and cover it well. Keep it in the fridge for up to 24 hours. When ready to bake, just add a few extra minutes to the baking time. If you don’t have cream of mushroom soup, you can use cream of chicken soup. You can also make a simple homemade version. Just blend cooked mushrooms, cream, and some broth. This gives a rich flavor and works well in the dish. This casserole can be a healthy choice. Asparagus is low in calories and high in vitamins. The quinoa adds protein and fiber. However, it does contain cheese and cream, so enjoy it in moderation. You can also make it lighter by using low-fat dairy options. For the full recipe, check out my detailed guide! Cheesy asparagus casserole is easy and tasty. You start with fresh asparagus and quinoa, mixing in delicious cheeses. Add spices to boost flavor and then bake it to perfection. You can change ingredients and make it your own. Remember to store any leftovers well. Enjoy it warm or cold. This dish is great for any meal. Exploring variations makes it fun and nutritious too. Keep it in mind for your next family meal or gathering. Your taste buds will thank you!

Looking for a delicious way to enjoy fresh asparagus? This Cheesy Asparagus Casserole is your answer! It’s easy to make and packed with flavor. You’ll love how simple the ingredients …

Read more

Categories Dinner

Reuben Balls with Spicy Thousand Island Dipping Sauce

May 11, 2025 by Chef Theo
- 1 cup cooked corned beef, finely chopped - 1 cup sauerkraut, drained and chopped - 1 cup Swiss cheese, shredded - ½ cup cream cheese, softened - 1 teaspoon Dijon mustard - 1 teaspoon garlic powder - ½ teaspoon black pepper - 1 cup breadcrumbs (preferably panko) - 2 large eggs, beaten - ½ cup mayonnaise - ¼ cup ketchup - 1 tablespoon horseradish sauce - 1 teaspoon hot sauce (adjust to taste) - Salt and pepper to taste Making Reuben Balls is fun and easy. First, gather your main ingredients. You need corned beef, sauerkraut, Swiss cheese, and cream cheese. Each adds a unique taste. The corned beef gives a savory flavor, while the sauerkraut adds a nice tang. Swiss cheese brings creaminess, and cream cheese helps bind everything together. Next, we need seasonings and breading. Dijon mustard adds a kick, while garlic powder gives depth. Black pepper adds warmth. Panko breadcrumbs will give your Reuben Balls a crispy outside. You will coat the balls with beaten eggs before rolling them in the breadcrumbs. For the spicy dipping sauce, mix mayonnaise and ketchup for creaminess. Horseradish sauce adds heat, and hot sauce makes it even spicier. Adjust the hot sauce to your taste. Add salt and pepper to finish. This is all you need for a great recipe. For the full recipe, check out the instructions later on! To start, grab a large bowl. Combine the following ingredients: - 1 cup cooked corned beef, finely chopped - 1 cup sauerkraut, drained and chopped - 1 cup Swiss cheese, shredded - ½ cup cream cheese, softened - 1 teaspoon Dijon mustard - 1 teaspoon garlic powder - ½ teaspoon black pepper Mix everything well. You want all the flavors to blend nicely. Next, take about a tablespoon of the mixture. Roll it into a ball using your hands. Place each ball on a tray as you go. Repeat this step until you use up all the mixture. Now, set up a breading station. In one bowl, place the breadcrumbs. In another bowl, pour the beaten eggs. Dip each ball in the eggs first, then roll it in the breadcrumbs. Make sure they are fully coated. Heat oil in a deep fryer or a large pot over medium-high heat. Once the oil is hot, gently place the breaded balls in batches. Fry them for about 3-4 minutes until they are golden brown and crispy. After frying, remove them and drain on paper towels. In a bowl, mix together the following for the Spicy Thousand Island Dipping Sauce: - ½ cup mayonnaise - ¼ cup ketchup - 1 tablespoon horseradish sauce - 1 teaspoon hot sauce (adjust to taste) - Salt and pepper to taste Stir well to combine. Adjust the flavors to fit your taste. For the full recipe, check the details above. Enjoy making these tasty Reuben Balls! To get the right texture, make sure your cream cheese is softened. This step helps mix the filling smoothly. If you want more flavor, feel free to adjust the seasoning. Add a bit more garlic powder or pepper if you like it spicier. When frying, use a thermometer to check the oil temperature. The right heat keeps the Reuben Balls from being soggy. Aim for a temperature around 350°F (175°C). Remember, do not overcrowd the frying pot. This step ensures each ball cooks evenly and gets that perfect golden color. For the best taste and texture, serve the Reuben Balls warm. Cold balls lose their crunch and flavor. You can also add extra sides like pickles or coleslaw. These pair well with the Spicy Thousand Island Dipping Sauce and enhance the meal. {{image_2}} You can easily switch up the ingredients in Reuben Balls. If you want a lighter option, use turkey or chicken instead of corned beef. Both will still give you that great taste. For the cheese, consider using Gruyère or cheddar. These options add a unique twist while keeping it delicious. If you prefer a vegan or vegetarian dish, you have tasty choices. Tempeh or mushrooms can replace the meat while adding a nice texture. For the cheese, use vegan cream cheese. You can also swap the eggs for alternatives like flaxseed meal mixed with water. This way, everyone can enjoy these tasty treats! Love heat? You can make the dipping sauce even spicier. Just increase the amount of hot sauce to your taste. For an extra kick, add diced jalapeños. This will take the flavor to a whole new level, making your Reuben Balls even more exciting! Refrigerate your leftover Reuben Balls in an airtight container. They stay fresh for up to 3 days. This helps keep them safe to eat and tasty for later meals. You can freeze uncooked Reuben Balls for up to 2 months. Just place them on a tray and freeze until solid. Once frozen, transfer them to a freezer bag. When you’re ready to enjoy them, thaw in the refrigerator before frying. This way, you can have a quick treat whenever you want! To reheat, use an oven or air fryer. This method helps restore their crispiness. Simply preheat your oven to 350°F. Bake for about 10 minutes. If using an air fryer, set it to 375°F and cook for 5-7 minutes. Enjoy them warm and crunchy, just like when they were first made! Reuben balls are tasty bites inspired by the classic Reuben sandwich. They combine corned beef, sauerkraut, Swiss cheese, and cream cheese. I love how the flavors blend together. You get a crispy outside and a warm, cheesy inside. This dish is fun to make and even more fun to eat. They are perfect for parties or game days. Yes, you can make the dipping sauce ahead of time. Just mix the ingredients and store them in the fridge. This sauce gets better as it sits. It saves time when you are ready to serve. Just remember to stir it again before serving. To make Reuben balls gluten-free, you can use gluten-free breadcrumbs. Check the labels on your sauces and mayonnaise. Many brands now offer gluten-free options. Just swap them in, and you can enjoy this dish without worry. Reuben balls pair well with various sides. Try serving pickles or potato chips for crunch. A fresh salad can lighten up the meal. You might also serve them with some extra spicy dipping sauce on the side. These options make your meal more fun and flavorful. For the full recipe, check out the main article. Reuben balls combine classic flavors in a fun, bite-sized treat. We covered each step, from gathering ingredients to frying them to perfection. Don't hesitate to experiment with variations or dips. Remember, they are best served warm and crispy. Store leftovers for quick snacks later. Enjoy this tasty dish that brings a twist to the familiar Reuben sandwich!

If you love classic Reuben flavors, you’ll adore Reuben Balls! These bite-sized treats combine delicious corned beef, tangy sauerkraut, and creamy Swiss cheese, all rolled into crispy bites. Plus, I’ll …

Read more

Categories Appetizers

Mini Bundt Cake Recipes for Delicious Desserts

May 11, 2025 by Chef Theo
To make these lovely cakes, gather these key ingredients: - 1 cup all-purpose flour - 1/2 cup almond flour - 1 teaspoon baking powder - 1/2 teaspoon baking soda - 1/4 teaspoon salt - 1/2 cup unsalted butter, softened - 3/4 cup granulated sugar - 2 large eggs - 1 tablespoon lemon zest - 1/4 cup fresh lemon juice - 1 teaspoon vanilla extract - 1 cup fresh blueberries (plus extra for topping) - 1/2 cup powdered sugar (for icing) - 1 tablespoon milk (for icing) These ingredients work together to create a moist, flavorful cake. The lemon and blueberries give a fresh taste. To bake these mini Bundt cakes, you will need: - Mini bundt cake pan - Mixing bowls - Whisk - Measuring cups and spoons - Toothpick for testing doneness - Cooling rack Having the right tools makes baking easier. A mini bundt pan helps shape the cakes perfectly. If you need to swap ingredients, here are some ideas: - Use gluten-free flour instead of all-purpose flour for a gluten-free option. - Replace almond flour with oat flour for a nut-free choice. - For a dairy-free option, use coconut oil in place of butter. - You can use other berries, like raspberries or blackberries, instead of blueberries. These substitutions keep the spirit of the recipe but cater to different diets. Adjusting ingredients can still yield great results. Check out the Full Recipe for more details! Start by gathering all your ingredients. This makes the process smooth and fun. You will need flour, almond flour, baking powder, baking soda, salt, butter, sugar, eggs, lemon zest, lemon juice, vanilla, and blueberries. Don’t forget the icing ingredients: powdered sugar and milk. Preheat your oven to 350°F (175°C). Grease and flour your mini bundt cake pan well. This keeps the cakes from sticking. In a medium bowl, whisk together the all-purpose flour, almond flour, baking powder, baking soda, and salt. This helps mix the dry ingredients well. Next, take a large mixing bowl. Cream the softened butter and granulated sugar until light and fluffy. It should take about 3-4 minutes. Add the eggs one at a time, mixing well after each. Then, blend in the lemon zest, lemon juice, and vanilla extract. Now, gradually add the dry ingredients to the wet ones. Stir until just combined. Gently fold in the blueberries. Be careful not to break them. Pour the batter into the prepared mini bundt pan. Fill each cavity about 3/4 full. Bake for 20-25 minutes. Check with a toothpick; it should come out clean. After baking, let the cakes cool in the pan for 10 minutes. Then, transfer them to a wire rack to cool completely. This step is key for a good texture. While they cool, make the icing. In a small bowl, whisk together the powdered sugar and milk until smooth. Once the cakes are cool, drizzle the icing over them. Top with extra blueberries for a lovely touch. For the full recipe, check the details above. Enjoy your beautiful mini bundt cakes! To make your mini bundt cakes shine, follow these tips: - Grease your pan well: Use butter or cooking spray to stop sticking. - Fill the pans evenly: Keep each cavity about three-quarters full. This ensures even baking. - Check your oven temp: An oven thermometer helps to get the right heat. - Rotate the pan: Halfway through baking, turn your pan for even cooking. Many home cooks make a few common errors. Here are my top mistakes to watch out for: - Not measuring flour correctly: Use a spoon to fill your cup, then level it off. - Overmixing the batter: Stir until just combined to keep the cake fluffy. - Skipping the cooling time: Let the cakes cool in the pan for ten minutes. This helps them hold their shape. Proper storage helps your mini bundt cakes stay fresh longer: - Store in an airtight container: This keeps them moist and tasty. - Refrigerate for longer shelf life: They can last up to a week in the fridge. - Reheat gently: Use a microwave for a few seconds or warm them in the oven at 300°F for a few minutes. By following these tips, you can create perfect mini bundt cakes every time. For the full recipe, check out the Mini Lemon Blueberry Bundt Cakes. Enjoy your baking! {{image_2}} You can play with flavors in mini bundt cakes. Try adding different fruits like raspberries or strawberries. You can also use spices. Cinnamon pairs well with apples. For a chocolate twist, add cocoa powder and chocolate chips. Don’t forget about nuts! Walnuts or pecans add a nice crunch. You can also switch up the liquid. Use orange juice instead of lemon for a fresh taste. Experiment with extracts too. Almond or coconut extracts can change the whole vibe. Decorating your mini bundt cakes can be fun! You can use icing, like the glaze from the Full Recipe. Dusting with powdered sugar is simple and pretty. Fresh fruit on top makes a colorful touch. You can also add whipped cream or a scoop of ice cream for a treat. Drizzle chocolate or caramel sauce for extra flair. For a festive look, sprinkle edible glitter or coconut flakes on top. You can make these cakes fit your diet. Substitute gluten-free flour for all-purpose flour if needed. For a vegan option, replace eggs with flaxseed meal or applesauce. Use coconut oil instead of butter to keep it dairy-free. If you want less sugar, try using honey or maple syrup. Always check labels for hidden allergens. These small changes let everyone enjoy your delicious mini bundt cakes! To store mini bundt cakes, let them cool completely first. This step is key. Place them in an airtight container. If you stack them, use parchment paper between layers. This way, they won’t stick together. You can keep them at room temperature for up to three days. For longer storage, refrigerate them for up to a week. Freezing mini bundt cakes is simple and effective. Wrap each cake tightly in plastic wrap. Then, place them in a freezer bag or an airtight container. This keeps the cakes fresh and prevents freezer burn. You can freeze them for up to three months. Just remember to label the bags with the date. To thaw your mini bundt cakes, move them from the freezer to the fridge. Let them sit overnight for best results. If you’re short on time, you can leave them at room temperature for a few hours. Once thawed, drizzle icing on top and add fresh blueberries. They will taste just as good as fresh! For the full recipe, check out Mini Lemon Blueberry Bundt Cakes. You can tell if your mini bundt cakes are done by using a toothpick. Insert the toothpick into the center of a cake. If it comes out clean or with a few crumbs, your cakes are ready. This usually takes about 20-25 minutes at 350°F. Keep an eye on them to avoid overbaking. When they are golden brown and spring back when touched, that’s another sign they are done. Yes, you can use frozen blueberries! Just toss them in a bit of flour before adding to the batter. This helps prevent them from sinking to the bottom. Keep in mind, the cakes may take a bit longer to bake. Make sure to check them with a toothpick to ensure they are fully cooked. If you need a substitute for almond flour, you can use regular all-purpose flour. You could also try oat flour or coconut flour, but be aware that these will change the texture. If using coconut flour, use less, as it absorbs more liquid than almond flour. Adjust the wet ingredients to get the right consistency in your batter. For the complete recipe, refer to the Mini Lemon Blueberry Bundt Cakes section. Making mini lemon blueberry bundt cakes is fun and easy. We covered key ingredients, tools, and simple steps to create these treats. I shared tips for perfecting your cakes and avoiding common mistakes. You can also explore many flavor variations and helpful storage tips. Remember, baking is all about experimenting and enjoying the process. So grab your tools, use your creativity, and start baking! You'll be proud of your delicious mini bundt cakes.

If you love desserts that look as good as they taste, you’re in the right place! These mini bundt cakes are perfect for any occasion. You can impress your guests …

Read more

Categories Desserts

Easy Crispy Rice Balls Simple and Crunchy Recipe

May 11, 2025 by Chef Theo
When making Easy Crispy Rice Balls, you need a few key ingredients. Here's what you'll need: - 2 cups cooked sushi rice - 1/2 teaspoon salt - 1/4 cup grated Parmesan cheese - 1/4 cup green onions, finely chopped - 1/2 cup panko breadcrumbs - 1/2 cup all-purpose flour - 2 large eggs, beaten - Vegetable oil for frying - Soy sauce for dipping These ingredients come together to create a crispy, delicious snack. The sushi rice gives a nice sticky texture, perfect for shaping. The salt enhances the flavor, while the Parmesan adds a cheesy twist. Green onions bring fresh flavor and color. Panko breadcrumbs ensure that crunch we all love. All-purpose flour helps the rice balls hold their shape during frying. Eggs act as a binder, keeping everything together. Vegetable oil is essential for frying, giving that golden, crispy exterior. Finally, soy sauce is a classic dip that adds umami. This simple list makes it easy to gather what you need. You can find most of these items at your local grocery store. If you want to make your rice balls extra special, feel free to add in your favorite herbs or spices! Check the Full Recipe for more detailed steps. - In a large bowl, combine the cooked sushi rice, salt, grated Parmesan cheese, and chopped green onions. - Mix thoroughly for even consistency. This helps all flavors blend well. You want every bite to be tasty. - Scoop about 2 tablespoons of the rice mixture and shape it into a ball. - Repeat until you have formed 12 rice balls. Aim for a size similar to golf balls. - Set up a breading station: Place all-purpose flour in one bowl, beaten eggs in another, and panko breadcrumbs in a third. - Roll each rice ball first in the flour, then dip into the beaten eggs, and finally coat with panko breadcrumbs. This ensures a nice crunch when frying. - In a large frying pan, heat about 1 inch of vegetable oil over medium-high heat. - When the oil is hot, test it by dropping in a breadcrumb; it should sizzle. - Gently place a few rice balls in the oil. Fry until golden brown on all sides, about 3-4 minutes. Turn them occasionally for even cooking. - Once golden, carefully remove the rice balls with a slotted spoon. Place them on a paper towel-lined plate to drain excess oil. Now, enjoy your crispy rice balls hot with soy sauce for dipping! For more details, check out the Full Recipe. For perfect crispy rice balls, panko breadcrumbs are key. They are light and help create a great crunch. Regular breadcrumbs can make your rice balls dense and chewy. Use panko for the best results. Oil temperature plays a big role in crispiness too. Heat your oil to medium-high. You can test if it’s ready by dropping in a breadcrumb. If it sizzles, you’re good to go! Frying in hot oil keeps the outside crispy while keeping the inside soft. For dipping, soy sauce is classic and tasty. You can also try spicy mayo or sweet chili sauce for a twist. Both add great flavor. Pair your rice balls with fresh salads or crunchy veggies. They balance the rich flavors and make a complete meal. Some sliced cucumbers or a simple green salad work well. A good frying pan is crucial for this recipe. A deep, heavy skillet holds heat better, frying the rice balls evenly. For shaping your rice balls, use your hands. They are the best tools! Just make sure your hands are wet to prevent sticking. You can also use a small ice cream scoop for uniform sizes. {{image_2}} You can make your rice balls even more tasty. Try adding spices like garlic powder or paprika for a kick. Fresh herbs like basil or cilantro give a bright flavor too. If cheese is your thing, swap out Parmesan for mozzarella or cheddar. Each choice brings a fun twist to the dish. Want to make these rice balls vegan? Use flaxseed meal or applesauce in place of eggs. This binding helps keep the rice balls together. For a gluten-free option, simply replace regular flour with a gluten-free blend. You can still enjoy this dish without the gluten! Get creative with fillings! You can stuff your rice balls with cheese, cooked meats, or even veggies. Small pieces of bell peppers or mushrooms add flavor and color. Mix in proteins like shredded chicken or tofu for a heartier snack. Each bite becomes a surprise! To store your rice balls, let them cool first. Place them in an airtight container. You can refrigerate them for up to three days. If you want to keep them longer, freeze the rice balls. Wrap each one tightly in plastic wrap. Then, place them in a freezer bag. They will keep well for up to three months in the freezer. To reheat, try using an oven or air fryer. Preheat your oven to 350°F (175°C). Place the rice balls on a baking sheet. Heat them for about 10-15 minutes, or until they are warm and crispy. If using an air fryer, set it to 350°F (175°C) and cook for 5-8 minutes. This method keeps them crispy and tasty. Avoid using a microwave, as it can make them soggy. In the fridge, your rice balls last about three days. In the freezer, they can stay fresh for three months. Always check for signs of spoilage. If they smell off or have a strange color, it’s best to toss them. Keeping an eye on their freshness ensures you enjoy them at their best. To keep your rice balls from falling apart, use sushi rice. It has more starch than other rice types. This starch helps bind the rice together. When forming the balls, make sure to pack the rice tightly. If needed, add a little more cheese to help with binding. Yes, you can make these rice balls ahead of time. Form the rice balls and place them on a tray. Cover them with plastic wrap and chill in the fridge. This lets the flavors mix. You can fry them just before serving for the best taste. Sushi rice is the best choice for crispy rice balls. It is short-grain rice and has more starch. This starch gives the rice a sticky texture. Other types of rice, like long-grain rice, may not hold together as well. The starch content is key for a great rice ball. Cooking crispy rice balls takes about 30 minutes. Here’s the breakdown: - Prep time: 15 minutes to mix and form the rice balls. - Cooking time: 15 minutes to fry them until golden brown. Make sure to heat the oil well before adding the rice balls. In this blog post, we covered how to make crispy rice balls. We discussed the ingredients, preparation steps, and cooking techniques. I shared tips for achieving the perfect crunch and delicious serving ideas. Don’t forget the fun variations and storage tips to keep them fresh. With these simple steps, you can create a tasty snack that satisfies. Enjoy your cooking adventure!

If you’re craving a crunchy snack that’s easy to make, these Easy Crispy Rice Balls are perfect for you! With just a handful of simple ingredients, you can whip up …

Read more

Categories Appetizers

Pineapple Dream Dessert Easy and Delicious Recipe

May 11, 2025 by Chef Theo
To make the Pineapple Dream Dessert, you need a few simple ingredients. This dessert is creamy, fruity, and easy to prepare. Here is the full list of ingredients: - 1 can (20 oz) crushed pineapple, drained - 1 cup whipped cream cheese - 1/2 cup powdered sugar - 1/2 teaspoon vanilla extract - 1 cup crushed graham crackers - 1/4 cup unsweetened coconut flakes - 1/2 cup mini marshmallows - Fresh pineapple chunks for garnish - Mint leaves for garnish (optional) Each ingredient adds to the flavor and texture. The crushed pineapple gives a fresh, juicy taste. Whipped cream cheese adds creaminess and richness. Powdered sugar sweetens the mix, while vanilla extract enhances the flavors. The crushed graham crackers and coconut flakes bring a nice crunch. Finally, mini marshmallows add a soft, sweet touch. You can find the complete recipe, including instructions, in the [Full Recipe]. This dessert is a fun way to bring the taste of summer to your table. - Step 1: Mix Primary Ingredients Start by draining the crushed pineapple. In a bowl, combine this pineapple with whipped cream cheese, powdered sugar, and vanilla extract. Use an electric mixer to blend until smooth and creamy. This step makes the base of your dessert rich and tasty. - Step 2: Prepare Graham Cracker Mixture In another bowl, mix the crushed graham crackers with the unsweetened coconut flakes. Be sure to save 1/4 cup of this mixture for later. This will add a nice crunch to the top of your dessert. - Step 3: Combine and Fold Ingredients Now, fold the graham cracker mixture into the pineapple cream mixture. Mix gently until everything is evenly combined. Next, stir in the mini marshmallows. This adds a fun chewy texture to your dessert. - Step 4: Serve or Store Spoon the mixture into dessert cups or a large dish. Sprinkle the reserved graham cracker and coconut mix on top. Chill in the fridge for at least 2 hours. This helps the flavors blend well. Before serving, top with fresh pineapple chunks and mint leaves if you like. Enjoy your Pineapple Dream Dessert! For a detailed guide, check the Full Recipe. Use Fresh vs. Canned Pineapple You can use either fresh or canned pineapple. Fresh pineapple adds a bright flavor. It also makes the dessert taste more vibrant. Canned pineapple is easier and still tasty. Just make sure to drain it well. This keeps your dessert from getting too watery. How to Achieve the Right Creamy Texture To get a creamy texture, mix the whipped cream cheese well. Use an electric mixer for the best results. Beat until it's smooth and fluffy. This step makes your dessert rich and delightful. If it feels too thick, add a splash of milk. This helps to loosen it up a bit. Chilling Time Importance Chilling is key for this dessert. It helps the flavors blend together. Let it chill in the fridge for at least 2 hours. If you can, chill it overnight. This makes every bite delicious and refreshing. The longer it sits, the better it gets! Check the [Full Recipe] for more details. {{image_2}} Tropical Twist with Other Fruits You can add other fruits to your Pineapple Dream Dessert for a tropical twist. Try using mango, banana, or kiwi. These fruits mix well with pineapple. Just chop them up and fold them into the creamy mixture. This adds flavor and color to your dessert. It makes it more fun and tasty! Different Crust Alternatives The crust can change the whole dessert. If you want a different taste, try using crushed cookies instead of graham crackers. Chocolate cookies give a rich flavor. Vanilla wafers add sweetness. You can also use crushed nuts for a crunchy base. Each crust choice brings a new vibe to this dish. Vegan Option Ideas For a vegan version, swap the whipped cream cheese for a plant-based cream. Use coconut cream or almond cream for a rich taste. You can use agave syrup instead of powdered sugar. This keeps it sweet without dairy. Your family and friends will love this vegan twist on a classic dessert. For the full recipe, check the detailed steps above. Refrigeration Guidelines Store your Pineapple Dream Dessert in an airtight container. Keep it in the fridge. It will stay fresh for about 3 to 4 days. If you use a large dish, cover it with plastic wrap. This keeps it from drying out. Freezing Pineapple Dream Dessert You can freeze this dessert if you have extra. Use a freezer-safe container. Before freezing, let it cool completely. It can last for up to 2 months in the freezer. To eat, thaw it in the fridge overnight. Shelf Life and Best Practices Always check for freshness before serving. If it looks off or smells strange, throw it away. Following these storage tips helps keep your dessert tasty and safe to eat. Enjoy it just like when you first made it! Can I make this dessert ahead of time? Yes, you can make this dessert ahead of time. It actually tastes better after chilling. I recommend making it a day before you serve. This way, the flavors mix well. Just cover it tightly and store it in the fridge. What can I substitute for whipped cream cheese? You can use regular cream cheese if you want. You can also use Greek yogurt for a lighter option. Both options will still give you a creamy texture. Just make sure to mix well until smooth. How can I make this dessert gluten-free? To make this dessert gluten-free, use gluten-free graham crackers. They are easy to find. You can also use crushed nuts or oats for the crust. Just ensure they are gluten-free certified. This way, everyone can enjoy this tasty treat! For the full recipe, check out the details above! You learned about making a tasty Pineapple Dream Dessert. We covered every step, from mixing the ingredients to serving it. I shared helpful tips for the best flavor and texture. We also explored fun variations and how to store leftovers. This dessert brings joy to any gathering. It’s easy to make and sure to impress. Enjoy creating your version of this sweet treat. Dive into the kitchen and let your taste buds celebrate!

Are you ready to indulge in a delicious treat? This Pineapple Dream Dessert is easy to make and packed with flavor. You’ll love how simple the ingredients are and how …

Read more

Categories Desserts

Puff Pastry Vanilla Custard Cream Squares Delight

May 11, 2025 by Chef Theo
To make Puff Pastry Vanilla Custard Cream Squares, gather these items: - 1 sheet of puff pastry, thawed - 2 cups whole milk - 1/2 cup granulated sugar - 3 large egg yolks - 1/4 cup cornstarch - 1 tablespoon vanilla extract - 1 tablespoon unsalted butter - Powdered sugar for dusting - Fresh berries for garnish (optional) When measuring, use dry and liquid measuring cups. For dry ingredients like sugar and cornstarch, spoon them into the cup and level off with a flat edge. For liquids, pour until you reach the desired line. This helps you get the right amounts for the best results. Make sure to use large eggs for the custard, as they help create a rich texture. To prepare your Puff Pastry Vanilla Custard Cream Squares, you will need: - A rolling pin for the puff pastry - A baking sheet lined with parchment paper - A medium saucepan for the custard - Mixing bowls for combining ingredients - A whisk for mixing the custard - A sharp knife for cutting the pastry Using these tools makes the process easier and more fun. For the full recipe, check the detailed instructions provided above. Start by preheating your oven to 400°F (200°C). Line a baking sheet with parchment paper. Take your thawed puff pastry and roll it out on a lightly floured surface. This helps to smooth it out. Next, cut the pastry into a 3x3 grid, making nine equal squares. Place these squares on your prepared baking sheet. Use a fork to prick each square. This step keeps them from puffing too much while baking. Bake the pastry for 15-20 minutes. You want them golden brown and crisp. Once baked, set them aside to cool. To make the vanilla custard, heat 2 cups of whole milk in a medium saucepan over medium heat. Watch closely until it steams, but do not let it boil. While the milk heats, combine 3 large egg yolks, 1/2 cup of granulated sugar, and 1/4 cup of cornstarch in a separate bowl. Whisk these together until smooth. Now, slowly pour a little of the hot milk into the egg mixture. Whisk constantly to temper the eggs. Keep adding the milk gradually while mixing. After that, return everything to the saucepan. Cook the mixture over medium heat, stirring constantly. You want it to thicken and coat the back of a spoon. This usually takes about 5-7 minutes. Once thickened, remove it from the heat. Stir in 1 tablespoon of vanilla extract and 1 tablespoon of unsalted butter. Mix until everything is well combined. Let the custard cool slightly. Now that your puff pastry has cooled, slice each square in half horizontally. Take a generous spoonful of vanilla custard and place it on the bottom half of each square. Then, carefully place the top half back on each square. This creates a delightful layer of custard. Finally, dust the tops with powdered sugar for a sweet touch. You can add fresh berries for garnish if you like. Enjoy your Puff Pastry Vanilla Custard Cream Squares! For more details, check the Full Recipe. To make great puff pastry, start with cold ingredients. Cold butter helps create those lovely layers. Roll the pastry evenly for the best puff. Use a light touch when rolling. Avoid pressing down too hard. This keeps the layers intact. Cut and shape gently, too. Pricking the pastry helps it bake evenly. It stops air from building up too much. Bake until golden brown. You want a nice crisp texture. Getting the custard just right is key. Use whole milk for a rich flavor. Heat it slowly, so it steams but doesn’t boil. Whisk the egg yolks, sugar, and cornstarch together well. This mix should be smooth to start. Temper the eggs by adding hot milk slowly. This keeps them from scrambling. Cook the custard over medium heat. Stir constantly until it thickens. It should coat the back of a spoon. If it gets too thick, you can whisk in a bit of milk. This keeps it creamy. Store any leftovers in an airtight container. This keeps the pastry fresh. You can keep them in the fridge for up to three days. For reheating, use a low oven. This helps restore the pastry's crispness. Avoid the microwave, as it can make the pastry soggy. If freezing, wrap the squares tightly. They can last for up to a month. When you’re ready to eat, thaw in the fridge overnight. Then reheat as mentioned before. Enjoy your tasty treat again! {{image_2}} You can make a tasty twist with chocolate. To do this, add cocoa powder to your custard. Replace a bit of the cornstarch with 1/4 cup of cocoa powder for rich flavor. You can also melt dark chocolate and mix it in after cooking the custard. This gives it a nice chocolatey taste that blends well with vanilla. Layer this custard between your puff pastry squares for a delightful dessert. If you like fruit, try infusing your custard with flavors like lemon or orange. Add the zest of your chosen fruit to the milk while heating. This gives the custard a fresh and bright taste. You can also fold in fresh fruit purée after cooking. Raspberries or strawberries make a lovely addition. This way, your squares have a burst of fruity flavor. For those needing gluten-free options, there are good replacements. You can find gluten-free puff pastry at many stores. Brands like Schar or Dufour offer great options. You can also make your own using gluten-free flour blends. Just remember to follow the package instructions carefully. This way, you still enjoy the crispy texture without gluten. To keep your puff pastry vanilla custard cream squares fresh, store them properly. First, let them cool completely. Place the squares in an airtight container. This keeps them from drying out. You can also layer them with parchment paper to prevent sticking. Keep the container in the fridge. This helps maintain their texture and flavor. If you want to save some for later, freezing works well. First, wrap each square in plastic wrap. Then, place them in a freezer bag or airtight container. Make sure to remove as much air as possible. These squares can freeze for up to two months. When you are ready to eat them, let them thaw in the fridge overnight. Reheat them in the oven for a few minutes to regain their crispiness. When stored in the fridge, these squares last about three days. After that, the puff pastry may become soggy. If you freeze them, they stay good for two months. Always check for any changes in smell or texture before eating. Enjoy your treats while they are fresh for the best taste! For the full recipe, check the earlier section. Puff pastry is a light, flaky dough made from layers of butter and flour. It puffs up when baked due to steam. This creates a crispy, airy texture that is perfect for desserts and savory dishes alike. You can buy it frozen or make it from scratch, but using pre-made sheets saves time. Always thaw it properly before use for the best results. Yes, you can make the custard ahead of time. Prepare it a day in advance and store it in the fridge. Just cover it with plastic wrap to avoid a skin forming on top. When you are ready to use it, give it a gentle stir to smooth it out. This way, you can assemble your squares quickly when it’s time to serve. To prevent curdling, always heat the milk slowly. This helps keep the temperature consistent. When adding hot milk to the egg mixture, do it gradually while whisking. This process is called tempering. It warms the eggs gently, so they don't cook too fast and curdle. Remember to whisk constantly until the custard thickens to a smooth texture. We covered the key steps to make delicious puff pastry vanilla custard cream squares. You learned about the ingredients, measurements, tools, and step-by-step instructions. I shared tips for perfecting your pastry and custard. Feel free to explore fun variations and proper storage methods. With these guidelines, you’ll create tasty treats with ease. Enjoy the process and impress everyone with your skills!

If you love light and creamy desserts, you’ll adore Puff Pastry Vanilla Custard Cream Squares! This treat combines flaky pastry and smooth custard for a blissful bite. In this post, …

Read more

Categories Desserts

Raspberry Danish Delight Simple and Delicious Recipe

May 11, 2025 by Chef Theo
- 1 package (14 oz) frozen puff pastry, thawed - 1 cup fresh raspberries (or frozen, thawed) - 1/4 cup granulated sugar - 1 tablespoon cornstarch - 1 teaspoon vanilla extract - 4 oz cream cheese, softened - 1/4 cup powdered sugar - 1 tablespoon lemon juice - 1 egg, beaten (for egg wash) If you're looking for vegan options, use plant-based cream cheese. For gluten-free needs, seek gluten-free puff pastry. You can also swap raspberries for other fruits, like blueberries or strawberries, for a fun twist. Each serving holds about 200 calories. You get around 10 grams of fat, 25 grams of carbs, and 3 grams of protein. Keep in mind the sugar content is about 5 grams. This tasty treat can fit into many diets, just check your needs. For the full recipe, check the Raspberry Bliss Danish section above. - Preheat your oven to 400°F (200°C). Line a baking sheet with parchment paper. - On a lightly floured surface, roll out the thawed puff pastry. Aim for a rectangle about 1/8 inch thick. Cut this into 6 squares. - In a medium bowl, combine 1 cup of raspberries with 1/4 cup of granulated sugar. Add 1 tablespoon of cornstarch and 1 teaspoon of vanilla extract. Gently mix them together and set aside. - In another bowl, make the cream cheese mixture. Blend 4 oz of softened cream cheese with 1/4 cup of powdered sugar and 1 tablespoon of lemon juice until it is smooth. - For each pastry square, slightly score a border about 1/2 inch from the edge. Be careful not to cut all the way through. This creates a nice frame for the filling. - Spread a small amount of the cream cheese mixture in the center of each square. Spoon the raspberry mixture over the cream cheese, but keep it away from the edges. - Place the filled pastries on the prepared baking sheet. Brush the edges with a beaten egg for a golden finish. - Bake in the preheated oven for 20 to 25 minutes. Look for a golden and puffed appearance. They should smell amazing! To achieve a flaky puff pastry, start with cold ingredients. Keep your butter and water very cold. When you roll out the pastry, do it gently. Avoid pressing too hard. This helps create those lovely layers. When working with cream cheese, make sure it is soft. You can let it sit at room temperature for a bit. This makes mixing easier. Mix it well with the powdered sugar and lemon juice. A smooth blend will taste better. For the best experience, serve your Raspberry Danish with fresh fruit. Strawberries or blueberries pair nicely. You can also enjoy it with a dollop of whipped cream. Ideal beverages include coffee or a light tea. Both drinks balance the sweetness well. A glass of cold milk also works great for kids. Garnish your Danish with powdered sugar for a sweet touch. This adds a nice contrast to the red raspberries. For visual appeal, plate each Danish on a colorful dish. A simple white plate lets the colors pop. You can also add a sprig of mint for a fresh look. For more details on how to make this delightful treat, check out the Full Recipe. {{image_2}} You can easily change the taste of your Raspberry Danish. Try adding lemon zest for a fresh zing. Or, mix in some coconut for a tropical twist. If you want more berries, create a mixed berry option. Use blueberries or blackberries for a colorful and tasty treat. If you follow a vegan diet, you can make a vegan Raspberry Danish. Use plant-based cream cheese in place of regular cream cheese. You can also use maple syrup instead of sugar. For gluten-free options, look for gluten-free puff pastry. Many stores offer great alternatives that taste just as good. Seasonal fruits can give your Danish a fun twist. In summer, try peaches or strawberries. In fall, add apples or pears for a cozy vibe. For holidays, think about using cranberries or pumpkin spice. Each season brings new flavors to enjoy! Raspberry Danish lasts about 3 to 5 days in the fridge. To keep it fresh, place the Danish in an airtight container. This helps prevent it from drying out. You can also wrap it tightly in plastic wrap for added protection. To freeze your Raspberry Danish, start by letting it cool completely. Then wrap each piece in plastic wrap. Place the wrapped pastries in a freezer bag. Make sure to remove as much air as possible. This helps avoid freezer burn. You can freeze them for up to 2 months. When you’re ready to enjoy them, remove the Danish from the freezer. Thaw them in the fridge overnight for best results. If you need them fast, you can also thaw them at room temperature for a few hours. For the best texture, reheat your Raspberry Danish in the oven. Preheat the oven to 350°F (175°C). Place the Danish on a baking sheet and heat for about 10-15 minutes. This method warms them without making them soggy. If using a microwave, heat on low power for 15-20 seconds. This is quick but may make the pastry less crispy. Adjust time based on your microwave's power and check often. Enjoy your delicious Raspberry Danish warm! Yes, you can use frozen raspberries. They are easy to find and work well. If you choose frozen, let them thaw first. Drain any extra juice to avoid a soggy Danish. Fresh raspberries taste great too, but frozen can save time. Look for a nice golden color. The pastry should be puffy and flaky. You can also check if the filling bubbles slightly. If it smells amazing, it's likely ready! Let them cool a bit before serving. Don’t toss those scraps! You can use them for mini tarts or savory pastries. Just roll them out and fill with cheese or veggies. You can also cut shapes and bake them as snacks. Puff pastry is versatile and fun to use. You can find prepared Raspberry Danish at many bakeries and grocery stores. Check the frozen section too; some stores sell frozen versions. Online options are available as well, so you can enjoy them at home without baking! In this post, we explored making a delicious raspberry Danish. We covered ingredients, substitutions, and nutritional info. I shared step-by-step instructions to help you bake with ease. We also discussed tips to perfect your pastry and ways to serve it. Don’t forget to experiment with variations and enjoy your Danish fresh or stored. Whether you’re saving it for later or impressing guests, this recipe makes baking fun and rewarding. Baking should be joy, not stress. Enjoy your time in the kitchen and let your creativity shine!

If you love sweet, flaky pastries, you’re in for a treat! This Raspberry Danish recipe is simple, delicious, and perfect for any occasion. With just a few ingredients, you’ll have …

Read more

Categories Desserts

Spicy Mexican Corn Bites Flavorful and Easy Treat

May 11, 2025 by Chef Theo
To make Spicy Mexican Corn Bites, you’ll need: - 2 cups corn kernels (fresh or canned) - 1/2 cup all-purpose flour - 1/2 cup cornmeal - 1/4 cup grated Parmesan cheese - 1 jalapeño, finely chopped (seeds removed for less heat) - 1/4 cup cilantro, chopped - 1 teaspoon baking powder - 1/2 teaspoon cumin - 1/2 teaspoon smoked paprika - 1/4 teaspoon cayenne pepper (adjust for spice preference) - Salt and pepper to taste - 1 large egg - 1/2 cup milk - Oil for frying You can use either fresh or canned corn for this recipe. Fresh corn gives a sweet crunch. It’s best when in season and can make your bites taste brighter. If using fresh, you’ll need to cut the kernels off the cob. Canned corn is quick and easy. Just drain and rinse it before using. Both options work well to create delicious bites. Want to kick the flavors up a notch? Here are some optional ingredients you can try: - Diced bell peppers for sweetness - Chopped green onions for a fresh bite - Crumbled feta cheese for tanginess - A splash of lime juice for zest - Diced tomatoes for added juiciness Feel free to mix and match these extras to suit your taste. You will find that the more flavors you add, the more unique your bites will become. For the full recipe, check the details above. Start by gathering all your ingredients. You need corn kernels, flour, cornmeal, Parmesan cheese, jalapeño, cilantro, baking powder, cumin, smoked paprika, cayenne pepper, salt, and pepper. In a large bowl, mix the corn, flour, cornmeal, Parmesan cheese, chopped jalapeño, and cilantro. Make sure everything is well combined. In a separate bowl, whisk together the baking powder, cumin, smoked paprika, cayenne pepper, salt, and pepper. This blend adds a nice kick to the bites. Next, in another bowl, beat the egg and mix it with milk. Pour this egg mixture into the corn mixture. Stir until just combined. Do not overmix it, or your bites will be tough. Now, it's time to fry! Heat about 2 inches of oil in a deep skillet over medium heat. You want the oil hot but not smoking. Carefully drop spoonfuls of the corn mixture into the oil. Make sure not to overcrowd the pan. Fry each batch until golden brown, which takes about 2-3 minutes per side. When they turn golden, transfer the corn bites to a plate lined with paper towels. This step helps to drain any extra oil. Serve the corn bites warm. You can squeeze fresh lime juice on top for a zesty touch. For dipping, try serving them with your favorite sauces. Options like sour cream, salsa, or guacamole work well. If you want to try something new, a spicy aioli can add a tasty twist. For the full recipe, check out the details above. Enjoy your delicious, spicy Mexican corn bites! To get your corn bites crispy, use cold ingredients. Cold milk and eggs help. After mixing, let the batter rest for ten minutes. This helps the flavors blend. When frying, heat your oil to 350°F. If the oil is too cool, the bites will soak up oil. Fry in small batches. This keeps the oil temperature steady. Lastly, drain excess oil on paper towels. This step makes a big difference. One common mistake is overmixing the batter. This can make the bites tough. Mix until just combined. Another mistake is not testing the oil's heat. Drop a small amount of batter into the oil. If it sizzles, the oil is ready. Avoid overcrowding the pan. This lowers the oil temperature and makes them soggy. Also, don't skip the seasoning. Salt and other spices enhance the flavor. If you want a milder taste, skip the cayenne pepper. For more heat, add more jalapeño. You can also try different cheeses. Cheddar or queso fresco adds a nice twist. If you love herbs, add more cilantro or fresh parsley. You can even mix in some corn salsa for extra flavor. These adjustments make it easy to customize your bites. Check out the Full Recipe for more ideas! {{image_2}} You can easily make these spicy Mexican corn bites vegetarian. The original recipe is already meat-free, which is great! If you want more texture, add diced bell peppers or mushrooms. They add flavor and crunch without losing the essence of the dish. You can also swap the Parmesan cheese for a vegan cheese option. This keeps it tasty while being plant-based. If you need gluten-free bites, simply switch the all-purpose flour with a gluten-free blend. Many brands offer great options that work well in frying. You can also use corn flour instead of regular flour. This keeps the corn flavor strong while ensuring it is safe for gluten-sensitive eaters. Do you prefer less heat? You can lower the spice by adjusting the jalapeño. Remove all the seeds and membranes, as that is where most of the heat hides. You can also reduce the cayenne pepper to a pinch or leave it out entirely. For those who love spice, add more jalapeño or a splash of hot sauce to the mix. Experimenting with flavors keeps it fun and delicious! For the full recipe, check the main article above. After enjoying your Spicy Mexican Corn Bites, let any leftovers cool down. Place them in an airtight container. Store the container in the fridge for up to three days. This keeps the bites fresh and tasty. To reheat, I recommend using an oven. Preheat it to 350°F (175°C). Place the corn bites on a baking sheet. Heat for about 10 minutes or until warm. This method keeps them crispy. You can also use an air fryer for a quick reheat. Set it to 350°F (175°C) and cook for 5 minutes. If you want to save some for later, freezing works great. First, let the corn bites cool completely. Then, place them in a single layer on a baking sheet. Freeze them for about an hour. Once frozen, transfer them to a freezer bag. They can last up to three months in the freezer. When ready to eat, thaw them overnight in the fridge before reheating. For the best taste, enjoy them fresh with the full recipe. Yes, you can make these corn bites ahead of time. Prepare the mixture and store it in the fridge. This keeps the flavors fresh. Just remember to fry them right before serving. This way, they stay crispy and warm. You can also reheat them in the oven for a few minutes if needed. If you want less heat, try using bell peppers. They add sweetness without the spice. Another option is to use banana peppers. They give a milder kick. For a smoky flavor, add a small amount of smoked paprika. You can also skip the peppers and add extra herbs for flavor. When frying, watch for a golden brown color. It usually takes about 2-3 minutes on each side. Use a slotted spoon to check one. If it’s golden and crispy, they are ready. Drain them on paper towels to remove extra oil. Enjoy them warm for the best taste! The blog post covered all the steps to make tasty corn bites. I discussed ingredients, from fresh to canned corn and optional flavors. I shared clear instructions on frying and serving them. Tips helped you make them extra crispy and avoid common mistakes. You learned about variations for different diets and how to store leftovers. These corn bites are fun and easy to make. Enjoy experimenting and find your favorite way to serve them!

Are you ready to spice up your snack game? My Spicy Mexican Corn Bites are both flavorful and easy to make. With simple ingredients, you’ll create a treat that packs …
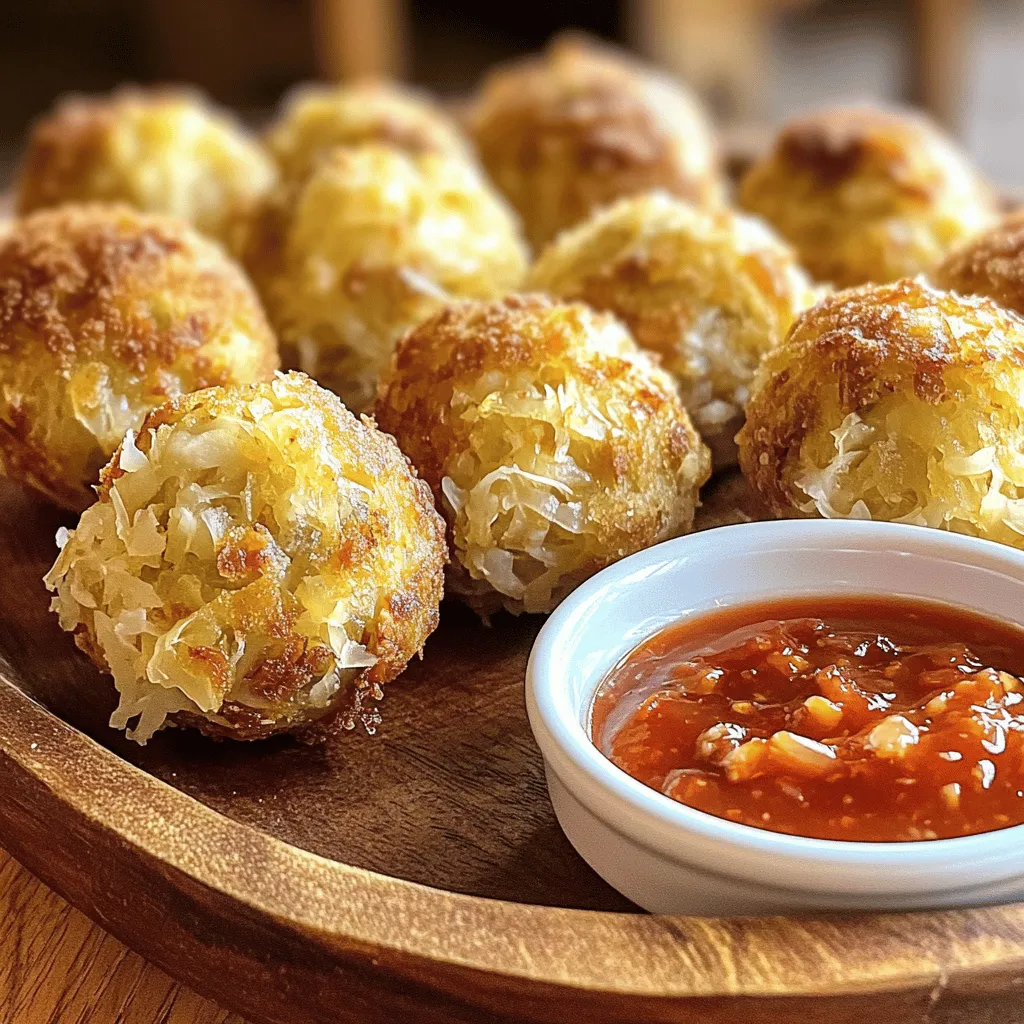
Read more

Categories Appetizers

Crab Rangoon Delight Simple and Tasty Recipe

May 11, 2025 by Chef Theo
- 8 oz cream cheese, softened - 1 cup crab meat, cooked and shredded - 2 green onions, finely chopped - 1 teaspoon garlic powder - 1 teaspoon Worcestershire sauce - 1 package of wonton wrappers (about 30-40 wrappers) - Vegetable oil (for frying) - Salt and pepper to taste - Sweet chili sauce (for serving) These ingredients make a tasty Crab Rangoon. The cream cheese gives it a rich flavor. The crab meat adds a nice touch of sweetness. Green onions bring freshness. Garlic powder and Worcestershire sauce give depth. Wonton wrappers hold everything together and fry up crispy. Sweet chili sauce is perfect for dipping. You can swap cream cheese for Neufchâtel cheese. It has less fat but tastes great. For a dairy-free option, use cashew cream. You can also use imitation crab meat if fresh crab is not available. This can cut costs but still tastes good. This recipe serves about 4-6 people. If you have a big event, double the ingredients. You can also make smaller batches if you want to try it first. Each person can enjoy 4-6 pieces. Adjust the quantities based on your guests and their appetites. To start, you need to mix the filling well. In a bowl, combine 8 oz of softened cream cheese, 1 cup of cooked and shredded crab meat, 2 finely chopped green onions, 1 teaspoon of garlic powder, 1 teaspoon of Worcestershire sauce, and a pinch of salt and pepper. Use a fork or spatula to blend everything until smooth and creamy. For the right consistency, make sure the cream cheese is very soft. If it is too firm, the filling will be hard to spread. You want a mixture that is thick but smooth. Now, let’s wrap the filling in the wonton wrappers. Lay a wrapper flat on your clean surface. Place about 1 teaspoon of the crab mixture in the center of the wrapper. Next, moisten the edges with a little water. This helps the wrapper seal better. Fold the wrapper over to make a triangle and press the edges firmly to seal. For added security, fold the two outer corners towards the center. Pinch them to seal again. Common mistakes include not sealing the edges well or overfilling the wrapper. Both can cause the filling to leak during frying. For frying, heat about 2 inches of vegetable oil in a deep frying pan. Use medium-high heat. The oil needs to reach 350°F (175°C) for perfect frying. You can test the heat by dropping a small piece of the wonton wrapper into the oil. If it sizzles, it is ready. Carefully add 3-4 crab rangoon to the hot oil. Fry them for about 2-3 minutes. They should turn golden brown and crispy. Use a slotted spoon to take them out and let them drain on a paper towel-lined plate. Following these steps will give you lovely, crispy Crab Rangoon. Don't forget to serve them warm with sweet chili sauce! To make the best crab rangoon, focus on even cooking. Use a deep frying pan with enough oil. This helps the rangoon float and fry evenly. Keep the oil at 350°F (175°C). Too low or high will affect the crispiness. Drain fried rangoon on paper towels. This cuts down on grease. To store leftovers, wait until they cool. Place them in an airtight container. They will stay fresh for up to three days in the fridge. Reheat them in the oven to keep them crispy. One mistake is overfilling the wonton wrappers. This can lead to leaks during frying. Ensure you seal them tightly. Don't skip moistening the edges; it helps the seal hold. Another issue is frying oil temperature. If it’s too hot, the rangoon burns outside and stays cold inside. If it’s too cool, they absorb too much oil and become soggy. Use a thermometer for best results. Serve crab rangoon with sweet chili sauce. It adds a nice, spicy touch. Pair it with fried rice or a light salad. This balances the rich flavors. For presentation, arrange them on a platter. Place a small bowl of sauce in the center. Add green onions or cilantro as a garnish. This makes your dish look more appealing. {{image_2}} You can take your Crab Rangoon to the next level! Adding spices or herbs can change the taste. Try adding a pinch of cayenne for heat. A sprinkle of dill or chives gives a fresh twist. You can also mix in cheese like mozzarella or cheddar for creaminess. Vegetables like spinach or bell peppers can add crunch and flavor. Baking and frying are the main ways to cook Crab Rangoon. Frying gives a crunchy texture. However, it can be greasy if not done right. Baking is healthier and still tasty. It takes longer, but you can make a big batch. If you want to cut calories, an air fryer works great! It gives a crisp finish without much oil. You can get creative with Crab Rangoon! Consider a spicy version with sriracha in the filling. For a vegetarian take, use a mix of mushrooms and cream cheese. Pair these with different dipping sauces, like soy sauce or a tangy mango salsa. Each twist can make your dish unique and fun. Don't hesitate to explore! To keep uncooked crab rangoon fresh, follow these steps: - Wrap each rangoon in plastic wrap. This prevents freezer burn. - Place them in a freezer bag or container. Seal it tightly. - Label the bag with the date. This helps track freshness. Uncooked crab rangoon can last up to three months in the freezer. For best taste, use them within a month. After cooking, store your crab rangoon properly: - Let them cool completely before storing. This keeps them crispy. - Place in an airtight container with paper towels. This absorbs moisture. Cooked rangoon will stay fresh for up to four days in the fridge. To reheat, use an oven or air fryer. Heat them at 350°F (175°C) for about 10 minutes. This keeps them crispy and delicious. Don’t let leftovers go to waste! Here are some fun ideas: - Add to soups for a creamy twist. They make a great topping. - Chop and mix into a salad for added flavor. - Create a dip by blending with sour cream or yogurt. These ideas can give your leftover crab rangoon a second life! If you need more ideas, check out the Full Recipe for inspiration. Crab Rangoon has a fun history. It likely started in the 1950s in the U.S. Some say it was made in California. Others say it was created in a restaurant in New York. The dish blends flavors from Chinese and American cooking. This mix helped it become popular. Today, you can find it in many Asian restaurants across the country. Yes, you can make Crab Rangoon ahead of time. Prepare the filling and wrap the wontons. Place them on a baking sheet and freeze them. This way, they stay fresh until you are ready to fry them. For busy days, this saves time. Just remember to fry them while frozen. This helps keep them crispy. The best Crab Rangoon can be found in many places. Look for local Asian restaurants with good reviews. Some national chains also serve great versions. When choosing a place, think about freshness. Fresh ingredients make a big difference in taste. You may also want to check if they have homemade dipping sauce. If you want to try making this dish, check out the [Full Recipe]. It guides you through making Crispy Creamy Crab Rangoon step-by-step. You will enjoy the crispy outside and creamy inside! This guide covers all you need for perfect Crab Rangoon. You learned the key ingredients, how to prepare the filling, wrap, and fry. Plus, I shared tips to avoid common mistakes and make tasty variations. Whether you bake, fry, or try something new, these options will impress your guests. Remember, perfecting your technique ensures a great dish every time. Enjoy your cooking and share your delicious results!

If you’ve ever craved a crunchy, creamy bite of Crab Rangoon, you’re in the right place! This delightful recipe brings together cream cheese, real crab meat, and a few tasty …

Read more

Categories Appetizers

Lemon Blueberry Cream Cheese Danish Fresh and Tasty Treat

May 11, 2025 by Chef Theo
To make this tasty treat, gather these simple ingredients: - 1 sheet of puff pastry, thawed - 1 cup fresh blueberries - 4 ounces cream cheese, softened - 1/4 cup granulated sugar - 1 teaspoon lemon zest - 1 tablespoon lemon juice - 1 egg, beaten (for egg wash) - 1 tablespoon all-purpose flour (for dusting) - Powdered sugar (for dusting, optional) If you want to add more flavor, consider these extras: - A pinch of salt to enhance sweetness - A dash of vanilla extract for richness - A sprinkle of cinnamon for warmth These optional ingredients can elevate your danish and make it even more special. To make the process smooth, use these tools: - A rolling pin for flattening the pastry - A medium mixing bowl for the cream cheese mixture - A baking sheet lined with parchment paper - A pastry brush for the egg wash - A sharp knife or pizza cutter to cut the pastry These tools will help you create the perfect Lemon Blueberry Cream Cheese Danish. For the full recipe, check the detailed instructions above. To start, gather your ingredients. You need: - 1 sheet of puff pastry, thawed - 1 cup fresh blueberries - 4 ounces cream cheese, softened - 1/4 cup granulated sugar - 1 teaspoon lemon zest - 1 tablespoon lemon juice - 1 egg, beaten (for egg wash) - 1 tablespoon all-purpose flour (for dusting) - Powdered sugar (for dusting, optional) Next, preheat the oven to 400°F (200°C). Line a baking sheet with parchment paper. This helps with easy cleanup. Now, on a floured surface, roll out the puff pastry. Roll it until it is smooth. Cut it into four equal squares. In a medium bowl, mix the softened cream cheese with the granulated sugar. Add the lemon zest and lemon juice. Stir until the mixture is smooth. Place a generous spoonful of the cream cheese mixture in the center of each puff pastry square. Then, add a few fresh blueberries on top of the cream cheese. To form the danish, fold the corners of each square towards the center. Pinch them to seal, but leave the middle open to show the filling. Now, brush the edges of each danish with the beaten egg. This will give them a lovely golden color when they bake. Bake in your preheated oven for 15-18 minutes. Watch for the pastry to turn golden and puff up. To check if your danish is done, look for a golden brown color. The pastry should be puffed and firm. If it looks pale or soft, give it a few more minutes. Let them cool slightly after baking. If you want, dust with powdered sugar for a sweet touch. Enjoy your fresh Lemon Blueberry Cream Cheese Danish! To get flaky pastry, use cold ingredients. Keep the puff pastry in the fridge until you're ready. Roll it out gently. Don't press too hard; let the layers stay intact. This helps create those nice, flaky layers. When you bake, the steam from the butter makes it puff up. Preheat your oven to 400°F for the best results. This high heat helps the pastry rise quickly. Start with soft cream cheese for easy mixing. If it is cold, it will be hard to blend. Use a medium bowl and a spatula for smooth results. Combine the cream cheese with sugar, lemon zest, and lemon juice. Mix until it looks creamy and smooth. Don’t overmix; you want it fluffy, not runny. This filling should be rich and tangy, enhancing the danish. Serve these danishes warm for the best taste. Place them on a nice plate and dust with powdered sugar. This adds a sweet touch and a pretty look. Pair with a cup of coffee or tea for a delightful treat. You can also add a side of fresh berries for extra color and flavor. Enjoy them fresh out of the oven or at room temperature. For the full recipe, check out the Lemon Blueberry Cream Cheese Danish recipe. {{image_2}} You can mix up the fruit in your danish. Try using raspberries or strawberries instead of blueberries. Peaches or cherries would also work well. Each fruit adds its own flavor. You can even use a mix of different fruits for a burst of color and taste. Want to jazz up your danish? Add a pinch of cinnamon or nutmeg to the cream cheese filling. You can also mix in vanilla extract for a rich flavor. A dash of almond extract gives a unique twist. These flavors pair well with the lemon and fruit. If you need a gluten-free option, use gluten-free puff pastry. Many brands offer good choices now. For a dairy-free version, replace cream cheese with a dairy-free cream cheese or a cashew-based spread. Check the labels to ensure they fit your diet. These swaps make the danish accessible for everyone. For the full recipe, check the previous section. To keep your Lemon Blueberry Cream Cheese Danish fresh, store leftovers in an airtight container. This helps prevent them from drying out. You can keep them at room temperature for one day. If you want them to last longer, refrigerate them. In the fridge, they stay good for up to three days. Just remember to let them cool completely before storing. You can freeze these delicious danishes for later. Wrap each one tightly in plastic wrap. Then, place the wrapped danishes in a freezer bag. This keeps air out and prevents freezer burn. When frozen, they last for about three months. To enjoy them later, just take them out and let them thaw in the fridge overnight. Reheating your danish is simple. Preheat your oven to 350°F (175°C). Place the danish on a baking sheet. Heat for about 10-15 minutes, or until warm. This method keeps the pastry crisp. You can also use a microwave, but this may make it a bit soggy. For best results, stick to the oven! Yes, you can make the Lemon Blueberry Cream Cheese Danish ahead of time. Prepare the filling and pastry. Keep them separate in the fridge. Assemble the danish just before baking. This way, the pastry stays fresh and flaky. To avoid soggy pastry, use a few simple tricks. First, roll the puff pastry thinly. This helps it cook evenly. Second, use a light hand with the cream cheese filling. Too much moisture can cause sogginess. Lastly, bake the danish right after assembling. This keeps everything crisp. You can swap cream cheese with several options. Soft ricotta cheese works well. Greek yogurt can also be a good choice. For dairy-free options, try cashew cream. Just make sure the texture stays smooth for the best flavor. Yes, this recipe is perfect for beginners. The steps are simple and clear. You only need a few basic ingredients and tools. Even if you’ve never baked before, you can make this tasty treat with confidence. You’ve learned how to make a tasty Lemon Blueberry Cream Cheese Danish. We covered the key ingredients, step-by-step baking, and helpful tips. Remember, achieving flaky pastry is key. You can also try different fruits and flavors to keep it fresh. If you store the leftovers right, they’ll stay delicious. This recipe is great for all skill levels, so don’t hesitate to try it. Making this Danish can be fun and rewarding. Enjoy creating this sweet treat!

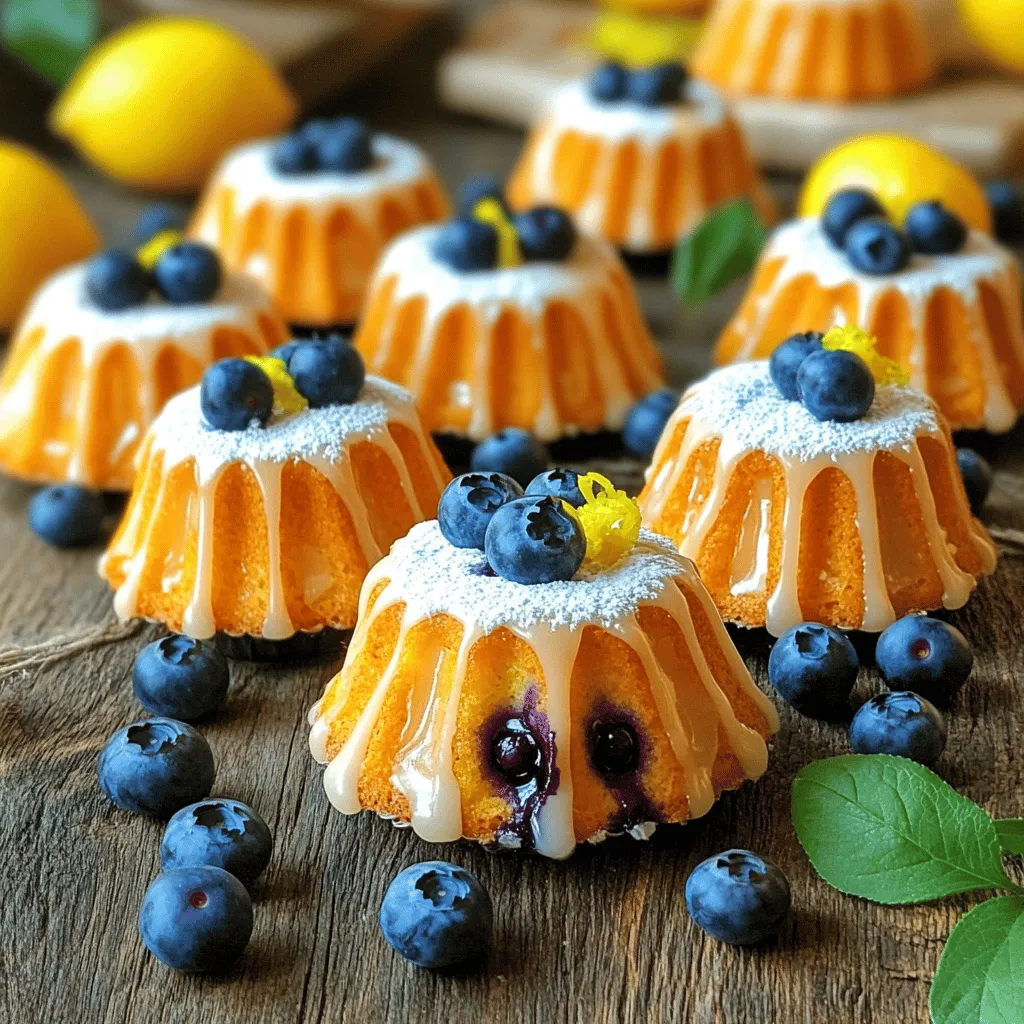
Ready for a delicious treat? My Lemon Blueberry Cream Cheese Danish is the perfect blend of tart lemon and sweet blueberries. This simple recipe creates a flaky pastry filled with …

Read more

Categories Desserts
Older posts
Newer posts
← Previous Page1 … Page77 Page78 Page79 … Page94 Next →

TOASTED RECIPES

Where ideas are warm, crisp, and ready to serve! 🍞

PAGES

Home About Contact Privacy Policy Terms & Conditions Cookie Policy GDPR Policy Copyright Policy Disclaimer

CATEGORIES

Appetizers Desserts Salads Breakfast Dinner

Contact

  • Pinterest
  • Mail
Copyright © 2025 Toasted Recipes. All rights reserved.