Skip to content
toastedrecipes.com
  • Home
  • Appetizers
  • Desserts
  • Salads
  • Breakfast
  • Dinner
  • Privacy Policy
  • Contact
  • About

Chef Theo

Breakfast Chili and Eggs Flavorful Morning Delight

May 22, 2025 by Chef Theo
- 1 can (15 oz) black beans, drained and rinsed: Black beans add protein and fiber. They make the dish hearty and filling. - 1 can (14.5 oz) diced tomatoes with green chiles: These add flavor and a bit of heat. They create a nice sauce base for the chili. - 1 small onion, diced: Onions bring sweetness and depth. They enhance the overall taste when cooked. - 1 bell pepper (any color), diced: Bell peppers add crunch and a hint of sweetness. They also provide color to the dish. - 2 cloves garlic, minced: Garlic offers a strong, savory flavor. It makes the chili aromatic. - 1 tablespoon chili powder: This spice gives the dish its signature heat. Adjust the amount to fit your taste. - 1 teaspoon cumin: Cumin brings a warm, earthy flavor. It adds complexity to the chili. - 1 teaspoon smoked paprika: This spice adds a smoky taste. It enhances the chili's richness. - Salt and pepper, to taste: These seasonings help balance the flavors. Use them to make the dish your own. - 4 large eggs: Eggs provide protein and make the dish more filling. They create a wonderful texture when cooked. - 2 tablespoons olive oil: Olive oil is great for cooking the veggies. It adds healthy fats to the dish. - Fresh cilantro, for garnish: Cilantro adds freshness and brightness. It makes the dish visually appealing. - Avocado slices, for serving (optional): Avocado offers creaminess and healthy fats. It pairs well with the chili. - Crumbled feta cheese, for serving (optional): Feta adds a tangy taste. It enhances the flavor profile of the dish. To pick the best ingredients, look for fresh produce. Choose beans with a good texture and no added preservatives. For spices, check for freshness to ensure strong flavors. Adding garnishes can take your Breakfast Chili and Eggs to the next level. Here are some ideas: - Avocado slices: They add creaminess and healthy fats. Plus, they help cool the heat from the chili. - Crumbled feta cheese: It gives a salty kick. Feta also adds a nice contrast to the chili's flavors. - Fresh cilantro: This bright herb adds a pop of color and freshness. It lifts the entire dish. Nutritionally, avocado is high in healthy fats and fiber. Feta cheese offers protein and calcium. Both garnishes make your meal more balanced and tasty. 1. Heat the oil: Start by pouring 2 tablespoons of olive oil into a large skillet. Set the heat to medium. This helps to coat the skillet and prevent sticking. 2. Cook the onion and bell pepper: Add 1 small diced onion and 1 diced bell pepper to the skillet. Cook for about 5 minutes. The goal is to soften them. Stir occasionally to ensure they cook evenly. 3. Add garlic: Next, stir in 2 minced garlic cloves. Sauté for another minute until the garlic smells good. This step adds a nice depth of flavor. 4. Combine the main ingredients: Now, add 1 can of black beans, 1 can of diced tomatoes with green chiles, 1 tablespoon of chili powder, 1 teaspoon of cumin, and 1 teaspoon of smoked paprika to the skillet. Mix everything well. Let it simmer for about 10 minutes. Stir occasionally to keep it from sticking. Season with salt and pepper to taste. 5. Create egg wells: Using a spoon, make 4 small wells in the chili mixture. This is where the eggs will cook. 6. Add the eggs: Crack one egg into each well. Be careful not to break the yolk. Cover the skillet with a lid. 7. Cook the eggs: Let the eggs cook for 5-7 minutes. This time depends on how runny you like your yolks. Check them after 5 minutes. 8. Garnish: Once the eggs are cooked, remove the skillet from heat. Sprinkle fresh cilantro on top. Add avocado slices and crumbled feta cheese if you like. These steps ensure a delicious breakfast chili and eggs dish. Aim for perfectly cooked eggs by keeping a close eye on them while they cook. - Equipment needed: A large skillet is essential. A lid helps trap heat and cook the eggs evenly. - Adjusting cooking time: For runnier yolks, check the eggs at 5 minutes. For firmer yolks, leave them for 7 minutes. Adjust based on your preference to get the best texture. Now that you have the steps, you can enjoy a hearty breakfast chili and eggs. For the complete recipe, refer to the [Full Recipe]. To make your breakfast chili and eggs pop, add spices like cayenne pepper or chili flakes. These spices will bring heat and depth to your dish. You can also try fresh herbs like parsley or oregano for a bright flavor. Balancing flavors is key. Aim for a mix of spicy, savory, and fresh. The creamy avocado helps cool the heat while the cilantro adds freshness. Textures matter too. Pair the soft eggs with the hearty chili for a satisfying bite. Watch out for overcooked eggs. They can turn rubbery if cooked too long. To avoid this, keep an eye on the eggs and cover the skillet. This helps them cook evenly. Don't let your chili fall flat. If it tastes bland, add more salt or spices. Taste as you cook. Adjusting flavors early saves the dish. Remember to stir often to prevent sticking or burning. For more detailed guidance, check the Full Recipe. {{image_2}} You can easily adjust this breakfast chili to fit your needs. Here are some ideas for swapping out beans or proteins: - Beans: Use pinto beans or kidney beans instead of black beans. - Meats: Add ground turkey or chicken for a protein boost. - Plant-Based: For a vegan option, skip the eggs and add tofu or tempeh. If you want a vegetarian dish, just stick with the beans and add more veggies. You can mix in corn or zucchini for extra flavor and texture. Now, let’s talk about adding some local flair or creative touches: - Regional Spices: Try adding cumin or chipotle powder for a smoky kick. - Cheese: Melt some cheese on top for creaminess. Cheddar or pepper jack works great! - Chorizo: Crumble cooked chorizo into the chili for a spicy punch. Feel free to experiment with these variations! Each twist makes this dish more fun and unique. For the full recipe, check out the [Full Recipe] link. To store leftovers of breakfast chili and eggs, let it cool first. Use an airtight container. Place it in the fridge. It will stay fresh for a few days. If you want to keep it longer, freeze it. Divide the chili into smaller portions. This way, you can thaw only what you need. When reheating, use a skillet on low heat. Stir gently to avoid breaking the eggs. You can also use a microwave. Heat in short intervals, checking often to prevent overcooking. In the fridge, breakfast chili and eggs last about 3 to 4 days. When frozen, it can stay fresh for up to 3 months. To tell if it has gone bad, check for off smells or colors. If the eggs look watery or dry, it’s best to throw it out. Always trust your senses. If in doubt, don't eat it. Yes, you can prepare Breakfast Chili and Eggs ahead of time. I recommend cooking the chili base first. Store it in an airtight container in the fridge for up to three days. When you are ready to eat, reheat the chili gently on the stove. For the eggs, cook them fresh. This keeps them fluffy and perfect. You can crack the eggs into the chili and cook them just before serving. This way, you enjoy the best texture and flavor. Pairing sides elevates your breakfast. Here are some great options: - Toasted bread or tortillas for dipping - Sliced avocado for creaminess - Fresh fruit like pineapple or berries for sweetness - A side of yogurt for coolness These sides create a well-rounded meal. They balance the heat from the chili and the richness of the eggs. To adjust spiciness, you can modify the chili powder. Start with less if you prefer mild flavors. You can also add fresh jalapeños for a kick. Use them sparingly to find your comfort level. Another option is to serve hot sauce on the side. This way, everyone can add their desired heat. Remember, spiciness can always be adjusted, but it's hard to take it away once added! This blog post outlined the key steps to making delicious breakfast chili and eggs. You learned about essential ingredients, tips for cooking, and how to avoid common mistakes. I shared options for customizing your dish and managing leftovers. Remember, the right garnishes can boost flavor and nutrition. With these tips, you can create a tasty breakfast that suits your taste and health needs. Enjoy experimenting with flavors, and don't be afraid to make this dish your own!

Looking for a new way to kickstart your mornings? Breakfast Chili and Eggs is the perfect blend of hearty flavors and energy. This dish is not only tasty but also …

Read more

Categories Breakfast

Savory Steak & Queso Rice Delightful Dinner Recipe

May 22, 2025 by Chef Theo
- 1 lb flank steak, sliced into thin strips - 1 cup long-grain white rice - 2 cups chicken broth - 1 cup queso cheese (store-bought or homemade) - 1 bell pepper, diced (any color) - 1 small onion, finely chopped - 2 cloves garlic, minced - 1 tablespoon olive oil - 1 teaspoon cumin - 1 teaspoon paprika - Salt and pepper to taste - Fresh cilantro, for garnish - Lime wedges, for serving When you choose flank steak, look for a piece that is bright red. This cut is great for searing. It has rich flavor and a nice texture. The rice should be long-grain white rice. This type cooks fluffy and pairs well with the sauce. Use chicken broth for great depth of flavor. It makes the rice taste better. For the queso cheese, you can use store-bought or make your own. Both options give a creamy finish. Don’t forget your veggies! A bell pepper adds color and sweetness. The onion and garlic provide a savory base. Add salt, pepper, cumin, and paprika for the best taste. Fresh cilantro and lime wedges give a fresh touch when serving. For the full recipe, check out the complete instructions. Let's get cooking! To cook perfect rice, use long-grain white rice. Combine it with chicken broth for more taste. Bring it to a boil and reduce to low heat. Cover it and let it simmer for 15 minutes. After that, let it rest for 5 minutes before fluffing it with a fork. If you're busy, you can use a rice cooker. Just add the rice and broth, then press start. For the best steak, choose flank steak. It’s tender and tasty. Season with salt, pepper, cumin, and paprika. Heat olive oil in a skillet over medium-high heat. Sear the steak for 3-4 minutes until browned. Use a meat thermometer to check doneness. Aim for 130°F for medium-rare. After cooking, set it aside. Use fresh veggies like bell peppers and onions. They add color and flavor. Chop them small for even cooking. Heat the same skillet after the steak. Sauté the onion, bell pepper, and minced garlic for 5 minutes. This softens them and brings out their sweetness. Now, bring it all together. Return the cooked steak to the skillet with the veggies. Stir well to mix. Add the cooked rice and ensure all ingredients blend evenly. This step is key to avoid sticking or burning. Keep the heat low and stir gently. Queso adds creaminess to the dish. You can use store-bought or homemade queso. Pour it over the steak and rice mixture. Stir until the queso melts and coats everything nicely. This makes a thick and creamy dish that everyone loves. Garnish your dish with fresh cilantro for a pop of color. Lime wedges add a zesty kick. This dish pairs well with a fresh salad or chips. You can also serve it with a cold drink to cool down the heat from the spices. Enjoy your savory steak and queso rice! For the complete recipe, visit the Full Recipe section. Using a cast-iron skillet has many benefits. It heats evenly and holds heat well. This helps sear your steak perfectly. A good sear locks in flavor and juices. Plus, it adds a nice crust. This method is great for high-heat cooking. To marinate your steak, mix olive oil, lime juice, salt, and spices in a bowl. Add the flank steak and let it sit for at least 30 minutes. This adds depth and flavor. You can marinate longer for even better taste. To elevate your dish, consider these spices: - Cumin - Paprika - Garlic powder - Onion powder These spices enhance the steak and rice flavor. You can also try mixing in some fresh herbs. For spice lovers, add chopped jalapeños or cayenne pepper. These options bring heat and zest. Adjust to your taste, but start small. You can always add more heat later! This meal is balanced with protein, carbs, and fats. A serving has about: - 450 calories - 25g protein - 50g carbs - 15g fat If you want healthier options, swap white rice for brown rice. Brown rice adds fiber and nutrients. You can also use leaner cuts of steak. This reduces fat without losing flavor. {{image_2}} You can switch up your proteins. If you prefer chicken, use boneless thighs or breasts. For a plant-based option, tofu works well. Press the tofu to remove water, then cube and sauté it until golden. Queso can vary in flavor and texture. You could make your own queso with cheese, milk, and spices. This gives you control over the taste. Store-bought queso is convenient but may have extra additives. When choosing cheese, consider cheddar for a sharp flavor. Nacho cheese offers a creamy and smooth texture. Each type brings a different vibe to the dish. You can serve your dish in many ways. For a burrito bowl, layer rice, steak, and queso in a bowl. Top with fresh veggies and cilantro. Another fun option is to wrap the steak and queso in a tortilla for a quesadilla. You can also make tacos by filling corn tortillas with the mixture. Each style adds a new twist to your meal. To store leftovers safely, let the dish cool first. Place it in an airtight container. Label the container with the date. This helps you keep track of freshness. The expected shelf-life is about 3 to 4 days in the fridge. For freezing Steak & Queso Rice, portion it into smaller containers. Leave some space for expansion as it freezes. Make sure to seal the containers tightly. It can last up to 3 months in the freezer. When you’re ready to eat, thaw it overnight in the fridge for best results. To avoid dryness when reheating, add a splash of chicken broth. This keeps the rice moist and flavorful. You can use a microwave or stove-top method. For the microwave, heat in short bursts, stirring in between. If using the stove, warm it over low heat, stirring gently. To add heat, try these suggestions: - Use diced jalapeños in the skillet. - Mix in hot sauce before serving. - Add chili powder to the steak. - Use pepper jack cheese instead of queso. These changes will give your meal a fiery kick! Yes, you can use brown rice! However, the cooking time differs. Brown rice takes about 40-45 minutes to cook. You should also add more liquid. Use 2.5 cups of chicken broth for brown rice. This will help it cook properly. Great sides to pair with this dish include: - Simple green salad with lime dressing. - Grilled corn on the cob. - Black beans seasoned with cumin. - Fresh guacamole with tortilla chips. These sides will enhance the meal's flavor and texture. Yes, you can make this dish vegetarian! Here are some substitutes: - Use grilled mushrooms or tofu instead of steak. - Replace queso with a vegan cheese option. - You can also add beans for protein. These swaps will keep the dish tasty and satisfying. For the full recipe, check out the detailed steps above! In this blog post, we covered how to create a flavorful Steak & Queso Rice dish. We explored the key ingredients, provided step-by-step cooking instructions, and shared helpful tips to boost flavors. You discovered various ingredient substitutions for personal preference and learned about storage methods for leftovers. Cooking should be fun and rewarding. With these insights, you can enjoy a delicious meal tailored to your taste, whether you're cooking for yourself or sharing with others. Enjoy your cooking journeys!

Get ready for a tasty treat with my Savory Steak & Queso Rice! This dish packs savory steak, creamy queso, and fluffy rice into one delightful meal. You’ll love how …

Read more

Categories Dinner

Creamy Garlic Mushroom Stuffed Shells Tasty Delight

May 22, 2025 by Chef Theo
- 20 large jumbo pasta shells - 2 cups fresh mushrooms, diced - 1 tablespoon olive oil - 4 cloves garlic, minced - 1 cup ricotta cheese - 1 cup shredded mozzarella cheese, divided - 1/2 cup grated Parmesan cheese - 1/4 cup fresh parsley, chopped - 1 cup spinach, wilted and chopped - 1 teaspoon dried Italian herbs - Salt and pepper to taste - 2 cups marinara sauce When I cook Creamy Garlic Mushroom Stuffed Shells, I focus on fresh, simple ingredients. I love using large jumbo pasta shells because they hold a lot of filling. Fresh mushrooms add a rich, earthy flavor. I often mix button and cremini mushrooms for depth. Olive oil helps sauté the mushrooms and garlic, adding a nice aroma. For the filling, I combine ricotta cheese and mozzarella cheese for creaminess. I also add grated Parmesan cheese for a salty kick. Fresh parsley brightens the dish. The wilted spinach gives it a nice color and nutrition. I use dried Italian herbs for classic flavor, but fresh herbs are great too. - Try using goat cheese or cottage cheese instead of ricotta for different flavors. - For a dairy-free option, use cashew cheese or tofu-based cheese. - Fresh herbs like basil or oregano can replace dried herbs. They provide a vibrant taste. Feel free to tweak the recipe based on what you have. You can find more tips in the Full Recipe section. Each ingredient plays a part in creating a delightful dish that warms the heart and pleases the palate. To start, cook the pasta shells. Boil water in a large pot. Add a pinch of salt. Cook the shells as instructed on the package. Aim for al dente, which means firm but not hard. This usually takes about 9-11 minutes. Once done, drain the shells and set them aside to cool. Next, sauté the mushrooms and garlic. Heat one tablespoon of olive oil in a large skillet over medium heat. Add two cups of diced mushrooms. Cook them for five minutes until they turn golden brown. Stir frequently to avoid burning. Now, add four minced garlic cloves to the skillet. Sauté for one more minute until you smell the garlic. Now it’s time to mix the filling ingredients. In a big mixing bowl, combine the sautéed mushrooms and garlic. Add one cup of ricotta cheese, half a cup of shredded mozzarella, and a quarter cup of grated Parmesan cheese. Toss in a quarter cup of chopped parsley, one cup of wilted spinach, and one teaspoon of dried Italian herbs. Season with salt and pepper. Mix everything together until well combined. For stuffing techniques, take a cooked shell and fill it carefully. Use a spoon to scoop the creamy mushroom mixture into each shell. Don’t overstuff, as they need space. Place the stuffed shells in a greased 9x13 inch baking dish. Now, layer the marinara sauce. Pour two cups of marinara sauce evenly over the stuffed shells. This keeps them moist as they bake. Sprinkle the remaining half cup of mozzarella cheese on top. Next, cover the dish with aluminum foil. Bake the shells in the preheated oven at 375°F (190°C) for 20 minutes. After this, remove the foil and bake for an additional 10-15 minutes. Look for bubbly and golden cheese as a sign they are ready. Let the shells cool for a few minutes before serving. Garnish with more parsley if you like. For the full recipe, check the link provided. How do you get the perfect al dente pasta? To cook pasta al dente, follow these steps: - Bring a large pot of salted water to a boil. - Add your jumbo pasta shells and stir gently. - Cook according to package instructions, but reduce the time by 1-2 minutes. - Taste a shell; it should be firm but not hard. - Drain the shells and rinse with cold water to stop cooking. This method keeps your pasta from becoming mushy. Firm shells will hold the creamy stuffing and sauce better. How do you maximize flavor in the stuffing? To enhance flavor in the stuffing, use these tips: - Sauté the mushrooms until golden brown. This brings out their natural sweetness. - Add minced garlic right after the mushrooms. This creates a rich aroma. - Mix in fresh herbs like parsley for a bright touch. - Use a blend of cheeses for depth. Ricotta adds creaminess, while Parmesan gives a salty kick. These steps ensure your filling is packed with flavor, making each bite a delight. What are good garnishing options? Garnishing elevates your dish. Consider these ideas: - Top the stuffed shells with extra parsley for color. - Drizzle with olive oil for a rich finish. - Sprinkle additional Parmesan or mozzarella for extra cheesiness. These simple touches make your dish look gourmet. What sides pair well with this dish? For a complete meal, serve with: - A fresh green salad with a light vinaigrette. - Garlic bread for a crunchy contrast. - Steamed vegetables like broccoli or asparagus. These sides complement the creamy stuffed shells and round out your dinner. For the full recipe, check the detailed instructions above. {{image_2}} You can change the filling to suit your taste. If you want a vegetarian option, try adding more vegetables. Spinach, artichokes, or bell peppers work well. You can also use different cheeses. Goat cheese or feta adds a nice tang. For meat lovers, add proteins like chicken or sausage. Cooked chicken breast, shredded or diced, mixes well with the creamy filling. Ground sausage can add a savory kick. Just cook the meat first to ensure it is safe to eat. These changes can make your stuffed shells unique and tasty. The sauce can change the flavor of your dish. Instead of marinara, try using pesto or Alfredo sauce. Pesto adds a fresh herb taste, while Alfredo gives a rich, creamy touch. Both options enhance the overall dish. You can also adjust the spice levels in your sauce. If you like heat, add red pepper flakes or a bit of cayenne pepper. For a milder sauce, skip the spices or use sweet basil. These small tweaks can make your Creamy Garlic Mushroom Stuffed Shells even more delightful. Check out the Full Recipe for more ideas! To keep your creamy garlic mushroom stuffed shells fresh, store them in an airtight container. It’s best to refrigerate them within two hours of cooking. This helps prevent bacteria growth. When stored properly, they will last for about 3 to 5 days in the fridge. Make sure to check for any signs of spoilage before eating. If you want to save some for later, freezing stuffed shells is easy. First, let them cool completely. Then, arrange the shells in a single layer on a baking sheet. Once they are frozen, transfer them to a freezer-safe container. They can stay in the freezer for up to 3 months. When you are ready to enjoy them, reheat the shells in the oven at 350°F (175°C) for about 25 minutes. Cover them with foil to keep moisture in. Enjoy your tasty meal later with just a little effort! You can find the full recipe in the earlier sections. Can I make this dish ahead of time? Yes, you can prepare the stuffed shells a day in advance. Just stuff the shells and place them in the baking dish. Cover and store them in the fridge. When ready to bake, add a few extra minutes to the cooking time. What can I substitute for ricotta cheese? You can use cottage cheese for a similar texture. Cream cheese also works well if you want a richer taste. For a vegan option, try cashew cream or tofu blended until smooth. How to reheat stuffed shells properly? To reheat, place the stuffed shells in a baking dish. Add a splash of marinara sauce to keep them moist. Cover with foil and bake at 350°F (175°C) for about 20 minutes. Check if they are heated through before serving. What's the best way to serve Creamy Garlic Mushroom Stuffed Shells? Serve the shells in individual bowls. Add extra marinara sauce on the side for dipping. Garnish with fresh parsley and a sprinkle of Parmesan for a nice touch. Why are my stuffed shells watery? Watery stuffed shells can happen if the mushrooms release too much moisture. Sauté the mushrooms longer to remove excess water. Also, make sure to drain the pasta shells well. How do I prevent pasta from sticking? To prevent sticking, toss the cooked pasta shells in a little olive oil after draining. This keeps them separate and easy to stuff. Make sure not to overcrowd the shells in the pot while cooking. You learned how to make delicious Creamy Garlic Mushroom Stuffed Shells. We covered the key ingredients, easy steps, and helpful tips. You can use different cheeses or add protein for variety. Store leftovers right and enjoy later. These shells are perfect for gatherings and weeknight meals. So go ahead, gather your ingredients, and impress everyone with this tasty dish!

If you love creamy pasta dishes, you’re in for a treat! Creamy Garlic Mushroom Stuffed Shells are a comforting meal that will impress everyone. With rich flavors and cheesy goodness, …

Read more

Categories Dinner

Lemon Raspberry Cookies Tasty and Easy Recipe

May 22, 2025 by Chef Theo
For Lemon Raspberry Cookies, you'll need these key items: - 1 cup all-purpose flour - 1/2 cup powdered sugar - 1/4 teaspoon salt - 1/2 teaspoon baking soda - 1/2 cup unsalted butter, softened - 1 tablespoon lemon zest - 2 tablespoons fresh lemon juice - 1/4 teaspoon vanilla extract - 1/2 cup fresh raspberries, lightly crushed - Extra powdered sugar for dusting When measuring ingredients, be precise for the best results. Use a dry measuring cup for flour and sugar. For butter, make sure it is softened but not melted. Zest the lemon before juicing. This helps capture the full flavor. Lightly crush the raspberries to release their juice but keep them chunky. You can swap out some ingredients if needed: - For all-purpose flour, try a gluten-free blend. - Use granulated sugar instead of powdered sugar for a crunchier cookie. - If you lack fresh lemons, bottled lemon juice works in a pinch. - Frozen raspberries can replace fresh ones, but drain excess moisture first. This recipe is flexible, making it easy to adapt based on what you have at home. For the full recipe, check the details above. First, preheat your oven to 350°F (175°C). Line a baking sheet with parchment paper. This step helps your cookies not stick. In a medium bowl, mix together 1 cup of all-purpose flour, 1/2 cup of powdered sugar, 1/4 teaspoon of salt, and 1/2 teaspoon of baking soda. Whisk until all the dry ingredients are well combined. In a large bowl, cream 1/2 cup of softened unsalted butter using a mixer. Mix for about 3 minutes until it’s light and fluffy. Next, add 1 tablespoon of lemon zest, 2 tablespoons of fresh lemon juice, and 1/4 teaspoon of vanilla extract. Mix until everything is combined. Now, slowly add the dry mixture to the wet mixture. Use low speed to combine them. Be careful not to overmix. Finally, gently fold in 1/2 cup of lightly crushed fresh raspberries. This keeps some berry pieces intact for bursts of flavor. Using a tablespoon or cookie scoop, drop rounded balls of dough onto your prepared sheet. Leave about 2 inches between each ball. This space helps them spread evenly. Bake the cookies for 12-15 minutes. You want the edges to be lightly golden while the centers stay soft. Once baked, remove them from the oven. Let the cookies cool on the sheet for 5 minutes. This helps them set and makes them easier to move. After 5 minutes, transfer the cookies to a wire rack. Allow the cookies to cool completely on the wire rack. This ensures they firm up nicely. Once cool, dust them with extra powdered sugar for a sweet touch. These cookies are great for sharing or enjoying with tea or coffee. For the full recipe, check the full recipe section. Enjoy your delicious Lemon Raspberry Cookies! To get soft and chewy cookies, use softened butter. Do not melt it. When mixing, cream the butter well. This adds air and makes cookies fluffy. Also, do not overmix the dough. Fold in the raspberries gently. This keeps nice berry chunks in each cookie. A common mistake is using too much flour. Always measure flour correctly. Spoon it into a cup and level it off. Another mistake is baking for too long. Check cookies around 12 minutes. They should look soft in the middle. Let them cool on the pan for a bit. This helps them set. Add a pinch of salt to boost flavor. It balances the sweetness of the cookies. You can also mix in lemon extract for a stronger lemon taste. Try adding a bit of almond extract too. This gives a lovely twist to the flavor. For a fun touch, sprinkle some zest on top before baking. For the full recipe, be sure to check out the complete Lemon Raspberry Delights! {{image_2}} You can mix in different fruits for fun flavors. Try blueberries or strawberries. Both fruits work well with lemon, making the cookies tasty and colorful. You can also use peaches for a summer twist. Just make sure the fruit is fresh and not too mushy. If you need a gluten-free option, use a gluten-free flour blend. Many brands offer this now, making it easy to switch. You can find blends made from rice, almond, or coconut flour. Just replace the all-purpose flour in the recipe with the blend in equal amounts. Icing can add extra flavor and fun. Consider a simple lemon glaze. Mix powdered sugar with lemon juice until smooth. Drizzle it over the cooled cookies for a zesty finish. You can also use white chocolate or cream cheese frosting. Each option gives a new taste that you will enjoy! For more ideas, check the Full Recipe for inspiration. To keep your Lemon Raspberry Cookies fresh, store them in an airtight container. This keeps them soft and tasty. Place a piece of parchment paper between layers if you stack them. Store them at room temperature for up to five days. For longer storage, consider freezing. Freezing these cookies is easy. First, let them cool completely. Then, place them in a single layer on a baking sheet. Freeze them for about one hour. Once frozen, transfer them to a freezer bag. Label the bag with the date. You can freeze them for up to three months. When you are ready to enjoy the cookies, take them out of the freezer. Let them thaw at room temperature for about 15 minutes. To warm them up, place them in a preheated oven at 350°F (175°C) for 5-7 minutes. This will refresh their taste and texture. Enjoy these sweet treats just like fresh from the oven! To make these cookies softer, use more butter. You can add an extra tablespoon of butter. This will help create a tender cookie. Also, do not overbake them. Keep an eye on the time. Once the edges turn light golden, take them out. They will continue to bake as they cool. Try chilling the dough for 30 minutes before baking, too. This can help with texture. Yes, you can use frozen raspberries! Just make sure to thaw them first. Drain any excess juice to avoid soggy cookies. Lightly crush them before adding to the dough. This keeps the cookie dough from getting too wet. Frozen raspberries work well and still taste great! These lemon raspberry cookies are delightful on their own. You can serve them with tea or coffee for a nice treat. They also pair well with vanilla ice cream. For a fun twist, try drizzling some lemon glaze on top. A sprinkle of extra powdered sugar looks pretty too! Check out the Full Recipe for more serving ideas. In this post, we covered the key ingredients for Lemon Raspberry Cookies and how to use them. We looked at step-by-step instructions for making the dough, baking, and tips for serving. We shared ways to perfect the texture and avoid common mistakes. You learned about fun variations, storage tips, and answers to FAQs. Baking can be simple and fun. Use these tips to make tasty cookies everyone will enjoy. Happy baking!

Get ready to delight your taste buds with my Lemon Raspberry Cookies! This tasty and easy recipe combines bright lemon zest with juicy raspberries. In just a few simple steps, …

Read more

Categories Desserts

Chocolate Cake Recipe Easy and Delicious Dessert

May 22, 2025 by Chef Theo
- 1 ¾ cups all-purpose flour - 1 ¾ cups granulated sugar - ¾ cup unsweetened cocoa powder - 1 ½ teaspoons baking powder - 1 ½ teaspoons baking soda - 1 teaspoon salt For the dry ingredients, I use all-purpose flour for the base. Granulated sugar adds sweetness. Unsweetened cocoa powder gives that rich chocolate flavor. Baking powder and baking soda help the cake rise. A bit of salt balances all the flavors. - 2 large eggs - 1 cup whole milk - ½ cup vegetable oil - 2 teaspoons vanilla extract - 1 cup freshly brewed coffee (cooled to room temperature) Next, the wet ingredients bring the cake to life. Eggs add structure and moisture. Whole milk makes it rich and creamy. Vegetable oil keeps it tender, while vanilla extract enhances flavor. Freshly brewed coffee adds depth, making the chocolate taste even better. - ½ cup semi-sweet chocolate chips - Additional frosting ingredients You can make the cake even more special with optional ingredients. Semi-sweet chocolate chips add more chocolatey goodness. If you love frosting, consider extra ingredients like cream or powdered sugar to elevate your cake. For the entire list and detailed instructions, check the Full Recipe. 1. Preheat your oven to 350°F (175°C). This step is crucial for baking. 2. Grease and flour two 9-inch round cake pans. This helps the cake come out easily. 1. Sift together the dry ingredients: flour, sugar, cocoa powder, baking powder, baking soda, and salt. This mixes air into the flour. 2. Add the wet ingredients: eggs, milk, vegetable oil, and vanilla. Beat on medium speed for about 2 minutes. You want a smooth batter. 1. Carefully stir in the cooled coffee. This adds a rich flavor. 2. Fold in the semi-sweet chocolate chips for extra chocolate joy. 3. Divide the batter evenly between the pans. 4. Pour and bake for 30-35 minutes. Check for doneness by inserting a toothpick. It should come out clean. After baking, let the cakes cool in the pans for 10 minutes. Then, transfer them to wire racks to cool completely. For the full recipe, don't forget the delicious frosting options! To get a perfect chocolate cake, you need the right texture. Start by using room temperature ingredients. This helps the batter mix more evenly. Make sure to measure your flour correctly. Too much flour can make the cake dry. Use a light hand when folding in the chocolate chips. This helps keep the batter airy. Check for doneness by inserting a toothpick into the center. If it comes out clean, the cake is ready. If some batter sticks, bake for a few more minutes. Keep an eye on the cake to avoid overbaking. Choosing the right frosting makes a huge difference. A rich chocolate buttercream pairs well with this cake. If you want something lighter, consider a whipped cream frosting. For a decadent twist, try a mocha ganache. To make mocha ganache, heat equal parts chocolate and cream. Stir until smooth and glossy. Pour it over the cooled cake for a stunning finish. Presentation matters when serving your cake. Dust the top with powdered sugar for a simple look. You can also add chocolate shavings or coffee beans for flair. Serve each slice with whipped cream or a scoop of vanilla ice cream. These little touches make your dessert stand out. Everyone will be impressed by your beautiful chocolate cake. For the full recipe, check above! {{image_2}} You can easily change the flavor of your chocolate cake. Adding different extracts can bring a new twist. Try using almond or mint extract. Just a teaspoon will add a fun flavor. Frosting also matters. You can use cream cheese frosting for a tangy taste. Buttercream frosting adds a rich, sweet flavor. Mix and match to find what you love! If you need gluten-free options, use a gluten-free flour blend. This helps keep the cake soft and tasty. You can also substitute dairy. Try almond milk or coconut milk instead of whole milk. These swaps keep the cake delicious and friendly for many diets. Mix-ins can make your cake even more special. Toss in nuts like walnuts or pecans for crunch. Fruits like raspberries or cherries add a fresh taste. You can also use different types of chocolate. Dark chocolate chips or white chocolate chunks can change the cake's flavor. Each mix-in gives a unique twist to your dessert. For the full recipe, check out the complete instructions to create your own delicious chocolate cake! After baking, let the chocolate cake cool completely. If you frost the cake, store it in an airtight container at room temperature for up to three days. If you leave it unfrosted, wrap it tightly in plastic wrap to keep it moist. An unfrosted cake can last up to a week. To freeze the cake, first cool it completely. Then, wrap the cake well in plastic wrap and foil. It can last up to three months in the freezer. When you want to enjoy it, take it out and let it thaw in the fridge overnight. This keeps it from getting too soggy. The shelf life of your chocolate cake depends on its storage. A frosted cake lasts about three days at room temperature. An unfrosted cake stays fresh for up to a week. If you freeze it, the flavor and texture remain great for about three months. For the best taste, eat it sooner rather than later! You can find the Full Recipe for this delicious cake above. To check if your cake is done, use a toothpick. Insert it into the center of the cake. If it comes out clean or with a few moist crumbs, your cake is ready. If it has wet batter, bake it a bit longer. You can also gently press the top of the cake. If it springs back, it is done. Pay attention to the edges. They should pull away slightly from the pan. These methods help ensure your cake is baked perfectly. Yes, you can! Different chocolates add unique flavors to your cake. You might choose dark chocolate for a rich taste. Milk chocolate adds sweetness, while white chocolate gives a creamy touch. Just remember to adjust the sugar in the recipe if you use sweeter chocolates. You can also mix types for a more complex flavor. Experimenting with chocolate can lead to delightful surprises! If your cake turns out dry, don't worry! You can fix it in a few ways. First, soak the cake with simple syrup. Mix equal parts water and sugar. Heat until the sugar dissolves, then brush it on the cake. Next time, consider adding more moisture. You could use an extra egg or a bit more oil. Be careful not to overbake it. Check for doneness a few minutes early to avoid dryness. For the complete recipe and step-by-step instructions, check the Full Recipe. This will guide you through making a delicious chocolate cake that everyone will love! In this blog post, we covered how to make a delicious chocolate cake from scratch. We discussed the ingredients you need, including dry and wet components. I shared step-by-step instructions for mixing the batter, baking, and tips for frosting. You learned about variations and how to store your cake correctly. Making a great chocolate cake is simple and fun. Experiment with flavors and toppings to create your perfect dessert. Enjoy baking!

If you want to impress your friends and family, this easy chocolate cake recipe is a must-try! With simple ingredients and straightforward steps, you’ll have a moist and delicious dessert …

Read more

Categories Desserts

Death By Chocolate Poke Cake Decadent Dessert Recipe

May 22, 2025 by Chef Theo
To make the Death By Chocolate Poke Cake, you need the following ingredients: - 1 box chocolate cake mix - 1 cup brewed coffee (cooled) - 3 large eggs - 1/2 cup vegetable oil - 1 can (14 oz) sweetened condensed milk - 1 cup chocolate fudge sauce (jarred or homemade) - 1 cup heavy whipping cream - 1/2 cup powdered sugar - 1 teaspoon vanilla extract - Chocolate shavings or chocolate chips for garnish - Chocolate Cake Mix: This is the base of your cake. It gives the cake its rich chocolate flavor. - Brewed Coffee: Adding coffee enhances the chocolate taste. It deepens the flavor without making the cake taste like coffee. - Sweetened Condensed Milk: This adds sweetness and moisture. It helps create that signature poke cake texture. - Chocolate Fudge Sauce: Use jarred or homemade. This adds rich, gooey chocolate to the cake. - Heavy Whipping Cream: Whipping cream becomes fluffy and light. It creates a perfect topping that balances the cake's richness. - Chocolate Shavings: These add a nice visual touch and extra chocolate flavor. - Chocolate Chips: Sprinkle these on top for added texture. They also melt slightly into the whipped cream. - Drizzled Fudge Sauce: A drizzle of fudge around the plate makes for an elegant presentation. - Fresh Berries: Add strawberries or raspberries for a fruity contrast that brightens the dish. For the complete recipe, check out the full recipe section. Enjoy making this delightful dessert! Start by gathering all your ingredients. You need a box of chocolate cake mix, brewed coffee, eggs, vegetable oil, sweetened condensed milk, chocolate fudge sauce, heavy whipping cream, powdered sugar, and vanilla extract. Don’t forget chocolate shavings or chips for garnish. Preheat your oven to 350°F (175°C). Grease and flour a 9x13 inch baking pan. In a large bowl, mix the chocolate cake mix, cooled coffee, eggs, and vegetable oil. Use an electric mixer on medium speed for 2 minutes. This helps blend everything well. Pour the batter into your prepared pan and smooth the top. Bake for 30-35 minutes. To check if it’s done, insert a toothpick in the center. If it comes out clean, it's ready. Once baked, let it cool for 10 minutes in the pan. After cooling, poke holes all over the cake with the end of a wooden spoon or fork. Be generous with the holes to let the sauce soak in. In another bowl, mix sweetened condensed milk with chocolate fudge sauce. Pour this mixture evenly over the warm cake, filling all the holes. Let the cake cool completely on a wire rack. While it cools, whip the heavy cream with powdered sugar and vanilla until soft peaks form. Spread this whipped cream over the cooled cake. Finally, sprinkle chocolate shavings or chips on top for a touch of elegance. Refrigerate for at least 1-2 hours to let the flavors mix before serving. For more details, check the Full Recipe. To make your cake super moist, use brewed coffee instead of water. The coffee adds depth and richness. Also, be sure to poke plenty of holes in the cake. This helps the sweetened condensed milk soak in well. Let the cake cool completely before adding the toppings. This keeps everything from melting together too fast. When serving, cut the cake into squares and plate them nicely. You can drizzle extra chocolate fudge sauce over each piece. This adds a nice touch. Top with whipped cream and a sprinkle of chocolate shavings. This makes each bite even more delightful. Serve with a scoop of vanilla ice cream for an extra treat! One common mistake is not letting the cake cool enough before adding the sauce. If the cake is too warm, the sauce will run off. Another mistake is not poking enough holes in the cake. If you don’t poke enough, the sauce won’t soak in well. Lastly, make sure to whip the cream until soft peaks form. This makes it light and fluffy. For the full recipe, check out the complete instructions. {{image_2}} You can mix things up with many flavors for this cake. Try adding peppermint extract for a festive touch. Just a teaspoon will do. For a rich twist, use Nutella instead of chocolate fudge. Spread it over the cooled cake after pouring the milk mixture. You can also experiment with caramel sauce instead of fudge. Each option gives a new taste to the classic dessert. If you want to make this cake gluten-free, use a gluten-free chocolate cake mix. Most brands work well in this recipe. For a vegan version, swap eggs with flax eggs and use almond milk. Replace the heavy cream with coconut cream for the topping. These changes keep the cake delicious while meeting dietary needs. Toppings can change everything about this cake. Instead of whipped cream, try a layer of chocolate mousse. You can also add fresh berries for a fruity touch. Mix in crushed cookies or nuts in the whipped cream for extra texture. Drizzle with caramel or white chocolate sauce for added flair. Each topping adds its own unique flavor and style to your Death By Chocolate Poke Cake. To keep your Death By Chocolate Poke Cake fresh, store it in the fridge. Wrap it tightly with plastic wrap or use an airtight container. This helps prevent the cake from drying out or absorbing other smells from the fridge. Enjoying it within three days gives you the best taste and texture. If you want to save some cake for later, freezing is a great option. First, let the cake cool completely after making it. Cut it into slices for easy thawing. Wrap each slice in plastic wrap, then place them in a freezer bag. Label the bag with the date. You can freeze it for up to three months. When you're ready to eat your frozen cake, take it out of the freezer. Unwrap the slices and place them on a plate. Let them thaw in the fridge overnight. If you want to warm them up, use the microwave. Heat them for about 15 to 20 seconds. This makes the chocolate fudge sauce gooey again. Enjoy the rich flavor of your cake! Yes, you can use other flavors of cake mix. Vanilla, red velvet, or even lemon can work. Each flavor gives a unique twist to the cake. However, chocolate works best for the classic Death By Chocolate Poke Cake. It pairs well with the rich chocolate fudge sauce and sweetened condensed milk. You can store the cake in the fridge for up to five days. Make sure to cover it well with plastic wrap or foil. This keeps the cake moist and fresh. The chocolate flavors will meld and deepen over time, making each bite even better. If you need a substitute for sweetened condensed milk, try using evaporated milk with added sugar. Mix one cup of evaporated milk with 1 1/4 cups of sugar. You can also use coconut milk for a dairy-free option. Just make sure to adjust the sweetness to your taste. We covered all parts of making a delicious cake. You learned key ingredients, step-by-step instructions, and helpful tips. I shared tasty variations and smart storage methods, too. Remember, making this cake can be fun and rewarding. Avoid common mistakes, and your cake will shine. Enjoy your baking, and share the joy with friends and family!

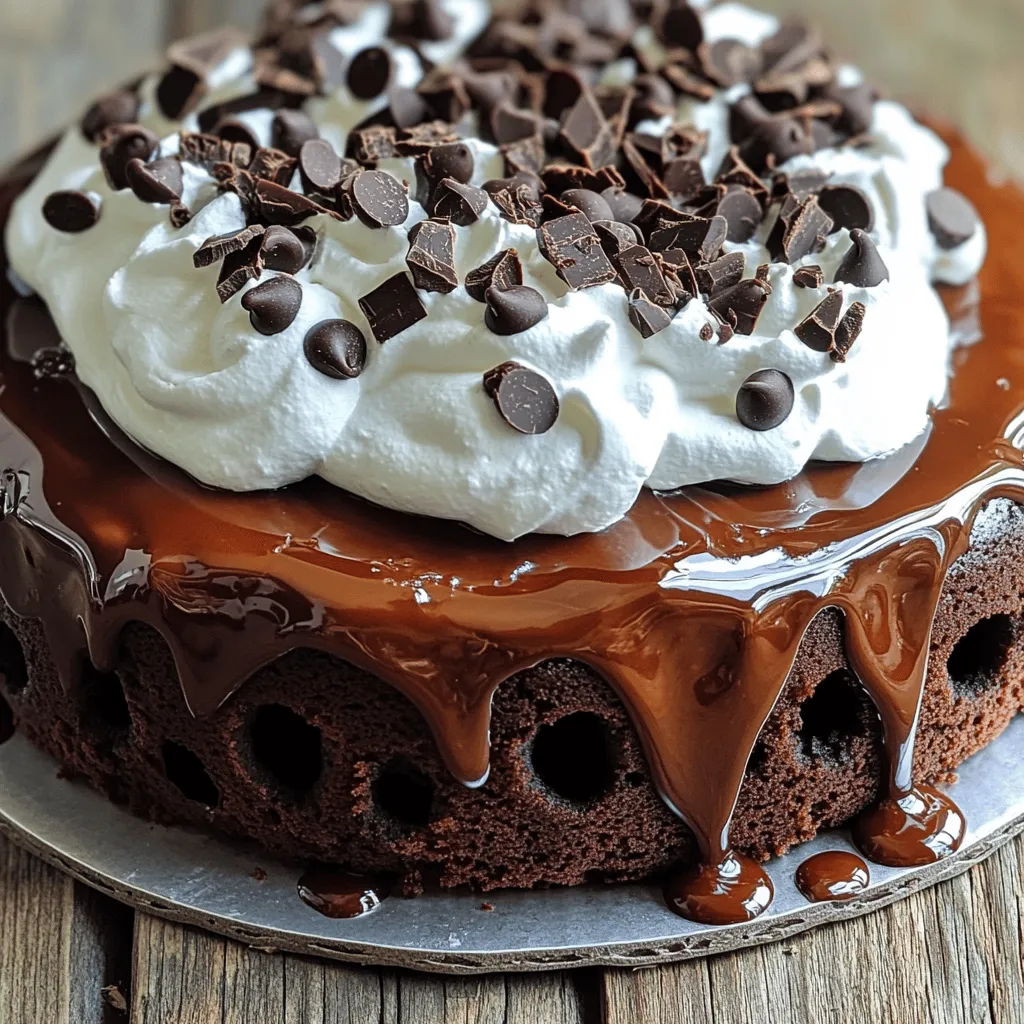
If you love rich chocolate treats, you’re in for a real treat! This Death By Chocolate Poke Cake is the ultimate dessert for any chocoholic. It’s moist, indulgent, and oh-so-decadent. …

Read more

Categories Desserts

Blueberry Buttermilk Pancake Casserole Warm and Cozy Dish

May 22, 2025 by Chef Theo
- 2 cups all-purpose flour - 2 tablespoons sugar - 2 cups buttermilk The main ingredients set the base for your pancake casserole. The all-purpose flour gives it structure. Sugar adds sweetness, while buttermilk brings a rich flavor and tender texture. You can even make your own buttermilk by mixing regular milk with lemon juice. - 1 tablespoon baking powder - ½ teaspoon baking soda - ½ teaspoon salt These other ingredients help the casserole rise and become fluffy. Baking powder and baking soda work together to create a light texture. Salt enhances the flavors, making the dish more balanced. - Powdered sugar - Maple syrup Toppings bring your dish to life. A dusting of powdered sugar adds a nice touch. Maple syrup drizzled on top adds sweetness and warmth. These toppings make each bite feel special. The Full Recipe takes these ingredients and transforms them into a warm, cozy dish that you’ll love. First, preheat your oven to 350°F (175°C). This setting will help your casserole bake evenly. Next, grab a 9x13-inch baking dish. Grease it with cooking spray or a little butter. This step makes sure the casserole does not stick. In a large bowl, whisk together the dry ingredients. You will need 2 cups of all-purpose flour, 2 tablespoons of sugar, 1 tablespoon of baking powder, ½ teaspoon of baking soda, and ½ teaspoon of salt. Mix these well until they are combined. This mix gives your casserole structure and flavor. In a separate bowl, beat 2 large eggs. Then, mix in 2 cups of buttermilk, 4 tablespoons of melted butter, and 1 teaspoon of vanilla extract. Stir until the mixture is smooth. This blend adds moisture and richness to your dish. Slowly pour the wet mix into the dry mix. Stir gently until just combined. Be careful not to overmix; it's okay if there are a few lumps. After that, fold in 2 cups of fresh blueberries. This step ensures the blueberries spread evenly throughout the batter. Pour the batter into your prepared baking dish. Use a spatula to spread it evenly. Bake in the oven for 25-30 minutes. Check for doneness by inserting a toothpick in the center. It should come out clean. After baking, let the casserole cool for about 5 minutes. This waiting period helps it set before cutting. Enjoy your warm, cozy dish! For the full recipe, check out the provided details. - Avoiding overmixing the batter: Mix the wet and dry ingredients until just combined. Overmixing can make the casserole tough. A few lumps are fine and help keep it light. - Ensuring even blueberry distribution: Gently fold in the blueberries with a spatula. This helps to spread them throughout the batter. You want every bite to have that juicy burst of flavor. - Ideal accompaniments to enhance flavors: Serve your pancake casserole warm with a dusting of powdered sugar and a drizzle of maple syrup. Fresh whipped cream can add a nice touch, too. - Presentation ideas: Cut the casserole into squares and place them on a colorful plate. Add a few extra blueberries on top for a pop of color. It makes the dish look inviting and delicious. - Recommended baking dish types: A 9x13-inch glass or ceramic baking dish works best. It helps to cook the casserole evenly. If you use metal, check it a bit earlier, as it can cook faster. - Adjusting cooking times for different ovens: Ovens can vary in heat. Start checking for doneness at 25 minutes. Use a toothpick; it should come out clean when the casserole is ready. {{image_2}} You can make this dish even better with simple swaps. For a healthier version, try using whole wheat flour instead of all-purpose flour. This adds fiber and a nutty flavor. If you want a vegan option, substitute the buttermilk with non-dairy milk. Almond or oat milk works great. Just add a splash of lemon juice to mimic buttermilk's tang. Spicing things up can add a fun twist. Consider incorporating ground cinnamon or nutmeg into the batter. These spices blend nicely with blueberries. You can also enhance the texture by adding chopped nuts or shredded coconut. Both options give extra crunch and flavor, making each bite exciting. Take advantage of seasonal fruits to change the dish. Swap blueberries for strawberries or peaches in the summer. This gives a fresh taste and bright color. For special occasions, create a festive version by adding cranberries or pumpkin spice in the fall. Each change brings a new way to enjoy this cozy dish. For the full recipe, check out the details above. After enjoying your delicious blueberry buttermilk pancake casserole, store leftovers properly. To refrigerate, place the cooled casserole in an airtight container. This keeps it fresh for up to three days. If you want to freeze it, cut the casserole into squares. Wrap each piece tightly in plastic wrap, then place them in a freezer-safe bag. This method helps prevent freezer burn. When you want to enjoy your casserole again, reheating is key. The best way to reheat is in the oven. Preheat your oven to 350°F (175°C). Place the casserole in an oven-safe dish and cover it with foil. Heat for about 15-20 minutes, or until it’s warm throughout. You can also use the microwave, but keep it short. Heat in 30-second intervals to avoid drying it out. Your blueberry buttermilk pancake casserole lasts up to three days in the fridge. If you freeze it, it can stay fresh for up to three months. Keep an eye out for signs of spoilage. Look for mold or an off smell. If it doesn’t look or smell right, it’s best to toss it out. You can make your own buttermilk at home. Mix 2 cups of milk with 2 tablespoons of lemon juice or vinegar. Let it sit for 5-10 minutes. This mix will thicken slightly and give you a similar taste. You can also use plain yogurt or sour cream, thinned with a bit of milk. Both options work well in your casserole. Yes, you can prepare this casserole the night before. Mix the dry and wet ingredients separately. Combine them just before baking. Store the batter in the fridge overnight. This helps flavors blend. In the morning, pour it into the baking dish and bake as usual. Check for doneness by inserting a toothpick into the center. If it comes out clean, your casserole is ready. The top should be golden brown and firm. If the top browns too quickly, cover it with foil. This helps it bake evenly without burning. In this post, we covered how to make a blueberry casserole. We started with key ingredients, like flour and buttermilk. Then, we walked through easy steps for mixing and baking. I shared tips for a perfect dish, including storage and reheating advice. With simple swaps, you can add your twist. Enjoy this recipe as a fun and tasty treat. Happy cooking!

Craving a warm and cozy dish? Look no further! My Blueberry Buttermilk Pancake Casserole is the answer. This easy recipe combines fluffy pancakes and juicy blueberries into a yummy casserole …

Read more

Categories Breakfast

Chewy French Toast Cookies Cozy and Delightful Treat

May 22, 2025 by Chef Theo
To make Chewy French Toast Cookies, you need simple ingredients. Here’s what to gather: - 1 cup all-purpose flour - 1 cup rolled oats - 1/2 teaspoon baking soda - 1/2 teaspoon ground cinnamon - 1/4 teaspoon salt - 1/2 cup unsalted butter, softened - 1/2 cup brown sugar, packed - 1/4 cup granulated sugar - 1 large egg - 2 tablespoons maple syrup - 1 teaspoon vanilla extract These ingredients come together to create a warm, cozy flavor. The oats add a nice chewiness, while the cinnamon and maple syrup give it that classic French toast taste. For more flavor, you can add a few optional ingredients. Consider these choices: - 1/4 cup chopped pecans - 1/4 cup raisins Adding nuts or raisins gives your cookies extra texture and sweetness. They can make the cookies more fun to eat! If you need to swap some ingredients, don’t worry. Here are some easy substitutions: - Use whole wheat flour instead of all-purpose flour for a heartier cookie. - Substitute coconut oil for butter to make them dairy-free. - Use honey instead of maple syrup for a different sweet taste. These swaps can fit your diet or taste preferences while keeping the cookies tasty. Remember, the key is to keep the balance between wet and dry ingredients! For the full recipe, check out the instructions to bake these delightful cookies. To start, gather your ingredients. You will need flour, oats, baking soda, cinnamon, salt, butter, and sugars. I love using brown sugar for that rich taste. Then, in a medium bowl, whisk together flour, oats, baking soda, cinnamon, and salt. This mix sets the base for your cookies. In a large bowl, cream the softened butter, brown sugar, and granulated sugar. Do this until the mixture is light and fluffy. This step is key; it helps create a soft texture. Next, beat in the egg. Then, mix in maple syrup and vanilla extract until everything is blended well. After this, slowly add your dry mix to the wet mix. Stir gently until just combined. If you want a little crunch, fold in chopped pecans or raisins. Both add great flavor and texture. Now, preheat your oven to 350°F (175°C). Line a baking sheet with parchment paper. This helps the cookies not stick. Use a cookie scoop or a tablespoon to drop rounded balls of dough onto the sheet. Space them about 2 inches apart to give them room to spread. Gently flatten each dough ball using the back of a spoon. This helps form the cookie shape. Bake in the oven for 12 to 15 minutes. Look for golden edges and soft centers. This is where the chewy magic happens! Once baked, take them out and let them cool on the sheet for about five minutes. After that, transfer them to a wire rack to cool completely. For chewy cookies, focus on the butter. Use softened butter, not melted. This helps keep the cookies fluffy. Also, do not overmix the dough. Mixing too much makes cookies tough. Timing is important too. Bake until edges are golden but centers are still soft, which keeps them chewy. If you want to keep your cookies soft even after cooling, store them in an airtight container. For more details, check the Full Recipe. Enjoy your cozy treats! To make your cookies chewy, focus on the butter and sugar. Use softened butter instead of melted. Cream the butter and sugars until light. This adds air, which helps with texture. Also, do not overmix the dough. Mix just until combined for a softer bite. Baking time is key too. Remove cookies when the edges are golden but the centers still look soft. Watch out for overbaking. Cookies can turn hard if you bake them too long. Keep an eye on them, especially in the last few minutes. Another mistake is not measuring ingredients correctly. Too much flour can dry out the dough. Always use the spoon and level method for flour. Lastly, don’t skip the chilling step if you have time. Chilling helps the dough firm up and enhances flavor. You can enhance your cookies with fun mix-ins. Adding chopped pecans brings a lovely crunch. Raisins add sweetness and chewiness. For even more flavor, try adding a pinch of nutmeg or a splash of almond extract. Top your cookies with a drizzle of maple syrup before serving. This adds a sweet finish that pairs well with the French toast flavor. For the full recipe, check out the details above. {{image_2}} You can easily change the flavors of your Chewy French Toast Cookies. Here are some tasty ideas: - Nutty: Add 1/4 cup of chopped nuts like pecans or walnuts. They give a great crunch. - Fruity: Toss in 1/4 cup of dried fruits like raisins or cranberries. They add a sweet burst. - Chocolate: Mix in 1/2 cup of chocolate chips for a rich twist. Who doesn't love chocolate? - Spicy: Add a pinch of nutmeg or ginger for a warm spice. It can brighten the flavor. Each of these options gives your cookies a new vibe while keeping that chewy texture. If you need a gluten-free version, swap out the all-purpose flour. Use a 1:1 gluten-free flour blend instead. This keeps the cookie texture without the gluten. You can also use gluten-free oats to make sure they fit your diet. For a dairy-free option, replace the unsalted butter with coconut oil or a vegan butter. This keeps your cookies tasty and still chewy. To make your cookies special, try these serving ideas: - Warm: Serve right out of the oven for a gooey treat. The warmth enhances the flavors. - Toppings: Dust with powdered sugar or drizzle maple syrup on top. This adds a sweet finish. - Pairings: Enjoy with a cup of coffee, hot chocolate, or milk. Each drink brings out the cookie's flavors. - Ice Cream Sandwich: Place a scoop of vanilla ice cream between two cookies. This is a fun twist that kids love! These ideas make your Chewy French Toast Cookies an even cozier treat. For the full recipe, check out the details above! To keep your Chewy French Toast Cookies fresh, store them in an airtight container. This helps to lock in moisture and keep them chewy. Place a piece of bread in the container. The bread will help keep the cookies soft. Make sure to store them at room temperature. Avoid the fridge, as it can make cookies hard. If you want to save cookies for later, freezing is the way to go. First, let the cookies cool completely. Then, arrange them in a single layer on a baking sheet. Freeze them for about an hour. Once frozen, transfer the cookies to a freezer bag or container. Be sure to label the bag with the date. You can freeze them for up to three months. When you’re ready to enjoy your frozen cookies, preheat your oven to 350°F (175°C). Place the cookies on a baking sheet. Heat them for about 5-10 minutes. This will bring back their soft, chewy texture. If you like, you can also microwave them for about 10-15 seconds. They will taste fresh and delicious, just like when you first baked them. To make chewy cookies, focus on the fat-to-flour ratio. Use more butter than flour. The butter keeps the cookies soft. Also, do not overmix the dough. Gently combine wet and dry ingredients. This helps keep air pockets, leading to chewiness. Yes, you can make these cookies without eggs. Use a flaxseed meal or applesauce as an egg substitute. Mix one tablespoon of flaxseed meal with three tablespoons of water for each egg. Let it sit until thick. Use 1/4 cup of applesauce instead of one egg. Both options will keep your cookies moist. For toppings, I love a drizzle of maple syrup. It adds sweetness and flavor. You can also sprinkle powdered sugar for a touch of elegance. Chopped nuts enhance crunch and flavor. Dried fruit like raisins or cranberries gives a fruity twist. Choose what you love! In this blog post, we explored how to make chewy French toast cookies. We covered key ingredients, step-by-step baking instructions, and tips to avoid common mistakes. You can also try fun variations and dietary adjustments to suit your tastes. Remember, the right storage keeps cookies fresh and chewy longer. I hope you feel ready to whip up these delicious treats. Enjoy the baking process and share them with friends!

Craving a cozy treat that combines sweet and warm flavors? Look no further! Chewy French Toast Cookies are the answer. These delightful bites capture the comfort of classic French toast …

Read more

Categories Desserts

How to Make Chicken Taco Dip Simple and Tasty Dish

May 22, 2025 by Chef Theo
To make a tasty chicken taco dip, gather these ingredients: - 2 cups shredded cooked chicken - 1 cup cream cheese, softened - 1 cup sour cream - 1 packet taco seasoning - 1 cup shredded cheddar cheese - 1 cup black beans, rinsed and drained - 1 cup corn (canned or frozen) - 1 small red onion, finely chopped - 1 jalapeño, deseeded and minced (optional for spice) - ½ cup fresh cilantro, chopped (for garnish) - Tortilla chips (for serving) Measuring ingredients correctly makes a big difference. Use standard measuring cups for accuracy. For shredded chicken, 2 cups can come from about two cooked chicken breasts. If you prefer, you can use a kitchen scale. Cream cheese should be soft for easy mixing. If it’s too hard, microwave it for a few seconds. You can swap ingredients based on taste and availability: - Use Greek yogurt instead of sour cream for a tangy twist. - Substitute rotisserie chicken for homemade shredded chicken to save time. - If you want a lighter dip, try low-fat cream cheese. - For a vegan version, replace chicken with cooked lentils or chickpeas and use vegan cheese. - Instead of black beans, you can use pinto beans or kidney beans. This recipe is flexible, so feel free to mix and match! For more details, check out the Full Recipe. To make chicken taco dip, first, gather your ingredients. You need shredded cooked chicken, cream cheese, sour cream, taco seasoning, cheddar cheese, black beans, corn, red onion, jalapeño, and cilantro. Preheat your oven to 350°F (175°C). In a large bowl, mix the softened cream cheese and sour cream together until smooth. Use a hand mixer or a whisk for this. Next, add the taco seasoning to the cream mixture and blend it well. Now, fold in the shredded chicken, black beans, corn, and chopped red onion. If you want some heat, add the minced jalapeño. Make sure everything is mixed evenly. It should smell great by now! Spread the mixture into a baking dish. A 9x9 inch dish works well. Top it off with the shredded cheddar cheese. Place the dish in your preheated oven and bake for 20 to 25 minutes. The dip is ready when it bubbles and the cheese melts. Once it’s done, carefully take it out of the oven. Let it cool for a few minutes before serving. This helps prevent burning your mouth! Serve the dip warm with tortilla chips. You can keep it in the baking dish for a nice look. For a pop of color, add sliced olives or extra cilantro on the side. This chicken taco dip is perfect for parties or family gatherings. Enjoy your delicious creation! For the complete recipe, check out the Full Recipe. When making chicken taco dip, avoid some key errors. First, don’t skip softening the cream cheese. Cold cream cheese will create lumps. Second, measure your taco seasoning. Too much can overpower the dip. Also, don’t forget to rinse the black beans. This helps remove excess salt and preserves taste. Lastly, let the dip cool a bit before serving. It’s easier to scoop when it’s not too hot. To enhance the flavor of your chicken taco dip, use fresh ingredients. Fresh cilantro adds a bright taste. You can also add lime juice for a zesty kick. If you want more heat, include diced jalapeños or diced green chiles. Mixing in roasted corn gives a sweet crunch. Top with sliced olives or more cheese before baking. This creates a beautiful, cheesy crust. You can make chicken taco dip in advance. Prepare the dip a day before and store it in the fridge. Just cover the baking dish tightly with plastic wrap. Before baking, let it sit at room temperature for about 30 minutes. This helps it cook evenly. If you want to freeze it, do so before baking. Wrap it well and store for up to three months. When ready, thaw it overnight in the fridge and bake as usual. Check out the Full Recipe for more details. {{image_2}} To make your dip spicy, add more jalapeños. You can also use hot salsa instead of regular salsa. Another option is to sprinkle red pepper flakes on top before baking. This will give your dip a nice kick. Adjust the spice level to fit your taste. If you like it hot, go for it! The spicy flavors mix well with the creamy cheese and chicken. If you want a vegetarian version, swap the chicken with extra beans. You can use black beans, pinto beans, or even kidney beans. Add more corn and diced bell peppers for texture. Cream cheese and sour cream keep it creamy, while taco seasoning adds great flavor. This dip remains tasty and satisfying without meat. Serve it with the same tortilla chips for a fun twist. For a lighter dip, choose low-fat cream cheese and sour cream. Greek yogurt can replace sour cream for a protein boost. Use shredded chicken breast instead of dark meat for fewer calories. You can also add more veggies like zucchini or spinach to increase nutrition. These swaps keep your dip creamy but cut some fat. Enjoy the same great taste while being a bit healthier! After making your chicken taco dip, let it cool. Once it cools, cover it tightly with plastic wrap or transfer it to an airtight container. You can store it in the fridge for up to three days. If you want to save time, prepare the dip a day ahead and chill it overnight. This helps the flavors blend well. You can freeze the chicken taco dip for later enjoyment. First, let it cool completely. Then, place it in a freezer-safe container. Make sure to leave some space at the top, as it will expand when frozen. This dip can stay fresh in the freezer for about two months. If you want to save some time, you can freeze it before baking. To reheat, take the dip out of the fridge or freezer. If frozen, thaw it overnight in the fridge. Preheat your oven to 350°F (175°C). Place the dip in an oven-safe dish and cover it with foil. Heat for about 20-30 minutes. Check for warmth and remove the foil for the last 5 minutes to melt the top cheese. You can also reheat it in the microwave. Heat it in short bursts, stirring in between, until hot. Enjoy your tasty dip warm! To make your chicken taco dip spicier, add more jalapeños. You can also use diced green chilies. Another option is to mix in hot sauce. Start with a small amount, then taste and adjust. This way, you control the heat. Spicy flavors can enhance the dip's taste and make it exciting! Yes, you can use leftover chicken! Shredded rotisserie chicken works great. Simply mix it into the dip as you would with fresh chicken. Using leftovers saves time and reduces waste. Plus, it adds great flavor. It’s a simple way to enjoy a tasty dish while being smart in the kitchen. Tortilla chips are the classic choice for this dip. They add a nice crunch, making the dip enjoyable. You can also serve it with veggies like carrot sticks or celery for a fresh touch. Sliced bell peppers are colorful and tasty too. For a fun twist, try it with pita chips or crackers. Absolutely! Making chicken taco dip in a slow cooker is easy. Combine all ingredients in the slow cooker. Set it on low for 2-3 hours or high for 1-2 hours. Stir occasionally until the dip is hot and bubbly. This method is perfect for parties or gatherings. You can keep it warm and ready to serve! For the full recipe, check out Chicken Taco Dip Delight . This blog post covered the key ingredients for chicken taco dip, how to measure them, and substitutes. You learned step-by-step instructions for preparing and baking the dip, along with serving ideas. I shared tips to avoid common mistakes and enhance flavors. We explored tasty variations and provided storage tips to keep your dip fresh. With your new knowledge, you’re ready to make a delicious chicken taco dip that everyone will enjoy. Don’t be afraid to get creative and make it your own!

If you’re craving a fun and tasty snack, look no further! I’m excited to share my simple recipe for chicken taco dip. This crowd-pleaser is easy to make and packed …

Read more

Categories Appetizers

Fresh Blueberry Brownies Tasty and Easy Recipe

May 22, 2025 by Chef Theo
To make fresh blueberry brownies, you need these simple ingredients: - 1 cup fresh blueberries - 1/2 cup unsweetened cocoa powder - 1/2 cup all-purpose flour - 1/2 cup granulated sugar - 1/4 cup brown sugar, packed - 1/2 teaspoon baking powder - 1/4 teaspoon salt - 2 large eggs - 1/3 cup unsalted butter, melted - 1 teaspoon vanilla extract - 1/4 cup chopped walnuts (optional) - Powdered sugar for dusting (optional) Each ingredient plays a key role. The cocoa powder gives the brownies their rich chocolate flavor. The sugars add sweetness and moisture. Blueberries bring a burst of juicy flavor, while eggs help bind everything. You can swap some ingredients if needed. For a gluten-free option, use almond or coconut flour. You can also try coconut sugar instead of granulated sugar for a different sweetness. If you want to skip eggs, use flaxseed meal mixed with water. This keeps the brownies moist and delicious. Fresh blueberries are the star of this recipe. They add a sweet and tangy flavor, which contrasts with the rich chocolate. Using fresh berries also boosts nutrition. They are full of vitamins, fiber, and antioxidants. This makes your brownies not just tasty but also healthier. Fresh blueberries keep their shape when baked, adding a lovely texture. Always choose plump, firm berries for the best results. Gather your fresh blueberries and other ingredients. You need: - 1 cup fresh blueberries - 1/2 cup unsweetened cocoa powder - 1/2 cup all-purpose flour - 1/2 cup granulated sugar - 1/4 cup brown sugar, packed - 1/2 teaspoon baking powder - 1/4 teaspoon salt - 2 large eggs - 1/3 cup unsalted butter, melted - 1 teaspoon vanilla extract - 1/4 cup chopped walnuts (optional) - Powdered sugar for dusting (optional) Make sure to wash the blueberries gently. Pat them dry to remove excess water. This step helps keep the batter from getting too wet. First, preheat your oven to 350°F (175°C). Grease an 8x8-inch baking pan or line it with parchment paper. This will make it easy to take the brownies out later. In a medium bowl, mix together the cocoa powder, flour, baking powder, and salt. Whisk them well to blend all the dry ingredients. In a large bowl, combine the granulated sugar, brown sugar, melted butter, eggs, and vanilla extract. Mix until smooth and creamy. Next, add the dry mix to the wet mix. Stir gently until just combined. Be careful not to overmix. Overmixing can make the brownies tough. Now, fold in the fresh blueberries and walnuts, if you are using them. Do this carefully. You want to keep the blueberries whole for juicy bites. Pour the brownie batter into your prepared pan. Spread it evenly across the pan. Bake in your preheated oven for 25-30 minutes. Check for doneness by inserting a toothpick into the center. It should come out mostly clean, with a few moist crumbs clinging to it. Once done, take the brownies out and let them cool in the pan for about 10 minutes. After that, move them to a wire rack to cool completely. Finally, cut into squares and dust with powdered sugar if you like. Enjoy your tasty treat! For the full recipe, check out the detailed guide. To get the best brownie texture, focus on mixing. You want a thick, smooth batter. Overmixing can lead to dry brownies. Stir just until the dry ingredients blend into the wet ones. This keeps your brownies fudgy. Also, remember to measure your flour correctly. Too much flour makes them cakey. Use the spoon and level method for accuracy. One common mistake is using cold eggs. Cold eggs can make your batter lumpy. Always use room-temperature eggs for smooth mixing. Another mistake is not greasing the pan well. This can make it hard to remove the brownies. Use parchment paper for easy lifting. Lastly, don't skip cooling time. Cutting them too soon results in messy squares. To boost the flavor of your brownies, try adding a pinch of espresso powder. It deepens the chocolate taste. You can also mix in some citrus zest, like orange or lemon. This adds a fresh twist. If you're feeling adventurous, add a splash of almond extract. It pairs well with blueberries. For an extra treat, sprinkle some sea salt on top before baking. This contrast makes every bite special. Check out the Full Recipe for more details! {{image_2}} To make gluten-free blueberry brownies, swap the all-purpose flour for a gluten-free blend. Many brands offer a cup-for-cup option. This change keeps the texture nice and moist, just like the original. Look for a mix that has xanthan gum, as it helps with binding. The brownies will still taste great with fresh blueberries. They will be just as rich and fudgy! If you want a vegan version, you can replace the eggs. Use 1/4 cup of unsweetened applesauce for each egg. It works well in brownies and adds moisture. Also, substitute the unsalted butter with coconut oil or a vegan butter. These swaps keep the brownies rich and tasty. You won’t miss the eggs or dairy in this recipe! You can get creative by adding other fruits or nuts. Chopped strawberries or raspberries pair well with blueberries. They add extra flavor and a pop of color. If you like nuts, try adding pecans or almonds. They give a nice crunch to the soft brownies. Just remember to adjust the amounts to keep the right balance in your batter. For the complete recipe, check out the Full Recipe section. To keep your blueberry brownies fresh, store them in an airtight container. Place a piece of parchment paper between layers to prevent sticking. They stay good at room temperature for about three days. If you want to keep them longer, consider refrigerating them. In the fridge, they can last up to a week. However, the cold may change the texture a bit. If you have extra brownies, freezing is a great option. First, let them cool completely. Cut the brownies into squares. Wrap each square tightly in plastic wrap. Then, place them in a freezer-safe bag or container. They can last up to three months in the freezer. When you're ready to enjoy them, just take out what you need. To reheat your brownies, use the microwave or the oven. For the microwave, place one brownie on a plate. Heat it for about 10-15 seconds. Check if it’s warm. If not, add a few more seconds. For the oven, preheat it to 350°F (175°C). Put the brownies on a baking sheet and warm them for about 5-10 minutes. This method keeps them soft and tasty. Enjoy your freshly warmed brownies! Blueberry brownies stay fresh for about 3 to 4 days at room temperature. If you store them in an airtight container, they will keep their taste and texture. For longer storage, place them in the fridge. This can extend their life to about a week. However, after a few days, they may lose some of their soft texture. Yes, you can use frozen blueberries in this recipe. Just make sure to thaw and drain them first. This way, they won’t add too much moisture to the brownie batter. Frozen blueberries may burst more easily, so fold them gently into the mix. This keeps the batter nice and smooth while still adding that yummy blueberry flavor. Blueberry brownies are delicious on their own, but you can serve them with a scoop of vanilla ice cream for a special treat. Whipped cream also pairs well, adding a light touch. Fresh fruit, like more blueberries or raspberries, can enhance the plate. For a fun twist, drizzle some chocolate sauce over the top. These additions can take your brownies to the next level! In this blog post, I covered how to make delicious blueberry brownies. We looked at the key ingredients, including fresh blueberries, and discussed alternatives. I shared step-by-step instructions for preparing, mixing, and baking your brownies. You learned tips for getting the right texture and avoiding common mistakes. We even explored gluten-free and vegan variations. Overall, with a few simple steps and fresh ingredients, you can create tasty treats. Enjoy your baking adventure with these easy blueberry brownies!

Looking for a sweet and easy treat? You’ll love my Fresh Blueberry Brownies! This recipe makes rich, fudgy brownies packed with juicy blueberries. It only takes a few simple ingredients …

Read more

Categories Desserts
Older posts
Newer posts
← Previous Page1 … Page66 Page67 Page68 … Page94 Next →

TOASTED RECIPES

Where ideas are warm, crisp, and ready to serve! 🍞

PAGES

Home About Contact Privacy Policy Terms & Conditions Cookie Policy GDPR Policy Copyright Policy Disclaimer

CATEGORIES

Appetizers Desserts Salads Breakfast Dinner

Contact

  • Pinterest
  • Mail
Copyright © 2025 Toasted Recipes. All rights reserved.