Loaded Potato Salad Flavorful and Creamy Delight
![- 4 large Yukon Gold potatoes, scrubbed and diced - 1 cup sour cream - 1/2 cup mayonnaise - 1 tablespoon Dijon mustard - 1 teaspoon garlic powder - Salt and pepper, to taste - 1 cup shredded sharp cheddar cheese - 1/2 cup cooked and crumbled turkey bacon - 1/4 cup green onions, sliced - 1/4 cup fresh parsley, chopped The star of this dish is the potatoes. Yukon Gold potatoes are my favorite. They are creamy and flavorful. They make the salad rich and hearty. I love to boil them until they are fork-tender. Next, we have sour cream and mayonnaise. These two add creaminess and tang. They blend together to coat the potatoes well. A touch of Dijon mustard gives a nice zing. Garlic powder adds depth, making each bite pop with flavor. Bacon and cheese bring that loaded touch. The turkey bacon adds a smoky crunch. If you prefer a vegetarian option, use plant-based bacon. Sharp cheddar cheese is a must. It melts into the potatoes and gives a savory kick. - Bell peppers - Celery - Dill - Paprika To make this salad even better, you can add some veggies. Chopped bell peppers add color and crunch. Celery gives a nice fresh bite. You can also toss in some herbs. Dill or paprika can enhance the taste. The options are endless! - Large pot - Mixing bowl - Serving dish For this recipe, you need a few simple tools. A large pot is key for boiling the potatoes. A mixing bowl helps combine all the creamy goodness. Finally, a serving dish lets you show off your tasty creation. If you want the full recipe, check out the Loaded Potato Salad section! 1. Start by boiling the diced potatoes. - Place the diced Yukon Gold potatoes in a large pot of salted water. - Bring the water to a boil over medium-high heat. - Once boiling, reduce the heat to a simmer. - Cook for 12 to 15 minutes or until a fork easily pierces the potatoes. 2. After cooking, drain the potatoes. - Allow them to cool in a colander for a few minutes. - Set them aside to cool completely before mixing. 1. In a large mixing bowl, combine the dressing ingredients. - Add 1 cup of sour cream and 1/2 cup of mayonnaise. - Mix in 1 tablespoon of Dijon mustard and 1 teaspoon of garlic powder. - Season with salt and pepper to taste. - Whisk everything together until smooth and creamy. 1. Once the potatoes have cooled, it's time to combine. - Gently fold the cooled potatoes into the dressing mixture. - Make sure to coat all the potatoes well. 2. Add the fun mix-ins. - Fold in 1 cup of shredded sharp cheddar cheese. - Add 1/2 cup of crumbled turkey bacon, 1/4 cup of sliced green onions, and 1/4 cup of chopped parsley. - Mix everything until well combined. 3. Adjust the seasoning as needed. - Taste the salad and add more salt or pepper if desired. - Cover and refrigerate for at least one hour. This helps the flavors blend. Now, your loaded potato salad is ready to impress! For the complete recipe, check out the [Full Recipe]. To make the best loaded potato salad, choose the right potatoes. I love using Yukon Gold potatoes. They stay creamy and have a nice flavor. Avoid russet potatoes. They can turn mushy when cooked. To keep your potatoes firm, don't overcook them. Boil until fork-tender but still slightly firm. Drain them well and let them cool completely before mixing them with the dressing. This helps keep the texture just right. Seasoning is key. If you want a bolder taste, try adding more garlic powder or a pinch of smoked paprika. For a tangy twist, a bit of lemon juice can brighten flavors nicely. For more crunch, add diced celery or bell peppers. They not only add texture but also a nice pop of color. You can also toss in some chopped pickles for an extra zing. Presentation matters! Serve your loaded potato salad in a large bowl. Top it with extra cheese, green onions, and parsley for a beautiful finish. This salad pairs well with grilled meats, especially at summer BBQs. It also works nicely as a side for picnics or potlucks. For a special touch, chill the salad before serving to let the flavors meld. For the complete recipe, check out the [Full Recipe]. {{image_2}} Loaded potato salad is not just one dish; it can be many! You can change it up to fit your taste or diet. Here are some fun variations to try. You can make a great vegetarian version of loaded potato salad! Instead of bacon, use plant-based options. Try using smoked tempeh or crispy chickpeas for a nice crunch. These options give a smoky flavor without meat. You won’t miss the bacon at all. If you love heat, try a spicy loaded potato salad! Just add jalapeños or your favorite hot sauce. You can slice fresh jalapeños and mix them in. For more heat, add some sauce to your dressing. This version will wake up your taste buds! Cheese can change the flavor of your potato salad. Sharp cheddar is classic, but feel free to try others. You might like creamy feta or tangy goat cheese. Each cheese adds a unique taste to the dish. Mix and match to find your favorite combo! For the full recipe, check out the loaded potato salad's main guide. Enjoy making these tasty variations! To keep your loaded potato salad fresh, store it in an airtight container. This helps prevent moisture loss and keeps the flavors intact. Make sure to refrigerate it right after serving. The cool temperature slows bacterial growth. I recommend using it within four days for the best taste. If you notice any off smells or changes in texture, it’s best to toss it out. Freezing loaded potato salad is not ideal due to the creamy texture. However, if you must freeze it, use a freezer-safe container. Leave some space at the top for expansion. To thaw, place it in the fridge overnight. After thawing, the salad may look a bit watery. You can stir in some fresh sour cream to restore its creaminess. When stored correctly, loaded potato salad lasts about three to five days in the fridge. For the best taste and texture, eat it within that time. If you freeze it, plan to enjoy it within a month. Over time, the quality may drop, so it’s best to consume it sooner rather than later. For full details on making the salad, refer to the Full Recipe. Yes, you can make Loaded Potato Salad ahead of time. I recommend making it a day in advance. This gives the flavors time to blend. Just store it in the fridge until you are ready to serve. If you need a sour cream substitute, use Greek yogurt. It has a similar taste and texture. You can also try using cottage cheese for a lighter option. Another choice is to use plant-based yogurt for a dairy-free salad. To make your Loaded Potato Salad creamy, use a mix of sour cream and mayonnaise. This combination adds richness. You can also add more cheese, like cream cheese, for extra creaminess. Yes, Loaded Potato Salad is gluten-free. Just make sure to check all ingredient labels. Some brands of mayonnaise and bacon may contain gluten, so look for gluten-free versions. Loaded potato salad is a tasty dish that combines creamy potatoes, rich toppings, and fun add-ins. You can customize it with herbs, spices, or veggies. Follow my easy steps for boiling, mixing, and serving. Remember to use the right potatoes for the best texture and flavor. Whether you want a spicy kick or a vegetarian twist, options await. Store your leftovers properly to keep them fresh. With these tips, you can create a crowd-pleaser and make every bite enjoyable. Enjoy your loaded potato salad and share it with friends and family!](https://toastedrecipes.com/wp-content/uploads/2025/05/82ab31a5-a42e-4f3d-a387-2e290b9ef51b.webp)
If you’re craving a dish that’s rich, creamy, and packed with flavor, look no further than loaded potato salad. This delightful twist on a classic will elevate your picnics and …
If you’re craving a dish that’s rich, creamy, and packed with flavor, look no further than loaded potato salad. This delightful twist on a classic will elevate your picnics and …

Craving a dish that’s both tasty and satisfying? You’re in for a treat with my Stuffed Seafood Bread Bowl! This recipe combines creamy seafood with a crusty bread exterior, creating …
![For these Spicy Mexican Corn Bites, fresh ingredients make all the difference. You will need: - 2 cups fresh corn kernels (about 4 ears of corn) - 1 jalapeño, finely chopped (remove seeds for less heat) - 1/4 cup fresh cilantro, chopped The corn gives a sweet crunch. The jalapeño adds heat, while cilantro brings freshness. These ingredients create a vibrant base for your snack. Next, we need some dry ingredients to hold everything together. Gather these: - 1/2 cup all-purpose flour - 2 large eggs - 1/2 cup cotija cheese, crumbled (or feta cheese) - 1 teaspoon cumin powder - 1 teaspoon baking powder - Salt and pepper to taste These ingredients provide structure and flavor. The flour and eggs bind the corn mix. The cheese adds creaminess and a savory touch. Garnishes can elevate your dish even more. Consider these options: - Lime wedges for serving - Extra cilantro for garnish Serving with lime adds a zesty kick. Fresh cilantro on top enhances the look and flavor. Enjoy your Spicy Mexican Corn Bites warm for the best taste. Check the [Full Recipe] for more details on preparation! First, gather all your fresh ingredients. You need 2 cups of corn kernels. That’s about 4 ears of corn. Next, take a large bowl. Add the corn, chopped jalapeño, and cilantro. Stir them gently. In a separate bowl, whisk 2 large eggs. Then, mix in the flour, cotija cheese, cumin, baking powder, salt, and pepper. Combine these until you have a thick batter. Now, fold the corn mixture into the batter. If it feels too dry, add a splash of water. You want a pancake-like consistency. Heat olive oil in a skillet over medium heat. You want enough oil to fry well. Once hot, scoop heaping tablespoons of the corn mixture into the oil. Press them down slightly to make small patties. Fry each side for 3 to 4 minutes. You want them golden brown and crispy. Once done, drain the bites on paper towels to remove extra oil. Serve your bites warm for the best taste. Add lime wedges on the side for squeezing. You can also sprinkle extra cilantro on top for color. These bites are great as a snack or a side dish. For the full recipe, refer back to the section above. Enjoy every tasty bite! To get the best texture, use fresh corn. Frozen corn can work, but it won't taste as good. Make sure to mix the batter well. A thick batter helps keep the corn inside. If the mixture feels too dry, add a splash of water. This keeps the bites moist and fluffy. If you love heat, keep the jalapeño seeds in. They add fiery flavor! For milder bites, remove the seeds. You can also add more spices. Try cayenne pepper or chili powder for extra kick. Taste the batter before frying. This way, you can adjust the heat to your liking. Heat the oil on medium heat. If it’s too hot, the bites burn quickly. If it’s too cold, they soak up too much oil. Use a deep skillet for even cooking. Fry in small batches to avoid crowding. This ensures they cook evenly and get crispy. Drain them on paper towels right after frying. This removes extra oil and keeps them light. {{image_2}} You can easily make Spicy Mexican Corn Bites vegetarian or vegan. For a vegetarian twist, skip the cotija cheese and use a plant-based cheese instead. To make them vegan, replace the eggs with flaxseed meal. Mix one tablespoon of flaxseed with three tablespoons of water and let it sit for five minutes. This mix will bind your ingredients just like eggs. If you have allergies, there are simple swaps you can make. For gluten-free bites, use almond flour or a gluten-free all-purpose flour mix. If you can’t have eggs, use the flaxseed mix mentioned earlier. For dairy allergies, try using nutritional yeast for a cheesy flavor without the cheese. Want to jazz up your bites? Add different herbs or spices. Chopped green onions or bell peppers work well for added taste. For a smoky twist, try adding smoked paprika. You can also mix in black beans for extra protein and a change in texture. Each of these additions will make your bites unique and fun! For the complete recipe, check out the [Full Recipe]. After enjoying Spicy Mexican Corn Bites, store leftovers in an airtight container. Keep them in the fridge. They stay fresh for up to three days. Make sure they cool down first. This helps keep them crispy. If you add toppings, store those separately. To reheat, use a skillet for the best results. Heat over medium heat. Add a small amount of olive oil to keep them crispy. Cook for about 3-4 minutes on each side. You can also use an oven. Preheat to 350°F (175°C) and bake for about 10 minutes. This method helps them regain their crunch. You can freeze these bites if you want to save some for later. Place them on a baking sheet and freeze until solid. Then, transfer them to a freezer bag. They stay good for up to two months. When ready to eat, thaw them in the fridge. Reheat in a skillet or oven for the best taste. Enjoy them like fresh! For the full recipe, check above! You can serve these corn bites with many fun sides. They pair well with salsa. A fresh pico de gallo adds a bright touch. Guacamole is a creamy option that complements the spice. Try serving them with sour cream for a cool contrast. You can also add lime wedges for some zest. These sides make the bites even more delicious. Yes, you can make these bites ahead of time. Prepare the batter and store it in the fridge. This keeps the flavors fresh. You can also cook them in advance. Just let them cool and store in an airtight container. When ready to eat, reheat in a skillet. This will help them stay crispy. Making them ahead saves time and makes entertaining easy. If you can’t find cotija cheese, don't worry! Feta cheese is a great alternative. It has a similar salty taste and crumbly texture. You could also use queso fresco for a milder flavor. Even shredded cheddar works well if you prefer a different taste. Keep in mind, each cheese gives its own unique twist to the dish. This article covered how to make Spicy Mexican Corn Bites from fresh and dry ingredients to serving suggestions. You learned the steps for preparing and cooking, plus tips to get the right texture. Variations let you cater to different diets or tastes. Lastly, we discussed how to store and reheat leftovers. Enjoy these bites with friends and family, and don’t hesitate to experiment with flavors. Trust me, your kitchen will smell great, and everyone will love them!](https://toastedrecipes.com/wp-content/uploads/2025/05/f65073b6-0573-457d-a11f-590f7188d83b.webp)
Are you ready to spice up your snack game? These Spicy Mexican Corn Bites are packed with flavor and easy to make! With simple ingredients and quick cooking methods, you’ll …

Are you ready to delight your taste buds with an Easy Chipotle Ranch Grilled Chicken Burrito? This recipe is simple, quick, and packed with flavor. You’ll learn how to marinate …
![For this delicious recipe, gather the following ingredients: - 6 large cinnamon rolls (store-bought or homemade) - 4 large eggs - 1 cup milk (whole or almond milk) - 1 teaspoon vanilla extract - 1 teaspoon ground cinnamon - 2 tablespoons maple syrup - 2 tablespoons butter (for cooking) - Powdered sugar (for dusting) - Fresh berries (strawberries or blueberries for garnish) If you want to make some swaps, here are a few ideas: - Use egg substitutes like flaxseed or chia seeds for a vegan option. - Almond milk or oat milk works well for dairy-free diets. - Try gluten-free cinnamon rolls if you need to avoid gluten. You can choose between store-bought cinnamon rolls for convenience or make your own from scratch for a personal touch. Both options can lead to tasty treats! If you’re short on time, the store-bought version saves you some effort without losing flavor. How to prep the cinnamon rolls Start with 6 large cinnamon rolls. If you use store-bought rolls, unroll each one carefully. This gives you a long strip of dough. If you make them from scratch, roll out the dough into flat rectangles. Mixing the filling ingredients In a small bowl, mix 2 tablespoons of maple syrup with a sprinkle of ground cinnamon. This simple mix will add extra flavor. Spread it evenly on each unrolled cinnamon roll. Rolling the cinnamon rolls back up Once the filling is on, roll each cinnamon roll back up tightly. Make sure the filling stays sealed inside. This step is key for the best taste. Detailed instructions for egg mixture preparation In a medium bowl, whisk together 4 large eggs, 1 cup of milk, 1 teaspoon of vanilla extract, and 1 teaspoon of ground cinnamon. Add another tablespoon of maple syrup. Mix well until everything is combined. Coating and cooking the cinnamon roll slices Dip each rolled cinnamon roll into the egg mixture. Coat them evenly, but do not soak them too long. Place the coated rolls in a large skillet. Melt 2 tablespoons of butter over medium heat. Cook each roll for about 3-4 minutes on each side until they turn golden brown. Tips for achieving golden-brown perfection Keep an eye on the rolls as they cook. Turn them carefully to avoid breaking. If they cook too fast, lower the heat a bit. This ensures they cook through without burning. - Best practices for flipping the rolls: Use a wide spatula to flip each roll. Gently slide the spatula under the roll. Lift it carefully to avoid breaking. Wait until the edges are golden before flipping. This ensures they stay intact and fluffy. - Avoiding sogginess in the rolls: Do not soak the rolls in the egg mixture for too long. A quick dip is all they need. This keeps the texture light and fluffy. Also, make sure your skillet is hot enough before adding the rolls. This helps seal in the flavors without making them soggy. - Achieving the right balance of flavors: Use just the right amount of cinnamon in the filling and the egg mix. Too much can overpower the sweet taste of the rolls. A teaspoon of vanilla adds depth without being too strong. This balance makes each bite delightful. - Garnishing ideas with fresh berries: Top your cinnamon roll French toast rolls with fresh berries. Strawberries and blueberries work great. They add a pop of color and freshness to the dish. The tartness of the berries balances the sweetness of the rolls. - Pairing with syrups or whipped cream: Drizzle with maple syrup for added sweetness. If you like, add a dollop of whipped cream on top. This adds a creamy texture that makes every bite richer. You can also try flavored syrups for a twist. - Creative serving ideas for special occasions: Serve these rolls on a large platter for brunch. Dust them with powdered sugar for a beautiful look. You can also stack them high for an eye-catching display. Add a few sprigs of mint for a fresh touch. These ideas make your presentation stand out at any gathering. For the full recipe, check the details mentioned earlier. {{image_2}} You can make these Cinnamon Roll French Toast Rolls even more fun. Here are some ways to change up the flavors: - Adding chocolate chips or nuts: Toss in some chocolate chips or chopped nuts. They add great texture and a sweet crunch. Mix these into the filling or sprinkle them on top while cooking. - Exploring different types of bread: Try using brioche, challah, or even gluten-free bread. Each type will give a unique taste and texture. A richer bread makes the rolls even fluffier. - Spicing it up with extracts or zests: A splash of almond extract or a bit of orange zest can brighten the flavor. Just a little goes a long way in making each bite special. These rolls can fit many diets. Here are some simple swaps: - Vegan or dairy-free adaptations: Use flax eggs instead of regular eggs and almond milk in place of dairy milk. This keeps the taste delicious while staying plant-based. - Gluten-free options: Opt for gluten-free cinnamon rolls. Many brands offer tasty gluten-free dough that works well in this recipe. - Reducing sugar for health-conscious choices: Cut back on the maple syrup or use a sugar substitute. You can still enjoy sweet flavors without all the sugar. Feel free to mix and match these ideas to make your perfect Cinnamon Roll French Toast Rolls! For the complete recipe, check the [Full Recipe]. To store leftover Cinnamon Roll French Toast Rolls, place them in an airtight container. This keeps them fresh and prevents them from drying out. You can also wrap them tightly in plastic wrap. They stay fresh in the fridge for about 3 to 4 days. If you want to enjoy them later, it’s best to refrigerate them as soon as they cool. Avoid leaving them out for too long. This helps keep their fluffy texture and sweet flavor. If you want to save some for later, freezing is a great option. First, let the cooked rolls cool completely. Then, wrap each roll tightly in plastic wrap. Place the wrapped rolls in a freezer-safe bag or container. They can last in the freezer for about 2 to 3 months. When you're ready to eat, take them out and let them thaw in the fridge overnight. To reheat, place the rolls in the oven at 350°F (175°C) for about 10-15 minutes. This will help restore their fluffy texture. You can also microwave them for about 30 seconds if you’re in a hurry. Just be careful not to overheat, as this can make them tough. Enjoy your delicious treat anytime! For the complete recipe, check out the Full Recipe. Can I make Cinnamon Roll French Toast Rolls ahead of time? Yes, you can prep the rolls ahead of time. Make the rolls and coat them in the egg mixture. Place them in the fridge, covered. Cook them when you're ready. This saves time in the morning. How do I know when they are fully cooked? You can tell they are done when they turn golden brown. Check both sides to ensure even cooking. If you cut one open, the center should not be doughy. What can I serve with Cinnamon Roll French Toast Rolls? These rolls pair well with fresh berries, whipped cream, or maple syrup. You can also add a sprinkle of nuts for crunch. They make a fun brunch dish! Can I use different flavors of cinnamon rolls? Absolutely! You can use chocolate rolls or even caramel rolls. The base recipe works well with many flavors. Try your favorite to mix things up. How to adapt for a larger group or gatherings? To serve more people, simply double the recipe. Prepare more rolls and increase the egg mixture as needed. You can cook them in batches to keep everything warm. In this post, I shared how to make delicious cinnamon roll French toast rolls. You learned about the key ingredients, preparation steps, and cooking methods. I included tips for storage and serving to enhance your meal. Feel free to explore variations to suit your taste and dietary needs. Cinnamon roll French toast is a fun twist on a classic. With this guide, you can impress your family and friends. Enjoy making this treat and share it with others!](https://toastedrecipes.com/wp-content/uploads/2025/05/411a8026-5769-4567-bbd0-98219481663b.webp)
If you love breakfast treats, you’re in for a treat! These Cinnamon Roll French Toast Rolls are fluffy, sweet, and fun to make. Imagine warm, gooey cinnamon rolls combined with …
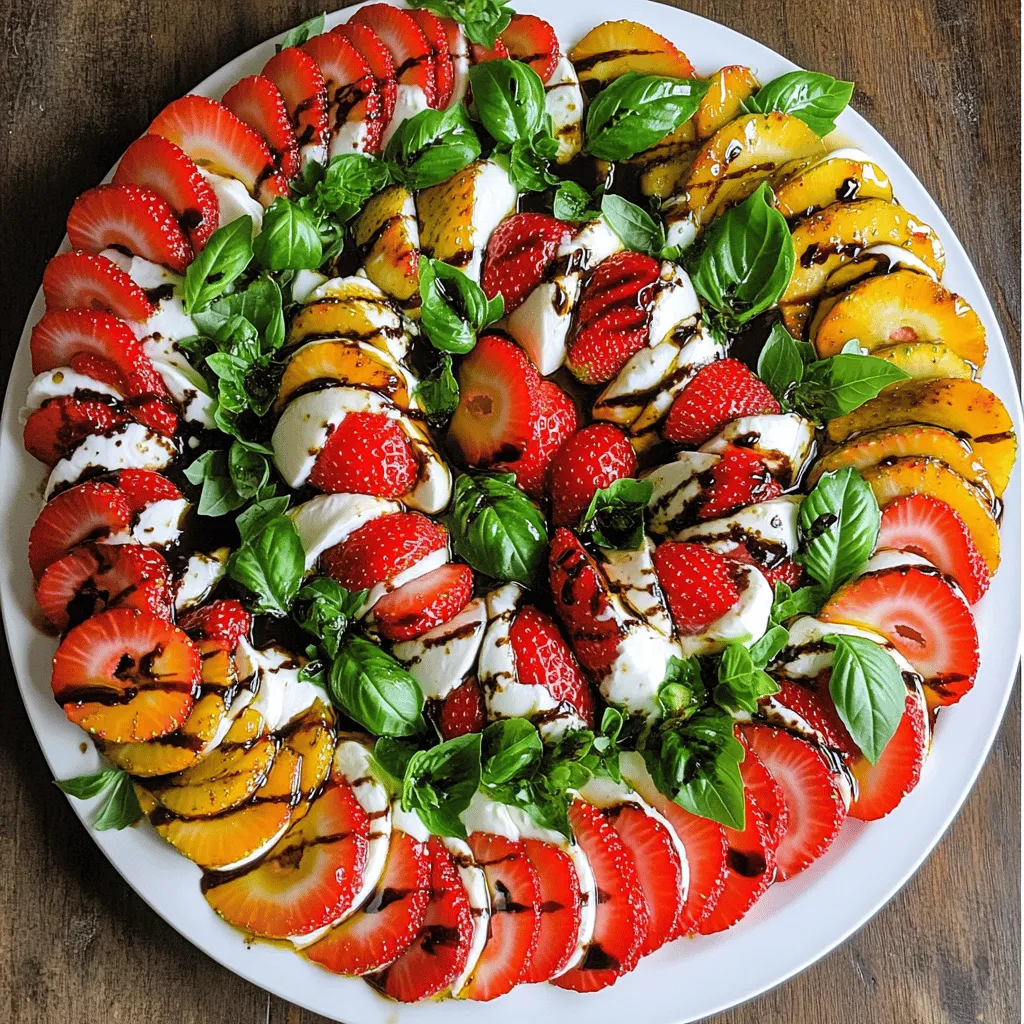
Summer is the perfect time for fresh flavors, and nothing shines like a Balsamic Strawberry Caprese. This dish combines juicy strawberries, creamy cheese, and zesty balsamic for a treat you …
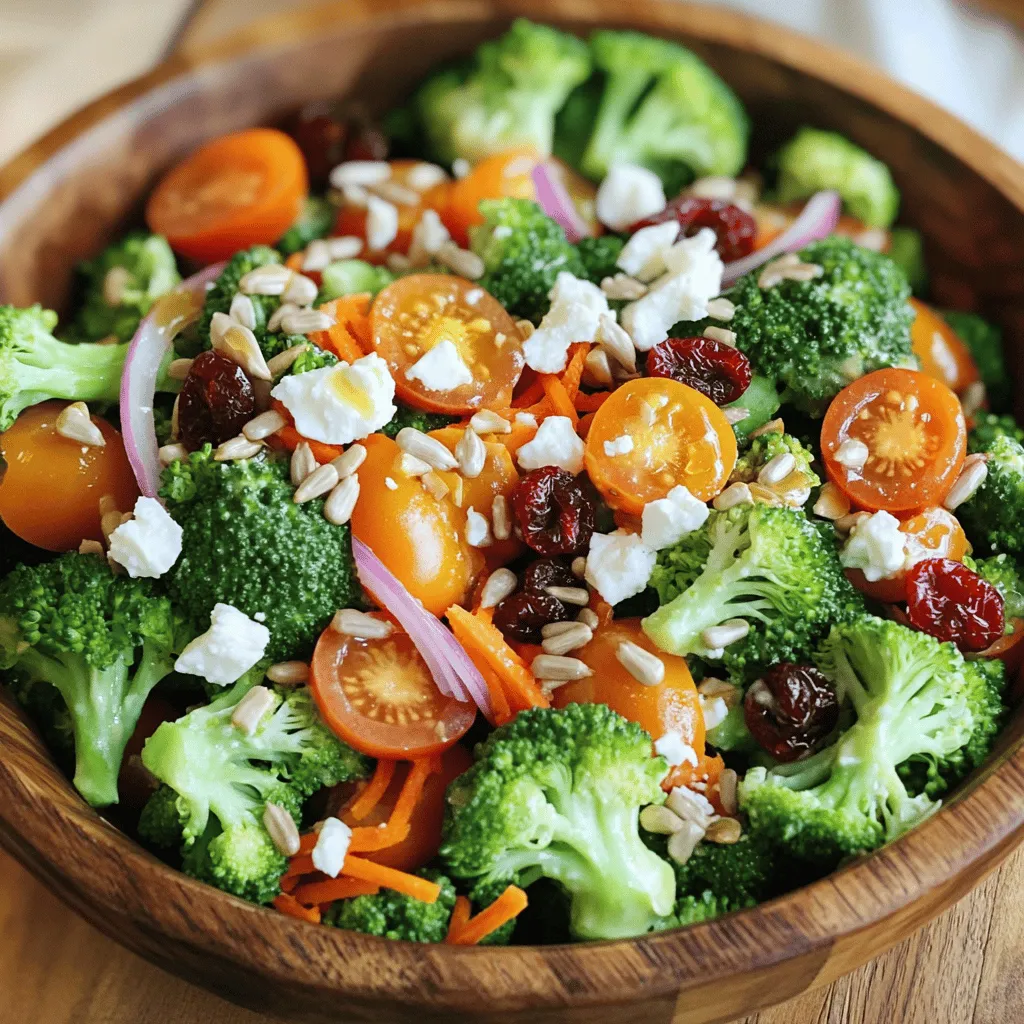
Are you ready for a fresh and tasty way to enjoy your veggies? The Broccoli Bliss Salad is packed with bright flavors and colorful ingredients. This nutritious delight combines crisp …
![Cooking Buttery Cinnamon Roll Doughnuts requires simple ingredients that blend to create magic. Here’s what you’ll need: - Dry Ingredients: - 2 cups all-purpose flour - 1/4 cup granulated sugar - 2 tsp baking powder - 1/2 tsp salt - 1/2 tsp ground cinnamon - Wet Ingredients: - 1/4 cup unsalted butter, softened - 3/4 cup milk - 1 large egg - 1 tsp vanilla extract - Toppings: - For the Cinnamon Sugar Topping: - 1/2 cup granulated sugar - 1 tsp ground cinnamon - For the Glaze: - 1 cup powdered sugar - 2 tbsp milk - 1/2 tsp vanilla extract Each part plays a role. The dry ingredients give structure. The wet ingredients add moisture and flavor. Toppings bring sweetness and extra taste. Don't forget to check the [Full Recipe] for more details! - Mixing dry ingredients: In a mixing bowl, add 2 cups all-purpose flour, 1/4 cup granulated sugar, 2 teaspoons baking powder, 1/2 teaspoon salt, and 1/2 teaspoon ground cinnamon. Stir until well combined. - Creaming butter and sugar: In another bowl, cream together 1/4 cup softened unsalted butter and the sugar mixture. Mix until fluffy and light. - Combining wet and dry ingredients: Now, add 3/4 cup milk, 1 large egg, and 1 teaspoon vanilla extract to the butter mixture. Stir until everything is well blended. - Kneading the dough: Gradually add the dry mix to the wet mix. Stir until a dough forms. On a floured surface, knead the dough for about 5 minutes until it’s smooth. - Rolling out the dough: Roll out the dough to about 1/2 inch thick. This thickness helps the doughnuts puff up nicely. - Cutting doughnut shapes: Use a doughnut cutter or two round cutters to cut out doughnut shapes. Make sure to cut out the center hole for that classic look. - Heating oil to the right temperature: Heat oil in a deep pan over medium heat. Aim for about 350°F (175°C). This temperature ensures a golden brown crust. - Frying techniques: Carefully drop the doughnuts in hot oil. Fry for about 2-3 minutes on each side until golden brown. Use a slotted spoon to flip them gently. Now, you're ready to enjoy these buttery cinnamon roll doughnuts! For a complete guide, check out the Full Recipe. To make dough that is soft and fluffy, start with warm ingredients. Use room temperature butter and milk. This helps the dough rise better. When mixing, look for a dough that is smooth and slightly tacky but not sticky. You can test the dough readiness by pressing it lightly with your finger. If it springs back, it is ready to rise. Frying can be tricky, but you can do it safely. Always use a thermometer to check the oil temperature. Aim for 350°F (175°C). Fry in small batches. This keeps the oil hot and helps doughnuts cook evenly. To avoid oily doughnuts, let them drain on paper towels after frying. This step helps absorb excess oil. Garnishing is where your creativity shines! After rolling the warm doughnuts in cinnamon sugar, you can drizzle them with glaze for extra sweetness. Try adding sprinkles for color or extra cinnamon on top for flair. For a fun presentation, arrange the doughnuts on a tiered stand. This makes them look even more tempting! {{image_2}} You can make your doughnuts even more tasty with extra flavors. Try adding spices like nutmeg or ginger. These spices add warmth and depth to your doughnuts. You can also mix in nuts for a bit of crunch. Chopped pecans or walnuts work well. For a fruity twist, add small pieces of apple or banana. This will give your doughnuts a fresh flavor. The toppings can change your doughnut game. Instead of just cinnamon sugar, try a chocolate glaze. Melted chocolate adds a rich, sweet layer. Maple glaze is another great choice. It brings a cozy flavor that pairs perfectly with cinnamon. For a fun touch, add sprinkles or crushed candy on top. You can also dust your doughnuts with powdered sugar for a classic look. If you want a healthier doughnut, there are easy swaps. Use whole wheat flour instead of all-purpose flour. This makes the doughnuts more nutritious. You can also bake them instead of frying. Baking reduces the fat and calories. Just place the shaped doughnuts on a baking sheet and bake until golden. This way, you enjoy the same great taste with less guilt. For the complete recipe, refer to the Full Recipe. To keep your buttery cinnamon roll doughnuts fresh, store them in an airtight container. This helps to keep them soft and tasty. You can also wrap each doughnut in plastic wrap for extra protection. The ideal temperature for storage is room temperature. Avoid placing them in the fridge, as cold air can dry them out. If you need to keep them for longer, consider freezing them. If you want to enjoy your doughnuts warm, you can reheat them easily. The best method is to use an oven. Preheat it to 350°F (175°C). Place the doughnuts on a baking sheet and heat for about 5 minutes. This method keeps them from getting soggy. You can also use a microwave, but do this carefully. Heat them for about 10-15 seconds. Check to see if they are warm enough. Enjoy them fresh with a drizzle of glaze! You can make doughnuts using a pan or an air fryer. Both methods work great. For pan frying, use a heavy skillet. Fill it with about an inch of oil. Heat the oil to 350°F. Fry the doughnuts for about 2-3 minutes on each side. If you use an air fryer, set it to 350°F. Cook the doughnuts for about 6-8 minutes. This method gives you a lighter, less oily treat. Yes, you can freeze these doughnuts! First, let them cool completely. Wrap each doughnut in plastic wrap. Place them in an airtight container or a freezer bag. They can stay fresh for up to three months. To thaw, just leave them out at room temperature. You can also pop them in the microwave for a few seconds for a warm treat. If you need an egg substitute, there are many options! Use 1/4 cup unsweetened applesauce for each egg. You can also use 1/4 cup mashed banana or 1 tablespoon of ground flaxseed mixed with 2.5 tablespoons of water. These options work well in doughnuts and keep them moist. To check if your doughnuts are done, look for a golden-brown color. They should puff up nicely, too. You can also test by inserting a toothpick into the doughnut. If it comes out clean, they are ready. Avoid cutting them open, as this lets steam escape and can make them dense. You now have a solid grasp of making delicious doughnuts. We covered the key ingredients, mixing techniques, frying methods, and creative variations. Remember, practice makes perfect. Pay attention to temperatures and follow the tips for best results. Whether you prefer classic flavors or quirky toppings, you can create something special. Enjoy sharing your tasty treats with friends and family. Your doughnut-making skills will impress everyone! Dive in and make your kitchen a doughnut haven.](https://toastedrecipes.com/wp-content/uploads/2025/05/63db7536-d788-40f3-989d-94be7fd62be6.webp)
Get ready for a treat with these Buttery Cinnamon Roll Doughnuts! Imagine biting into a fluffy, warm doughnut, bursting with sweet cinnamon flavor, coated in a sugary glaze. This recipe …
![To make a Berry Watermelon Fruit Salad, gather your fresh ingredients. The mix of sweet watermelon and tangy berries creates a bright flavor. Here’s what you will need: - 4 cups watermelon, cubed - 1 cup strawberries, hulled and halved - 1 cup blueberries - 1 cup raspberries - 1 tablespoon honey (optional) - 1 tablespoon fresh mint, chopped - Juice of 1 lime - Pinch of salt Watermelon stands out in this salad. It is juicy and sweet, perfect for summer. I recommend using a ripe watermelon for the best taste. Mixed berries add a burst of flavor. Strawberries bring sweetness, while blueberries and raspberries add tartness. Honey enhances the sweetness. If you prefer a less sweet salad, skip it. Lime juice adds zest and balances the flavors. A pinch of salt brightens the taste of the fruits. Finally, fresh mint gives a refreshing finish. Using fresh ingredients makes all the difference. This salad is not just colorful but also healthy. You can find the full recipe in the article to enjoy this easy-to-make dish. - Preparing the Watermelon Start by cutting the watermelon. Slice it in half, then scoop out the flesh with a spoon. Make sure to remove the seeds. Next, cut the watermelon into small cubes. This makes it easy to eat and adds a nice texture. - Hulling and Halving Strawberries Take your strawberries and remove the green tops. This step is called hulling. After hulling, slice each strawberry in half. This helps them mix well with the other fruits. - Measuring and Washing Berries Rinse the blueberries and raspberries under cool water. Drain them well. Measure one cup of each berry. This way, you have the right amount for your salad. - Combining Ingredients in a Mixing Bowl In a large mixing bowl, add the cubed watermelon. Gently fold in the halved strawberries, blueberries, and raspberries. Be careful not to squish the berries while mixing. You want to keep them whole for a nice presentation. - Preparing the Dressing In a small bowl, whisk together the honey (if you want it sweeter), lime juice, and a pinch of salt. This dressing adds a light and tangy flavor to the salad. Make sure everything is well mixed. - Tossing the Salad Drizzle the dressing over the mixed fruits. Use a spatula to toss the salad gently. Make sure all the fruit gets coated with the dressing without mashing the berries. - Garnishing with Mint Finally, sprinkle the chopped fresh mint over the top of the salad. This adds a pop of color and freshness. Now, you can chill the salad in the fridge for at least 20 minutes. This lets all the flavors blend perfectly. For the full recipe, check out the Berry Watermelon Fruit Salad. Enjoy this refreshing treat on hot summer days! Selection Tips for Ripe Watermelon To find the best watermelon, look for a firm skin. A ripe watermelon feels heavy for its size. Check for a creamy spot on one side; this shows where it rested on the ground. Tap the watermelon lightly and listen for a deep sound. This indicates ripeness. Picking Fresh Berries When selecting berries, choose ones that are bright and firm. Avoid berries with mold or mushy spots. Look for berries with a nice sheen. This shows they are fresh. For strawberries, the green caps should be bright and fresh. Blueberries should be plump and dry. Raspberries need to be deep red and full. Best Serving Dishes For a fruit salad, use a large, shallow bowl. This lets the colors shine. A glass bowl works well to show off the layers. You can also use individual cups for a fun twist. This makes serving easy and adds a nice touch to your table. Pairing Ideas for Dishes Berry watermelon fruit salad pairs well with grilled meats. You can serve it alongside chicken or fish. It also complements a picnic spread. Try it with sandwiches or wraps. Adding a scoop of yogurt on the side enhances the meal. Adjusting for Sweetness If you like sweeter salads, add honey. Start with a little, then taste as you go. You can also use agave syrup or maple syrup. These natural sweeteners work well with fruits. Substituting Ingredients Feel free to swap out fruits based on your taste. You can add peaches or kiwi for a twist. If you want to skip honey, use orange juice for a nice sweetness. This keeps the salad fresh and exciting. {{image_2}} You can make your berry watermelon fruit salad even more exciting. Try adding seasonal fruits. For summer, peaches and nectarines work well. In fall, fresh apples and pears can add a crunch. Each fruit brings its own flavor. This keeps your salad fresh and fun. Adding nuts or seeds is another great option. Chopped almonds or walnuts add a nice crunch. You can also try pumpkin seeds or sunflower seeds. These additions boost nutrition and taste. They give your salad a different texture and depth. You can change the dressing to give the salad a new twist. A citrus dressing brightens the flavors. Mix orange juice or grapefruit juice with olive oil. This creates a zesty kick. You can also add a bit of honey for sweetness. Yogurt-based dressings are another tasty choice. Use plain yogurt and mix in some lime juice. This dressing adds creaminess and tang. You can also mix in herbs like cilantro or mint for extra flavor. Themed fruit salads can make gatherings special. For a tropical twist, add pineapple and mango. This gives your salad a sunny vibe. You can also toss in shredded coconut for a fun texture. If you want a berry medley, mix different types of berries. Use strawberries, blueberries, and blackberries together. This creates a colorful and vibrant dish. Each bite bursts with berry goodness. To discover the full recipe, check out the complete guide on how to make this delicious berry watermelon fruit salad. To keep your Berry Watermelon Fruit Salad fresh, choose a good container. I recommend using a glass or BPA-free plastic container with a tight lid. This helps keep moisture in and air out. If you have any leftover salad, store it in the fridge right away. This keeps the flavors vibrant and the fruits crisp. You should consume the salad within 2 to 3 days. After that, the fruits start to lose their texture and flavor. Look for signs of spoilage, like mushy berries or a sour smell. If you spot any, it's best to toss the salad. If you have leftovers, don’t worry! You can get creative. Add the salad to yogurt for breakfast or a snack. You can also mix it into smoothies for a fruity twist. Another idea is to use it as a topping for desserts like ice cream or cheesecake. Enjoying your leftovers can be just as fun as the first serving! For the complete recipe, check out the [Full Recipe]. You can add natural sweeteners to your salad. Here are some options: - Honey: This is a great choice. Use about one tablespoon for a light touch. - Maple Syrup: This adds a rich flavor. Use it just like honey. - Agave Nectar: It has a mild taste and mixes well. - Stevia: A no-calorie option, it can sweeten without added sugar. Add these sweeteners to the lime juice mix. Start with a small amount and taste. Adjust until you reach your desired sweetness. Yes, you can use frozen berries! They can be a great option. Here’s how to use them: - Thawing: Take them out of the freezer and let them sit at room temperature for about 30 minutes. - Drain Excess Water: Make sure to drain any extra water after thawing. This keeps your salad from getting soggy. - Mixing: Gently fold them into the salad to avoid mushiness. Frozen berries can still taste fresh and flavorful. They are great for off-season months. Absolutely! This salad works well for meal prep. Here are some tips: - Prep Ahead: You can chop the watermelon and berries a day before. Store them in separate containers. - Mix Later: Combine the fruits the day you plan to eat. This keeps everything fresh and crisp. - Dressing: Keep the dressing separate until serving. This prevents sogginess. With proper storage, the salad can last up to three days in the fridge. Enjoy it as a quick snack or a fresh side! This blog post covered how to make a fresh fruit salad. We explored key ingredients like watermelon and berries, and I shared step-by-step instructions for mixing them together. You learned tips for choosing the best produce and how to customize your salad. I also provided storage tips to keep your salad fresh. Experimenting with variations keeps the recipe exciting. Remember, fresh fruits boost taste and health. Enjoy creating your own delicious salads!](https://toastedrecipes.com/wp-content/uploads/2025/05/b55eafd2-31fa-494f-ab13-6b243e76da58.webp)
Looking for a refreshing treat to beat the summer heat? A Berry Watermelon Fruit Salad is your answer! This colorful mix of sweet watermelon and juicy berries not only pleases …
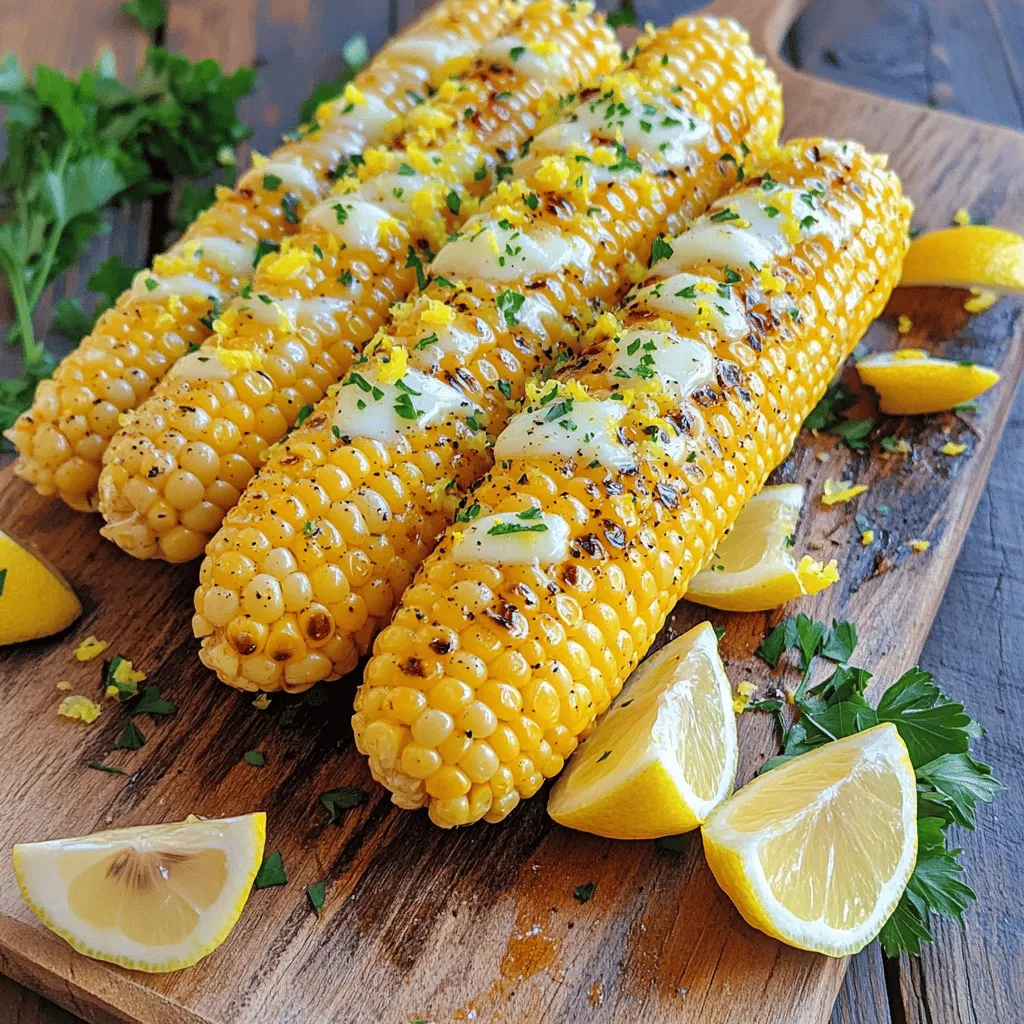
Get ready to elevate your grilling game with my Lemon Pepper Corn on the Cob! This dish combines fresh, sweet corn with a burst of zesty lemon and spices that …