Skip to content
toastedrecipes.com
  • Home
  • Appetizers
  • Desserts
  • Salads
  • Breakfast
  • Dinner
  • Privacy Policy
  • Contact
  • About

Chef Theo

Vegan 4-Ingredient Pumpkin Brownies Simple Delight

July 27, 2025 by Chef Theo
The magic of these vegan brownies lies in their simple ingredients. You only need four! Here they are: - 1 cup canned pumpkin puree - 1 cup almond butter (or any nut/seed butter) - 1 cup maple syrup (or agave syrup) - 1 cup cocoa powder Each ingredient plays a big role in making these brownies tasty and healthy. 1. Canned pumpkin puree: This ingredient is rich in fiber and low in calories. It adds moisture and a slight sweetness. Plus, it's packed with vitamins A and C, which are great for your skin and immune system. 2. Almond butter: It provides healthy fats and protein. Almond butter also has vitamin E, which helps keep your heart healthy. It gives the brownies a creamy texture too. 3. Maple syrup: This natural sweetener is better than refined sugar. It has antioxidants and minerals like manganese and zinc. It adds a lovely sweetness that complements the cocoa. 4. Cocoa powder: It brings chocolatey goodness to the dish. Cocoa is rich in iron and magnesium. It can also boost your mood with its flavonoids. If you want to change things up, you can easily substitute some ingredients: - Pumpkin puree: You can use applesauce or mashed bananas. Both will keep the brownies moist. - Almond butter: Any nut or seed butter works well. Try peanut butter or sunflower seed butter for different flavors. - Maple syrup: Agave syrup or honey can replace maple syrup if you’re not vegan. - Cocoa powder: If you want a different taste, try carob powder. It is naturally sweet and caffeine-free. These substitutions help you make the recipe fit your taste and needs. If you want the full recipe, check it out [here](#)
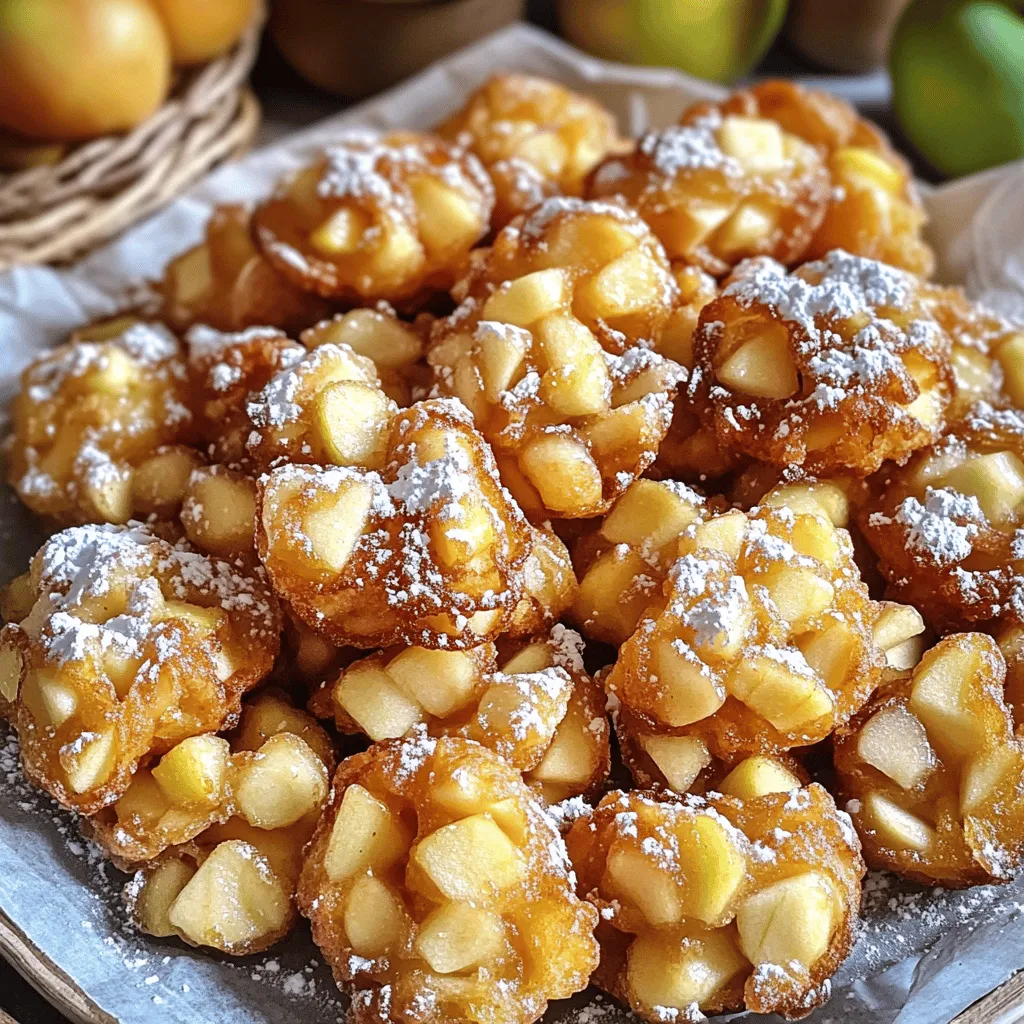
. First, gather all your ingredients. You need pumpkin puree, almond butter, maple syrup, and cocoa powder. Prepare your baking pan by greasing it or lining it with parchment paper. Preheat your oven to 350°F (175°C). This step helps the brownies bake evenly. 1. In a large bowl, mix the pumpkin puree and almond butter. Stir until smooth. 2. Add the maple syrup next. Mix well so all the ingredients combine nicely. 3. Now, slowly sift in the cocoa powder. Stir as you add it to avoid lumps. 4. Make sure the batter is smooth. Pour it into your prepared pan. Spread it evenly with a spatula. 5. Bake the brownies for 25-30 minutes. Check them with a toothpick. If it comes out mostly clean, they are done. 6. Let the brownies cool in the pan for about 10 minutes. Then, move them to a wire rack to cool completely. 7. Slice the cooled brownies into squares. They are now ready to serve. - Use a toothpick to test for doneness. A few moist crumbs are fine. - Don't overbake; this can make your brownies dry. - Let them cool before cutting. This helps them hold their shape. - For a special touch, dust the top with cocoa powder or powdered sugar. Serve with vegan whipped cream or non-dairy ice cream for extra delight. For the full recipe, refer to the beginning of the article. When making Vegan 4-Ingredient Pumpkin Brownies, avoid overmixing the batter. If you mix too much, your brownies may turn out tough. Another mistake is using too much cocoa powder. Stick to the one cup to keep the flavor balanced. Also, don’t forget to check the baking time. Overbaking will dry them out, while underbaking may leave them gooey. To get a great texture, use smooth almond butter. Chunky nut butter can create lumps. Make sure your pumpkin puree is well stirred and free of water. This helps your brownies stay moist without being too wet. For a fudgy outcome, let the brownies cool completely before slicing. This lets them set properly. You can serve these brownies in many fun ways. Try dusting the top with cocoa powder or powdered sugar for a nice look. Pair them with vegan whipped cream or a scoop of non-dairy ice cream for a special treat. For added crunch, sprinkle chopped nuts on top before baking. These simple ideas will make your brownies even more delightful! {{image_2}} You can boost the flavor of your brownies by adding nuts or chocolate chips. Try mixing in 1/2 cup of chopped walnuts or pecans for a crunchy texture. If you love chocolate, add 1/2 cup of dairy-free chocolate chips. Both options make the brownies richer and more exciting. While maple syrup is great, you can use other sweeteners. Agave syrup works well if you want a milder taste. You could also try coconut sugar for a caramel-like flavor. Just remember to adjust the amount based on sweetness. This keeps your brownies delicious without being too sweet. Almond butter is my go-to, but feel free to experiment. Peanut butter adds a fun twist with its strong taste. Sunflower seed butter is perfect for nut-free options, keeping the recipe safe for schools. Each nut or seed butter gives a unique flavor and texture to the brownies. Mixing it up can make your baking adventures even more fun! For the full recipe, check out the full recipe section above. To keep your brownies fresh, store them in an airtight container. This helps them stay moist and tasty. Place parchment paper between layers to prevent sticking. Keep them at room temperature for up to four days. For longer storage, try refrigerating them. Just remember to wrap them well to avoid drying out. You can also freeze these brownies for later. First, let them cool completely. Then, cut them into squares. Wrap each square tightly in plastic wrap. Place them in a freezer-safe bag or container. They stay good for up to three months. When you're ready to eat, just thaw them at room temperature. To enjoy your brownies warm, preheat the oven to 350°F (175°C). Place the brownies on a baking sheet. Heat them for about 5 to 10 minutes. You can also microwave them for 10 to 15 seconds. This makes them soft and delicious again. Enjoy them warm, maybe with a scoop of vegan ice cream! For the complete recipe, check out the Full Recipe. Yes, you can make these brownies gluten-free. The main ingredient that could contain gluten is the cocoa powder. Make sure you choose a gluten-free brand. Almond butter and pumpkin puree are gluten-free as well. If you prefer, you can use gluten-free flour to thicken the mix. However, with the four ingredients listed, you won’t need any flour. The brownies will be moist and fudgy! These brownies stay fresh for about five days when stored correctly. Keep them in an airtight container at room temperature. If you want them to last longer, you can freeze them. They freeze well for up to three months. Just wrap each brownie in plastic wrap and place them in a zip-top bag before freezing. To reduce the sweetness, you can cut back on the maple syrup. Try using three-quarters of a cup instead of a full cup. You can also add a pinch of salt to balance the flavors. Another option is to mix in a bit of unsweetened cocoa powder. This will enhance the chocolate flavor without adding more sweetness. Enjoy experimenting with the taste! These Vegan 4-Ingredient Pumpkin Brownies are easy and healthy. We explored each ingredient and its benefits. I shared tips for perfect texture and common mistakes to avoid. You can also try tasty variations and learn how to store them well. Remember, these brownies can adapt to your taste and needs. Experiment, enjoy the process, and savor every bite. Happy baking!

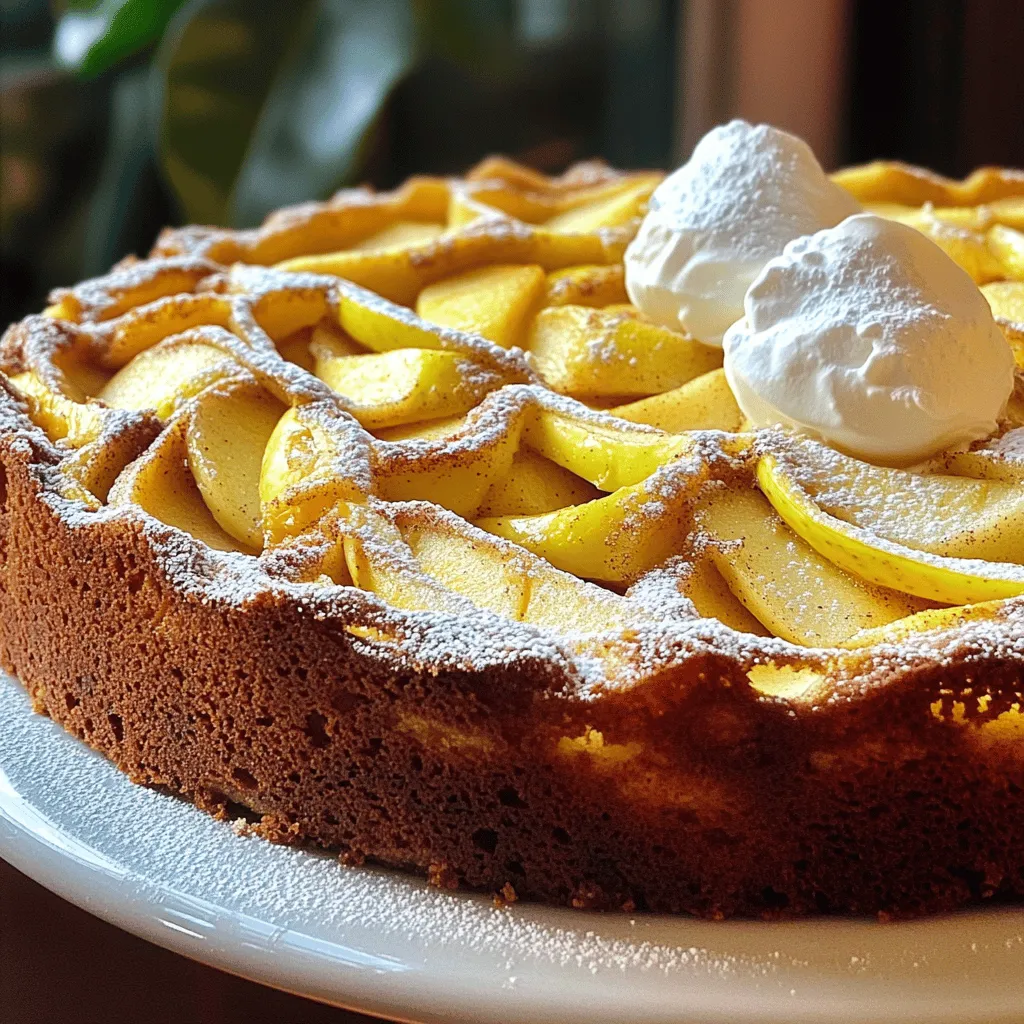
Craving a sweet treat that’s simple, healthy, and vegan? Let’s dive into my Vegan 4-Ingredient Pumpkin Brownies! With just four easy ingredients, you can whip up a delicious dessert that …

Read more

Categories Desserts

Cranberry Orange Breakfast Cake Tasty and Easy Recipe

July 27, 2025 by Chef Theo
To make the cranberry orange breakfast cake, you'll need these key ingredients: - 1 ½ cups all-purpose flour - 1 teaspoon baking powder - ½ teaspoon baking soda - ¼ teaspoon salt - ½ cup unsalted butter, softened - ¾ cup granulated sugar - 2 large eggs - 2 teaspoons vanilla extract - Zest of 1 large orange - ½ cup fresh cranberries, chopped - ½ cup orange juice - 1 teaspoon ground cinnamon - ½ cup powdered sugar (for glaze) - 1-2 tablespoons orange juice (for glaze) These ingredients work together to create a moist and flavorful cake. The tartness of the cranberries pairs perfectly with the sweet orange flavor. If you don't have some ingredients, here are some easy swaps: - Use whole wheat flour instead of all-purpose flour for added fiber. - Swap in coconut oil for unsalted butter to make it dairy-free. - Replace granulated sugar with brown sugar for a richer taste. - Use lemon juice and zest instead of orange for a different citrus flavor. - You can use dried cranberries if fresh ones aren't available, just chop them smaller. These substitutions can help you adapt the recipe to your kitchen needs. To bake this cake, you will need a few essential tools: - An 8-inch round cake pan - Mixing bowls (one large, one medium) - A whisk for mixing dry ingredients - A hand mixer or stand mixer to cream the butter and sugar - A rubber spatula for folding in the cranberries - A wire rack for cooling the cake Having the right tools makes the process smoother and more enjoyable. Each tool plays a role in helping you create the perfect cake. For the full recipe, check out the detailed instructions. First, I gather all my ingredients. This makes cooking easier and more fun. You’ll need flour, baking powder, baking soda, salt, butter, sugar, eggs, vanilla, orange zest, cranberries, orange juice, and cinnamon. 1. Preheat your oven to 350°F (175°C). This step is key for a good bake. 2. Grease and flour an 8-inch round cake pan. You can also line it with parchment paper. This helps the cake come out easily. Next, I mix the dry ingredients. 1. In a medium bowl, whisk together the flour, baking powder, baking soda, salt, and cinnamon. Set this aside. 2. In a large bowl, cream the softened butter and sugar. Mix for about 2-3 minutes until it’s light and fluffy. Then, it’s time to add the eggs. 1. Add the eggs one at a time. Mix well after each egg. 2. Now, add the vanilla extract and orange zest. Mix until everything is well combined. Now, we combine the wet and dry mixes. 1. Gradually add the dry mix to the wet mix. Alternate with the orange juice. Start and end with the dry mix. This keeps the batter smooth. 2. Gently fold in the chopped cranberries. You want them evenly spread throughout the batter. Next, pour the batter into your prepared cake pan. 1. Smooth the top with a spatula. 2. Bake the cake for 25-30 minutes. To check if it's done, insert a toothpick into the center. If it comes out clean, the cake is ready. Once baked, let the cake cool. 1. Allow it to cool in the pan for about 10 minutes. 2. After that, transfer it to a wire rack to cool completely. While the cake cools, I prepare the glaze. 1. In a bowl, whisk together the powdered sugar and orange juice. Mix until you reach a smooth and drizzling consistency. 2. Once the cake is cool, drizzle the glaze over the top. Let it flow down the sides for a beautiful look. And there you have it! A lovely Cranberry Orange Breakfast Cake that's both tasty and easy. For the full recipe, check the details above. To get the best texture for your Cranberry Orange Breakfast Cake, focus on mixing. Cream the butter and sugar until they are light and fluffy. This step adds air and helps the cake rise. When adding the dry and wet ingredients, mix just until combined. Over-mixing will lead to a dense cake, which is not what we want. If you want a moister cake, try using fresh cranberries instead of frozen ones. They hold more moisture. To boost the flavor of your cake, use fresh orange zest. The zest gives a bright, citrusy kick that blends well with cranberries. Adding a pinch of ground cinnamon also enhances the overall taste. You can even try a splash of almond extract for a nutty undertone. If you want a sweeter glaze, add more powdered sugar. It creates a nice contrast with the tart cranberries. Sometimes, cakes can sink in the middle. To fix this, make sure your oven is at the right temperature. An oven thermometer can help. If your cake is too dry, it may be overbaked. Always check for doneness with a toothpick. If it comes out clean, the cake is ready. For uneven baking, rotate the cake halfway through baking. This helps it cook evenly. If the glaze is too thick, add a bit more orange juice until it flows easily. For the full recipe, check the details above! {{image_2}} You can change the fruit in this cake to suit your taste. If you want to try something new, consider using blueberries or raspberries. These fruits add a nice touch. You can even mix different fruits together for a fruity burst. Just keep the amount of fruit similar to the cranberries in the Full Recipe. Making this cake gluten-free is easy. Just swap regular flour for a gluten-free blend. Look for one that works well in cakes. For a vegan version, replace the eggs with flaxseed meal or applesauce. Use a plant-based butter instead of regular butter. These changes keep the cake tasty while meeting dietary needs. You can boost the flavor of this cake in many ways. Adding spices like nutmeg or ginger gives it a warm touch. A dash of almond extract can also add depth. Try mixing in some chopped nuts for crunch. Each of these options can create a new twist on the original recipe. Experiment with what you like best! After baking your cake, let it cool in the pan for about 10 minutes. This helps the cake set. Then, transfer it to a wire rack. Let it cool completely. Cooling prevents sogginess. It also helps keep the cake from breaking. Once your cake is cool, wrap it well. Use plastic wrap or foil. This helps keep the cake fresh. Store it at room temperature for up to three days. If you want to keep it longer, freeze it. Wrap it tightly in plastic wrap and then in foil. It can stay in the freezer for up to three months. To reheat your cake, preheat the oven to 350°F (175°C). Remove the plastic wrap and foil. Place the cake in the oven for about 10-15 minutes. This warms it up without drying out. You can also microwave a slice for about 20-30 seconds. If the cake seems dry, add a little glaze or orange juice. This adds moisture and flavor. For the best taste, enjoy it fresh from the oven. For the full recipe, check out the recipe section. To prevent your cake from sinking, make sure to measure ingredients accurately. Use leveled cups for flour and sugar. Mix the batter just until combined; avoid overmixing. Ensure your oven is at the right temperature before baking. Finally, check that your baking powder and soda are fresh. These steps help your cake rise evenly and stay fluffy. Yes, you can use frozen cranberries in this recipe. Frozen cranberries work well and save time. Just chop them slightly before adding to the batter. You don’t need to thaw them, but be aware that the cake may take a few extra minutes to bake. Using frozen berries keeps the cake moist and delicious. Cranberry Orange Breakfast Cake pairs well with many delightful options. Here are some ideas: - A dollop of whipped cream - A scoop of vanilla ice cream - Fresh orange slices - A cup of hot coffee or tea These pairings enhance the flavors and make for a lovely breakfast or snack. Enjoy your cake with these treats for an extra special touch! For the full recipe, visit the [Full Recipe] section. This blog post covered key ingredients, step-by-step instructions, and useful tips. You learned how to choose the right baking tools and enhance flavors. We also explored variations for different diets and fruit options. Proper cooling and storage methods keep your cake fresh longer. Remember, baking is a fun journey. Don’t hesitate to experiment and make it your own. Enjoy every slice of your Cranberry Orange Breakfast Cake, and share it with friends and family for smiles all around. Happy baking!

Are you ready to delight your taste buds with a Cranberry Orange Breakfast Cake? This tasty and easy recipe will brighten your mornings with its sweet and tangy flavors. In …

Read more

Categories Dinner

Cinnamon Brown Sugar Pancakes Fluffy and Easy Recipe

July 27, 2025 by Chef Theo
Cinnamon brown sugar pancakes are a delightful treat. They are fluffy and easy to make. You will love the warm spices and sweet flavor. This recipe uses simple ingredients that you may already have. - Flour Use 1 cup of all-purpose flour. This gives the pancakes structure. - Brown Sugar Add 2 tablespoons of brown sugar. This adds sweetness and a hint of caramel flavor. - Baking Powder and Baking Soda Use 1 teaspoon of baking powder and 1/2 teaspoon of baking soda. These help the pancakes rise and become fluffy. - Ground Cinnamon Add 1/2 teaspoon of ground cinnamon. This gives the pancakes their warm and cozy taste. - Salt A small pinch of salt (1/4 teaspoon) enhances all the flavors. - Buttermilk (or substitute) Use 1 cup of buttermilk for a rich taste. If you don’t have buttermilk, mix regular milk with a splash of vinegar. - Large Egg One large egg adds moisture and helps bind the batter. - Melted Butter Use 2 tablespoons of melted butter for flavor. You will need more butter for cooking too. - Vanilla Extract Add 1 teaspoon of vanilla extract. This adds depth to the flavor. - Optional Add-ins You can mix in chopped nuts or chocolate chips for fun flavor twists. Start by gathering your dry ingredients. You need: - 1 cup all-purpose flour - 2 tablespoons brown sugar - 1 teaspoon baking powder - 1/2 teaspoon baking soda - 1/2 teaspoon ground cinnamon - 1/4 teaspoon salt In a large bowl, whisk together these ingredients. Make sure they mix well. This step is key for even flavor in your pancakes. Now, let’s prepare the wet ingredients. In another bowl, combine: - 1 cup buttermilk (or milk with a splash of vinegar) - 1 large egg - 2 tablespoons melted butter - 1 teaspoon vanilla extract Whisk these together until fully mixed. This helps create a smooth batter once we combine everything. Next, pour the wet mixture into the dry ingredients. Use a spatula to mix gently. It’s okay if the batter has a few lumps. Overmixing can make the pancakes tough. If you want, you can fold in some chopped nuts or chocolate chips for extra flavor. Heat a non-stick skillet or griddle over medium heat. Add a little butter to grease the surface. For each pancake, pour 1/4 cup of batter onto the skillet. Cook until bubbles form on top and the edges look set, about 2-3 minutes. Then, flip the pancakes. Cook for another 1-2 minutes until they turn golden brown. Stack your pancakes on a plate. Drizzle with maple syrup and sprinkle with powdered sugar and a bit more cinnamon. For a pop of color, add fresh fruit like sliced bananas or berries. Enjoy your fluffy cinnamon brown sugar pancakes! For the full recipe, refer back to the earlier section. To make your pancakes fluffy, use fresh baking powder. This helps them rise well. Mix dry and wet ingredients gently. Overmixing makes the pancakes dense. Let the batter rest for a few minutes. This gives time for the baking powder to activate. You can also separate the egg and whip the white. Fold it in at the end for an extra lift. Avoid using too much flour. Measuring it correctly is key. Scooping directly from the bag packs it down. You want a light, airy batter. Don't skip the buttermilk or its substitute. It adds flavor and helps with texture. Lastly, don't flip the pancakes too soon. Wait for bubbles to form on the surface. This ensures even cooking. A non-stick skillet works best for cooking pancakes. It prevents sticking and ensures even heat. A flat spatula helps flip them easily. A ladle or measuring cup makes pouring the batter simple. If you have a griddle, that’s great too! It can cook multiple pancakes at once. For the perfect pancake, keep your heat at medium. This avoids burning while allowing them to cook through. For the full recipe, check out the Cinnamon Brown Sugar Pancakes section! {{image_2}} You can change the taste of your pancakes with seasonal ingredients. Try adding pumpkin puree in the fall. It gives a warm, cozy feel. In summer, fresh berries like blueberries or strawberries add a fruity twist. These fruits can also make your pancakes more colorful and fun. You can mix in grated apples in winter for a sweet crunch. These added ingredients can bring new life to your pancakes. You can easily make these pancakes vegan. Swap the egg with a mashed banana or flaxseed meal mixed with water. For milk, use almond, soy, or oat milk. To make them gluten-free, use a good gluten-free flour blend. This way, everyone can enjoy delicious pancakes. Just ensure the baking powder is gluten-free as well. Adding chocolate chips or nuts makes pancakes even yummier. Chocolate chips give a sweet burst in every bite. You can use dark, milk, or even white chocolate, depending on your taste. Chopped walnuts or pecans add a nice crunch and nutty flavor. Mix these add-ins into the batter before cooking. This is your chance to get creative. You can try different combos to find your favorite flavor. For the full recipe, check out the details above. To store leftover pancakes, let them cool first. Stack the pancakes with a piece of wax paper between each one. This keeps them from sticking together. Place the stack in an airtight container. You can also use plastic wrap. Store them in the fridge for up to three days. To reheat pancakes, use a microwave or a skillet. For the microwave, place a pancake on a plate. Heat it for about 20-30 seconds. Check if it's warm enough; if not, heat a bit longer. For a skillet, add a little butter over low heat. Warm the pancake for about one minute on each side. This makes them nice and soft again. To freeze pancakes, make sure they are fully cool. Stack them with wax paper in between, just like for the fridge. Place the stack in a freezer-safe bag or container. Seal tightly to prevent freezer burn. You can freeze them for up to three months. When you’re ready to eat, just reheat them as usual. This way, you can enjoy your cinnamon brown sugar pancakes any time! For the full recipe, check out the earlier section. To make pancakes fluffier, use fresh baking powder. Always sift dry ingredients. This helps mix air into the batter. Also, don’t overmix your batter. A few lumps are fine. Let the batter rest for a few minutes before cooking. This lets the baking powder work better. Yes, you can substitute buttermilk. Mix regular milk with a splash of vinegar or lemon juice. Let it sit for five minutes before using. This mimics buttermilk's tangy flavor. You can also use yogurt mixed with water for a similar result. Pancakes will last about three to four days in the fridge. Store them in an airtight container. Place parchment paper between layers to prevent sticking. If you want them to last longer, consider freezing them instead. Many toppings suit cinnamon brown sugar pancakes. Try maple syrup for sweetness. Fresh fruits like bananas or berries add color and flavor. You can also sprinkle nuts for crunch. Whipped cream or yogurt makes a lovely addition too. To prevent pancakes from sticking, use a non-stick skillet. Heat it well before pouring batter. Always add a little butter or oil. Wipe the pan with a paper towel to spread it evenly. This ensures a nice, golden brown pancake without sticking. This blog post covered everything you need for making perfect pancakes. We discussed the key ingredients, like flour and brown sugar, and shared a step-by-step guide to cooking. You learned tips for fluffy pancakes and ways to customize your recipe with seasonal ingredients. In the end, pancakes are fun and easy to make. Don't hesitate to experiment with flavors or serve them your way. Enjoy your cooking journey!

Get ready for a pancake treat! My Cinnamon Brown Sugar Pancakes are fluffy and easy to make. With simple ingredients like brown sugar and cinnamon, you’ll love how quickly they …

Read more

Categories Breakfast

Savory Swedish Apple Cake Easy and Flavorful Recipe

July 26, 2025 by Chef Theo
To make this tasty Swedish apple cake, you need the following ingredients: - 3 large apples, peeled, cored, and sliced - 1 cup all-purpose flour - 1 cup granulated sugar - 1/2 cup unsalted butter, melted - 2 large eggs - 1 teaspoon baking powder - 1 teaspoon vanilla extract - 1/2 teaspoon ground cinnamon - 1/4 teaspoon salt - Powdered sugar, for dusting (optional) - Whipped cream, for serving (optional) When picking apples, look for firm ones without bruises. Good choices include Granny Smith, Honeycrisp, or Fuji apples. These types add a nice tartness and sweetness to the cake. Fresh apples make your cake moist and flavorful. Always choose apples that smell sweet and have a shiny skin. If you have dietary needs, you can make some easy swaps. For a gluten-free version, use a gluten-free flour blend. Replace the eggs with flaxseed meal mixed with water for a vegan option. If you want less sugar, try using coconut sugar or a sugar substitute. These tweaks help everyone enjoy this delicious cake without worry. First, preheat your oven to 350°F (175°C). This step is key for even baking. While the oven heats, grease a 9-inch round cake pan. Then, line the bottom with parchment paper. This helps the cake come out easily after baking. Next, grab a large mixing bowl. In this bowl, add the melted butter and granulated sugar. Use a whisk to mix them together well. This should create a smooth blend. Now, crack in the eggs one at a time. Mix well after adding each egg. Finally, stir in the vanilla extract to add flavor. In another bowl, mix the dry ingredients. Combine the flour, baking powder, ground cinnamon, and salt. Whisk these together gently. Now, add the dry mix to the wet mixture. Stir until just combined. Be careful not to overmix, as this can make the cake tough. Next, fold in the sliced apples gently. Make sure they are evenly spread throughout the batter. Pour the batter into your prepared cake pan. Smooth the top with a spatula for an even surface. Place the pan in your preheated oven. Bake for 35-40 minutes. To check if it's done, insert a toothpick into the center. If it comes out clean, the cake is ready. Once baked, let it cool in the pan for 10 minutes. Then, transfer it to a wire rack to cool completely. Dust the top with powdered sugar before serving. Enjoy your homemade Swedish apple cake! To get a soft and moist cake, use the right apples. I suggest using tart apples like Granny Smith. They hold their shape well and add a nice balance to the sweetness. Make sure you slice your apples thinly. This helps them cook evenly in the cake. Also, avoid overmixing your batter. Mix just until combined for a light texture. One common mistake is using too many apples. Stick to the recipe's amount for the best results. If you add too many, the cake can become soggy. Another mistake is not measuring your ingredients correctly. Use a kitchen scale or measuring cups for accuracy. Lastly, remember to grease your pan well. This keeps the cake from sticking, making it easier to serve. If you want to boost the flavor, try adding lemon zest to the batter. This brightens the taste and adds freshness. You can also mix in some nuts like walnuts or pecans for crunch. A sprinkle of nutmeg can add warmth too. If you love spices, consider adding a pinch of ginger for a unique twist. For the full recipe, check out the details above. {{image_2}} You can easily make Swedish apple cake gluten-free. Just swap all-purpose flour with a gluten-free blend. Look for a mix that includes xanthan gum for the best results. This change keeps the cake moist and tasty, just like the original. Adding nuts or dried fruits can enhance the flavor of your cake. Chopped walnuts or pecans bring a lovely crunch. Dried cranberries or raisins add a sweet twist. Simply fold in half a cup of your choice when mixing in the apples. This step gives the cake a fun texture and flavor. You can switch up the flavors for each season. In fall, add nutmeg or ginger for a warm spice. In spring, mix in lemon zest for a fresh taste. You can even use pears instead of apples in summer. Each variation keeps the cake exciting and delicious throughout the year. For more ways to enjoy this delightful dish, check the Full Recipe for additional ideas! To store leftover Swedish apple cake, first let it cool. Once cool, wrap it tightly in plastic wrap. You can also place it in an airtight container. This keeps the cake fresh for up to three days at room temperature. If you want to keep it longer, consider freezing. Freezing the cake is easy. Slice it into pieces and wrap each slice in plastic wrap. Then, place the wrapped slices in a freezer-safe bag. Remove as much air as you can from the bag. This helps prevent freezer burn. The cake can stay good for up to three months in the freezer. To reheat your Swedish apple cake, you can use the oven or microwave. For the oven, preheat it to 350°F (175°C). Place the cake on a baking sheet and cover it with foil. Heat for about 10-15 minutes. If using the microwave, heat one slice for about 15-20 seconds. This will warm it up without drying it out. Enjoy your cake warm or at room temperature! The best apples for Swedish apple cake are tart ones. Granny Smith apples work great. They add a nice balance to the sweet cake. You can also use Honeycrisp or Braeburn apples. These apples hold their shape well when baked. This keeps the cake from getting mushy. Yes, you can use other flours. Almond flour or oat flour are good choices. They add a unique taste and texture to the cake. Just remember, using a different flour can change how the cake rises. You may need to adjust the liquid ingredients. Swedish apple cake lasts about three days at room temperature. If you keep it in the fridge, it can last up to a week. Make sure to cover it well to keep it fresh. For longer storage, you can freeze it. Wrap it tightly in plastic wrap and foil before freezing. Yes, Swedish apple cake is a traditional dish. It's enjoyed in many homes across Sweden. This cake often appears at family gatherings and special events. It combines simple ingredients with a rich flavor, making it a favorite. It showcases the beauty of Swedish baking. You can make this recipe ahead of time. Bake the cake a day before your event. Just let it cool completely and store it. If you want, add the powdered sugar just before serving. This keeps it looking fresh and tasty. You can find the full recipe above for easy reference. We covered the key ingredients for Swedish apple cake, focusing on the best apples and substitutions. You learned the step-by-step process to bake it to perfection and the tips for texture and flavor. We also explored variations like gluten-free options, added nuts, and how to store leftovers. Remember, baking is about joy and creativity. Try new variations and make this cake your own! Enjoy every bite of your delicious creation.

Welcome to my simple and tasty recipe for Swedish Apple Cake! If you love apples, you’re in for a treat. This cake is soft, sweet, and full of flavor. I’ll …

Read more

Categories Desserts

Tomato Pesto Flavorful Blend for Your Dishes

July 26, 2025 by Chef Theo
- Fresh basil leaves - Sun-dried tomatoes - Pine nuts Fresh basil leaves are key. They bring a bright, herbal taste. Look for vibrant green leaves. Sun-dried tomatoes add sweetness and depth. They should be packed in oil for the best flavor. Pine nuts give a nice crunch. Toast them lightly to enhance their nuttiness. - Different types of cheese - Variations of nuts (e.g., walnuts, hazelnuts) - Flavor enhancers (e.g., garlic, lemon juice) You can mix in different cheeses. Parmesan is classic, but try pecorino for a twist. If you want a nutty flavor, use walnuts or hazelnuts instead of pine nuts. Garlic adds a punch, while lemon juice brightens the mix. These optional ingredients can enhance your tomato pesto’s taste. For the full recipe, check out Tomato Basil Pesto Delight. To start, toast the pine nuts. Place them in a dry skillet over medium heat. Stir them frequently until they turn golden brown. This should take about 3 to 5 minutes. Remove them from heat and let them cool. This step adds a nice, nutty flavor to the pesto. Next, prepare your fresh basil and sun-dried tomatoes. Rinse the basil leaves gently under cool water. Pat them dry with a clean towel. For the sun-dried tomatoes, make sure they are packed in oil and drained well. This will help blend smoothly. Now, it’s time to blend! Grab your food processor and add in the fresh basil leaves, sun-dried tomatoes, toasted pine nuts, grated Parmesan cheese, and minced garlic. Pulse these ingredients together until they start to break down. Slowly drizzle in the extra-virgin olive oil while the food processor runs. This helps to create a smooth paste. Blend until you reach your desired consistency. If it seems too thick, add a bit more olive oil. Once blended, it’s time to adjust the seasoning. Add the lemon juice, salt, and pepper to taste. Blend again to mix everything well. Taste your pesto and adjust the flavors if needed. A little more lemon juice or salt can enhance the taste. Finally, transfer your pesto to an airtight container. You can use it right away or store it in the fridge for up to a week. If you want to keep it longer, freeze it in ice cube trays. This way, you can enjoy this delicious tomato pesto whenever you want! For the complete recipe, check the [Full Recipe]. To make a great tomato pesto, start with high-quality ingredients. Fresh basil gives the best flavor. Look for vibrant green leaves without any brown spots. Sun-dried tomatoes should be plump and packed in oil. This adds depth to your pesto. Pine nuts must be toasted lightly for a nutty taste. Avoid burnt nuts; they ruin the flavor. When making pesto, avoid common mistakes. Do not over-blend the mixture; it should remain slightly chunky. This adds texture to your dish. Be careful with salt. Start with a little, then add more if needed. You can always add but can’t take away! For the best taste, let your pesto rest overnight in the fridge. This allows the flavors to blend beautifully. Use an airtight container to keep it fresh. The next day, give it a quick stir before using. Feel free to experiment with ingredient proportions. If you love garlic, add more. If you want a creamier texture, use more cheese. Each small change can lead to a new flavor adventure. Try different nuts or add a hint of spice for a twist. Creating the perfect tomato pesto is all about your taste. Enjoy this flavorful blend in your dishes. For a complete guide, check out the Full Recipe. {{image_2}} Tomato pesto is so fun to make! You can try different versions to mix things up. One popular type is sun-dried tomato pesto. This version gives a richer flavor. You simply swap fresh tomatoes for sun-dried ones. They add a wonderful sweetness. Just blend them with the other ingredients, and you’re all set! If you're looking for nut-free options, you can skip the pine nuts. Instead, use seeds like pumpkin or sunflower. These seeds still add a nice crunch. You can also use more cheese to keep the texture creamy. It’s easy to adapt the recipe to fit your needs. Tomato pesto can jazz up many dishes. One of my favorite uses is in pasta. Just toss it with hot pasta for a quick meal. The heat makes the pesto melt into a sauce. You can add veggies or protein for a complete dish. You can also use tomato pesto as a spread. It works great on sandwiches or wraps. Simply spread some on your bread for extra flavor. It also makes a tasty dip for crackers or veggies. The options are endless! To keep your tomato pesto fresh, store it in the fridge. Use an airtight container. This helps to prevent air from spoiling the flavors. Your pesto can last up to a week in the fridge. If you want to store it longer, freezing is a great option. - Freezing Tips: You can freeze tomato pesto in ice cube trays. Once frozen, pop the cubes into a freezer bag. This way, you can use just what you need later. The pesto will stay good for up to six months in the freezer. How long does homemade pesto last? Homemade pesto can last about a week in the fridge. Always check the smell and color before using. - Signs of Spoilage: If your pesto smells sour or changes color, it’s time to toss it. Mold is another sign that your pesto has gone bad. Always trust your senses when it comes to food safety. Can I use fresh tomatoes instead of sun-dried? Yes, you can use fresh tomatoes. However, fresh tomatoes will change the texture. Sun-dried tomatoes offer a deeper and richer flavor. If you prefer fresh, use a variety that is sweet and ripe. You might need to adjust the other ingredients to balance the moisture. Is tomato pesto healthy? Tomato pesto can be healthy. It includes fresh herbs, healthy fats, and vitamins. The olive oil and nuts provide beneficial fats. Just be mindful of portion sizes, as it can be calorie-dense. How far in advance can I make it? You can make tomato pesto up to a week ahead. Store it in an airtight container. To keep it fresh, drizzle a little olive oil on top before sealing. Can I prepare it without a food processor? Yes, you can make pesto without a food processor. Use a sharp knife to chop the ingredients finely. You can also use a mortar and pestle to blend everything together. It takes longer but gives you a nice texture. Where to find high-quality products? Look for tomato pesto at local grocery stores or specialty shops. Check the aisle with pasta sauces or condiments. Many farmers' markets also sell homemade versions. What to look for when purchasing store-bought pesto? When buying pesto, read the label. Look for fresh ingredients and no preservatives. A good pesto should have olive oil listed first. Check for a bright color, as this shows quality and freshness. Tomato pesto is a simple and tasty treat. We explored key ingredients like fresh basil, sun-dried tomatoes, and pine nuts. I shared steps to prepare, blend, and tweak flavors to get it just right. You learned tips to enhance taste and store your pesto safely. Whether you prefer sun-dried or nut-free versions, the options are endless. Remember, quality ingredients matter. Enjoy making and sharing your own unique tomato pesto creations.

Are you ready to elevate your meals? Tomato pesto is a delightful mix that adds a burst of flavor to any dish. With key ingredients like fresh basil, sun-dried tomatoes, …

Read more

Categories Appetizers

Amazing Homemade Apple Fritters Irresistible Recipe

July 26, 2025 by Chef Theo
To make your apple fritters, you will need: - 2 large apples (preferably Granny Smith or Honeycrisp), peeled, cored, and diced - 2 cups all-purpose flour - 1 tablespoon baking powder - 1 teaspoon cinnamon - 1/2 teaspoon nutmeg - 1/4 teaspoon salt - 1/2 cup granulated sugar - 2 large eggs - 1 cup milk - 1 teaspoon vanilla extract - Vegetable oil (for frying) - For the glaze: - 1 cup powdered sugar - 2 tablespoons milk - 1/2 teaspoon vanilla extract If you don’t have Granny Smith apples, you can use Fuji or Gala apples. They add a nice sweetness. For flour, you can use whole wheat flour for a healthier option. If you want a dairy-free version, swap milk for almond or oat milk. You can use maple syrup instead of granulated sugar for a unique twist. If you don’t have vanilla extract, almond extract works well too. When picking apples, look for ones that are firm and heavy for their size. A great apple has a bright color and should not have bruises. Granny Smith apples give a nice tart flavor that pairs well with sweetness. Honeycrisp apples are juicy and sweet, making them great in fritters. Always choose fresh apples to ensure the best taste in your homemade apple fritters. For the full recipe, refer to the section above. To make amazing apple fritters, start with the dry mix. In a large bowl, whisk together 2 cups of flour, 1 tablespoon of baking powder, 1 teaspoon of cinnamon, 1/2 teaspoon of nutmeg, 1/4 teaspoon of salt, and 1/2 cup of sugar. This mix gives the fritters great flavor. In another bowl, beat 2 large eggs. Add 1 cup of milk and 1 teaspoon of vanilla extract. Mix until smooth. Next, pour the wet mix into the dry mix. Stir gently until they just come together. Overmixing can make them tough. Now, fold in 2 diced apples. Granny Smith or Honeycrisp apples work best. Heat about 2 inches of vegetable oil in a deep skillet over medium heat. Use a thermometer to check the oil temperature; it should be around 350°F (175°C). This temperature is key for crispy fritters. Using a spoon or ice cream scoop, drop about 2 tablespoons of batter into the hot oil. Fry in small batches to avoid crowding. Cook each fritter for 3 to 4 minutes on each side until golden brown. Use a slotted spoon to lift them out and place them on paper towels. This step helps soak up extra oil, keeping them light. Timing is crucial here. Keep an eye on the fritters as they fry. Once they turn golden, remove them quickly to prevent burning. After frying, let them cool slightly. For the glaze, mix 1 cup of powdered sugar, 2 tablespoons of milk, and 1/2 teaspoon of vanilla extract in a small bowl. Adjust the thickness by adding more milk or sugar. Drizzle the glaze over warm fritters or dip the tops in the glaze for a thicker coat. Enjoy your delicious homemade apple fritters! For complete instructions, check the Full Recipe. Frying fritters can be tricky. First, use fresh oil for the best flavor. Heat the oil to 350°F (175°C) before adding the batter. This helps the fritters cook evenly. Don’t overcrowd the pan; fry in small batches. This keeps the oil temperature steady and ensures crispy fritters. To get that light and fluffy texture, don’t overmix your batter. Mix just until combined to keep air in the mixture. Folding in the apples gently lets them mix without breaking down. Also, let the batter rest for a few minutes. This can help the fritters rise better while frying. Serve your apple fritters warm for the best taste. Drizzle them with glaze right before serving. You can also dust them with powdered sugar for a sweet touch. For a fun twist, serve with a side of caramel sauce for dipping. Enjoy them with coffee or tea for a delightful treat! {{image_2}} You can use many apple types to change your fritters' taste. Granny Smith apples give a nice tartness. Honeycrisp adds a sweet crunch. Fuji apples bring a sweet and juicy bite. For a more complex flavor, try a mix of different apples. This will give your fritters depth and a fun twist. While the classic glaze is sweet, you can try other options. A maple glaze can add a warm, rich flavor. You might drizzle caramel for a decadent touch. Want something extra special? Try a lemon glaze for a zesty kick. You can even top your fritters with chopped nuts or shredded coconut for more texture and flavor. Not all fritters need to be sweet. You can make savory versions, too. Try adding cheese and herbs to the batter. This creates a delicious contrast with the apple. You could also mix in cooked bacon for a smoky flavor. Serve these savory fritters with a dip, like ranch or garlic sauce, for a fun twist on a classic dish. For the complete recipe, check out the Full Recipe. To keep your apple fritters fresh, store them in an airtight container. Place parchment paper between layers to avoid sticking. Keep them at room temperature if you will eat them within two days. For longer storage, move them to the fridge where they can last up to a week. When you want to enjoy your fritters again, reheating is key. Avoid microwaving them, as this can make them soggy. Instead, use an oven or an air fryer. Set the oven to 350°F (175°C) and reheat for about 5-10 minutes. This will help restore their crispiness and flavor. You can freeze apple fritters for later. Allow them to cool completely, then wrap each one in plastic wrap. Place the wrapped fritters in a freezer bag, removing as much air as possible. They can stay fresh for up to three months. When ready to eat, thaw them in the fridge overnight and reheat as mentioned. Enjoy your tasty treats whenever you want! What type of apples should I use? I suggest using Granny Smith or Honeycrisp apples. They add great flavor and texture. These apples hold their shape well when cooked, giving you a nice bite. Can I make these fritters ahead of time? Yes, you can prepare the batter ahead. Keep it in the fridge for up to 24 hours. Just remember to fold in the apples right before frying. How long do the fritters last? Homemade apple fritters are best when fresh. They can last for about two days at room temperature. If you want them to last longer, store them in the fridge. My fritters are too oily. What happened? If your fritters absorb too much oil, the oil might not be hot enough. Make sure to heat it to 350°F (175°C) before frying. Why did my fritters fall apart? Fritters can fall apart if the batter is too thin. Ensure you mix until just combined. Avoid overmixing, which can lead to a thin batter. What if my fritters are soggy? Soggy fritters may be due to undercooking. Fry them until they are golden brown and fully cooked through. How many calories are in each fritter? Each fritter has about 180 calories. This can vary based on the size and amount of glaze used. Are these fritters healthy? While they are a treat, fritters are not for everyday eating. They have sugar and oil, so enjoy them in moderation. Can I make a healthier version? You can create a healthier version by using whole wheat flour and reducing sugar. Baking instead of frying can also cut down on calories. For the full recipe, check out the Amazing Homemade Apple Fritters section above. Homemade apple fritters are fun and tasty to make. We covered key ingredients, tips for frying, and storage info. Remember to choose the right apples for the best taste. Experiment with glazes and toppings for variety. Use these tips to create perfect fritters every time. Enjoy your cooking journey and share these treats with others!

Get ready for a delightful treat with my Amazing Homemade Apple Fritters recipe! You’ll learn how to whip up these crispy, sweet bites and impress your friends and family. With …

Read more

Categories Desserts

Homemade Healthy Twix Bars Irresistible Snack Delight

July 26, 2025 by Chef Theo
- 1 cup dates, pitted: Dates are natural sweeteners. They bring a soft texture and rich flavor. - 1 cup almond flour: This flour is gluten-free. It adds a nutty taste and healthy fats. - 1/2 cup unsweetened peanut butter or almond butter: Nut butters give creaminess and protein. Choose unsweetened for low sugar. - 1/4 cup maple syrup: This syrup sweetens without refined sugar. It has a rich taste and is full of nutrients. - 1/2 teaspoon vanilla extract: Vanilla adds warmth and depth to the bars. It enhances all the other flavors. - 1/4 teaspoon sea salt: Salt balances sweetness. It brings out the flavors in your bars. - 1/4 cup cacao powder: Cacao is rich in antioxidants. It gives a deep chocolate flavor. - 1/4 cup coconut oil, melted: Coconut oil adds healthy fats. It helps the chocolate layer set smoothly. - 1/2 cup dark chocolate chips (dairy-free if desired): Chocolate chips create a rich topping. Use dairy-free for a vegan option. - Sea salt flakes for topping: These flakes add a burst of flavor. They enhance the overall taste experience. When sourcing these ingredients, try to pick organic options. This way, you support sustainable farming. Each ingredient plays a key role in the bars' taste and health benefits. Dates offer fiber, almond flour provides protein, and nut butters add healthy fats. These bars are not just tasty; they are also good for you! To make the base layer, start by adding the pitted dates, almond flour, and a pinch of sea salt into your food processor. Blend these ingredients on high until they form a sticky dough. The right texture is key; it should stick together but not be too wet. If it feels dry, add a little water. Once ready, line an 8x8 inch baking dish with parchment paper. Press the date-almond mixture evenly into the bottom of the dish. Make sure it’s tightly packed. Now, chill this in the freezer for about 20 minutes. This step is important for firmness, so don’t skip it! Next, let’s prepare the caramel layer. In a small bowl, mix together the peanut or almond butter, maple syrup, vanilla extract, and a pinch of sea salt. Stir until the mixture is smooth and creamy. A smooth consistency is crucial here, as it helps the caramel spread easily. If you have any leftover caramel, store it in an airtight container in the fridge. You can use it later for drizzling or as a dip! Now, onto the chocolate layer! In a medium bowl, melt the coconut oil. Once it’s melted, add the cacao powder and stir until you have a smooth mix. Then, mix in the dark chocolate chips until they melt and blend well. It’s vital to ensure even distribution of the chocolate over the caramel. This way, every bite is rich and chocolaty! Pour the chocolate mixture over the caramel layer in the dish, spreading it evenly. - Best practices for blending ingredients: Use a food processor for a smooth base. Blend the dates with almond flour until they form a sticky dough. This texture is key for good bars. - Adjusting sweetness according to taste: Each person likes different levels of sweetness. Start with the given amount of maple syrup. Taste and add more if you like it sweeter. - Suggested toppings for added flavors: Try adding nuts, seeds, or coconut flakes on top. You can also use a sprinkle of sea salt for a perfect balance. - Issues with texture and how to fix them: If your bars are too crumbly, add more nut butter or a bit of water. Mix well to help it stick together. - Overheating chocolate and remedies: Melt chocolate slowly to avoid burning. Use a double boiler or microwave in short bursts. If it gets too thick, stir in a bit of coconut oil to thin it out. - Importance of timing when chilling: Chilling times matter. If not chilled long enough, the layers may separate. Follow the times closely for the best results. {{image_2}} If you need a gluten-free version of these bars, you can easily swap out the almond flour. Here are some great alternatives: - Coconut flour: Use less, about 1/3 cup, as it absorbs more liquid. - Oat flour: This is a great option. Just make sure it's certified gluten-free. - Brown rice flour: Adds a nice texture and taste. To avoid cross-contamination, make sure your ingredients are certified gluten-free. Clean surfaces and tools help, too. To make these bars completely plant-based, you can swap out a few ingredients. Here’s how: - Use maple syrup instead of honey. - For the chocolate chips, look for dairy-free dark chocolate. Many brands offer great options. You can also use coconut cream instead of butter in the chocolate layer to keep it vegan. You can get creative with flavors in your homemade healthy Twix bars. Here are some ideas: - Add almond extract for a nutty twist. Just a teaspoon can make a big difference. - Want some crunch? Try mixing in chopped nuts or seeds like sunflower or pumpkin seeds. This adds texture and boosts nutrition. Feel free to experiment with different flavors. Your taste buds will thank you! For the full recipe, check the instructions above. To keep your Homemade Healthy Twix Bars fresh, store them in the fridge. Wrap each bar in parchment paper or plastic wrap. Place them in an airtight container to prevent moisture from getting in. This helps maintain their texture and flavor. If you want to freeze your bars, first cut them into pieces. Wrap each piece tightly in plastic wrap. Then, place them in a freezer-safe bag or container. Make sure to label the bag with the date. This will help you keep track of freshness. When you’re ready to eat a frozen bar, remove it from the freezer. Let it thaw in the fridge for a few hours. You can also let it sit at room temperature for about 30 minutes for quicker thawing. When stored properly in the fridge, these bars last about one week. If frozen, they can keep for up to three months. Just make sure to check the date on your container. Look out for signs of spoilage. If the bars have an off smell, or if you see mold, it’s best to toss them. Also, if they become too hard or dry, that’s a sign they have lost their freshness. Enjoy your delicious homemade treats while they are at their best! Yes, you can switch nut butters! Almond butter works well, too. You can even try cashew butter for a creamier taste. Each nut butter gives a unique flavor and texture. Just ensure you use unsweetened options for a healthy twist. This allows you to find the taste you love while keeping it healthy. To cut down the sweetness, reduce the maple syrup. You can start by using half the amount and taste as you mix. If you want it less sweet, add more almond flour to balance the flavor. You can also use a different sweetener, like stevia, for a low-calorie option. Adjust until you find the right level for your taste. Absolutely! These bars are full of healthy ingredients. Dates give them a sweet, chewy texture, while nut butter adds protein. Kids will love the chocolate layer on top. It's a great way to sneak in nutrients without them noticing. You can serve them chilled or at room temperature, making them perfect for lunchboxes or snacks. In this post, we explored the ingredients, preparation, and variations for delicious bars. We detailed how to create a great base, caramel, and chocolate layers while sharing tips to avoid common mistakes. We also discussed storage tips to keep your bars fresh. Remember, you can adjust ingredients to fit your taste and dietary needs. Enjoy making these bars your way!

Are you craving a sweet treat that won’t derail your health goals? I’ve got the solution! Homemade Healthy Twix Bars are an irresistible snack delight you can make right in …

Read more

Categories Desserts

Candy Corn and White Chocolate Cookies Delightful Treat

July 26, 2025 by Chef Theo
- 1 cup unsalted butter, softened - 1 cup granulated sugar - 1 cup brown sugar, packed - 2 large eggs - 1 teaspoon vanilla extract The main ingredients in these cookies are easy to find. You need unsalted butter to keep the flavor rich. Granulated and brown sugar add sweetness and depth. Eggs help bind everything together, while vanilla gives a warm aroma. - 3 cups all-purpose flour - 1 teaspoon baking soda - 1/2 teaspoon salt - 1/2 teaspoon pumpkin spice (optional) The dry ingredients create the cookie's structure. All-purpose flour serves as the base. Baking soda helps the cookies rise. Salt balances the sweetness. If you want a cozy taste, add pumpkin spice. - 1 cup white chocolate chips - 1 cup candy corn Mix-ins are where the fun begins! White chocolate chips bring a creamy touch. Candy corn adds a pop of color and a sweet crunch. Together, they make these cookies a festive treat. This combination of ingredients ensures a soft cookie with bursts of flavor. You can find the Full Recipe above to get started on this delightful treat! - Preheat your oven to 350°F (175°C). - Line two baking sheets with parchment paper. - In a large mixing bowl, cream together the softened butter, granulated sugar, and brown sugar. Beat until light and fluffy. - Add in the eggs, one at a time. Beat well after each egg. - Mix in the vanilla extract until well combined. - In a separate bowl, whisk together the all-purpose flour, baking soda, salt, and pumpkin spice if you choose to use it. - Gradually mix the dry ingredients with the wet ingredients. Blend just until combined. - Fold in the white chocolate chips and candy corn. Ensure they are evenly mixed. - Using a cookie scoop or tablespoon, drop rounded balls of dough onto the baking sheets. Space them about 2 inches apart. - Bake in the preheated oven for 10-12 minutes. Look for lightly golden edges and soft centers. - Remove from the oven and let the cookies cool on the sheets for 5 minutes. Transfer to a wire rack to cool completely. For the full recipe, check the sections above. Enjoy making these delightful treats! To bake the best cookies, remember these key points: - Ideal baking time and temperature: Preheat your oven to 350°F (175°C). Bake the cookies for 10 to 12 minutes. - How to tell when cookies are done: Look for golden edges. The centers should still be soft. They will firm up as they cool. Want to boost the taste of your cookies? Consider these ideas: - Suggested spices and extracts to use: A pinch of cinnamon or nutmeg adds warmth. Vanilla extract enhances the sweetness. - Tips for using different types of chocolate: You can swap white chocolate for dark or milk chocolate. Each type brings a unique taste. Make your cookies shine with these fun serving tips: - Creative ways to serve and display cookies: Use a colorful platter. Stack cookies with a few candy corns on top for flair. - Suggest seasonal decorations for serving: Line your platter with autumn leaves. Add mini pumpkins or candy corn around the cookies for a festive touch. These easy tricks will make your Candy Corn and White Chocolate Cookies a hit! For the full recipe, check the section above. {{image_2}} If you want to swap out some ingredients, you have great options. For butter, you can use coconut oil or margarine. Both give a nice texture to the cookies. If you need sugar options, try using coconut sugar or honey. These will add a unique flavor and sweetness. Instead of candy corn, you can use M&Ms or chocolate-covered pretzels. They can give your cookies a fun look and taste. You can also try using seasonal candies like pumpkin spice candies for a twist. For those who need gluten-free options, swap the all-purpose flour with a gluten-free flour blend. Make sure it has xanthan gum for the best results. This will keep your cookies chewy and soft. If you want a vegan version, use flax eggs instead of regular eggs. Just mix one tablespoon of ground flaxseed with three tablespoons of water. Let it sit for a few minutes to thicken. You can also choose vegan butter and dairy-free chocolate chips. This way, everyone can enjoy these tasty treats! Want to change up the flavors? Adding nuts is a great idea! Chopped pecans or walnuts can add a nice crunch. Dried fruits, like cranberries or cherries, can also give a sweet and tangy kick. For chocolate lovers, try dark chocolate chips or even mint chocolate chips. You can mix different candies too, like Reese’s Pieces or Snickers bits. Each combination can create a new and delightful cookie experience. Explore your creativity with flavors! To keep your Candy Corn and White Chocolate Cookies fresh, choose the right container. A simple, airtight container works best. Glass or plastic containers are great choices. You can also use a resealable bag. Store cookies at room temperature for up to a week. If you want to keep them longer, consider freezing. Freezing cookie dough is easy. First, scoop the dough into balls. Place them on a baking sheet lined with parchment paper. Freeze the dough for about an hour until firm. After that, transfer the balls to a freezer-safe bag. They can last up to three months in the freezer. When you're ready to bake, thaw the dough in the fridge overnight. You can bake them straight from frozen, but add a minute or two to the baking time. If your cookies go stale, don’t worry. You can restore freshness quickly. Place stale cookies in a container with a slice of bread. The moisture from the bread helps soften the cookies. You can also warm them in the oven at a low temperature for a few minutes. This keeps cookies soft and chewy. Enjoy your treats as if they were just baked! Can I make the dough ahead of time? Yes, you can make the dough ahead of time. After mixing, wrap it in plastic wrap. Keep it in the fridge for up to 3 days. You can also freeze it for 2 months. Just thaw it in the fridge before baking. What can I do if I run out of white chocolate? If you run out of white chocolate, use milk or dark chocolate instead. You can also try butterscotch chips for a different flavor. Just keep the amount the same to maintain the balance. How can I prevent cookies from spreading? To stop cookies from spreading, chill the dough for at least 30 minutes. Cold dough holds its shape better. Also, make sure your baking sheets are cool before adding more dough. What to do if my cookies are too dry? If your cookies are too dry, check your measurements. Use a kitchen scale for accuracy. You can add a tablespoon of milk to the dough. This helps to soften the cookies and keep them chewy. Can I use different types of candy? Yes, you can use different types of candy. Try M&M's, Reese's Pieces, or even chopped nuts. This adds fun flavors and colors to your cookies. Is pumpkin spice necessary for this recipe? Pumpkin spice is optional. It adds a warm, autumn flavor but isn’t a must. If you prefer a classic cookie taste, feel free to skip it. You learned how to make candy corn and white chocolate cookies. We covered the key ingredients, step-by-step instructions, and tips for success. You can also try fun variations and storage methods to keep your cookies fresh. Baking can be a fun way to share joy with others. Remember, the perfect cookie is just a recipe away. Now it's time for you to bake and enjoy these treats!

Get ready to indulge in a sweet fall treat! In this post, I’ll show you how to make Candy Corn and White Chocolate Cookies. These cookies mix sweet, creamy white …

Read more

Categories Desserts

Creamy Italian Polenta with Parmesan Delight Recipe

July 26, 2025 by Chef Theo
- Polenta and dairy ingredients - 1 cup coarse cornmeal (polenta) - 4 cups vegetable broth - 1 cup milk - 1 cup grated Parmesan cheese - 4 tablespoons unsalted butter - Flavoring and seasoning components - 1 teaspoon garlic powder - 1 teaspoon onion powder - Salt and pepper to taste - Garnishing items - Fresh parsley for garnish Each ingredient plays a key role in making creamy Italian polenta. The coarse cornmeal is the base, giving polenta its unique texture. Vegetable broth adds depth, while milk makes the dish rich. Parmesan cheese brings a salty kick that enhances the flavor. Butter adds silkiness, making it even more delightful. Garlic powder and onion powder give a hint of savories that blend well. Finally, fresh parsley brightens the dish, making it look inviting. You can find the full recipe in the earlier sections. Enjoy crafting this delicious dish! 1. Bringing vegetable broth to a boil Start by pouring 4 cups of vegetable broth into a large pot. Set the pot over medium heat. Wait for the broth to boil. This step is important as it helps the polenta cook evenly. 2. Whisking in cornmeal Once the broth is boiling, take 1 cup of coarse cornmeal. Slowly whisk the cornmeal into the boiling broth. Keep stirring to avoid lumps. This helps the polenta absorb the broth well. 3. Cooking and stirring for creaminess Lower the heat to a simmer. Cook the polenta for about 30-40 minutes. Stir it often to keep it smooth and creamy. The polenta will thicken during this time, creating a rich texture. 1. Adding milk and butter After cooking, add 1 cup of milk and 4 tablespoons of unsalted butter to the polenta. Stir well until the butter melts and blends in. This adds a rich creaminess to the dish. 2. Incorporating seasonings and cheese Next, mix in 1 teaspoon of garlic powder, 1 teaspoon of onion powder, and half of the 1 cup of grated Parmesan cheese. Stir until everything is well combined. The cheese will melt, adding a nice flavor. 3. Final touches before serving Season the polenta with salt and pepper to taste. Transfer it to a serving dish. Top with the remaining Parmesan cheese. Garnish with fresh parsley for a pop of color. This simple step makes your dish look inviting. For the full recipe, check out the details above. Enjoy your creamy Italian polenta with Parmesan! Avoiding lumps in polenta To stop lumps in your polenta, always whisk in the cornmeal slowly. This helps it blend well. Start with boiling vegetable broth. When it boils, lower the heat. Keep whisking as you add the cornmeal. This constant stirring is key to smooth polenta. Achieving the right creaminess For creamy polenta, stir it often as it cooks. After about 30-40 minutes, it should be thick and soft. Adding milk and butter makes it richer. The cheese also adds creaminess. Adjust the heat as needed to keep it from sticking. Adding spices or herbs You can jazz up your polenta with spices or herbs. Garlic powder and onion powder add depth. Fresh herbs like parsley brighten the dish. You might also try thyme or rosemary for extra flavor. Just sprinkle them in while cooking. Using different cheeses While Parmesan is classic, you can experiment with other cheeses too. Try adding feta for a tangy twist. Cheddar gives a sharp taste, while a creamy goat cheese adds smoothness. Mix and match based on your taste! For the full recipe, check out the Creamy Italian Polenta with Parmesan. {{image_2}} Polenta can be creamy or baked. Creamy polenta is soft and smooth. You make it with water or broth, stirring until it thickens. Baked polenta is firmer and can be cut into shapes. You cook it, chill it, and then bake it until golden. Both styles are tasty! For dairy, you can swap out milk or cheese. Use almond milk or oat milk for a lighter dish. You can also try goat cheese for a tangy twist. These options keep the dish light while adding unique flavors. Creamy Italian polenta pairs well with many main dishes. It goes great with roasted meats like chicken or pork. A rich mushroom ragu adds depth and warmth. You can also serve it with grilled vegetables for a lighter meal. As for side dishes, polenta fits well with salads or sautéed greens. It can also stand alone as a comforting dish. Top it with herbs or extra cheese for a delightful touch. For the complete recipe, refer to the Full Recipe. To store your creamy Italian polenta with Parmesan, let it cool first. Place it in an airtight container. It keeps well in the fridge for about three days. If you want to store it longer, consider freezing. To freeze, scoop portions into freezer bags or containers. Remove as much air as possible to avoid freezer burn. It can last up to three months in the freezer. To reheat polenta, I recommend using the stovetop. Place the polenta in a pot with a splash of water or milk. Heat over low heat, stirring often. This helps keep the texture creamy. You can also use a microwave for quick reheating. Just add a bit of water and cover. Heat in short bursts until warm. Remember to stir between intervals for even heating. For the full recipe, check out the details on how to make this delightful dish! What is polenta? Polenta is a dish made from ground corn. It cooks into a thick, creamy texture. You can serve it soft or let it cool and slice it. Polenta is a staple in Italian cooking, often enjoyed with sauces or cheese. How long does polenta last? Cooked polenta lasts about three to five days in the fridge. Store it in an airtight container. If you freeze polenta, it can last up to three months. Just thaw and reheat when you are ready to eat. Gluten-free options Polenta is naturally gluten-free since it's made from corn. You can enjoy it safely if you avoid gluten. Always check labels for any added ingredients that may contain gluten. Dairy-free alternatives If you want to make polenta dairy-free, use plant-based milk. Almond, oat, or soy milk work well. Instead of Parmesan, try nutritional yeast for a cheesy flavor without dairy. What to serve with creamy Italian polenta? Creamy polenta pairs well with various dishes. You can serve it with a hearty meat sauce, sautéed mushrooms, or roasted vegetables. It also goes great with grilled chicken or fish. Can polenta be served cold? Yes, polenta can be served cold. After cooking, let it cool and set in a dish. Once firm, slice it and serve with toppings like pesto or fresh veggies. It makes a great side dish or snack. Polenta is a versatile dish that can delight any meal. We covered key ingredients, preparation, and helpful tips for the best texture and flavor. You learned different polenta styles and how to store leftovers. Polenta can be creamy or baked, and it fits well with many dishes. Remember, you can adjust it to meet dietary needs too. Use this guide to make your polenta experience enjoyable and satisfying. Cooking this dish is easy and fun, so dive in and enjoy!

If you’re looking for a warm, comforting dish, creamy Italian polenta is the answer. This rich and silky comfort food pairs perfectly with Parmesan cheese and simple seasonings. In this …

Read more

Categories Dinner

Hungry Girl’s Turkey Protein Rollups Easy and Tasty Meal

July 26, 2025 by Chef Theo
- 8 ounces lean turkey breast, thinly sliced - 1 cup raw spinach leaves - 1/2 cup cucumber, thinly sliced - 1/2 cup bell pepper, thinly sliced (any color) - 1/4 cup hummus (choosing your favorite flavor) - 1/4 teaspoon garlic powder - 1/4 teaspoon paprika - Salt and pepper to taste - Fresh herbs (such as dill or parsley) When I make Hungry Girl's Turkey Protein Rollups, I start with the main ingredients. The turkey breast is lean and packed with protein. It helps me feel full and satisfied. Spinach adds a fresh crunch and loads of nutrients. Cucumber and bell peppers bring color and flavor. Next, I use my favorite hummus. It adds creaminess and taste. You can pick any flavor you love. I often choose garlic or red pepper for a boost. For spices, I use garlic powder and paprika. They add warmth and depth. I sprinkle salt and pepper for a little kick. If I want to impress, I add fresh herbs like dill or parsley. They make the rollups look pretty and taste great. This mix of ingredients makes the rollups nutritious and fun to eat. You can find the full recipe in the complete article. - Lay out turkey breast slices on a clean surface. - Mix hummus with garlic powder, paprika, salt, and pepper. Start by placing the turkey slices side by side. They should touch or slightly overlap. This creates a solid base for the rollups. Next, grab a small bowl and combine the hummus with garlic powder, paprika, salt, and pepper. Stir until everything is mixed well. This hummus spread adds great flavor to the turkey. - Spread hummus on turkey slices. - Layer spinach and vegetables before rolling. Now, take a turkey slice and spread a thin layer of hummus over it. Leave about half an inch at the edges. On one end of the turkey, place a few spinach leaves. Add a couple of cucumber slices and some bell pepper slices too. This gives the rollups a nice crunch and color. - Roll turkey tightly around fillings. - Secure rollups with toothpicks if needed. - Slice for bite-sized pieces. Carefully roll the turkey slice from the end with the veggies. Make sure to keep the filling inside. If the rollups seem loose, use toothpicks to hold them together. Once rolled, slice each rollup into halves or thirds for bite-sized pieces. This makes them easy to eat and share. For a final touch, you can garnish with fresh herbs from your garden or store. Enjoy these tasty rollups as a quick meal or snack! For the full recipe, you can check the details above. To make great rollups, lay the turkey slices so they overlap. This helps keep the filling inside. A sharp knife is key for clean cuts. A dull knife can mash your turkey and make it hard to roll. You can change the flavor by trying different hummus types. Roasted red pepper or garlic hummus adds nice taste. Feel free to add more veggies based on what you like. Carrots or radishes can give a nice crunch. For a fun look, arrange the rollups on a platter. You can add some fresh herbs as a garnish. Serve with a dipping sauce for extra flavor. A light ranch or yogurt dip pairs well with these tasty rollups. {{image_2}} You can switch turkey with other meats. Chicken works well and is tasty. Ham is another good choice. If you want a vegetarian option, use tempeh or tofu. Both options are high in protein and add great texture. Hummus is a classic choice, but you can get creative! Try guacamole for a creamy twist. Tzatziki adds a fresh flavor that pairs nicely with turkey. If you want something rich, spread cream cheese on the turkey. It makes each bite feel special. Want to jazz up your rollups? Add shredded carrots for crunch. Slices of avocado bring creaminess and healthy fats. You can also include cheese, like a thin slice of cheddar or cream cheese. These extras take your rollups to the next level! To keep your leftover rollups fresh, place them in an airtight container. You want to avoid any air getting in, which can cause them to dry out. I recommend using glass containers or BPA-free plastic ones. They help keep the flavors intact. You can freeze these rollups for later. If you want to freeze them, do this before rolling them up. Wrap each roll tightly in plastic wrap, then place them in a freezer bag. If frozen after assembling, thaw them in the fridge overnight. To reheat, warm them gently in the microwave for about 30 seconds. In the fridge, your rollups will last about three to four days. If you notice any change in smell or color, toss them out. Signs they should not be eaten include a slimy texture or off-putting odor. Enjoy your tasty and healthy meal by checking on their freshness! To make these rollups gluten-free, use gluten-free wraps. Look for rice paper or corn tortillas. You can also skip the wrap and just use the turkey slices as the main part. This way, you keep the flavor while avoiding gluten. Make sure to check labels for any hidden gluten in your hummus or spices. Yes, you can meal prep these rollups! Make them a day ahead to save time. Store them in an airtight container in the fridge. To keep them fresh, place parchment paper between layers. This helps avoid sogginess. When ready to eat, just grab and go! You can use many other vegetables in the rollups. Try adding shredded carrots for crunch. Sliced radishes give a nice bite. Avocado adds creaminess, while zucchini brings a fresh taste. Feel free to mix and match based on what you have at home. This keeps your rollups fun and different each time! These turkey protein rollups are easy to prepare and perfect for a healthy snack. You can personalize them with your choice of veggies and sauces. Remember, mixing different flavors keeps things exciting. Store them well to keep them fresh, and don’t shy away from experimenting with new ingredients. With these tips and variations, you can make a tasty rollup every time. Get creative and enjoy your healthy meals!

Looking for a quick, healthy meal that’s bursting with flavor? Hungry Girl’s Turkey Protein Rollups are your answer. In just a few minutes, you can enjoy these tasty rollups packed …

Read more

Categories Appetizers
Older posts
Newer posts
← Previous Page1 … Page5 Page6 Page7 … Page92 Next →

TOASTED RECIPES

Where ideas are warm, crisp, and ready to serve! 🍞

PAGES

Home About Contact Privacy Policy Terms & Conditions Cookie Policy GDPR Policy Copyright Policy Disclaimer

CATEGORIES

Appetizers Desserts Salads Breakfast Dinner

Contact

  • Pinterest
  • Mail
Copyright © 2025 Toasted Recipes. All rights reserved.