Skip to content
toastedrecipes.com
  • Home
  • Appetizers
  • Desserts
  • Salads
  • Breakfast
  • Dinner
  • Privacy Policy
  • Contact
  • About

Chef Theo

Taco Bell Beefy Melt Burrito Delicious and Easy Recipe

June 8, 2025 by Chef Theo
The Taco Bell Beefy Melt Burrito is a warm, tasty dish that hits the spot. It features ground beef, rice, and cheese all wrapped in a soft tortilla. You get a blend of flavors in every bite. It’s a quick meal you can make at home. This burrito combines savory beef with creamy cheese and zesty salsa. Each bite mixes the ground beef’s richness with the soft rice. The cheese adds a gooey texture, making it even better. The tortilla holds everything together, providing a nice contrast. One Beefy Melt Burrito has about 450 calories. It contains protein from the beef and cheese. The rice adds carbs, while sour cream gives a bit of fat. If you want to make it lighter, consider using less cheese or sour cream. Always check the full recipe for full ingredient details and nutritional info. For the Beefy Melt Burrito, gather these items: - 1 lb ground beef - 1 cup cooked rice - 1 packet taco seasoning - 1 cup shredded cheddar cheese - 1/2 cup sour cream - 1/2 cup salsa - 4 large flour tortillas - 1/2 cup diced onion - 1/4 cup chopped fresh cilantro (optional) - 1 tablespoon olive oil - Salt and pepper to taste If you want to switch things up, try these: - Use ground turkey instead of ground beef for a leaner option. - Swap white rice with brown rice or quinoa for added fiber. - Replace cheddar cheese with pepper jack for a spicy kick. - Greek yogurt can stand in for sour cream for a healthier twist. - Try pico de gallo instead of salsa for fresh flavor. When shopping, look for quality: - Choose ground beef that is bright red with minimal fat. - Select tortillas that are soft and flexible, not brittle. - Look for fresh cilantro with vibrant green leaves, no wilting. - Pick onions that feel firm and have no soft spots. - For cheese, go for blocks rather than pre-shredded for better flavor. These tips help you create the best Beefy Melt Burrito ever. Enjoy the process and the taste! 1. Start by heating one tablespoon of olive oil in a large skillet over medium heat. 2. Add the diced onion and cook for 3-4 minutes until soft. 3. Next, add 1 pound of ground beef. Cook until browned, breaking it up with a spatula for about 6-8 minutes. 4. Stir in one packet of taco seasoning and a splash of water. Cook for 5 minutes until thick. 5. In a bowl, mix 1 cup of cooked rice, 1 cup of shredded cheddar cheese (save 1/4 cup for later), 1/2 cup of sour cream, and 1/2 cup of salsa. 6. Lay out 4 large flour tortillas. Spoon the beef and rice mixture onto the center of each. 7. Roll each tortilla by folding in the sides and rolling from the bottom up. 8. Preheat your oven to 350°F (175°C). Place the rolled burritos seam side down in a baking dish. 9. Sprinkle the reserved cheddar cheese on top. Bake for 15 minutes until the cheese melts and bubbles. 10. Remove from the oven and add chopped cilantro if you like. - Use medium heat to avoid burning the onion. - Make sure to break the beef into small pieces for even cooking. - A splash of water helps the seasoning stick to the beef better. - Mix the rice and cheese well to ensure every bite is cheesy. - Be careful when rolling the tortillas to keep the filling inside. - Bake until the cheese is melted for a gooey texture. - Prep Time: 20 minutes - Cooking Time: 20 minutes - Total Time: 40 minutes - Oven Temperature: 350°F (175°C) This recipe brings the Taco Bell Beefy Melt Burrito to your kitchen with ease. For the full recipe, check the ingredients list above. Enjoy making this tasty dish! {{image_2}} To make a great burrito, start with soft tortillas. Heat them for a few seconds in a pan. This makes them easier to roll. Fill them in the center, not too close to the edges. Keep the filling balanced. If you add too much, it will spill out. When rolling, fold in the sides first. Then roll from the bottom to the top. This helps hold everything together. Flavor comes from seasoning. Use fresh taco seasoning for a bold taste. Mix the beef well with the spices. Don't skip the sour cream and salsa. They add creaminess and spice. For extra zest, try adding lime juice or jalapeños. Fresh cilantro also brightens the taste. Serve your burritos with extra salsa on the side. A dollop of sour cream works great too. You can add a simple salad for crunch. Chips and guacamole are tasty sides as well. For drinks, try a cold soda or lemonade. Enjoy your meal with friends and family! You can easily make a vegetarian version of the Beefy Melt Burrito. Swap the ground beef for black beans or lentils. Use cooked quinoa for extra protein. For a vegan burrito, replace sour cream with avocado or a dairy-free yogurt. Use vegan cheese or skip it altogether. This way, you keep the flavors while making it plant-based. If you love spice, add jalapeños to the beef mixture. You can also mix in diced green chilies or hot salsa. For a kick, sprinkle some red pepper flakes on top. Remember, balance the heat with cool toppings like sour cream. This will give you a nice contrast. Cheese makes everything better! While cheddar is great, you can try Monterey Jack for a creamier taste. Pepper Jack adds heat and flavor, perfect for spicy lovers. Or use a blend of cheeses for a richer taste. Experiment to find your favorite cheese combo for the burrito. You'll create a new twist each time! For the full recipe, check the details above. To reheat your Beefy Melt Burrito, wrap it in foil. Place it in the oven at 350°F for about 15-20 minutes. This method keeps the burrito nice and soft. You can also use a microwave. Heat it for 2-3 minutes on medium power. Check if it’s hot all the way through. Yes, you can freeze the Beefy Melt Burrito. Wrap each burrito tightly in plastic wrap. Then, put them in a freezer bag. They will last up to three months in the freezer. When ready to eat, thaw them in the fridge overnight. Reheat as mentioned above. A burrito is usually larger and wrapped fully. It has fillings like meat, rice, and cheese inside a tortilla. A taco, on the other hand, is open-faced. It has fillings like meat and veggies in a folded tortilla. The shapes and sizes make them different. To make the Beefy Melt Burrito gluten-free, choose gluten-free tortillas. Many stores sell these now. Make sure your taco seasoning is also gluten-free. This way, you keep all the flavors without the gluten! The Taco Bell Beefy Melt Burrito is a tasty choice. We explored its flavors, ingredients, and nutrition. I shared step-by-step cooking instructions to help you recreate it with ease. Remember to choose fresh ingredients for the best taste. Experiment with variations, like vegetarian options or extra spice. Whether you enjoy tacos or burritos, now you know how to make a great one. With these tips, you can impress friends and family. Enjoy creating your own delicious Beefy Melt Burrito!

Craving that delicious Taco Bell Beefy Melt Burrito? You’re in the right place! In this post, I’ll walk you through an easy recipe to make this tasty treat at home. …

Read more

Categories Dinner

Savory Hamburger Potato Casserole Easy Family Meal

June 8, 2025 by Chef Theo
To make a tasty Hamburger Potato Casserole, gather these ingredients: - 1 pound ground beef - 1 medium onion, diced - 3 garlic cloves, minced - 4 medium potatoes, thinly sliced - 1 can (14 oz) diced tomatoes, drained - 1 cup shredded cheddar cheese - 1 cup sour cream - 1 tablespoon Worcestershire sauce - 1 teaspoon paprika - 1 teaspoon dried oregano - Salt and pepper to taste - 2 tablespoons olive oil - Fresh parsley, chopped (for garnish) These ingredients work together to create a hearty and filling meal. Each one adds flavor and texture to the dish. Fresh ingredients can often bring out the best flavors. For example, fresh potatoes give a nice texture. Fresh onions add a sweet, crisp bite. If you use frozen ingredients, be sure to thaw them first. Frozen meat can be handy when you're short on time. Just remember, fresh can make a big difference in taste. You can easily swap out some ingredients to fit your needs. If you want a lighter dish, use ground turkey or chicken instead of beef. For a dairy-free option, try almond or coconut yogurt in place of sour cream. If you're avoiding gluten, check the Worcestershire sauce label. Some brands may contain gluten. These swaps help everyone enjoy this dish. You can find the full recipe [here](#). Start by preheating your oven to 375°F (190°C). This step warms the oven for even cooking. While the oven heats, gather your ingredients. You will need ground beef, onion, garlic, potatoes, diced tomatoes, cheese, sour cream, and spices. Make sure your potatoes are thinly sliced. This helps them cook evenly. In a large skillet, add the olive oil and heat it over medium heat. Next, add the diced onion and minced garlic. Sauté them for about 3-4 minutes. You want them to turn soft and clear. Then, add your ground beef to the skillet. Break it apart with a spatula. Cook until it is browned, about 5-7 minutes. Drain any extra fat from the pan. Now, stir in the drained diced tomatoes, Worcestershire sauce, paprika, oregano, salt, and pepper. Mix well and let it simmer for about 3 minutes. Now it’s time to layer the casserole. Grease a 9x13 inch baking dish for easy serving. Start with half of the sliced potatoes and layer them evenly on the bottom. Next, spread half of the beef mixture over the potatoes. Follow this with half of the shredded cheddar cheese. Repeat this step with the remaining potatoes, beef, and cheese. Finally, spread the sour cream on top. Smooth it out evenly across the casserole. Cover the dish with aluminum foil and bake it in the preheated oven for 30 minutes. After that, remove the foil and bake for another 15 minutes. Your casserole should be bubbly and the potatoes tender. Let it cool for a few minutes before slicing. You can garnish with fresh parsley for a nice touch. For the full recipe, check the previous section. To get the best potatoes, slice them thin. Thin slices cook faster and mix well with the beef. I suggest using a mandoline for even slices. Soak the sliced potatoes in cold water for 30 minutes. This removes extra starch and keeps them from turning mushy. Drain them well and dry with a towel before layering. Cheese adds richness to your casserole. I love using sharp cheddar for its bold taste. You can also try Monterey Jack for a milder flavor. Mixing cheeses can create a unique taste. If you want something extra, sprinkle some mozzarella on top for a gooey finish. One mistake is not browning the beef well. This step adds flavor to your dish. Another pitfall is overcooking the potatoes. They should be tender but not mushy. Lastly, don’t skip the layering step. Proper layers help all the flavors blend better. For the complete details, check the Full Recipe. {{image_2}} You can make a tasty vegetarian version. Replace the ground beef with lentils or mushrooms. Both options add great flavor and texture. Use the same spices to keep it savory. You’ll still layer potatoes, cheese, and sauce for a satisfying dish. This version is still filling and full of taste. If you like heat, add some spice. Mix in jalapeños or crushed red pepper to the beef. You can also use pepper jack cheese for an extra kick. This change brings a whole new level of flavor to the dish. Your family will enjoy the spicy twist while they dig in. Adding veggies boosts nutrition and flavor. Try layering in spinach, bell peppers, or zucchini. Chop them small so they blend well with the potatoes and beef. This will enhance the dish's color and make it even healthier. It’s an easy way to sneak more greens into your meal. For more ideas, check the Full Recipe. Storing leftover casserole is easy. First, let it cool to room temperature. Then, cover it tightly with plastic wrap or aluminum foil. You can also use an airtight container. This way, it stays fresh for up to three days in the fridge. When you want to eat it, just take it out and enjoy! You can freeze Hamburger Potato Casserole for later. First, let it cool fully. Then, cut it into portions. Wrap each piece in plastic wrap, then in aluminum foil. This helps prevent freezer burn. You can freeze it for up to three months. When you're ready to eat, just thaw it overnight in the fridge before reheating. Reheating is simple and quick. If your casserole is in the fridge, just preheat your oven to 350°F (175°C). Place the casserole in an oven-safe dish. Cover it with foil to keep it moist. Bake for about 20-30 minutes until it is hot throughout. If you froze it, let it thaw first. Then, follow the same steps to reheat. Enjoy your delicious meal! Yes, you can make Hamburger Potato Casserole ahead of time. It’s great for busy days. Just prepare the casserole, cover it, and store it in the fridge. You can keep it there for up to a day. When you're ready to eat, bake it as directed. If it's cold from the fridge, it may need a few extra minutes in the oven. You can serve many sides with Hamburger Potato Casserole. Here are some tasty options: - A fresh green salad - Steamed broccoli or green beans - Garlic bread or rolls - Pickles for a tangy crunch These sides add balance and make your meal more fun. Hamburger Potato Casserole can be gluten-free with small changes. The main ingredients like beef, potatoes, and vegetables are gluten-free. However, check the Worcestershire sauce label. Some brands add gluten. You can find gluten-free Worcestershire sauce or make your own. This way, you can enjoy a safe dish without gluten. For the full recipe, you can refer back to the ingredients and steps above. Hamburger Potato Casserole is easy to make and full of flavor. You learned about key ingredients, cooking steps, and helpful tips. We discussed tasty variations like vegetarian and spicy options. Plus, we covered how to store and reheat your casserole. Remember, making this dish can fit many dietary needs. With the right ingredients and a bit of care, you can enjoy this comforting meal anytime. Try it out and bring new flavors to your table today!

If you’re looking for a hearty, easy family meal, this Savory Hamburger Potato Casserole is your answer! Packed with flavor and simple to make, it’s a dish that kids and …

Read more

Categories Dinner

Ground Beef and Potato Taco Bowl Flavorful Comfort Meal

June 8, 2025 by Chef Theo
To create a hearty and tasty Ground Beef and Potato Taco Bowl, gather these key ingredients: - 1 lb ground beef - 2 medium potatoes, diced into small cubes - 1 tablespoon olive oil - 1 small onion, finely chopped - 2 cloves garlic, minced - 1 bell pepper (any color), diced - 1 packet taco seasoning (or homemade: 1 tsp chili powder, 1 tsp cumin, 1 tsp paprika, 1/2 tsp onion powder, 1/2 tsp garlic powder, salt to taste) - 1 cup corn kernels (fresh or frozen) - 1 can (15 oz) black beans, drained and rinsed - 1 cup diced tomatoes (fresh or canned) - 1 cup shredded cheese (cheddar or a Mexican blend) - Fresh cilantro for garnish - Sour cream or Greek yogurt for topping (optional) Each ingredient plays a role in building the flavor. The ground beef brings richness, while the potatoes add a nice texture. The taco seasoning is key for that classic taste. You can swap out the ground beef for turkey or chicken if you prefer. For a veggie twist, use lentils or mushrooms instead of meat. If you want to skip potatoes, try quinoa or rice for a different base. Toppings can vary too. Add avocado, jalapeños, or salsa for extra zest. This dish is flexible, so feel free to mix and match based on what you like or have on hand. For the full recipe, check out the detailed steps to make this delicious meal. To make the Ground Beef and Potato Taco Bowl, follow these simple steps. 1. Heat the Olive Oil: Start by heating 1 tablespoon of olive oil in a large skillet over medium heat. This sets the stage for cooking. 2. Sauté the Potatoes: Add 2 medium potatoes, diced into small cubes. Cook them for about 8-10 minutes. You want them to soften and turn golden brown. Stir them often. 3. Add the Veggies: Once the potatoes are ready, add 1 small onion (finely chopped), 2 cloves of minced garlic, and 1 diced bell pepper. Cook for another 5 minutes until the vegetables are tender. 4. Cook the Beef: Push the veggies to one side of the skillet. Add 1 pound of ground beef to the center. Break it apart with a spatula. Cook the beef until it is browned, which takes about 5-7 minutes. 5. Drain and Season: After the beef is fully cooked, drain any excess fat. Stir in 1 packet of taco seasoning, 1 cup of corn kernels (fresh or frozen), and 1 can of black beans (drained and rinsed). Mix everything well and let it cook for 5 more minutes. 6. Add Tomatoes: Stir in 1 cup of diced tomatoes. Heat everything through for another 3-4 minutes. This step adds freshness to the dish. 7. Melt the Cheese: Remove the skillet from heat. Sprinkle 1 cup of shredded cheese over the mixture. Cover the skillet with a lid for a couple of minutes. This melts the cheese perfectly. 8. Serve: Serve the taco bowl warm. Garnish with fresh cilantro and a dollop of sour cream or Greek yogurt if you want. - Keep an eye on the potatoes. You want them golden, not burnt. - Check the beef for doneness. It should be brown with no pink spots. - Use a spatula to mix well. It helps blend all the flavors together. This method ensures a flavorful meal that warms your soul. You can find all the details in the Full Recipe. Enjoy! To get the best flavor from your Ground Beef and Potato Taco Bowl, follow these tips: - Sautéing Potatoes: Start with a hot skillet. Heat olive oil before adding the diced potatoes. Cook until golden brown, which takes about 8-10 minutes. This step ensures they become crispy outside but soft inside. - Browning Beef: When adding ground beef, let it sit for a minute before stirring. This helps it brown better. Use a spatula to break it up as it cooks. Once it turns brown, drain any excess fat to keep it from being greasy. - Enhancing Flavors: Use taco seasoning for a quick flavor boost. You can also add extra garlic or chili powder for more heat. Fresh herbs like cilantro can brighten the dish. - Cooking Tools: A large skillet is essential for even cooking. Use a wooden spatula to stir and scrape up brown bits from the pan. This adds depth to your sauce. Now, let's talk about how to serve this delicious taco bowl: - Plating: Layer the beef and potato mix in bowls. Top with shredded cheese while it’s hot. This allows the cheese to melt nicely. Add a sprinkle of fresh cilantro for color. - Pairing Options: Serve with tortilla chips for crunch. A side of guacamole or fresh salsa adds a nice dip. For drinks, try a light beer or a refreshing limeade. - Meal Prep: This dish is perfect for meal prep. You can make it ahead and store it in the fridge. It keeps well for up to three days. To save time, chop the veggies in advance. You can also double the recipe for easy lunches throughout the week. For the complete recipe, check the [Full Recipe]. {{image_2}} You can easily adapt this taco bowl to fit various diets. For gluten-free options, use gluten-free taco seasoning. Always check labels on canned ingredients like beans and corn. If you want a dairy-free meal, skip the cheese and sour cream. Instead, try avocado or a dairy-free yogurt. For those following a keto diet, swap the potatoes for cauliflower rice. This keeps the meal low in carbs while adding a tasty texture. You can also use a sugar-free taco seasoning to stay on track. If you want to make a vegetarian version, replace the ground beef with lentils or black beans. Both add great flavor and protein. You can also use mushrooms for a meat-like texture. Spice up your taco bowl by trying different spice blends. Instead of taco seasoning, use fajita seasoning or chili powder. You can also mix in some smoked paprika for a deeper flavor. Adding extra veggies is a great way to boost nutrition. Try corn, zucchini, or spinach. These will give your bowl more color and flavor. For toppings, experiment with different cheeses. Queso fresco or pepper jack cheese works well. You can also add fresh toppings like jalapeños, salsa, or avocado to enhance the taste. For the full recipe, check the complete list of ingredients and cooking steps. To store your Ground Beef and Potato Taco Bowl, place leftovers in an airtight container. This keeps them fresh and safe. You can store it in the fridge for up to three days. When you want to eat it again, reheat in a skillet over medium heat. This helps keep the potatoes crisp and the beef juicy. Stir occasionally for even heating. You can also use a microwave, but the skillet gives better texture. If you want to keep your taco bowl longer, freezing is a great option. Allow the bowl to cool completely before freezing. Use a freezer-safe container or bag to avoid freezer burn. The dish can stay good for up to three months. When you’re ready to eat it, thaw it in the fridge overnight. Reheat in a skillet or microwave until hot. This ensures the flavors stay rich and tasty. For the full recipe, check the earlier sections. You can use ground turkey or chicken as a leaner option. For a vegetarian dish, try lentils or black beans. Both options provide great flavor. Yes, you can prepare the taco bowl a day ahead. Cook the ingredients and store them in the fridge. Reheat before serving for the best taste. To make taco seasoning, mix these spices: - 1 tsp chili powder - 1 tsp cumin - 1 tsp paprika - 1/2 tsp onion powder - 1/2 tsp garlic powder - Salt to taste This mix gives your bowl a tasty kick. Taco bowls pair well with: - Rice or quinoa - Fresh salsa - Guacamole - Tortilla chips These sides add extra flavor and fun! Absolutely! The Ground Beef and Potato Taco Bowl is perfect for meal prep. It stores well in the fridge and reheats nicely. Enjoy a quick meal all week long! This blog post shared a clear guide to making delicious Ground Beef and Potato Taco Bowls. We discussed the key ingredients, including beef, potatoes, and seasonings, plus optional toppings. I provided step-by-step instructions for cooking and helpful tips for flavor and presentation. You can customize this dish for different diets. Don't forget about storage and reheating tips to enjoy your meal later. With these insights, you can create a tasty bowl that fits your needs. Enjoy making this dish your own!

Looking for a tasty and comforting meal? The Ground Beef and Potato Taco Bowl is your answer! Packed with flavor and easy to make, it’s perfect for busy weeknights or …

Read more

Categories Dinner

Garlic Parmesan Cheeseburger Bombs Tasty and Easy Meal

June 8, 2025 by Chef Theo
To make Garlic Parmesan Cheeseburger Bombs, gather these tasty ingredients: - 1 pound ground beef - 1 cup shredded cheddar cheese - 1/4 cup grated Parmesan cheese - 1 teaspoon garlic powder - 1 teaspoon onion powder - 1/2 teaspoon salt - 1/2 teaspoon black pepper - 1 package (8 oz) refrigerated biscuit dough - 2 tablespoons melted butter - 1 teaspoon fresh parsley, chopped (for garnish) - Extra Parmesan cheese for sprinkling These items come together to create cheesy, flavorful bites. When picking your ingredients, focus on quality. Here are some brands I trust: - For ground beef, I like 80/20 blend for juicy flavor. - Kraft makes great shredded cheddar cheese that melts well. - For Parmesan, Grana Padano offers a rich taste. - Pillsbury’s refrigerated biscuit dough is easy and reliable. Choosing these brands can make a big difference in taste. You can swap ingredients if needed. Here are some ideas: - Use ground turkey or chicken in place of beef for a lighter option. - Try mozzarella or Monterey Jack cheese for a different flavor. - If you need a gluten-free option, look for gluten-free biscuit dough. - You can use garlic cloves instead of garlic powder for fresh flavor. These substitutions let you customize the recipe to your taste. For the full recipe, check the original source. Start by preheating your oven to 375°F (190°C). This helps the bombs cook evenly. Line a baking sheet with parchment paper. This prevents sticking and makes cleanup easy. In a mixing bowl, combine 1 pound of ground beef, 1 cup of shredded cheddar cheese, and 1/4 cup of grated Parmesan cheese. Add 1 teaspoon of garlic powder, 1 teaspoon of onion powder, 1/2 teaspoon of salt, and 1/2 teaspoon of black pepper. Mix everything well. Make sure the beef gets coated in all the flavors. This mixture gives your bombs a tasty filling. Open the package of refrigerated biscuit dough. Separate it into 8 individual biscuits. Roll each biscuit into a flat circle. You can use your hands or a rolling pin for this. Take a spoonful of the beef mixture and place it in the center of each biscuit circle. Carefully fold the edges over the filling. Pinch to seal tightly. This keeps the filling inside during baking. Place the filled biscuit bombs seam-side down on the prepared baking sheet. Brush the tops with 2 tablespoons of melted butter. Sprinkle extra Parmesan cheese on top. This gives them a nice crust. Bake in the preheated oven for 15-18 minutes. Look for a golden brown color. Once done, let them cool slightly. Garnish with fresh parsley before serving. For the full recipe, check the details above. To ensure your Garlic Parmesan Cheeseburger Bombs cook evenly, use a uniform filling. Make sure each biscuit has the same amount of beef mixture. This will help them cook at the same rate. Place them on a lined baking sheet with space between each bomb. This allows hot air to circulate. For a crispy exterior, brush the tops of the bombs with melted butter. This adds flavor and helps with browning. You can also sprinkle extra Parmesan cheese on top before baking. The cheese crisps nicely and adds a great crunch. Bake them at 375°F for 15-18 minutes. Keep an eye on them to avoid burning. Want to kick up the flavor? Try adding diced jalapeños or cooked bacon to the beef mixture. These ingredients add spice and richness. You can also experiment with different cheeses. Monterey Jack or mozzarella can provide a different taste. Fresh herbs like chives or cilantro can brighten the dish too. For the full recipe, check the earlier sections. {{image_2}} You can easily switch the ground beef for other proteins. Ground turkey or chicken works great. Both will give you a lighter flavor. Just make sure to adjust the cooking times, as leaner meats cook faster. You still get that juicy, cheesy goodness. This is a fun way to try new recipes. If you want a meat-free version, use plant-based ground meat. These options taste great and are easy to find. You can also use finely chopped mushrooms or lentils. Both add texture and flavor. Mix in some veggies like bell peppers or onions for extra taste. Just be sure to add enough seasoning to keep it rich. Cheese is key to these bombs. While cheddar and Parmesan are delicious, you can use Monterey Jack for a creamier texture. Mozzarella melts well and adds a gooey center. Feel free to mix cheeses for a unique flavor. Consider adding a bit of blue cheese for a bold twist. Each option makes these bombs special and fun to eat. For the full recipe, check out the section above. After you enjoy your Garlic Parmesan Cheeseburger Bombs, store leftovers in an airtight container. Keep them in the fridge for up to three days. This helps keep them fresh and tasty. If you want to keep them longer, consider freezing. To reheat your cheeseburger bombs, preheat your oven to 350°F (175°C). Place the bombs on a baking sheet. Heat them for about 10-15 minutes or until warm. This keeps the outside crispy while warming the inside. You can also use the microwave, but the texture may not be as nice. If you want to freeze these bombs, let them cool completely first. Place them in a single layer on a baking sheet. Freeze until firm, then transfer to a freezer bag. They can stay in the freezer for up to three months. When ready to eat, bake from frozen at 375°F (190°C) for 20-25 minutes. This keeps the flavor fresh and delicious. Check the [Full Recipe](#) for more details! Yes, you can make these bombs ahead. Prepare them and store them in the fridge. If you want to freeze them, wrap them in plastic. They can stay fresh for about a month. When ready to eat, bake them straight from the freezer or thaw them first. Many sides go great with these bombs. Here are some ideas: - Crispy fries - Fresh garden salad - Steamed vegetables - Onion rings These sides add color and balance to your meal. Look for a golden brown color. The cooking time is usually 15-18 minutes. You can check the inside with a meat thermometer. The beef should reach 160°F (71°C). The cheese should also be melted and bubbly. Absolutely! You can add different sauces for a twist. Try barbecue sauce for sweetness. Hot sauce adds heat, while ranch dressing gives creaminess. You can also serve dipping sauces on the side for fun! Check out the Full Recipe for more ideas. In this post, I shared how to make tasty Garlic Parmesan Cheeseburger Bombs. We covered the right ingredients and the best brands. You learned about simple steps to prepare, bake, and enjoy the bombs. I also provided tips for even cooking and flavor boosts. Plus, you saw options for different proteins and cheeses. Store leftovers easily and warm them up later. Enjoy trying these simple recipes, and don’t hesitate to make them your own!

Craving a fun, tasty meal that’s simple to whip up? Try my Garlic Parmesan Cheeseburger Bombs! These little bites are packed with juicy beef, rich cheese, and a burst of …

Read more

Categories Appetizers

Crispy Sea Salt Chopped Potatoes Tasty and Simple Recipe

June 7, 2025 by Chef Theo
To make crispy sea salt chopped potatoes, you need a few key items: - 4 medium-sized russet potatoes, scrubbed clean - 2 tablespoons olive oil - 1 teaspoon sea salt - 1 teaspoon garlic powder - 1 teaspoon smoked paprika - Freshly ground black pepper, to taste - 2 tablespoons fresh parsley, chopped (for garnish) These ingredients come together to create a tasty dish. The russet potatoes give a nice fluffy center. Olive oil helps achieve that crispy outer layer. Sea salt adds flavor, while garlic powder and smoked paprika provide depth. You can mix in a few extra ingredients for more flavor. Consider using: - 1 teaspoon onion powder - 1 teaspoon dried oregano - A pinch of cayenne pepper for heat - Fresh herbs like rosemary or thyme These ingredients can enhance the taste, making your dish even better. Feel free to experiment with what you like. When picking potatoes, look for firm ones without blemishes. I recommend russet potatoes for this recipe. They have a high starch content, which helps them crisp up well. If you want a different texture, try Yukon Gold potatoes. They offer a creamier inside. Always select potatoes that are similar in size. This ensures even cooking. Start by washing the russet potatoes. Scrub them well to remove dirt. Next, cut each potato into 1-inch cubes. Keep the pieces similar in size. This helps them cook evenly. Grab a large mixing bowl. Add the potato cubes. Pour in 2 tablespoons of olive oil. Then, sprinkle 1 teaspoon of sea salt. Add 1 teaspoon of garlic powder and 1 teaspoon of smoked paprika. Finally, toss in freshly ground black pepper as you like. Mix everything well until the potatoes get a good coat. Preheat your oven to 425°F (220°C). Spread the coated potatoes on a baking sheet. Make sure they are in a single layer. This step is key for crispiness. Bake for 25 to 30 minutes. Remember to turn the potatoes halfway through the cooking time. They should turn golden brown and crispy at the edges. Once done, take them out and let them cool a bit. Sprinkle more sea salt and some fresh parsley on top. Serve and enjoy your crispy sea salt chopped potatoes! For the complete recipe, check out the Full Recipe section. To make your crispy sea salt chopped potatoes perfect, start with dry potatoes. After washing, pat them with a towel. This helps them get crunchy. Cut the potatoes into even pieces. This way, they cook at the same time. Remember to spread them out on the baking sheet. Crowding the pan makes them steam, not crisp. Flip them halfway through cooking for even browning. Use fine sea salt for the best flavor. It sticks better to the potatoes. Sprinkle some on before baking and after cooking. This creates a tasty crust. You can also try flavored sea salts for a twist. Try garlic-infused or smoked sea salt for a unique touch. For this recipe, you need a few simple tools. A good knife is key for chopping. A cutting board is also essential. Use a large mixing bowl for tossing the potatoes. An oven-safe baking sheet lined with parchment paper works great for easy cleanup. Finally, a spatula helps you flip the potatoes. If you want a crispier texture, consider an air fryer. It cooks faster and gives an extra crunch! For the full recipe, refer back to the section above. {{image_2}} You can add garlic and herbs for a tasty twist. Use fresh garlic or garlic powder. Mix in chopped rosemary or thyme for flavor. These herbs pair well with the crispy potatoes. You can also add a squeeze of lemon juice before serving. This adds brightness and balances the saltiness. For a kick, add some heat! Sprinkle cayenne pepper or chili powder into the mix. You can also toss in crushed red pepper flakes. The spice will enhance the potatoes without overpowering them. Adjust the amount based on your heat preference. These spicy potatoes are perfect for those who love bold flavors. Want to make this dish vegan? Simply stick to the original ingredients. The olive oil and spices make these potatoes great on their own. If you want a creamy dip, blend avocado with lemon juice. This dip brings a rich texture and flavor to the potatoes. Enjoy your crispy sea salt chopped potatoes in a whole new way! For the full recipe, check the details above. To keep leftover crispy potatoes, let them cool first. Place them in an airtight container. You can store them in the fridge for up to three days. Make sure they are fully cooled to prevent moisture build-up. This helps keep them crispy longer. To reheat, place the potatoes on a baking sheet. Preheat your oven to 400°F (200°C). Bake for about 10 minutes or until hot. This method helps restore their crunch. You can also use an air fryer for even better results. Set it to 375°F (190°C) and heat for 5-8 minutes. Freezing crispy potatoes is not ideal, but you can do it. First, let them cool completely. Spread them on a baking sheet in a single layer. Freeze for about 1-2 hours until firm. Then, transfer them to a freezer bag. They can last for up to a month. To use, thaw in the fridge and reheat in the oven for the best texture. For step-by-step cooking, check the Full Recipe. Yes, you can use other types of potatoes. While russet potatoes work great, you can try Yukon Gold or red potatoes. These types have a creamy texture that can add a nice twist. Just remember, different potatoes may need slight adjustments in cooking time. Keep an eye on them to ensure they stay crispy. The best oil for roasting potatoes is olive oil. It gives a nice flavor and helps the potatoes crisp up. Other good options include avocado oil or canola oil. These oils can handle high heat well. Just be sure to avoid oils with lower smoke points, like butter or nut oils, as they might burn. To make these potatoes ahead of time, you can prep and cut the potatoes. Store them in cold water to prevent browning. You can also season them and keep them in the fridge for a few hours. Bake them just before serving for the best texture. Reheating can make them lose their crunch, so it’s best to bake them fresh. Crispy sea salt chopped potatoes are simple and fun to make. You learned the best ingredients, tips for choosing potatoes, and how to achieve that perfect crunch. From mixes that add flavor to helpful storage tips, you now know how to enjoy great potatoes anytime. Try variations like garlic and herb or spicy options for a twist. Keep these simple ideas in mind for crispy success every time. Enjoy your cooking adventure!

Are you ready to elevate your potato game? My recipe for Crispy Sea Salt Chopped Potatoes is simple and oh-so-delicious. You’ll learn how to choose the right potatoes and achieve …

Read more

Categories Appetizers

Fried Sliced Mushrooms with Ranch Crispy Delight

June 7, 2025 by Chef Theo
- 16 oz fresh white mushrooms, cleaned and sliced - 1 cup breadcrumbs (preferably panko for extra crunch) - 1/2 cup all-purpose flour - 2 large eggs - 1 teaspoon garlic powder - 1 teaspoon onion powder - 1 teaspoon paprika - Salt and pepper to taste - Oil for frying (vegetable or canola) - 1/2 cup ranch dressing (for dipping) - Fresh parsley, chopped (for garnish) Gather all these items before you start. Fresh mushrooms make a big difference in taste. Panko breadcrumbs give that extra crunch we all love. - Mixing bowls - Skillet for frying - Slotted spoon These tools help you create a smooth cooking process. Mixing bowls let you combine the dry and wet ingredients easily. A skillet is essential for frying your mushrooms to crispy perfection. A slotted spoon helps drain excess oil after frying. You can find the Full Recipe for Fried Sliced Mushrooms with Ranch in the recipe section. Enjoy the process and have fun cooking! First, let’s clean and slice the mushrooms. Take 16 oz of fresh white mushrooms. Rinse them gently under cool water. Use a damp cloth to wipe off any dirt. After cleaning, slice each mushroom into even pieces, about a quarter-inch thick. Next, we need to mix the dry ingredients. In a medium bowl, combine 1 cup of breadcrumbs, 1 teaspoon of garlic powder, 1 teaspoon of onion powder, and 1 teaspoon of paprika. Add salt and pepper to taste. Mix these well. This blend adds flavor to our crispy mushrooms. Now, we’ll coat the mushrooms. Start by placing 1/2 cup of all-purpose flour in a bowl. Add a pinch of salt and pepper, then stir lightly. In another bowl, beat 2 large eggs until they are frothy. Take each mushroom slice. First, dip it into the flour, ensuring it’s fully coated. Shake off any excess flour. Next, dip it into the beaten eggs. Finally, roll the mushroom slice in the breadcrumb mixture. Ensure it is well coated. Repeat this process for all the mushroom slices. It’s time to fry the mushrooms. In a large skillet, heat about 1/2 inch of oil over medium-high heat. Wait until the oil is shimmering. This means it is hot enough to fry. Now, fry the coated mushrooms in batches. Don’t crowd the pan, as this can lower the oil temperature. Cook each side for about 2-3 minutes. You want them to turn golden brown and crispy. Once done, use a slotted spoon to transfer the fried mushrooms to a plate lined with paper towels. This helps drain any excess oil. Serve your crispy mushrooms warm with ranch dressing on the side for dipping, garnished with freshly chopped parsley. Enjoy your crispy delight! For the full recipe, refer to the provided instructions. To get that perfect crunch, choose panko breadcrumbs. They add great texture. Regular breadcrumbs can work, but panko shines. Heat your oil to the right temperature. Aim for about 350°F. Use a thermometer for accuracy. If the oil is too cool, the mushrooms become soggy. Too hot, and they burn quickly. Consider adding spices like cayenne for heat or Italian herbs for flavor. A dash of parmesan can elevate your mushrooms too. To adjust flavors, taste your breadcrumb mix. If it lacks salt, add more. If you want more spice, sprinkle in extra paprika or garlic powder. Garnish your fried mushrooms with fresh parsley. This adds color and a nice touch. Serve them warm with ranch dressing on the side. You can also use other dips like spicy mayo or garlic aioli. Enjoy them as a tasty snack or appetizer. Try this idea with the Full Recipe to impress your guests! {{image_2}} You can switch up the fun by using different coatings. Instead of panko breadcrumbs, try crushed cornflakes. This gives a nice crunch and a unique taste. You can even use crushed nuts like almonds or pecans for a nutty twist. If you're looking for gluten-free options, use gluten-free breadcrumbs or ground oats. Both work great and keep the texture you want. Just make sure to check the labels for gluten. To enhance the flavor of your mushrooms, try using different seasonings. You can add Italian herbs like oregano and basil for a fresh taste. Or, mix in some cayenne pepper for a spicy kick. Adding cheese is another great idea. Grated Parmesan or cheddar can give your mushrooms a rich flavor. You can also sprinkle fresh herbs like cilantro or chives right before serving for a burst of freshness. These crispy delights pair well with various dips. Besides ranch, consider serving them with blue cheese or a spicy aioli. Each dip brings out new flavors in the mushrooms. You can also use the fried mushrooms in a salad. Toss them on top of mixed greens along with cherry tomatoes and avocado. This creates a fun and tasty meal that feels light but satisfying. For more details, check out the Full Recipe. To keep your fried sliced mushrooms fresh, follow these steps: - Refrigeration: Place the cooled mushrooms in an airtight container. This helps keep them from getting soggy. They last about 3 days in the fridge. - Freezing: For longer storage, freeze the mushrooms. First, place them in a single layer on a baking sheet. Freeze until firm, then transfer to a freezer bag. This method helps prevent clumping. You can keep them frozen for up to 2 months. When it's time to enjoy your mushrooms again, reheating is key. - Oven versus Microwave: The oven gives the best results. Preheat it to 350°F (175°C). Place mushrooms on a baking sheet and heat for about 10-15 minutes. This helps restore their crispiness. The microwave is quick but can make them soggy. - Maintaining Crispiness: To keep your fried mushrooms crisp during reheating, consider using a wire rack. Place it on a baking sheet. This allows air to circulate around the mushrooms while they warm up. Enjoy them just like when they were freshly made! Fried mushrooms last about 3 to 4 days in the fridge. Store them in an airtight container. To keep them fresh, allow them to cool before sealing. If they get soggy, they may lose their crunch. Yes, you can use other types of mushrooms! Varieties like cremini, shiitake, or portobello work well. Each type brings its own flavor. Just slice them like the white mushrooms in the recipe. Absolutely, this recipe is easy for beginners. Start by prepping your ingredients. Follow each step closely. Don’t worry if your first batch isn’t perfect. Practice makes you better! You can find the Full Recipe for Fried Sliced Mushrooms with Ranch in the earlier sections of this article. It has all the details you need to create this crispy delight! Frying mushrooms is simple and fun. We covered essential ingredients, tools, and step-by-step instructions. I shared tips for perfecting crispiness and enhancing flavors. You can explore different coatings and serving ideas too. Store your leftovers properly to keep them fresh. If you reheated them, do it right for best results. Remember, even beginners can enjoy this recipe. Check out the full recipe for more details. Dive into making delicious fried mushrooms today!

Are you ready to make a crispy snack that everyone will love? Fried sliced mushrooms with ranch dressing are a tasty treat, perfect for any occasion. With simple ingredients like …

Read more

Categories Appetizers

Vanilla Cupcakes with Berry Decoration Delight

June 7, 2025 by Chef Theo
To make the perfect vanilla cupcakes with berry decoration, gather these ingredients: - 1 ½ cups all-purpose flour - 1 cup granulated sugar - ½ cup unsalted butter, softened - 2 large eggs - 1 cup whole milk - 2 teaspoons baking powder - 1 teaspoon vanilla extract - ½ teaspoon salt - 1 cup mixed berries (strawberries, blueberries, raspberries) - 1 cup whipped cream (store-bought or homemade) - Fresh mint leaves for garnish (optional) Each item plays a key role in your cupcake's taste and texture. The all-purpose flour gives structure, while granulated sugar adds sweetness. Unsalted butter ensures a rich flavor, and eggs help bind everything together. Whole milk keeps the batter moist. Baking powder acts as a leavening agent, making cupcakes light and fluffy. Vanilla extract brings in that warm, familiar flavor. Salt balances the sweetness, and mixed berries offer a fresh burst of flavor on top. Whipped cream adds a creamy layer, and mint leaves can brighten your presentation. These ingredients come together to create a delightful dessert. Follow the full recipe to craft these amazing vanilla cupcakes with berry decoration! Preheat your oven to 350°F (175°C). This step is key for perfect cupcakes. Next, line a cupcake tin with paper liners. This keeps your cupcakes from sticking and makes for easy cleanup. In a large bowl, cream together the softened butter and granulated sugar. Mix until it is light and fluffy. This helps the cupcakes rise well. Next, add the eggs one at a time. Mix well after each addition. Stir in the vanilla extract for a rich flavor. In a separate bowl, whisk together the all-purpose flour, baking powder, and salt. This is important to evenly distribute the baking powder. It ensures uniform rising when baking. Gradually add the dry mixture to the wet mixture, alternating with the milk. Start and end with the flour mixture. Mix just until combined. Then, divide the batter evenly among the cupcake liners, filling each about two-thirds full. Place the filled cupcake tin in the preheated oven. Bake for 18-20 minutes. Check for doneness by inserting a toothpick in the center. If it comes out clean, they are done. Allow the cupcakes to cool in the tin for 5 minutes. Then, transfer them to a wire rack to cool completely. Once the cupcakes are cool, top each one generously with whipped cream. Use a spatula or a piping bag for a nice finish. Decorate with small clusters of mixed berries on top of the whipped cream. For added flair, sprinkle fresh mint leaves around the berries. This adds color and freshness. For the full recipe, check the earlier section. - Creaming Butter and Sugar Properly To get fluffy cupcakes, start with soft butter. Use a mixer to beat the butter and sugar until it looks light and fluffy. This step adds air, which helps the cupcakes rise. Don’t rush it! Take about 3-5 minutes to cream them well. - Measuring Flour Accurately Accurate flour measurement is key. Use a spoon to scoop flour into a measuring cup. Then level it off with a knife. Avoid packing the flour down, as this can lead to dense cupcakes. For best results, consider using a kitchen scale. - How to Arrange Berries Aesthetically For a beautiful look, place berries in clusters. Group different types together on the whipped cream. Make sure colors contrast, like red strawberries and blue blueberries. This adds visual appeal and makes each cupcake pop! - Choosing the Right Berries Use fresh, ripe berries for the best flavor. Strawberries, blueberries, and raspberries work well together. Make sure to wash and dry them gently. If you want extra sweetness, consider lightly sprinkling them with sugar before decorating. - Best Practices for Storage To keep cupcakes fresh, store them in an airtight container. Place a piece of parchment paper between the layers to avoid sticking. Keep them in a cool, dry place. Avoid the fridge, as it can dry them out. - Reheating Suggestions If you need to warm them, use the microwave. Heat for just 10-15 seconds. This will help soften the cupcake without making it dry. If you want them a bit warm, you can also place them in a low oven for a few minutes. For the full recipe, refer to the Full Recipe section above. {{image_2}} Using different berries can change the flavor of your cupcakes. You can use strawberries, blueberries, and raspberries together. Each berry adds its own taste and color. Strawberries give a sweet touch, while blueberries add a nice tartness. Raspberries bring a burst of freshness. Mixing them makes a lovely visual treat. You might also try other berries like blackberries or cranberries. Blackberries are juicy and sweet, while cranberries offer a tangy twist. You can even consider using seasonal berries for a fun twist. Just remember to adjust the amount based on the sweetness of the berry. Frosting can make your cupcakes even better. Cream cheese frosting is a great option. It is tangy and creamy, which pairs well with the vanilla flavor. You can also make it fancy by adding lemon zest or vanilla bean. You can choose ganache or buttercream instead. Ganache is rich and chocolatey. It adds a luxurious touch to your cupcakes. Buttercream is sweet and fluffy. You can flavor it with vanilla, berries, or even chocolate. Each frosting will change how your vanilla cupcakes taste. Cupcakes come in many sizes. You can make mini cupcakes for bite-sized treats. They are perfect for parties or snacks. Just remember to reduce the baking time. Mini cupcakes usually bake faster, about 10-12 minutes. Jumbo cupcakes are another fun option. They are big and impressive. You can fill them with more batter and bake them a little longer, about 25-30 minutes. Jumbo cupcakes can be a showstopper at any event. Explore these variations to create your own special twist on the classic vanilla cupcakes. For more details, check the Full Recipe. To keep your vanilla cupcakes fresh, you can store them in two ways: at room temperature or in the fridge. If you plan to eat them within two days, room temperature works well. Just place them in an airtight container. If you want them to last longer, store them in the fridge. This keeps them moist but may change their texture slightly. Vanilla cupcakes stay fresh for different lengths of time. At room temperature, they last about 2 days. In the fridge, they can last up to a week. For the best taste and texture, enjoy them within this timeline. After a week, they may dry out or lose flavor. If you want to save cupcakes for later, freezing is a great option. Here’s how to do it step-by-step: 1. Cool Completely: Make sure your cupcakes are fully cooled. 2. Wrap Individually: Wrap each cupcake in plastic wrap. This prevents freezer burn. 3. Place in a Container: Put the wrapped cupcakes in a sturdy container. 4. Label and Date: Write the date on the container to track freshness. 5. Freeze: Store them in the freezer for up to three months. When you're ready to eat, thaw them in the fridge overnight. You can then top them with whipped cream and berries. Enjoy your delightful vanilla berry bliss cupcakes! For the full recipe, check above. Vanilla cupcakes last about 3 to 5 days at room temperature. Store them in an airtight container. If you put them in the fridge, they can last about a week. Remember, the fresher they are, the better they taste! Yes, you can substitute some ingredients! For example, you can use coconut oil instead of butter. You can also swap whole milk for almond milk or oat milk. Just keep the ratios the same. If you don’t have whipped cream, try using yogurt or cream cheese. You can also make a simple frosting with butter and powdered sugar. It will still be tasty and add a nice touch. To make fluffier cupcakes, cream the butter and sugar well. This adds air to the batter. Also, don’t overmix after adding flour. Mixing until just combined helps keep them light. Yes, you can use frozen berries! Just let them thaw and drain any extra juice. They still look pretty and taste great on your cupcakes. To transport decorated cupcakes, use a cupcake carrier. It keeps them safe and prevents them from sliding around. If you don’t have one, a large box with paper towels can work too. Just be gentle! For the full recipe, check out Delightful Vanilla Berry Bliss Cupcakes. In this post, we explored how to make delicious vanilla cupcakes. We covered essential ingredients, detailed steps, and clever tips for perfecting texture and décor. Remember, every step counts, from creaming the butter to topping with berries. Don't shy away from trying alternative flavors and size variations. Enjoy experimenting with storage methods and flavors to find your favorite cupcake creation. Your baking journey awaits, and these cupcakes will surely impress!

If you love baking, vanilla cupcakes with berry decoration will steal your heart! These treats are soft, sweet, and bursting with fresh flavors. In this article, I’ll guide you through …

Read more

Categories Desserts

White Cheddar and Spinach Chicken Burgers Delight

June 7, 2025 by Chef Theo
- 1 lb ground chicken - 1 cup fresh spinach, finely chopped - 1 cup shredded white cheddar cheese - 1/2 cup breadcrumbs - 1 clove garlic, minced - 1 tablespoon Dijon mustard - 1 teaspoon onion powder - 1 teaspoon garlic powder - Salt and pepper to taste - Burger buns - Lettuce and tomato - Optional toppings When you make these white cheddar and spinach chicken burgers, you need fresh and tasty ingredients. Ground chicken serves as the base. It is lean and easy to work with. Fresh spinach adds color and nutrition. The white cheddar cheese gives a creamy, rich flavor. Breadcrumbs help hold the patties together. You can use plain or seasoned breadcrumbs. For seasoning, garlic and onion powders add depth. Dijon mustard gives a nice tangy kick. Don’t forget salt and pepper to taste; they enhance all flavors. For serving, choose your favorite burger buns. Soft, toasted buns work best. Fresh lettuce and tomato add crunch and freshness. You can also add other toppings like avocado or pickles for extra flavor. Check out the Full Recipe for more details on preparation. - In a large bowl, combine the ground chicken, chopped spinach, white cheddar cheese, breadcrumbs, Parmesan cheese, minced garlic, Dijon mustard, onion powder, and garlic powder. - Season the mixture with salt and pepper to taste, and mix until all the ingredients are evenly blended. - Divide the mixture into 4 equal portions and shape each portion into a patty. - Preheat a grill or skillet over medium heat. Lightly coat it with olive oil. - Cook the chicken patties for about 5-6 minutes on each side. They should reach an internal temperature of 165°F (75°C) and turn golden brown. - If you are using burger buns, toast them lightly on the grill or skillet in the last couple of minutes of cooking the patties. - Assemble the burgers by placing a chicken patty on the bottom half of each toasted bun. Top with lettuce, tomato, and any additional toppings you like. - Finish with the top half of the bun and serve immediately. You can find the full recipe in the earlier section. Enjoy these tasty burgers! Using a food thermometer helps you check if your chicken burgers are cooked right. The safe internal temperature is 165°F (75°C). Stick it into the center of the patty to get an accurate reading. This step ensures juicy burgers, not dry ones. For a perfect sear, heat your grill or skillet over medium-high heat. Use olive oil to coat the surface lightly. Avoid overcrowding the pan, as this can lower the heat. Cook the patties for 5-6 minutes on each side. A golden-brown crust adds great flavor and texture. If you want a different base, try ground turkey or even lentils for a veggie option. Ground turkey has a similar taste and texture, while lentils give a healthy twist. Both options work well with the flavors in this recipe. For cheese, you can use non-dairy cheese if you need a dairy-free option. Look for shreds that melt well. Nutritional yeast is another great choice. It adds a cheesy flavor without dairy. Pair your chicken burgers with crispy sweet potato fries for a fun side. A fresh salad with greens and a light dressing also works well. You can even serve them with grilled veggies for a nice touch. To enhance flavor, think about toppings like avocado, spicy mayo, or pickled onions. These add texture and zest. You can also try adding a slice of crispy bacon. Each choice gives your burger a unique twist. For the full recipe, check the link provided. {{image_2}} You can change the taste of your burgers by adding herbs and spices. Fresh basil or oregano can brighten the flavor. A pinch of smoked paprika adds depth and warmth. You can also use onion or garlic powder for an extra kick. Experimenting with different cheeses can also elevate your dish. Try adding feta for a tangy twist or pepper jack for a bit of heat. Each cheese gives a unique flavor that can change your burger game. Spinach and cheddar stuffed burgers are a fun way to enjoy this dish. You can create a pocket in the patty and fill it with cheese and spinach. This way, each bite is extra cheesy and flavorful. You can choose between grilled or pan-seared cooking methods. Grilling gives you a smoky flavor and nice grill marks. Pan-searing can create a crispy crust while keeping the inside juicy. Both options work well, so try both and see what you like best. To make your burgers gluten-free, swap regular breadcrumbs for gluten-free ones. You can also use crushed gluten-free crackers for a similar texture. For low-carb variations, skip the breadcrumbs altogether. You can use ground flaxseed or almond flour as a binder instead. This keeps your burgers moist while cutting down on carbs. Enjoy these tasty options with your White Cheddar and Spinach Chicken Burgers! To keep your White Cheddar and Spinach Chicken Burgers fresh, store leftovers in the fridge. Place them in an airtight container. This helps lock in moisture and flavor. The burgers can last in the fridge for up to three days. When reheating, use a skillet over medium heat. Heat each side for about 3-4 minutes. This method keeps the patties juicy and restores their crispy edges. Freezing is a great way to save uncooked patties for later. To freeze, place them on a baking sheet lined with parchment paper. Make sure the patties do not touch each other. Freeze them for about 1-2 hours until solid. Once firm, transfer the patties to a freezer bag. Remove as much air as possible to prevent freezer burn. These uncooked burgers can stay fresh for up to three months in the freezer. Yes, you can. Ground turkey or beef work well. They both add great flavor. Just remember to adjust cooking times. Chicken burgers cook faster than beef. Turkey is similar, but it may need an extra minute. Want heat? Add diced jalapeños to the mix. You can also use hot sauce or chili flakes. A pinch of cayenne pepper adds warmth without changing the flavor much. Experiment to find your perfect heat level! Absolutely! Mix the ingredients and shape the patties. Keep them in the fridge for up to a day. This saves time when you're ready to cook. Just make sure to cover them well to keep them fresh. Use a meat thermometer. The internal temperature should reach 165°F (75°C). If you don’t have one, cut a patty in half. The meat should be white, not pink. This ensures your burgers are safe to eat and juicy! In this blog post, we explored how to make tasty chicken burgers. We covered key ingredients like ground chicken, spinach, and cheddar cheese. The step-by-step guide made it easy to prepare and cook your burgers. We shared tips for better flavors and healthy swaps. These burgers are simple, fun to make, and packed with nutrition. Try different toppings and spices to make them unique. Enjoy your cooking!

Looking for a fresh twist on burger night? Try my White Cheddar and Spinach Chicken Burgers! These juicy, flavorful patties combine ground chicken, creamy white cheddar, and vibrant spinach into …

Read more

Categories Dinner

Burger Bowls Flavorful and Wholesome Meal Idea

June 7, 2025 by Chef Theo
- Ground beef or turkey - Seasonings - Mixed greens - Toppings Burger bowls are fun and easy to make. You need a few main ingredients to start. First, choose your protein. Ground beef gives a classic taste. If you want a leaner option, go for ground turkey. Next, gather your seasonings. Garlic powder, onion powder, and paprika add great flavor. Don't forget salt and pepper to enhance the taste. For the base, mixed greens work well. Use romaine, spinach, or arugula for a fresh crunch. Finally, think about your toppings. Cherry tomatoes, diced cucumber, and sliced pickles add color and flavor. Shredded cheese and avocado make it creamy and rich. - Additional vegetables - Different cheese options - Dressings and sauces You can easily switch things up with optional ingredients. Add more vegetables like bell peppers or radishes for extra crunch. Different cheese options like feta or pepper jack can change the taste. For sauces, ketchup and mustard are classic choices. You can also drizzle your favorite dressing for added zest. Don't be afraid to mix and match! Check out the Full Recipe for more details. Seasoning mixture Start by mixing the ground beef or turkey in a bowl. Add 1 teaspoon of garlic powder, 1 teaspoon of onion powder, and 1 teaspoon of paprika. Sprinkle in salt and pepper to taste. Use your hands to mix until everything is well combined. This mix gives your meat a great flavor. Forming patties Take a handful of the meat mixture and shape it into a patty. Aim for about 2-3 inches in diameter. Make sure the patties are even in size. This helps them cook at the same rate. Place the patties on a plate while you prepare to cook. Skillet heating tips Heat a non-stick skillet over medium-high heat. Let it warm up for a few minutes. You want it hot enough to sear the meat. A good test is to sprinkle a drop of water on the skillet. If it sizzles, you are ready to cook. Cooking times and temperature guidelines Carefully place the patties in the skillet. Cook each patty for 3-4 minutes on one side. Then flip them over and cook for another 3-4 minutes. Use a meat thermometer to check the doneness. Aim for 160°F for beef. This ensures your patties are safe to eat. Layering ingredients In a large serving dish or individual bowls, start with a base of mixed greens. Use about 4 cups of greens like romaine, spinach, and arugula. This gives your bowl a fresh crunch. Presentation tips Place the cooked burger patties on top of the greens. Add cherry tomatoes, diced cucumber, and sliced pickles around the patties. Sprinkle shredded cheddar cheese and avocado slices on top. This colorful display makes the bowl look appetizing. Lastly, drizzle with ketchup and mustard. You can also add sliced jalapeños if you like some heat. To make juicy burger patties, start with the right ground meat. I prefer ground beef with 80/20 fat content. This gives great flavor and keeps the meat moist. When mixing, be gentle. Overworking the meat can make it tough. Add garlic powder, onion powder, and paprika for extra flavor. These spices enhance the taste and make your burger bowls stand out. Don't forget to season with salt and pepper. A pinch of each goes a long way. Burger bowls shine with great sides and drinks. Pair them with crispy sweet potato fries or a fresh fruit salad. For drinks, iced tea or lemonade work well. They balance the savory taste of the burger. For meal prep, make your burger bowls in advance. Store each component separately. This keeps the greens fresh and the patties tasty for days. When you're ready to eat, just combine everything in a bowl. One big mistake is overcooking the meat. Use a meat thermometer for perfect patties. Aim for 160°F for ground beef. This ensures they stay juicy. Another mistake is the order of toppings. Start with greens as your base. Then layer the cooked patties on top. This keeps everything from getting soggy. Top with cheese, veggies, and sauces last to keep it fresh. {{image_2}} You can change the protein in your burger bowl for different tastes. For a meatless option, use black beans, lentils, or chickpeas. These add protein and fiber. For meat lovers, try ground turkey or chicken for a leaner choice. Each option gives a new flavor and texture. Spice up your burger bowls with bold flavors. For a spicy kick, add jalapeños or a chipotle sauce to your bowl. You can also try a southwestern twist with corn, black beans, and avocado. If you want to travel the world with your meal, make a Mediterranean bowl. Use ground lamb and top with feta cheese, olives, and a drizzle of tzatziki sauce. Adjust your ingredients based on the season. In summer, include fresh corn, bell peppers, and tomatoes. These bright flavors keep your bowl light and refreshing. For winter, add roasted sweet potatoes, warm grains, or even a hearty soup base. These comfort food elements make your meal warm and filling. Try these variations to make your burger bowls exciting and festive. For more details, check out the Full Recipe. To keep your burger bowls fresh, use airtight containers. Place your burger patties and toppings in separate containers. This helps maintain their texture. Store the bowls in the fridge for up to three days. If you want to keep them longer, you can freeze the cooked patties. Wrap them tightly in plastic wrap, then place them in a freezer bag. They can last up to three months in the freezer. When reheating, use a microwave or skillet. If using a microwave, place the patty on a plate, cover it with a damp paper towel, and heat for one minute. Check if it’s warm enough. If not, heat in 30-second bursts. For a skillet, warm the patty over medium heat for two to three minutes on each side. This keeps the burger juicy and tasty. Cooked burger bowls last about three days in the fridge. If you notice any off-smells or changes in color, it's best to discard them. For frozen burgers, they can taste good for three months, but the quality may decline over time. Always check for freezer burn or ice crystals before cooking. Burger bowls are a fun twist on classic hamburgers. Instead of using a bun, we create a meal in a bowl. You start with a layer of fresh greens. Then, you add cooked burger patties and delicious toppings. This makes for a colorful and healthy dish. You get all the flavors of a burger without the bread. Yes, you can easily prepare burger bowls in advance. This makes them great for meal prep. Cook the patties and store them in the fridge. You can also wash and chop the veggies ahead of time. Just keep everything in separate containers. When you're ready to eat, assemble your bowl. This keeps the greens fresh and crispy. There are many tasty toppings you can use for burger bowls. Here are some popular ones: - Sliced avocado - Cherry tomatoes, halved - Diced cucumbers - Pickles - Shredded cheese (like cheddar or mozzarella) - Sliced jalapeños for a kick - Ketchup and mustard for that classic burger taste Feel free to mix and match toppings based on your taste. You can even add unique ingredients like roasted red peppers or olives for a twist. Get creative and make it your own! You can find the full recipe [here](#). Burger bowls are a fun and tasty way to enjoy your favorite burger flavors. You learned about key ingredients like ground meat, seasonings, and fresh greens. I shared how to prepare, cook, and assemble these bowls. You got tips for juicy patties and common mistakes to avoid. Exploring variations lets you personalize your dish for any season. Finally, proper storage keeps leftovers fresh. Now, you can create the perfect burger bowl tailored to your taste! Enjoy your cooking adventure.

Looking for a tasty and simple meal idea? Try burger bowls! They’re not just burgers but a fun twist on your favorite dish. You start with seasoned ground meat, add …

Read more

Categories Salads

Addictive Dan Dan Noodles Easy and Flavorful Recipe

June 7, 2025 by Chef Theo
You can use either fresh or dried noodles for this dish. Fresh noodles add a soft texture. Dried noodles work well too and are easy to find. I prefer using egg noodles, but any type will do. Aim for 8 ounces for a good serving size. The sauce is where the magic happens. It brings all the flavors together. You will need: - 3 tablespoons peanut butter - 2 tablespoons soy sauce - 1 tablespoon sesame oil - 2 tablespoons chili oil (adjust for spice preference) - 1 tablespoon rice vinegar - 2 teaspoons sugar - 1 garlic clove, minced - 1 inch piece of ginger, grated Mix these ingredients well. The peanut butter adds creaminess, while the chili oil gives a nice kick. For protein, add ground beef or turkey. Use about 1/4 cup for a hearty touch. If you prefer a meat-free option, skip this step. For garnishes, I recommend: - Chopped peanuts for crunch - Fresh cilantro for brightness - 4 green onions, chopped (white and green parts separated) These add texture and color, making your dish even more appealing. For the full recipe, check the detailed instructions I provided. To cook the noodles, you start with a big pot. Bring salted water to a boil. Then, add the noodles. If you use fresh noodles, they cook fast—around 3 to 5 minutes. If you choose dried noodles, they take a bit longer, about 8 to 10 minutes. Once cooked, drain the noodles and rinse them with cold water. This stops the cooking and keeps them firm. Set the noodles aside while you make the sauce. Making the sauce is simple and fun! In a medium bowl, whisk together the following ingredients: - 3 tablespoons peanut butter - 2 tablespoons soy sauce - 1 tablespoon sesame oil - 2 tablespoons chili oil (add more for heat) - 1 tablespoon rice vinegar - 2 teaspoons sugar - 1 garlic clove, minced - 1 inch piece of ginger, grated Mix everything until it is smooth and creamy. Taste it to see if you like the spice level. You can always add more chili oil if you want it spicier. If you want to add meat, grab a skillet and heat it over medium heat. Add a little oil to the pan. Then, cook your choice of ground beef or turkey. Cook it until it’s browned, breaking it into small pieces. If there's a lot of fat, you might want to drain it. Next, add the white parts of the green onions to the pan. Sauté these for one more minute until they smell great. Now, everything is ready to combine for the full flavor experience. You can find the full recipe to see how to put it all together! You can control the heat in your Dan Dan noodles. Start by using less chili oil. Taste the sauce first, then add more if you want it spicier. You can also use chili flakes for different flavor notes. If the dish gets too hot, balance it with more peanut butter or sugar. This will give you a creamy texture and sweet taste. Serving your noodles well makes them even more appealing. Use deep bowls for a nice look. Drizzle extra chili oil on top for color and heat. Add a sprinkle of sesame seeds for crunch. Place the chopped peanuts and cilantro right before serving for freshness. This not only adds taste but also makes your dish pop visually. One common mistake is overcooking the noodles. They should be tender but not mushy. Rinse them with cold water after cooking to stop the cooking process. Another mistake is using too little sauce. The noodles need enough sauce to coat them well. Lastly, don’t skip the garnishes. They add flavor and make your dish look gourmet. Following these tips will help you create a great plate. For the full recipe, you can refer to the earlier section. {{image_2}} You can easily make Dan Dan noodles vegetarian or vegan. Start by swapping the meat for mushrooms. Shiitake or portobello mushrooms work great. They add a rich, umami flavor. Use vegetable broth instead of meat broth for more depth. For the sauce, ensure your soy sauce is vegan. You can also add tofu for extra protein. Silken tofu blends well into the sauce, making it creamy without dairy. If you prefer other proteins, consider ground chicken or pork. They add a nice texture and flavor. You can also use shrimp for a seafood twist. For a heartier dish, try lentils or chickpeas. These options are filling and tasty. They work well with the sauce and noodles. Just cook them separately and mix them in with the sauce. To kick up the flavor, add some fresh herbs. Mint or basil pairs nicely with the dish. You can also include pickled vegetables for a tangy bite. Sesame seeds add crunch and a nutty flavor. If you like it spicy, try adding Szechuan peppercorns. They give a unique numbing heat that complements the dish. For a citrusy note, squeeze fresh lime juice just before serving. Each of these tweaks makes your Dan Dan noodles even more addictive. You can find the full recipe for these rich flavors in the recipe section. To store leftover Dan Dan noodles, place them in an airtight container. Let the noodles cool completely before sealing. This helps keep them fresh. Store them in the fridge for up to three days. If you have sauce left, store it separately to keep the noodles from getting soggy. Reheating Dan Dan noodles is easy. You can use the microwave or stovetop. If using a microwave, place them in a bowl and cover with a damp paper towel. Heat for one to two minutes, stirring halfway through. On the stovetop, add a splash of water to a pan. Heat over medium-low heat, stirring gently until warmed through. Freezing Dan Dan noodles is not ideal, but it can be done. If you want to freeze them, separate the noodles and sauce. Place each in freezer-safe bags. Noodles can last up to a month in the freezer. When ready to eat, thaw in the fridge overnight. Reheat as mentioned above. Enjoy your meal! For the complete cooking process, check the Full Recipe. Dan Dan noodles are a popular dish from Sichuan, China. They feature wheat noodles served with a spicy sauce. The sauce often has peanut butter, soy sauce, and chili oil. You can enjoy them hot or cold, depending on your mood. This dish usually has ground meat, but you can skip it for vegetarian options. The mix of flavors makes them truly addictive. Yes, you can make Dan Dan noodles ahead of time. Cook the noodles and sauce separately. Store them in airtight containers in the fridge. When you're ready to eat, just combine them and heat everything up. This method keeps the noodles from getting mushy. You can also adjust the spice level when you reheat them. Finding the best Dan Dan noodles can be fun! Local Chinese restaurants often serve this dish. Some places may even have their unique twist on it. You can look for restaurants specializing in Sichuan cuisine. If you like cooking, try making them at home with the full recipe. This way, you can customize the flavors to your liking. Dan Dan noodles are a fun dish to make. We explored their key ingredients, from noodles to sauce. You learned the step-by-step process to cook them right. I shared tips for spice levels and how to avoid common mistakes. You can also try different variations, like vegan options. Lastly, I covered how to store leftovers and reheat them. With these insights, you can create your own addictive Dan Dan noodles. Enjoy your cooking journey!

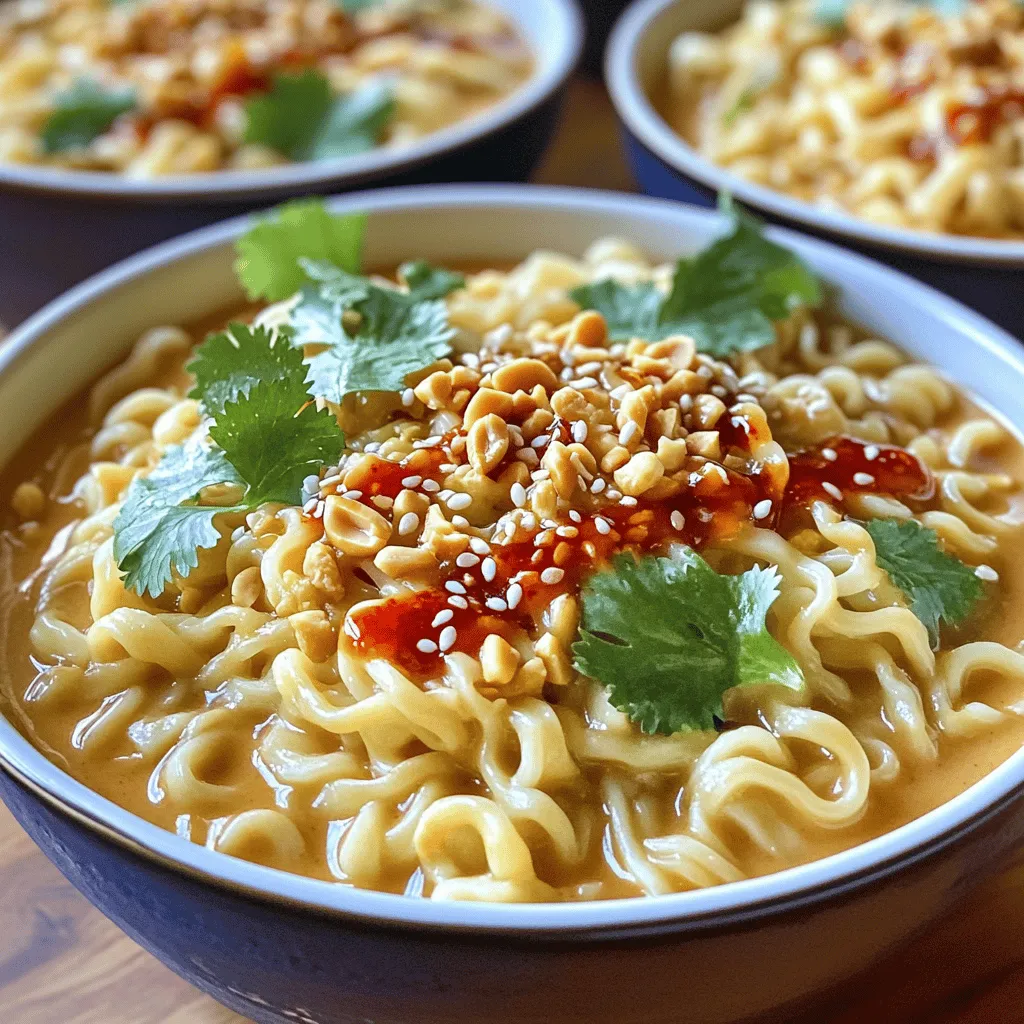
Are you ready to dive into a bowl of irresistible flavor? My easy and flavorful Addictive Dan Dan Noodles will take your taste buds on a wild ride! With fresh …

Read more

Categories Dinner
Older posts
Newer posts
← Previous Page1 … Page56 Page57 Page58 … Page101 Next →

TOASTED RECIPES

Where ideas are warm, crisp, and ready to serve! 🍞

PAGES

Home About Contact Privacy Policy Terms & Conditions Cookie Policy GDPR Policy Copyright Policy Disclaimer

CATEGORIES

Appetizers Desserts Salads Breakfast Dinner

Contact

  • Pinterest
  • Mail
Copyright © 2025 Toasted Recipes. All rights reserved.